HTC DM PDA Phone User Manual users manual 1
HTC Corporation PDA Phone users manual 1
UserManual.wiki
>
HTC
>
DM User Manual
>
users manual 1
Contents
1.
users manual 1
2.
users manual 2
3.
users manual 3
4.
users manual 4
users manual 1
Navigation menu
Upload a User Manual
Namespaces
Wiki Guide
HTML
PDF
Info
Views
User Manual
Discussion / Help
Navigation


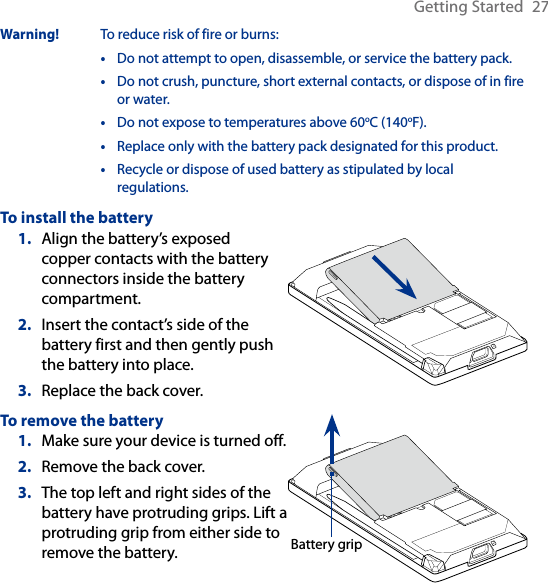
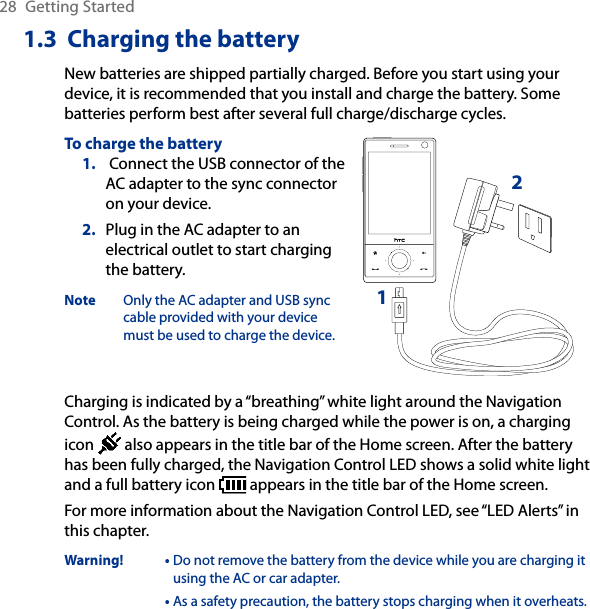


![Using Phone Features 57To find a contact name or numberYou can just enter the first letter of the name or number of a contact. Smart Dial will search for contact phone numbers and the first character of a contact name as well as from the character that appears after a space, dash, or underscore in a contact name. For example, if you tap number “2” on the phone keypad, which is associated with [a, b, and c] on the Phone keypad, contact names such as the following will be considered matches: “Ben Miller”, “George Adams”, “John-Carter”, “Carter, Ellen”, “Dixon, Allan”, “Thomas_Clark”, “JaneCampbell”.If the matching list is long and you want to narrow down the search further, enter another letter. Using the same example above, if you continue to tap “3” which is associated with [d, e, f], the matching list will be narrowed down to the following names: “Ben Miller”, “George Adams”, “Carter, Ellen”, “Dixon, Allan”.Make a call or send a text message using Smart Dial1. On the Home screen, tap Phone.2. Begin entering the first few numbers or characters.When you start entering a number or letter, the Smart Dial panel will display matches found.Tip Tap to close the phone keypad and to see if there are more matching contacts. 3. In the Smart Dial panel, flick and slide your finger on the touch screen or press NAVIGATION up/down to browse the list or select a contact.4. You can do one of the following:• Tap the contact to call the selected contact. • To send a text message to the selected contact, tap Menu > Send Text Message.• To call a different phone number associated with the selected contact, select the contact and then press NAVIGATION left/right to select the number to call.](https://usermanual.wiki/HTC/DM.users-manual-1/User-Guide-964257-Page-57.png)