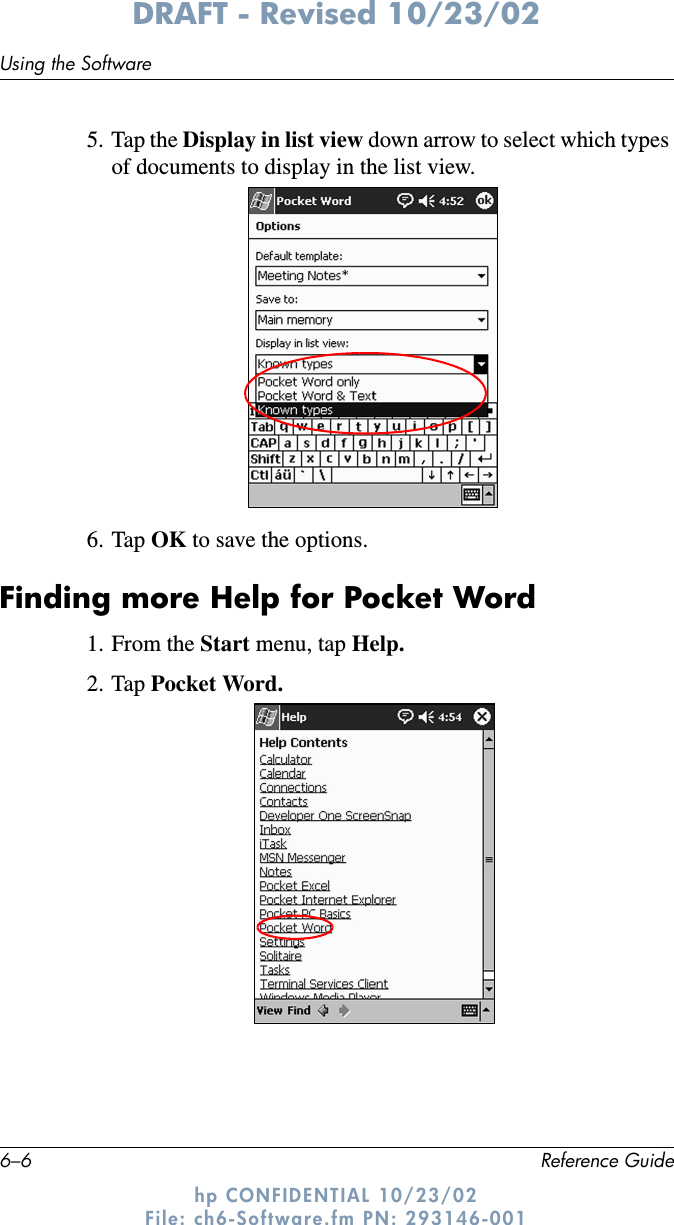
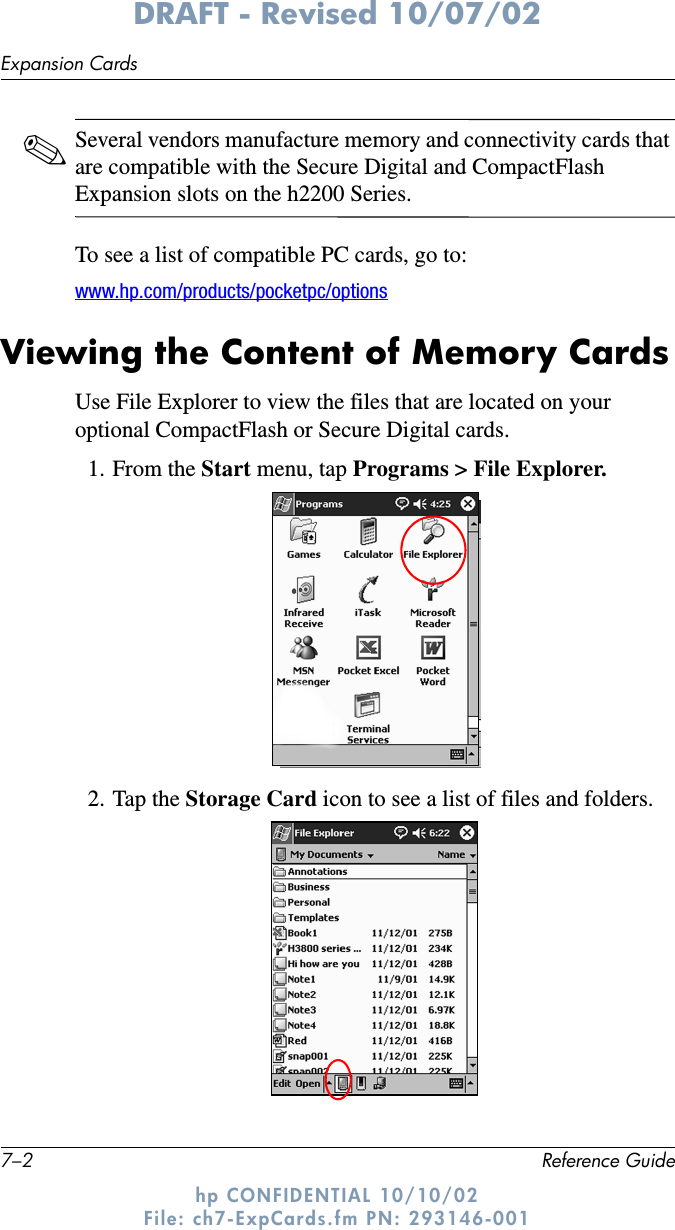
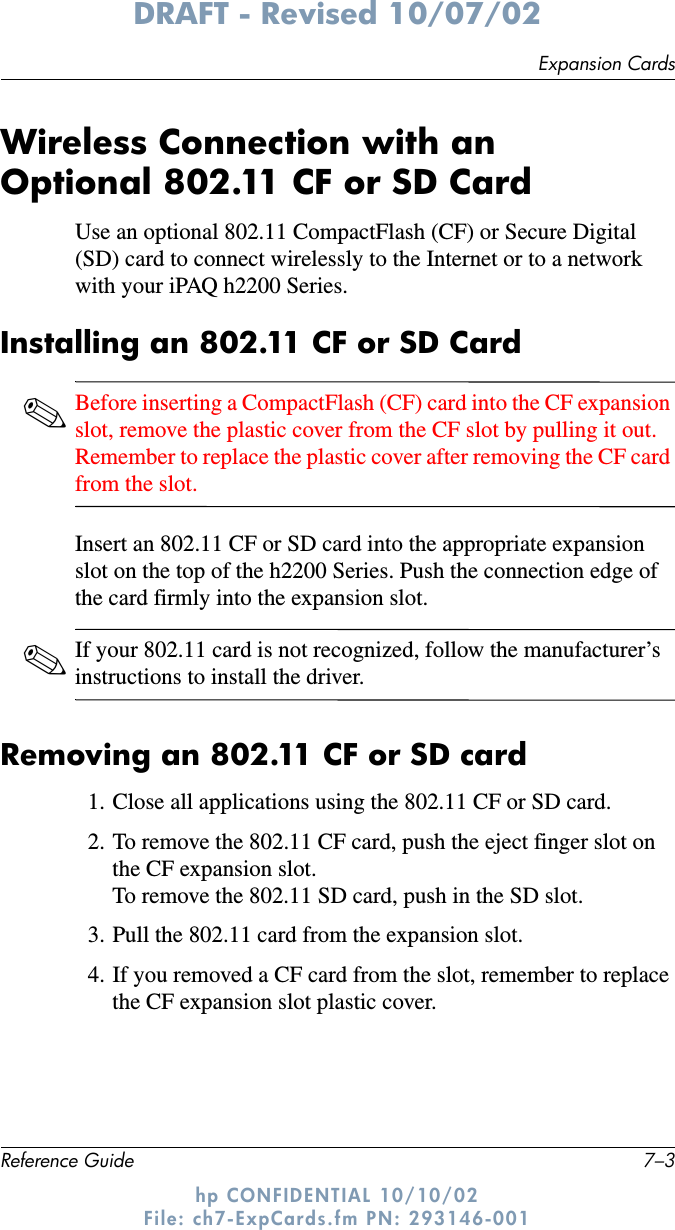
HTC GREATWALLB Handheld PC with Bluetooth Transceiver User Manual H2200Series
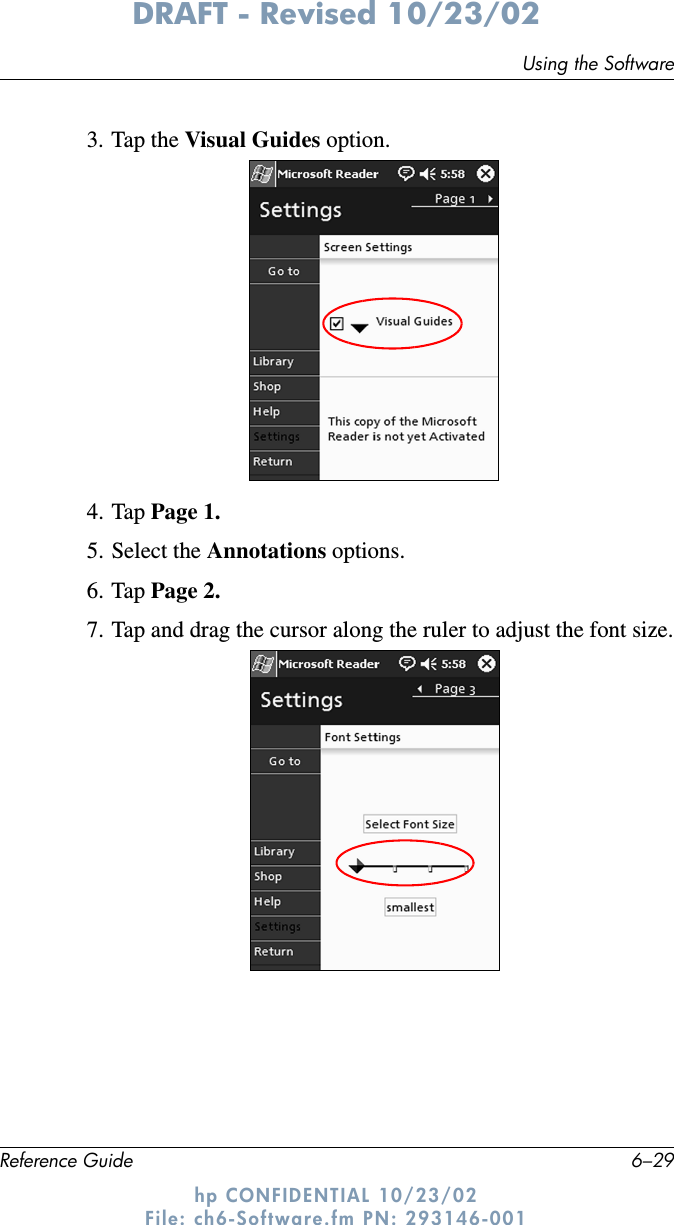
HTC Corporation Handheld PC with Bluetooth Transceiver H2200Series
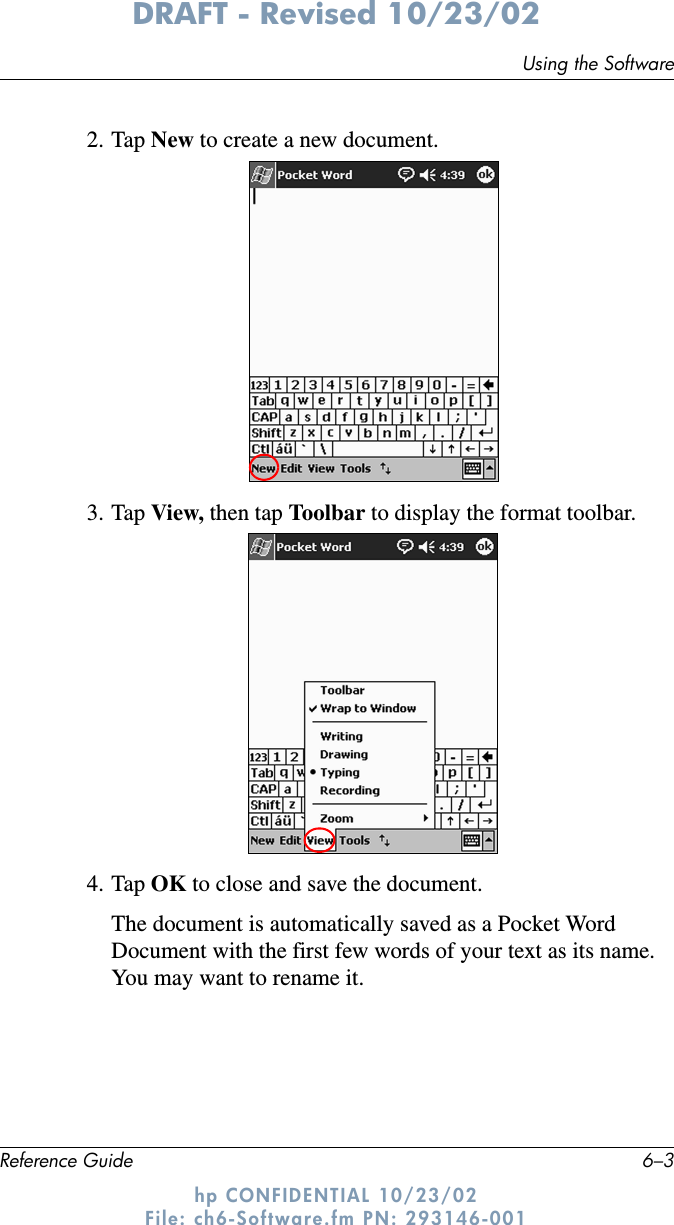
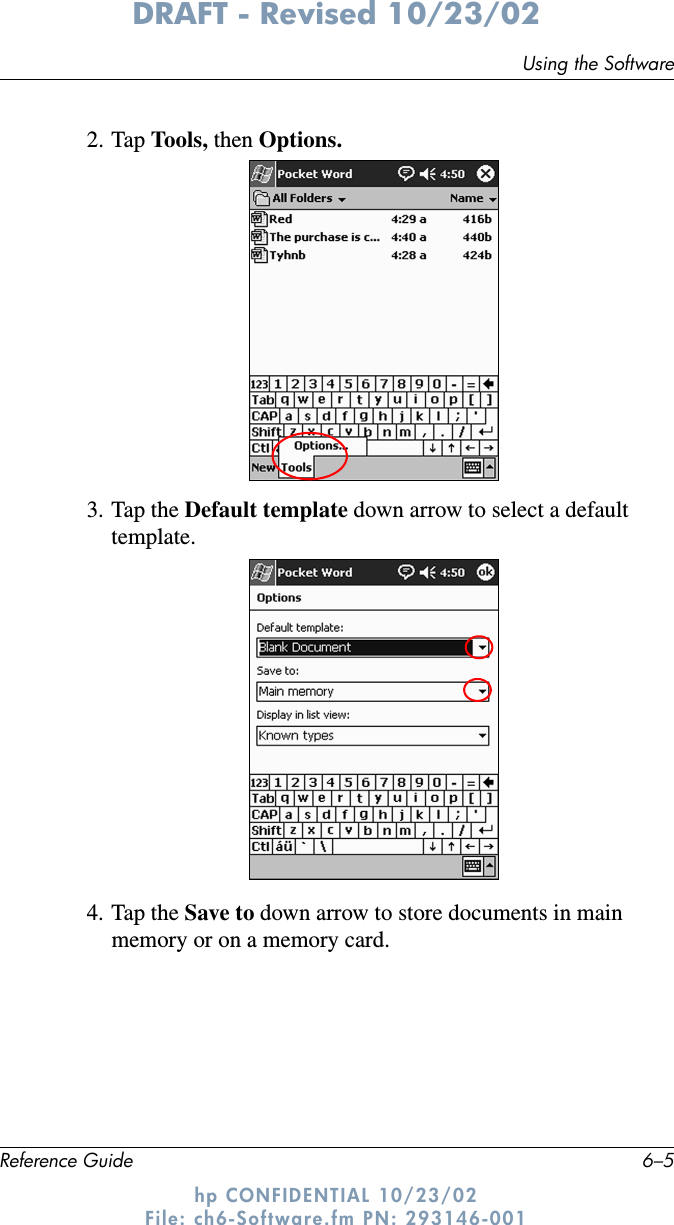
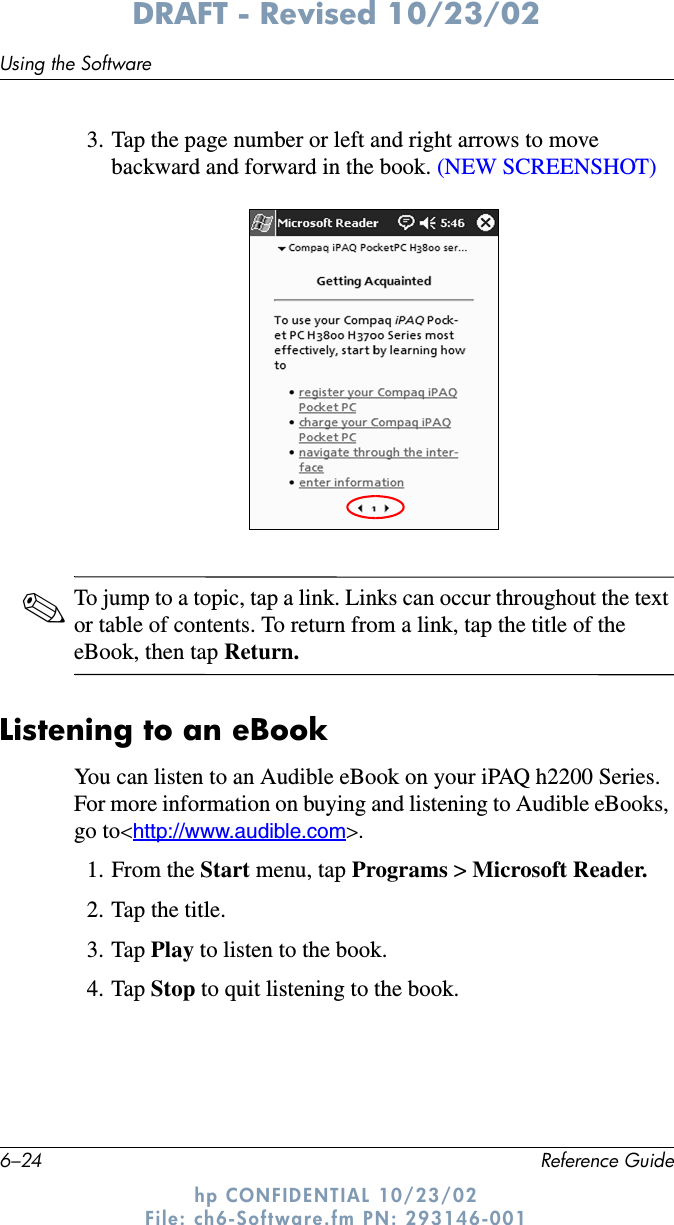
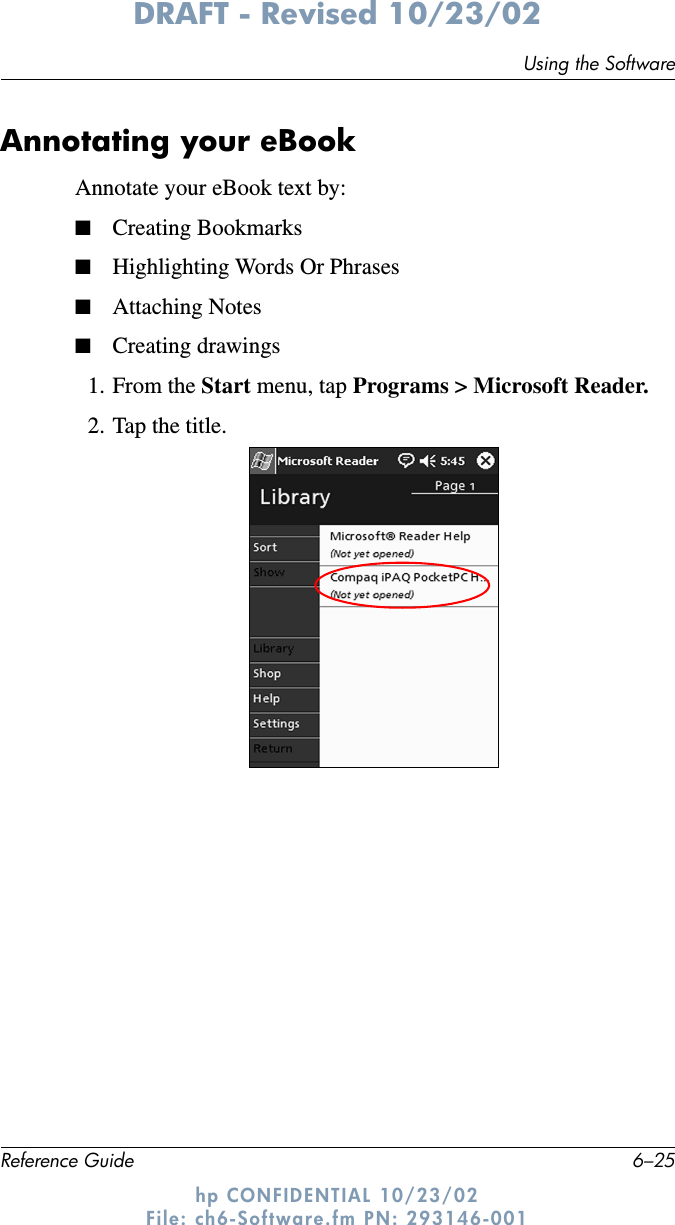
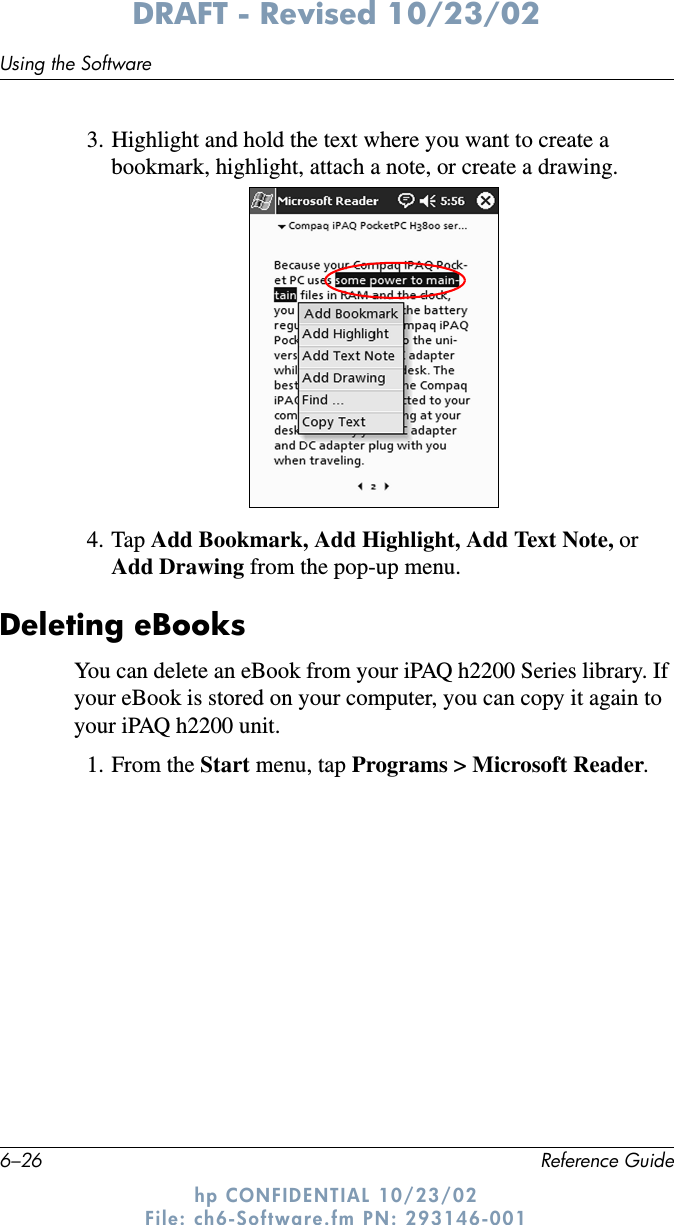
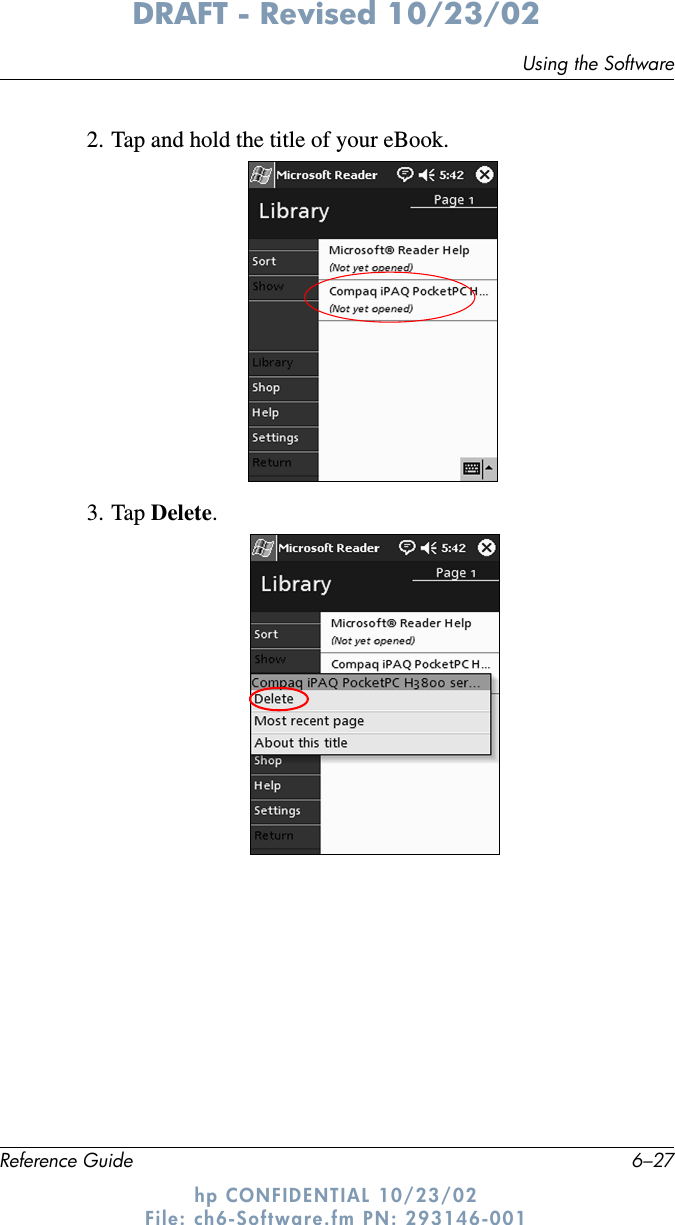
HTC >
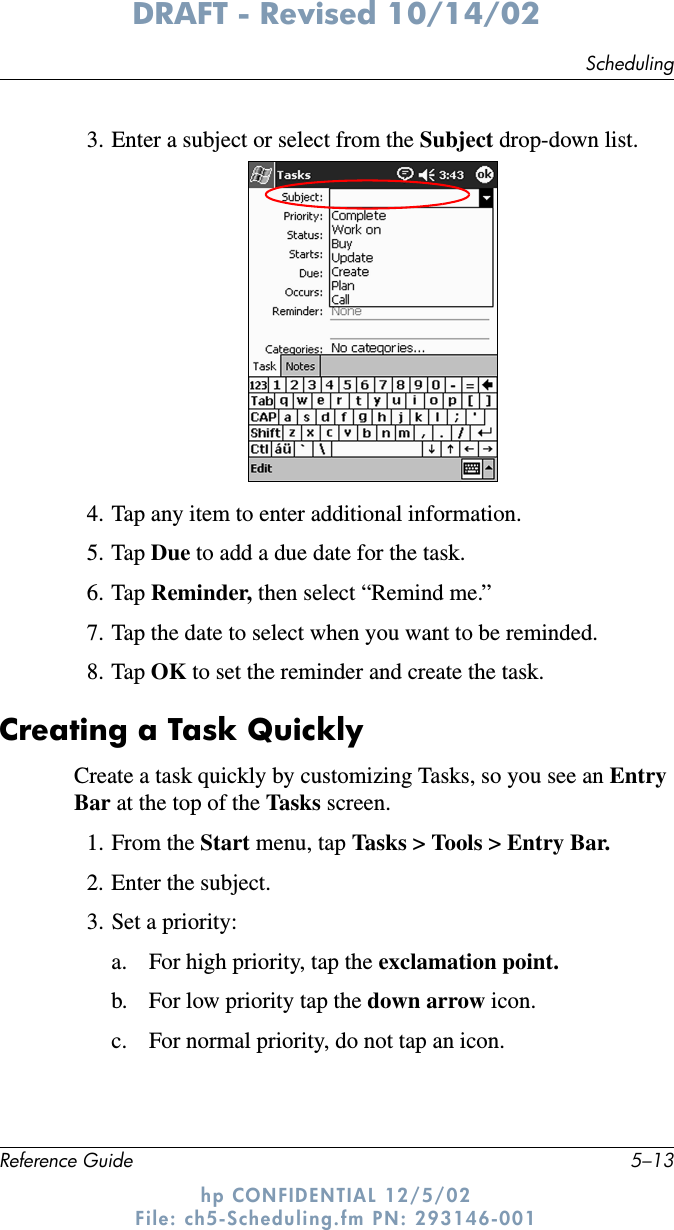
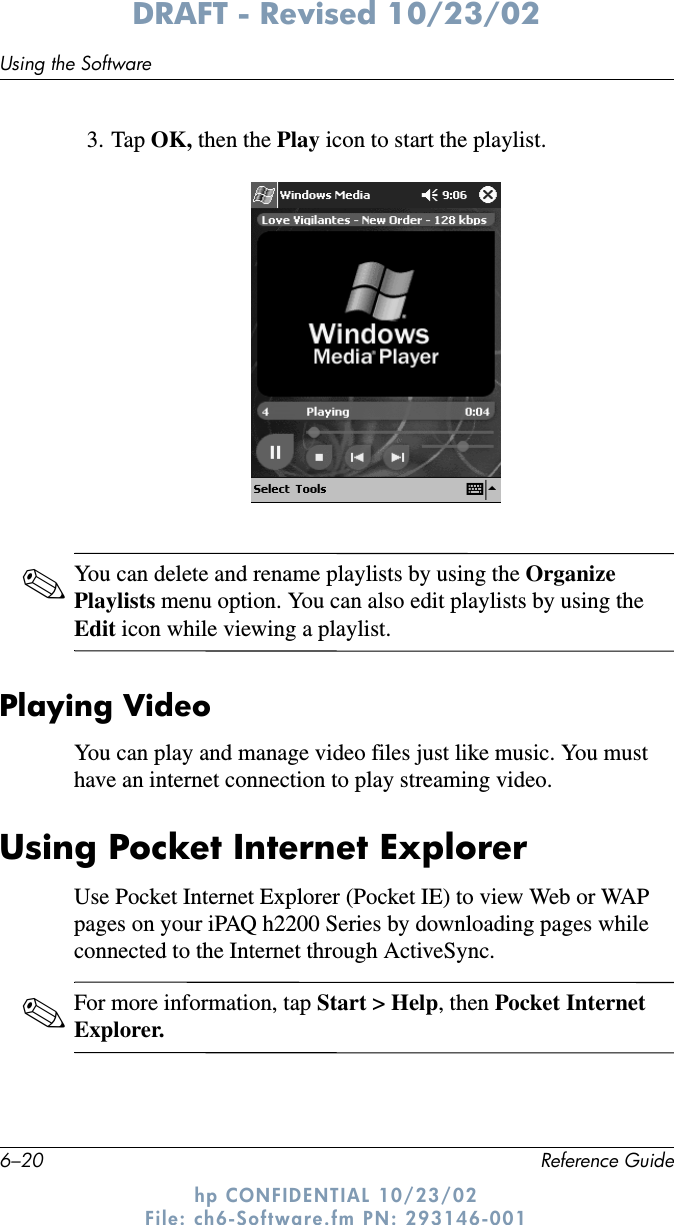
Contents
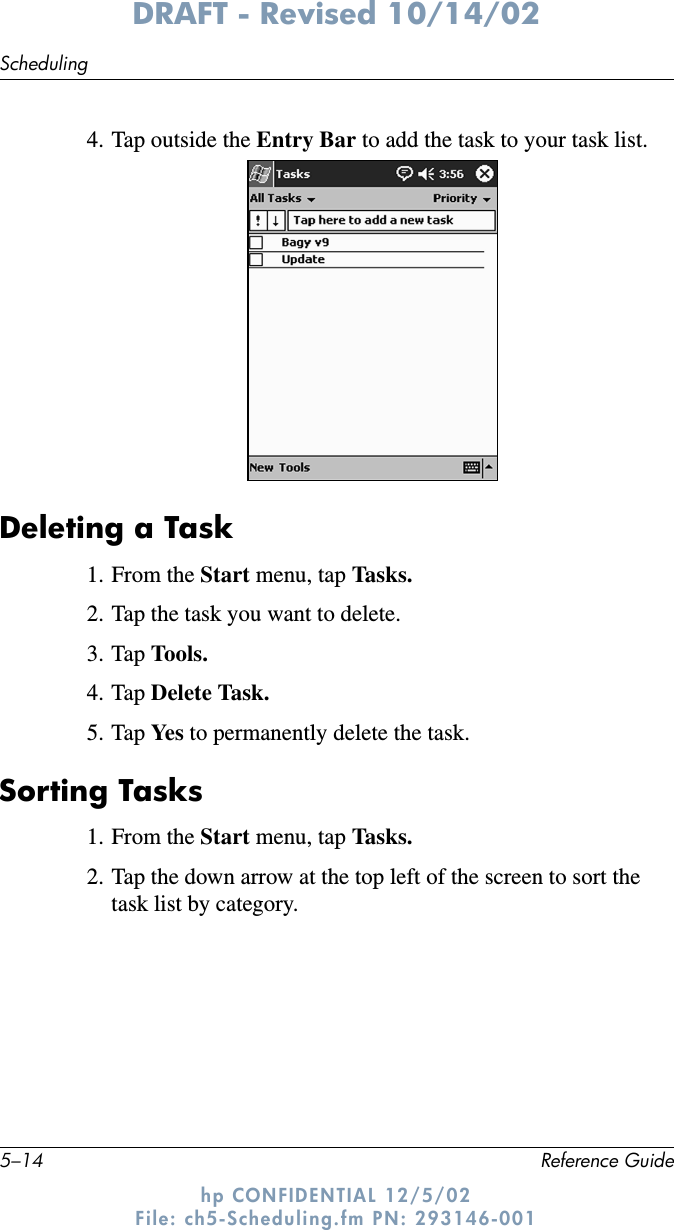
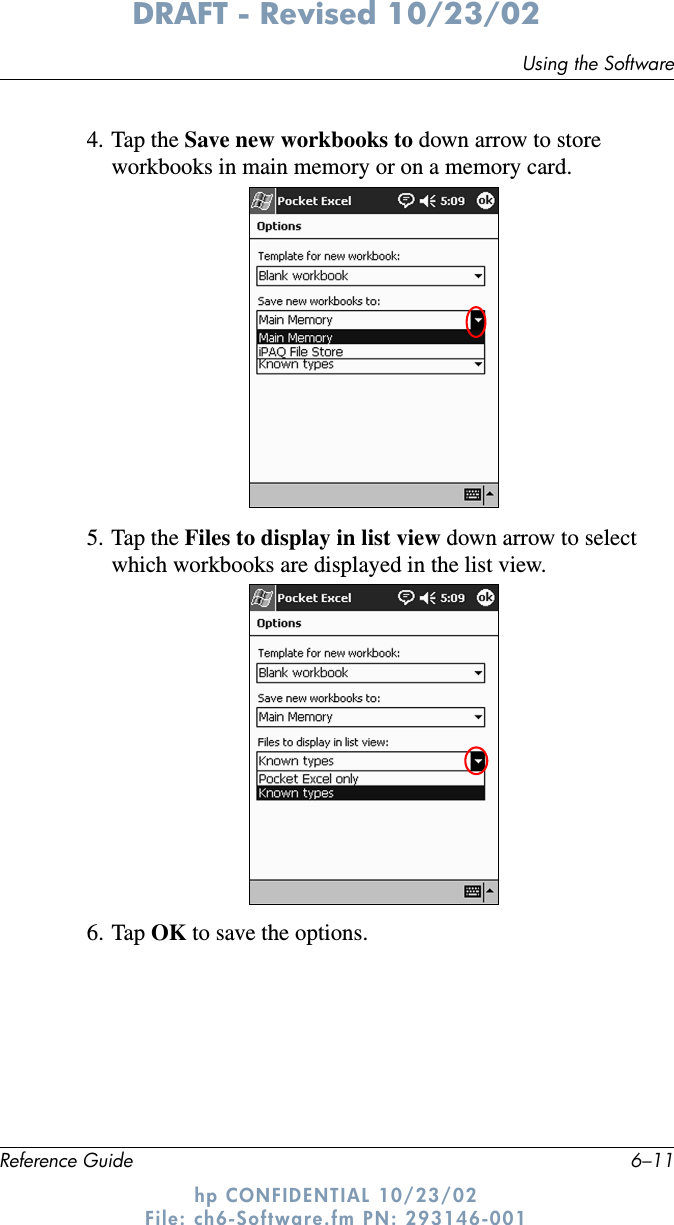
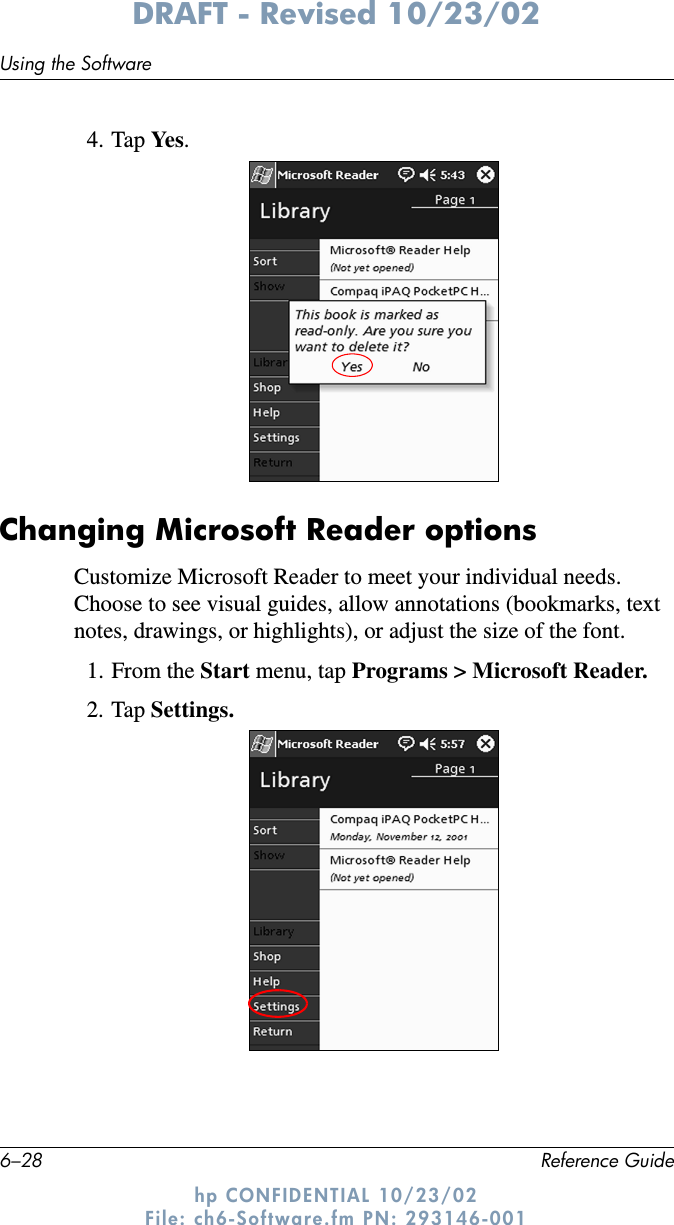
- 1. users manual PartI
- 2. users manual Part 2
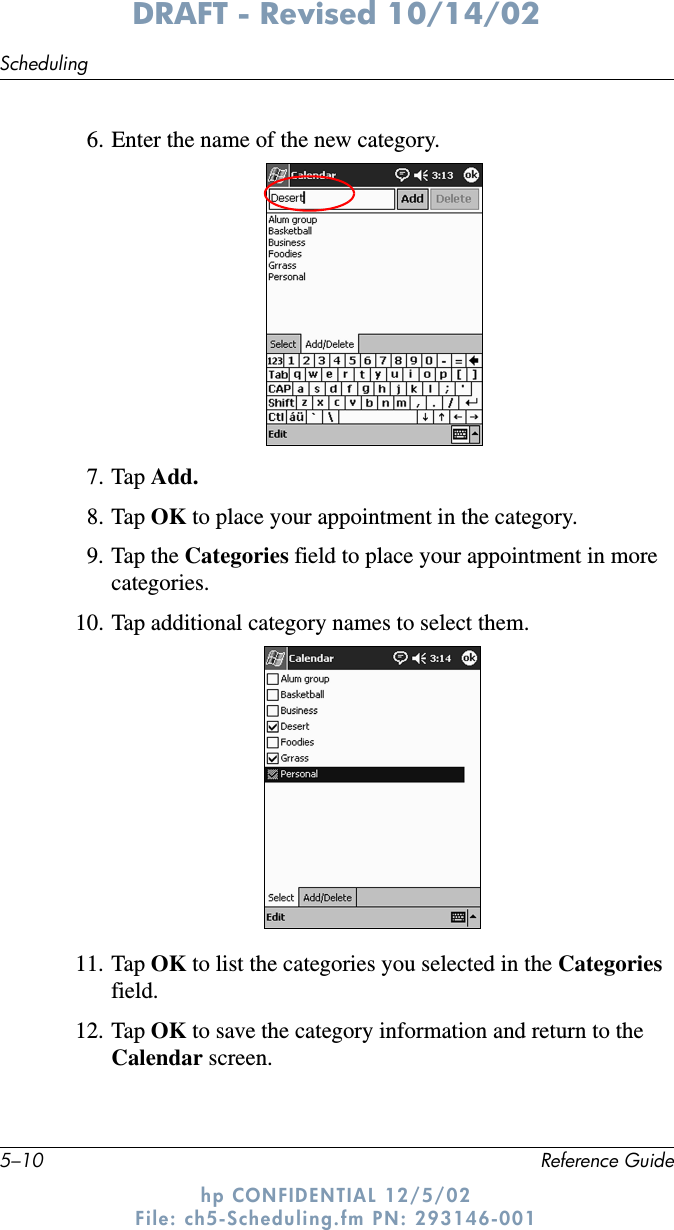
- 3. users manual Part 3
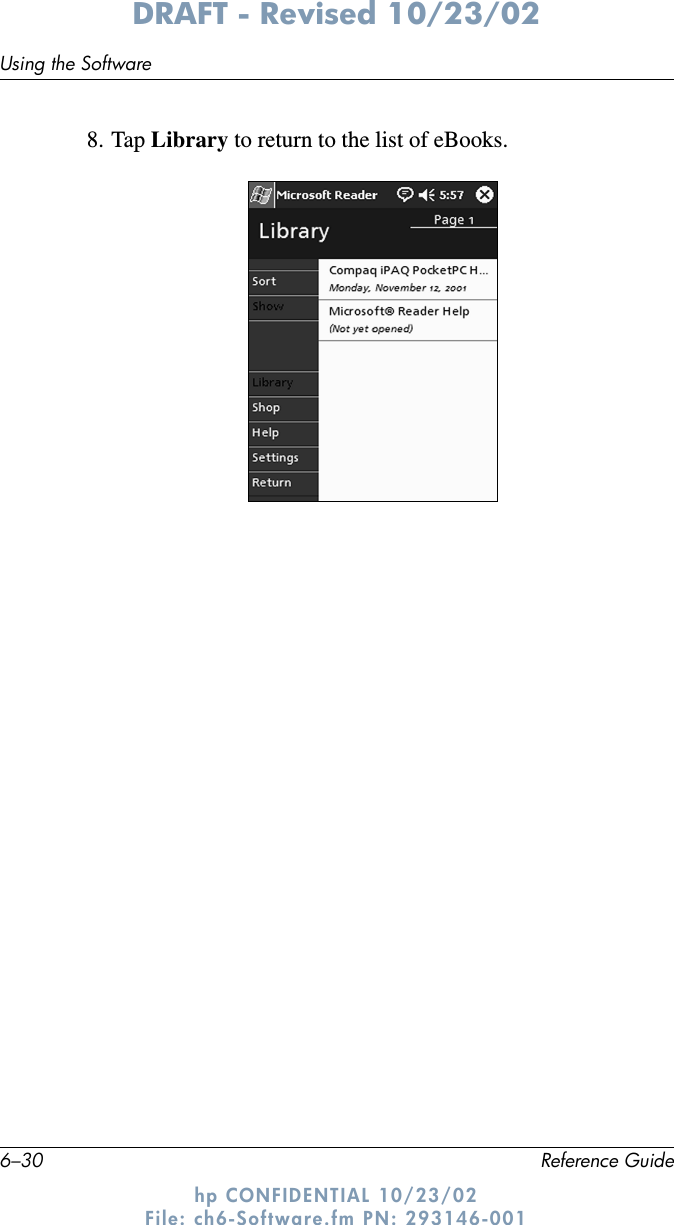
- 4. Safety Addendum to Manual
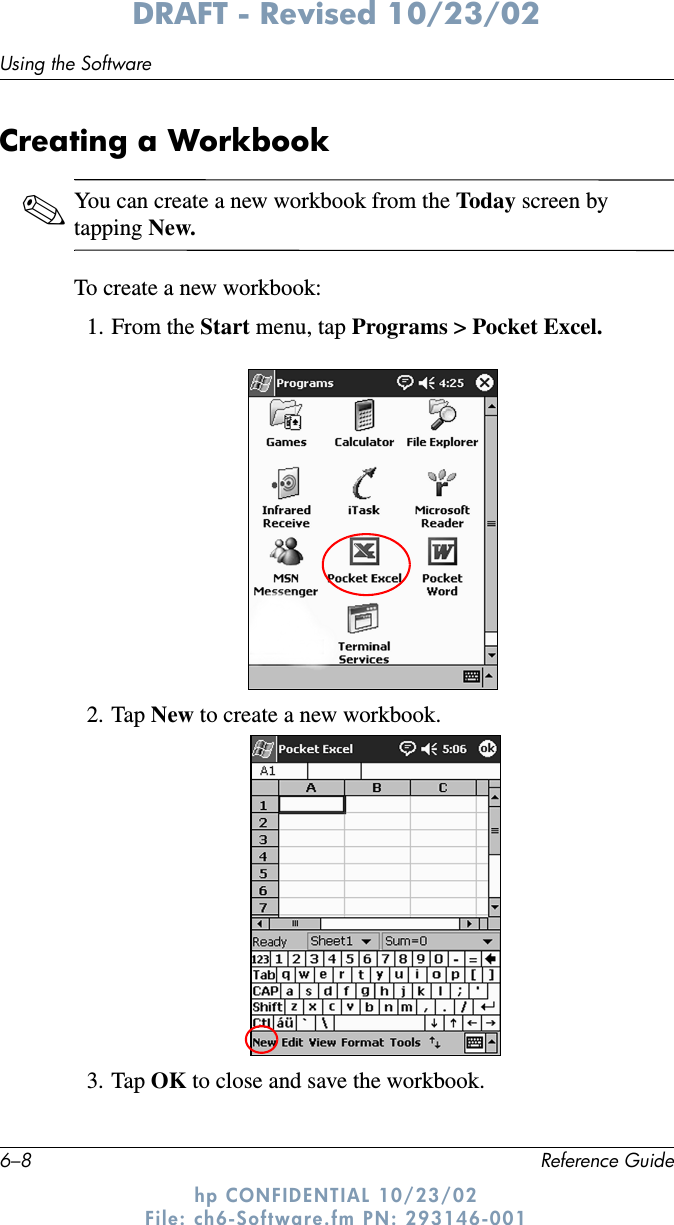
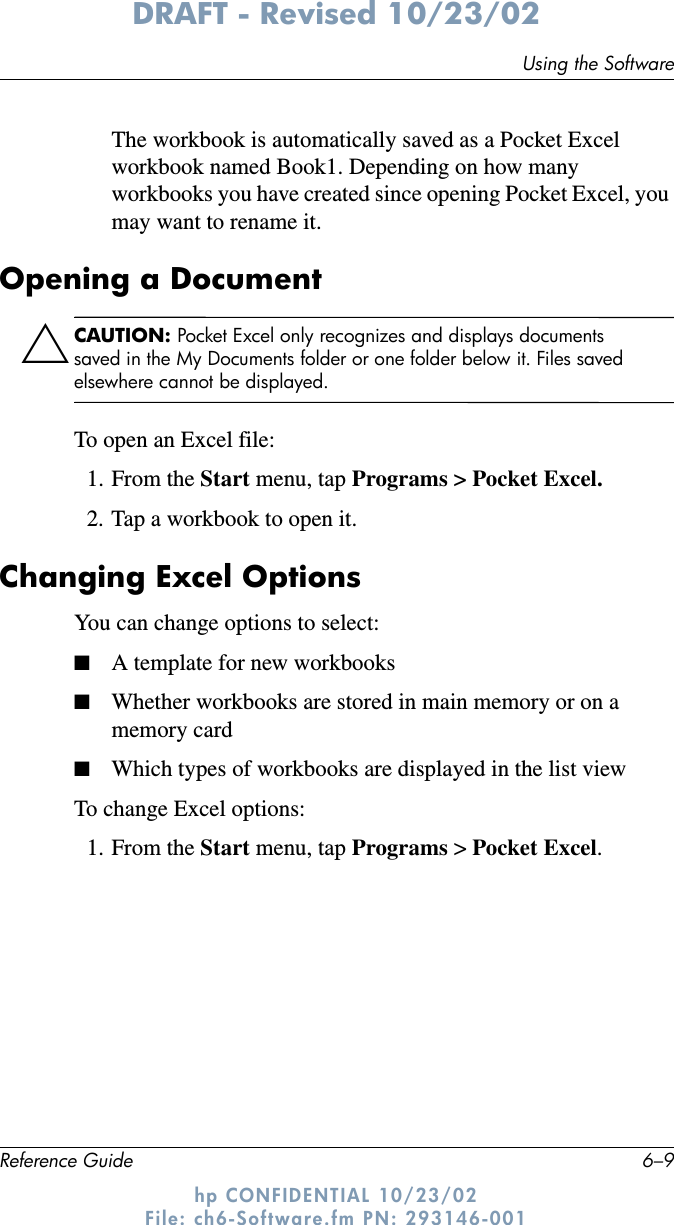
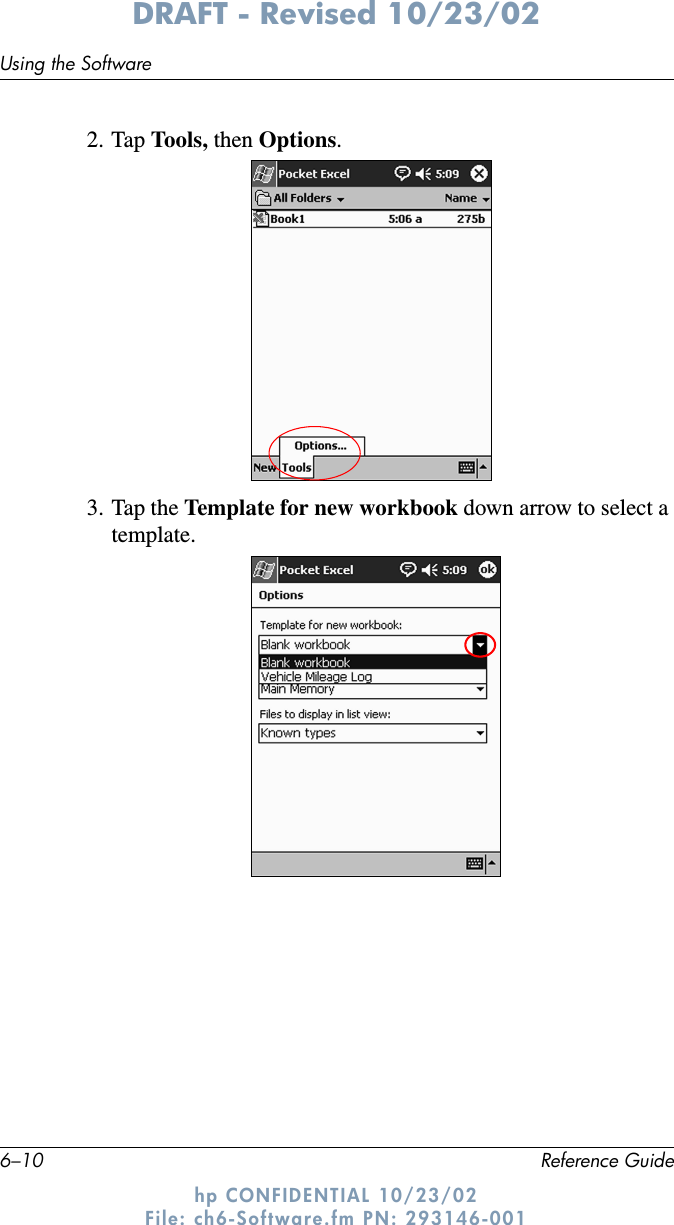
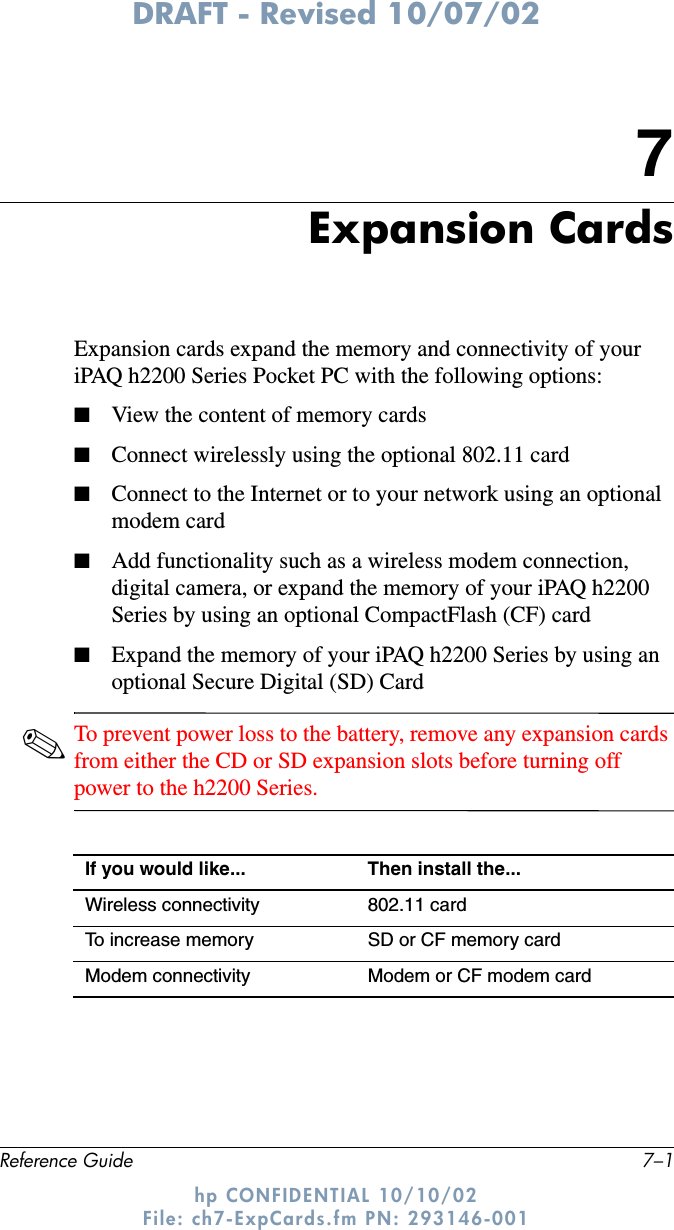
users manual Part 3