HTC IRIS100 Smart Phone User Manual Book Iris Generic English Manual indb
HTC Corporation Smart Phone Book Iris Generic English Manual indb
UserManual.wiki
>
HTC
>
IRIS100 User Manual
>
User manual 3 rev
Contents
1.
User manual 1
2.
User manual 2
3.
User manual 3 rev
User manual 3 rev
Navigation menu
Upload a User Manual
Namespaces
Wiki Guide
HTML
PDF
Info
Views
User Manual
Discussion / Help
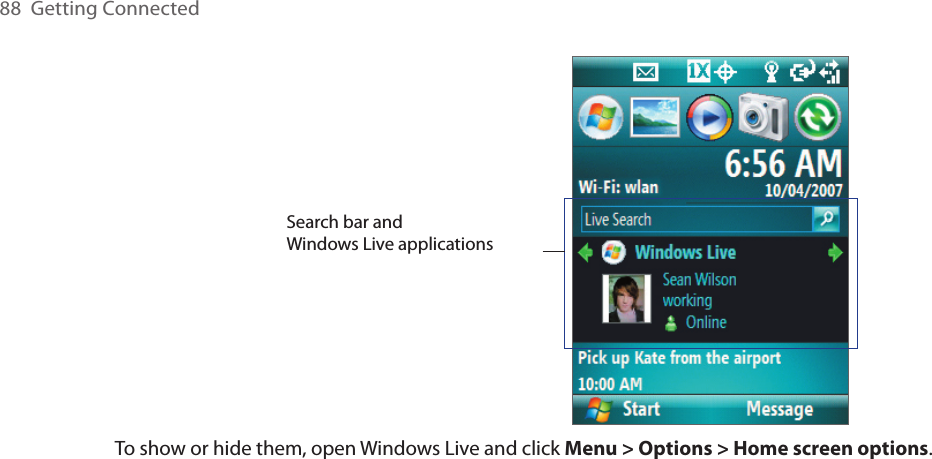
Navigation

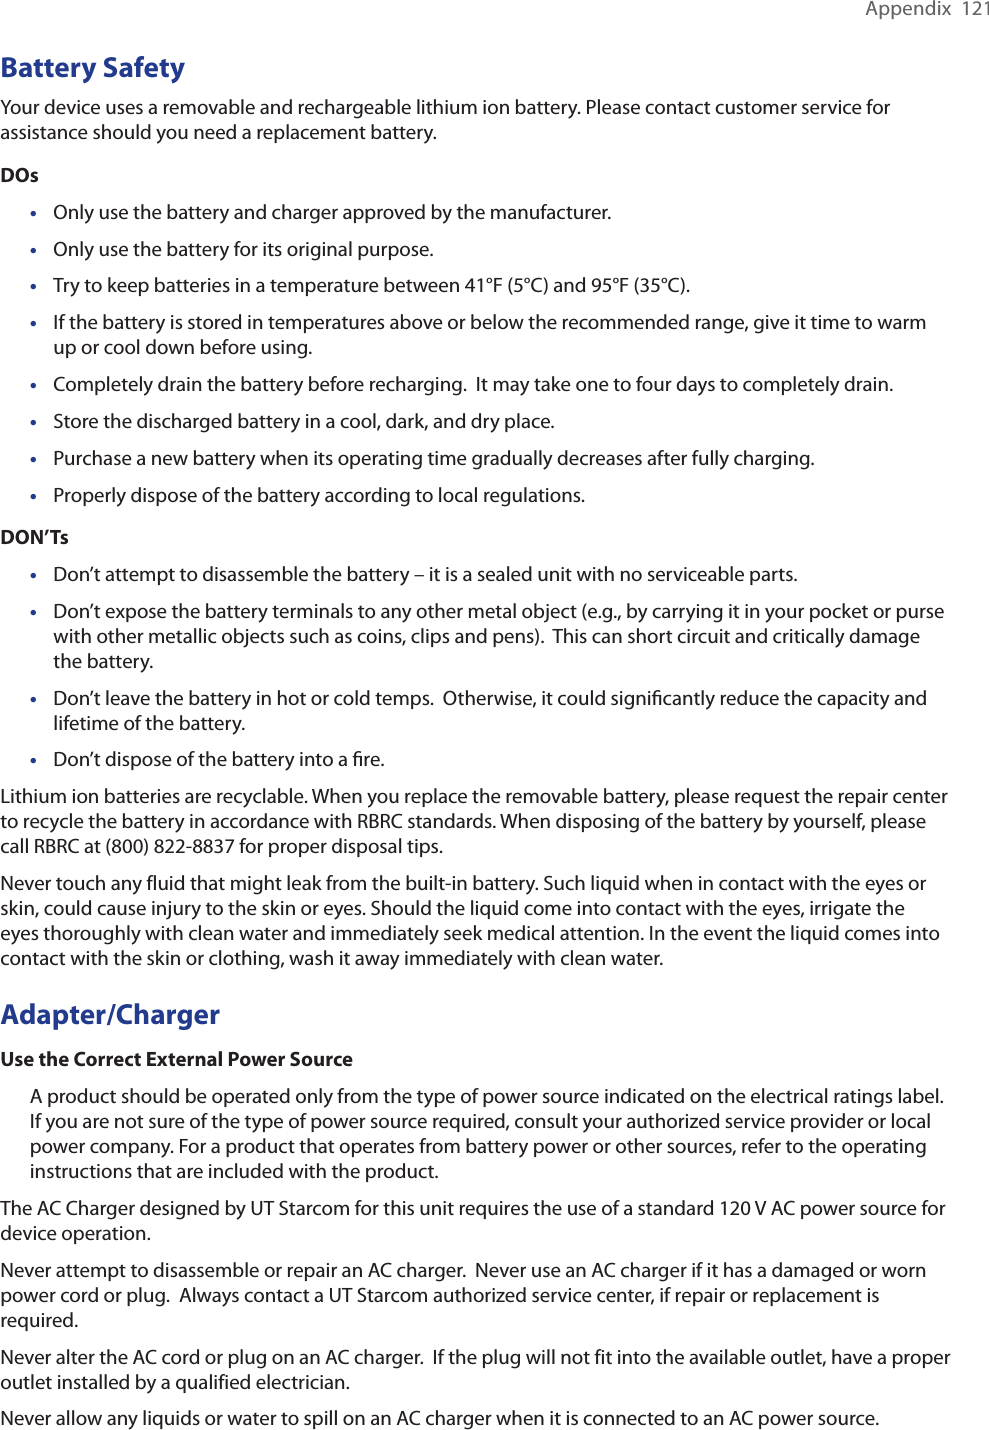
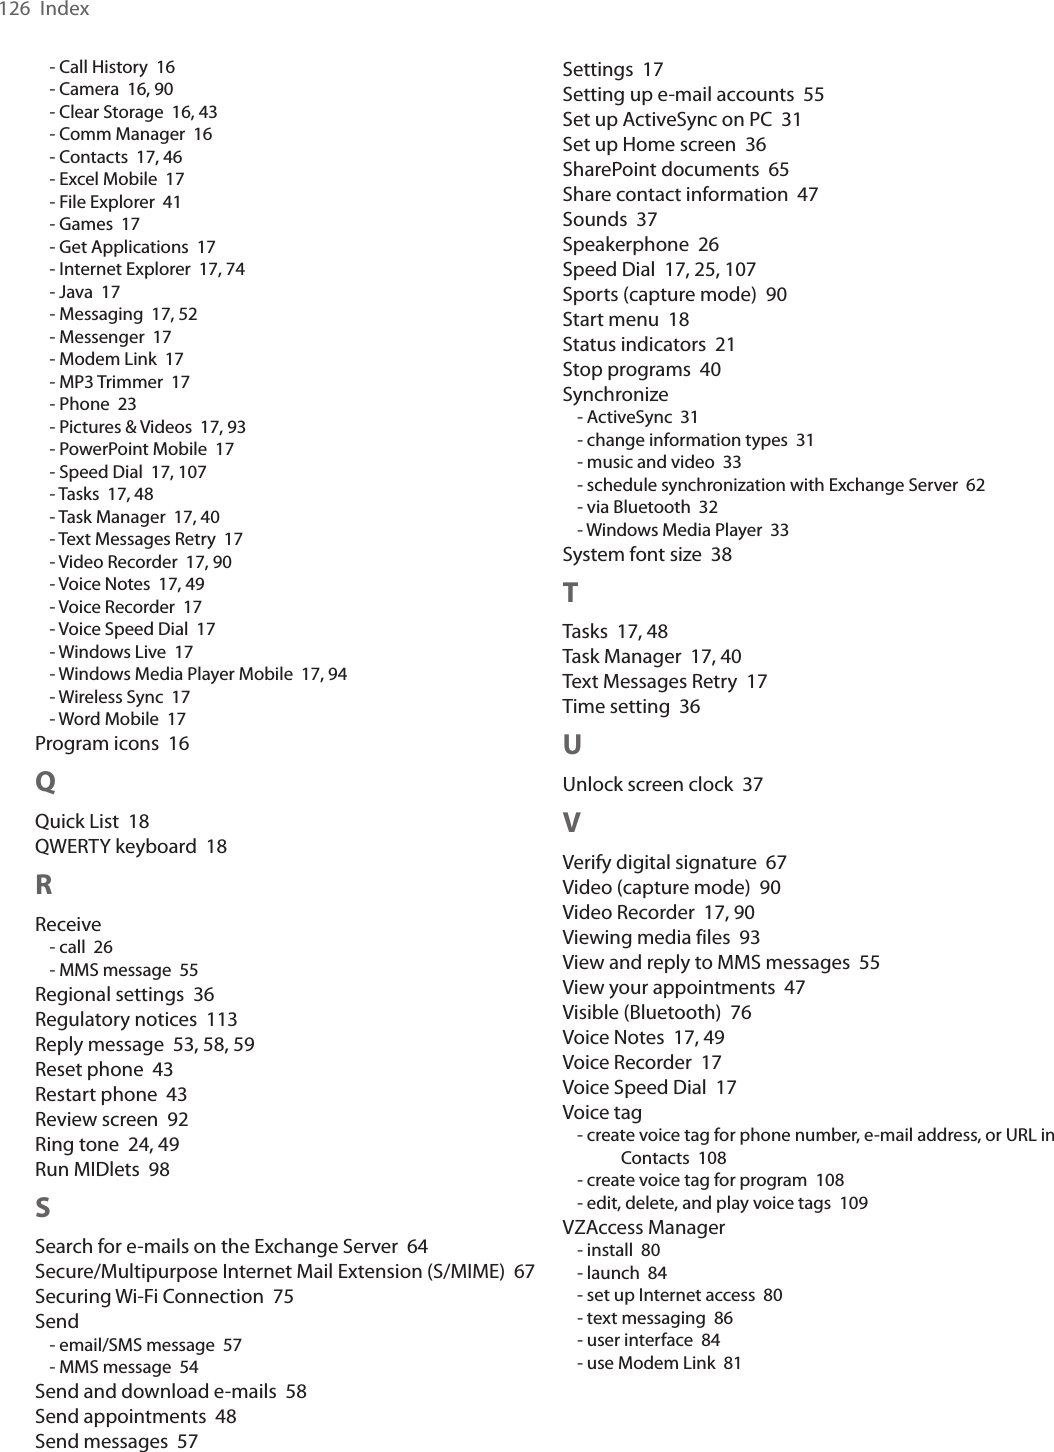
![Experiencing Multimedia 91Camera mode icons and indicatorsThe Camera [Photo] screen1 Indicates the current capture mode.2 Indicates the current zoom ratio. Press NAVIGATION up or down to increase or decrease the zoom level.3 Indicates the current image or video size based on the resolution you chose. 4 Indicates where the captured images and video clips will be saved.5 Depending on the capture mode, this shows the remaining, available shots of pictures that you can take or remaining duration that can be recorded. While recording video, this shows the recorded duration.6 Click to open the Camera Settings screen.7 Indicates the current Metering mode being used, either Center Area ( ) or Average ( ).1 2 3 456 7 8 9 10 118 Adjust the exposure value from -2 EV to +2 EV (increments of 0.5) by pressing NAVIGATION left or right.9 Indicates the current white balance setting.10 Indicates the current self-timer setting while capturing images. 11 Click to view the picture or video in Pictures & Videos.The Camera [Video] screen The Camera [Picture Theme] screenThe Recording Status indicator blinks while video recording is in progress.Displays the current and total number of photos that can be taken using the selected template.](https://usermanual.wiki/HTC/IRIS100.User-manual-3-rev/User-Guide-802524-Page-7.png)

![Using Other Applications 105To delete cells• Select the cell you want to delete and click Menu > Edit > Delete Cells.Tip You can select multiple cells to delete by clicking Menu > Select and then choosing what to select in the worksheet. To copy and paste cell contents1. Select the cell(s) you want to copy and then click Menu > Edit > Copy.Tip You can select multiple cells to delete by clicking Menu > Select and then choosing what to select in the worksheet. 2. Select the cell(s) where you want to copy the cell contents to and click Menu > Edit > Paste. To insert a row or columnSelect the cell where you want to insert a row or column and then click Menu > Insert > Row or Column. If you insert a row, the row will be inserted above the selected cell; if you insert a column, the column will be inserted at the left of the selected cell. Tip You can also shift the contents of a row or column. To shift, select the cell you want to shift and click Menu > Insert > Shift Right or Shift Down. To go to a cell • Click Menu > Tools > Go To and then enter the Cell reference or name. Click OK.Tip You can also sort and find text in the worksheet by clicking Menu > Tools > Sort or Find. To undo and redo an action• Click Menu > Undo [Action] or Redo [Action].To save the worksheet1. Click Menu > File > Save As.2. Type in the Name you want to use for the edited worksheet and select the Location where you want to save the worksheet. 3. Click Save.To send the document through e-mail1. Click Menu > File > Send. 2. In the Messaging screen, select the e-mail account you want to use to send the worksheet.3. In the e-mail, the file is automatically appended as an attachment.4. Enter the recipient name and click Send.](https://usermanual.wiki/HTC/IRIS100.User-manual-3-rev/User-Guide-802524-Page-21.png)