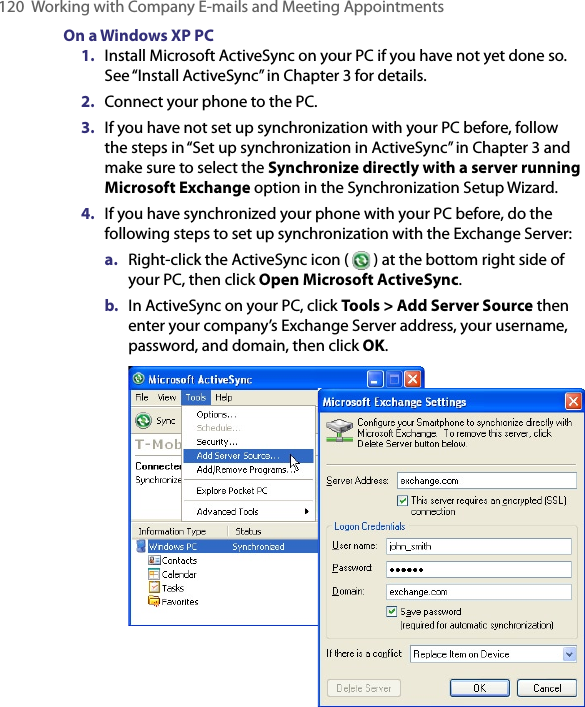
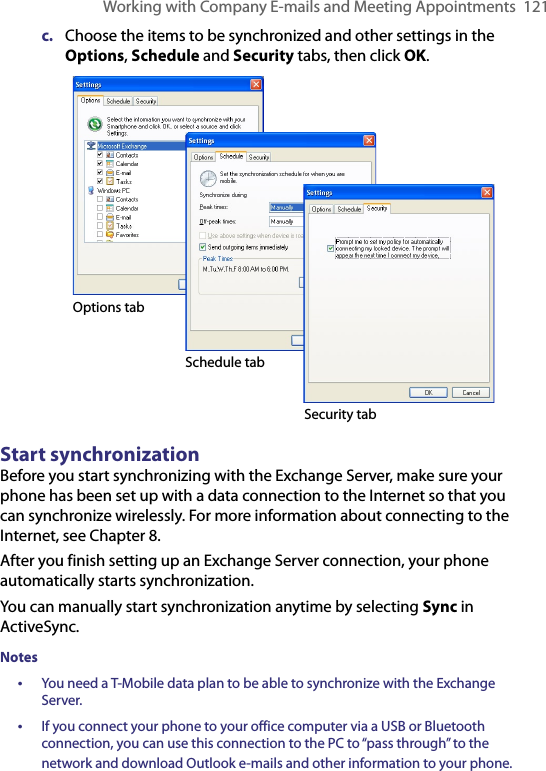
HTC PB PHOE100 User Manual Book JUNO TMOUS Manual indb
HTC Corporation PHOE100 Book JUNO TMOUS Manual indb
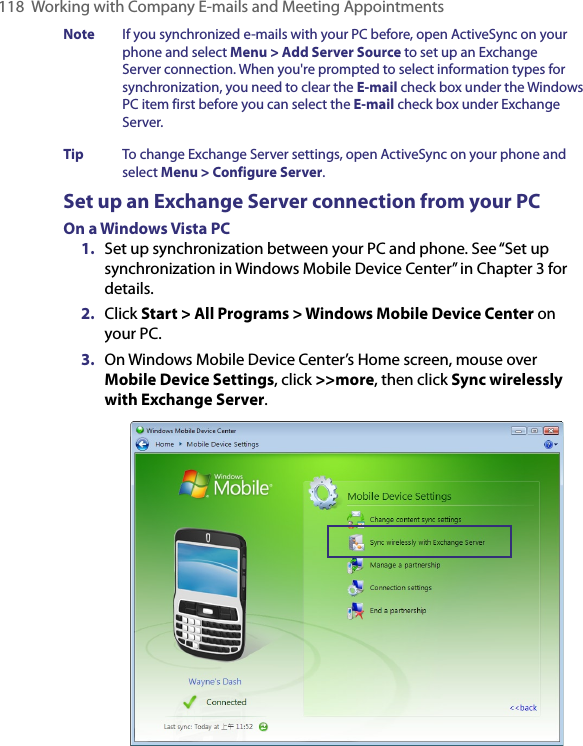
UserManual.wiki
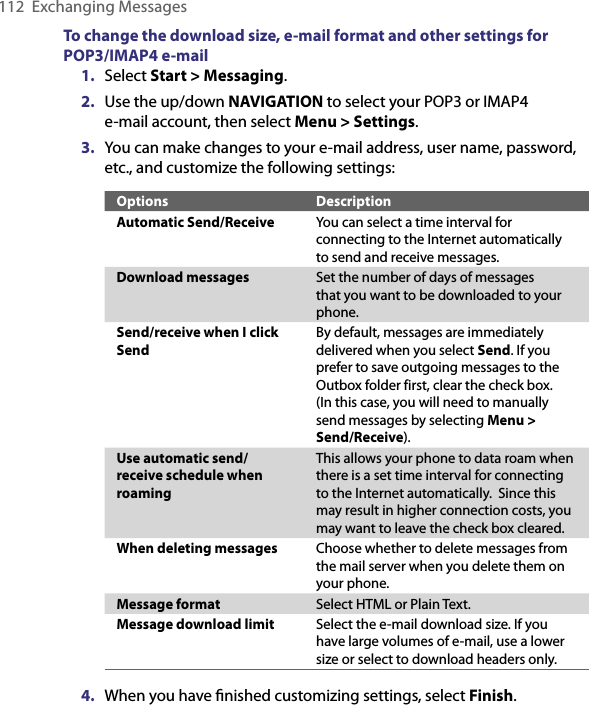
>
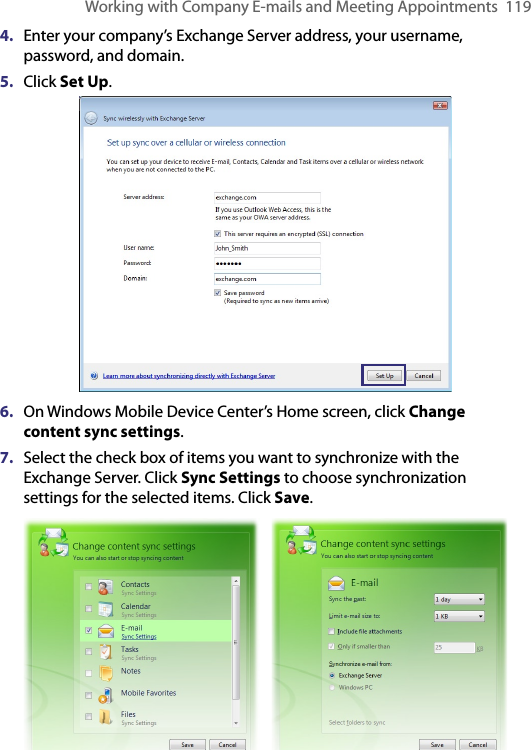
HTC
>
PB User Manual
>
User manual 2
Contents
1.
User manual 1
2.
User manual 2
3.
User manual 3
User manual 2
Navigation menu
Upload a User Manual
Namespaces
Wiki Guide
HTML
PDF
Info
Views
User Manual
Discussion / Help
Navigation
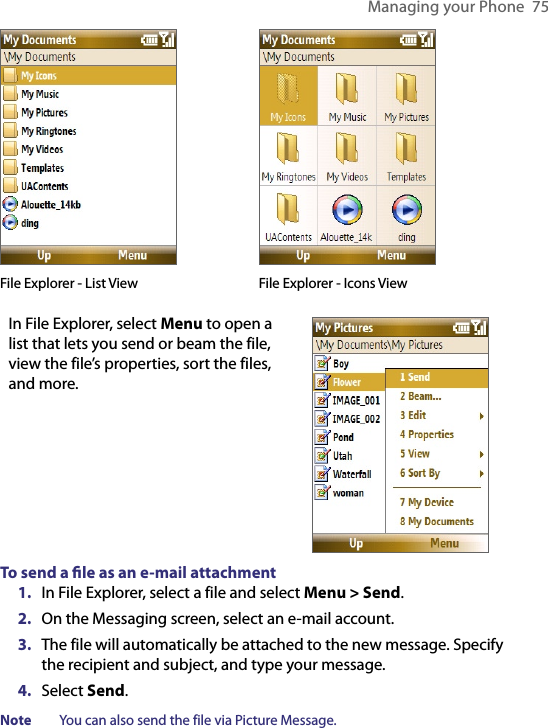
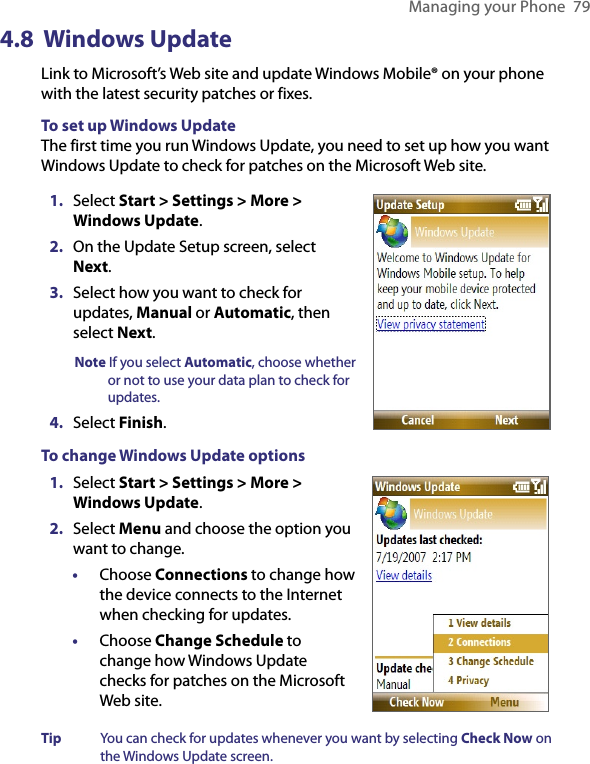
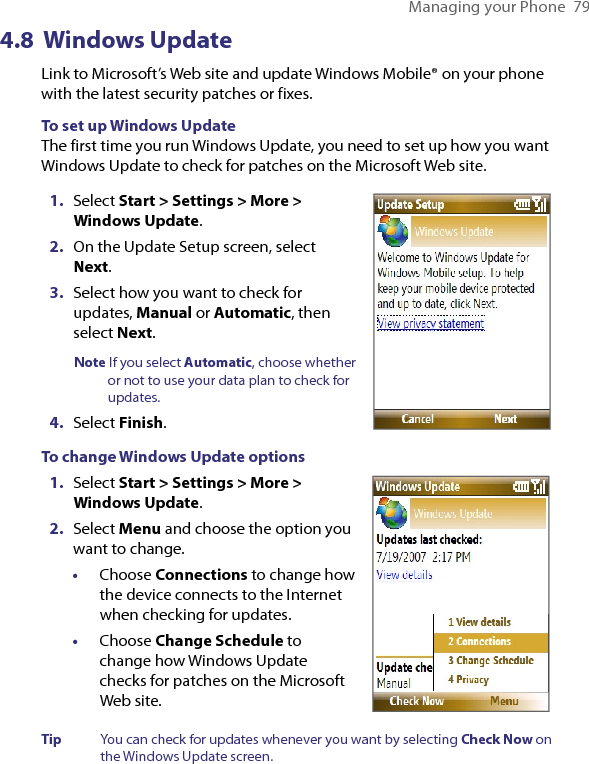
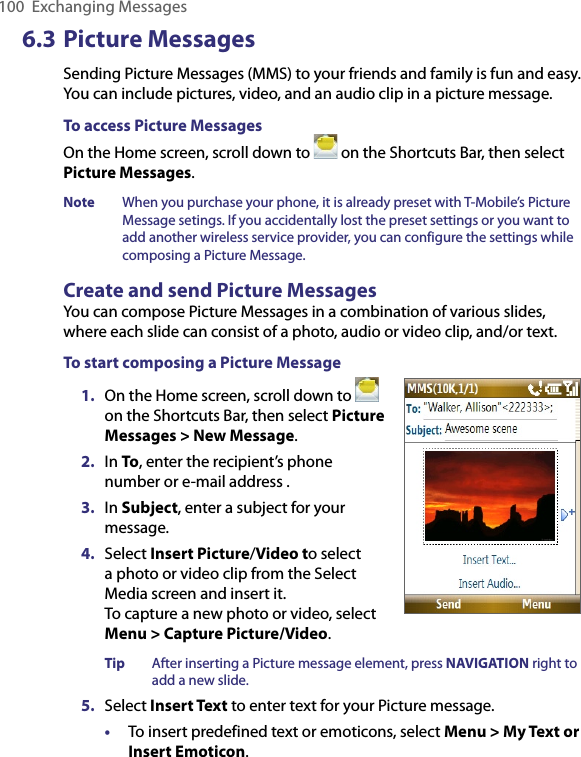
![74 Managing your Phone4.4 Managing and Backing Up FilesYou can back up files to your PC using Windows Mobile Device Center or ActiveSync or copy files to a storage card that is installed on your phone. You can also efficiently manage your files and folders using File Explorer installed on your phone.Copy files using Windows Mobile Device Center/ActiveSync to the PC1. Connect your phone to your PC. 2. In Windows Mobile Device Center, click File Management > Browse the contents of your device. Or In ActiveSync on your PC, click Explore. This opens the Mobile Device folder for your phone. 3. Browse your phone for files that you want to copy to your PC.4. Select and copy the files [Ctrl + C] and then paste them [Ctrl+V] to the destination folder in the PC.Copying a file results in separate versions of a file on your phone and PC. Changes made to one file will not affect the other since the files are not synchronized. Use File ExplorerFile Explorer provides many easy-to-use features for file and folder management.To start File ExplorerOn the Home screen, select Start > File Explorer.File Explorer operates in the following two views: • List View • Icons ViewFile Explorer displays the entire file structure in your phone’s memory. The functions focus primarily on folder management. When initially started, File Explorer is in List View by default. To switch between views, select Menu > View > Icons or List.](https://usermanual.wiki/HTC/PB.User-manual-2/User-Guide-826466-Page-8.png)