Contents
- 1. user manual 1 of 5
- 2. user manual 2 of 5
- 3. user manual 3 of 5
- 4. user manual 4 of 5
- 5. user manual 5 of 5
user manual 3 of 5
3. Tap the flash button repeatedly to choose a flash mode depending on your
lighting conditions.
Auto flash
Flash on
Flash off
4. Choose the resolution and other camera settings you want to use.
5. Choose an effect to apply to your photo.
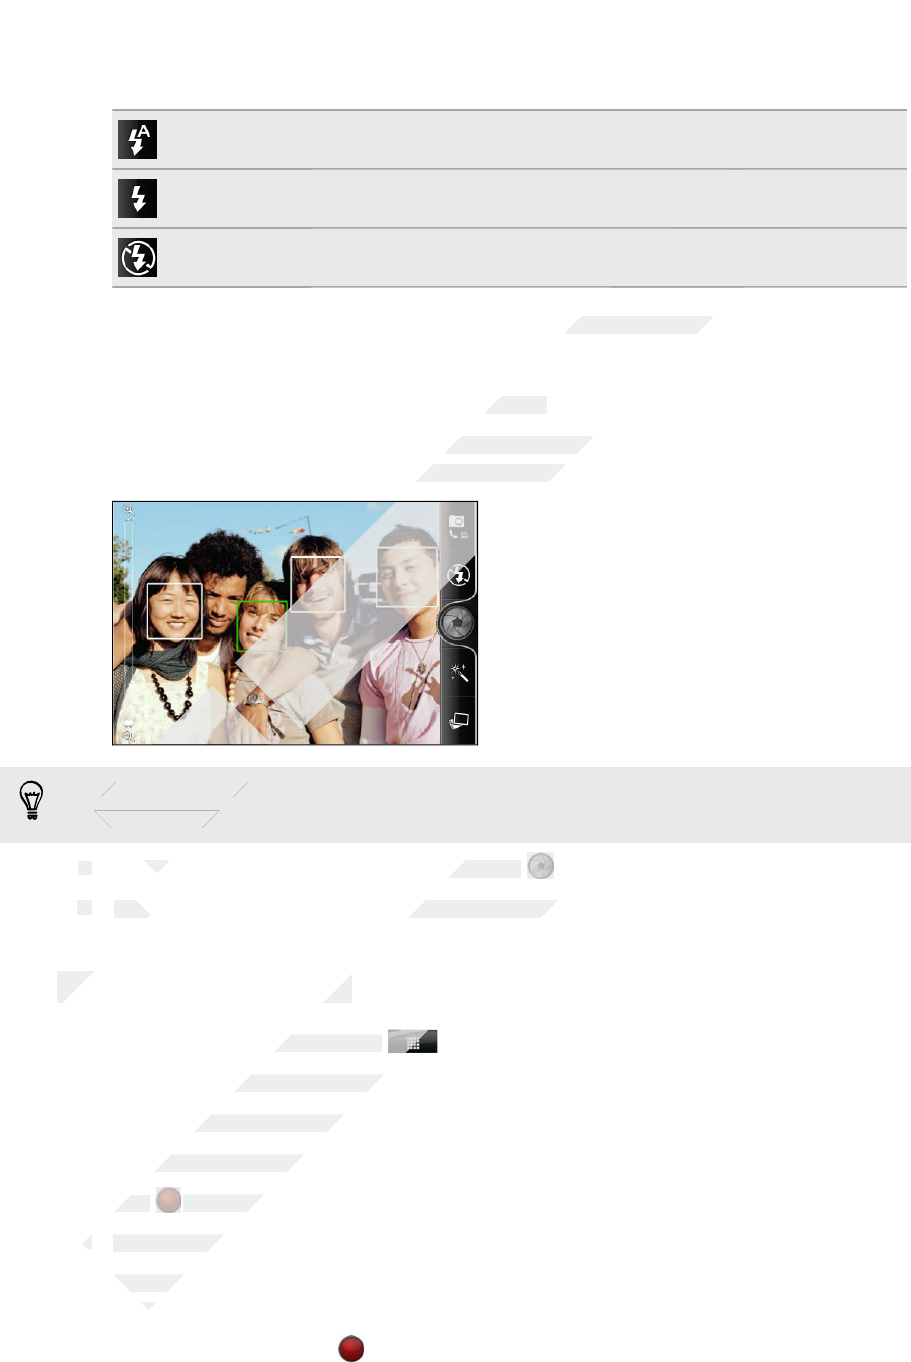
6. Point the camera and focus on your subject.
If you're taking people's photo, the camera will automatically recognize faces
and adjust the focus. You'll see boxes on people's faces.
Make sure the Auto focus and Face detection check boxes are selected in the
camera settings.
7. When you're ready to take the photo, tap .
8. Choose what you want to do with the photo you’ve just taken.
Recording video
1. From the Home screen, tap > Camcorder.
2. Choose the video quality and other camera settings you want to use.
3. Choose an effect to apply to your video.
4. Frame your subject on the Viewfinder screen.
5. Tap to start recording.
6. You can freely zoom in or out while recording video.
7. You can change focus to a different subject or area by just tapping it on the
Viewfinder screen.
8. To stop recording, tap again.
9. Choose what you want to do with the video you’ve just recorded.
93 Camera
Only
Only
7.
Only
7.
When you're ready to take the photo, tap
Only
When you're ready to take the photo, tap
8.
Only
8.
Choose what you want to do with the photo you’ve just taken.
Only
Choose what you want to do with the photo you’ve just taken.
Recording video
Only
Recording video
for
for
for
for
for
Make sure the
for
Make sure the
Auto focus
for
Auto focus
camera settings.
for
camera settings.
When you're ready to take the photo, tap
for
When you're ready to take the photo, tap
certification
certification
certification
certification
certification
Choose the resolution and other camera settings you want to use.
certification
Choose the resolution and other camera settings you want to use.
Point the camera and focus on your subject.
certification
Point the camera and focus on your subject.
If you're taking people's photo, the camera will automatically recognize faces
certification
If you're taking people's photo, the camera will automatically recognize faces
and adjust the focus. You'll see boxes on people's faces.
certification
and adjust the focus. You'll see boxes on people's faces.
certification
certification
certification
2011/03/07
2011/03/07
When you're ready to take the photo, tap
2011/03/07
When you're ready to take the photo, tap
2011/03/07
.
2011/03/07
.
Choose what you want to do with the photo you’ve just taken.
2011/03/07
Choose what you want to do with the photo you’ve just taken.
Recording video
2011/03/07
Recording video
From the Home screen, tap
2011/03/07
From the Home screen, tap
2011/03/07
Choose the video quality and other camera settings you want to use.
2011/03/07
Choose the video quality and other camera settings you want to use.
Choose an effect to apply to your video.
2011/03/07
Choose an effect to apply to your video.
2011/03/07
Frame your subject on the Viewfinder screen.
2011/03/07
Frame your subject on the Viewfinder screen.
Tap
2011/03/07
Tap
2011/03/07
to start recording.
2011/03/07
to start recording.
6.
2011/03/07
6.
You can freely zoom in or out while recording video.
2011/03/07
You can freely zoom in or out while recording video.
You can change focus to a different subject or area by just tapping it on the
2011/03/07
You can change focus to a different subject or area by just tapping it on the
Viewfinder screen.
2011/03/07
Viewfinder screen.
Adding effects
Want to make your photos look more interesting? Easy. Use the available camera
effects to make your photos look like they’ve been taken through special lenses and
filters. You can also add certain effects to videos.
Choose an effect first before you start taking a photo or video.
1. Tap .
2. Scroll through the available effects and tap one that you like.
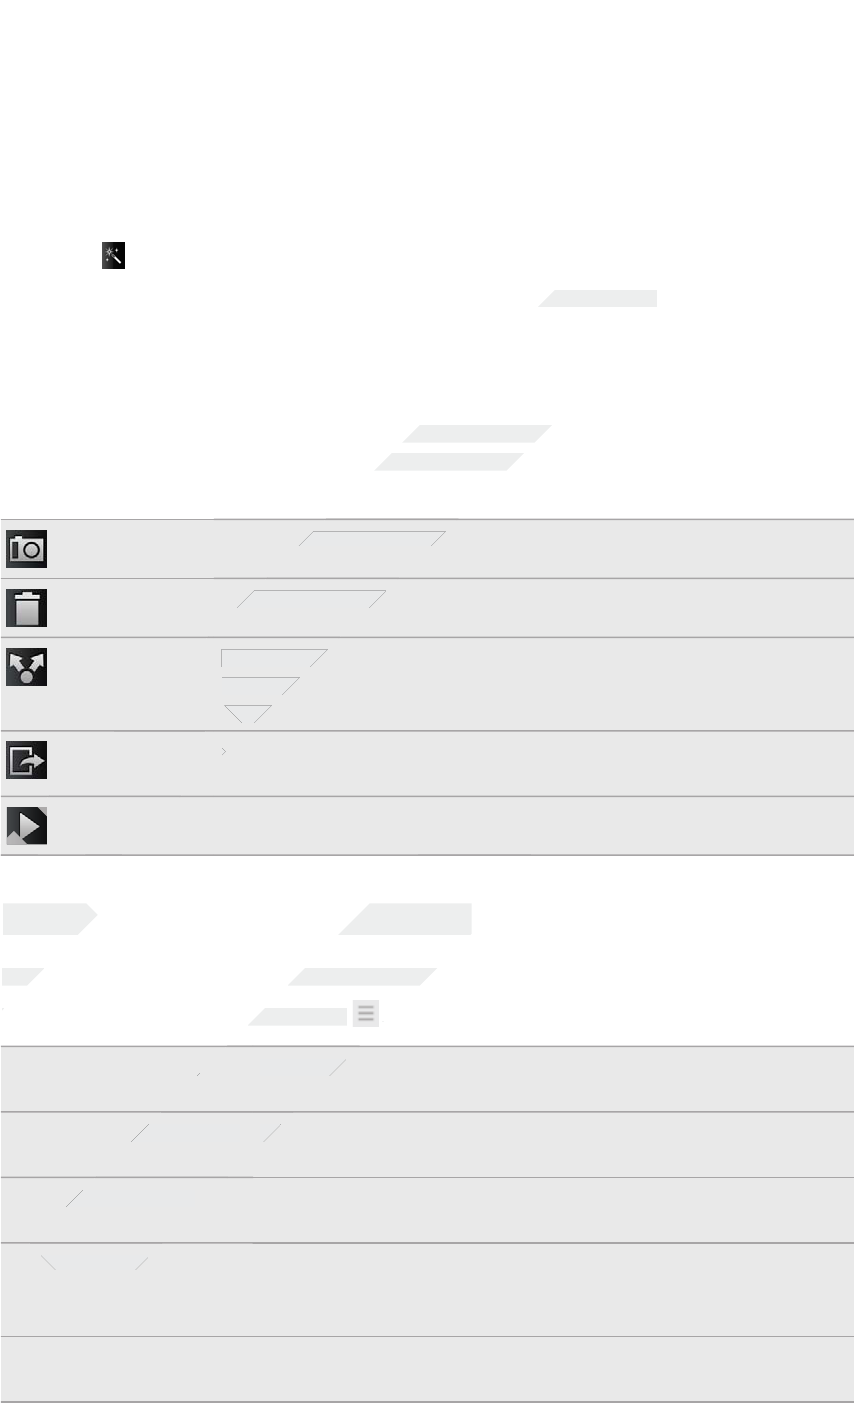
After capturing
After capturing a photo or video, the Review screen will display the photo or the
starting image of the video that you have just captured. Tap the onscreen buttons to
choose what you want to do next.
Return to the Viewfinder screen.
Delete the photo or video
Send the photo or video to your computer or another device
using Bluetooth, send it by email, or select a social network
where you want to upload it to.
Choose how you want to use the photo, such as to use it as
your wallpaper
Watch the video.
Changing camera settings
Open the menu panel to access and change camera settings.
To open the camera settings, press .
Self-portrait (photo
mode only)
Select this option to take your own closeup shot.
Self-timer (photo mode
only)
Set a time delay before your camera automatically takes
the photo.
Image adjustments Slide your finger across each of the slider bars to adjust the
exposure, contrast, saturation, and sharpness.
White balance White balance enables the camera to capture colors more
accurately by adjusting to your current lighting
environment.
Resolution/Video
quality
Choose a photo or video resolution to use.
94 Camera
Only
Only
Only
Only
Changing camera settings
Only
Changing camera settings
Open the menu panel to access and change camera settings.
Only
Open the menu panel to access and change camera settings.
To open the camera settings, press
Only
To open the camera settings, press
for
for
Choose how you want to use the photo, such as to use it as
for
Choose how you want to use the photo, such as to use it as
for
for
for
for
certification
Scroll through the available effects and tap one that you like.
certification
Scroll through the available effects and tap one that you like.
After capturing a photo or video, the Review screen will display the photo or the
certification
After capturing a photo or video, the Review screen will display the photo or the
starting image of the video that you have just captured. Tap the onscreen buttons to
certification
starting image of the video that you have just captured. Tap the onscreen buttons to
certification
Return to the Viewfinder screen.
certification
Return to the Viewfinder screen.
Delete the photo or video
certification
Delete the photo or video
Send the photo or video to your computer or another device
certification
Send the photo or video to your computer or another device
using Bluetooth, send it by email, or select a social network
certification
using Bluetooth, send it by email, or select a social network
where you want to upload it to.
certification
where you want to upload it to.
certification
certification
certification
certification
2011/03/07
2011/03/07
2011/03/07
Changing camera settings
2011/03/07
Changing camera settings
Open the menu panel to access and change camera settings.
2011/03/07
Open the menu panel to access and change camera settings.
To open the camera settings, press
2011/03/07
To open the camera settings, press
2011/03/07
.
2011/03/07
.
2011/03/07
(photo
2011/03/07
(photo
Select this option to take your own closeup shot.
2011/03/07
Select this option to take your own closeup shot.
2011/03/07
(photo mode
2011/03/07
(photo mode
Set a time delay before your camera automatically takes
2011/03/07
Set a time delay before your camera automatically takes
2011/03/07
2011/03/07
2011/03/07
2011/03/07
Image adjustments
2011/03/07
Image adjustments
2011/03/07
2011/03/07
2011/03/07
White balance
2011/03/07
White balance
2011/03/07

ISO (photo mode only) Choose an ISO level or set it back to Auto. Higher ISO
numbers are better for taking pictures in low light
conditions.
Review duration Set the time for a captured photo or video to be displayed
on the Review screen before the camera changes back to
the Viewfinder screen.
Widescreen (photo
mode only)
When this check box is selected (default), photo
resolutions available for selection are in 3:2 ratio and you
can use the entire Viewfinder screen to frame your subject.
When not selected, photo resolutions available for selection
are in standard 4:3 ratio.
Geo-tag photos (photo
mode only)
Select to store GPS location in your captured photos.
Auto enhance (photo
mode only)
Select to reduce noise when using a high ISO setting and to
automatically adjust photo brightness.
Auto focus (photo
mode only)
Enables or disables centered auto focus.
Face detection (photo
mode only)
Select to automatically recognize faces and adjust the
focus when you take people photos. Face detection will be
turned off if you disable auto focus.
Shutter sound Select to play a sound when you press the shutter release
or record button.
Grid (photo mode only) Select to display a grid on the Viewfinder screen so you
can easily frame and center your subject before taking the
photo.
Record with audio
(video mode only)
Select to record audio when capturing videos.
Reset to default Change the camera settings back to default.
95 Camera
Only
Only
Record with audio
Only
Record with audio
(video mode only)
Only
(video mode only)
Reset to default
Only
Reset to default
Only
Only
for
(photo mode only) Select to display a grid on the Viewfinder screen so you
for
(photo mode only) Select to display a grid on the Viewfinder screen so you
for
Record with audio
for
Record with audio
(video mode only)
for
(video mode only)
for
for
certification
on the Review screen before the camera changes back to
certification
on the Review screen before the camera changes back to
When this check box is selected (default), photo
certification
When this check box is selected (default), photo
resolutions available for selection are in 3:2 ratio and you
certification
resolutions available for selection are in 3:2 ratio and you
can use the entire Viewfinder screen to frame your subject.
certification
can use the entire Viewfinder screen to frame your subject.
When not selected, photo resolutions available for selection
certification
When not selected, photo resolutions available for selection
are in standard 4:3 ratio.
certification
are in standard 4:3 ratio.
Select to store GPS location in your captured photos.
certification
Select to store GPS location in your captured photos.
Select to reduce noise when using a high ISO setting and to
certification
Select to reduce noise when using a high ISO setting and to
automatically adjust photo brightness.
certification
automatically adjust photo brightness.
Enables or disables centered auto focus.
certification
Enables or disables centered auto focus.
Select to automatically recognize faces and adjust the
certification
Select to automatically recognize faces and adjust the
focus when you take people photos. Face detection will be
certification
focus when you take people photos. Face detection will be
turned off if you disable auto focus.
certification
turned off if you disable auto focus.
certification
certification
certification
certification
certification
certification
Select to play a sound when you press the shutter release
certification
Select to play a sound when you press the shutter release
or record button.
certification
or record button.
certification
certification
certification
2011/03/07
Select to record audio when capturing videos.
2011/03/07
Select to record audio when capturing videos.
2011/03/07
2011/03/07
Change the camera settings back to default.
2011/03/07
Change the camera settings back to default.
2011/03/07
2011/03/07
2011/03/07
Photos, videos, and music
Gallery
About the Gallery app
Relive the fun while viewing photos and videos of your latest travels or your pet’s
newest tricks. Get an audience by tagging your Facebook and Flickr friends.
To start using Gallery, check first if you have photos or videos copied on your
storage card.
What’s more, you can edit and add effects to your photos. You can also easily use a
photo as your contact icon, location icon, or wallpaper.
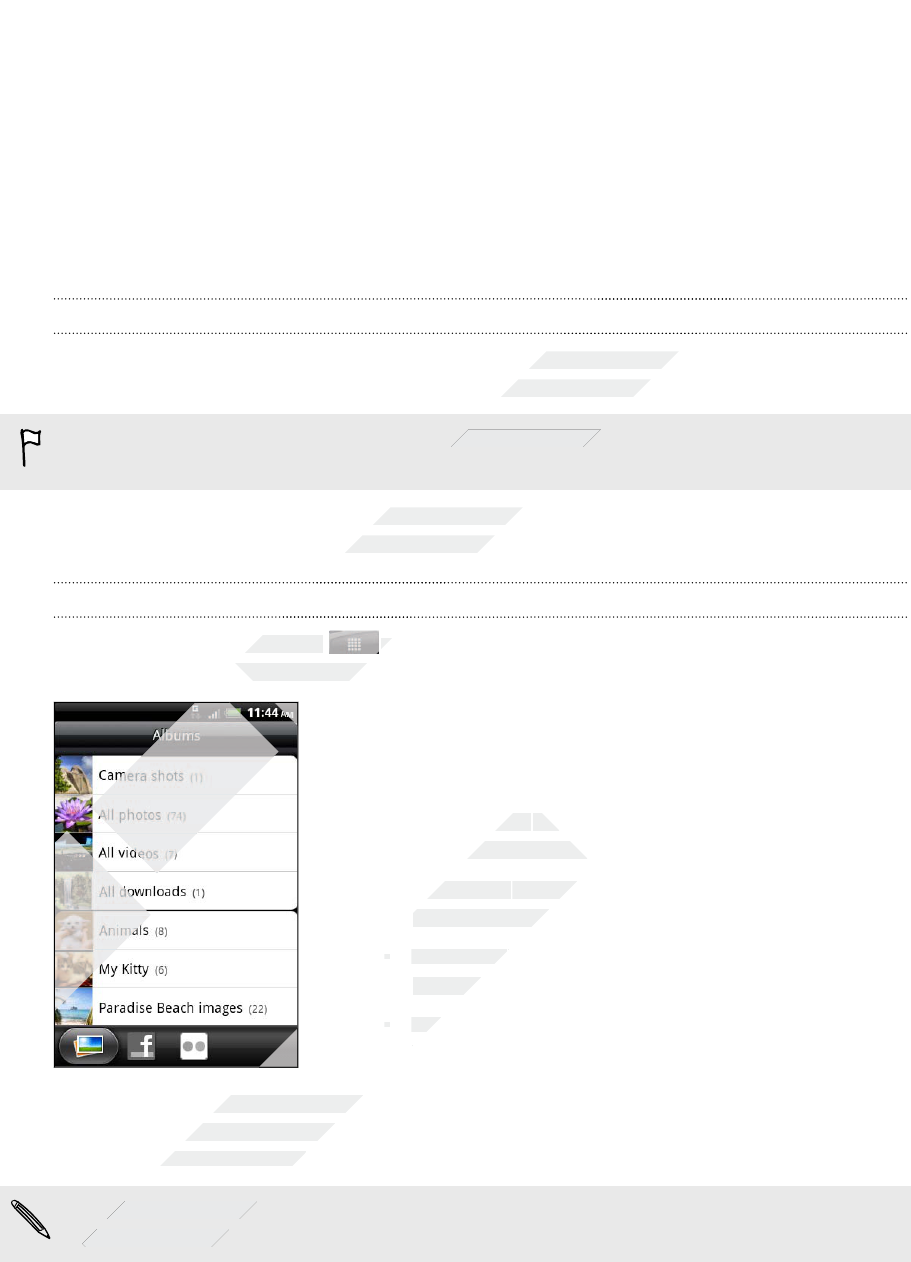
Selecting an album
From the Home screen, tap > Gallery. The Gallery app opens on the Albums
screen where your photos and videos are organized by albums for easy viewing.
The following are preset albums:
§Camera shots lets you view photos and videos
that are stored in the camera’s folder.
§My favorites lets you group photos and videos
that you set as your favorites.
§All photos lets you view all photos that are stored
in all the folders on the storage card.
§All videos lets you view all videos that are stored
in all the folders on the storage card.
§All downloads lets you view photos and videos
that you downloaded.
Folders in your storage card that contain photos and videos will also be treated as
albums and will be listed below the preset albums. The actual folder names will be
used as the album names.
If there are photos or videos under the root path of your storage card (that are not
contained in folders), they will be grouped under the Other album.
96 Photos, videos, and music
Only
Only
Only
for
for
for
certification
certification
certification
Relive the fun while viewing photos and videos of your latest travels or your pet’s
certification
Relive the fun while viewing photos and videos of your latest travels or your pet’s
newest tricks. Get an audience by tagging your Facebook and Flickr friends.
certification
newest tricks. Get an audience by tagging your Facebook and Flickr friends.
certification
To start using Gallery, check first if you have photos or videos copied on your
certification
To start using Gallery, check first if you have photos or videos copied on your
What’s more, you can edit and add effects to your photos. You can also easily use a
certification
What’s more, you can edit and add effects to your photos. You can also easily use a
photo as your contact icon, location icon, or wallpaper.
certification
photo as your contact icon, location icon, or wallpaper.
certification
certification
certification
From the Home screen, tap
certification
From the Home screen, tap
certification
>
certification
>
screen where your photos and videos are organized by albums for easy viewing.
certification
screen where your photos and videos are organized by albums for easy viewing.
certification
certification
certification
2011/03/07
2011/03/07
2011/03/07
2011/03/07
My favorites
2011/03/07
My favorites
lets you group photos and videos
2011/03/07
lets you group photos and videos
that you set as your favorites.
2011/03/07
that you set as your favorites.
All photos
2011/03/07
All photos
lets you view all photos that are stored
2011/03/07
lets you view all photos that are stored
in all the folders on the storage card.
2011/03/07
in all the folders on the storage card.
§
2011/03/07
§
All videos
2011/03/07
All videos
lets you view all videos that are stored
2011/03/07
lets you view all videos that are stored
in all the folders on the storage card.
2011/03/07
in all the folders on the storage card.
§
2011/03/07
§
All downloads
2011/03/07
All downloads
2011/03/07
that you downloaded.
2011/03/07
that you downloaded.
Folders in your storage card that contain photos and videos will also be treated as
2011/03/07
Folders in your storage card that contain photos and videos will also be treated as
albums and will be listed below the preset albums. The actual folder names will be
2011/03/07
albums and will be listed below the preset albums. The actual folder names will be
used as the album names.
2011/03/07
used as the album names.
2011/03/07
If there are photos or videos under the root path of your storage card (that are not
2011/03/07
If there are photos or videos under the root path of your storage card (that are not
contained in folders), they will be grouped under the
2011/03/07
contained in folders), they will be grouped under the
Viewing photos
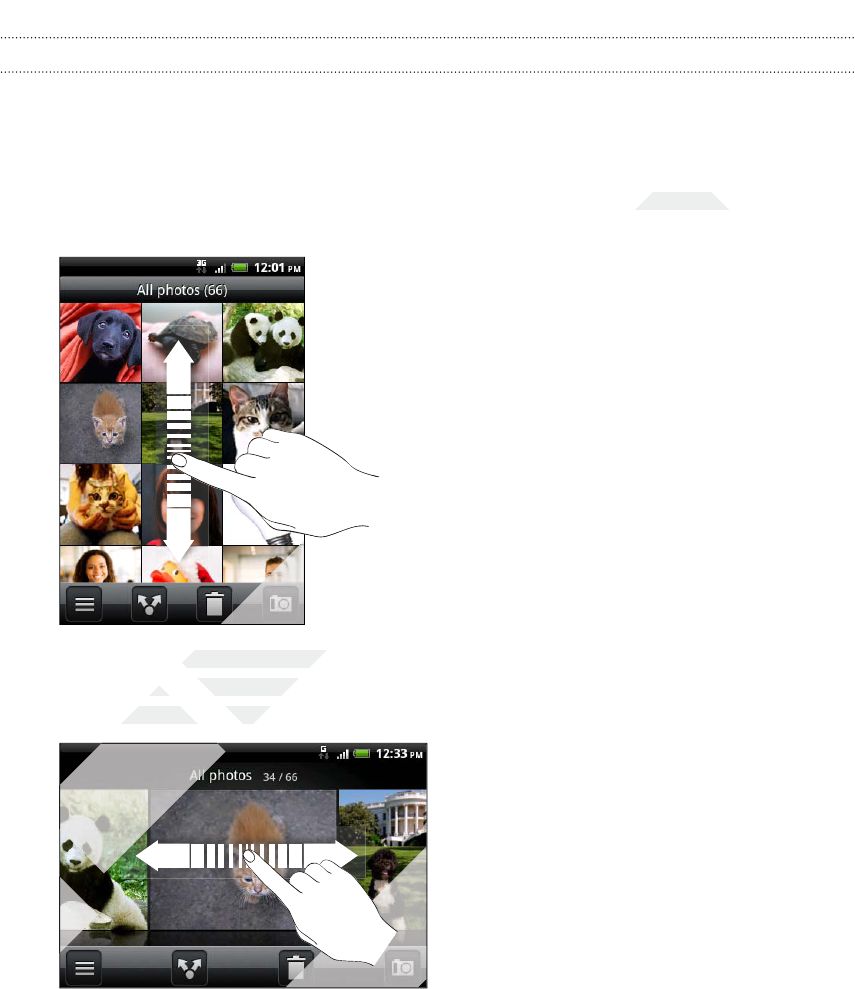
After you’ve selected an album, you can browse through your photos and videos.
Depending on how you hold your phone, the screen automatically switches to either
grid view or filmstrip view:
§While in grid view, slide your finger up or down to scroll through the thumbnails.
Tap a photo or video to view it in full screen.
§While in filmstrip view (when you turn your phone sideways), slide your finger
left or right across the screen to go through your photos and videos. Tap a
photo or video to view it in full screen.
97 Photos, videos, and music
Only
Only
Only
for
left or right across the screen to go through your photos and videos. Tap a
for
left or right across the screen to go through your photos and videos. Tap a
photo or video to view it in full screen.
for
photo or video to view it in full screen.
for
for
for
certification
While in grid view, slide your finger up or down to scroll through the thumbnails.
certification
While in grid view, slide your finger up or down to scroll through the thumbnails.
certification
certification
certification
certification
certification
While in filmstrip view (when you turn your phone sideways), slide your finger
certification
While in filmstrip view (when you turn your phone sideways), slide your finger
left or right across the screen to go through your photos and videos. Tap a
certification
left or right across the screen to go through your photos and videos. Tap a
photo or video to view it in full screen.
certification
photo or video to view it in full screen.
2011/03/07
2011/03/07
2011/03/07
2011/03/07
2011/03/07
2011/03/07
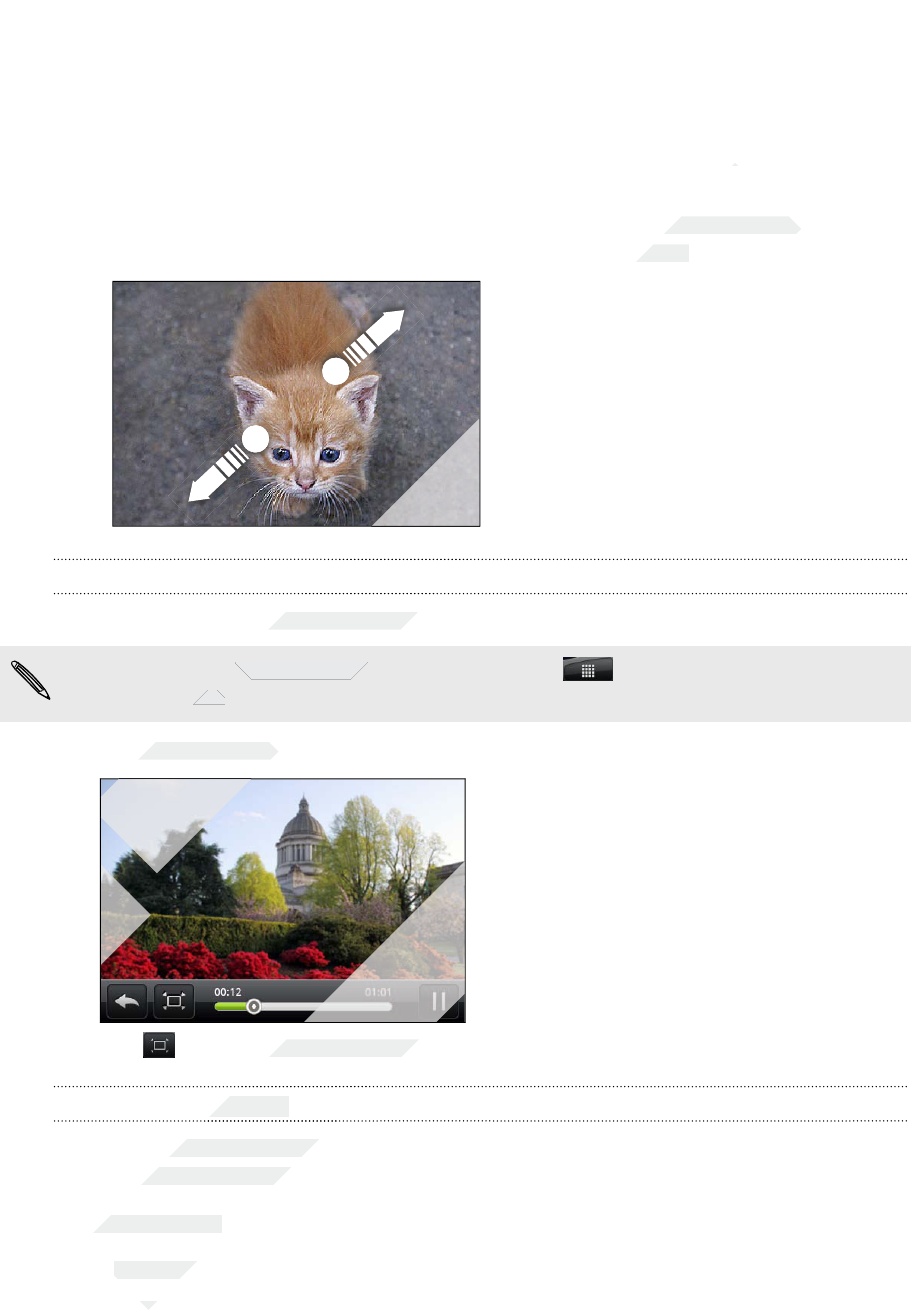
Zooming in or out on a photo
There are two ways you can zoom in or out of a photo.
§Tap the screen twice quickly to zoom in, then tap the screen twice quickly again
to zoom out.
§Press your thumb and index finger on the screen and then spread your fingers
apart to zoom in; pinch your fingers together to zoom out.
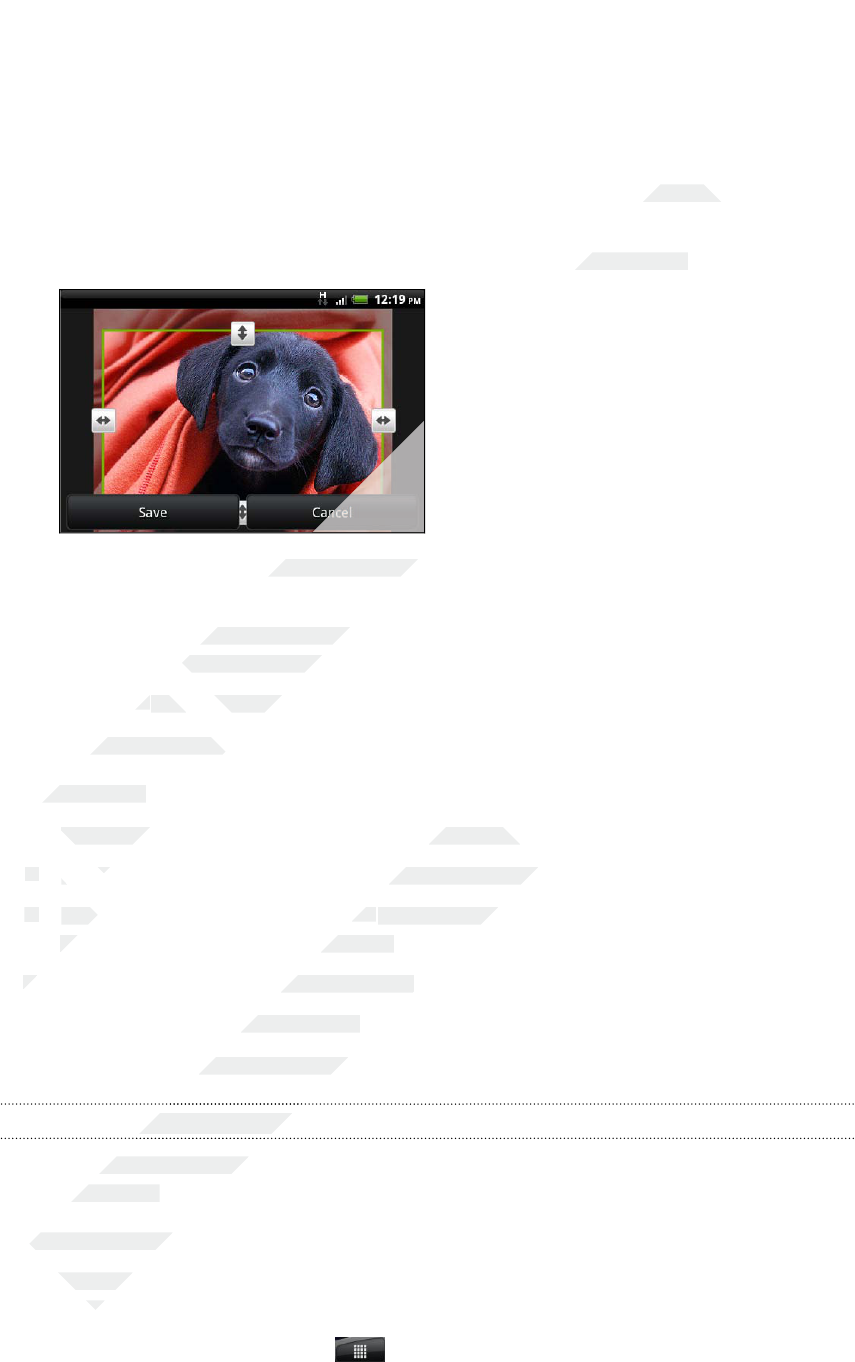
Watching videos
While browsing an album, tap a video to play it.
Another way to easily get to your videos is to tap from the Homescreen, and
then tap Videos.
§Use the onscreen controls to play, pause, or stop the video.
§Tap to toggle between full and best-fit screens.
Editing your photos
Do basic editing tasks on your photos such as rotate and crop. You can also enhance
your photos by applying effects such as high contrast, vintage, and more.
Rotating a photo
1. On the Gallery app’s Albums screen, tap an album.
2. Press and hold on the photo that you want to rotate.
3. In the menu that opens, tap Edit, and then tap either Rotate left or Rotate right.
98 Photos, videos, and music
Only
Only
Only
for
for
Videos
for
Videos
.
for
.
Use the onscreen controls to play, pause, or stop the video.
for
Use the onscreen controls to play, pause, or stop the video.
for
for
for
certification
Tap the screen twice quickly to zoom in, then tap the screen twice quickly again
certification
Tap the screen twice quickly to zoom in, then tap the screen twice quickly again
Press your thumb and index finger on the screen and then spread your fingers
certification
Press your thumb and index finger on the screen and then spread your fingers
apart to zoom in; pinch your fingers together to zoom out.
certification
apart to zoom in; pinch your fingers together to zoom out.
certification
certification
certification
certification
While browsing an album, tap a video to play it.
certification
While browsing an album, tap a video to play it.
certification
Another way to easily get to your videos is to tap
certification
Another way to easily get to your videos is to tap
2011/03/07
2011/03/07
2011/03/07
2011/03/07
to toggle between full and best-fit screens.
2011/03/07
to toggle between full and best-fit screens.
Editing your photos
2011/03/07
Editing your photos
2011/03/07
2011/03/07
2011/03/07
Do basic editing tasks on your photos such as rotate and crop. You can also enhance
2011/03/07
Do basic editing tasks on your photos such as rotate and crop. You can also enhance
your photos by applying effects such as high contrast, vintage, and more.
2011/03/07
your photos by applying effects such as high contrast, vintage, and more.
Rotating a photo
2011/03/07
Rotating a photo
On the Gallery app’s Albums screen, tap an album.
2011/03/07
On the Gallery app’s Albums screen, tap an album.
Press and hold on the photo that you want to rotate.
2011/03/07
Press and hold on the photo that you want to rotate.
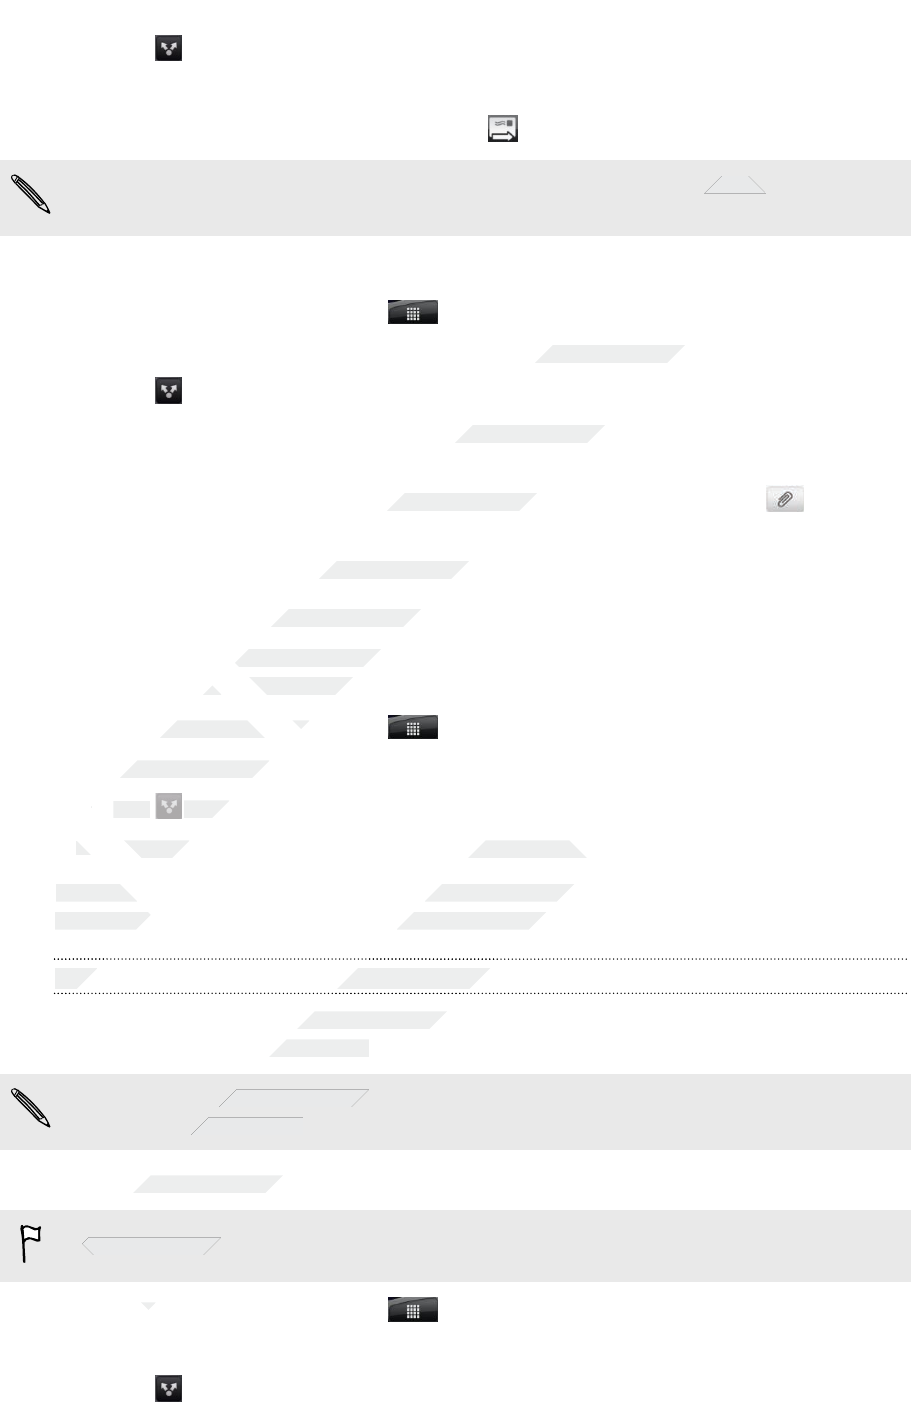
Cropping a photo
1. On the Gallery app’s Albums screen, tap an album.
2. Press and hold on the photo that you want to crop.
3. In the menu that opens, tap Edit, and then tap Crop. You’ll see a crop box
around the photo.
4. To adjust the crop box size, press and hold the edge of the box.
5. When directional arrows appear, drag your finger inward or outward to resize
the crop box.
6. To move the crop box to the part of the photo that you want to crop, drag the
crop box to the desired position.
7. Tap Save to keep the changes.
The cropped photo is saved as a copy. The original photo remains unedited.
Adding effects
1. On the Gallery app’s Albums screen, tap an album.
2. Press and hold on the photo that you want to add effects to.
3. In the menu that opens, tap Edit, and then tap Effects. On the panel that opens,
you’ll see options available to you.
4. Tap an effect to apply on the photo.
5. Tap Save to keep the changes.
The enhanced photo is saved as a copy. The original photo remains unedited.
Sending your photos and videos
Send photos and videos via email or MMS or to another phone or your computer
using Bluetooth.
Sending photos or videos by email
You can send several photos, videos, or both in an email message. They are added as
file attachments in your email.
1. From the Home screen, tap > Gallery.
2. Tap the album that has the photos or videos you want to share.
99 Photos, videos, and music
Only
2.
Only
2.
Press and hold on the photo that you want to add effects to.
Only
Press and hold on the photo that you want to add effects to.
3.
Only
3.
In the menu that opens, tap
Only
In the menu that opens, tap
you’ll see options available to you.
Only
you’ll see options available to you.
4.
Only
4.
for
Save
for
Save
to keep the changes.
for
to keep the changes.
The cropped photo is saved as a copy. The original photo remains unedited.
for
The cropped photo is saved as a copy. The original photo remains unedited.
Adding effects
for
Adding effects
On the Gallery app’s Albums screen, tap an album.
for
On the Gallery app’s Albums screen, tap an album.
Press and hold on the photo that you want to add effects to.
for
Press and hold on the photo that you want to add effects to.
certification
. You’ll see a crop box
certification
. You’ll see a crop box
To adjust the crop box size, press and hold the edge of the box.
certification
To adjust the crop box size, press and hold the edge of the box.
certification
certification
certification
When directional arrows appear, drag your finger inward or outward to resize
certification
When directional arrows appear, drag your finger inward or outward to resize
To move the crop box to the part of the photo that you want to crop, drag the
certification
To move the crop box to the part of the photo that you want to crop, drag the
crop box to the desired position.
certification
crop box to the desired position.
to keep the changes.
certification
to keep the changes.
2011/03/07
On the Gallery app’s Albums screen, tap an album.
2011/03/07
On the Gallery app’s Albums screen, tap an album.
Press and hold on the photo that you want to add effects to.
2011/03/07
Press and hold on the photo that you want to add effects to.
Edit
2011/03/07
Edit
, and then tap
2011/03/07
, and then tap
you’ll see options available to you.
2011/03/07
you’ll see options available to you.
Tap an effect to apply on the photo.
2011/03/07
Tap an effect to apply on the photo.
to keep the changes.
2011/03/07
to keep the changes.
The enhanced photo is saved as a copy. The original photo remains unedited.
2011/03/07
The enhanced photo is saved as a copy. The original photo remains unedited.
Sending your photos and videos
2011/03/07
Sending your photos and videos
2011/03/07
2011/03/07
2011/03/07
Send photos and videos via email or MMS or to another phone or your computer
2011/03/07
Send photos and videos via email or MMS or to another phone or your computer
using Bluetooth.
2011/03/07
using Bluetooth.
Sending photos or videos by email
2011/03/07
Sending photos or videos by email
You can send several photos, videos, or both in an email message. They are added as
2011/03/07
You can send several photos, videos, or both in an email message. They are added as
file attachments in your email.
2011/03/07
file attachments in your email.
3. Tap and then tap Gmail or Mail.
4. Select the photos or videos you want to share and then tap Next.
5. Compose your message and then tap (Gmail) or Send (Mail).
If you selected Mail and you have multiple email accounts, the default email
account will be used.
Sending a photo or video by MMS
1. From the Home screen, tap > Gallery.
2. Tap the album that has the photos or videos you want to share.
3. Tap and then tap Messages.
4. Tap the photo or video you want to send. The photo or video is automatically
added into the MMS message.
5. To add another photo or video to your slideshow attachment, tap and then
tap Picture or Video.
6. Compose your message and then tap Send.
Sending photos or videos using Bluetooth
You can select several photos, videos, or both and send them to someone’s phone or
your computer using Bluetooth.
1. From the Home screen, tap > Gallery.
2. Tap the album that has the photos or videos you want to share.
3. Tap and then tap Bluetooth.
4. Select the photos or videos you want to share and then tap Next.
In the next few steps, you’ll be asked to turn on Bluetooth on your phone and connect
to the receiving Bluetooth device so the files can be sent.
Sharing your photos and videos on the Web
Using the Gallery app, you can share photos and videos on your social networks, as
well as post videos on YouTube.
You can also use the Camera or Camcorder app to share a photo or video right
after you’ve captured it.
Sharing photos or videos on Facebook
You need to be logged in to your account to be able to upload photos or videos.
1. From the Home screen, tap > Gallery.
2. Tap the album that has the photos or videos you want to share.
3. Tap and then tap Facebook for HTC Sense.
100 Photos, videos, and music
Only
4.
Only
4.
In the next few steps, you’ll be asked to turn on Bluetooth on your phone and connect
Only
In the next few steps, you’ll be asked to turn on Bluetooth on your phone and connect
to the receiving Bluetooth device so the files can be sent.
Only
to the receiving Bluetooth device so the files can be sent.
Sharing your photos and videos on the Web
Only
Sharing your photos and videos on the Web
Only
Only
for
your computer using Bluetooth.
for
your computer using Bluetooth.
From the Home screen, tap
for
From the Home screen, tap
Tap the album that has the photos or videos you want to share.
for
Tap the album that has the photos or videos you want to share.
3.
for
3.
Tap
for
Tap
for
and then tap
for
and then tap
Select the photos or videos you want to share and then tap
for
Select the photos or videos you want to share and then tap
certification
certification
and you have multiple email accounts, the default email
certification
and you have multiple email accounts, the default email
Tap the album that has the photos or videos you want to share.
certification
Tap the album that has the photos or videos you want to share.
Tap the photo or video you want to send. The photo or video is automatically
certification
Tap the photo or video you want to send. The photo or video is automatically
To add another photo or video to your slideshow attachment, tap
certification
To add another photo or video to your slideshow attachment, tap
Compose your message and then tap
certification
Compose your message and then tap
Sending photos or videos using Bluetooth
certification
Sending photos or videos using Bluetooth
You can select several photos, videos, or both and send them to someone’s phone or
certification
You can select several photos, videos, or both and send them to someone’s phone or
your computer using Bluetooth.
certification
your computer using Bluetooth.
From the Home screen, tap
certification
From the Home screen, tap
2011/03/07
Select the photos or videos you want to share and then tap
2011/03/07
Select the photos or videos you want to share and then tap
In the next few steps, you’ll be asked to turn on Bluetooth on your phone and connect
2011/03/07
In the next few steps, you’ll be asked to turn on Bluetooth on your phone and connect
to the receiving Bluetooth device so the files can be sent.
2011/03/07
to the receiving Bluetooth device so the files can be sent.
Sharing your photos and videos on the Web
2011/03/07
Sharing your photos and videos on the Web
2011/03/07
2011/03/07
2011/03/07
Using the Gallery app, you can share photos and videos on your social networks, as
2011/03/07
Using the Gallery app, you can share photos and videos on your social networks, as
well as post videos on YouTube.
2011/03/07
well as post videos on YouTube.
2011/03/07
You can also use the Camera or Camcorder app to share a photo or video right
2011/03/07
You can also use the Camera or Camcorder app to share a photo or video right
after you’ve captured it.
2011/03/07
after you’ve captured it.
Sharing photos or videos on Facebook
2011/03/07
Sharing photos or videos on Facebook
2011/03/07
You need to be logged in to your account to be able to upload photos or videos.
2011/03/07
You need to be logged in to your account to be able to upload photos or videos.
From the Home screen, tap
2011/03/07
From the Home screen, tap
4. Select the photos or videos you want to share and then tap Next.
5. Enter a different caption on each photo or video. You can also tag friends on
your photos. Tap Tag this photo, and then tap the part where your friend is.
From the list that shows, select who you want to tag.
6. Slide to the left to go to the next photo or video.
7. Tap Upload.
8. Select which album to upload to and set privacy settings for the uploaded
photos or videos.
9. Tap Done.
Sharing photos and videos on Flickr
You need to be logged in to your Flickr account to be able to upload photos or
videos.
1. From the Home screen, tap > Gallery.
2. Tap the album that has the photos or videos you want to share.
3. Tap and then tap Flickr.
4. Select the photos or videos you want to share and then tap Next.
5. Enter a different title and description on each photo or video. You can also tag
friends on your photos. Tap Tag this photo, and then tap the part where your
friend is. From the list that shows, select who you want to tag.
6. Slide to the left to go to the next photo or video.
7. Tap Upload.
8. Select which album to upload to and set privacy settings for the uploaded
photos or videos.
9. Tap Done.
Sharing photos on Picasa
You need to be signed in to a Google Account to be able to upload photos to the
Picasa photo organizing service.
1. From the Home screen, tap > Gallery.
2. Tap the album that has the photos you want to share.
3. Tap and then tap Picasa.
4. Select the photos you want to share and then tap Next.
5. Enter a caption for the photos you're uploading.
6. Select the online album where you want to upload the photos, or tap to
create a new album.
7. Tap Upload.
You can view the photos online at http://picasaweb.google.com.
101 Photos, videos, and music
Only
8.
Only
8.
photos or videos.
Only
photos or videos.
9.
Only
9.
Tap
Only
Tap
Sharing photos on Picasa
Only
Sharing photos on Picasa
Only
Only
Only
for
friends on your photos. Tap
for
friends on your photos. Tap
friend is. From the list that shows, select who you want to tag.
for
friend is. From the list that shows, select who you want to tag.
Slide to the left to go to the next photo or video.
for
Slide to the left to go to the next photo or video.
7.
for
7.
Tap
for
Tap
Upload
for
Upload
Select which album to upload to and set privacy settings for the uploaded
for
Select which album to upload to and set privacy settings for the uploaded
photos or videos.
for
photos or videos.
certification
Select which album to upload to and set privacy settings for the uploaded
certification
Select which album to upload to and set privacy settings for the uploaded
certification
You need to be logged in to your Flickr account to be able to upload photos or
certification
You need to be logged in to your Flickr account to be able to upload photos or
From the Home screen, tap
certification
From the Home screen, tap
certification
>
certification
>
Gallery
certification
Gallery
Tap the album that has the photos or videos you want to share.
certification
Tap the album that has the photos or videos you want to share.
and then tap
certification
and then tap
Flickr
certification
Flickr
.
certification
.
Select the photos or videos you want to share and then tap
certification
Select the photos or videos you want to share and then tap
Enter a different title and description on each photo or video. You can also tag
certification
Enter a different title and description on each photo or video. You can also tag
friends on your photos. Tap
certification
friends on your photos. Tap
friend is. From the list that shows, select who you want to tag.
certification
friend is. From the list that shows, select who you want to tag.
2011/03/07
Select which album to upload to and set privacy settings for the uploaded
2011/03/07
Select which album to upload to and set privacy settings for the uploaded
2011/03/07
2011/03/07
2011/03/07
2011/03/07
You need to be signed in to a Google Account to be able to upload photos to the
2011/03/07
You need to be signed in to a Google Account to be able to upload photos to the
Picasa photo organizing service.
2011/03/07
Picasa photo organizing service.
From the Home screen, tap
2011/03/07
From the Home screen, tap
Tap the album that has the photos you want to share.
2011/03/07
Tap the album that has the photos you want to share.
2011/03/07
and then tap
2011/03/07
and then tap
Select the photos you want to share and then tap
2011/03/07
Select the photos you want to share and then tap
5.
2011/03/07
5.
Enter a caption for the photos you're uploading.
2011/03/07
Enter a caption for the photos you're uploading.
Select the online album where you want to upload the photos, or tap
2011/03/07
Select the online album where you want to upload the photos, or tap
create a new album.
2011/03/07
create a new album.
Sharing videos on YouTube
You can share your videos by uploading them to YouTube.
1. From the Home screen, tap > Gallery.
2. Tap the album that has the videos you want to share.
3. Tap and then tap YouTube.
4. Select the videos you want to share and then tap Next. Sign in to your YouTube
or Google Account, if you’re asked to do so.
5. Enter a title for the videos you're uploading.
6. Tap More details where you can enter information such as description and tags,
and select a privacy option.
7. Tap Upload.
Viewing photos in your social networks
Right in the Gallery app, check what you and your friends have uploaded to your
social networks (Facebook and Flickr only).
Viewing photos on Facebook
You need to be logged in to your Facebook account to view Facebook photos.
1. From the Home screen, tap > Gallery.
2. Tap the Facebook tab.
3. Tap your account name or your friend’s account on the list to view the photos in
the account.
You can view photos in your online albums in the same way as you view photos on
your storage card.
Viewing photos on Flickr
You need to be logged in to your Flickr account to view Flickr photos.
1. From the Home screen, tap > Gallery.
2. Tap the Flickr tab. You may be asked to give authorization for the app to
connect to the Flickr website. If this happens, you need to give authorization to
access your Flickr account.
3. Tap your account name or your friend’s account on the list to view the photos in
the account.
You can view photos in your online albums in the same way as you view photos on
your storage card.
102 Photos, videos, and music
Only
You can view photos in your online albums in the same way as you view photos on
Only
You can view photos in your online albums in the same way as you view photos on
your storage card.
Only
your storage card.
Viewing photos on Flickr
Only
Viewing photos on Flickr
You need to be logged in to your Flickr account to view Flickr photos.
Only
You need to be logged in to your Flickr account to view Flickr photos.
for
From the Home screen, tap
for
From the Home screen, tap
Tap the
for
Tap the
Facebook
for
Facebook
Tap your account name or your friend’s account on the list to view the photos in
for
Tap your account name or your friend’s account on the list to view the photos in
the account.
for
the account.
You can view photos in your online albums in the same way as you view photos on
for
You can view photos in your online albums in the same way as you view photos on
certification
Next
certification
Next
. Sign in to your YouTube
certification
. Sign in to your YouTube
where you can enter information such as description and tags,
certification
where you can enter information such as description and tags,
Viewing photos in your social networks
certification
Viewing photos in your social networks
certification
certification
certification
Right in the Gallery app, check what you and your friends have uploaded to your
certification
Right in the Gallery app, check what you and your friends have uploaded to your
social networks (Facebook and Flickr only).
certification
social networks (Facebook and Flickr only).
Viewing photos on Facebook
certification
Viewing photos on Facebook
You need to be logged in to your Facebook account to view Facebook photos.
certification
You need to be logged in to your Facebook account to view Facebook photos.
From the Home screen, tap
certification
From the Home screen, tap
2011/03/07
Tap your account name or your friend’s account on the list to view the photos in
2011/03/07
Tap your account name or your friend’s account on the list to view the photos in
You can view photos in your online albums in the same way as you view photos on
2011/03/07
You can view photos in your online albums in the same way as you view photos on
You need to be logged in to your Flickr account to view Flickr photos.
2011/03/07
You need to be logged in to your Flickr account to view Flickr photos.
From the Home screen, tap
2011/03/07
From the Home screen, tap
2011/03/07
2011/03/07
tab. You may be asked to give authorization for the app to
2011/03/07
tab. You may be asked to give authorization for the app to
connect to the Flickr website. If this happens, you need to give authorization to
2011/03/07
connect to the Flickr website. If this happens, you need to give authorization to
access your Flickr account.
2011/03/07
access your Flickr account.
Tap your account name or your friend’s account on the list to view the photos in
2011/03/07
Tap your account name or your friend’s account on the list to view the photos in
the account.
2011/03/07
the account.
You can view photos in your online albums in the same way as you view photos on
2011/03/07
You can view photos in your online albums in the same way as you view photos on
your storage card.
2011/03/07
your storage card.
Commenting on photos in your social networks
Add comments to your uploaded photos as well as your friends’ photos.
1. Do one of the following:
§While browsing online albums, press and hold a photo and then tap Add
comment.
§While viewing a photo in full screen, tap anywhere on the screen, and then
tap .
2. Tap the box that says “Write a comment.”
3. Enter your text, and then tap Comment.
Music
Listening to music
Enjoy listening to songs and music on your phone using the Music app.
You need to copy music files to your storage card first to use the Music app to play
music.
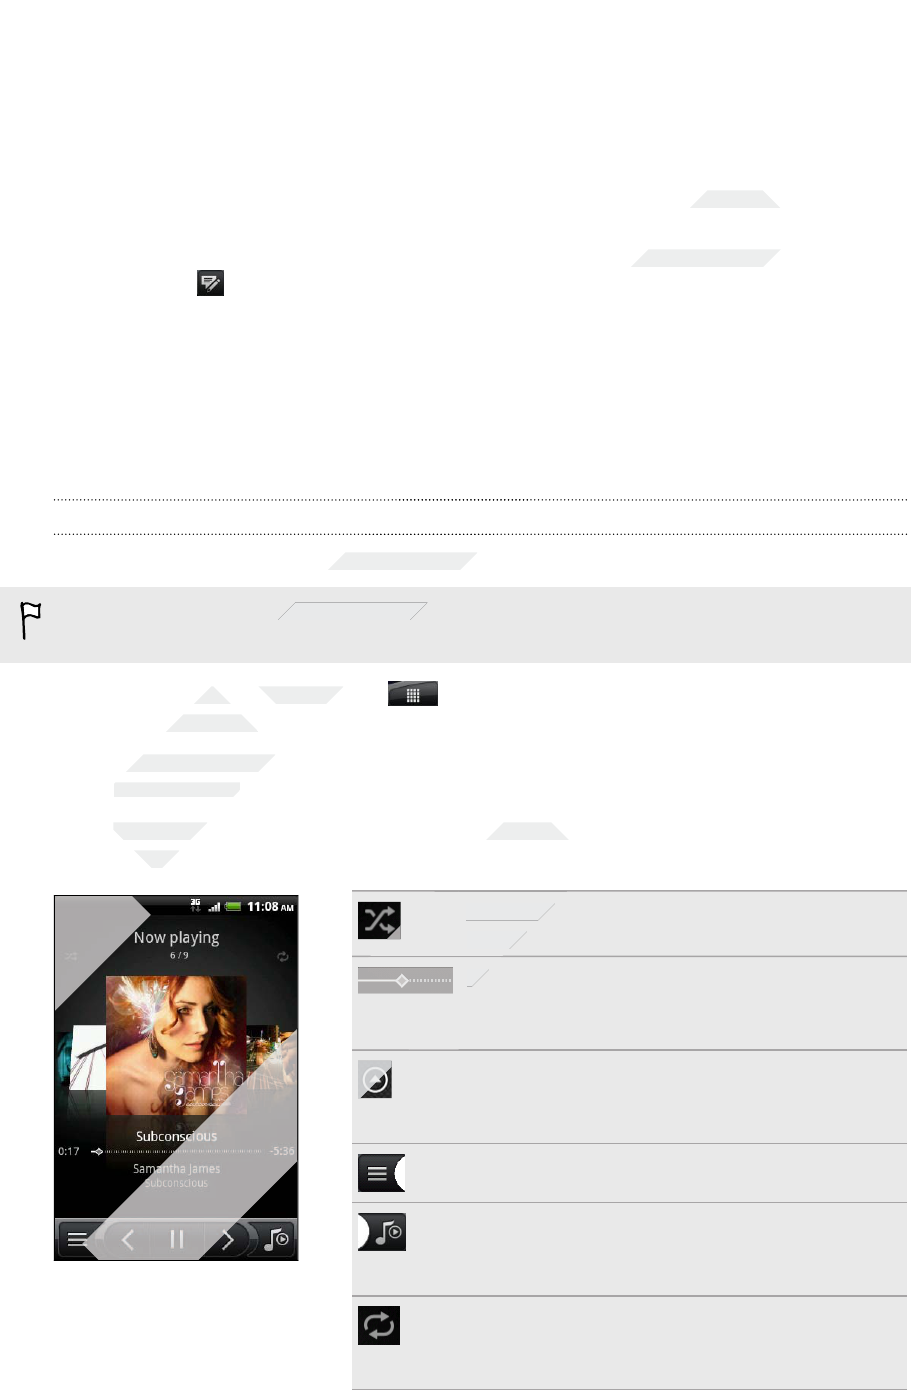
1. From the Home screen, tap > Music. The Music app opens in the Now
playing screen.
2. Swipe your finger left or right across the screen to go to the next or previous
music album.
3. Tap the onscreen icons to control music playback, select a song to play, repeat
songs, and more.
Turn shuffle on or off. (Shuffle is off when
button is gray.)
Press and drag your finger across the
progress bar to jump to any part of the
song.
Tap to check out featured albums from
HTCSense.com. (Availability depends on
your country.)
Go to the library.
Switch between showing the Now playing
list and Now playing screen. You can
rearrange songs in the Now playing list.
Cycle through the repeat modes: repeat all
songs, repeat current song, and don’t
repeat.
103 Photos, videos, and music
Only
Only
Only
Only
for
From the Home screen, tap
for
From the Home screen, tap
playing screen.
for
playing screen.
Swipe your finger left or right across the screen to go to the next or previous
for
Swipe your finger left or right across the screen to go to the next or previous
music album.
for
music album.
Tap the onscreen icons to control music playback, select a song to play, repeat
for
Tap the onscreen icons to control music playback, select a song to play, repeat
songs, and more.
for
songs, and more.
certification
While browsing online albums, press and hold a photo and then tap
certification
While browsing online albums, press and hold a photo and then tap
While viewing a photo in full screen, tap anywhere on the screen, and then
certification
While viewing a photo in full screen, tap anywhere on the screen, and then
certification
certification
certification
Enjoy listening to songs and music on your phone using the Music app.
certification
Enjoy listening to songs and music on your phone using the Music app.
certification
You need to copy music files to your storage card first to use the Music app to play
certification
You need to copy music files to your storage card first to use the Music app to play
From the Home screen, tap
certification
From the Home screen, tap
2011/03/07
Tap the onscreen icons to control music playback, select a song to play, repeat
2011/03/07
Tap the onscreen icons to control music playback, select a song to play, repeat
2011/03/07
2011/03/07
2011/03/07
2011/03/07
2011/03/07
Turn shuffle on or off. (Shuffle is off when
2011/03/07
Turn shuffle on or off. (Shuffle is off when
button is gray.)
2011/03/07
button is gray.)
2011/03/07
Press and drag your finger across the
2011/03/07
Press and drag your finger across the
2011/03/07
2011/03/07
2011/03/07
2011/03/07
2011/03/07
2011/03/07
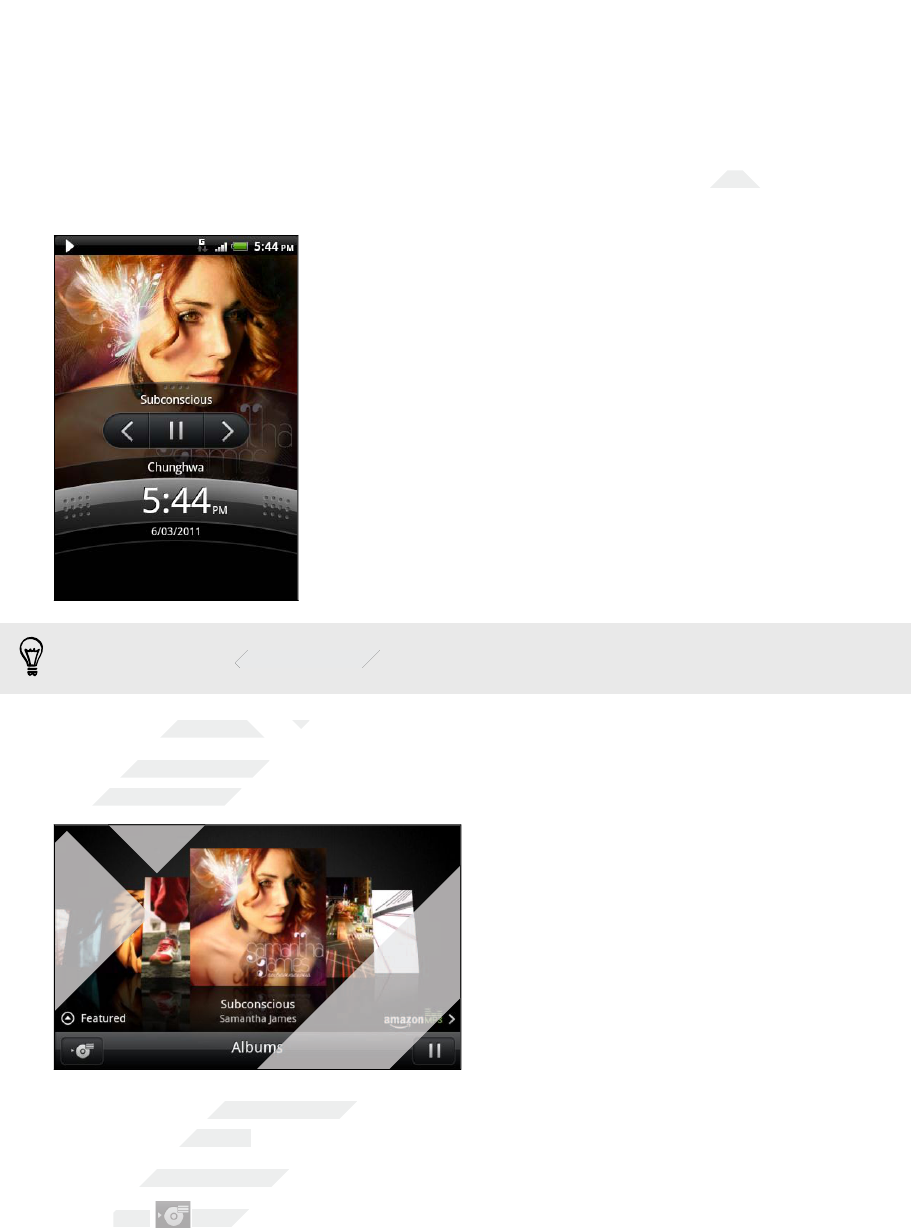
Playing music from the Lock screen
When you’re listening to music and the screen turns off, press POWER to turn the
screen back on and control the music playback directly on the Lock screen.
If you don’t see the playback controls on the Lock screen, tap anywhere on the screen
to display them.
You can also pause music playback right from the Notifications panel.
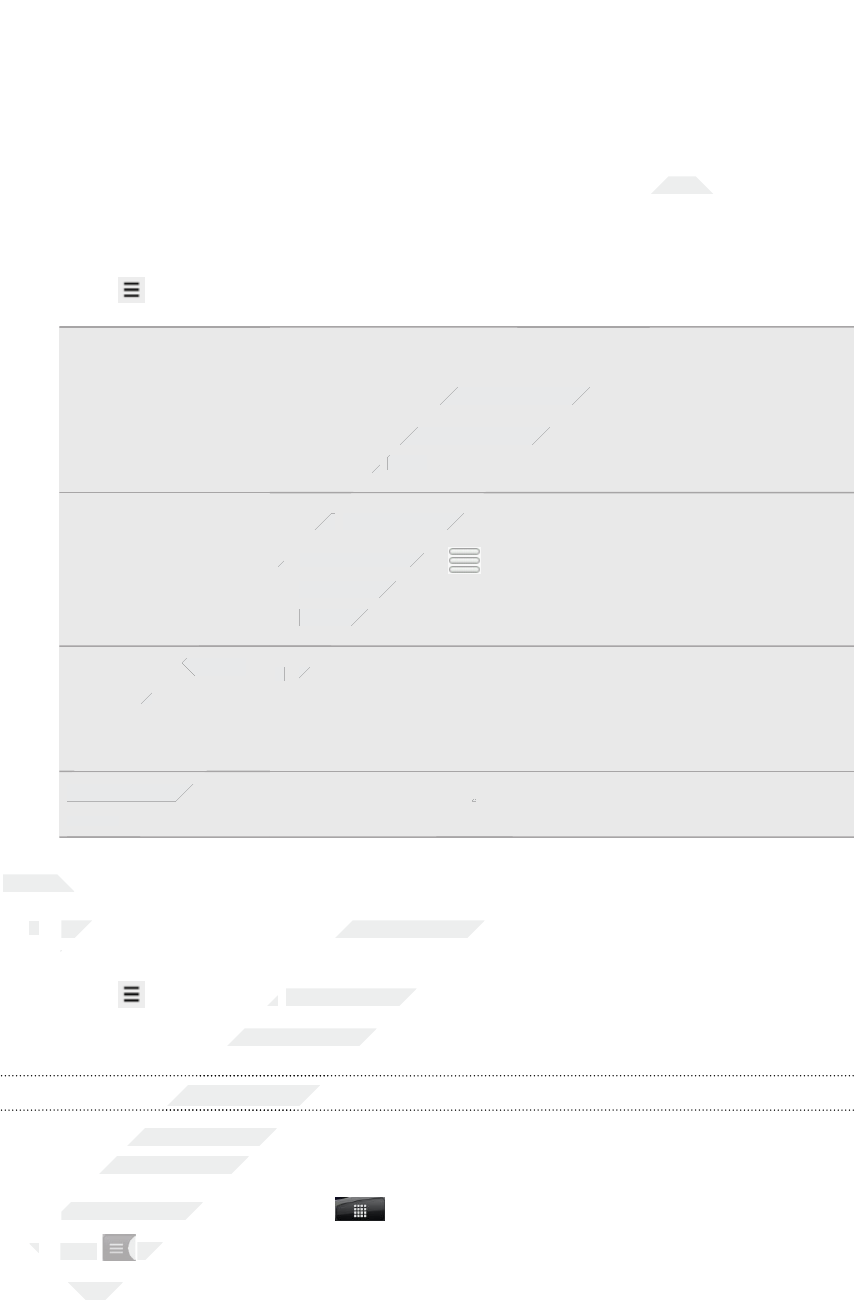
Browsing albums in landscape view
When you turn your phone sideways, you get a wider view of your screen and can
skim through your albums easily.
§If you have lots of albums, flick left or right across the screen to quickly skim
through them.
§To look at one album at a time, slide your finger left or right.
§Tap to see the song list of the current album.
104 Photos, videos, and music
Only
Only
Only
for
for
Browsing albums in landscape view
for
Browsing albums in landscape view
When you turn your phone sideways, you get a wider view of your screen and can
for
When you turn your phone sideways, you get a wider view of your screen and can
skim through your albums easily.
for
skim through your albums easily.
for
for
certification
If you don’t see the playback controls on the Lock screen, tap anywhere on the screen
certification
If you don’t see the playback controls on the Lock screen, tap anywhere on the screen
certification
certification
certification
You can also pause music playback right from the Notifications panel.
certification
You can also pause music playback right from the Notifications panel.
Browsing albums in landscape view
certification
Browsing albums in landscape view
2011/03/07
2011/03/07
2011/03/07
2011/03/07
If you have lots of albums, flick left or right across the screen to quickly skim
2011/03/07
If you have lots of albums, flick left or right across the screen to quickly skim
through them.
2011/03/07
through them.
To look at one album at a time, slide your finger left or right.
2011/03/07
To look at one album at a time, slide your finger left or right.
Tap
2011/03/07
Tap
2011/03/07
to see the song list of the current album.
2011/03/07
to see the song list of the current album.

About the Music widget
You can use the Music widget to play music right from your Home screen.
Browsing music in the library
1. Tap on the Music app’s Now playing screen or Now playing list to go to the
library. In the library, your music is organized by categories such as Artists and
Albums. Choose a category by tapping one of the tabs at the bottom of the
screen.
2. Tap a song in a category to play it. The Now playing list is updated with the
song list from your selected category.
You can add, remove, or rearrange the tabs in the library.
Creating a playlist
Personalize your music experience by creating music playlists. Make a playlist
containing just your favorite songs or create one to match your mood for the day.
You can make as many playlists as you like.
1. From the Home screen, tap > Music.
2. Tap to go to the library.
3. In the library, tap or slide your finger on the bottom row to go to the Playlists
category.
4. Tap Add playlist.
5. Enter a playlist name, and then tap Add songs to playlist.
6. Choose a category.
7. Select the check boxes of songs you want to add to the playlist and then tap
Add.
8. Tap Save.
Playing the songs in a playlist
1. In the library, tap or slide your finger on the bottom row to go to the Playlists
category.
2. Tap a playlist to open it.
3. Tap the first song or any song in the playlist.
When you tap a song in the list to play it, the Now playing screen is updated with the
songs from your playlist.
105 Photos, videos, and music
Only
5.
Only
5.
6.
Only
6.
Choose a category.
Only
Choose a category.
7.
Only
7.
Select the check boxes of songs you want to add to the playlist and then tap
Only
Select the check boxes of songs you want to add to the playlist and then tap
Add
Only
Add
8.
Only
8.
for
for
to go to the library.
for
to go to the library.
In the library, tap or slide your finger on the bottom row to go to the
for
In the library, tap or slide your finger on the bottom row to go to the
category.
for
category.
4.
for
4.
Tap
for
Tap
Add playlist
for
Add playlist
Enter a playlist name, and then tap
for
Enter a playlist name, and then tap
certification
certification
on the Music app’s Now playing screen or Now playing list to go to the
certification
on the Music app’s Now playing screen or Now playing list to go to the
library. In the library, your music is organized by categories such as Artists and
certification
library. In the library, your music is organized by categories such as Artists and
Albums. Choose a category by tapping one of the tabs at the bottom of the
certification
Albums. Choose a category by tapping one of the tabs at the bottom of the
Tap a song in a category to play it. The Now playing list is updated with the
certification
Tap a song in a category to play it. The Now playing list is updated with the
certification
You can add, remove, or rearrange the tabs in the library.
certification
You can add, remove, or rearrange the tabs in the library.
certification
certification
certification
Personalize your music experience by creating music playlists. Make a playlist
certification
Personalize your music experience by creating music playlists. Make a playlist
containing just your favorite songs or create one to match your mood for the day.
certification
containing just your favorite songs or create one to match your mood for the day.
You can make as many playlists as you like.
certification
You can make as many playlists as you like.
From the Home screen, tap
certification
From the Home screen, tap
to go to the library.
certification
to go to the library.
2011/03/07
Add songs to playlist
2011/03/07
Add songs to playlist
2011/03/07
Select the check boxes of songs you want to add to the playlist and then tap
2011/03/07
Select the check boxes of songs you want to add to the playlist and then tap
Playing the songs in a playlist
2011/03/07
Playing the songs in a playlist
In the library, tap or slide your finger on the bottom row to go to the
2011/03/07
In the library, tap or slide your finger on the bottom row to go to the
category.
2011/03/07
category.
2011/03/07
Tap a playlist to open it.
2011/03/07
Tap a playlist to open it.
Tap the first song or any song in the playlist.
2011/03/07
Tap the first song or any song in the playlist.
When you tap a song in the list to play it, the Now playing screen is updated with the
2011/03/07
When you tap a song in the list to play it, the Now playing screen is updated with the
songs from your playlist.
2011/03/07
songs from your playlist.
Managing playlists
After creating a playlist, you can add more songs to it, rearrange their order, and
more.
1. In the library, tap or slide your finger on the bottom row to go to the Playlists
category.
2. Tap a playlist to open it.
3. Press , and then choose what you want to do:
Add more songs to
a playlist 1. Tap Add songs.
2. Go to the Songs category or any other category.
3. Select the songs you want to add to the playlist and
then tap Add.
Rearrange songs 1. Tap Change order.
2. Press and hold at the end of the song title you want
to move. When the row is highlighted, drag it to its new
position, then release.
Delete songs from
a playlist 1. Tap Remove songs.
2. Select the songs you want to delete and then tap
Remove.
Change playlist
name
Tap Rename playlist.
Deleting playlists
1. In the library, tap or slide your finger on the bottom row to go to the Playlists
category.
2. Press and then tap Delete playlists.
3. Select the playlists to delete and then tap Delete.
Setting a song as a ringtone
You can choose a song from the Music app’s library and set it as your phone’s
ringtone or a ringtone for a certain contact.
1. From the Home screen, tap > Music.
2. Tap to go to the library.
3. In the library, choose the song that you want to use as ringtone and then play it
back.
106 Photos, videos, and music
Only
Deleting playlists
Only
Deleting playlists
1.
Only
1.
In the library, tap or slide your finger on the bottom row to go to the
Only
In the library, tap or slide your finger on the bottom row to go to the
category.
Only
category.
for
for
a playlist
for
a playlist
Change playlist
for
Change playlist
name
for
name
for
for
certification
In the library, tap or slide your finger on the bottom row to go to the
certification
In the library, tap or slide your finger on the bottom row to go to the
certification
Go to the Songs category or any other category.
certification
Go to the Songs category or any other category.
Select the songs you want to add to the playlist and
certification
Select the songs you want to add to the playlist and
then tap
certification
then tap
Add
certification
Add
.
certification
.
Tap
certification
Tap
Change order
certification
Change order
2.
certification
2.
Press and hold
certification
Press and hold
to move. When the row is highlighted, drag it to its new
certification
to move. When the row is highlighted, drag it to its new
position, then release.
certification
position, then release.
Delete songs from
certification
Delete songs from
1.
certification
1.
Tap
certification
Tap
2.
certification
2.
certification
certification
certification
certification
2011/03/07
2011/03/07
Rename playlist
2011/03/07
Rename playlist
2011/03/07
In the library, tap or slide your finger on the bottom row to go to the
2011/03/07
In the library, tap or slide your finger on the bottom row to go to the
and then tap
2011/03/07
and then tap
Delete playlists
2011/03/07
Delete playlists
Select the playlists to delete and then tap
2011/03/07
Select the playlists to delete and then tap
Setting a song as a ringtone
2011/03/07
Setting a song as a ringtone
2011/03/07
2011/03/07
2011/03/07
You can choose a song from the Music app’s library and set it as your phone’s
2011/03/07
You can choose a song from the Music app’s library and set it as your phone’s
ringtone or a ringtone for a certain contact.
2011/03/07
ringtone or a ringtone for a certain contact.
From the Home screen, tap
2011/03/07
From the Home screen, tap
2.
2011/03/07
2.
Tap
2011/03/07
Tap
2011/03/07
to go to the library.
2011/03/07
to go to the library.
In the library, choose the song that you want to use as ringtone and then play it
2011/03/07
In the library, choose the song that you want to use as ringtone and then play it
4. On the Now playing screen, press and then tap Set as ringtone .
5. In the Set as ringtone options menu, tap Phone ringtone or Contact ringtone. If
you select Contact ringtone, you need to choose the contacts you want to
associate the song with in the next screen.
Checking if the song was added as a ringtone
1. From the Home screen, press , and then tap Settings.
2. On the Settings screen, tap Sound > Phone ringtone.
The song should be in the ringtone list and selected.
Sharing music using Bluetooth
You can choose a song from the Music app’s library and send it to someone’s phone
or your computer using Bluetooth.
1. From the Home screen, tap > Music.
2. Tap to go to the library.
3. In the library, choose the song that you want to send via Bluetooth and then
play it back.
4. On the Now playing screen, press and then tap Share > Bluetooth.
In the next few steps, you’ll be asked to turn on Bluetooth on your phone and connect
to the receiving Bluetooth device so the music can be sent.
Finding music videos on YouTube
You can find music videos of the song you’re listening to on YouTube. It’s simple. On
the Now playing screen, just press and then tap Find videos.
107 Photos, videos, and music
Only
You can find music videos of the song you’re listening to on YouTube. It’s simple. On
Only
You can find music videos of the song you’re listening to on YouTube. It’s simple. On
the Now playing screen, just press
Only
the Now playing screen, just press
for
In the next few steps, you’ll be asked to turn on Bluetooth on your phone and connect
for
In the next few steps, you’ll be asked to turn on Bluetooth on your phone and connect
to the receiving Bluetooth device so the music can be sent.
for
to the receiving Bluetooth device so the music can be sent.
Finding music videos on YouTube
for
Finding music videos on YouTube
for
for
for
You can find music videos of the song you’re listening to on YouTube. It’s simple. On
for
You can find music videos of the song you’re listening to on YouTube. It’s simple. On
the Now playing screen, just press
for
the Now playing screen, just press
certification
Settings
certification
Settings
.
certification
.
Phone ringtone
certification
Phone ringtone
.
certification
.
The song should be in the ringtone list and selected.
certification
The song should be in the ringtone list and selected.
certification
certification
You can choose a song from the Music app’s library and send it to someone’s phone
certification
You can choose a song from the Music app’s library and send it to someone’s phone
certification
>
certification
>
Music
certification
Music
.
certification
.
to go to the library.
certification
to go to the library.
In the library, choose the song that you want to send via Bluetooth and then
certification
In the library, choose the song that you want to send via Bluetooth and then
On the Now playing screen, press
certification
On the Now playing screen, press
In the next few steps, you’ll be asked to turn on Bluetooth on your phone and connect
certification
In the next few steps, you’ll be asked to turn on Bluetooth on your phone and connect
to the receiving Bluetooth device so the music can be sent.
certification
to the receiving Bluetooth device so the music can be sent.
2011/03/07
You can find music videos of the song you’re listening to on YouTube. It’s simple. On
2011/03/07
You can find music videos of the song you’re listening to on YouTube. It’s simple. On
and then tap
2011/03/07
and then tap
Find videos
2011/03/07
Find videos

Accounts and sync
About online accounts
HTC Wildfire S can sync with popular online social networking and email accounts.
Among the information you can get include:
§Gmail, Exchange ActiveSync, and other POP3/IMAP email.
§Google and Exchange ActiveSync contacts, as well as your friends’ contact
information in Facebook and their Twitter profiles.
§Calendar events from your Google Account(s), from Exchange ActiveSync, and
from your Facebook account.
§Status updates and links shared by your friends and yourself on social networks
such as Facebook and Twitter.
§Flickr and Facebook photo uploads.
You can set up your Exchange ActiveSync and POP3/IMAP email accounts on HTC
Wildfire S either in the Mail app or the Accounts & sync settings.
Synchronizing with a Google Account
Signing in to your Google Account lets you sync Gmail and your Google contacts and
calendars between HTC Wildfire S and the Web. You also need to sign in to a Google
Account to use Google apps such as Google Talk™ and Android Market.
If you skipped adding a Google Account when you first set up HTC Wildfire S, you
may encounter problems when using some Google apps. If these problems persist,
you may need to factory reset HTC Wildfire S and enter your Google Account
details when you set up HTC Wildfire S again.
Adding more Google Accounts
You can add more than one Google Account. However, subsequent Google Accounts
can only sync contacts, emails, and calendar events. Other Google services use the
first Google Account you added.
1. From the Home screen, press , and then tap Settings > Accounts & sync.
2. Tap Add account > Google.
3. Follow the onscreen instructions to sign in to an account or create a new
account.
108 Accounts and sync
Only
Signing in to your Google Account lets you sync Gmail and your Google contacts and
Only
Signing in to your Google Account lets you sync Gmail and your Google contacts and
calendars between HTC Wildfire S and the Web. You also need to sign in to a Google
Only
calendars between HTC Wildfire S and the Web. You also need to sign in to a Google
Account to use Google apps such as Google Talk
Only
Account to use Google apps such as Google Talk
Only
Only
Only
Only
Only
Only
Only
Only
Only
Only
Only
Only
Only
If you skipped adding a Google Account when you first set up HTC Wildfire S, you
Only
If you skipped adding a Google Account when you first set up HTC Wildfire S, you
may encounter problems when using some Google apps. If these problems persist,
Only
may encounter problems when using some Google apps. If these problems persist,
for
for
You can set up your Exchange ActiveSync and POP3/IMAP email accounts on HTC
for
You can set up your Exchange ActiveSync and POP3/IMAP email accounts on HTC
Wildfire S either in the Mail app or the Accounts & sync settings.
for
Wildfire S either in the Mail app or the Accounts & sync settings.
Synchronizing with a Google Account
for
Synchronizing with a Google Account
Signing in to your Google Account lets you sync Gmail and your Google contacts and
for
Signing in to your Google Account lets you sync Gmail and your Google contacts and
calendars between HTC Wildfire S and the Web. You also need to sign in to a Google
for
calendars between HTC Wildfire S and the Web. You also need to sign in to a Google
certification
HTC Wildfire S can sync with popular online social networking and email accounts.
certification
HTC Wildfire S can sync with popular online social networking and email accounts.
Gmail, Exchange ActiveSync, and other POP3/IMAP email.
certification
Gmail, Exchange ActiveSync, and other POP3/IMAP email.
Google and Exchange ActiveSync contacts, as well as your friends’ contact
certification
Google and Exchange ActiveSync contacts, as well as your friends’ contact
information in Facebook and their Twitter profiles.
certification
information in Facebook and their Twitter profiles.
Calendar events from your Google Account(s), from Exchange ActiveSync, and
certification
Calendar events from your Google Account(s), from Exchange ActiveSync, and
from your Facebook account.
certification
from your Facebook account.
Status updates and links shared by your friends and yourself on social networks
certification
Status updates and links shared by your friends and yourself on social networks
such as Facebook and Twitter.
certification
such as Facebook and Twitter.
Flickr and Facebook photo uploads.
certification
Flickr and Facebook photo uploads.
certification
You can set up your Exchange ActiveSync and POP3/IMAP email accounts on HTC
certification
You can set up your Exchange ActiveSync and POP3/IMAP email accounts on HTC
Wildfire S either in the Mail app or the Accounts & sync settings.
certification
Wildfire S either in the Mail app or the Accounts & sync settings.
2011/03/07
Synchronizing with a Google Account
2011/03/07
Synchronizing with a Google Account
Signing in to your Google Account lets you sync Gmail and your Google contacts and
2011/03/07
Signing in to your Google Account lets you sync Gmail and your Google contacts and
calendars between HTC Wildfire S and the Web. You also need to sign in to a Google
2011/03/07
calendars between HTC Wildfire S and the Web. You also need to sign in to a Google
Account to use Google apps such as Google Talk
2011/03/07
Account to use Google apps such as Google Talk
™
2011/03/07
™
and Android Market.
2011/03/07
and Android Market.
2011/03/07
If you skipped adding a Google Account when you first set up HTC Wildfire S, you
2011/03/07
If you skipped adding a Google Account when you first set up HTC Wildfire S, you
may encounter problems when using some Google apps. If these problems persist,
2011/03/07
may encounter problems when using some Google apps. If these problems persist,
you may need to factory reset HTC Wildfire S and enter your Google Account
2011/03/07
you may need to factory reset HTC Wildfire S and enter your Google Account
details when you set up HTC Wildfire S again.
2011/03/07
details when you set up HTC Wildfire S again.
Adding more Google Accounts
2011/03/07
Adding more Google Accounts
2011/03/07
2011/03/07
2011/03/07
You can add more than one Google Account. However, subsequent Google Accounts
2011/03/07
You can add more than one Google Account. However, subsequent Google Accounts
can only sync contacts, emails, and calendar events. Other Google services use the
2011/03/07
can only sync contacts, emails, and calendar events. Other Google services use the
first Google Account you added.
2011/03/07
first Google Account you added.
1.
2011/03/07
1.
From the Home screen, press
2011/03/07
From the Home screen, press
Tap
2011/03/07
Tap
Add account
2011/03/07
Add account
Forgot your Google Account password?
If you have forgotten your Google Account password, you can try to recover it
by going to the Google website.
1. On HTC Wildfire S or on your computer, open your web browser and go
to https://www.google.com/accounts/ForgotPasswd.
2. Enter the email address or username that you use to sign in to your
Google Account and click Submit.
3. Follow the instructions on the screen to reset your password.
If you don’t have an alternate email address or cannot access the email
account you used to create your Google Account, you can reset your Google
Account after 24 hours by answering the security question for password
recovery.
Adding a social network account
Skipped signing in to your social network accounts (such as Facebook, Twitter, or
Flickr) when you first turned on and set up HTC Wildfire S? You can still add these
accounts.
1. From the Home screen, press , and then tap Settings > Accounts & sync.
2. Tap Add account, and then tap the account type you want to add.
3. Follow the onscreen instructions to enter the account information.
Your social network account is then added to the list on the Accounts & sync screen.
Depending on how you configured the account, the new information may start
synchronizing with HTC Wildfire S.
Managing your online accounts
Changing general sync settings
1. From the Home screen, press , and then tap Settings > Accounts & sync.
2. Select or clear the following:
Background
data
If this is selected, apps can send and receive online account
information even if you are not currently using them.
Auto-sync If this is selected, apps can use the sync schedule defined in
the account settings. If this is cleared, you will need to sync
accounts manually.
109 Accounts and sync
Only
Your social network account is then added to the list on the Accounts & sync screen.
Only
Your social network account is then added to the list on the Accounts & sync screen.
Depending on how you configured the account, the new information may start
Only
Depending on how you configured the account, the new information may start
synchronizing with HTC Wildfire S.
Only
synchronizing with HTC Wildfire S.
Managing your online accounts
Only
Managing your online accounts
for
From the Home screen, press
for
From the Home screen, press
Tap
for
Tap
Add account
for
Add account
Follow the onscreen instructions to enter the account information.
for
Follow the onscreen instructions to enter the account information.
Your social network account is then added to the list on the Accounts & sync screen.
for
Your social network account is then added to the list on the Accounts & sync screen.
certification
On HTC Wildfire S or on your computer, open your web browser and go
certification
On HTC Wildfire S or on your computer, open your web browser and go
https://www.google.com/accounts/ForgotPasswd
certification
https://www.google.com/accounts/ForgotPasswd
.
certification
.
Enter the email address or username that you use to sign in to your
certification
Enter the email address or username that you use to sign in to your
Follow the instructions on the screen to reset your password.
certification
Follow the instructions on the screen to reset your password.
If you don’t have an alternate email address or cannot access the email
certification
If you don’t have an alternate email address or cannot access the email
account you used to create your Google Account, you can reset your Google
certification
account you used to create your Google Account, you can reset your Google
Account after 24 hours by answering the security question for password
certification
Account after 24 hours by answering the security question for password
certification
Adding a social network account
certification
Adding a social network account
Skipped signing in to your social network accounts (such as Facebook, Twitter, or
certification
Skipped signing in to your social network accounts (such as Facebook, Twitter, or
Flickr) when you first turned on and set up HTC Wildfire S? You can still add these
certification
Flickr) when you first turned on and set up HTC Wildfire S? You can still add these
2011/03/07
Follow the onscreen instructions to enter the account information.
2011/03/07
Follow the onscreen instructions to enter the account information.
Your social network account is then added to the list on the Accounts & sync screen.
2011/03/07
Your social network account is then added to the list on the Accounts & sync screen.
Depending on how you configured the account, the new information may start
2011/03/07
Depending on how you configured the account, the new information may start
synchronizing with HTC Wildfire S.
2011/03/07
synchronizing with HTC Wildfire S.
Managing your online accounts
2011/03/07
Managing your online accounts
Changing general sync settings
2011/03/07
Changing general sync settings
2011/03/07
2011/03/07
2011/03/07
From the Home screen, press
2011/03/07
From the Home screen, press
Select or clear the following:
2011/03/07
Select or clear the following:
2011/03/07
Background
2011/03/07
Background
data
2011/03/07
data
Auto-sync
2011/03/07
Auto-sync
2011/03/07
2011/03/07
Synchronizing an account manually
1. From the Home screen, press , and then tap Settings > Accounts & sync.
2. Tap the account that you want to sync.
3. Tap Sync now.
Changing account settings
You can change settings such as the sync frequency and the types of information
synchronized, the kinds of notification you receive, and the way that account
information is displayed.
1. From the Home screen, press , and then tap Settings > Accounts & sync.
2. On the Accounts & sync screen, tap the account that you want to edit.
3. Tap the type of information you want to sync or select an item to edit its
settings.
Removing an account
You can remove an account to delete it and all information associated with it from
HTC Wildfire S, for example messages, contacts, or settings. Removing an account
does not delete information from the online service itself.
You cannot remove some accounts, such as the first Google account you signed
into, except by deleting all personal information from HTC Wildfire S with a hard
reset.
1. From the Home screen, press , and then tap Settings > Accounts & sync.
2. Tap the account that you want to remove.
3. Tap Remove account, and then confirm that you want to remove the account.
110 Accounts and sync
Only
2.
Only
2.
3.
Only
3.
Tap
Only
Tap
for
for
You cannot remove some accounts, such as the first Google account you signed
for
You cannot remove some accounts, such as the first Google account you signed
into, except by deleting all personal information from HTC Wildfire S with a hard
for
into, except by deleting all personal information from HTC Wildfire S with a hard
1.
for
1.
From the Home screen, press
for
From the Home screen, press
for
Tap the account that you want to remove.
for
Tap the account that you want to remove.
certification
certification
certification
You can change settings such as the sync frequency and the types of information
certification
You can change settings such as the sync frequency and the types of information
synchronized, the kinds of notification you receive, and the way that account
certification
synchronized, the kinds of notification you receive, and the way that account
, and then tap
certification
, and then tap
Settings
certification
Settings
On the Accounts & sync screen, tap the account that you want to edit.
certification
On the Accounts & sync screen, tap the account that you want to edit.
Tap the type of information you want to sync or select an item to edit its
certification
Tap the type of information you want to sync or select an item to edit its
certification
certification
certification
You can remove an account to delete it and all information associated with it from
certification
You can remove an account to delete it and all information associated with it from
HTC Wildfire S, for example messages, contacts, or settings. Removing an account
certification
HTC Wildfire S, for example messages, contacts, or settings. Removing an account
does not delete information from the online service itself.
certification
does not delete information from the online service itself.
certification
You cannot remove some accounts, such as the first Google account you signed
certification
You cannot remove some accounts, such as the first Google account you signed
into, except by deleting all personal information from HTC Wildfire S with a hard
certification
into, except by deleting all personal information from HTC Wildfire S with a hard
2011/03/07
, and then tap
2011/03/07
, and then tap
Tap the account that you want to remove.
2011/03/07
Tap the account that you want to remove.
2011/03/07
, and then confirm that you want to remove the account.
2011/03/07
, and then confirm that you want to remove the account.
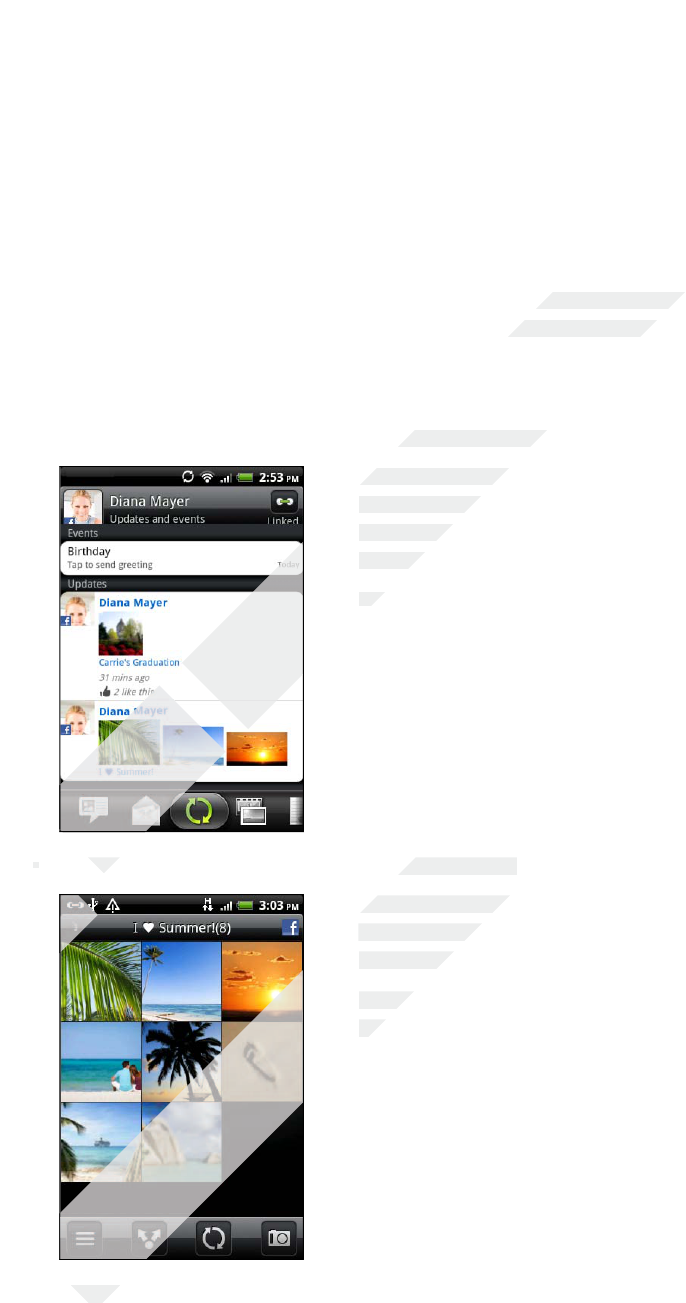
Social
Facebook for HTC Sense
If you signed in to your Facebook account when you turned on and set up HTC
Wildfire S for the first time, that means your Facebook account is linked to Facebook
for HTC Sense on HTC Wildfire S.
With Facebook for HTC Sense, you can:
§See all your Facebook contacts and their instant status updates in People.
When you tap a contact on the All tab, slide to
the Updates and events tab to see updates such
as posted status messages, uploads, and profile
changes.
When there is a notification of the contact’s
birthday, you can tap the notification to send a
greeting.
§See Facebook photos right on the Gallery app.
You can also upload one or more photos from
your storage card to Facebook, then tag and add
captions that go with it.
When you’re viewing the albums of a Facebook
friend, you can also share a link to a particular
album, or comment on the album photos.
§Check your friends’ Facebook status updates in Friend Stream.
§Add your Facebook events and your friends’ birthdays to the Calendar app.
111 Social
Only
§
Only
§
Only
Only
Only
for
for
for
for
See Facebook photos right on the Gallery app.
for
See Facebook photos right on the Gallery app.
certification
If you signed in to your Facebook account when you turned on and set up HTC
certification
If you signed in to your Facebook account when you turned on and set up HTC
Wildfire S for the first time, that means your Facebook account is linked to Facebook
certification
Wildfire S for the first time, that means your Facebook account is linked to Facebook
See all your Facebook contacts and their instant status updates in People.
certification
See all your Facebook contacts and their instant status updates in People.
certification
certification
When you tap a contact on the All tab, slide to
certification
When you tap a contact on the All tab, slide to
the Updates and events tab to see updates such
certification
the Updates and events tab to see updates such
as posted status messages, uploads, and profile
certification
as posted status messages, uploads, and profile
changes.
certification
changes.
When there is a notification of the contact’s
certification
When there is a notification of the contact’s
2011/03/07
See Facebook photos right on the Gallery app.
2011/03/07
See Facebook photos right on the Gallery app.
2011/03/07
2011/03/07
2011/03/07
2011/03/07
2011/03/07
You can also upload one or more photos from
2011/03/07
You can also upload one or more photos from
your storage card to Facebook, then tag and add
2011/03/07
your storage card to Facebook, then tag and add
captions that go with it.
2011/03/07
captions that go with it.
When you’re viewing the albums of a Facebook
2011/03/07
When you’re viewing the albums of a Facebook
2011/03/07
friend, you can also share a link to a particular
2011/03/07
friend, you can also share a link to a particular
Check your friends’ Facebook status updates in Friend Stream.
2011/03/07
Check your friends’ Facebook status updates in Friend Stream.
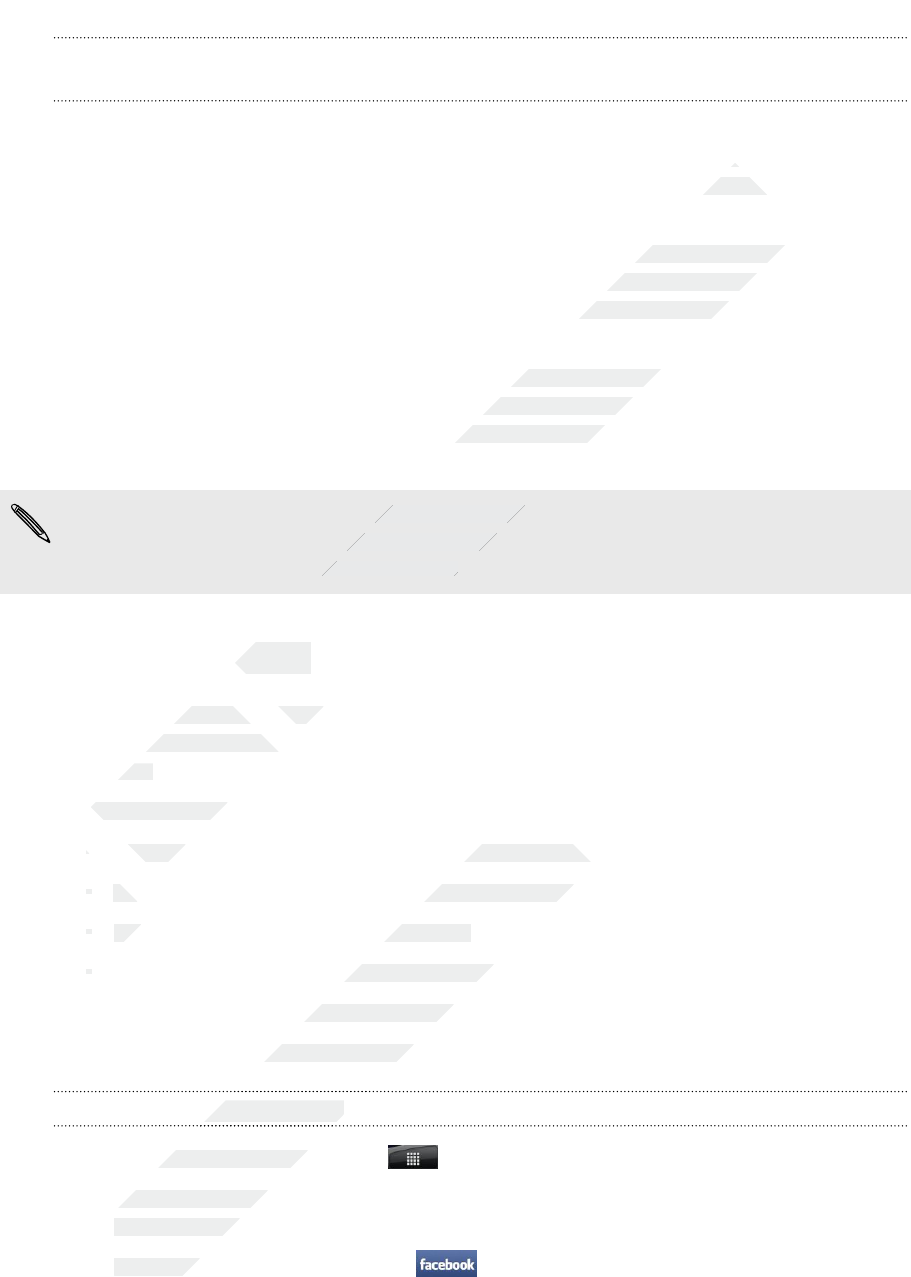
What’s the difference between Facebook app and Facebook for HTC
Sense?
§Facebook for HTC Sense is not a standalone app. It is integrated in People,
Friend Stream, Gallery, and Calendar to give you up-to-date information about
your Facebook contacts (their status updates, shared links, and photos) in these
apps.
§The Facebook app is a standalone app. Use this app to do most of the things
that you would do when you’re using your computer’s web browser to access
your Facebook account, such as adding a friend and sending Facebook
messages.
§The two do not share the same login credentials. Signing in to Facebook for
HTC Sense does not sign you in to the Facebook app and vice versa. If you want
to use the same Facebook account for both, you’ll have to sign in to both using
the same login credentials.
If you have more than one Facebook account, you may sign in to the Facebook app
using your second account, since the Facebook app does not share the same login
credentials as Facebook for HTC Sense.
Facebook app
The Facebook app lets you keep up and stay close with your friends in Facebook. It
offers most of the features that you are familiar with when using Facebook on your
computer.
With the Facebook app, you can:
§Share your thoughts and check other people’s status updates.
§View your friends list and write on someone’s wall.
§Comment on and like a friend’s post.
§View someone’s personal information, including photo albums.
§Check your Facebook notifications.
§Take a photo and upload it straight to your Facebook account.
Using the Facebook app
1. From the Home screen, tap > Facebook.
2. If this is your first time to use Facebook, follow the onscreen instructions to sign
in to your Facebook account.
3. On the News Feed screen, tap to access the other functions.
112 Social
Only
§
Only
§
§
Only
§
View your friends list and write on someone’s wall.
Only
View your friends list and write on someone’s wall.
§
Only
§
Comment on and like a friend’s post.
Only
Comment on and like a friend’s post.
§
Only
§
for
The Facebook app lets you keep up and stay close with your friends in Facebook. It
for
The Facebook app lets you keep up and stay close with your friends in Facebook. It
offers most of the features that you are familiar with when using Facebook on your
for
offers most of the features that you are familiar with when using Facebook on your
computer.
for
computer.
With the Facebook app, you can:
for
With the Facebook app, you can:
Share your thoughts and check other people’s status updates.
for
Share your thoughts and check other people’s status updates.
certification
Friend Stream, Gallery, and Calendar to give you up-to-date information about
certification
Friend Stream, Gallery, and Calendar to give you up-to-date information about
your Facebook contacts (their status updates, shared links, and photos) in these
certification
your Facebook contacts (their status updates, shared links, and photos) in these
The Facebook app is a standalone app. Use this app to do most of the things
certification
The Facebook app is a standalone app. Use this app to do most of the things
that you would do when you’re using your computer’s web browser to access
certification
that you would do when you’re using your computer’s web browser to access
your Facebook account, such as adding a friend and sending Facebook
certification
your Facebook account, such as adding a friend and sending Facebook
The two do not share the same login credentials. Signing in to Facebook for
certification
The two do not share the same login credentials. Signing in to Facebook for
HTC Sense does not sign you in to the Facebook app and vice versa. If you want
certification
HTC Sense does not sign you in to the Facebook app and vice versa. If you want
to use the same Facebook account for both, you’ll have to sign in to both using
certification
to use the same Facebook account for both, you’ll have to sign in to both using
certification
If you have more than one Facebook account, you may sign in to the Facebook app
certification
If you have more than one Facebook account, you may sign in to the Facebook app
using your second account, since the Facebook app does not share the same login
certification
using your second account, since the Facebook app does not share the same login
credentials as Facebook for HTC Sense.
certification
credentials as Facebook for HTC Sense.
Facebook app
certification
Facebook app
The Facebook app lets you keep up and stay close with your friends in Facebook. It
certification
The Facebook app lets you keep up and stay close with your friends in Facebook. It
2011/03/07
Share your thoughts and check other people’s status updates.
2011/03/07
Share your thoughts and check other people’s status updates.
View your friends list and write on someone’s wall.
2011/03/07
View your friends list and write on someone’s wall.
Comment on and like a friend’s post.
2011/03/07
Comment on and like a friend’s post.
View someone’s personal information, including photo albums.
2011/03/07
View someone’s personal information, including photo albums.
Check your Facebook notifications.
2011/03/07
Check your Facebook notifications.
Take a photo and upload it straight to your Facebook account.
2011/03/07
Take a photo and upload it straight to your Facebook account.
Using the Facebook app
2011/03/07
Using the Facebook app
2011/03/07
2011/03/07
2011/03/07
From the Home screen, tap
2011/03/07
From the Home screen, tap
If this is your first time to use Facebook, follow the onscreen instructions to sign
2011/03/07
If this is your first time to use Facebook, follow the onscreen instructions to sign
in to your Facebook account.
2011/03/07
in to your Facebook account.
On the News Feed screen, tap
2011/03/07
On the News Feed screen, tap

§While on the Facebook home screen, press , and then tap Settings to set refresh
and notification options.
§On some Facebook screens, you can press and hold an item to open an options
menu.
Adding the Facebook widget
Add the Facebook widget to the Home screen so you can easily post updates and
check status updates of your friends.
The widget will only link to the Facebook account that you logged into on the
Facebook app.
Tweeting on your phone using Peep
You can post and read tweets, send and receive direct messages, search for new
Twitter users to follow using the Peep app. Peep is a Twitter client that lets you enjoy
“tweeting” on your phone. You can also link your contacts in People to their Twitter
profiles (if you’re following them).
If you did not sign in to your Twitter account when you first turned on the phone, you
can do one of the following:
§Sign in to your Twitter account from Peep. From the Home screen, tap >
Peep, then follow the onscreen instructions.
§Add the Twitter for HTC Sense account in Settings > Accounts & sync.
Twitter for HTC Sense and Peep share the same login credentials. This means that
when you use Peep on your phone for tweeting, you can also link your contacts to
their Twitter profiles via Twitter for HTC Sense.
From the Home screen, tap > Peep. Peep opens in the All tweets tab.
113 Social
Only
Only
Only
Only
Twitter for HTC Sense and Peep share the same login credentials. This means that
Only
Twitter for HTC Sense and Peep share the same login credentials. This means that
when you use Peep on your phone for tweeting, you can also link your contacts to
Only
when you use Peep on your phone for tweeting, you can also link your contacts to
their Twitter profiles via Twitter for HTC Sense.
Only
their Twitter profiles via Twitter for HTC Sense.
From the Home screen, tap
Only
From the Home screen, tap
for
Sign in to your Twitter account from Peep. From the Home screen, tap
for
Sign in to your Twitter account from Peep. From the Home screen, tap
Peep
for
Peep
, then follow the onscreen instructions.
for
, then follow the onscreen instructions.
Add the Twitter for HTC Sense account in
for
Add the Twitter for HTC Sense account in
for
Twitter for HTC Sense and Peep share the same login credentials. This means that
for
Twitter for HTC Sense and Peep share the same login credentials. This means that
when you use Peep on your phone for tweeting, you can also link your contacts to
for
when you use Peep on your phone for tweeting, you can also link your contacts to
certification
certification
certification
certification
certification
Add the Facebook widget to the Home screen so you can easily post updates and
certification
Add the Facebook widget to the Home screen so you can easily post updates and
certification
The widget will only link to the Facebook account that you logged into on the
certification
The widget will only link to the Facebook account that you logged into on the
Tweeting on your phone using Peep
certification
Tweeting on your phone using Peep
You can post and read tweets, send and receive direct messages, search for new
certification
You can post and read tweets, send and receive direct messages, search for new
Twitter users to follow using the Peep app. Peep is a Twitter client that lets you enjoy
certification
Twitter users to follow using the Peep app. Peep is a Twitter client that lets you enjoy
“tweeting” on your phone. You can also link your contacts in People to their Twitter
certification
“tweeting” on your phone. You can also link your contacts in People to their Twitter
profiles (if you’re following them).
certification
profiles (if you’re following them).
If you did not sign in to your Twitter account when you first turned on the phone, you
certification
If you did not sign in to your Twitter account when you first turned on the phone, you
can do one of the following:
certification
can do one of the following:
Sign in to your Twitter account from Peep. From the Home screen, tap
certification
Sign in to your Twitter account from Peep. From the Home screen, tap
2011/03/07
2011/03/07
2011/03/07
2011/03/07
Twitter for HTC Sense and Peep share the same login credentials. This means that
2011/03/07
Twitter for HTC Sense and Peep share the same login credentials. This means that
when you use Peep on your phone for tweeting, you can also link your contacts to
2011/03/07
when you use Peep on your phone for tweeting, you can also link your contacts to
their Twitter profiles via Twitter for HTC Sense.
2011/03/07
their Twitter profiles via Twitter for HTC Sense.
2011/03/07
>
2011/03/07
>
Peep
2011/03/07
Peep
. Peep opens in the All tweets tab.
2011/03/07
. Peep opens in the All tweets tab.
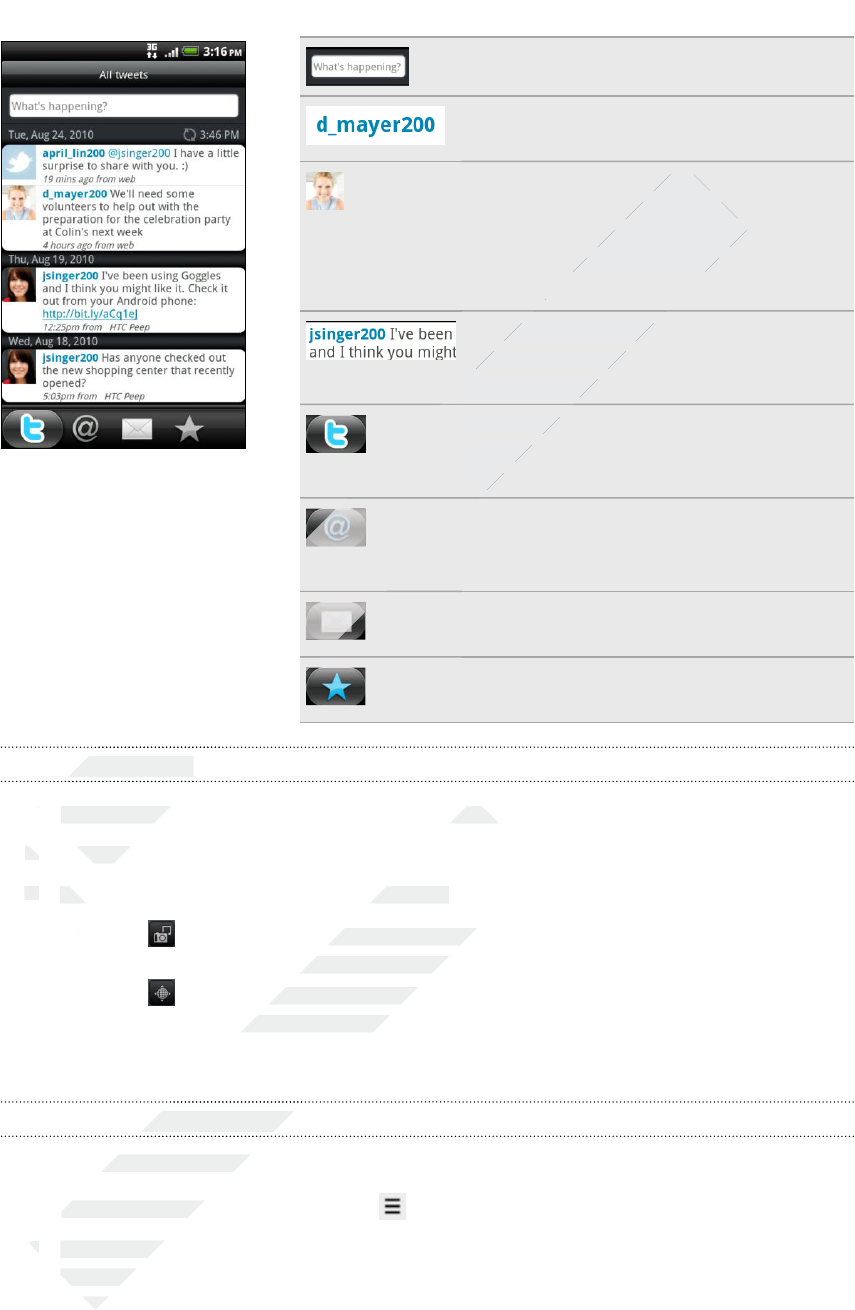
Tap to compose and send a tweet.
Tap a person’s name to check profile
details and all of his or her tweets.
If you have linked the contact in
People, tap the photo or icon to open
a menu where you can quickly choose
how to communicate with the
contact.
Press and hold a tweet to open an
options menu to reply, send a direct
message, retweet, and more.
View all the tweets from people you
follow and tweets that you have
posted.
View all tweets that mention your
username using the “@[your
username]” convention.
View all private/direct messages that
you have received or sent.
View tweets that you have marked as
favorites.
Sending a tweet
1. On the All tweets tab, tap the text box that says What's happening.
2. Type your tweet.
3. Add a picture or location to your tweet.
§Tap to post a picture from Gallery or Camera to your default photo
hosting site and add the link to the picture in your tweet.
§Tap to insert your location into the tweet. You can choose to add a map
link, insert your location name, or insert your position coordinates.
4. Tap Post.
Sending a direct message
You can only send a direct message to someone who is following you.
1. In any of the tabs in Peep, press , and then tap New message.
2. Tap the text box at the top of the screen, and then enter the name. As you enter
characters, the names of the Twitter users that match the characters you enter
will appear. Tap the name when you see it.
3. Enter your message, and then tap Post.
114 Social
Only
2.
Only
2.
3.
Only
3.
Add a picture or location to your tweet.
Only
Add a picture or location to your tweet.
§
Only
§
for
Sending a tweet
for
Sending a tweet
for
for
1.
for
1.
On the All tweets tab, tap the text box that says
for
On the All tweets tab, tap the text box that says
Type your tweet.
for
Type your tweet.
certification
certification
If you have linked the contact in
certification
If you have linked the contact in
People, tap the photo or icon to open
certification
People, tap the photo or icon to open
a menu where you can quickly choose
certification
a menu where you can quickly choose
how to communicate with the
certification
how to communicate with the
contact.
certification
contact.
Press and hold a tweet to open an
certification
Press and hold a tweet to open an
options menu to reply, send a direct
certification
options menu to reply, send a direct
message, retweet, and more.
certification
message, retweet, and more.
View all the tweets from people you
certification
View all the tweets from people you
follow and tweets that you have
certification
follow and tweets that you have
posted.
certification
posted.
certification
certification
certification
certification
certification
certification
certification
certification
certification
certification
2011/03/07
On the All tweets tab, tap the text box that says
2011/03/07
On the All tweets tab, tap the text box that says
Add a picture or location to your tweet.
2011/03/07
Add a picture or location to your tweet.
to post a picture from Gallery or Camera to your default photo
2011/03/07
to post a picture from Gallery or Camera to your default photo
hosting site and add the link to the picture in your tweet.
2011/03/07
hosting site and add the link to the picture in your tweet.
to insert your location into the tweet. You can choose to add a map
2011/03/07
to insert your location into the tweet. You can choose to add a map
link, insert your location name, or insert your position coordinates.
2011/03/07
link, insert your location name, or insert your position coordinates.
Sending a direct message
2011/03/07
Sending a direct message
2011/03/07
2011/03/07
2011/03/07
You can only send a direct message to someone who is following you.
2011/03/07
You can only send a direct message to someone who is following you.
In any of the tabs in Peep, press
2011/03/07
In any of the tabs in Peep, press
2.
2011/03/07
2.
Tap the text box at the top of the screen, and then enter the name. As you enter
2011/03/07
Tap the text box at the top of the screen, and then enter the name. As you enter
2011/03/07
characters, the names of the Twitter users that match the characters you enter
2011/03/07
characters, the names of the Twitter users that match the characters you enter
will appear. Tap the name when you see it.
2011/03/07
will appear. Tap the name when you see it.
You can also send a direct message when you press and hold a tweet of the person
you want to send the direct message to, and then tap Send direct message on the
options menu.
Setting Peep options
In any of the tabs in Peep, press , and then tap More > Settings. You can set these
options:
Account settings Sign out of your Twitter account.
General settings Choose whether to show the screen name or the real name of
the people you follow.
Send & receive Set the frequency to check for new tweets and set the number
of tweets to download.
Services Set your photo hosting site, photo quality, location options, and
URL shortening host.
Notification settings Select when and how you want to be notified.
Searching for Twitter users to follow
1. In any of the tabs in Peep, press the button.
2. Type a Twitter name in the search box. You can also narrow down the search
when you tap > Users.
3. Tap .
4. In the list of search results, tap the Twitter user you want to follow.
5. Press , and then tap Follow.
Unfollowing a Twitter user
1. On the All tweets tab, tap the Twitter user you want to stop following.
2. Press , and then tap Unfollow.
Using Friend Stream
Friend Stream connects you to your social networks. Share and get updates from
friends in popular networks like Facebook and Twitter in a single feed. With Friend
Stream, you can easily track your friends’ status messages, photo uploads,
notifications, and more — or comment and post your own.
§You must be signed in to at least one social network account to use Friend
Stream.
§To use your Facebook account on Friend Stream, you need to be signed in via
Facebook for HTC Sense.
From the Home screen, tap > Friend Stream. Friend Stream opens on the All
updates tab.
115 Social
Only
Unfollowing a Twitter user
Only
Unfollowing a Twitter user
1.
Only
1.
On the All tweets tab, tap the Twitter user you want to stop following.
Only
On the All tweets tab, tap the Twitter user you want to stop following.
2.
Only
2.
for
Type a Twitter name in the search box. You can also narrow down the search
for
Type a Twitter name in the search box. You can also narrow down the search
when you tap
for
when you tap
Tap
for
Tap
for
.
for
.
In the list of search results, tap the Twitter user you want to follow.
for
In the list of search results, tap the Twitter user you want to follow.
Press
for
Press
for
, and then tap
for
, and then tap
Unfollowing a Twitter user
for
Unfollowing a Twitter user
certification
certification
Settings
certification
Settings
. You can set these
certification
. You can set these
certification
Choose whether to show the screen name or the real name of
certification
Choose whether to show the screen name or the real name of
Set the frequency to check for new tweets and set the number
certification
Set the frequency to check for new tweets and set the number
of tweets to download.
certification
of tweets to download.
Set your photo hosting site, photo quality, location options, and
certification
Set your photo hosting site, photo quality, location options, and
URL shortening host.
certification
URL shortening host.
Select when and how you want to be notified.
certification
Select when and how you want to be notified.
certification
certification
certification
certification
certification
certification
Searching for Twitter users to follow
certification
Searching for Twitter users to follow
certification
certification
certification
In any of the tabs in Peep, press the
certification
In any of the tabs in Peep, press the
Type a Twitter name in the search box. You can also narrow down the search
certification
Type a Twitter name in the search box. You can also narrow down the search
certification
>
certification
>
Users
certification
Users
2011/03/07
In the list of search results, tap the Twitter user you want to follow.
2011/03/07
In the list of search results, tap the Twitter user you want to follow.
2011/03/07
On the All tweets tab, tap the Twitter user you want to stop following.
2011/03/07
On the All tweets tab, tap the Twitter user you want to stop following.
Unfollow
2011/03/07
Unfollow
.
2011/03/07
.
Using Friend Stream
2011/03/07
Using Friend Stream
Friend Stream connects you to your social networks. Share and get updates from
2011/03/07
Friend Stream connects you to your social networks. Share and get updates from
friends in popular networks like Facebook and Twitter in a single feed. With Friend
2011/03/07
friends in popular networks like Facebook and Twitter in a single feed. With Friend
Stream, you can easily track your friends’ status messages, photo uploads,
2011/03/07
Stream, you can easily track your friends’ status messages, photo uploads,
2011/03/07
notifications, and more — or comment and post your own.
2011/03/07
notifications, and more — or comment and post your own.
You must be signed in to at least one social network account to use Friend
2011/03/07
You must be signed in to at least one social network account to use Friend
Stream.
2011/03/07
Stream.
To use your Facebook account on Friend Stream, you need to be signed in via
2011/03/07
To use your Facebook account on Friend Stream, you need to be signed in via
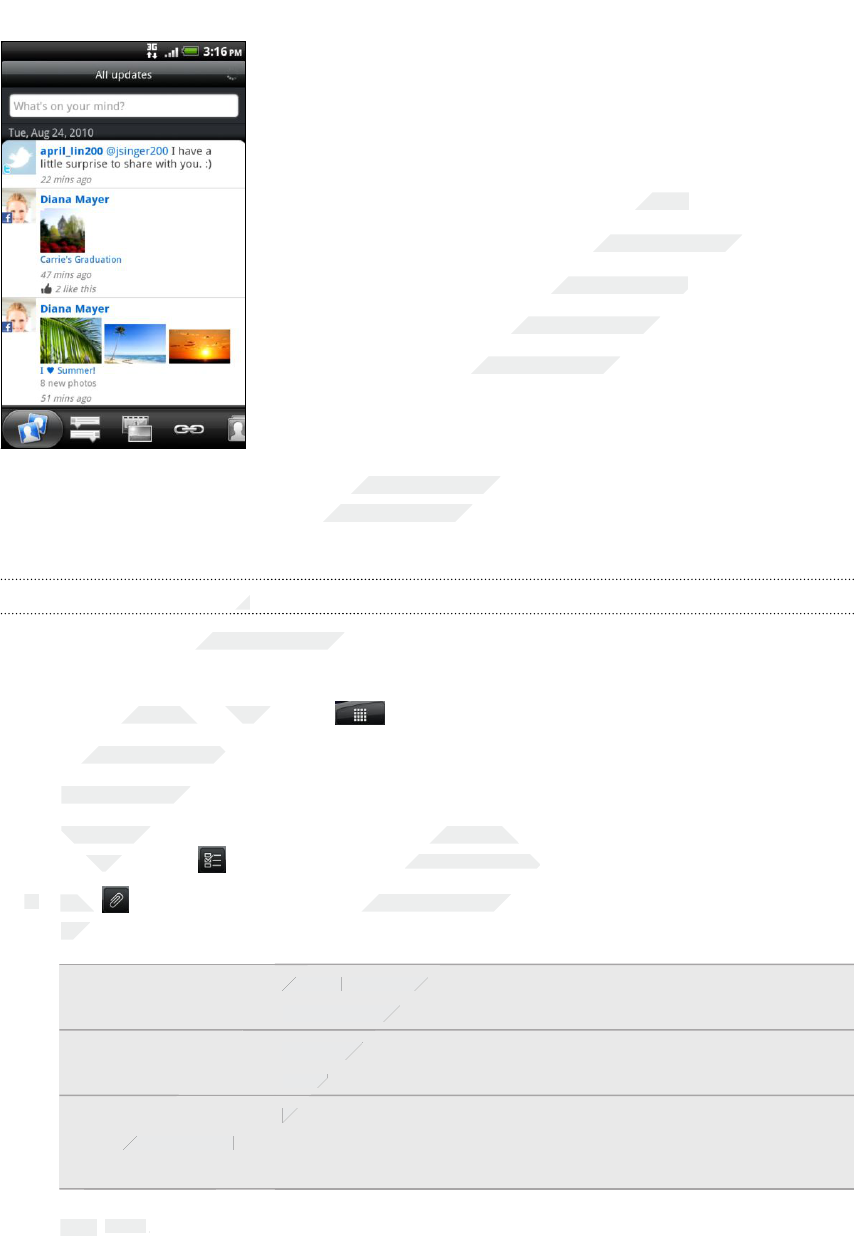
When you tap someone’s status update, you can:
§View all tweets.
§Write a comment. Like or unlike someone’s
Facebook posts.
§Look at someone’s album photos.
When you tap someone’s photo or name, you can:
§Check the person’s profile details.
§Look at the person’s Facebook wall.
§Check the person’s posted tweets.
Slide to the other tabs to view social network updates grouped as status updates
only, photo uploads, links, updates from members of your Facebook list, or social
network notifications.
Updating your status
You can update your status simultaneously on all the social network accounts you are
signed in to.
1. From the Home screen, tap > Friend Stream.
2. On the All updates tab, tap the text box that says What's on your mind.
3. Enter your status update.
4. If you do not want to send the status update to all your social network
accounts, tap and clear the check boxes of the social networks to exclude.
5. Tap and then choose what you want to attach to your tweet or status
update.
Picture Select From Camera to take a photo and attach it or
From Gallery to attach a photo from your storage card.
Location Add your current location or a location you pick on a
map.
App
recommendation
Choose an app you’ve installed from Android Market that
you want to share with others. The URL from which the
app can be downloaded will be inserted to your status.
6. Tap Post.
116 Social
Only
4.
Only
4.
5.
Only
5.
Tap
Only
Tap
update.
Only
update.
for
From the Home screen, tap
for
From the Home screen, tap
On the All updates tab, tap the text box that says
for
On the All updates tab, tap the text box that says
Enter your status update.
for
Enter your status update.
If you do not want to send the status update to all your social network
for
If you do not want to send the status update to all your social network
accounts, tap
for
accounts, tap
certification
Look at someone’s album photos.
certification
Look at someone’s album photos.
When you tap someone’s photo or name, you can:
certification
When you tap someone’s photo or name, you can:
Check the person’s profile details.
certification
Check the person’s profile details.
Look at the person’s Facebook wall.
certification
Look at the person’s Facebook wall.
Check the person’s posted tweets.
certification
Check the person’s posted tweets.
Slide to the other tabs to view social network updates grouped as status updates
certification
Slide to the other tabs to view social network updates grouped as status updates
only, photo uploads, links, updates from members of your Facebook list, or social
certification
only, photo uploads, links, updates from members of your Facebook list, or social
Updating your status
certification
Updating your status
certification
certification
certification
You can update your status simultaneously on all the social network accounts you are
certification
You can update your status simultaneously on all the social network accounts you are
From the Home screen, tap
certification
From the Home screen, tap
2011/03/07
If you do not want to send the status update to all your social network
2011/03/07
If you do not want to send the status update to all your social network
and clear the check boxes of the social networks to exclude.
2011/03/07
and clear the check boxes of the social networks to exclude.
and then choose what you want to attach to your tweet or status
2011/03/07
and then choose what you want to attach to your tweet or status
2011/03/07
Select
2011/03/07
Select
From Camera
2011/03/07
From Camera
From Gallery
2011/03/07
From Gallery
Add your current location or a location you pick on a
2011/03/07
Add your current location or a location you pick on a
map.
2011/03/07
map.
recommendation
2011/03/07
recommendation
Choose an app you’ve installed from Android Market that
2011/03/07
Choose an app you’ve installed from Android Market that
2011/03/07
2011/03/07
2011/03/07
2011/03/07
2011/03/07
2011/03/07
Tap
2011/03/07
Tap
Post
2011/03/07
Post
.
2011/03/07
.
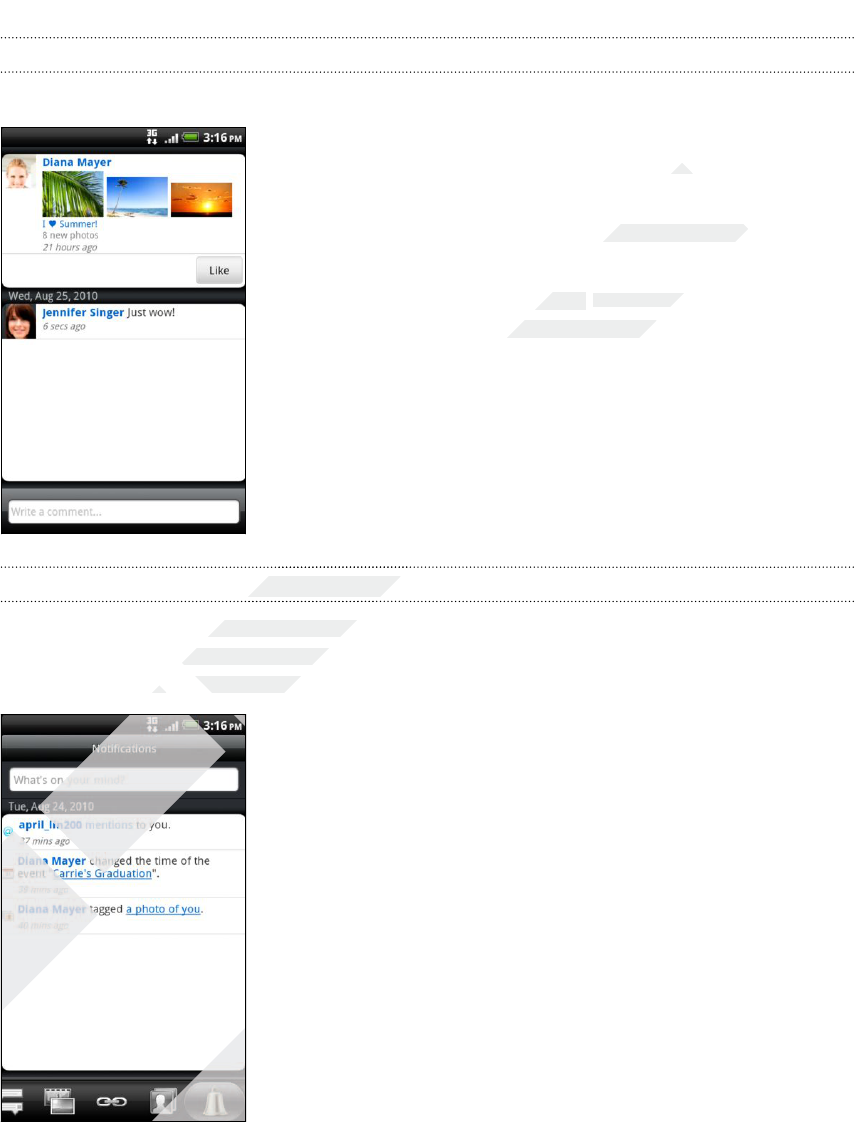
Commenting on and liking Facebook posts
Tap someone’s status update on the All updates tab, and do any of the following:
§Tap a photo or the album name shown in the status
update to view and comment on the album photos
using the Gallery app.
§Tap Like or Unlike to like or unlike the person’s status
update.
§Tap the text box that says Write a comment, and
then enter what you think about the person’s status
update.
Checking notifications from your social networks
Slide to the Notifications tab to easily see a single feed of your notifications from
different social networks. It can be a comment on your Facebook post, a mention or
direct message in Twitter, a tagged photo of you, and more.
117 Social
Only
Only
Only
for
direct message in Twitter, a tagged photo of you, and more.
for
direct message in Twitter, a tagged photo of you, and more.
for
for
certification
update to view and comment on the album photos
certification
update to view and comment on the album photos
to like or unlike the person’s status
certification
to like or unlike the person’s status
Tap the text box that says
certification
Tap the text box that says
Write a comment
certification
Write a comment
then enter what you think about the person’s status
certification
then enter what you think about the person’s status
Checking notifications from your social networks
certification
Checking notifications from your social networks
certification
certification
certification
Slide to the Notifications tab to easily see a single feed of your notifications from
certification
Slide to the Notifications tab to easily see a single feed of your notifications from
different social networks. It can be a comment on your Facebook post, a mention or
certification
different social networks. It can be a comment on your Facebook post, a mention or
direct message in Twitter, a tagged photo of you, and more.
certification
direct message in Twitter, a tagged photo of you, and more.
certification
certification
certification
2011/03/07
2011/03/07
2011/03/07
2011/03/07
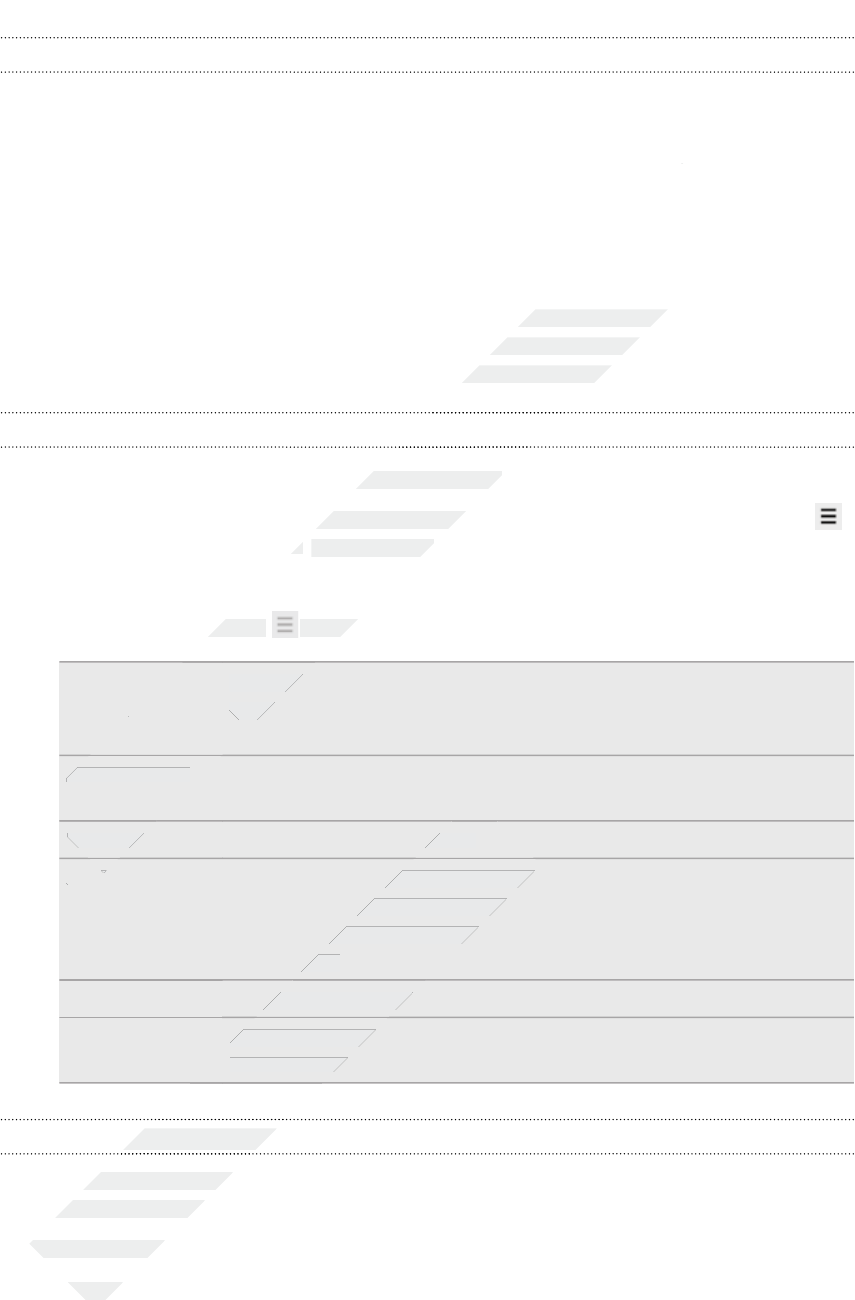
About the Friend Stream widget
Use the Friend Stream widget so you can easily update your status and view other
people’s status updates right on the Home screen. If you want to keep up with just
one person's Facebook updates, you can add the Friend Channel widget. You can find
it in the Friend Stream widget layout options.
Chatting in Google Talk
Google Talk is Google’s instant messaging program. It lets you communicate with
other people that also use Google Talk. If you signed in to your Google Account when
you first set up the phone, you are already signed in to Google Talk.
Chatting with a friend
1. In Google Talk, tap a friend in the Friends list.
2. Enter your message in the text box. You can also insert a smiley by pressing ,
and then tapping More > Insert smiley.
3. Tap Send.
4. While chatting, press and then tap any of these options:
Chat off
record
Your Google Talk messages are stored in the Chats folder of
your Gmail account. Tap this option if you don’t want to store
your chat messages.
Switch chats If you have more than one chat going, tap to switch chat with
another friend.
Friends list Return to the Friends list.
Add to chat Add another friend to your chat. The friend you invited and
the friend you're currently chatting will receive an invitation to
a group chat. Each one who accepts the invitation joins the
group chat.
End chat End your current chat.
More Clear the chat history, insert a smiley or view your friend’s
contact details.
Accepting a chat invitation
When a friend sends you a Google Talk message, you receive a notification. Their
entry in the Friends list displays the message.
Do one of the following:
§In the Friends list, tap the friend who sent you the invitation to chat.
§Open the Notifications panel, and then tap the chat notification.
118 Social
Only
Only
Add to chat
Only
Add to chat
for
for
record
for
record
Switch chats
for
Switch chats
Friends list
for
Friends list
Add to chat
for
Add to chat
for
for
for
for
certification
one person's Facebook updates, you can add the Friend Channel widget. You can find
certification
one person's Facebook updates, you can add the Friend Channel widget. You can find
Google Talk is Google’s instant messaging program. It lets you communicate with
certification
Google Talk is Google’s instant messaging program. It lets you communicate with
other people that also use Google Talk. If you signed in to your Google Account when
certification
other people that also use Google Talk. If you signed in to your Google Account when
you first set up the phone, you are already signed in to Google Talk.
certification
you first set up the phone, you are already signed in to Google Talk.
certification
certification
In Google Talk, tap a friend in the Friends list.
certification
In Google Talk, tap a friend in the Friends list.
Enter your message in the text box. You can also insert a smiley by pressing
certification
Enter your message in the text box. You can also insert a smiley by pressing
>
certification
>
Insert smiley
certification
Insert smiley
While chatting, press
certification
While chatting, press
certification
and then tap any of these options:
certification
and then tap any of these options:
certification
Your Google Talk messages are stored in the
certification
Your Google Talk messages are stored in the
your Gmail account. Tap this option if you don’t want to store
certification
your Gmail account. Tap this option if you don’t want to store
certification
certification
2011/03/07
2011/03/07
Return to the Friends list.
2011/03/07
Return to the Friends list.
Add another friend to your chat. The friend you invited and
2011/03/07
Add another friend to your chat. The friend you invited and
the friend you're currently chatting will receive an invitation to
2011/03/07
the friend you're currently chatting will receive an invitation to
a group chat. Each one who accepts the invitation joins the
2011/03/07
a group chat. Each one who accepts the invitation joins the
group chat.
2011/03/07
group chat.
End your current chat.
2011/03/07
End your current chat.
Clear the chat history, insert a smiley or view your friend’s
2011/03/07
Clear the chat history, insert a smiley or view your friend’s
contact details.
2011/03/07
contact details.
2011/03/07
2011/03/07
2011/03/07
2011/03/07
2011/03/07
2011/03/07
Accepting a chat invitation
2011/03/07
Accepting a chat invitation
2011/03/07
2011/03/07
2011/03/07
When a friend sends you a Google Talk message, you receive a notification. Their
2011/03/07
When a friend sends you a Google Talk message, you receive a notification. Their
entry in the Friends list displays the message.
2011/03/07
entry in the Friends list displays the message.
Do one of the following:
2011/03/07
Do one of the following:
In the Friends list, tap the friend who sent you the invitation to chat.
2011/03/07
In the Friends list, tap the friend who sent you the invitation to chat.
Changing your online status and picture
1. In Google Talk's Friends list, tap your name to open the Set Status screen.
2. Enter your new status message. Or press to choose a custom status from
the list.
3. Tap the online status beside your picture, and then select the status you want
on the menu.
4. Tap your picture, and then do one of the following:
§Tap Remove to remove your photo.
§Tap Change to select another picture on the storage card.
5. Tap Done.
Your online status, message, and picture appear in your contacts' Friends list and in
other apps where your Google Talk status are displayed.
Adding and managing friends
The Friends list is where you add and manage your friends in Google Talk.
In Google Talk's Friends list, you can:
Invite a friend 1. Press , and then tap Add friend.
2. Enter the Google Talk instant messaging ID or Gmail address of
the friend you want to add.
3. Tap Send invitation.
View all
friends
Initially, only those friends that you often chat with — the most
popular — are shown in the Friends list. To view all your friends,
press , and then tap All friends. To view only friends that you
often chat with, press , and then tap Most popular.
Make a friend
popular 1. Press , and then tap All friends.
2. Press and hold a friend’s name, and then tap Always show friend.
Block a friend You can block a friend from sending you messages. When blocked,
your friend is removed from the Friends list and is added to the
Blocked friends list.
1. Press , and then tap All friends.
2. Press and hold a friend’s name, and then tap Block friend.
Unblock a
friend Press , and then tap More > Blocked.
View all
invited friends
Press , and then tap More > Invites. Friends who have not yet
accepted your invitation are listed on the screen.
119 Social
Only
Only
View all
Only
View all
friends
Only
friends
Make a friend
Only
Make a friend
popular
Only
popular
Only
for
2.
for
2.
the friend you want to add.
for
the friend you want to add.
3.
for
3.
Tap
for
Tap
for
View all
for
View all
for
for
certification
Tap the online status beside your picture, and then select the status you want
certification
Tap the online status beside your picture, and then select the status you want
Tap your picture, and then do one of the following:
certification
Tap your picture, and then do one of the following:
to select another picture on the storage card.
certification
to select another picture on the storage card.
Your online status, message, and picture appear in your contacts' Friends list and in
certification
Your online status, message, and picture appear in your contacts' Friends list and in
other apps where your Google Talk status are displayed.
certification
other apps where your Google Talk status are displayed.
Adding and managing friends
certification
Adding and managing friends
certification
certification
certification
The Friends list is where you add and manage your friends in Google Talk.
certification
The Friends list is where you add and manage your friends in Google Talk.
In Google Talk's Friends list, you can:
certification
In Google Talk's Friends list, you can:
certification
Press
certification
Press
certification
, and then tap
certification
, and then tap
Enter the Google Talk instant messaging ID or Gmail address of
certification
Enter the Google Talk instant messaging ID or Gmail address of
certification
2011/03/07
Initially, only those friends that you often chat with — the most
2011/03/07
Initially, only those friends that you often chat with — the most
popular — are shown in the Friends list. To view all your friends,
2011/03/07
popular — are shown in the Friends list. To view all your friends,
, and then tap
2011/03/07
, and then tap
All friends
2011/03/07
All friends
. To view only friends that you
2011/03/07
. To view only friends that you
often chat with, press
2011/03/07
often chat with, press
2011/03/07
, and then tap
2011/03/07
, and then tap
2011/03/07
, and then tap
2011/03/07
, and then tap
All friends
2011/03/07
All friends
Press and hold a friend’s name, and then tap
2011/03/07
Press and hold a friend’s name, and then tap
2011/03/07
2011/03/07
2011/03/07
You can block a friend from sending you messages. When blocked,
2011/03/07
You can block a friend from sending you messages. When blocked,
your friend is removed from the Friends list and is added to the
2011/03/07
your friend is removed from the Friends list and is added to the
Blocked friends list.
2011/03/07
Blocked friends list.
1.
2011/03/07
1.
Press
2011/03/07
Press
2011/03/07
2.
2011/03/07
2.
Press and hold a friend’s name, and then tap
2011/03/07
Press and hold a friend’s name, and then tap
2011/03/07
Unblock a
2011/03/07
Unblock a
friend
2011/03/07
friend
Press
2011/03/07
Press
2011/03/07
View all
2011/03/07
View all
2011/03/07
2011/03/07
2011/03/07
2011/03/07

Changing settings or signing out
In Google Talk's Friends list, press and then tap:
§Settings to change the app and notification settings.
§Sign out to sign out.
120 Social
Only
for
certification
2011/03/07
Maps and location
Location settings
Turning on location services
In order to find your location on HTC Wildfire S, you need to enable location sources.
1. From the Home screen, press and then tap Settings > Location.
2. Select one or both of the following:
Use wireless
networks
Uses Wi-Fi or your mobile data connection to find your
approximate location.
Use GPS satellites Finds your exact GPS location. This requires a clear view
of the sky and more battery power.
121 Maps and location
Only
for
certification
certification
certification
certification
In order to find your location on HTC Wildfire S, you need to enable location sources.
certification
In order to find your location on HTC Wildfire S, you need to enable location sources.
and then tap
certification
and then tap
Settings
certification
Settings
Select one or both of the following:
certification
Select one or both of the following:
certification
Uses Wi-Fi or your mobile data connection to find your
certification
Uses Wi-Fi or your mobile data connection to find your
approximate location.
certification
approximate location.
Finds your exact GPS location. This requires a clear view
certification
Finds your exact GPS location. This requires a clear view
of the sky and more battery power.
certification
of the sky and more battery power.
certification
certification
certification
certification
certification
2011/03/07
Google Maps
About Google Maps
Google Maps lets you track your current location, view real-time traffic situations, and
receive detailed directions to your destination. It also provides a search tool where
you can locate places of interest or an address on a map, or view locations at street
level.
§You need an active mobile data or Wi-Fi connection to use Google Maps.
§To find your location with Google Maps, you need to enable location sources.
§The Google Maps app does not cover every country or city.
Getting around maps
When you open Google Maps, you can easily find your location on the map or check
out nearby places by panning and zooming in and out on the map.
To find your location with Google Maps, you need to enable location sources.
1. From the Home screen, tap > Maps.
2. Tap to show your current location. The blue marker shows your location
on the map.
3. Do any of the following:
Move around Swipe your finger to any direction on the screen to view
nearby places on the map.
Zoom in §Place your thumb and index fingers on top of the area that
you want to zoom in, and then spread your fingers across
the map.
§Tap .
§Double-tap the area on the map that you want to zoom in.
122 Maps and location
Only
Only
Zoom in
Only
Zoom in
for
to show your current location. The blue marker
for
to show your current location. The blue marker
on the map.
for
on the map.
Do any of the following:
for
Do any of the following:
for
Move around
for
Move around
for
for
certification
Google Maps lets you track your current location, view real-time traffic situations, and
certification
Google Maps lets you track your current location, view real-time traffic situations, and
receive detailed directions to your destination. It also provides a search tool where
certification
receive detailed directions to your destination. It also provides a search tool where
you can locate places of interest or an address on a map, or view locations at street
certification
you can locate places of interest or an address on a map, or view locations at street
certification
You need an active mobile data or Wi-Fi connection to use Google Maps.
certification
You need an active mobile data or Wi-Fi connection to use Google Maps.
To find your location with Google Maps, you need to enable location sources.
certification
To find your location with Google Maps, you need to enable location sources.
The Google Maps app does not cover every country or city.
certification
The Google Maps app does not cover every country or city.
certification
certification
certification
When you open Google Maps, you can easily find your location on the map or check
certification
When you open Google Maps, you can easily find your location on the map or check
out nearby places by panning and zooming in and out on the map.
certification
out nearby places by panning and zooming in and out on the map.
certification
To find your location with Google Maps, you need to enable location sources.
certification
To find your location with Google Maps, you need to enable location sources.
From the Home screen, tap
certification
From the Home screen, tap
to show your current location. The blue marker
certification
to show your current location. The blue marker
2011/03/07
Swipe your finger to any direction on the screen to view
2011/03/07
Swipe your finger to any direction on the screen to view
nearby places on the map.
2011/03/07
nearby places on the map.
Place your thumb and index fingers on top of the area that
2011/03/07
Place your thumb and index fingers on top of the area that
you want to zoom in, and then spread your fingers across
2011/03/07
you want to zoom in, and then spread your fingers across
the map.
2011/03/07
the map.
Tap
2011/03/07
Tap
2011/03/07
.
2011/03/07
.
§
2011/03/07
§
Double-tap the area on the map that you want to zoom in.
2011/03/07
Double-tap the area on the map that you want to zoom in.
2011/03/07
2011/03/07
2011/03/07
2011/03/07
2011/03/07
Zoom out §Pinch your thumb and index finger on the map to zoom
out.
§Tap .
View
information for
a random
location
1. Press and hold a location on the map. A balloon opens over
the location, with the address and a thumbnail from street
view (if available).
2. Tap the balloon to see more information.
You can get directions to the location, check for nearby
places of interest, and more.
Searching for a location
In Google Maps, you can search for a location, such as an address or a type of
business or establishment (for example, museums).
1. In Maps, enter the place you want to search for in the search box.
2. Tap to search for the location you entered or tap a suggested search item.
The search results are displayed as markers on the map.
3. Do any of the following:
§Tap a marker to see if that is what you’re looking for, tap the balloon if it
is.
§Tap to show the search results as a list, and then tap the location.
Details about the selected location displays on the screen.
4. Do any of the following:
§Tap the onscreen buttons to view the location on a map, get directions,
view the location in Street View, if available, and more. Scroll down the
screen to view more options.
§Swipe left or right across the screen to view the information for the next or
previous search result.
123 Maps and location
Only
4.
Only
4.
for
Tap a marker
for
Tap a marker
is.
for
is.
§
for
§
Tap
for
Tap
for
to show the search results as a list, and then tap the location.
for
to show the search results as a list, and then tap the location.
Details about the selected location displays on the screen.
for
Details about the selected location displays on the screen.
for
Do any of the following:
for
Do any of the following:
certification
certification
Press and hold a location on the map. A balloon opens over
certification
Press and hold a location on the map. A balloon opens over
the location, with the address and a thumbnail from street
certification
the location, with the address and a thumbnail from street
Tap the balloon to see more information.
certification
Tap the balloon to see more information.
You can get directions to the location, check for nearby
certification
You can get directions to the location, check for nearby
places of interest, and more.
certification
places of interest, and more.
certification
certification
certification
certification
certification
In Google Maps, you can search for a location, such as an address or a type of
certification
In Google Maps, you can search for a location, such as an address or a type of
business or establishment (for example, museums).
certification
business or establishment (for example, museums).
In Maps, enter the place you want to search for in the search box.
certification
In Maps, enter the place you want to search for in the search box.
to search for the location you entered or tap a suggested search item.
certification
to search for the location you entered or tap a suggested search item.
The search results are displayed as markers on the map.
certification
The search results are displayed as markers on the map.
Do any of the following:
certification
Do any of the following:
Tap a marker
certification
Tap a marker
certification
to see if that is what you’re looking for, tap the balloon if it
certification
to see if that is what you’re looking for, tap the balloon if it
2011/03/07
Details about the selected location displays on the screen.
2011/03/07
Details about the selected location displays on the screen.
2011/03/07
Tap the onscreen buttons to view the location on a map, get directions,
2011/03/07
Tap the onscreen buttons to view the location on a map, get directions,
view the location in Street View, if available, and more. Scroll down the
2011/03/07
view the location in Street View, if available, and more. Scroll down the
screen to view more options.
2011/03/07
screen to view more options.
2011/03/07
Swipe left or right across the screen to view the information for the next or
2011/03/07
Swipe left or right across the screen to view the information for the next or
previous search result.
2011/03/07
previous search result.
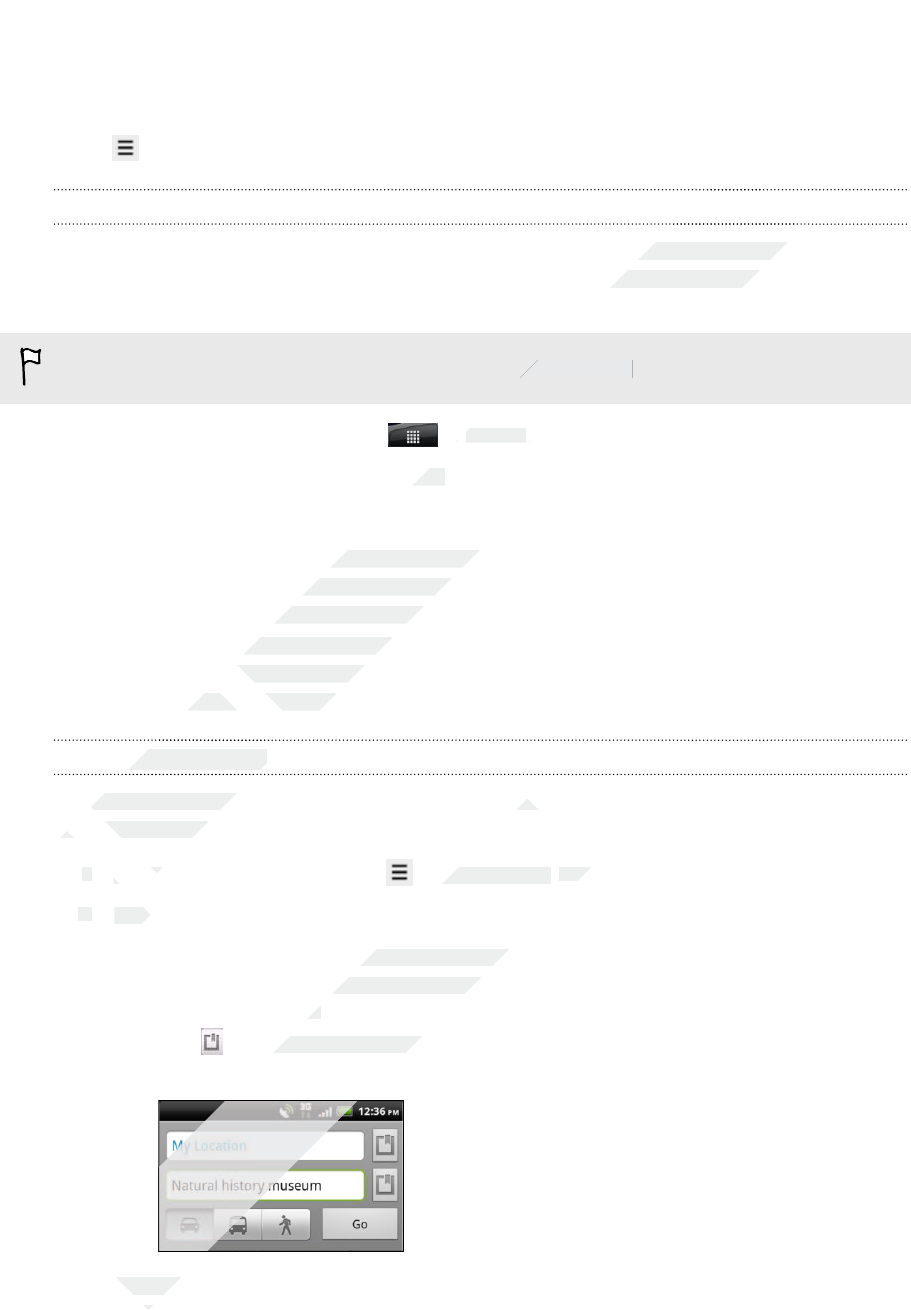
Clearing the map
After searching on a map, you can clear away the various markers drawn on it.
Press , and then tap Clear Map.
Searching for a place of interest near you
Use Places to find places of interest near your current location. Places uses Google
Maps to search common places that you would want to find, such as the nearest gas
station or ATM kiosk.
Before using Places, you need to enable location sources.
1. From the Home screen, tap > Places.
2. Tap the place you want to search.
3. Do any of the following:
§When one or two places of interest are found, the search results are
displayed as markers on the map. You can tap the marker, and then tap the
balloon to view more information about the place.
§When several places are found, the search results display in a list. Tap a
place to show its location on a map, and then tap its balloon to view more
information about the place.
Getting directions
Get detailed directions to your destination. Google Maps can provide directions for
travel by foot, public transportation, or car.
1. While viewing a map, press , and then tap Directions.
2. Do any of the following:
§Use your current location as the starting point, or enter a location from
where to start in the first text box. Then enter your destination in the
second text box.
§Tap to select an address from your contacts or a point that you tap on a
map.
3. Choose how you want to get to your destination by tapping the car, public
transit, or walk button.
124 Maps and location
Only
travel by foot, public transportation, or car.
Only
travel by foot, public transportation, or car.
1.
Only
1.
While viewing a map, press
Only
While viewing a map, press
2.
Only
2.
Do any of the following:
Only
Do any of the following:
for
information about the place.
for
information about the place.
Getting directions
for
Getting directions
for
for
for
Get detailed directions to your destination. Google Maps can provide directions for
for
Get detailed directions to your destination. Google Maps can provide directions for
travel by foot, public transportation, or car.
for
travel by foot, public transportation, or car.
While viewing a map, press
for
While viewing a map, press
certification
certification
certification
Use Places to find places of interest near your current location. Places uses Google
certification
Use Places to find places of interest near your current location. Places uses Google
Maps to search common places that you would want to find, such as the nearest gas
certification
Maps to search common places that you would want to find, such as the nearest gas
certification
Before using Places, you need to enable location sources.
certification
Before using Places, you need to enable location sources.
>
certification
>
Places
certification
Places
.
certification
.
Tap the place you want to search.
certification
Tap the place you want to search.
When one or two places of interest are found, the search results are
certification
When one or two places of interest are found, the search results are
displayed as markers on the map. You can tap the marker, and then tap the
certification
displayed as markers on the map. You can tap the marker, and then tap the
balloon to view more information about the place.
certification
balloon to view more information about the place.
When several places are found, the search results display in a list. Tap a
certification
When several places are found, the search results display in a list. Tap a
place to show its location on a map, and then tap its balloon to view more
certification
place to show its location on a map, and then tap its balloon to view more
information about the place.
certification
information about the place.
2011/03/07
Get detailed directions to your destination. Google Maps can provide directions for
2011/03/07
Get detailed directions to your destination. Google Maps can provide directions for
, and then tap
2011/03/07
, and then tap
Directions
2011/03/07
Directions
Use your current location as the starting point, or enter a location from
2011/03/07
Use your current location as the starting point, or enter a location from
where to start in the first text box. Then enter your destination in the
2011/03/07
where to start in the first text box. Then enter your destination in the
second text box.
2011/03/07
second text box.
to select an address from your contacts or a point that you tap on a
2011/03/07
to select an address from your contacts or a point that you tap on a
2011/03/07
2011/03/07
2011/03/07
2011/03/07
2011/03/07
2011/03/07
Choose how you want to get to your destination by tapping the car, public
2011/03/07
Choose how you want to get to your destination by tapping the car, public
transit, or walk button.
2011/03/07
transit, or walk button.
4. Tap Go. The next screen displays the directions to your destination in a list.
If the place you’ve set as your destination has several locations available, choose
which one to go to.
5. Tap an item to view the directions on the map.
6. Tap the arrow buttons on the map to follow the directions.
When you’re finished viewing or following the directions, press and then tap Clear
Map to reset the map. Your destination is automatically saved in the Google Maps
history.
Getting help
Get help and more information about Maps.
To open the help, press , and then tap More > Help. The web browser opens and
takes you to the Google Maps Help site.
Finding your friends with Google Latitude (available by country)
Google Latitude user location service lets you and your friends share locations and
status messages with each other. It also lets you send text and email messages, make
phone calls, and get directions to your friends’ locations.
Your location is not shared automatically. You must join Latitude, and then invite your
friends to view your location or accept their invitations. Only friends that you have
explicitly invited or accepted can see your location.
Opening and joining Latitude
1. From the Home screen, tap > Maps.
2. While viewing a map, press and then tap Join Latitude.
3. After you’ve joined Latitude and closed the application, you can do any of the
following to open it from the Home screen:
§Tap > Latitude.
§Open Maps, press , and then tap Latitude.
125 Maps and location
Only
2.
Only
2.
While viewing a map, press
Only
While viewing a map, press
3.
Only
3.
After you’ve joined Latitude and closed the application, you can do any of the
Only
After you’ve joined Latitude and closed the application, you can do any of the
following to open it from the Home screen:
Only
following to open it from the Home screen:
for
Your location is not shared automatically. You must join Latitude, and then invite your
for
Your location is not shared automatically. You must join Latitude, and then invite your
friends to view your location or accept their invitations. Only friends that you have
for
friends to view your location or accept their invitations. Only friends that you have
explicitly invited or accepted can see your location.
for
explicitly invited or accepted can see your location.
Opening and joining Latitude
for
Opening and joining Latitude
From the Home screen, tap
for
From the Home screen, tap
While viewing a map, press
for
While viewing a map, press
certification
Tap the arrow buttons on the map to follow the directions.
certification
Tap the arrow buttons on the map to follow the directions.
When you’re finished viewing or following the directions, press
certification
When you’re finished viewing or following the directions, press
certification
and then tap
certification
and then tap
to reset the map. Your destination is automatically saved in the Google Maps
certification
to reset the map. Your destination is automatically saved in the Google Maps
certification
certification
Get help and more information about Maps.
certification
Get help and more information about Maps.
, and then tap
certification
, and then tap
More
certification
More
>
certification
>
Help
certification
Help
takes you to the Google Maps Help site.
certification
takes you to the Google Maps Help site.
Finding your friends with Google Latitude (available by country)
certification
Finding your friends with Google Latitude (available by country)
certification
certification
certification
Google Latitude user location service lets you and your friends share locations and
certification
Google Latitude user location service lets you and your friends share locations and
status messages with each other. It also lets you send text and email messages, make
certification
status messages with each other. It also lets you send text and email messages, make
phone calls, and get directions to your friends’ locations.
certification
phone calls, and get directions to your friends’ locations.
Your location is not shared automatically. You must join Latitude, and then invite your
certification
Your location is not shared automatically. You must join Latitude, and then invite your
friends to view your location or accept their invitations. Only friends that you have
certification
friends to view your location or accept their invitations. Only friends that you have
2011/03/07
Maps
2011/03/07
Maps
.
2011/03/07
.
and then tap
2011/03/07
and then tap
Join Latitude
2011/03/07
Join Latitude
2011/03/07
After you’ve joined Latitude and closed the application, you can do any of the
2011/03/07
After you’ve joined Latitude and closed the application, you can do any of the
following to open it from the Home screen:
2011/03/07
following to open it from the Home screen:
Latitude
2011/03/07
Latitude
.
2011/03/07
.
Open Maps, press
2011/03/07
Open Maps, press
2011/03/07
, and then tap
2011/03/07
, and then tap
Market and other apps
Finding and installing apps from Android
Market
Android Market is the place to go to find new apps for your phone. Choose from a
wide variety of free and paid apps ranging from productivity apps, entertainment, to
games.
Paid apps are currently only available in certain countries.
Finding and installing an app
When you install apps and use them on your phone, they may require access to your
personal information or access to certain functions or settings of your phone.
Download and install only apps that you trust.
Be cautious when downloading apps that have access to your phone’s functions or
a significant amount of your data. You’re responsible for the results of using
downloaded apps on your phone.
You need a Google Checkout account to purchase items on Android Market.
1. From the Home screen, tap > Market.
2. Do any of the following to find an app:
Browse featured
apps
Scroll through the list of featured apps.
Browse apps by
categories
Tap Apps or Games, and then tap a category. Under a
category, you can filter the apps by Top paid, Top free
or Just in.
Search for an app Tap , enter the name or type of app you’re looking
for, and then tap .
3. When you find the app that you like, tap it and read its description and user
reviews.
4. To download or purchase the app, FREE (for free apps) or the price button
under Buy (for paid apps).
5. If you agree to the conditions, tap OK to begin downloading and installing the
app.
126 Market and other apps
Only
1.
Only
1.
2.
Only
2.
Do any of the following to find an app:
Only
Do any of the following to find an app:
Only
Browse featured
Only
Browse featured
Only
for
for
Be cautious when downloading apps that have access to your phone’s functions or
for
Be cautious when downloading apps that have access to your phone’s functions or
a significant amount of your data. You’re responsible for the results of using
for
a significant amount of your data. You’re responsible for the results of using
downloaded apps on your phone.
for
downloaded apps on your phone.
You need a Google Checkout account to purchase items on Android Market.
for
You need a Google Checkout account to purchase items on Android Market.
From the Home screen, tap
for
From the Home screen, tap
Do any of the following to find an app:
for
Do any of the following to find an app:
certification
Finding and installing apps from Android
certification
Finding and installing apps from Android
Android Market is the place to go to find new apps for your phone. Choose from a
certification
Android Market is the place to go to find new apps for your phone. Choose from a
wide variety of free and paid apps ranging from productivity apps, entertainment, to
certification
wide variety of free and paid apps ranging from productivity apps, entertainment, to
certification
Paid apps are currently only available in certain countries.
certification
Paid apps are currently only available in certain countries.
Finding and installing an app
certification
Finding and installing an app
certification
certification
certification
When you install apps and use them on your phone, they may require access to your
certification
When you install apps and use them on your phone, they may require access to your
personal information or access to certain functions or settings of your phone.
certification
personal information or access to certain functions or settings of your phone.
Download and install only apps that you trust.
certification
Download and install only apps that you trust.
certification
Be cautious when downloading apps that have access to your phone’s functions or
certification
Be cautious when downloading apps that have access to your phone’s functions or
a significant amount of your data. You’re responsible for the results of using
certification
a significant amount of your data. You’re responsible for the results of using
2011/03/07
You need a Google Checkout account to purchase items on Android Market.
2011/03/07
You need a Google Checkout account to purchase items on Android Market.
Market
2011/03/07
Market
.
2011/03/07
.
Do any of the following to find an app:
2011/03/07
Do any of the following to find an app:
2011/03/07
Scroll through the list of featured apps.
2011/03/07
Scroll through the list of featured apps.
Tap
2011/03/07
Tap
Apps
2011/03/07
Apps
or
2011/03/07
or
category, you can filter the apps by
2011/03/07
category, you can filter the apps by
or
2011/03/07
or
Just in
2011/03/07
Just in
2011/03/07
2011/03/07
2011/03/07
Search for an app
2011/03/07
Search for an app
Tap
2011/03/07
Tap
2011/03/07
2011/03/07
2011/03/07
2011/03/07
When you find the app that you like, tap it and read its description and user
2011/03/07
When you find the app that you like, tap it and read its description and user
reviews.
2011/03/07
reviews.
4.
2011/03/07
4.
To download or purchase the app,
2011/03/07
To download or purchase the app,
under
2011/03/07
under
Buy
2011/03/07
Buy
If you agree to the conditions, tap
2011/03/07
If you agree to the conditions, tap
You can uninstall an app for a refund within a limited time after your purchase. To
know more about the refund policy for paid apps, please visit the Android Market
Help site (http://market.android.com/support).
Opening an installed app
Do one of the following:
§If you see this icon on the status bar, open the Notifications panel, and then
tap the app.
§From the Home screen, tap > Market > My apps. On the My apps screen,
tap the app, and then tap Open.
§From the Home screen, tap . On the All apps screen, slide to the
Downloaded tab, and then tap the app.
Uninstalling an app
You can uninstall any app that you have downloaded and installed from Android
Market.
1. From the Home screen, tap > Market > My apps.
2. Tap the app you want to uninstall, and then tap Uninstall.
3. When asked, tap OK.
4. Choose the reason for removing the app, and then tap OK.
Getting help
If you need help or have questions about Android Market, press , and then tap Help.
The web browser will take you to the Android Market Help site.
127 Market and other apps
Only
The web browser will take you to the Android Market Help site.
Only
The web browser will take you to the Android Market Help site.
for
Choose the reason for removing the app, and then tap
for
Choose the reason for removing the app, and then tap
Getting help
for
Getting help
for
for
for
If you need help or have questions about Android Market, press
for
If you need help or have questions about Android Market, press
The web browser will take you to the Android Market Help site.
for
The web browser will take you to the Android Market Help site.
certification
certification
certification
on the status bar, open the Notifications panel, and then
certification
on the status bar, open the Notifications panel, and then
My apps
certification
My apps
. On the My apps screen,
certification
. On the My apps screen,
. On the All apps screen, slide to the
certification
. On the All apps screen, slide to the
Downloaded tab, and then tap the app.
certification
Downloaded tab, and then tap the app.
certification
certification
certification
You can uninstall any app that you have downloaded and installed from Android
certification
You can uninstall any app that you have downloaded and installed from Android
From the Home screen, tap
certification
From the Home screen, tap
certification
>
certification
>
Tap the app you want to uninstall, and then tap
certification
Tap the app you want to uninstall, and then tap
When asked, tap
certification
When asked, tap
OK
certification
OK
.
certification
.
Choose the reason for removing the app, and then tap
certification
Choose the reason for removing the app, and then tap
2011/03/07
If you need help or have questions about Android Market, press
2011/03/07
If you need help or have questions about Android Market, press
The web browser will take you to the Android Market Help site.
2011/03/07
The web browser will take you to the Android Market Help site.
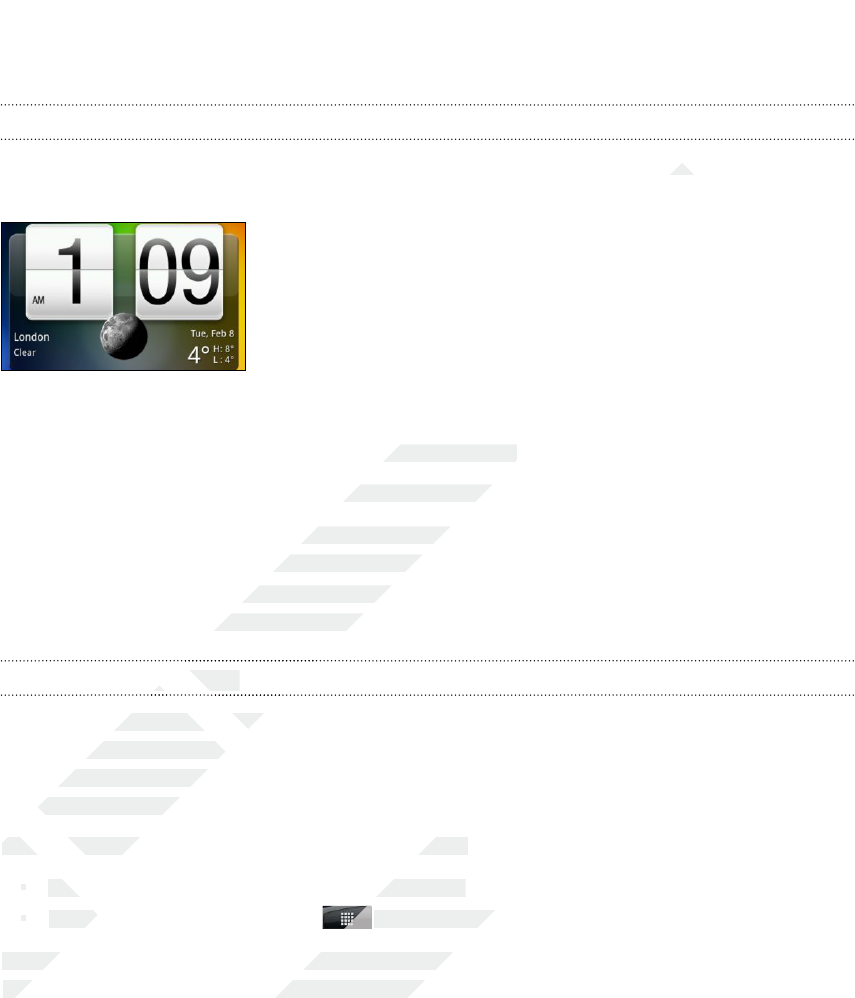
Using the Clock
About the HTC Clock widget
Use the HTC Clock widget to see your current date, time, and location. You can also
use the Clock to show the time in another city.
Changing the city for the Clock widget
You can change the city to use for the Clock widget.
If you want to show the time of another city, you can:
§Edit the widget settings. Press and hold the Clock widget on the Home screen,
the drag it to the Edit button. Select the city you want to show.
§Add another Clock widget to the extended Home screen. Select from a variety of
looks and designs and choose the city to display.
Using the Clock app
Get more from the Clock app than just the regular date and time. Use your phone as a
desk clock complete with weather information or as a world clock so you can see
what time it is in several cities across the globe. You can also use it as an alarm clock,
stopwatch, and countdown timer.
To open the Clock app, do one of the following:
§Tap the Clock widget on the Home screen.
§From the Home screen, tap and then tap Clock.
Tap the tabs on the bottom row or slide your finger across the tabs to switch
between the different functions of the Clock app.
128 Market and other apps
Only
To open the Clock app, do one of the following:
Only
To open the Clock app, do one of the following:
§
Only
§
Tap the Clock widget on the Home screen.
Only
Tap the Clock widget on the Home screen.
§
Only
§
From the Home screen, tap
Only
From the Home screen, tap
Tap the tabs on the bottom row or slide your finger across the tabs to switch
Only
Tap the tabs on the bottom row or slide your finger across the tabs to switch
between the different functions of the Clock app.
Only
between the different functions of the Clock app.
for
Using the Clock app
for
Using the Clock app
for
for
Get more from the Clock app than just the regular date and time. Use your phone as a
for
Get more from the Clock app than just the regular date and time. Use your phone as a
desk clock complete with weather information or as a world clock so you can see
for
desk clock complete with weather information or as a world clock so you can see
what time it is in several cities across the globe. You can also use it as an alarm clock,
for
what time it is in several cities across the globe. You can also use it as an alarm clock,
stopwatch, and countdown timer.
for
stopwatch, and countdown timer.
To open the Clock app, do one of the following:
for
To open the Clock app, do one of the following:
certification
Use the HTC Clock widget to see your current date, time, and location. You can also
certification
Use the HTC Clock widget to see your current date, time, and location. You can also
You can change the city to use for the Clock widget.
certification
You can change the city to use for the Clock widget.
If you want to show the time of another city, you can:
certification
If you want to show the time of another city, you can:
Edit the widget settings. Press and hold the Clock widget on the Home screen,
certification
Edit the widget settings. Press and hold the Clock widget on the Home screen,
button. Select the city you want to show.
certification
button. Select the city you want to show.
Add another Clock widget to the extended Home screen. Select from a variety of
certification
Add another Clock widget to the extended Home screen. Select from a variety of
looks and designs and choose the city to display.
certification
looks and designs and choose the city to display.
Using the Clock app
certification
Using the Clock app
certification
certification
Get more from the Clock app than just the regular date and time. Use your phone as a
certification
Get more from the Clock app than just the regular date and time. Use your phone as a
2011/03/07
To open the Clock app, do one of the following:
2011/03/07
To open the Clock app, do one of the following:
Tap the Clock widget on the Home screen.
2011/03/07
Tap the Clock widget on the Home screen.
2011/03/07
2011/03/07
and then tap
2011/03/07
and then tap
Tap the tabs on the bottom row or slide your finger across the tabs to switch
2011/03/07
Tap the tabs on the bottom row or slide your finger across the tabs to switch
2011/03/07
between the different functions of the Clock app.
2011/03/07
between the different functions of the Clock app.
Using Desk Clock
Opening the Clock app brings you directly to the Desk Clock screen.
The Desk Clock displays the current date, time, and weather. It also has an alarm clock
indicator and a battery charging indicator. You can dim the screen to show only the
time and date.
§Tap the weather information to open the Weather app where you can see
weather forecasts for the next few days.
§Tap to dim the screen and display only the time and date on the Desk
Clock . To light up the screen again, tap anywhere on the screen.
§Tap to dim the screen and go into screensaver mode. When in screensaver
mode, the time and date will change position on the screen every few minutes.
To light up the screen again, tap anywhere on the screen.
Using World Clock
Use the Clock app's World Clock tab to check the current time in several places
around the globe simultaneously. You can also set your home city, add more cities to
the world clock list, and manually set your time zone, date, and time.
Setting your home city
1. On the World Clock tab, press and then tap Home settings.
2. Enter your home city’s name. As you enter letters, the list is filtered to show
matching cities and countries.
3. Scroll through the list and tap your home city.
Setting the time zone, date, and time
To set the time zone, date, and time on your phone manually, you need to turn off
auto time sync first.
1. On the World Clock tab, press and then tap Local time settings.
2. Clear the Automatic check box, and then set the time zone, date, and time as
required.
From the Home screen, you can also press and then tap Settings > Date & time
to open the Date & time settings screen.
Adding a city to the World Clock screen
Add more cities to the World Clock screen so you can instantly check the date and
time in these cities.
1. On the World Clock tab, tap Add city.
2. Enter the city name you want to add. As you enter letters, the list is filtered to
show matching cities and countries.
3. Scroll through the matching list and tap the city that you want to add.
129 Market and other apps
Only
Setting the time zone, date, and time
Only
Setting the time zone, date, and time
To set the time zone, date, and time on your phone manually, you need to turn off
Only
To set the time zone, date, and time on your phone manually, you need to turn off
auto time sync first.
Only
auto time sync first.
1.
Only
1.
On the World Clock tab, press
Only
On the World Clock tab, press
2.
Only
2.
Only
for
On the World Clock tab, press
for
On the World Clock tab, press
Enter your home city’s name. As you enter letters, the list is filtered to show
for
Enter your home city’s name. As you enter letters, the list is filtered to show
matching cities and countries.
for
matching cities and countries.
Scroll through the list and tap your home city.
for
Scroll through the list and tap your home city.
Setting the time zone, date, and time
for
Setting the time zone, date, and time
To set the time zone, date, and time on your phone manually, you need to turn off
for
To set the time zone, date, and time on your phone manually, you need to turn off
certification
indicator and a battery charging indicator. You can dim the screen to show only the
certification
indicator and a battery charging indicator. You can dim the screen to show only the
Tap the weather information to open the Weather app where you can see
certification
Tap the weather information to open the Weather app where you can see
to dim the screen and display only the time and date on the Desk
certification
to dim the screen and display only the time and date on the Desk
Clock . To light up the screen again, tap anywhere on the screen.
certification
Clock . To light up the screen again, tap anywhere on the screen.
to dim the screen and go into screensaver mode. When in screensaver
certification
to dim the screen and go into screensaver mode. When in screensaver
mode, the time and date will change position on the screen every few minutes.
certification
mode, the time and date will change position on the screen every few minutes.
To light up the screen again, tap anywhere on the screen.
certification
To light up the screen again, tap anywhere on the screen.
certification
certification
certification
Use the Clock app's World Clock tab to check the current time in several places
certification
Use the Clock app's World Clock tab to check the current time in several places
around the globe simultaneously. You can also set your home city, add more cities to
certification
around the globe simultaneously. You can also set your home city, add more cities to
the world clock list, and manually set your time zone, date, and time.
certification
the world clock list, and manually set your time zone, date, and time.
Setting your home city
certification
Setting your home city
On the World Clock tab, press
certification
On the World Clock tab, press
Enter your home city’s name. As you enter letters, the list is filtered to show
certification
Enter your home city’s name. As you enter letters, the list is filtered to show
2011/03/07
Scroll through the list and tap your home city.
2011/03/07
Scroll through the list and tap your home city.
To set the time zone, date, and time on your phone manually, you need to turn off
2011/03/07
To set the time zone, date, and time on your phone manually, you need to turn off
On the World Clock tab, press
2011/03/07
On the World Clock tab, press
2011/03/07
and then tap
2011/03/07
and then tap
2011/03/07
check box, and then set the time zone, date, and time as
2011/03/07
check box, and then set the time zone, date, and time as
2011/03/07
From the Home screen, you can also press
2011/03/07
From the Home screen, you can also press
to open the Date & time settings screen.
2011/03/07
to open the Date & time settings screen.
Adding a city to the World Clock screen
2011/03/07
Adding a city to the World Clock screen
Add more cities to the World Clock screen so you can instantly check the date and
2011/03/07
Add more cities to the World Clock screen so you can instantly check the date and
time in these cities.
2011/03/07
time in these cities.
On the World Clock tab, tap
2011/03/07
On the World Clock tab, tap
Enter the city name you want to add. As you enter letters, the list is filtered to
2011/03/07
Enter the city name you want to add. As you enter letters, the list is filtered to
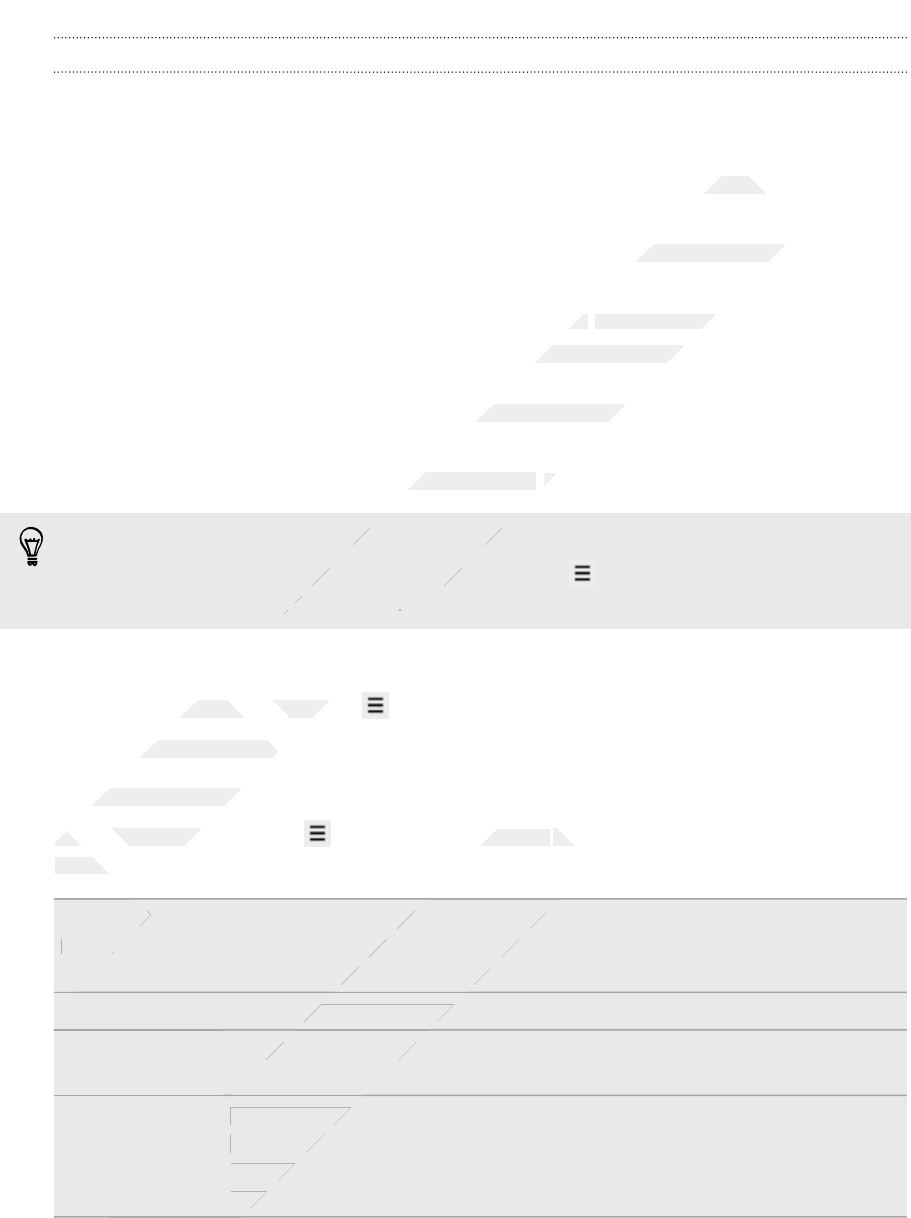
Setting an alarm
You can use the Clock app's Alarms tab to set up one or more wake-up alarms.
1. On the Alarms tab, select the check box of an alarm and then tap that alarm.
2. On the Set alarms screen, drag your finger up or down to roll the time scroll
wheels and set the alarm time.
3. Scroll through the Set alarms screen to see all the available alarm options. You
can:
§Enter the alarm Description and choose the Alarm sound to use.
§Tap Repeat. Select which days of the week to sound the alarm, and then
tap OK.
§Select the Vibrate check box if you want your phone to also vibrate when
the alarm goes off.
4. When you're finished setting the alarm, tap Done.
§To turn off an alarm, clear the check box of that alarm.
§If you need to set more than three alarms, press while you're on the Alarms
screen and then tap Add alarm.
Deleting an alarm
1. On the Alarms tab, press and then tap Delete.
2. Select the alarms you want to delete and then tap Delete.
Changing alarm sound settings
On the Alarms tab, press and then tap Settings. You can change the following
settings:
Alarm in silent
mode
Selected by default, this option allows the alarm to sound even
when your phone's volume is set to silent. Clear this check box if
you want to silence the alarm when your phone is in silent mode.
Alarm volume Set the volume level that you want for the alarm.
Snooze
duration
Set how long to snooze between alarms.
Side button
behavior
Choose what happens to the alarm when pressing the side button
(VOLUME UP/VOLUME DOWN) of your phone. You can set the
button to snooze, dismiss the alarm, or disable the button. The side
button works only when the phone's screen is not locked.
130 Market and other apps
Only
On the Alarms tab, press
Only
On the Alarms tab, press
settings:
Only
settings:
Only
Alarm in silent
Only
Alarm in silent
mode
Only
mode
Alarm volume
Only
Alarm volume
Only
Only
for
On the Alarms tab, press
for
On the Alarms tab, press
Select the alarms you want to delete and then tap
for
Select the alarms you want to delete and then tap
Changing alarm sound settings
for
Changing alarm sound settings
On the Alarms tab, press
for
On the Alarms tab, press
certification
On the Set alarms screen, drag your finger up or down to roll the time scroll
certification
On the Set alarms screen, drag your finger up or down to roll the time scroll
Scroll through the Set alarms screen to see all the available alarm options. You
certification
Scroll through the Set alarms screen to see all the available alarm options. You
and choose the
certification
and choose the
Alarm sound
certification
Alarm sound
. Select which days of the week to sound the alarm, and then
certification
. Select which days of the week to sound the alarm, and then
check box if you want your phone to also vibrate when
certification
check box if you want your phone to also vibrate when
When you're finished setting the alarm, tap
certification
When you're finished setting the alarm, tap
Done
certification
Done
certification
To turn off an alarm, clear the check box of that alarm.
certification
To turn off an alarm, clear the check box of that alarm.
If you need to set more than three alarms, press
certification
If you need to set more than three alarms, press
screen and then tap
certification
screen and then tap
Add alarm
certification
Add alarm
.
certification
.
On the Alarms tab, press
certification
On the Alarms tab, press
2011/03/07
Settings
2011/03/07
Settings
. You can change the following
2011/03/07
. You can change the following
2011/03/07
Selected by default, this option allows the alarm to sound even
2011/03/07
Selected by default, this option allows the alarm to sound even
when your phone's volume is set to silent. Clear this check box if
2011/03/07
when your phone's volume is set to silent. Clear this check box if
you want to silence the alarm when your phone is in silent mode.
2011/03/07
you want to silence the alarm when your phone is in silent mode.
2011/03/07
Set the volume level that you want for the alarm.
2011/03/07
Set the volume level that you want for the alarm.
2011/03/07
Set how long to snooze between alarms.
2011/03/07
Set how long to snooze between alarms.
2011/03/07
Choose what happens to the alarm when pressing the side button
2011/03/07
Choose what happens to the alarm when pressing the side button
(VOLUME UP/VOLUME DOWN) of your phone. You can set the
2011/03/07
(VOLUME UP/VOLUME DOWN) of your phone. You can set the
button to snooze, dismiss the alarm, or disable the button. The side
2011/03/07
button to snooze, dismiss the alarm, or disable the button. The side
button works only when the phone's screen is not locked.
2011/03/07
button works only when the phone's screen is not locked.
2011/03/07
2011/03/07
2011/03/07
2011/03/07
2011/03/07
2011/03/07
2011/03/07
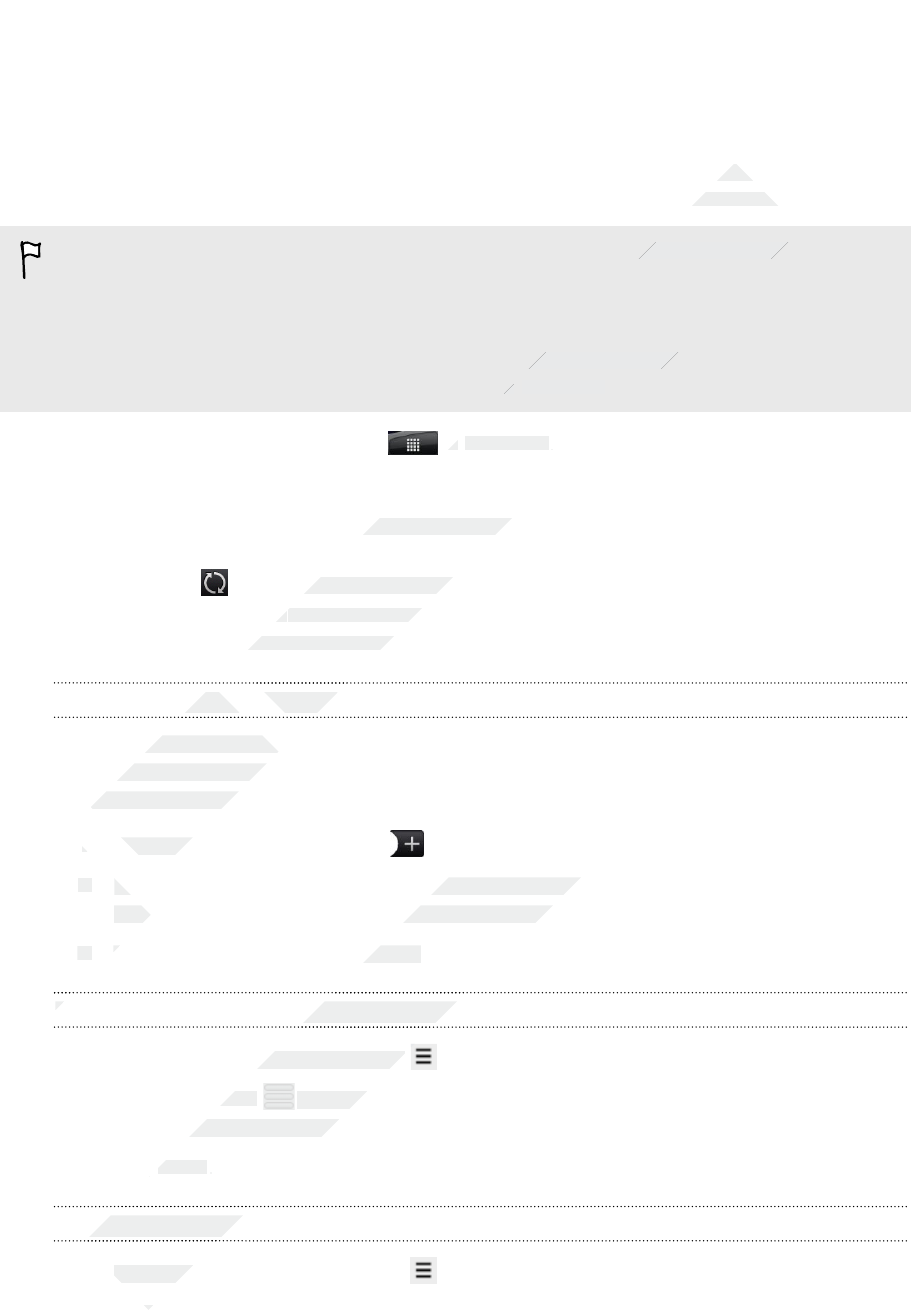
Checking Weather
You can use the Weather app and widget to check the current weather and weather
forecasts for the next four days. In addition to your current location, you can view
weather forecasts for other cities around the globe. Your settings in the Weather app
also control the weather information that is shown in the Clock and Calendar.
To automatically update your current location's weather in the Weather app and
widget as well as Clock and Calendar:
§Your phone must be connected to the Internet.
§The My location service must be enabled. If you didn't enable it when you first set
up your phone, you can do so in Settings > Location.
1. From the Home screen, tap > Weather.
2. Do any of the following:
§Swipe your finger up or down the screen to check the weather in other
cities,.
§Tap to update the weather information at any time.
§Tap Weather at the bottom center of the Weather screen to see more
weather details on the Web.
Adding a city to the Weather screen
Add more cities to the Weather screen so you can instantly check the weather
forecasts in these cities. In addition to your current location, the Weather screen can
display up to fifteen cities.
1. On the Weather screen, tap .
2. Enter the location you want to add. As you type, the list is filtered to show the
possible locations based on the letters you entered.
3. Tap the desired city to select it.
Changing the order of cities on the Weather screen
1. On the Weather screen, press and then tap Rearrange.
2. Press and hold at the end of the item you want to move. When the row is
highlighted in green, drag it to its new position, then release.
3. Tap Done.
Deleting cities from the Weather screen
1. On the Weather screen, press and then tap Delete.
2. Select the cities you want to remove and then tap Delete.
131 Market and other apps
Only
1.
Only
1.
2.
Only
2.
Enter the location you want to add. As you type, the list is filtered to show the
Only
Enter the location you want to add. As you type, the list is filtered to show the
possible locations based on the letters you entered.
Only
possible locations based on the letters you entered.
3.
Only
3.
Tap the desired city to select it.
Only
Tap the desired city to select it.
Changing the order of cities on the Weather screen
Only
Changing the order of cities on the Weather screen
Only
for
Adding a city to the Weather screen
for
Adding a city to the Weather screen
for
Add more cities to the Weather screen so you can instantly check the weather
for
Add more cities to the Weather screen so you can instantly check the weather
forecasts in these cities. In addition to your current location, the Weather screen can
for
forecasts in these cities. In addition to your current location, the Weather screen can
display up to fifteen cities.
for
display up to fifteen cities.
On the Weather screen, tap
for
On the Weather screen, tap
certification
weather forecasts for other cities around the globe. Your settings in the Weather app
certification
weather forecasts for other cities around the globe. Your settings in the Weather app
also control the weather information that is shown in the Clock and Calendar.
certification
also control the weather information that is shown in the Clock and Calendar.
certification
To automatically update your current location's weather in the Weather app and
certification
To automatically update your current location's weather in the Weather app and
The My location service must be enabled. If you didn't enable it when you first set
certification
The My location service must be enabled. If you didn't enable it when you first set
>
certification
>
Location
certification
Location
.
certification
.
>
certification
>
Weather
certification
Weather
.
certification
.
Swipe your finger up or down the screen to check the weather in other
certification
Swipe your finger up or down the screen to check the weather in other
to update the weather information at any time.
certification
to update the weather information at any time.
Weather
certification
Weather
at the bottom center of the Weather screen to see more
certification
at the bottom center of the Weather screen to see more
weather details on the Web.
certification
weather details on the Web.
Adding a city to the Weather screen
certification
Adding a city to the Weather screen
certification
certification
2011/03/07
Enter the location you want to add. As you type, the list is filtered to show the
2011/03/07
Enter the location you want to add. As you type, the list is filtered to show the
possible locations based on the letters you entered.
2011/03/07
possible locations based on the letters you entered.
Tap the desired city to select it.
2011/03/07
Tap the desired city to select it.
Changing the order of cities on the Weather screen
2011/03/07
Changing the order of cities on the Weather screen
2011/03/07
2011/03/07
2011/03/07
On the Weather screen, press
2011/03/07
On the Weather screen, press
2011/03/07
Press and hold
2011/03/07
Press and hold
2011/03/07
at the end of the item you want to move. When the row is
2011/03/07
at the end of the item you want to move. When the row is
highlighted in green, drag it to its new position, then release.
2011/03/07
highlighted in green, drag it to its new position, then release.
Tap
2011/03/07
Tap
Done
2011/03/07
Done
.
2011/03/07
.
Deleting cities from the Weather screen
2011/03/07
Deleting cities from the Weather screen
2011/03/07
2011/03/07
2011/03/07
On the Weather screen, press
2011/03/07
On the Weather screen, press
Select the cities you want to remove and then tap
2011/03/07
Select the cities you want to remove and then tap
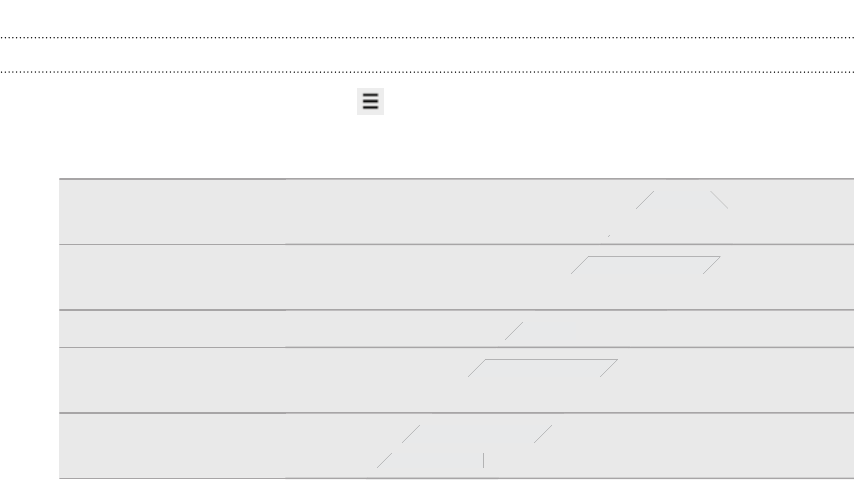
Changing Weather options
1. On the Weather screen, press and then tap Settings.
2. You can change the following weather settings:
Update when opened Select this check box to refresh weather updates every
time you open the Weather app.
Update automatically Select this check box to automatically download
weather updates.
Update schedule Set an auto update schedule.
Temperature scale Choose whether to display the temperature in Celsius or
Fahrenheit.
Sound effects Choose whether to play sound effects related to the
weather conditions.
132 Market and other apps
Only
for
certification
certification
Select this check box to refresh weather updates every
certification
Select this check box to refresh weather updates every
time you open the Weather app.
certification
time you open the Weather app.
Select this check box to automatically download
certification
Select this check box to automatically download
Set an auto update schedule.
certification
Set an auto update schedule.
Choose whether to display the temperature in Celsius or
certification
Choose whether to display the temperature in Celsius or
certification
certification
certification
certification
certification
Choose whether to play sound effects related to the
certification
Choose whether to play sound effects related to the
weather conditions.
certification
weather conditions.
certification
certification
certification
2011/03/07
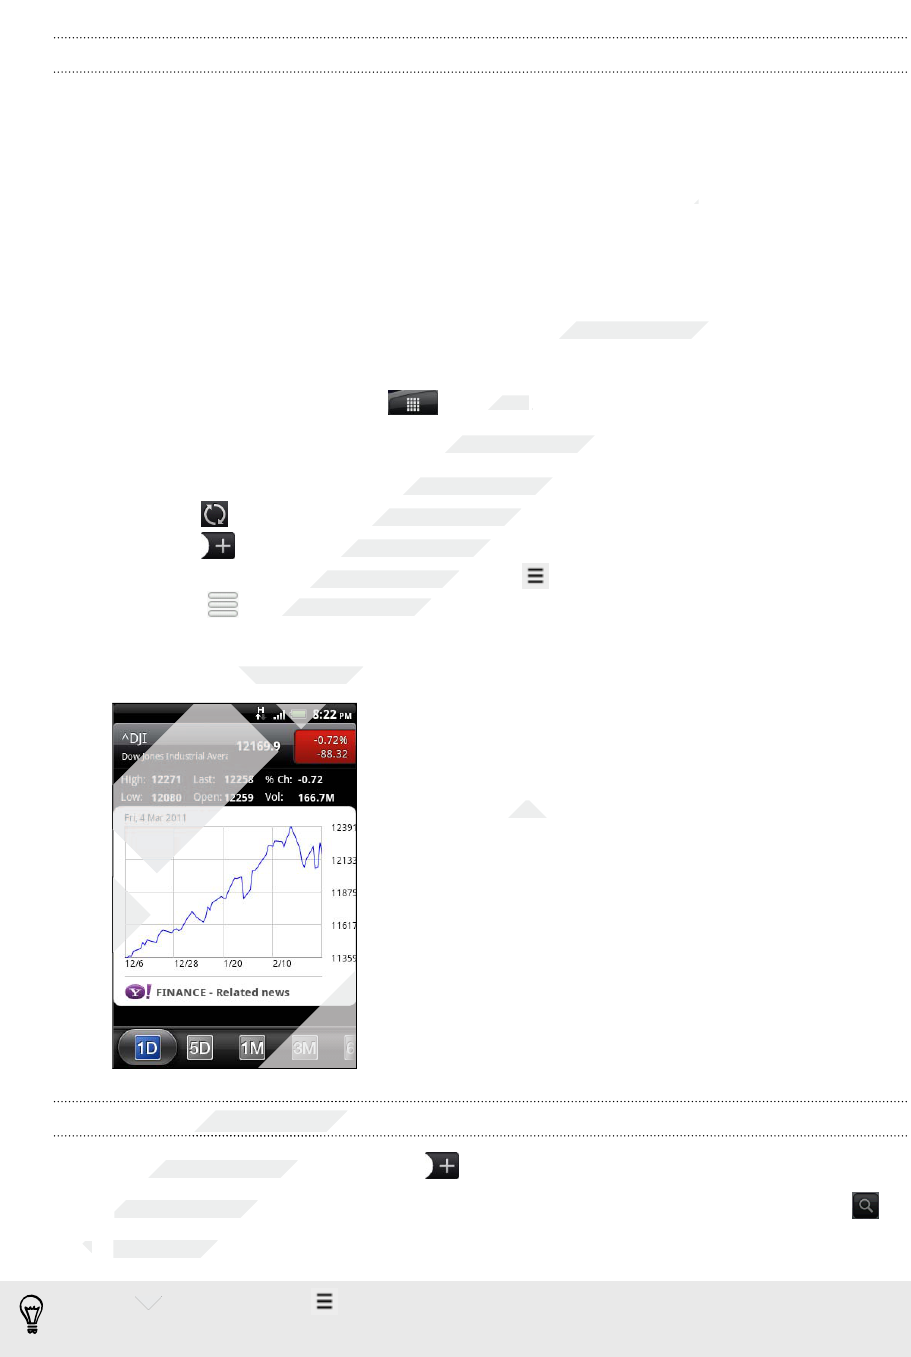
About the Weather widget
Use the Weather widget to instantly check weather forecasts of your current location
and other cities without having to open the Weather app. The Weather widget comes
in different looks and styles.
You can add this widget to the Home screen, if it’s not yet added.
Keeping track of your stocks
Use the Stocks app to get the latest stock updates for stock quotes and market
indices you follow.
1. From the Home screen, tap > Stocks.
2. On the Stocks main screen, do any of the following:
§Tap an item to view from the list of stock quotes and market indices.
§Tap to update the stock information.
§Tap to add a stock quote or stock market index.
§To change the stock list order, press , and then tap Rearrange. Press and
hold at the end of the item you want to move, then drag it to its new
position.
3. When you've selected a particular stock quote or stock market index, you can:
§View an item’s trade information as well as its
price chart for a specific period.
§Slide to other tabs to view up to two years of
an item’s past trade information.
Adding a stock quote or stock market index
1. On the Stocks main screen, tap .
2. Enter the stock quote or stock market index on the text field, and then tap .
3. Tap the stock quote or stock market index you want to add.
To delete an item, press while on the Stocks main screen, and then tap Delete.
Select the items you want to delete, and then tap Delete.
133 Market and other apps
Only
Only
Only
for
for
for
for
certification
You can add this widget to the Home screen, if it’s not yet added.
certification
You can add this widget to the Home screen, if it’s not yet added.
Use the Stocks app to get the latest stock updates for stock quotes and market
certification
Use the Stocks app to get the latest stock updates for stock quotes and market
Stocks
certification
Stocks
.
certification
.
On the Stocks main screen, do any of the following:
certification
On the Stocks main screen, do any of the following:
Tap an item to view from the list of stock quotes and market indices.
certification
Tap an item to view from the list of stock quotes and market indices.
to update the stock information.
certification
to update the stock information.
to add a stock quote or stock market index.
certification
to add a stock quote or stock market index.
To change the stock list order, press
certification
To change the stock list order, press
at the end of the item you want to move, then drag it to its new
certification
at the end of the item you want to move, then drag it to its new
When you've selected a particular stock quote or stock market index, you can:
certification
When you've selected a particular stock quote or stock market index, you can:
certification
certification
2011/03/07
2011/03/07
2011/03/07
2011/03/07
an item’s past trade information.
2011/03/07
an item’s past trade information.
Adding a stock quote or stock market index
2011/03/07
Adding a stock quote or stock market index
2011/03/07
2011/03/07
2011/03/07
On the Stocks main screen, tap
2011/03/07
On the Stocks main screen, tap
Enter the stock quote or stock market index on the text field, and then tap
2011/03/07
Enter the stock quote or stock market index on the text field, and then tap
3.
2011/03/07
3.
Tap the stock quote or stock market index you want to add.
2011/03/07
Tap the stock quote or stock market index you want to add.
2011/03/07
To delete an item, press
2011/03/07
To delete an item, press
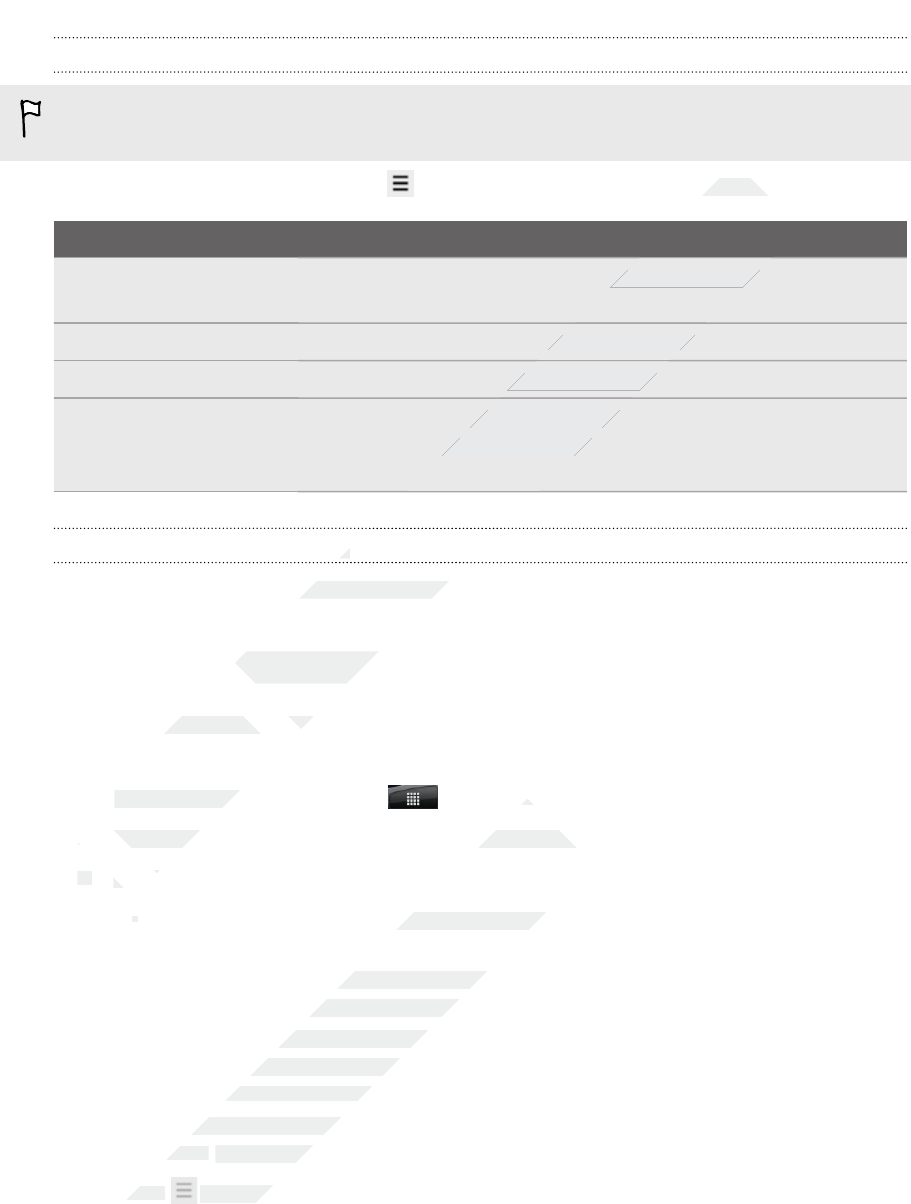
Changing update schedule and color settings
Downloading stock information automatically may incur additional fees from your
mobile operator.
On the Stocks main screen, press , and then tap Settings. Do any of the following:
Tap To
Update when opened Update the stock information every time you open the
Stocks app.
Scheduled sync Set automatic downloads of stock information.
Update schedule Choose a time interval for checking updates.
Set color for price raise Change the color for displaying stock price increases to
either red or green, depending on what’s being used in your
country.
About the Stocks widget
Use the Stocks widget to instantly check stock updates right on your Home screen.
Watching videos on YouTube
Use the YouTube app to check out what’s popular on the online video-sharing
website.
1. From the Home screen, tap > YouTube.
2. Scroll through the list of videos, and then tap a video to watch it.
3. While watching a video, you can:
§Turn your phone sideways or double-tap the screen to watch the video in
full screen.
§Tap the video screen to pause, resume playback, or drag the slider to jump
to a different part of the video.
§Tap a tab to learn more about the video, see related videos, or check out
what other viewers think. You can also slide your finger across the tabs to
see if there are more items available.
§Tap the thumbs-up or thumbs-down icon to add your video rating. Tap
More to see other options.
4. Press , and then tap Home to return to the YouTube main screen.
134 Market and other apps
Only
2.
Only
2.
3.
Only
3.
While watching a video, you can:
Only
While watching a video, you can:
§
Only
§
for
Use the YouTube app to check out what’s popular on the online video-sharing
for
Use the YouTube app to check out what’s popular on the online video-sharing
From the Home screen, tap
for
From the Home screen, tap
Scroll through the list of videos, and then tap a video to watch it.
for
Scroll through the list of videos, and then tap a video to watch it.
While watching a video, you can:
for
While watching a video, you can:
certification
. Do any of the following:
certification
. Do any of the following:
certification
certification
Update the stock information every time you open the
certification
Update the stock information every time you open the
Set automatic downloads of stock information.
certification
Set automatic downloads of stock information.
Choose a time interval for checking updates.
certification
Choose a time interval for checking updates.
Change the color for displaying stock price increases to
certification
Change the color for displaying stock price increases to
either red or green, depending on what’s being used in your
certification
either red or green, depending on what’s being used in your
certification
certification
certification
certification
certification
About the Stocks widget
certification
About the Stocks widget
certification
certification
certification
Use the Stocks widget to instantly check stock updates right on your Home screen.
certification
Use the Stocks widget to instantly check stock updates right on your Home screen.
Watching videos on YouTube
certification
Watching videos on YouTube
Use the YouTube app to check out what’s popular on the online video-sharing
certification
Use the YouTube app to check out what’s popular on the online video-sharing
2011/03/07
YouTube
2011/03/07
YouTube
Scroll through the list of videos, and then tap a video to watch it.
2011/03/07
Scroll through the list of videos, and then tap a video to watch it.
Turn your phone sideways or double-tap the screen to watch the video in
2011/03/07
Turn your phone sideways or double-tap the screen to watch the video in
Tap the video screen to pause, resume playback, or drag the slider to jump
2011/03/07
Tap the video screen to pause, resume playback, or drag the slider to jump
to a different part of the video.
2011/03/07
to a different part of the video.
Tap a tab to learn more about the video, see related videos, or check out
2011/03/07
Tap a tab to learn more about the video, see related videos, or check out
what other viewers think. You can also slide your finger across the tabs to
2011/03/07
what other viewers think. You can also slide your finger across the tabs to
2011/03/07
see if there are more items available.
2011/03/07
see if there are more items available.
Tap the thumbs-up or thumbs-down icon to add your video rating. Tap
2011/03/07
Tap the thumbs-up or thumbs-down icon to add your video rating. Tap
More
2011/03/07
More
to see other options.
2011/03/07
to see other options.
Press
2011/03/07
Press
2011/03/07
, and then tap
2011/03/07
, and then tap
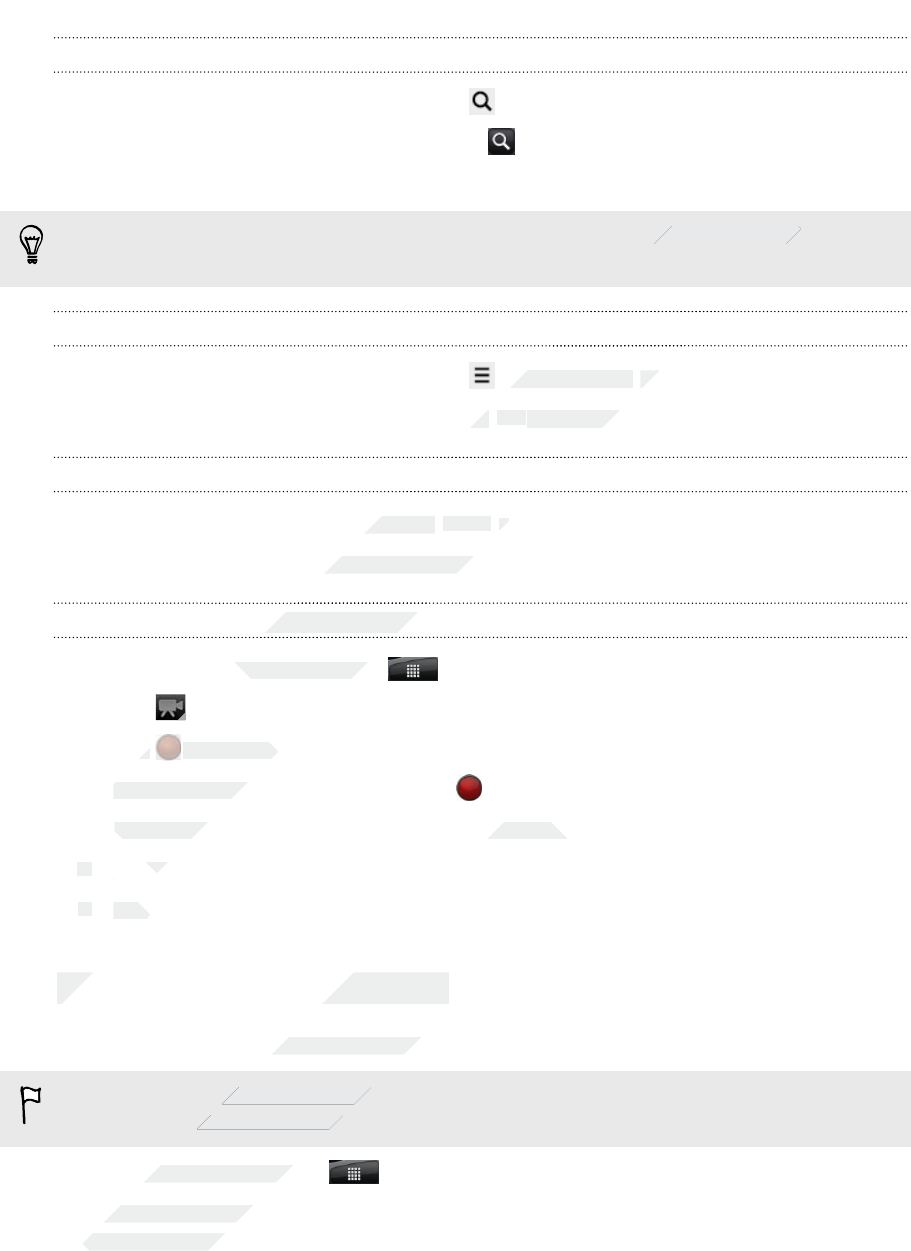
Searching for videos
1. On the YouTube main screen, press .
2. Enter a search keyword, and then tap .
3. Scroll through the results and tap a video to watch it.
You also have the option to show results that were just recently posted. Tap All
time, and then select a time period you want.
Clearing the search history
1. On the YouTube main screen, press , and then tap Settings.
2. Tap Clear search history, and then tap OK when prompted.
Sharing a video link
1. On the video’s watch screen, tap More > Share.
2. Choose how you want to share the video link from the available options.
Capturing and sharing videos on YouTube
1. From the Home screen, tap > YouTube.
2. Tap .
3. Tap to start capturing video.
4. When you are done capturing, tap again.
5. Enter a title, description, and tags for your video.
6. Set the privacy level.
7. Tap Upload.
Listening to FM Radio
Tune in and listen to chart-topping pop songs using your phone’s FM Radio app.
You need to connect a headset first to the audio jack of your phone to use FM
Radio. FM Radio uses the stereo headset as the FM radio antenna.
From the Home screen, tap > FM Radio.
The first time you open FM Radio, it automatically scans for available FM stations,
saves them as presets, and plays the first FM station found.
135 Market and other apps
Only
6.
Only
6.
Set the privacy level.
Only
Set the privacy level.
7.
Only
7.
Tap
Only
Tap
Listening to FM Radio
Only
Listening to FM Radio
for
for
.
for
.
Tap
for
Tap
for
to start capturing video.
for
to start capturing video.
When you are done capturing, tap
for
When you are done capturing, tap
Enter a title, description, and tags for your video.
for
Enter a title, description, and tags for your video.
Set the privacy level.
for
Set the privacy level.
certification
certification
You also have the option to show results that were just recently posted. Tap
certification
You also have the option to show results that were just recently posted. Tap
certification
certification
, and then tap
certification
, and then tap
Settings
certification
Settings
, and then tap
certification
, and then tap
OK
certification
OK
when prompted.
certification
when prompted.
certification
certification
certification
On the video’s watch screen, tap
certification
On the video’s watch screen, tap
More
certification
More
>
certification
>
Choose how you want to share the video link from the available options.
certification
Choose how you want to share the video link from the available options.
Capturing and sharing videos on YouTube
certification
Capturing and sharing videos on YouTube
certification
certification
certification
From the Home screen, tap
certification
From the Home screen, tap
2011/03/07
again.
2011/03/07
again.
Enter a title, description, and tags for your video.
2011/03/07
Enter a title, description, and tags for your video.
Listening to FM Radio
2011/03/07
Listening to FM Radio
Tune in and listen to chart-topping pop songs using your phone’s FM Radio app.
2011/03/07
Tune in and listen to chart-topping pop songs using your phone’s FM Radio app.
2011/03/07
2011/03/07
You need to connect a headset first to the audio jack of your phone to use FM
2011/03/07
You need to connect a headset first to the audio jack of your phone to use FM
Radio. FM Radio uses the stereo headset as the FM radio antenna.
2011/03/07
Radio. FM Radio uses the stereo headset as the FM radio antenna.
From the Home screen, tap
2011/03/07
From the Home screen, tap
2011/03/07
The first time you open FM Radio, it automatically scans for available FM stations,
2011/03/07
The first time you open FM Radio, it automatically scans for available FM stations,
saves them as presets, and plays the first FM station found.
2011/03/07
saves them as presets, and plays the first FM station found.
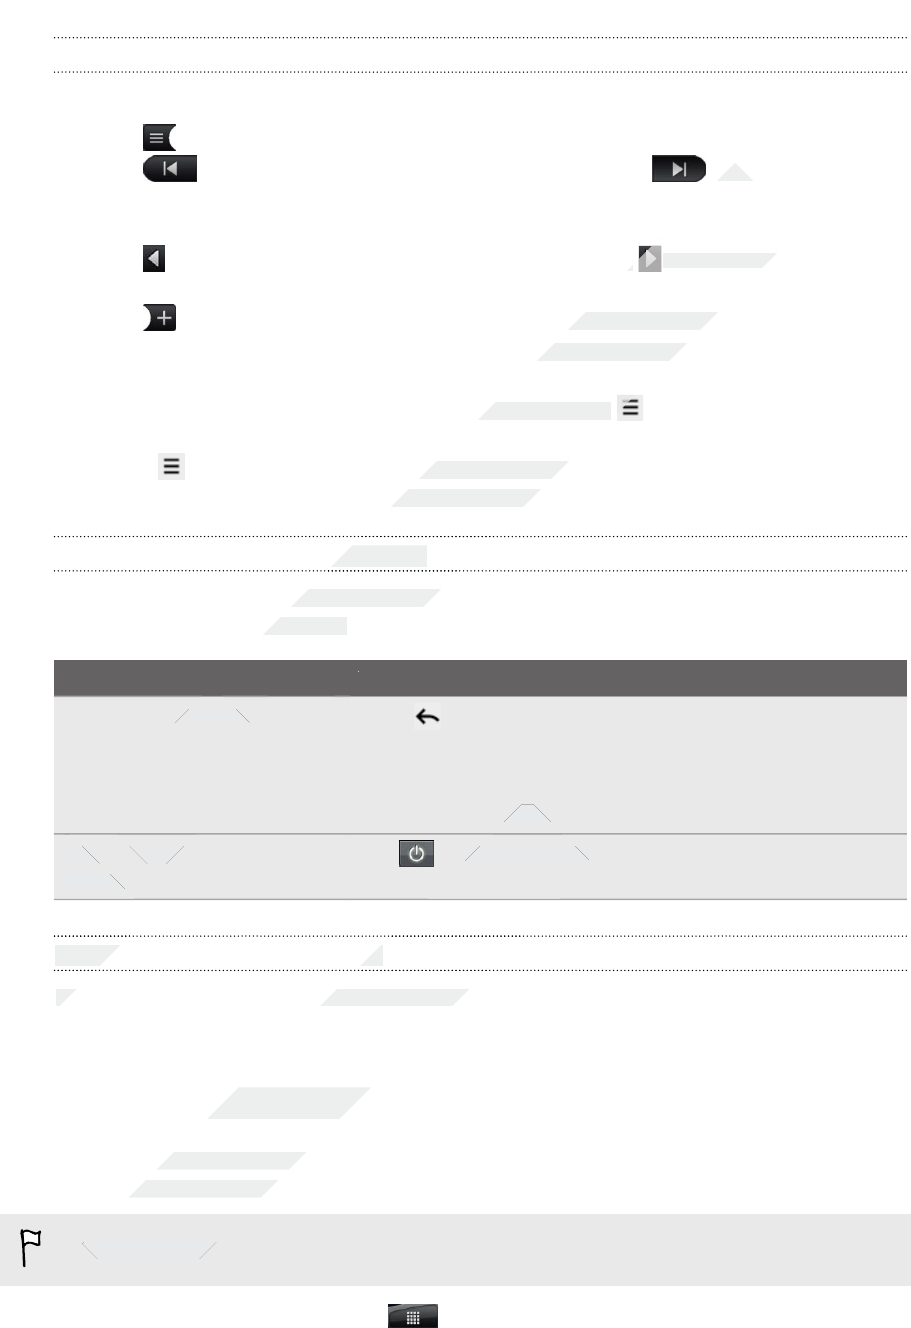
Tuning in to an FM station
There are several things you can do while you’re on the FM Radio screen:
§Tap to view the All presets list, and then select a station you want to listen to.
§Tap to go to the previous available FM station, or to go to the next
available FM station.
§Drag the slider to tune in to a frequency on the FM band.
§Tap to fine tune the radio frequency by -0.1 MHz or to fine tune the radio
frequency by +0.1 MHz.
§Tap to add a preset name for the current station you are tuned into.
§Press the VOLUME UP and VOLUME DOWN buttons on the side of the phone to
adjust the volume.
§To repeat scanning and saving of FM stations, press , and then tap Scan &
Save.
§Press to mute the sound or to change the sound output to Mono or Stereo.
You can also switch the sound output between the Speaker and Headset.
Closing or turning off FM Radio
You can continue listening to the radio while using other apps on your phone or close
the FM Radio app completely.
To Do this
To close the FM Radio
screen
Press . FM Radio continues to run in the
background.
To go back to the FM Radio screen, slide open the
Notifications panel, and then tap FM Radio.
To turn off completely and
close FM Radio
Tap on the FM Radio screen.
About the FM Radio widget
Use the FM Radio widget to listen to your favorite FM stations right on your Home
screen.
Recording your voice
Don’t just think out loud. Use Voice Recorder to quickly capture your thoughts. You
can also record your voice and set it as a ringtone.
You need to have a storage card on your phone to use Voice Recorder.
1. From the Home screen, tap > Voice Recorder.
2. Hold the phone’s microphone near your mouth.
136 Market and other apps
Only
Only
To turn off completely and
Only
To turn off completely and
close FM Radio
Only
close FM Radio
Only
Only
About the FM Radio widget
Only
About the FM Radio widget
Only
Only
Use the FM Radio widget to listen to your favorite FM stations right on your Home
Only
Use the FM Radio widget to listen to your favorite FM stations right on your Home
for
for
To close the FM Radio
for
To close the FM Radio
To turn off completely and
for
To turn off completely and
for
for
certification
to go to the next
certification
to go to the next
Drag the slider to tune in to a frequency on the FM band.
certification
Drag the slider to tune in to a frequency on the FM band.
to fine tune the radio frequency by -0.1 MHz or
certification
to fine tune the radio frequency by -0.1 MHz or
certification
to fine tune the radio
certification
to fine tune the radio
to add a preset name for the current station you are tuned into.
certification
to add a preset name for the current station you are tuned into.
Press the VOLUME UP and VOLUME DOWN buttons on the side of the phone to
certification
Press the VOLUME UP and VOLUME DOWN buttons on the side of the phone to
To repeat scanning and saving of FM stations, press
certification
To repeat scanning and saving of FM stations, press
certification
to mute the sound or to change the sound output to
certification
to mute the sound or to change the sound output to
You can also switch the sound output between the
certification
You can also switch the sound output between the
Closing or turning off FM Radio
certification
Closing or turning off FM Radio
certification
certification
You can continue listening to the radio while using other apps on your phone or close
certification
You can continue listening to the radio while using other apps on your phone or close
the FM Radio app completely.
certification
the FM Radio app completely.
certification
certification
Do this
certification
Do this
certification
2011/03/07
2011/03/07
Notifications panel, and then tap
2011/03/07
Notifications panel, and then tap
on the FM Radio screen.
2011/03/07
on the FM Radio screen.
2011/03/07
2011/03/07
About the FM Radio widget
2011/03/07
About the FM Radio widget
2011/03/07
2011/03/07
2011/03/07
Use the FM Radio widget to listen to your favorite FM stations right on your Home
2011/03/07
Use the FM Radio widget to listen to your favorite FM stations right on your Home
Recording your voice
2011/03/07
Recording your voice
Don’t just think out loud. Use Voice Recorder to quickly capture your thoughts. You
2011/03/07
Don’t just think out loud. Use Voice Recorder to quickly capture your thoughts. You
can also record your voice and set it as a ringtone.
2011/03/07
can also record your voice and set it as a ringtone.
2011/03/07
You need to have a storage card on your phone to use Voice Recorder.
2011/03/07
You need to have a storage card on your phone to use Voice Recorder.
From the Home screen, tap
2011/03/07
From the Home screen, tap
3. Tap to start recording a voice clip.
Voice Recorder can run on the background while you do other things on your
phone, except when you open other apps that also use audio functions. To go back
to the Voice Recorder screen, slide open the Notifications panel, and then tap Voice
Recorder.
4. Tap to stop recording.
5. Type a name for the voice clip and tap Save.
6. To play back the voice clip, tap .
7. To show options for sharing, deleting, or renaming the voice clip, press .
Sharing a voice clip
1. On the Voice Recorder screen, tap .
2. Press and hold the voice clip you want to share, and then tap Share.
3. From the available options, choose how you want to share the voice clip.
Setting a voice clip as a ringtone
1. On the Voice Recorder screen, tap .
2. Press and hold the voice clip you want to set as a ringtone, and then tap Set as
ringtone.
Sharing games and apps
Having fun with a game or app that you found from Android Market? Share your
favorite games and apps instantly with your circle of friends.
For your friends to link to the app and download it from Android Market, they must
be using an Android phone.
1. From the Home screen, tap .
2. Press , and then tap Share. You’ll then see the list of games and apps that you
downloaded and installed from Android Market.
3. Tap an app, and then choose how to share it.
When your friends see the link in your sent message, email, or status update, they can
simply tap the link to go directly to the game or app in Android Market to download it.
§While entering your status update in Friend Stream, you can also tap to choose
from games or apps that you want to share in your social networks.
§If you’ve already created a new text or email message, press and then tap
Attach > App recommendation to choose from your list of installed games and
apps.
137 Market and other apps
Only
Having fun with a game or app that you found from Android Market? Share your
Only
Having fun with a game or app that you found from Android Market? Share your
favorite games and apps instantly with your circle of friends.
Only
favorite games and apps instantly with your circle of friends.
Only
Only
Only
Only
Only
Only
Only
Only
Only
Only
Only
Only
Only
For your friends to link to the app and download it from Android Market, they must
Only
For your friends to link to the app and download it from Android Market, they must
be using an Android phone.
Only
be using an Android phone.
for
Press and hold the voice clip you want to set as a ringtone, and then tap
for
Press and hold the voice clip you want to set as a ringtone, and then tap
ringtone
for
ringtone
.
for
.
Sharing games and apps
for
Sharing games and apps
Having fun with a game or app that you found from Android Market? Share your
for
Having fun with a game or app that you found from Android Market? Share your
favorite games and apps instantly with your circle of friends.
for
favorite games and apps instantly with your circle of friends.
certification
certification
to the Voice Recorder screen, slide open the Notifications panel, and then tap
certification
to the Voice Recorder screen, slide open the Notifications panel, and then tap
To show options for sharing, deleting, or renaming the voice clip, press
certification
To show options for sharing, deleting, or renaming the voice clip, press
certification
certification
On the Voice Recorder screen, tap
certification
On the Voice Recorder screen, tap
certification
.
certification
.
Press and hold the voice clip you want to share, and then tap
certification
Press and hold the voice clip you want to share, and then tap
From the available options, choose how you want to share the voice clip.
certification
From the available options, choose how you want to share the voice clip.
Setting a voice clip as a ringtone
certification
Setting a voice clip as a ringtone
certification
certification
certification
On the Voice Recorder screen, tap
certification
On the Voice Recorder screen, tap
Press and hold the voice clip you want to set as a ringtone, and then tap
certification
Press and hold the voice clip you want to set as a ringtone, and then tap
2011/03/07
Having fun with a game or app that you found from Android Market? Share your
2011/03/07
Having fun with a game or app that you found from Android Market? Share your
favorite games and apps instantly with your circle of friends.
2011/03/07
favorite games and apps instantly with your circle of friends.
2011/03/07
2011/03/07
2011/03/07
2011/03/07
For your friends to link to the app and download it from Android Market, they must
2011/03/07
For your friends to link to the app and download it from Android Market, they must
From the Home screen, tap
2011/03/07
From the Home screen, tap
2011/03/07
.
2011/03/07
.
, and then tap
2011/03/07
, and then tap
Share
2011/03/07
Share
. You’ll then see the list of games and apps that you
2011/03/07
. You’ll then see the list of games and apps that you
downloaded and installed from Android Market.
2011/03/07
downloaded and installed from Android Market.
Tap an app, and then choose how to share it.
2011/03/07
Tap an app, and then choose how to share it.
When your friends see the link in your sent message, email, or status update, they can
2011/03/07
When your friends see the link in your sent message, email, or status update, they can
simply tap the link to go directly to the game or app in Android Market to download it.
2011/03/07
simply tap the link to go directly to the game or app in Android Market to download it.
2011/03/07
While entering your status update in Friend Stream, you can also tap
2011/03/07
While entering your status update in Friend Stream, you can also tap
from games or apps that you want to share in your social networks.
2011/03/07
from games or apps that you want to share in your social networks.
If you’ve already created a new text or email message, press
2011/03/07
If you’ve already created a new text or email message, press

HTC Sync
About HTC Sync
You have your new vacation photos on your phone while your business calendar is on
your computer. Why not make these types of files and information available on both
devices?
With HTC Sync, you can:
§Sync your contacts between your Microsoft Outlook, Outlook Express or
Windows Contacts on your computer and your phone.
§Sync your calendar events between the Outlook or Windows Calendar on your
computer and your phone.
§Bring your photos, videos, documents, songs, and playlists to your phone and
enjoy them on the go.
§Easily import your captured photos and videos from your phone to your
computer.
§Store the same bookmarks on both your computer and phone's web browsers.
§Install third-party mobile phone apps (not downloaded from Android Market)
from your computer.
§You need a storage card inserted into your phone to be able to sync multimedia
files, maps, and documents.
§The available categories and options depend on the phone you've connected to
your computer.
138 HTC Sync
Only
Only
Only
Only
files, maps, and documents.
Only
files, maps, and documents.
§
Only
§
The available categories and options depend on the phone you've connected to
Only
The available categories and options depend on the phone you've connected to
your computer.
Only
your computer.
for
Store the same bookmarks on both your computer and phone's web browsers.
for
Store the same bookmarks on both your computer and phone's web browsers.
Install third-party mobile phone apps (not downloaded from Android Market)
for
Install third-party mobile phone apps (not downloaded from Android Market)
from your computer.
for
from your computer.
for
You need a storage card inserted into your phone to be able to sync multimedia
for
You need a storage card inserted into your phone to be able to sync multimedia
files, maps, and documents.
for
files, maps, and documents.
certification
You have your new vacation photos on your phone while your business calendar is on
certification
You have your new vacation photos on your phone while your business calendar is on
your computer. Why not make these types of files and information available on both
certification
your computer. Why not make these types of files and information available on both
Sync your contacts between your Microsoft Outlook, Outlook Express or
certification
Sync your contacts between your Microsoft Outlook, Outlook Express or
Windows Contacts on your computer and your phone.
certification
Windows Contacts on your computer and your phone.
Sync your calendar events between the Outlook or Windows Calendar on your
certification
Sync your calendar events between the Outlook or Windows Calendar on your
computer and your phone.
certification
computer and your phone.
Bring your photos, videos, documents, songs, and playlists to your phone and
certification
Bring your photos, videos, documents, songs, and playlists to your phone and
enjoy them on the go.
certification
enjoy them on the go.
Easily import your captured photos and videos from your phone to your
certification
Easily import your captured photos and videos from your phone to your
Store the same bookmarks on both your computer and phone's web browsers.
certification
Store the same bookmarks on both your computer and phone's web browsers.
2011/03/07
2011/03/07
You need a storage card inserted into your phone to be able to sync multimedia
2011/03/07
You need a storage card inserted into your phone to be able to sync multimedia
2011/03/07
2011/03/07
The available categories and options depend on the phone you've connected to
2011/03/07
The available categories and options depend on the phone you've connected to