HTC VOYAGER SmartPhone User Manual voyager um aContents indd
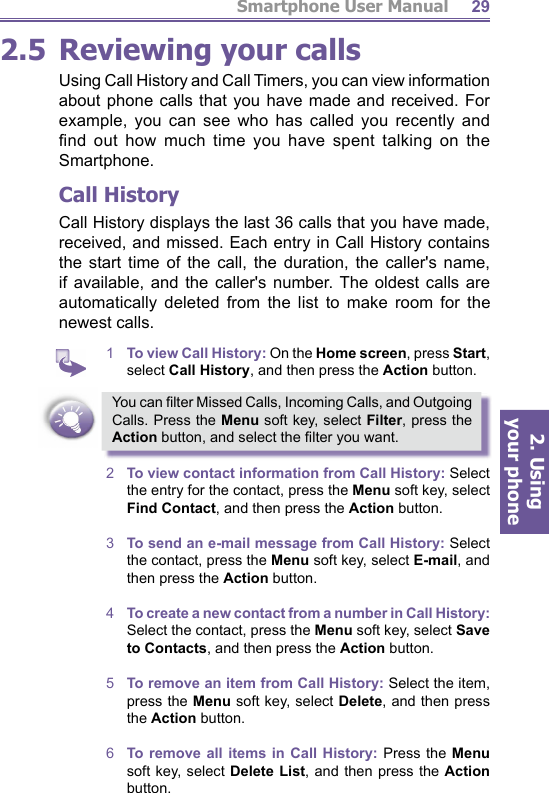
HTC Corporation SmartPhone voyager um aContents indd
UserManual.wiki
>
HTC
>
VOYAGER User Manual
>
User Manual Part I
Contents
1.
User Manual Part I
2.
User Manual Part II
3.
Users Manual Part I
User Manual Part I
Navigation menu
Upload a User Manual
Namespaces
Wiki Guide
HTML
PDF
Info
Views
User Manual
Discussion / Help
Navigation


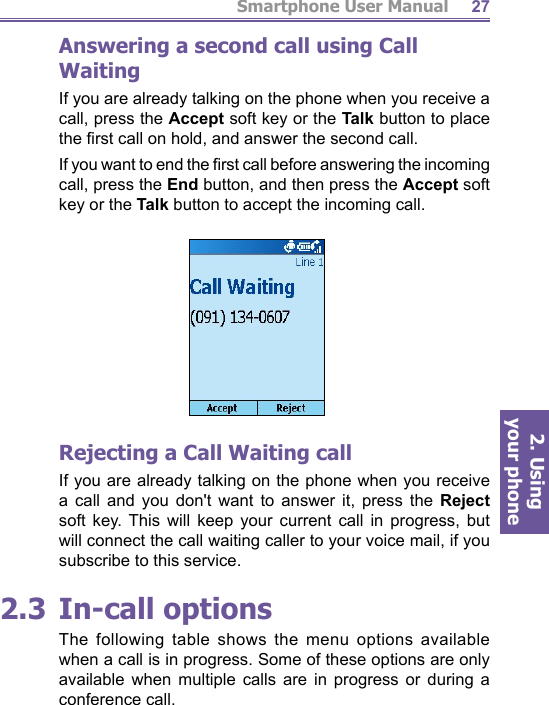

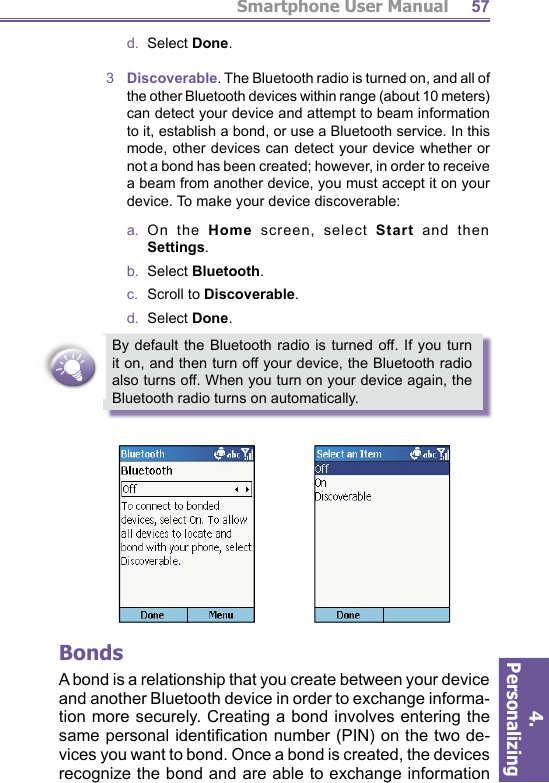
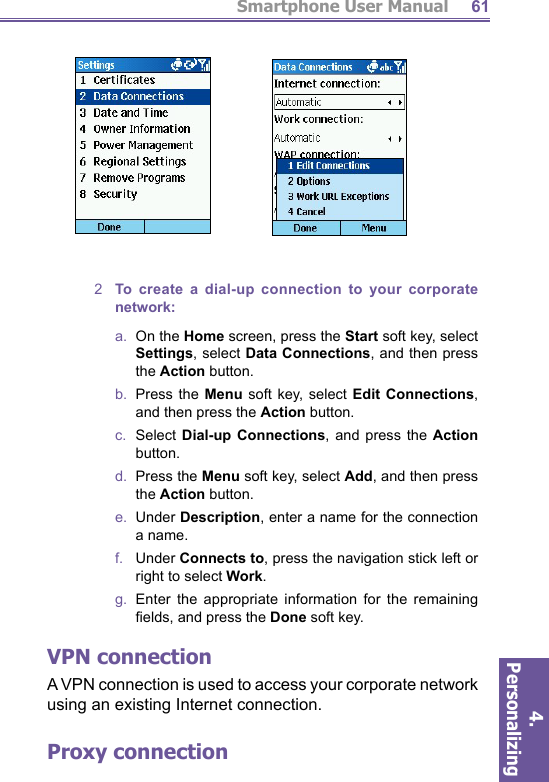
![Smartphone User Manual4. Personalizing 51The following table shows the list of profi les that come with your phone and their attributes.your phone ring loudly.1 To view Profi les settings: On the Home screen, press the Start soft key, select Settings, select Profi les, and then press the Action button.2 To use preset profi les: a. On the Home screen, press the navigation stick down to select Profi les: [Type], and then press the Action button.b. Select the profi le, press the Action button to set the profi le, and then press the Done soft key.You can also select a different profi le using the Quick List. Press the Power button, select the profi le, and then press the Action button.Profi le Name Ring Type Ring Volume Notification Type Notification Volume Feedback VolumeNormal Ring 3 Play sound 33Silent Vibrate Off Vibrate Off OffMeeting Vibrate 1 Sound 1 OffLoud Ring Loud Sound Loud LoudAutomatic (Toggles between Normal & Meeting, based on Calendar)Headset Ring 3 Sound 3 3 Car Ring 4 Sound 4 4Ring Loud Sound Loud Loud](https://usermanual.wiki/HTC/VOYAGER.User-Manual-Part-I/User-Guide-372276-Page-51.png)