HWASUNG SYSTEM HP-500 Thermal Mobile Printer User Manual
HWASUNG SYSTEM CO., LTD Thermal Mobile Printer
User Manual
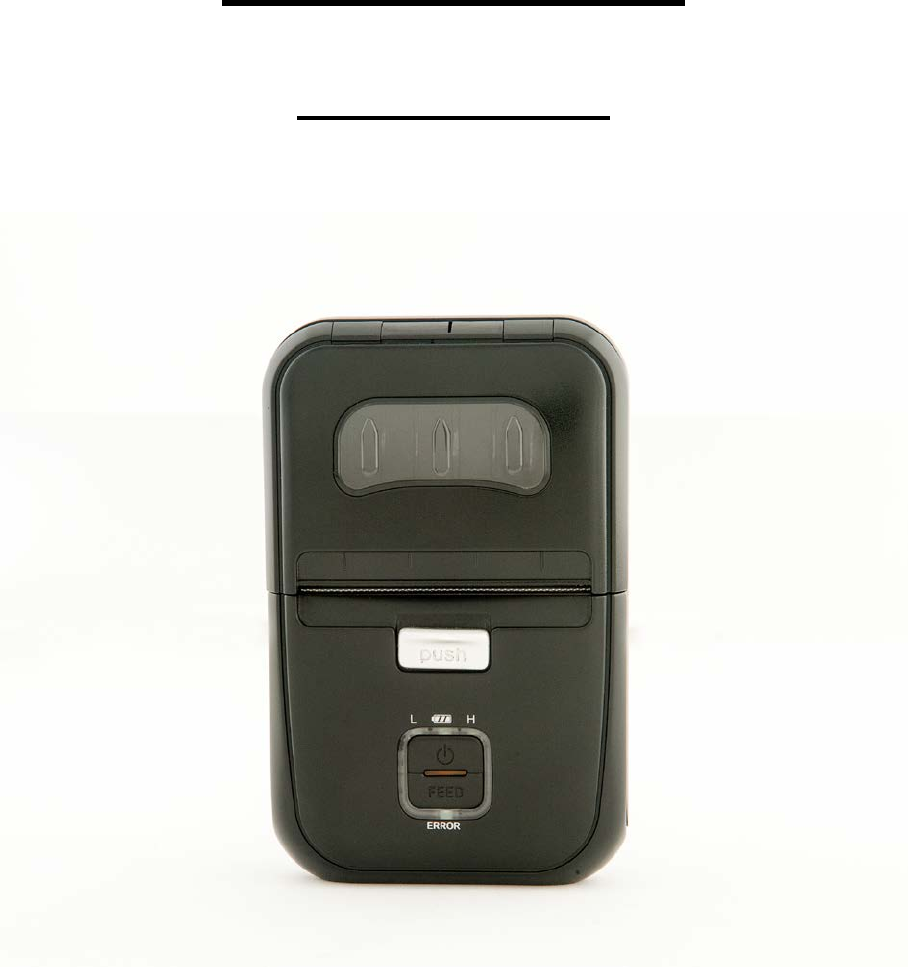
Technical Manual
(Model : HP-500)
CAUTION
• Please do not disassemble / reorganize the product.
• Please do not the remove the paper jam during power on.
• Pleased do not exceed the standard power voltage.
• Please do not wash off the product.
• Please do not press / shock the product.
• Please do not put the product at the moist (humid) condition.
• Please contact us if there is any problem.
• Please power off once remove the paper jam.
• Please clear the air / open the disclosed place.
• Please set the product without damage enviornment.
• Please set the product at the stable place.
• Pleaes keep the requires as necessary as general electrics.
Title Rev. Page
HP-500 Ver 1 Ver1.0 P.1
목 차
1. Printer features & External dimension 3
1-1) Name of each parts 3
1-2) Operation Part 4
2. Operation 5
2-1) Replacing the roll of paper 5
2-2) Self test 6
2-3) Communicatino Setting up 7
2-4) HEX Dump 8
2-5) Update 9
2-6) Memory switch 10
2-7) Way of connecting WiFi or Bluetoorh 13
(RF Interface)
3. Genearl Specification 13
3-1) Specification 13
3-2) Font 13
3-3) Inner Buffer 13
3-4) Electronical Spec 13
3-5) Operation condition 13
3-6) MCBF 13
4. Interface Specification 14
4-1)RS-232C 14
4-2)USB 14
4-3)WiFi 14
4-4)BlueTooth 14
5. Command 15
6.Windows Driver 40
6-1) Set up the function 40
6-2) Set up the paper 41
6-3) Set up the new paper 42
7. USB User Interface 44
7-1)
functions 44
7-2) Caution for using USB Interface 46
Title Rev. Page
HP-500 Ver 1 Ver1.0 P. 2
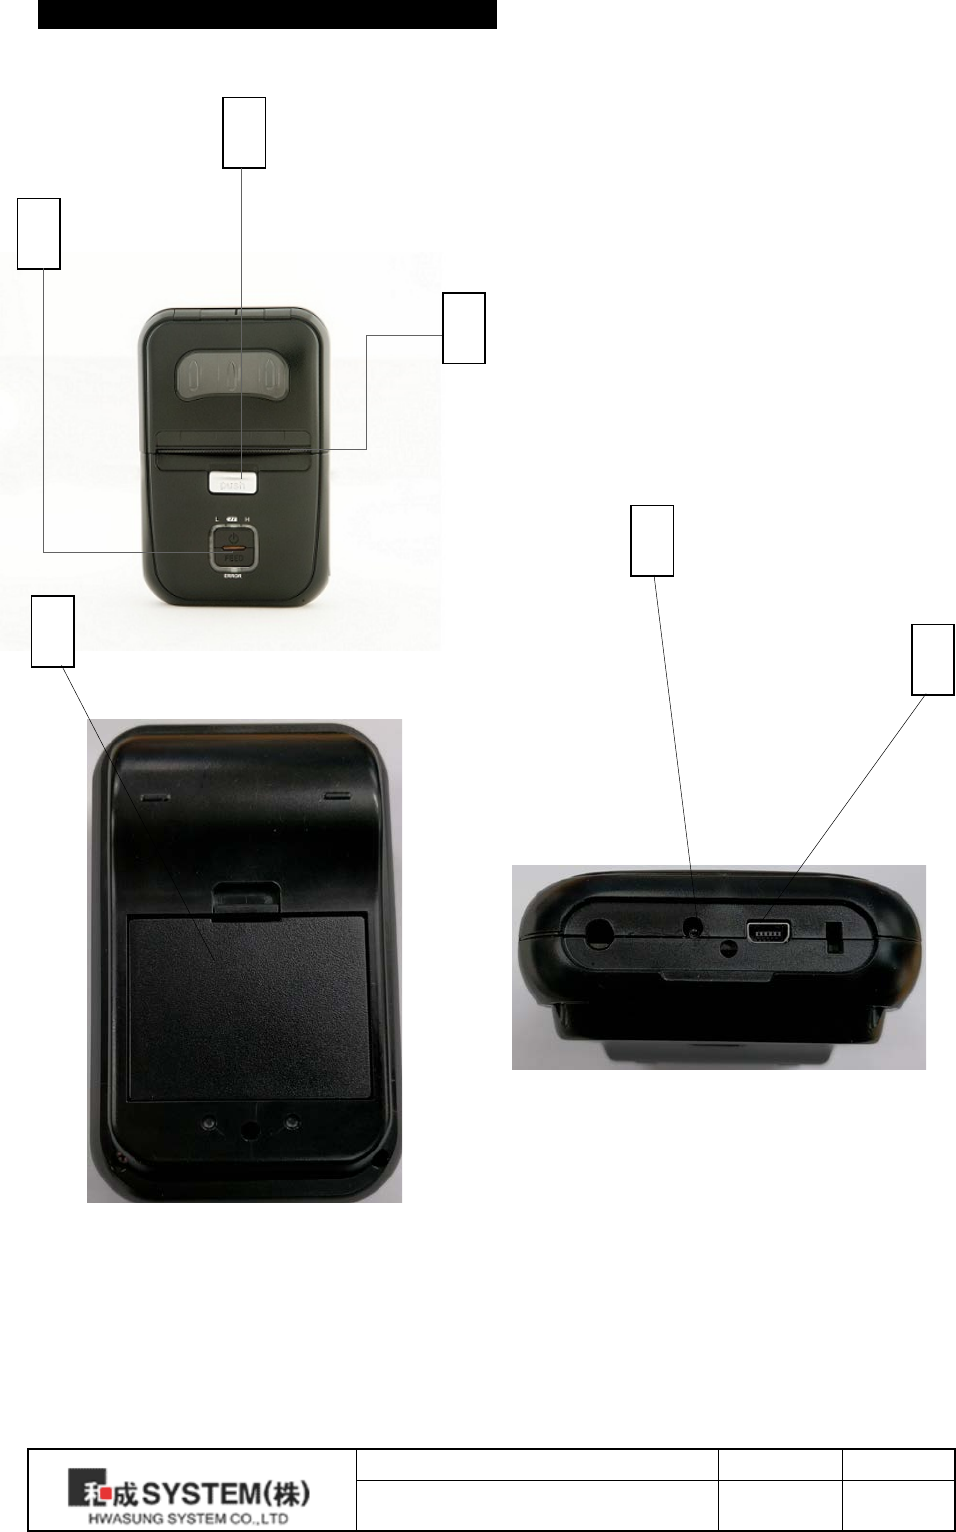
1. Printer features & External Dimension
1-1) Name of each parts
1. Button and LED
2. Open Lever
3. Maual Cutter
4. Battery
5. DC Connect
6. USB/RS232C Interface
1
2
3
4
5
6
Title Rev. Page
HP-500 Ver 1 Ver1.0 P. 3
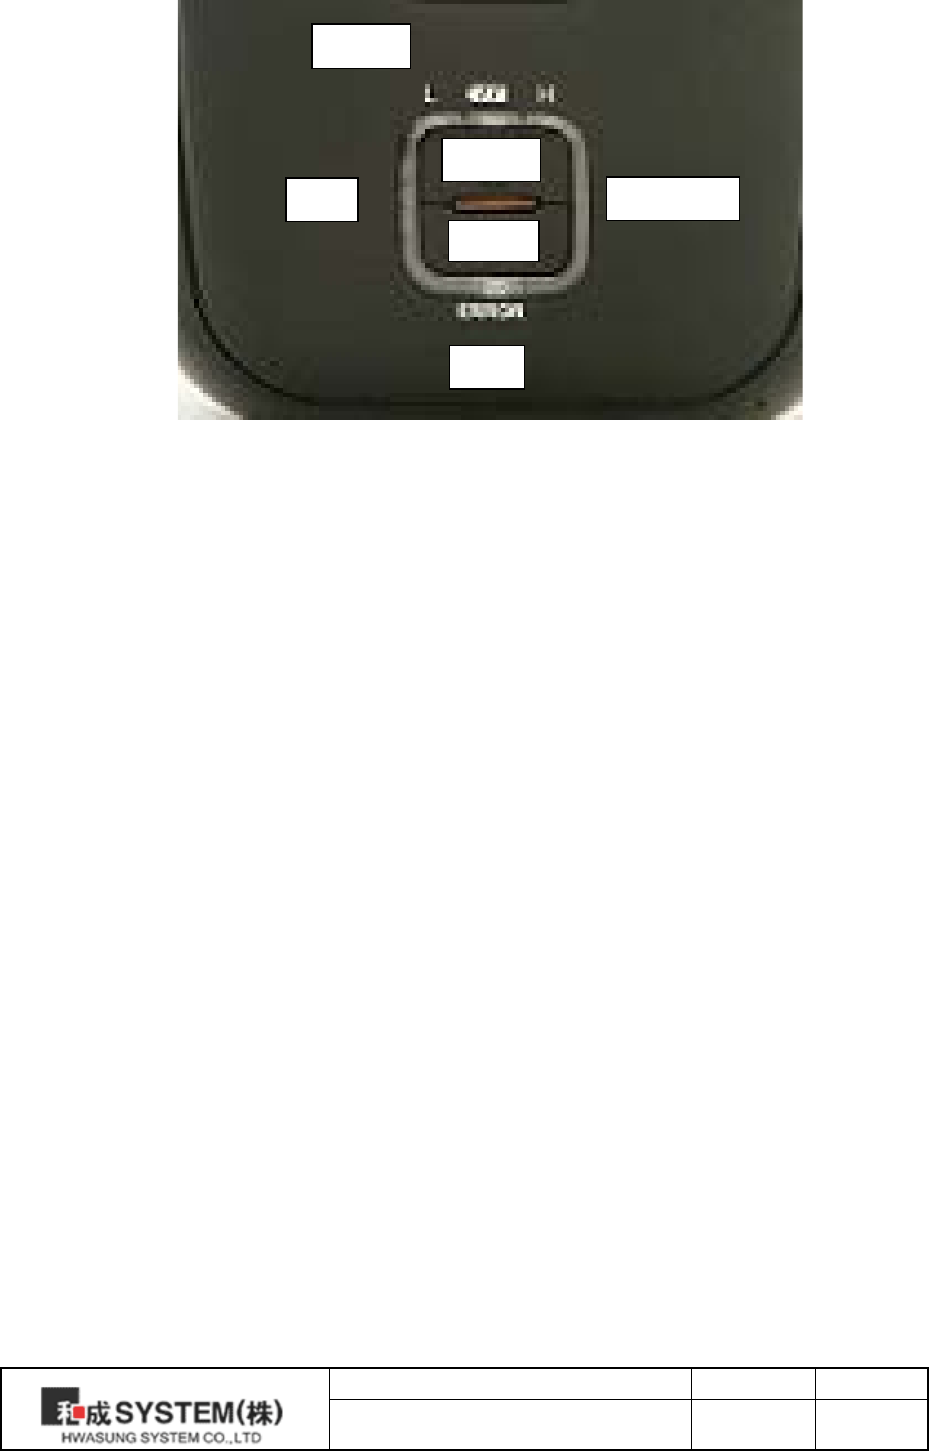
1-2) Operation Parts
* Battary State
3 light is “ Full “ charged.
2 light is “ Middle “ Charged
1 light is “ Low “ it needed to be charged.
If the light in Error LED is “ Very Low “ in a battary
* Power
Power on : Please press the button for 1 sec more.
Power off : Please press the button for 1 sec more.
* FEED
Paper feeding .
* Error
If there is something worng, it will be light as Red when there is no paper or out of bettary
* WiFi and Bluetooth
When operating WiFi or BlueTooth, the LED indicator will be lighting.
* Setting the Lable.
You can use the label paper after setting label option.
① Power on the printer
② Open the paper cover and Press the FEED button for 2 seconds.
③ When Melody is alaming, Put the paper of label in the printer and close the paper cover.
When it comes back to Receipt Option, Please follow this step again.
Battery
WiFi BlueTooth
Error
Power
FEED
Title Rev. Page
HP-500 Ver 1 Ver1.0 P. 4
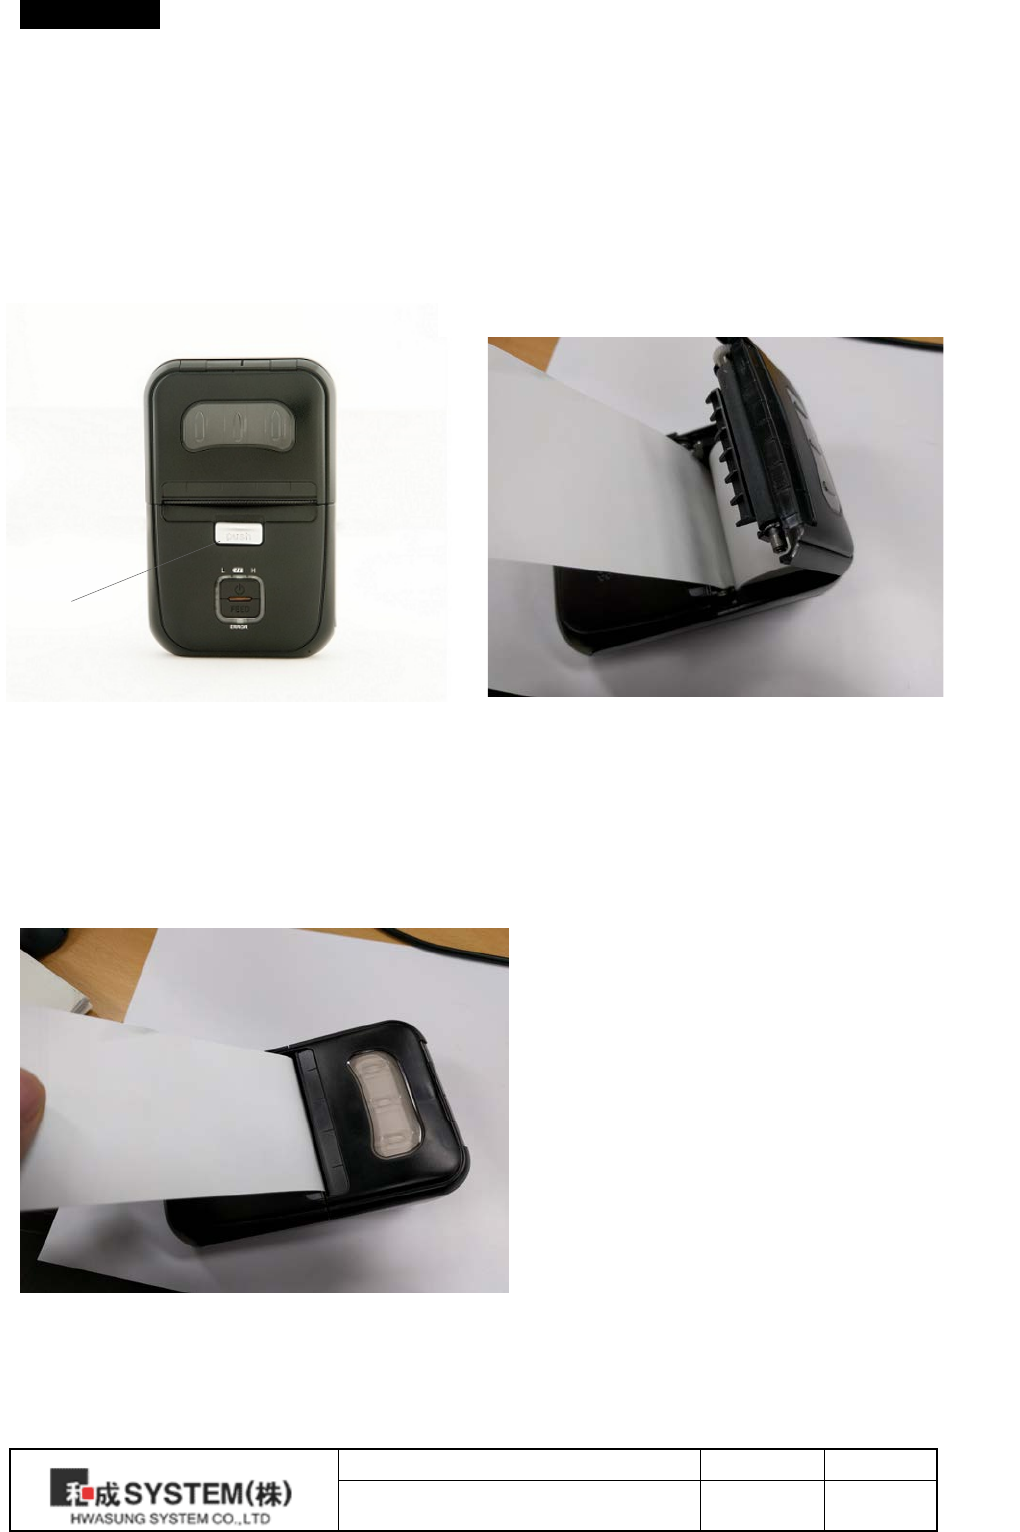
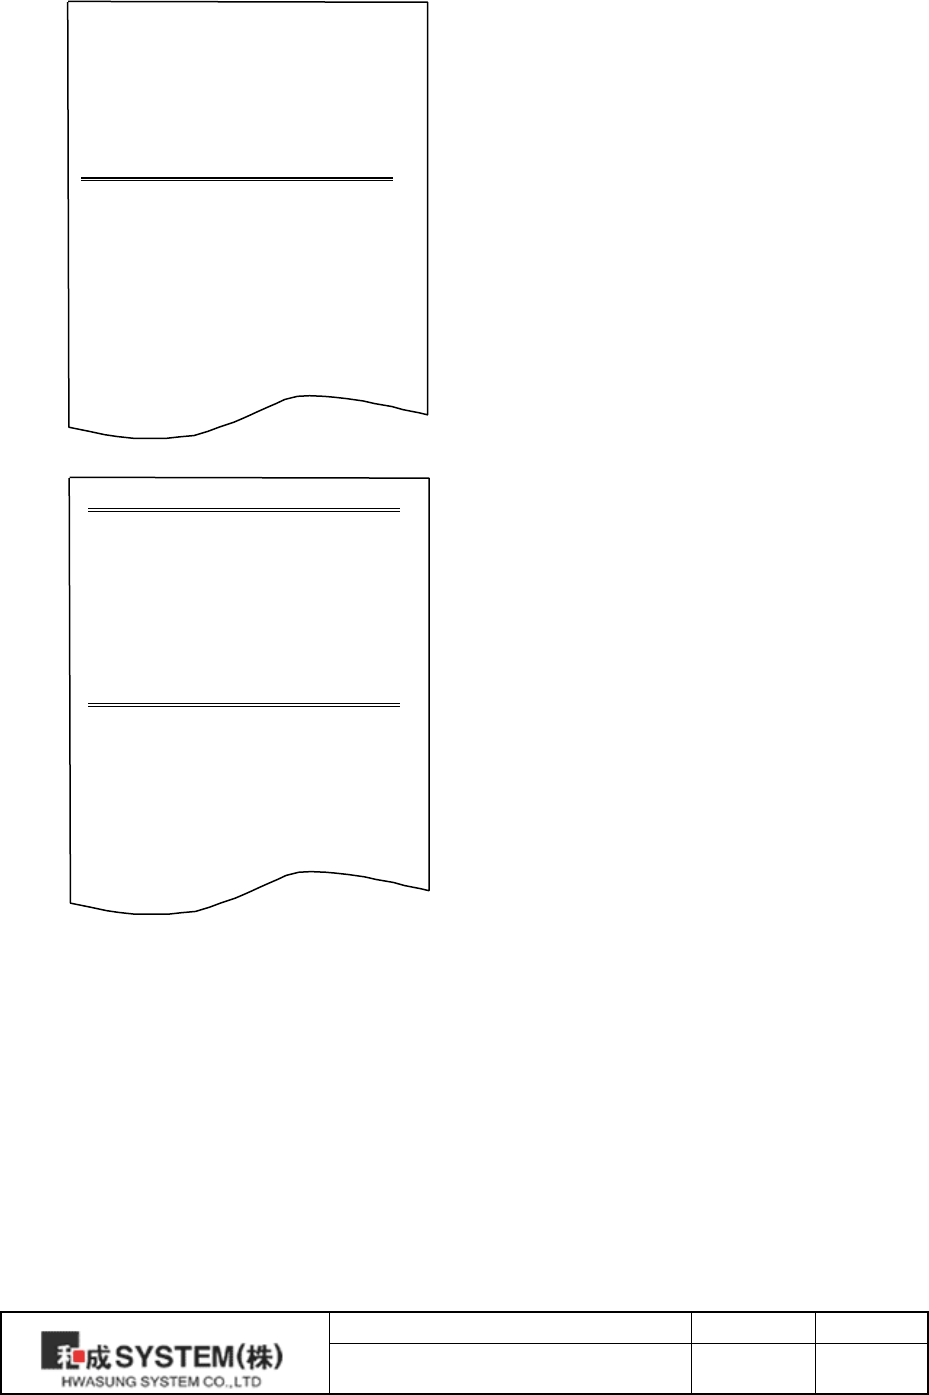
2. Operation
2-1) Replacing the roll of paper.
The paper setting up is as below.
Lever
②
Please insert the paper, till the paper comes out from
the cover.
①
Open the cover in Mobile Printer by Lever
③
Close the cover and cut the extra paper.
Title Rev. Page
HP-500 Ver 1 Ver1.0 P. 5
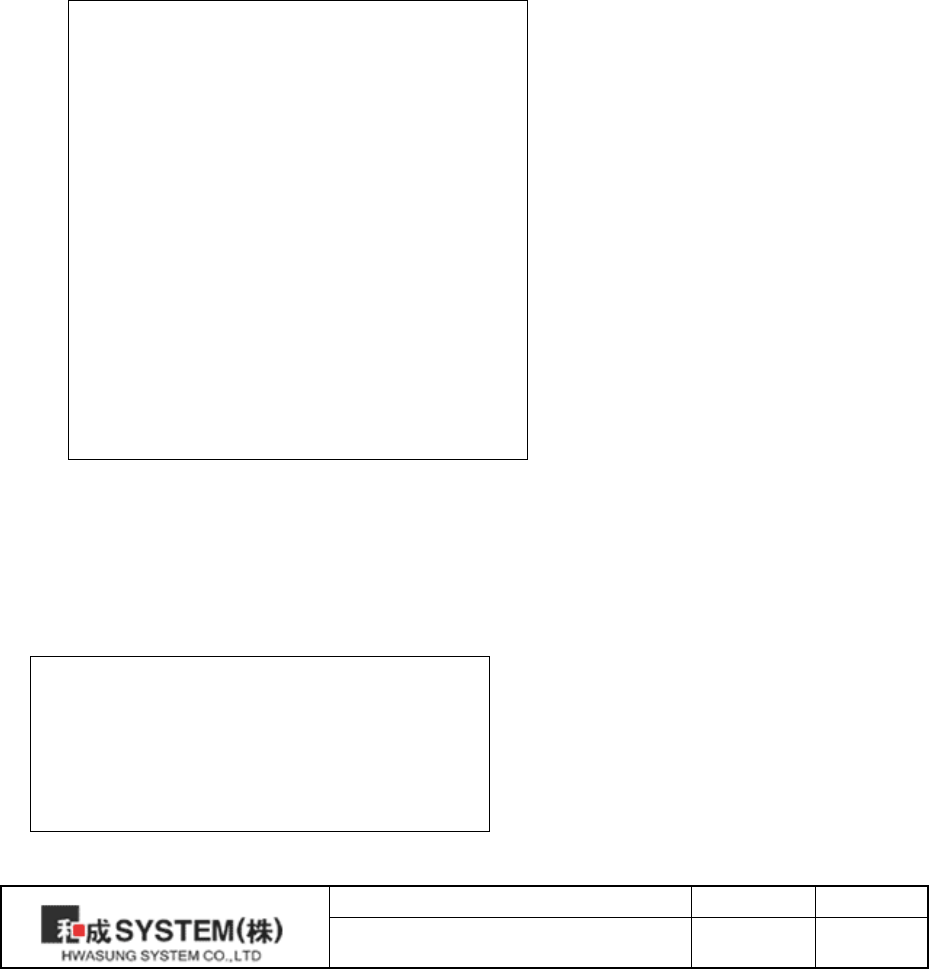
2-2 ) Selftest
Please turn off and on the power, while you press down the feed button.
And you can see the Error Led light kept then the following informations are being feeded.
Model.
Firmware version / creare date.
Printer information.
Serial I/F information
WiFi information
******************************
HP-500 Control Board
Firmware :: Ver0 .45
Create : 20XX/XX/XX
******************************
Printer Information
Battery Volt : 7.7(V)
Hex Dump Mode : OFF
Print Density : Normal
Melody Sound : ON
Paper Type : Receipt
Wireless Type : WiFi / BlueTooth
Power off time : 10 Minute
Tear Bar : 5 Pitch
Serial I/F Information
Baud Rate : 9600
Date Bit : 8 bit
Partiy : None
Stop Bit : 1 or 2
Flow Control : RTS-CTS(DTR-DSR)
WiFi Information
WiFi Mode : AP Mode
IP Address : 192.168.012.101
Gateway : 192.168.012.001
SSID : HWASUNG_4E:8E:EE
SECURITY KEY : 12345678
Title Rev. Page
HP-500 Ver 1 Ver1.0 P. 6
2-3 ) Communication setting
Set the printer function and communication condition between host by memory switch utility
program.
※ Note : Setting ereases all contents in memory switch, so code page and print optionshall be set
again.
1 ) Manual setting
Turn on the printer at initial setting mode.
※ Method to go initial setting mode
[ Press and hold FEED button and then turn on power pressing 2 or more seconds, then PE LED and
ERROR LED blinks by turns and it is switched to initial setting mode (9600 BPS, PARITY NONE,
HARDWARE HANDSHAKE).]
In manual setting, considering of communication condition is not required.
2 ) After switched to initial setting mode, followings will be printed.
.
[Menu]
1.Print Density
2.Melody Sound
3.Paper Type
4.Hex Dump Mode
5.Wireless Type
6.WiFi Mode
7.IP Mode
Select and then Enter...
Enter : Press the feed button once for
more than 1second.
Select: Press the feed button many times
less than 1second as menu number.
Exit : Turn power off then on.
Pressing FEED button for more than 1second, it is fixed(press enter), and less than 1 second, item
is selected.
For example, if you want to change the Wifi Mode of #6 menu, press #6 less than 1 second, and
press more than 1 second. To exit, turn off the power and turn on again.
3) Successively, select from printed items and confirm.
Ex) [Wireless Type]
1.WiFi
-> 2.Bluetooth
-> : Indicate current set status
Select and then Enter...
Ex) In here, arrow((->) indicates current settings. To change, select item and enter. TO move to
Title Rev. Page
HP-500 Ver 1 Ver1.0 P. 7
next menu with no change, just enter without selecting item.
4) Successively, you will know the change result from the printed items.
“ It was changed successfully!”
This message means change was successful.
“ The value is invalid, try again!”
This message is shown when selected item is invalid or when you move to other menu without item
change.
5) Setting result can be confirmed by printing test page or by the location of arrow(->) after selecting
menu item in initial setting mode.
2-4) HEX Dump
Setting up “Hex Dump Mode in Setting Mode. Then it prints all data in hex character
(16 antilogarithm).
You can see the status of receipt. . It will be useful for the appilcation you do.
It prints the data, once it receives the data 12 digit.
You can print the data less than 12 digit, when you press down the button of feed
The control code ( 1F16 below) prints “.”.
The 8016 above prints “^”.
[Printing sample]
16 antilogarithm ASCII
[HEX DUMP MODE]
41 42 43 44 45 46 47 47 49 A B C D E F G H I
30 31 32 33 34 35 36 37 38 0 1 2 3 4 5 6 7 8
FF 1B 69 ^ . i
Title Rev. Page
HP-500 Ver 1 Ver1.0 P. 8

2-5) Onboard update
Please conduct the updates, after refering the following steps.
1) Please switch off and on
2) Please check the connection between the printer and the data cable.
* Please make sure about if it is the right cable.
* If use USB cable, save the time to update the firmware
3) Please conduct the provided program , then set up the model and Interface port
If the error LED is turned off and is lighted on slightly after 4 seconds,
then the updated is being started.
* Please do not switch off the printer power, till the update is complete.
4) The update will be complete, once the update indicates complete.
* If the error LED keeps the light goes in and out, it’s error.
Please stop the update program and make sure the cable and other connections.
Please return the process “1.” and follow the step again.
5) Atfer update, automatically the printer will be reset for using and use the printer.
Title Rev. Page
HP-500 Ver 1 Ver1.0 P. 9

2-6) Memory switch
Please set the function of internal memory.
※ Please use the provided program - ‘memory swtich setting utility program’.
※ The value is not deleted until the next value is changed, even though power off.
Memory SW
Setting Value
Descreption
SW1
Reservation
SW2
0~1200 or 0~136
SW3
248-4000
SW4
Base Code Page
Setting one
default
value for each country
SW5
Base Font
Setting one of
1) 2byte codes : korean(24 x 24), korean(16 x 16),
Japenes(24x24), Chinese(24x24).
2).1byte codes : ASCII(12x24),
ASCII(8x16,9x16)
SW6
Reservation
SW7
Reservation
SW8
Reservation
Code Page Manu
Font Manu
After setting, Press the button
Setting
paper
Title Rev. Page
HP-500 Ver 1 Ver1.0 P. 10

[Memory Switch information]
================================
Code Page = PC437(U.S)
2Byte Font = Korean(24x24)
1Byte Font = ASCII(12x24)
Mem1:FFh
Mem2:FFh,FFh
Mem3:FFh,FFh
Mem4:00h
Mem5:00h
Mem6:FFh
Mem7:FFh
Mem8:FFh
Mem9:FFh
Mem10:FFh
Mem11:40h
Mem12:F9h
(Ex) Sample of printing by selftest
Title Rev. Page
HP-500 Ver 1 Ver1.0 P. 11

2-7) The way to connect the RF interface.
1) BlueTooth
BlueTooth inteferface can be set up by simple control
① Please refer to 2-3P and set up from Wireless moder to Bluetooth
② When the Error LED is not lighting, Pressing power button and FEED button togather for
1second then take off.
③ And searching for Bluetooth device in Mobile Phone or PC
④ When finding “HWASUNG_XX:XX:XX” on PC or Smart Phone and choosing it and it will be
pairing automatically.
⑤ the pairing is complete ordinarily, the light in LED bluetooth will be stopped.
2) WiFi
There are two of modes
Station Mode : Printer will be connected with Wireless directely.(SSID and others Setting necessary)
AP Mode : Printer will be connected with other devices(Not setting necessary)
① Please refer to 2-3 and Set up “ Wireless Mode “
② Please refer to 2-3 and Set up “ Station Mode “ or “ AP Mode “ according to where you use.
When choose the mode is “AP Mode “
③ Turn on the printer and atfer 3 second automatically IP Address and SSID and Password will be
printed.
④ And please connect with PC or Smart Phone then put in the SSID and Password.
⑤ When the connection is complete, using IP address printed.
Title Rev. Page
HP-500 Ver 1 Ver1.0 P. 12
3. General Specification
3-1) Specification
1) Printing : Direct thermal printer
2) Resolution and Dot : 203dpi, 1dot=0.125mm, 8dot/mm, Total 384 dot
3) Printing speed (Max) : 90mm/sec(Max)
4) Printing Width : 48mm
5) Paper Width : 58mm
6) Paper Diameter : 40 Diameter (Max)
7) Character (MAX) a line : 32fonts (ASCII 12 x 24),16fonts (Korean 24 x 24)
3-2) Font
1) English / Number FONT A(8 x 24) 95, FONT B(8 x 16) 95
2) Graphic FONT A(8 x 24) 128, FONT B(8 x 20) 95
3) International 14types 37fonts
(Korean,English,France,Germany,England,Denmark1,Swden,Italy,
Spain1,Japan,Norway,Denmark2,Spain2,Latin America)
4) Korean FONT A Gothic (24 x 24), FONT B Gothic (16 x 16,option)
3-3) Internal Buffer
Receiver buffer : 4KByte
3-4) Electrical Spec
1) Operating Voltage
Insert Voltage
7.4V Li-ion Battery
Operation voltage
5V
Motor,Thermal print head
Logic voltage
5V±5%
Logic circuit
2) Consumption current
Average : 1.5A(Printing percentage 12.5%))
Peak : 3.7A
3-5) Operation condition (temperature / Humid)
1) Temperature : 0∼40℃
2) Humidity : 40∼90%RH(in not dew condensation)
Notice : The printing is subjet to the operation condition.
3-6) MCBF
1) Mechanism : 15,000,000 Lines.
2) Thermal Print Head 50Km, 1 pulse.
Title Rev. Page
HP-500 Ver 1 Ver1.0 P. 13
4. Interface specification
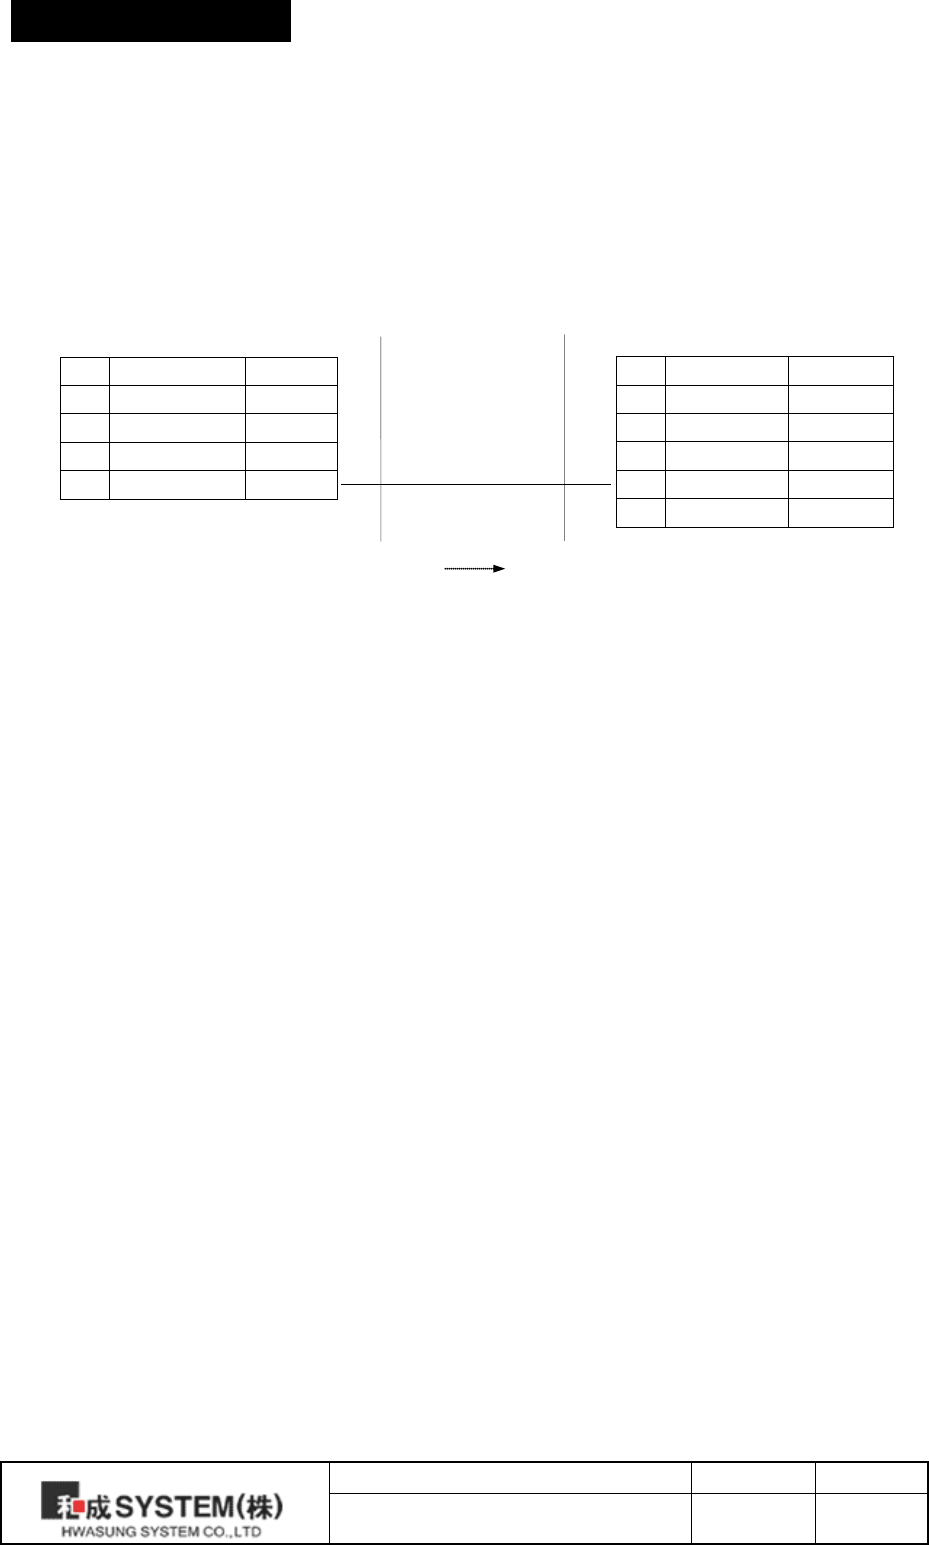
4-1) RS-232C
1) Data Transmission : Serial
2) Hand shake : Hardware (RTS/CTS or DTR/DSR )
3) Baud Rate : 9600, 19200, 38400, 57600 BPS
4) Data Bit : 8bit
5) Parity : None, Odd, Even
6) Stop Bit : 1 or 1.5 or 2 bit
7) Connector : 10 pin Mini-B(Dedicated Cable)
Printer
Pin
Signal
In/Out
1
TxD
Out
2
RxD
In
3
DTR/RTS
In
4
GND
-
(Dotted line) : Connect to host.
4-2) USB
1) Standard : USB 2.0 Compatibility, Full Speed(12Mb)
2) Connector : Type MINI-B
3) Cable : USB2.0 Standard Cable
4) Data : Bulk IN, Bulk OUT
Bulk IN : End point 6
Bulk OUT : End point 2
Full Speed : Max Packet Size 64 Byte(Bulk OUT),64 Byte(Bulk IN)
4-3) WiFi
1) Standard : IEEE 802.11b/g/n,
2) Frequency : 2.400 GHz ~ 2.484 GHz
3) Channel : CH1 ~ CH11
4) Security : WEP, WPA/WPA2PSK
4-4) BlueTooth
1) Standard : Bluetooth 3.0 Class2
Host
Pin
Signal
In/Out
2 RxD
In
3 TxD
Out
8 CTS
In
5 GND -
6 DSR
In
Title Rev. Page
HP-500 Ver 1 Ver1.0 P. 14
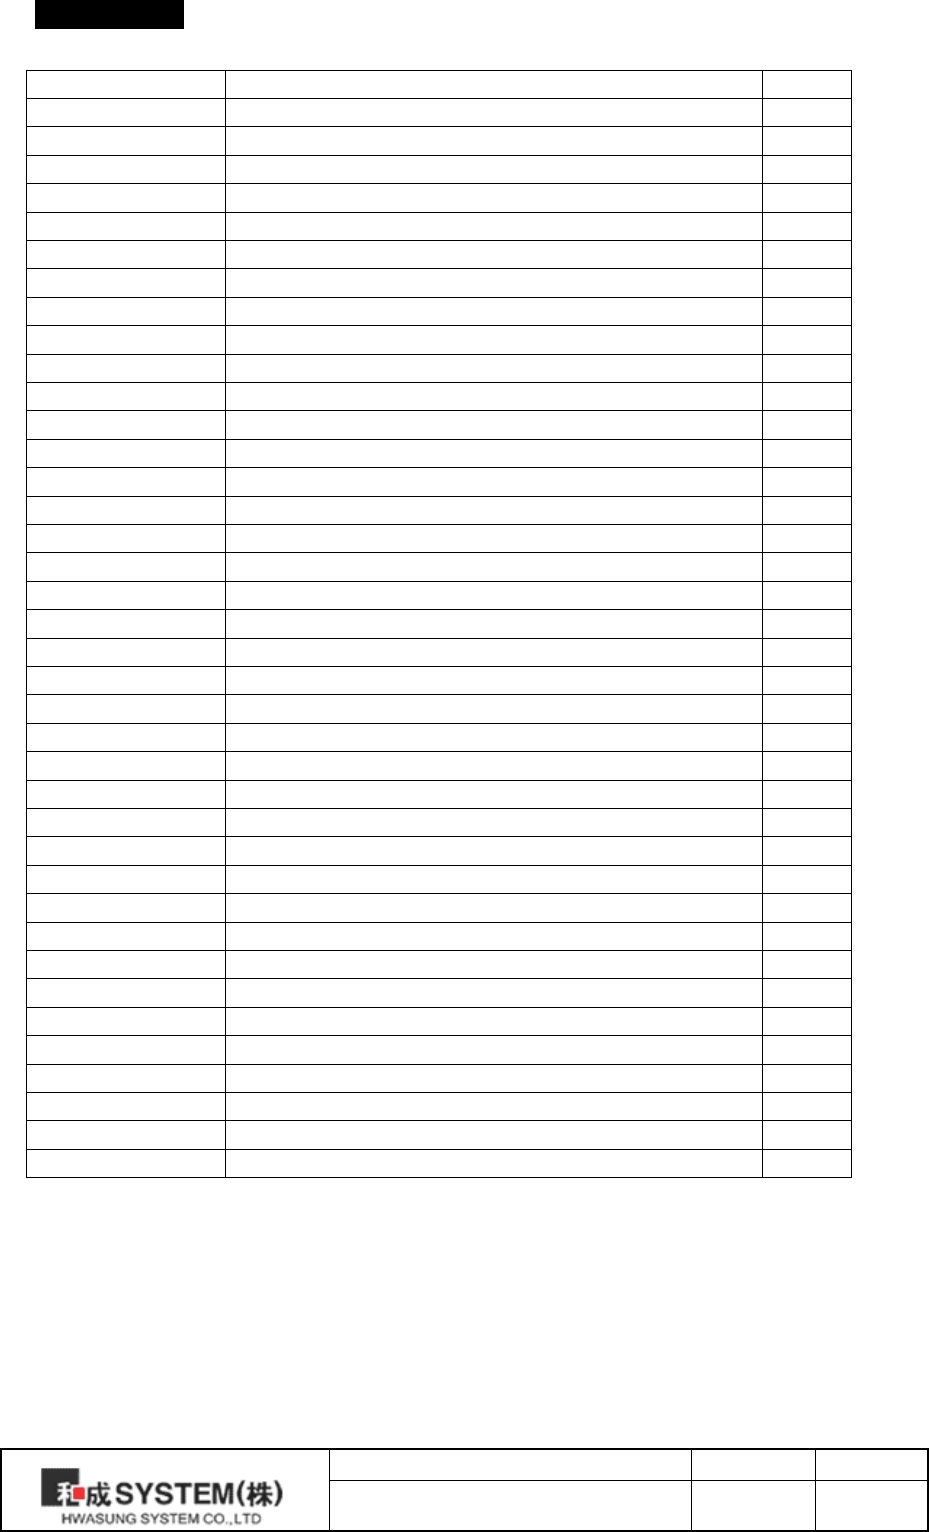
5.Commend
Command
Function
PAGE
CR
Print and carriage return
17
LF
Print and line feed
17
CAN
Cancel the print data
17
HT
Horizontal tab
17
FF
Print the page mode / return to the standard mode
17
SUB x
Extended graphic mode
18
SUB p
Print the off line a paper detection
18
SUB R
Outline Character (Tetragon)
18
SUB B
2D barcode
18
SUB 1
Line 1 (Vertical, Horizontal)
19
SUB 2
Line 2 (Vertical, Horiztontal)
19
SUB W
Write (line data)
19
SUB C
Clear (line data)
19
SUB O
Line ON
20
SUB F
Line OFF
20
SUB P
Print line 1 dot line (Vertical, Horizontal)
20
ESC D
Horizontal tab position
20
ESC SP
Spacing the character of ASCII
20
ESC !
Font decoration
21
ESC $
Absolute position of printing
21
ESC *
Bit image (vertical)
21
ESC -
Underline the character of ASCII
23
ESC 2
Initial row pitch
23
ESC 3
Row pitch
24
ESC @
Printer reset
24
ESC E
Emphasize
24
ESC G
Double
24
ESC J
FEED
24
ESC j
BACK FEED
24
ESC M
Font (ASCII)
25
ESC R
International character
25
ESC a
Align the printing
26
ESC d
Printing and row FEED
26
ESC {
180° rotation
26
ESC t
Code page (International)
26
ESC S
Standard mode / Clear the area of page
27
ESC L
Page mode
27
ESC FF
Printing of page area
27
Title Rev. Page
HP-500 Ver 1 Ver1.0 P. 15
Command
Function
PAGE
ESC T
Page mode (Direction of printing)
28
ESC W
Page mode (Area of printing)
29
FS !
Korean font decoration
30
FS &
Korean extended graphic mode (set up)
30
FS .
Korean extended graphic mode (cancel)
30
FS -
Underline Korean
31
FS S
Space Korean
31
FS W
Size Korean
31
FS q
Register Non Volatile logo (bit image)
32
FS p
Non Volatile logo print
32
GS !
Extension of character
33
GS (K (fn=49)
Density of printing
33
GS (K (fn=97)
Operating Thermal Head Partially
34
GS B
Reverse printing in black / white
34
GS H
Barcode
34
GS L
Left space
35
GS W
Area of printing
35
GS h
Barcode (Height)
35
GS k
Barcode (Printing)
35
GS w
Barcode (Extension / Reduction)
36
GS r
Status check
37
GS a
Status check (Auto reply)
37
GS v
Laster bit image (Horizontal)
38
DLE ENQ
Buffer clear (real time)
38
DLE EOT
Status transmission (real time)
39
Title Rev. Page
HP-500 Ver 1 Ver1.0 P. 16

CR
[Name] Print and carriage return
[Format] ASCII CR
Hex 0Dh
Decimal 13
[Range] -
[Descript] equal LF
LF
[Name] Print and line feed
[Format] ASCII LF
Hex 0Ah
Decimal 10
[Range] -
[Descript] ① STANDARD MODE:
After printing the data and go to return according as the fixed data.
② PAGE MODE:
The fixed data can be only conduted, according as the fixed data.
[Caution] The LF is ignored behind of CR
CAN
[Name] Cancel print data in page mode
[Format] ASCII CAN
Hex 18h
Decimal 24
[Range] -
[Dsecirpt] The data is deleted within the area of printing.
HT
[Name] Horizontal tab
[Format] ASCII HT
Hex 09h
Decimal 9
[Range] -
[Descript] Moves the print position to the next tab poisition
[Caution] Horizontal tab position are to set in ESC+’D’+n.
FF
[Name] Print and return to standard mode in page mode
[Format] ASCII FF
Hex 0Ch
Decimal 12
[Range] -
[Descript] Print the data in the print buffer and returns to standard mode
[Caution] Use the command ESC+FF , in order not to return the standard mode.
The data is not deleted in the area of page.
Title Rev. Page
HP-500 Ver 1 Ver1.0 P. 17
SUB+’x’+n
[Name] Extension Graphic Mode, Korean Mode
[Format] ASCII SUB x n
Hex 1A 78h n
Decimal 26 120 n
[Range] 0≤n≤1
[Initial Value] n=0
[Descript] n=0 : Korean Mode, First code is A1h more, automatically transfer Korean
in 2 bytes
n=1 : Extension Graphic Mode, Every code is setting in 1 byte
Extension Graphic font will be printed
SUB+’p’+n
[Name] Off line printing in paper detection
[Format] ASCII SUB p n
Hex 1A 70h n
Decimal 26 112 n
[Range] 0≤n≤1
[Initial Value] n=1
[Descript] n=0 : Not transition to offline once paper empty (data communication available)
n=1 : Transition to offline once paper empty (data communication not avaiable)
SUB+’R’+n
[Name] Set the character outline
[Format] ASCII SUB b n
Hex 1A 52h n
Decimal 26 82 n
[Range] 0≤n≤1
[Descript] n=0 : cancel character outline (tetragon)
n=1 : Set character outline (tetragon).
[Caution] The horizontal extension is valid as eight times.
The vertical extension is valid as two times
SUB+’B’+n1+n2+n3+d1……dk
[Name] 2D Barcode.
[Format] ASCII SUB B n1 n2 n3 d1…………dk
Hex 1A 42h n1 n2 n3 d1…………dk
Decimal 26 66 n1 n2 n3 d1…………dk
[Range] Please refer the table below.
[Descript] Please choose the barcode by the data of barcode.
n1 : two dimension of barcode
n2 : the number of data of barcode
n3 : size of barcode
d1… dk : the data of barccode
n1
Barcode
1
PDF417
2
QR code
Title Rev. Page
HP-500 Ver 1 Ver1.0 P. 18

1) PDF417 2) QR code
SUB+’1’
[Name] Line 1 (Vertical, Horizontal)
[Format] ASCII SUB 1
Hex 1A 31h
Decimal 26 49
[Description] Line of Vertical Horizontal.
SUB+’2’
[Name] Line 2 (Vertical,Horizontal)
[Format] ASCII SUB 1
Hex 1A 32h
Decimal 26 50
[Description] Line of Vertical Horizontal
SUB+’W’+nL+nH+kL+kH
[Name] Write (line data)
[Format] ASCII SUB W nL nH kL kH
Hex 1A 57h nL nH kL kH
Decimal 26 87 nL nH kL kH
[Range] 0≤nL+(nH×256)≤512、(0≤nL≤255, 0≤nH≤3)
0≤kL+(kH×256)≤512、(0≤kL≤255, 0≤kH≤3)
[Description] It writes 1 from nL+nH×256 to kL+kH×256.
[Caution] It is not deleted, till you power off, or you clear the command.
SUB+’C’
[Name] Clear (line data)
[Format] ASCII SUB C
Hex 1A 43h
Decimal 26 67
[Description] It clears all of line zero (0).
[Caution] Please use this command to write the line again.
Please use the command line ON/ line OFF to write line 1 to speed up the progress.
n2
Number of data
1 < n2 ≤ 255
n3
Size of data
3
Horizontal 3
4
Horizontal 4
5
Horizontal 5
6
Horizontal 6
7
Horizontal 7
8
Horizontal 8
9
Horizontal 9
※ Vertica l is set autom atically.
n2
Number of data
n3=1
1 < n2 ≤ 17
n3=3
1 < n2 ≤ 53
n3=5
1 < n2 ≤ 106
n3=9
1 < n2 ≤ 230
n3
Size of data
1
Version 1
3
Version 3
5
Version 5
9
Version 9
Title Rev. Page
HP-500 Ver 1 Ver1.0 P. 19

SUB+’O’
[Name] Line ON
[Format] ASCII SUB O
Hex 1A 4Fh
Decimal 26 79
[Description] The line data is valid ON. The line prints together, when you print the character.
SUB+’F’
[Name] Line OFF
[Format] ASCII SUB F
Hex 1A 46h
Decimal 26 70
[Description] The line is valid OFF. The line data is preserved.
SUB+’P’
[Name] Print line 1 dot line (Vertical,Horizontal)
[Format] ASCII SUB P
Hex 1A 50h
Decimal 26 80
[Description] It prints line 1 dot line.
[Caution] Please do not use this command, when you print any character,or any graphic.
Please use the command Line ON.
Please use this command, when you print the line at the space.
ESC+’D’+n1…nk+NUL
[Name] Set the horizontal position
[Format] ASCII ESC D n1…nk NUL
Hex 1B 44h n1…nk 00
Decimal 27 68 n1…nk 0
[Range] 1≤n≤255, 0≤k≤32
[Descript] Set the horizontal tab position
[Caution] n : Indicating the figures from the start poistion of line to set position
K : indicating the total tabs a line
ESC+SP+n
[Name] Set the space amount on the right of ASCII character
[Format] ASCII ESC SP n
Hex 1B 20h n
Decimal 27 32 n
[Range] 0≤n≤255
[Initial Value] n=0
[Descript] Set in n x 0.125mm the space amount on the right of ASCII character
[Caution] Set the Korean space in FS+’S+n
Title Rev. Page
HP-500 Ver 1 Ver1.0 P. 20
ESC+’!’+n
[Name] Font decoration
[Format] ASCII ESC ! n
Hex 1B 21h n
Decimal 27 33 n
[Range] 0≤n≤255
[Initial] n=0
[Description] It sets the font decoration in the same time.
Bit
Function
Hex
Decimal
0
0: Font 12x24, 24x24
00h
0
1: Font 8x16, 16x16
01h
1
1
-
-
-
2
-
-
-
3
0: Cancel the highlight
00h
0
1: Set the highlight
08h
8
4
0: Cancel the extension in Vertical
00h
0
1: Set the extension in Vertical
10h
16
5
0: Cancel the extension in Horizontal
00h
0
1: Set the extension in Horizontal
20h
32
6
-
-
-
7
0: Cancel the underline
00h
0
1: Set the underline
80h
128
ESC+’$’+nL+nH
[Name] Set absolute poisition
[Format] ASCII ESC $ nL nH
Hex 1B 24h nL nH
Decimal 27 36 nL nH
[Range] 0≤nL+nH×256≤65535, 0≤nL≤255, 0≤nH≤255
[Initial Value] nL=0, nH=0
[Descript]
Move the printing position from left ending space to (nL+nH×256)×0.125mm
Move the printing position in left ending once printing position is over.
ESC+’*’+m+nL+nH+d1+…+dk
[Name] Set the bitmap image
[Format] ASCII ESC * m nL nH d1…dk
Hex 1B 2Ah m nL nH d1…dk
Decimal 27 42 m nL nH d1…dk
[Range] m=0,1,32,33
1≤nL+nH×256≤1023, 0≤nL≤255, 0≤nH≤3, 0≤d≤255
[Descirpt] Due to fixing nL+nHx256, Printing from bit data to graphic data in Mode m
Title Rev. Page
HP-500 Ver 1 Ver1.0 P. 21
m Mode Dots in
vertical
Dots in
horizontal
Data (k)
0 8dots Single Density 8 224 nL+nH×256
1 8dots Double Density 8 448 nL+nH×256
32 24dots Single Density 24 224 (nL+nH×256)×3
33 24dots Double Density 24 448 (nL+nH×256)×3
•8 dots Mode
D1 D2 D3
MSB
LSB
D1
D2
D3
Twice
once
Single
Double
Title Rev. Page
HP-500 Ver 1 Ver1.0 P. 22
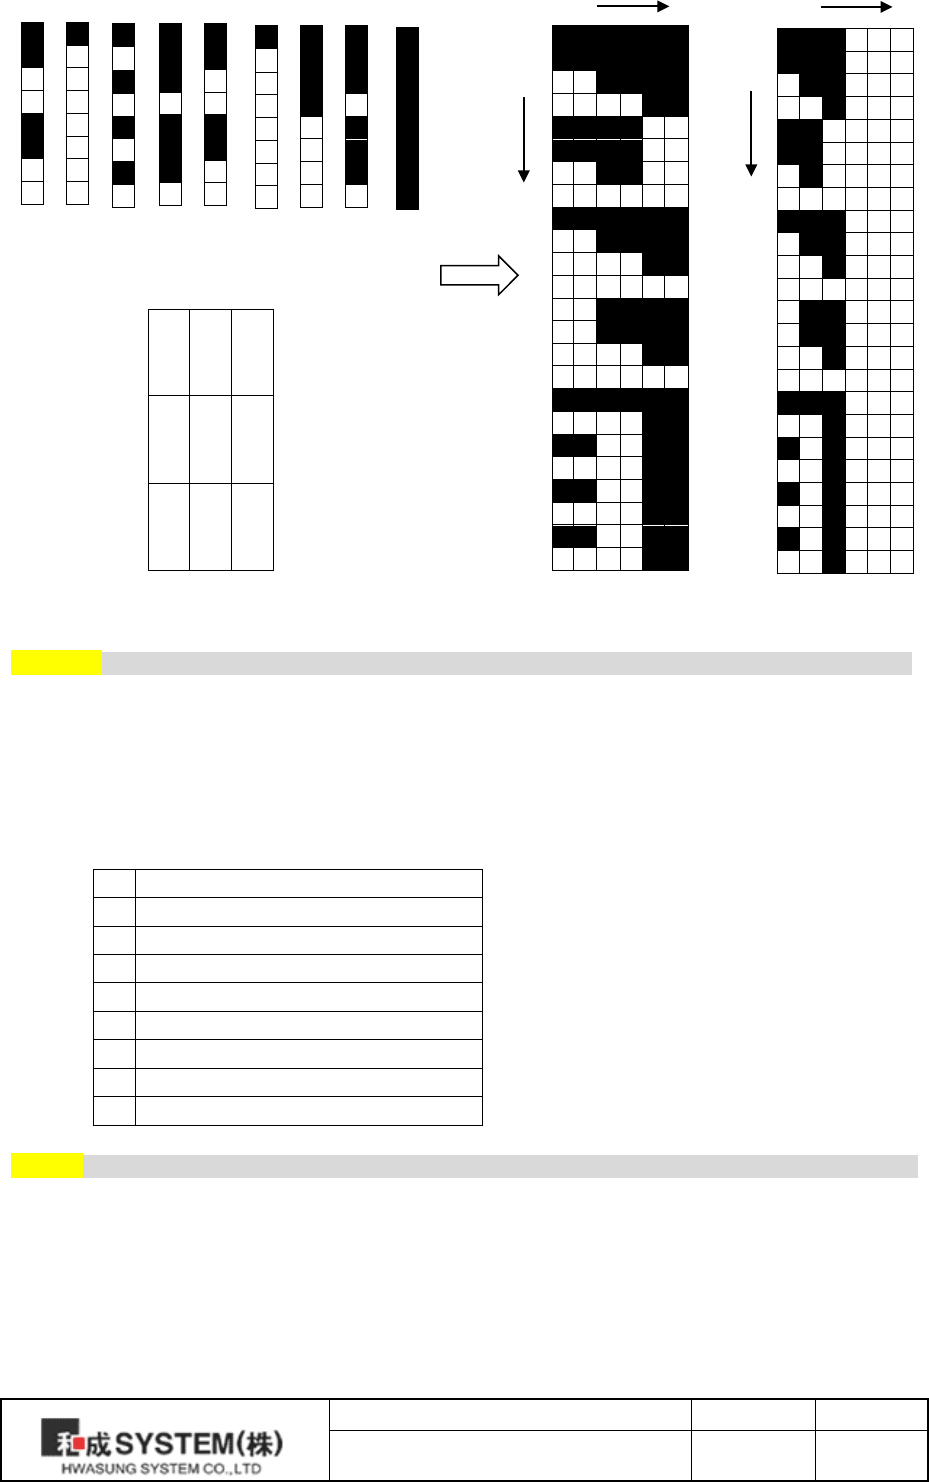
•24 dots Mode
D1 D2 D3 D4 D5 D6 D7 D8 D9
MSB
LSB
ESC+’-’+n
[Name] Set / Cancel underline
[Format] ASCII ESC - n
Hex 1B 2Dh n
Decimal 27 45 n
[Range] 0≤n≤255,
[Invitial Value] n=0,
[Descript] Set / Cancel underline
n
Function
0
Cancel underline
1
Set underline in thick 0.125mm
2
Set underline in thick 0.25mm
3
Set underline in thick 0.375mm
4
Set underline in thick 0.5mm
5
Set underline in thick 0.625mm
6
Set underline in thick 0.75mm
7
Set underline in thick 0.875mm
ESC+’2’
[Name] Set the interval of initial line
[Format] ASCII ESC 2
Hex 1B 32h
Decimal 27 50
[Range] 0≤n≤255,
[Initial Value] n=0
[Descirpt] Set the interval of initial value in 4mm
D1
D4
D7
D2
D5
D8
D3
D6
D9
Once
Twice
Once
Once
Single
Density
Double
Density
Title Rev. Page
HP-500 Ver 1 Ver1.0 P. 23

ESC+’3’+n
[Name] Set the interval of line
[Format] ASCII ESC 3 n
Hex 1B 33h n
Decimal 27 51 n
[Range] 0≤n≤255,
[Initial Value] n=0
[Descript] Set the interval of line in n x 0.125mm
ESC+’@’
[Name] Rest printer
[Format] ASCII ESC @
Hex 1B 40h
Decimal 27 64
[Range] 0≤n≤255,
[Descript] Clear buffer & Initialize all parameter
ESC+’E’+n
[Name] Set the font in thick
[Format] ASCII ESC E n
Hex 1B 45h n
Decimal 27 69 n
[Range] 0≤n≤255,
[Initial Value] n=0
[Descript] n=0, cancel the font in thick
n=1, set the font in thick
ESC+’G’+n
Name] Set the printing double for font thickness
[Format] ASCII ESC G n
Hex 1B 47h n
Decimal 27 71 n
[Range] 0≤n≤255,
[Initial Value] n=0.
[Descript] n=0. cancel the printing twice for font thickness.
n=1. set the printing twice for font thickeness.
ESC+’J’+n
[Name] Feeding
[Format] ASCII ESC J n
Hex 1B 4Ah n
Decimal 27 74 n
[Range] 0≤n≤255
[Descript] Printing the data inner buffer, feeding in n x 0.125mm
ESC+’j’+n
[Name] Back Feeding
[Format] ASCII ESC j n
Hex 1B 6Ah n
Decimal 27 106 n
[Range] 0≤n≤255
[Descript] Printing the data inner buffer and back feeding in n x 0.125mm
Title Rev. Page
HP-500 Ver 1 Ver1.0 P. 24
ESC+’M’+n
[Name] Select font
[Format] ASCII ESC M n
Hex 1B 4Dh n
Decimal 27 77 n
[Range] 0≤n≤2
[Initial Value] n=0
[Descript] Select printer font
n
Precedence 4bits(Korean fonts)
Subordinate 4bits (ASCII)
0000
Korean 24x24 Gothic
0000
Korean 24x24 Gothic
0001
Korean 16 x 16 General
0001
Korean 16 x 16 General
0010
Japanese 24 x 24 Bodoni
0010
Japanese 24 x 24 Bodoni
0011
Chinese 24 x 24 Gothic
0011
Chinese 24 x 24 Gothic
Notice : When you set up one of fonts, you can use “Memory Switch Setting program “ without
commend. If you need any more information, please refer to How to use Memory Switch Setting
Program.
* Caution : In case of Big Font as 56x88, it would be possible to extend font size as much as
Double(Width and Length) and other fonts would be possible to extend the font size as
Octuple
ESC+’R’+n
[Name] Select the International character
[Format] ASCII ESC R n
Hex 1B 52h n
Decimal 27 82 n
[Range] 0≤n≤13
[Initial Value] n=13
[Descirpt] Select the international character as follows:-
n
Country Name
0
USA
1
France
2
Germany
3
England
4
Denmark1
5
Sweden
6
Italian
7
Spain1
8
Japanese
9
Norway
10
Denmark2
11
Spain2
12
Latin America
13
Korea
Title Rev. Page
HP-500 Ver 1 Ver1.0 P. 25
ESC+’a’+n
[Name] Align the printing
[Format] ASCII ESC a n
Hex 1B 61h n
Decimal 27 97 n
[Range] 0≤n≤2
[Initial Value] n=0
[Descript] Align the printing position
n
Printing Position
0
Left
1
Middle
2
Right
ESC+’d’+n
[Name] Printing and feeding ‘n’ line
[Format] ASCII ESC d n
Hex 1B 64h n
Decimal 27 100 n
[Range] 0≤n≤255
[Descript] Printing the date & feeding ‘n’ line
ESC+’{’+n
[Name] Turning 180°
[Format] ASCII ESC d n
Hex 1B 7Bh n
Decimal 27 123 n
[Range] 0≤n≤255
[Initial Value] n=0
[Descript] Set the reverse image
[Caution] Move the standard from the left to the right
n
Function
0
Cancel 180°
1
Set 180°
ESC+’t’+n
[Name] International code page
[Format] ASCII ESC t n
Hex 1B 74h n
Decimal 27 116 n
[Range] 0≤n≤5 14≤n≤17
[Initial Value] n=0
[Descript] You can see the following table of the international code page.
[Caution] It is valid, if you direct the command SUB+”x” for 1 byte.
It is not valid, if you direct the command SUB+”x” for 2 bytes.
Title Rev. Page
HP-500 Ver 1 Ver1.0 P. 26
n
code page
n
code page
0
PC437(US)
6
PC850((Multilingual)
1
KANA(JAPAN)
7
PC860(Portugal)
2
GREEK
8
Windows1252
3
Windows1251
9
Iran System Encoding Standard
4
PC866(Cyrllic #2)
10
PC857(Turkish)
5
Windows1250 (Poland)
ESC+’S’
[Name] Set the Standard mode
[Format] ASCII ESC S
Hex 1B 53h
Decimal 27 83
[Descript] Swtiches from page mode to standard mode and the data is deleted at the page.
ESC+’L’
[Name] Select page mode
[Format] ASCII ESC L
Hex 1B 4Ch
Decimal 27 76
[Range] 0≤n≤255
[Initial Value] n=0
[Descript] Switches from standard mode to page mode
ESC+FF
[Name] Printing as the page mode
[Format] ASCII ESC FF
Hex 1B 0Ch
Decimal 27 12
[Descript] It prints the data at the page mode.
(The data is NOT deleted at the page.)
Title Rev. Page
HP-500 Ver 1 Ver1.0 P. 27
ESC+’T’+n
[Name] Select print direction in page mode
[Format] ASCII ESC T n
Hex 1B 54h n
Decimal 27 84 n
[Range] 0≤n≤3
[Initial Value] n=0
[Descript] Select the print direction & start position in page mode
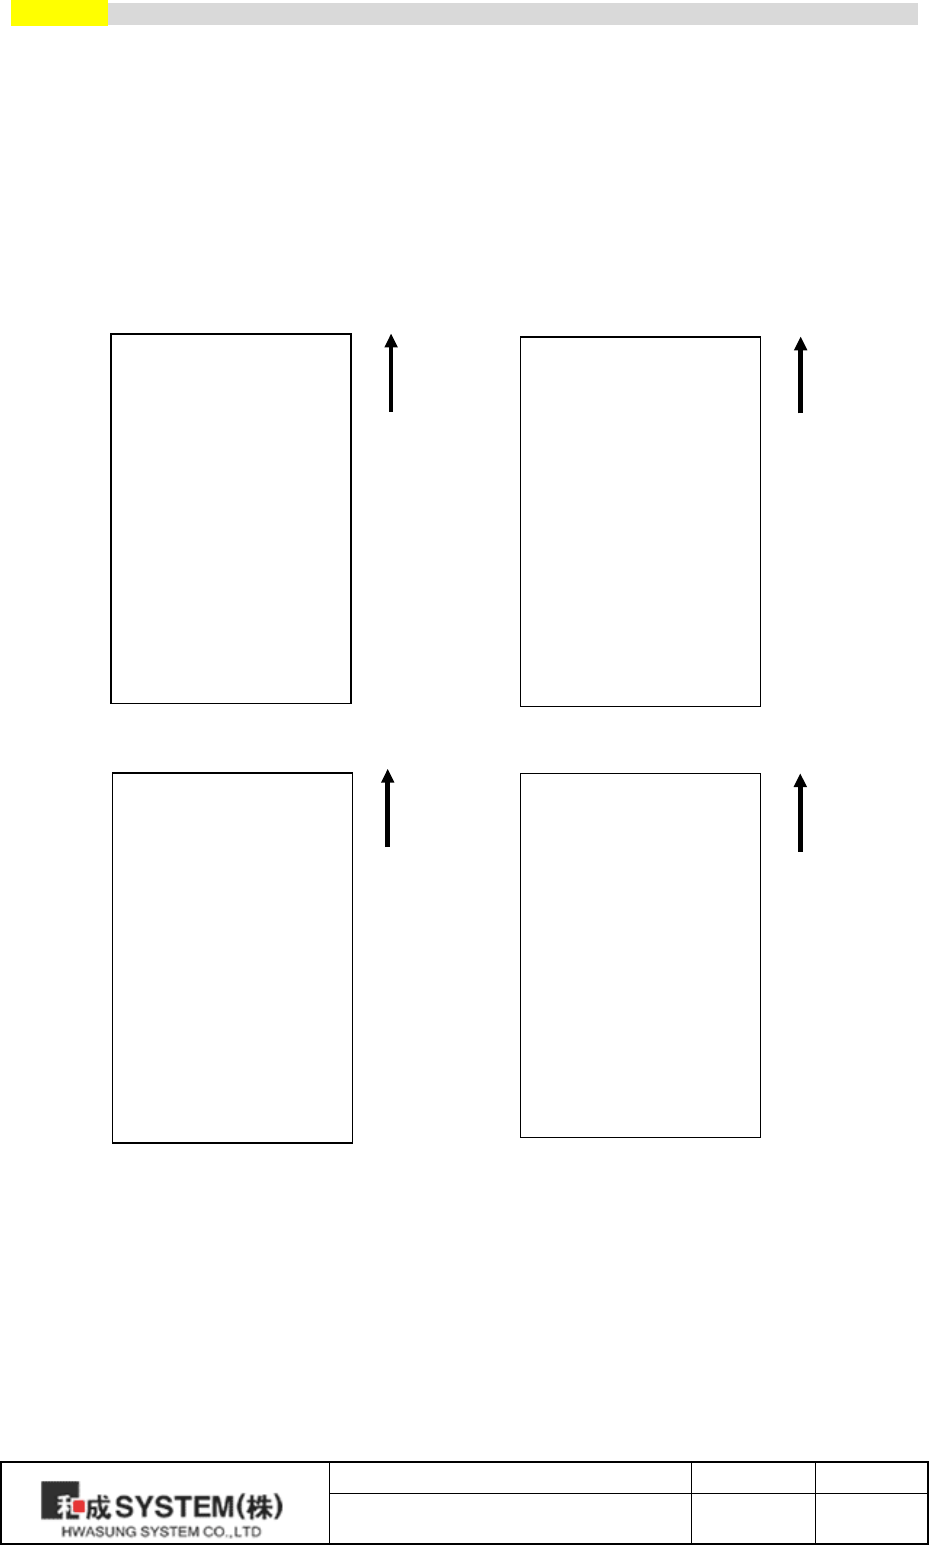
•n=0(Left→Right), •n=1(Bottom→Top),
Feeding Feeding
•n=2(Right→Left), •n=3(Top→Bottom),
Feeding Feeding
ABCD
ABCD
ABCD
ABCD
Title Rev. Page
HP-500 Ver 1 Ver1.0 P. 28
ESC+’W’+xL+xH+yL+yH+dxL+dxH+dyL+dyH
[Name] Set printing area in page mode
[Format ] ASCII ESC W xL xH yL yH dxL dxH dyL dyH
Hex 1B 57h xL xH yL yH dxL dxH dyL dyH
Decimal 27 87 xL xH yL yH dxL dxH dyL dyH
[Range] 0≤xL+xH×256≤65535 (0≤xL≤255, 0≤xL≤255)
0≤yL+yH×256≤65535 (0≤yL≤255, 0≤yL≤255)
1≤dxL+dxH×256≤65535 (0≤dxL≤255, 0≤dxL≤255)
1≤dyL+dyH×256≤65535 (0≤dyL≤255, 0≤dyL≤255)
[Initial Value] (xL+xH×256)=0 (0mm, xL=0, xH=0)
(yL+yH×256)=0 (0mm, yL=0, yH=0)
(dxL+dxH×256)=448 (56mm, dxL=C0h, dxH=01h)
(dyL+dyH×256)=1200 (150mm, dyL=B0h, dyH=04h)
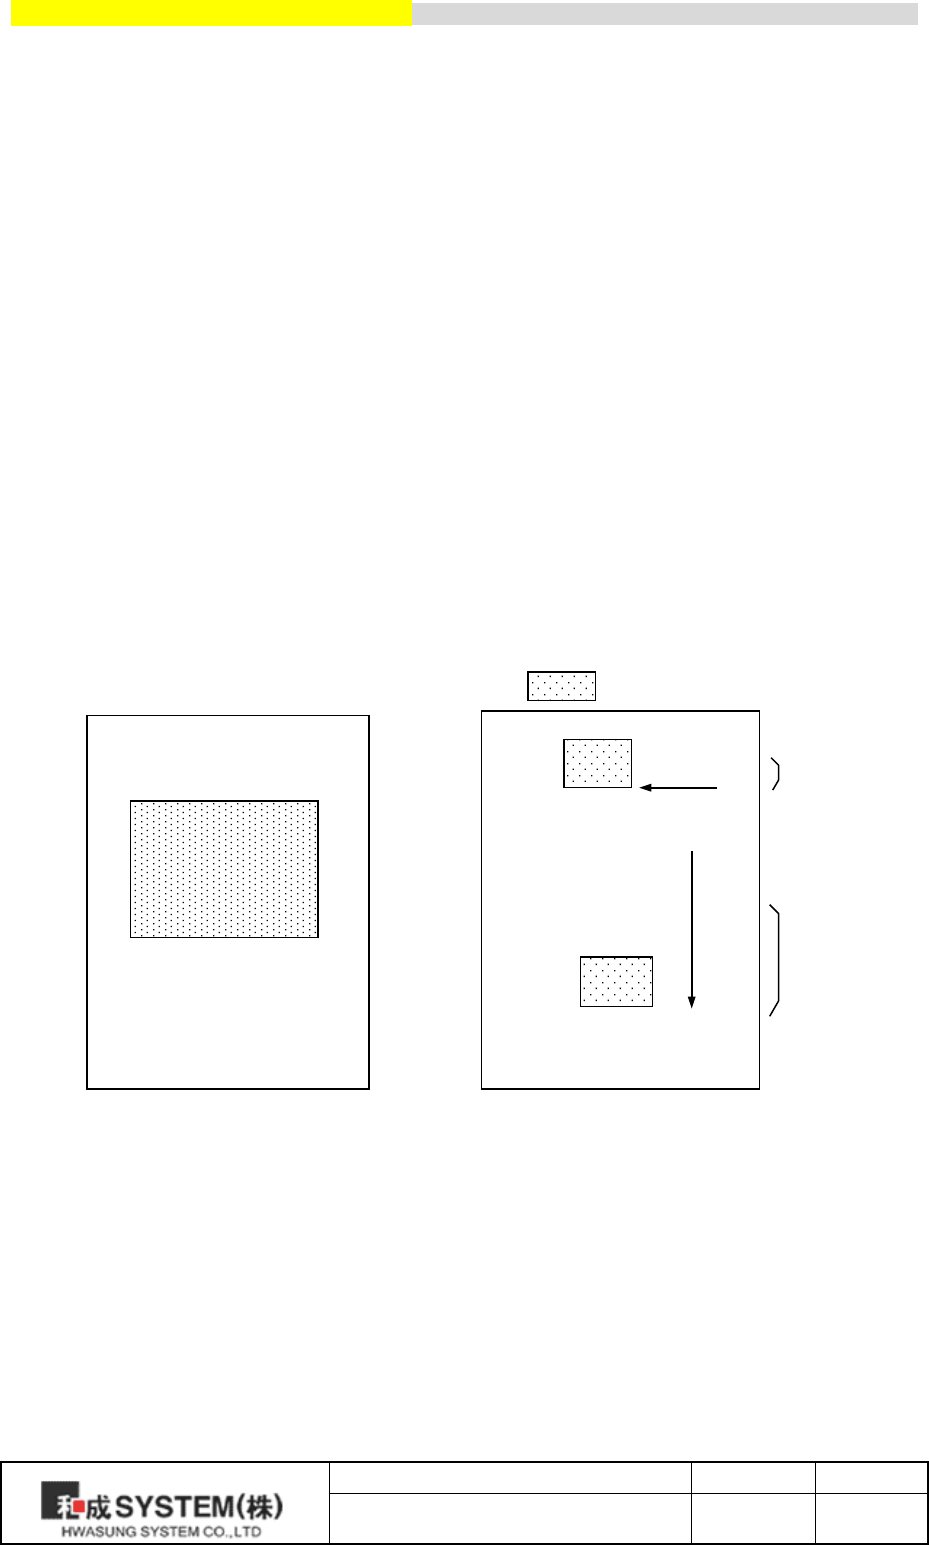
[Descript] Set printing area & starting point
Horizontal starting point : (xL+xH×256) × 0.125mm
Vertical starting point : (yL+yH×256) × 0.125mm
Horizontal size : (dxL+dxH×256) × 0.125mm
Vertical size : (dyL+dyH×256) × 0.125mm
[Caution] The maximum page width is available 56mm
The maximum page length is available 150mm
Barcode & graphic data is executed as per standard line,
If the size exceed the standard line, move the standardline by CR or LF.
Paper
(x,y) dx
Printing Area
dy
(x+dx,y+dy)
Paper
EFGH
ABCD
Move the standard line
by CR or LF
EFGH
Standard
: Barcode or Graphic
Printing before
moving
the standard line
Printing after
moving
the standard line
ABCD
Title Rev. Page
HP-500 Ver 1 Ver1.0 P. 29
FS+’!’+n
[Name] Set the printing mode in Korean
[Format] ASCII FS ! n
Hex 1C 21h n
Decimal 28 33 n
[Range] 0≤n≤255
[Initial Value] n=0
[Descript] Set the printing mode in Korean
[Caution] Only valid in Koean
FS+’&’
[Name] Set to print Korean mode (2bytes Mode)
[Format] ASCII FS &
Hex 1C 26h
Decimal 28 38
[Descript] Set to print Korean mode (2bytes Mode)
[Caution] Set to print Korean mode in extended graphic mode
Appointment is not required in Korean mode, due to auto detection.
(Ref.SUB+’x’+n command)
FS+’.’
[Name] Cancel Korean mode (2Bytes mode)
[Format] ASCII FS .
Hex 1C 2Eh
Decimal 28 46
[Descript] Cancel Korean mode (2Bytes mode)
[Caution] In case of cancel 2 bytes mode in extended graphic mode
Appointment is not required due to auto detection in Korean mode
(Ref.SUB+’x’+n command)
Bit
Function
Hex
Decimal
0
-
00h
0
1
-
00h
0
2
Cancel the horizontal extension
00h
0
Set the horizontal extension
04h
4
3
Cancel the vertical extension
00h
0
Set the vertical extension
08h
8
4
-
00h
0
5
-
00h
0
6
-
00h
0
7
Cancel the underline
00h
0
Set the underline
80h
128
Title Rev. Page
HP-500 Ver 1 Ver1.0 P. 30

FS+’-’+n
[Name] Set the underline of Korean
[Format] ASCII FS - n
Hex 1C 2Dh n
Decimal 28 45 n
[Range] 0≤n≤2
[Initial Value] n=0
[Descript] Set the underline of Korea
n
Function
0
Cancel the underline of Korean
1
Set the thickness of underline in 0.125mm
2
Set the thickness of underline in 0.25mm
FS+’S’+n1+n2
[Name] Set the space between Korean characters
[Format] ASCII FS S n1 n2
Hex 1C 53h n1 n2
Decimal 28 83 n1 n2
[Range] 0≤n1≤255, 0≤n2≤255
[Initial Value] n=0
[Descript] Set the space between Korean characters
Set the left space in n1×0.125mm
Set the right space in n2×0.125mm
FS+’W’+n
[Name] Set the font size in Korean
[Format] ASCII FS W n
Hex 1C 57h n
Decimal 28 87 n
[Range] 0≤n1≤255
[Initial Value] n=0
[Descript] Set the Korean font size twice (HorizontalxVertical) in Korean
n=0, Cancel the font size two times
n=1, Set the font size two times
Title Rev. Page
HP-500 Ver 1 Ver1.0 P. 31

FS+’q’+n+(xL+xH+yL+yH+d1…dk)1……+(xL+xH+yL+yH+d1…dk)n
[Name] Register logo (bitmap image) non volatilization
[Format] ASCII FS q n (xL xH yL yH d1..dk)1…(xL xH yL yH d1..dk)n
Hex 1C 71h n (xL xH yL yH d1..dk)1…(xL xH yL yH d1..dk)n
Decimal 28 113 n (xL xH yL yH d1..dk)1…(xL xH yL yH d1..dk)n
[Range] 1≤n≤255
0≤xL+xH×256≤65535 (0≤xL≤255, 0≤xH≤255)
0≤yL+yH×256≤65535 (0≤yL≤255, 0≤yH≤255)
0≤d≤255
k=(xL+xH×256)×(yL+yH×256)×8, Capable register : 64kbytes
[Descript.] Register the logo non-volatilization
n : Total unit of N/V logo
xL,xH : Set the horizontal dot in (xL+xH×256)×8
yL,yH : Set the vertical dot in (xL+xH×256)×8
k : Bitmap image of a N/V logo
[Caution] Register various as much as NV’s capa.
Required to delete all if (it is) registered again.
Renewable registeration / deletion at 100000 cycles,
It’s not recommended frequent registeration / deletion,
due to memory damage
<Register Image >
.
.
.
.
.
.
.
.
.
.
.
.
.
.
.
FS+’p’+n+m
[Name] Printing N/ V logo
[Format] ASCII FS p n m
Hex 1C 70h n m
Decimal 28 112 n m
[Range] 1≤n≤255, 0≤m≤3
[Initial Value] n=0
[Descript.] m : printing the registered N/V in ‘m’ mode
n : indicating the regsitered logo in the ‘n’.
m Printing mode
0
Standard
1
Horizontal extension
2 Vertical extension
3 Horizontal,vertical extension in the same time
D1
Dy
D
(x×8-1)×y+1
D
(x×8)×y
MSB
LSB
Title Rev. Page
HP-500 Ver 1 Ver1.0 P. 32

GS+’!’+n
[Name] Set the proportion of character extention
[Format] ASCII GS ! n
Hex 1D 21h n
Decimal 29 33 n
[Range] 0≤n1≤255 (horizontal / vertical portions is restricted maxim value 8)
[Initial Value] n=0
[Descript.] Set the proportion of character extention
[Caution] Caculate the numberic value,
if vertical & horizontal is extended in the same time
ex.) x3 (Horizontal Rate), x3(Vertical Rate) : n=32+2=34
Bit
Function
0-3
Set the extension proportion in vertical
4-7
Set the extension proportion in horizontal
Extension in Horizontal Extension in Vertica
GS+’(’+’K’+pL+pH+fn+m (fn=49)
[Name] Set the printing density
[Format] ASCII GS ( K pL pH fn m
Hex 1D 28h 4Bh pL pH fn m
Decimal 29 40 75 pL pH fn m
[Range] pL=2, pH=0, fn=49
1≤m≤30
[Initial Value] It set up automatically as per the voltage. (Ref.Table below)
[Descript] Set the printing density
Drive Voltage (Vp)
m
5 ~ 5.4V
26
5.5 ~ 5.9V
16
6 ~ 6.4V
10
6.5 ~ 6.9V
8
7.0 ~ 7.4V
7
7.5 ~ 7.9V
6
8.0 ~ 8.3V
5
8.4V ~ 8.5V
4
※ Once it is a power on reset, the density is set up automatically,
You can choose the density as per the conditions, such as power,printing quality.
n(Hex)
n(Decimal)
Rate
00h
0
x1
10h
16
x2
20h
32
x3
30h
48
x4
40h
64
x5
50h
80
x6
60h
96
x7
70h
112
X8
n(Hex)
n(DecimaL)
Rate
00h
0
x1
01h
1
x2
02h
2
x3
03h
3
x4
04h
4
x5
05h
5
x6
06h
6
x7
07h
7
X8
Title Rev. Page
HP-500 Ver 1 Ver1.0 P. 33
GS+’(’+’K’+pL+pH+fn+m (fn=97)
[Name] Operating thermal head partially
[Format] ASCII GS ( K pL pH fn m
Hex 1D 28h 4Bh pL pH fn m
Decimal 29 40 75 pL pH fn m
[Range] pL=2, pH=0, fn=97
0≤m≤4
[Initial Value] m=2 (3 partiation)
[Descript] Set the operation of partial thermal head
[Caution] This function is effective in case of power capa is short.
The current electric will be reduced as big as the partition.
m
Thermal Head Partition operation
0
First Partition
1
Second Partition
2
Third Partition
3
Fourth Partition
4
Fifth Partition
GS+’B’+n
[Name] Reverse printing in black
[Format] ASCII GS B n
Hex 1D 42h n
Decimal 29 66 n
[Range] 0≤n≤255
[Initial Value] n=0
[Descript] Reverse printing in black
n=0, standard printing
n=1, reverse printing in black
GS+’H’+n
[Name] Select the printing position of HRI characters (Barcode)
[Format] ASCII GS H n
Hex 1D 48h n
Decimal 29 72 n
[Range] 0≤n≤3
[Initial Value] n=0
[Descript] Select the printing positions of numerical value & characters
n
Printing Position
0
Non printing
1
Above the barcode
2
Below the barcode
3
Both above & below barcode
Title Rev. Page
HP-500 Ver 1 Ver1.0 P. 34
GS+’L’+nL+nH
[Name] Select the left margin
[Format] ASCII GS L nL nH
Hex 1D 4Ch nL nH
Decimal 29 76 nL nH
[Range] 0≤nL≤255, 0≤nH≤255
[Initial Value] nL+nH×256=0 (nL=0, nH=0)
[Descript] The left margin is set in (nL+nH×256)×0.125mm.
GS+’W’+nL+nH
[Name] Set printing area width
[Format] ASCII GS W nL nH
Hex 1D 57h nL nH
Decimal 29 87 nL nH
[Range] 0≤nL≤255, 0≤nH≤255
[Initial Value] nL+nH×256=448 (56mm, nL=0, nH=0)
[Descript] Set printing area width from the left margin in (nL+nH×256)×0.125mm
GS+’h’+n
[Name] Select barcode height
[Format] ASCII GS h n
Hex 1D 68h n
Decimal 29 104 n
[Range] 1≤n≤255
[Initial Value] n=162 (20.25mm)
[Descript] Select barcode height by n×0.125mm
GS+’k’+m+d1…dn+NUL
[Name] Print barcode
[Format] ASCII GS k m d1…dn NUL
Hex 1D 6Bh m d1…dn 00h
Decimal 29 107 m d1…dn 0
[Range] 1≤m≤7, n & d depend on barcode system used
[Descript] Refer the table as below
Printing area
Left Margin
Printing area width
Title Rev. Page
HP-500 Ver 1 Ver1.0 P. 35
m
Barcode system
n (Barcode data numbers)
d (barcode data )
1 UPC-E n=7 (check digit is automatically added ) 48≤d≤57
2 EAN13 n=12 (check digit is automatically added) 48≤d≤57
3 EAN8 n=7 (check digit is automatically added) 48≤d≤57
4
CODE39
1≤n (Start & Stop characteres is automatically
added
48≤d≤57, 65≤d≤90
d=32,36,37,43,45,46,47
5 ITF(I of 2/5) 1≤n (Only even number) 48≤d≤57
6
CODABAR
1≤n
48≤d≤57, 65≤d≤68
d=36,43,45,46,47,58
7
CODE128
2≤n≤255 (Check digit , Stop character
Is automatically added)
0≤d≤127
[Caution] In CODE128, set additional “{“ in 2bytes when the special character as below
Special
character
Barcode data
ASCII
Hex
Decimal
SHIFT
{S
7Bh, 53h
123, 83
CODE A
{A
7Bh, 41h
123, 65
CODE B
{B
7Bh, 42h
123, 66
CODE C
{C
7Bh, 43h
123, 67
FNC1
{1
7Bh, 31h
123, 49
FNC2
{2
7Bh, 32h
123, 50
FNC3
{3
7Bh, 33h
123, 51
FNC4
{4
7Bh, 34h
123, 52
“{“
{{
7Bh, 7Bh
123, 123
GS+’w’+n
[Name] Set the vertical size of barcode
[Format] ASCII GS w n
Hex 1D 77h n
Decimal 29 119 n
[Range] 1≤n≤4
[Initial Value] n=2
[Descript.] Set the horizontal size of barcode
n
Module barcode width
Two level barcode
Narrow
Wide
1
0.25mm
0.125mm
0.375mm
2
0.375mm
0.25mm
0.625mm
3
0.5mm
0.375mm
1mm
4
0.625mm
0.5mm
1.25mm
* Multi Level barcode : UPC-E, EAN13, EAN8
* 2 level barcode : CODE39, ITF, CODABAR
Title Rev. Page
HP-500 Ver 1 Ver1.0 P. 36

GS+’r’+n
[Name] Transmit status
[Format] ASCII GS r n
Hex 1D 72h n
Decimal 29 114 n
[Range] n=1
[Descript] Transmit current status of printer
[Caution] The status is not ready till the printer is offline,
The command is executed when the data in receive buffer is devloped
Therefore automatic status function (GS+’a’+n) is to use better,
It is used for re-confirm in on-line after automatic status is received
GS+’a’+n
[Name] Enable / Disable automatic status back (ASB)
[Format] ASCII GS a n
Hex 1D 61h n
Decimal 29 97 n
[Range] 0≤n≤1
[Initial Value] n=1
[Descript] Enable / Disable ASB
If the status is changed after checking the printer status,
the status is automatically executed.
This command is executed to enable or disable.
n
Function
0
Disable automatic status back
1
Enable automatic status back
<Status transmission data >
Bit
Satus
Hex
Decimal
0
0 : Paper
1 : No paper
00h
01h
0
1
1 0 : Printer head down
1 : Printer head up
00h
02h
0
2
2
0 : Paper w/o jamm
1 : Paper with jamm
00h
04h
0
4
3
0 : Paper enough
1 : Paper Near End
00h
08h
0
8
4
0 : Print complete
1 : Print or Feeding
00h
10h
0
16
5
0
00h
0
6
0
00h
0
7
0
00h
0
※ the status of bit 4 is effective when the realtime conducts
the command DLE + EOT + n, The others are fixed ‘0’.
Title Rev. Page
HP-500 Ver 1 Ver1.0 P. 37
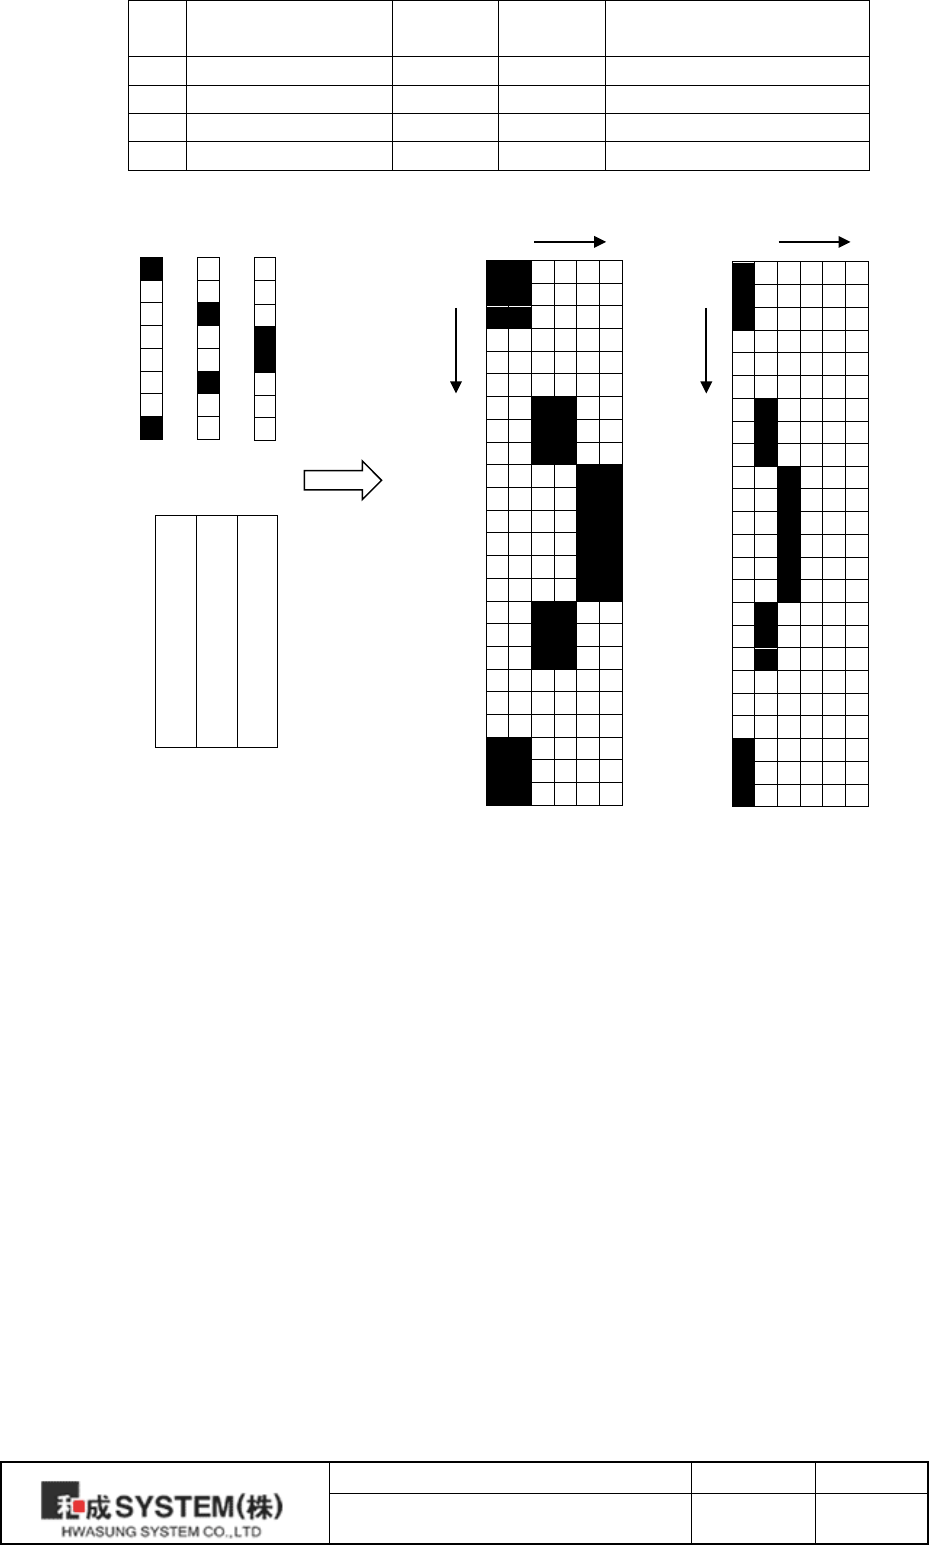
GS+’v’+’0’+m+xL+xH+yL+yH+d1+…+dk
[Name] Laster bit image
[Format] ASCII GS v 0 m xL xH yL yH d1..dk
Hex 1D 76h 30h m xL xH yL yH d1..dk
Decimal 28 118 48 m xL xH yL yH d1..dk
[Range] 0≤m≤3 or 48≤m≤51,
1≤(xL+xH×256)≤150 (0≤xL≤150, xH=0)
1≤(yL+yH×256)≤436 (0≤yL≤255, 0≤yH≤1)
0≤d≤255 (yL+yH×256)
K (All data) = (xL+xH×256) × (yL+yH×256)
[Descript] The laster bit image will be recognized in mode ‘m’.
xL,xH appoint the data (byte) of horizontal at image data.
yL,yH appoint the dta (dot line) of vertical at image data.
* d is a data for laster bit.
m
Mode
Expansion
0, 48
Normal
x1
1, 49
Horizontal expansion
x2
2, 50
Vertical expansion
x2
3, 51
Horizontal,Vertical expansion
x2 (Horizontal & Vertical)
Ex) Expansion image
xL+xH×256 = 32 byte,
32 × 8 = 256 dot
1
2
3
……
30
31
32
33
34
35
……
62
63
64
……
……
……
……
……
……
……
k-31
k-30
k-29
……
k-2
k-1
k
DLE+ENQ+n
[Name] Realtime request the printer to be clear each buffer
[Format] ASCII DLE ENQ n
Hex 10h 05h n
Decimal 16 5 n
[Range] n=2
[Descript] The realtime clear each buffer as soon as this command receive.
[Caution] It’s only valid as you switch up ‘1’ as ‘ON’.
This command is only effective if the printer is off.
This command is only effective if it receives the data as same command.
This command is not effective if it’s online.
yL+yH×256 dot line
7
6
5
4
3
2
1
0
MSB LSB
Title Rev. Page
HP-500 Ver 1 Ver1.0 P. 38

DLE+EOT+n
[Name] Realtime status transmission
[Format] ASCII DLE EOT n
Hex 10h 04h n
Decimal 16 4 n
[Range] n=2
[Descript] The real time transmits a byte as soon as this command receives.
[Caution] It’s only valid as you switch up ‘1’as ‘ON’.
Please refer status table at the page 29.
If the command is received same data, it could be same operation
(Bit image data,etc)
Title Rev. Page
HP-500 Ver 1 Ver1.0 P. 39

6. Widows Driver
6-1) Set up the function.
1) Please open the screen of printer / fax, and click the basic setting (I) of the general tap.
2) Please click (V).
3) Please refer to the following images, and set up each details.
6-2) Set up the paper.
Please set the form feeding after printing.
1) Please click the basic setting (I) of the general tap.
2) Please click the tap of paper /quality, and drop down paper providing.
3) Auto & Role Feeder : After printing, the form feeding is not conducted any more.
Please set up if the printing length is not regular.
You can’t conduct the feeding, even you set up the space at the program Visual Basic.
We recommend you make the font size smaller, such as “.”, and make the position
the cutting.
Example)
'----- Example Dummy form feeding to cutting position ---------
Printer.Print " " & vbLf
Printer.Print " " & vbLf
Printer.Print " " & vbLf
Printer.FontSize = 2
Printer.Print "." ' dummy print for form feeding
Printer.EndDoc
4) Page length Feeder : After printing, The form feeding will be conducted
as long as the length is fixed. It is mostly used when the regular legnth is printed.
6-3) Set up the new paper.
You can make the size of paper you need.
Please refer the example of 60mm x 150mm as below.
1) Please open the screen of printer & fax,and click the server on file / menu.
2) Please choose the STANDARD(Size 80 x 400mm) as image.
3) Please tick ‘new documentation (C)’ as image.
4) Please type the width 6.0 cm / the height 15.0 cm as image.
5) Please click the ‘form install’ Ticket (Size 60 x 150mm) as image.
6) Please click the tap ‘advanced’ and set the paper Ticket(Size 60 x 150mm).
Title Rev. Page
HP-500 Ver 1 Ver1.0 P. 40

. USB (User Interface)
Without using the Windows driver, you are able to check the printer status, and transmit / receive the
data,
by using USB Interface DLL (HwaUSB.DLL) and OCX driver (HwaUSB.OCX).
7-1) DLL Interface
Please add the file HwaUSB.DLL at the folder System 32, or the folder SysWow64.
7-1-1) DLL function.
1) long UsbOpen(LPCTSTR SelPrinter);
Please open the port USB by the printer Model “HP-500”
Parameters:
SelPrinter : Printer Model Name
Return :
Open normal : 0
Open error : -3(minus)
2) long PrintStr(LPCTSTR data);
It prints the string.
Parameters:
data : String datas
Return :
Print normal : 1
Print error : 0
Notice : To prevent the loss of data for the print timeout ,
Please use the function ‘NewRealRead’ to check the status,and go to the next step,
when it’s normal.
3) long PrintCmd(unsigned char data);
It prints the data one (1) byte.
Please use the ‘PrintPackage function’ as below, if there are a lot of datas to print.
Then you are able to increase the speed of the transmission.
Parameters:
data : one (1) byte data (0~255)
Return :
Print normal : 1
Print error : 0
Title Rev. Page
HP-500 Ver 1 Ver1.0 P. 41

4)long NewRealRead(void);
It reads the printer status data as one (1) byte by the port USB.
Parameters:
None
Return :
Read normal : Printer status value.
Read error : -1( minus )
5)long PrintPacket(unsigned char *PacketBuf,unsigned long PacketLength);
It prints the data by the port USB, as much as the data at the transmission data buffer .
Parameters:
PacketBuf : Transmission data buffer pointer.
PacketLength : Transmissiong data length
Notice : Please do not exceed more than 64 bytes max.
Return :
Print normal : 1
Print error : 0
Notice Please do not use any function we don’t provide, due to the debug usage.
Notice Please ask the sample program for more details.
Title Rev. Page
HP-500 Ver 1 Ver1.0 P. 42

7-2) Caution for using USB Interface
If you use the USB interface and windows drivers together, the data will not be printed in regular
sequence. So please release the spool, when you wan to use the USB interface and window
driver together. If you release the spool, the data receipt is only made by USB Interface.
※
The Data diafram of window application.
Window Application
Printer
Window Driver
(Graphic)
DLL Interface
OCX Driver
(Command,
Character)
USB Port
Send
Receive (Printer State Date)
Title Rev. Page
HP-500 Ver 1 Ver1.0 P. 43
No. Date Descripction Page Ver.
1 2017.05.02 Release HP-500 V1.0 V1.0
Title Rev. Page
HP-500 Ver 1 Ver1.0 P. 44

FCC Compliance Statement
This device complies with part 15 of the FCC rules. Operation is subject to the following two
conditions: (1) This device may not cause harmful interference, and (2) this device must
accept any interference received, including interference that may cause undesired operation.
FCC Interference Statement
This equipment has been tested and found to comply with the limits for a Class B digital
device, pursuant to part 15 of the FCC Rules. These limits are designed to provide reasonable
protection against harmful interference in a residential installation. This equipment generates,
uses and can radiate radio frequency energy and, if not installed and used in accordance with
the instructions, may cause harmful interference to radio communications. However, there is
no guarantee that interference will not occur in a particular installation. If this equipment does
cause harmful interference to radio or television reception, which can be determined by
turning the equipment off and on, the user is encouraged to correct the interference by one of
the following measures:
• Reorient or relocate the receiving antenna.
• Increase the separation between the equipment and receiver.
• Connect the equipment into an outlet on a circuit different from which the receiver is
connected. • Consult the dealer or an experienced radio/TV technician for help.
FCC Caution
Any changes or modifications not expressly approved by the party responsible for compliance
could void the user's authority to operate this equipment. This transmitter must not be co-
located or operating in conjunction with any other antenna or transmitter.
Title Rev. Page
HP-500 Ver 1 Ver1.0 P. 45