Hanwha Techwin SNH-1011N Home Smart Camera User Manual Appendix 4 Block Diagram
Samsung Techwin Co Ltd Home Smart Camera Appendix 4 Block Diagram
UserManual.wiki
>
Hanwha Techwin
>
SNH 1011N User Manual
Users Manual
Navigation menu
Upload a User Manual
Namespaces
Wiki Guide
HTML
PDF
Info
Views
User Manual
Discussion / Help
Navigation
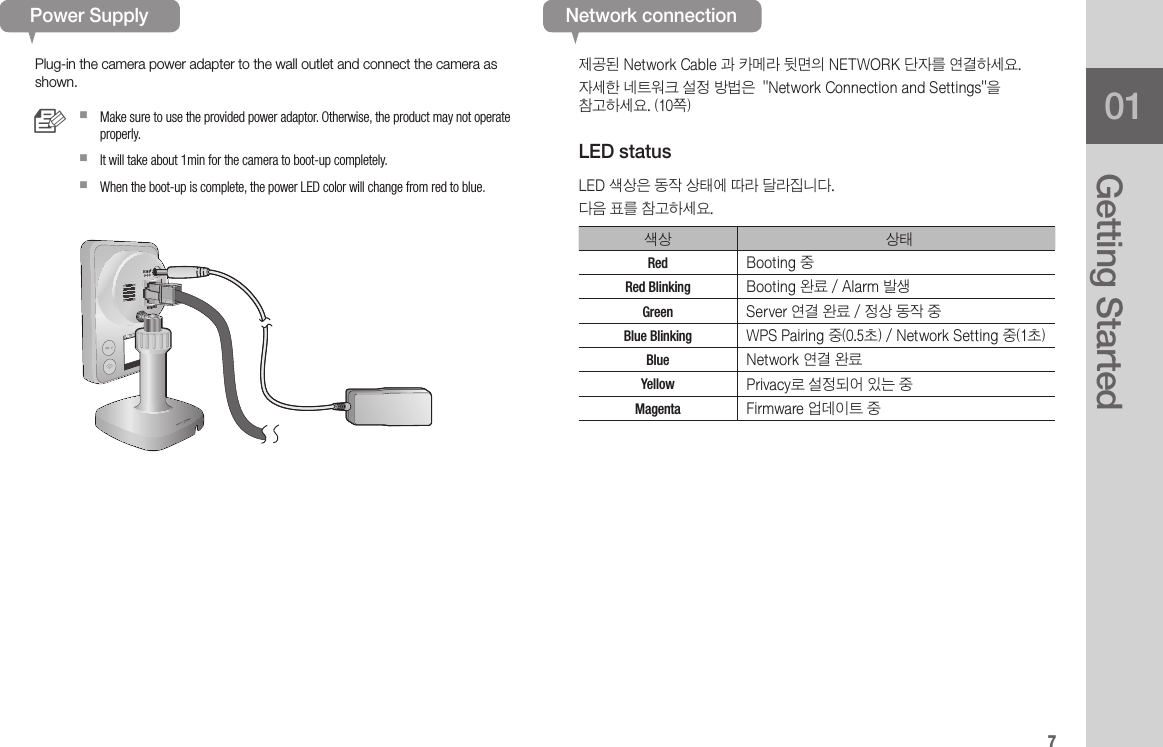
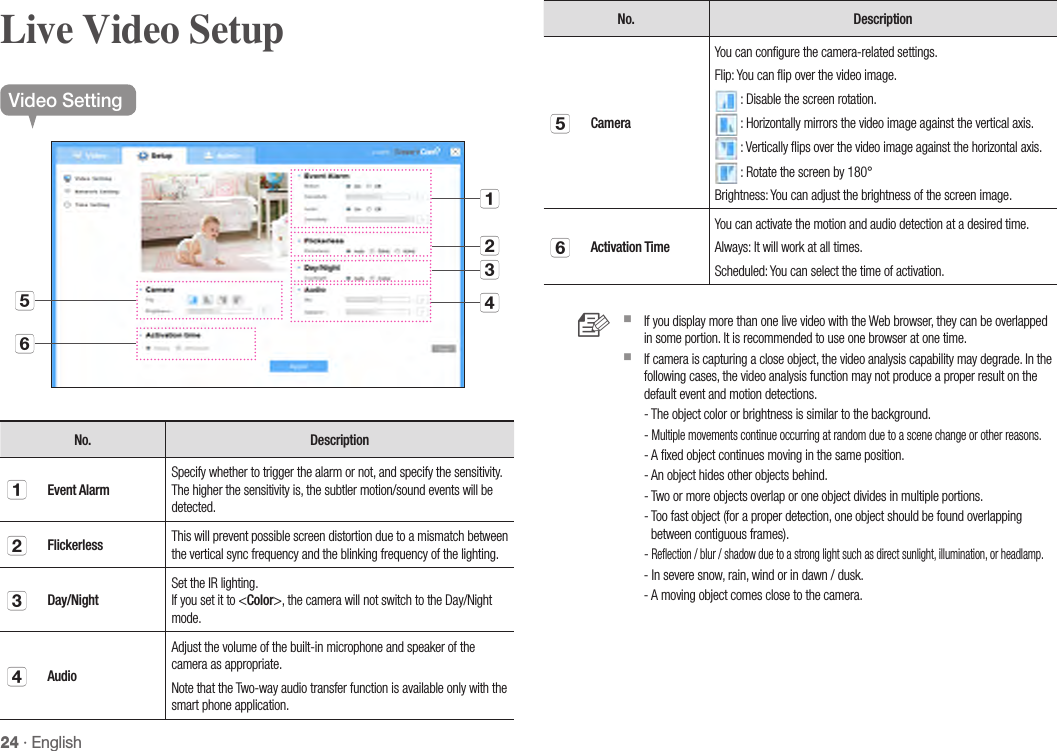
![902Installation & Network ConnectionWall mounting조립하기1. Zipper bag에서 Tape wall hanging 및 Bracket wall을 꺼내세요. 2. Tape wall hanging의 사각형 바닥면 필름을 제거한 후, Bracket wall의 바닥면에 위치를 맞춰 부착하세요. 3. Tape wall hanging의 손잡이를 잡고 이형지를 제거한 후, 부착하고자 하는 면의 [▲ Top] 표시가 12시 방향을 향하게 하여 부착하세요. n `The Tape wall hanging cannot be reused after being used once. `부착면에 먼지 / 물기 / 기름기를 사전에 닦아낸 후 부착해야 접착력이 좋습니다. 4. 동봉된 Adaptor의 선을 Bracket wall의 홈에 끼우세요. n ` Adaptor 플러그 부분이 12시 방향을 향하도록 하세요.5. Bracket body의 두 개의 홈에 맞춰 선을 정리하세요. n `Bracket body의 [UNLOCK LOCK] 표시와 Bracket wall의 [▲ Top] 각인 방향이 동일한 방향을 향하게 하세요.6. Bracket body를 시계 방향으로 ‘딸깍’ 소리가 들릴 때까지 회전시켜 고정하세요.TOPTOPTOPTOPTOPUNLOCK ◀▶ LOCKUNLOCK ◀▶ LOCKUNLOCK ◀▶ LOCKBracket body의홈](https://usermanual.wiki/Hanwha-Techwin/SNH-1011N/User-Guide-1731077-Page-10.png)
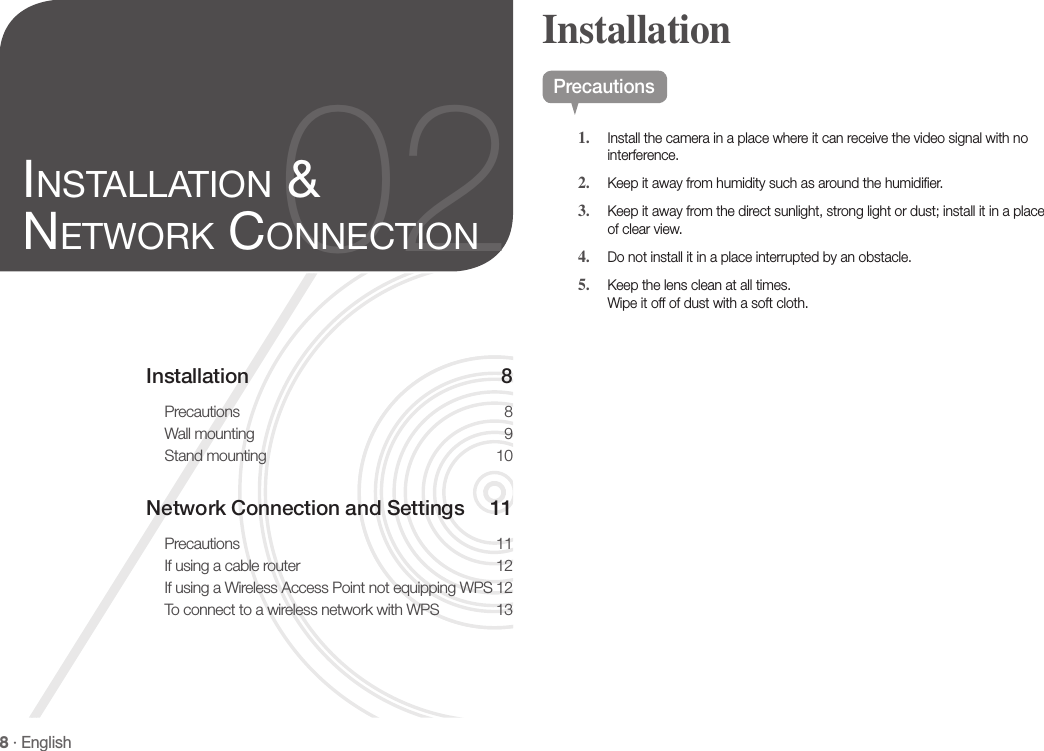
![10 · English7. Adaptor의 플러그와 카메라 뒷면의 전원 단자와 연결하세요 n `When done, remove the protective film from the lens.8. Adjust the camera’s shooting angle as appropriate. n `Do not put excessive force. Otherwise, it may cause damage to the camera.분리하기1. 카메라 뒷면의 전원 단자에서 Adaptor의 플러그를 빼세요.2. Bracket body의 왼쪽에 있는 [PUSHI TO RELEASE] 를 누른 상태에서 시계 반대방향으로 돌리면, Bracket wall이 분리됩니다. n `[PUSHI TO RELEASE] 를 누르지 않고 Bracket body를 시계 반대방향으로 돌려도 됩니다.Stand mounting조립하기1. Bracket body와 Bracket wall의 [▼], [▲] 각인 방향에 맞춰 조립하세요.DC IN 5VNETWORKSAMSUNG SMARTCAMUNLOCK ◀ ▶LOCKUNLOCK ◀▶ LOCK](https://usermanual.wiki/Hanwha-Techwin/SNH-1011N/User-Guide-1731077-Page-11.png)
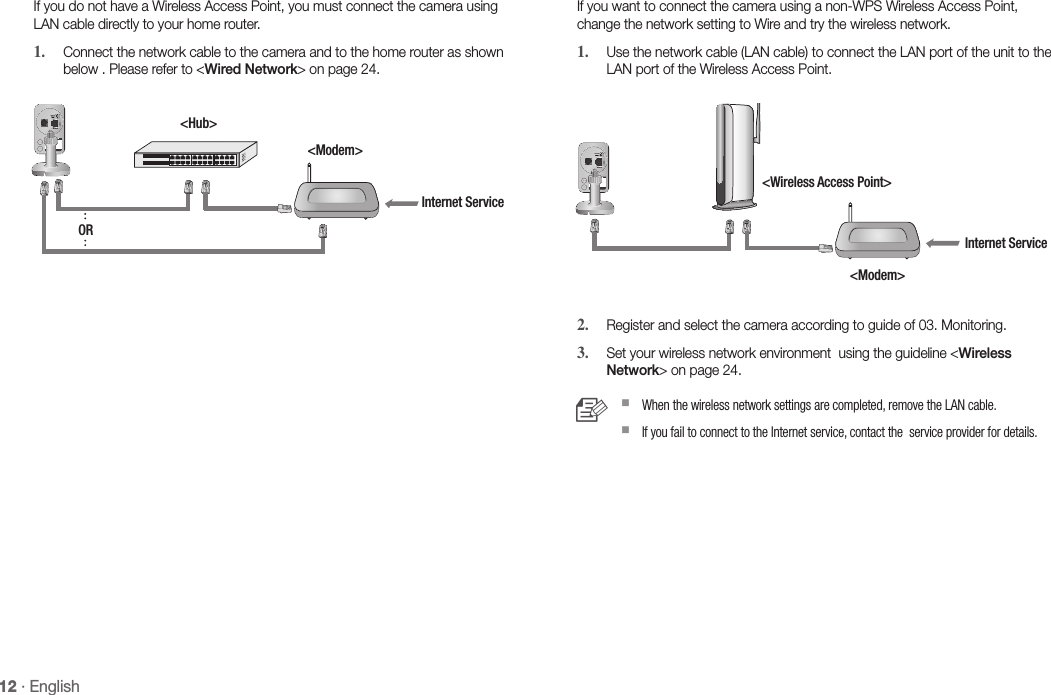
![1102Installation & Network Connection2. Bracket wall의 홈을 이용하여 시계 방향으로 ‘딸깍’ 소리가 들릴 때까지 회전시키세요.3. 분리 시, Bracket body 측면의 [PUSHI TO RELEASE] 를 누른 상태에서 홈을 이용하여 시계 반대방향으로 회전시키세요. n `조립 및 분리 시, 손톱이 부러지지 않도록 주의하세요.4. Adaptor의 플러그와 카메라 뒷면의 전원 단자와 연결하세요.Precautions• The wireless network access may fail, depending on the communications environment.• For details about the network settings and password, contact your network administrator or service provider.• For a specific Internet service requiring user authentication, you may not access the service. If this is the case, contact the service provider.• Do not access the unauthorized network.• The farther the distance from the Wireless Access Point, the longer time the network connection may take.• If you fail to access the selected wireless network, try a different Wireless Access Point to make access.• For more information about the router or the wireless connection, refer to the documentation of the router or contact the router manufacturer.• If the camera is connected to a multiple-Wireless Access Point network environment, some video packets may be lost, depending on the network traffic load.• According to the network policy (blocking UDP) of the service provider, the video transmission can be limited to one minute.• In addition to the above two situations, you may encounter a network delay or interruption due to the network conditions.• This product has gone through the compatibility test with worldwide top ranking routers in the market but you may still have a problem in compatibility with some conventional routers or other routers manufactured by other than the industry leading companies.Network Connection and SettingsDC IN 5VNETWORKSAMSUNG SMARTCAMUNLOCK◀▶ LOCK](https://usermanual.wiki/Hanwha-Techwin/SNH-1011N/User-Guide-1731077-Page-12.png)
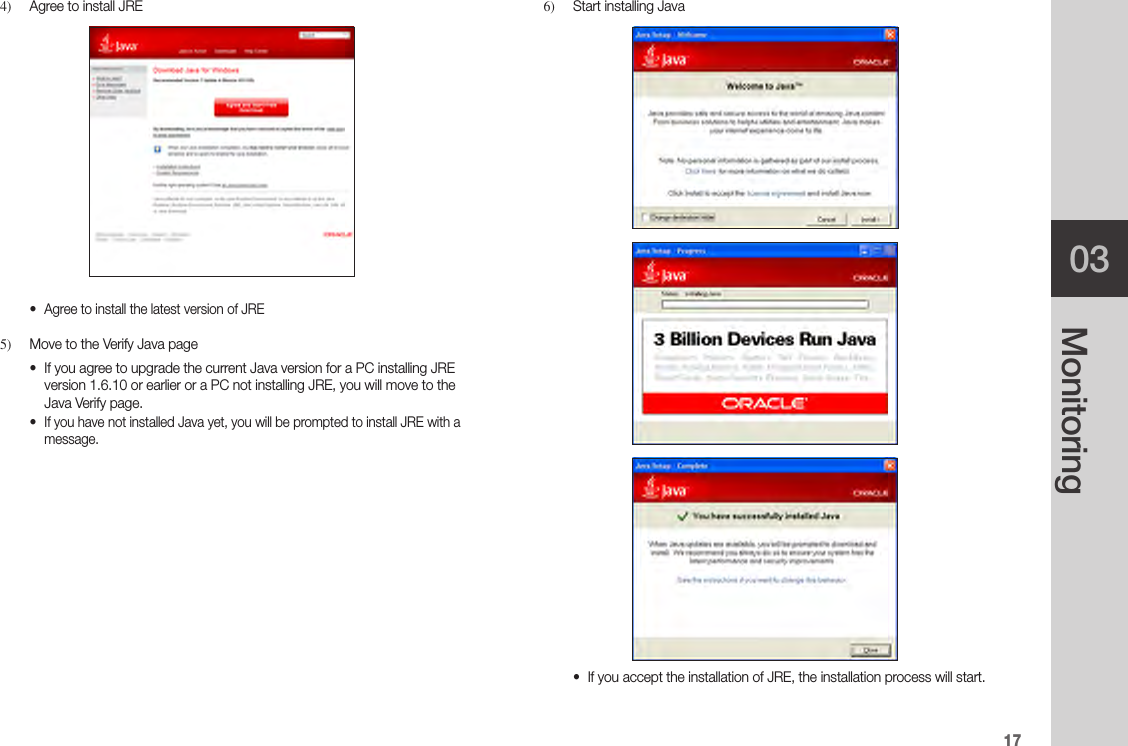
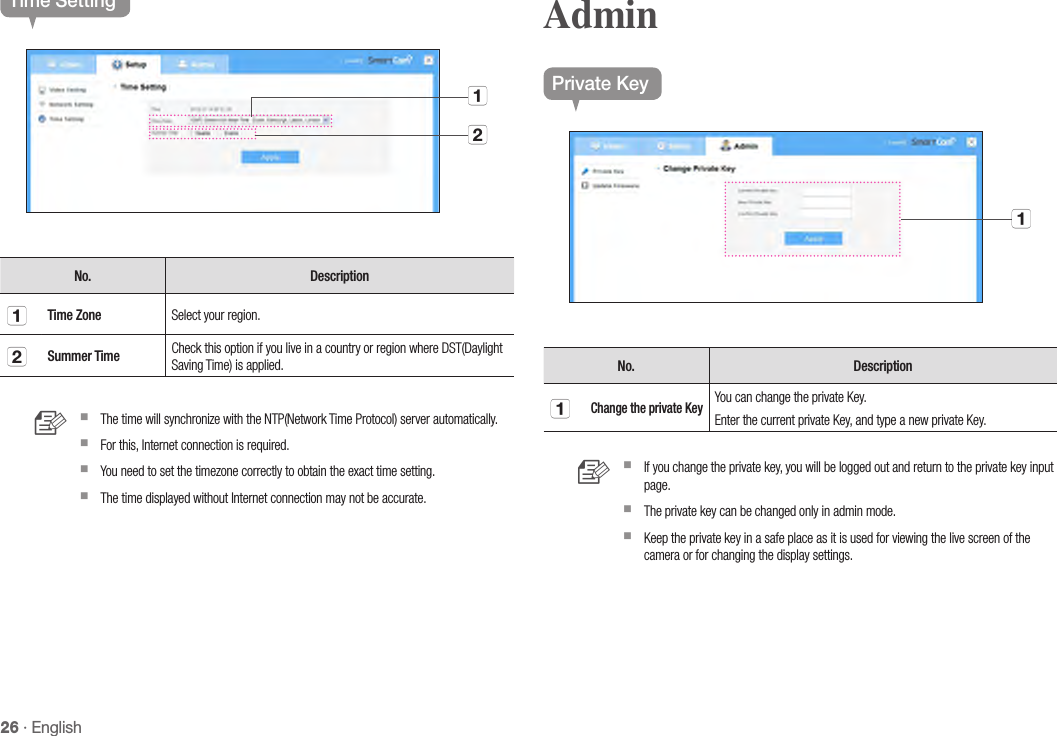
![1903Monitoring4. Enter the <Serial No> and click the check.5. Create a <Private key>. n `Private key is required to prevent unauthorized access to the camera. `You can use one to eight length strings of letters, numbers, and characters except ‘-’ and ‘,’.6. Create a <Camera Name>.• Camera Name : You can provide the camera name to your preference for identification in the multi-camera network. (ex: Living room, Kitchen...) n `You can use one to fifteen length string of letters, numbers, and characters ‘~`!@#$%^&*()_-|{}[];’,./?’.7. When done, click <Registration>. n `If you want to change the private Key, please refer to <Admin> on page 25.8. Once the camera is successfully registered, you can check the camera in the <Camera List>.SAMSUNG SMARTCAMMODEL : SNH-1011NDC 5. OV 2. 2AM/C : SNH-1011N/US PVApr 2012 S/N : XXXXXXXXXXXXXXXMAC ADDRESS. : XX-XX-XX-XX-XX-XXSAMSUNG TECHWIN CO., LTD.MADE BY SAMSUNG IN CHINA<Rear Label of the Product> XXXXXXXXXXXXXXX](https://usermanual.wiki/Hanwha-Techwin/SNH-1011N/User-Guide-1731077-Page-20.png)
![22 · English<YouTube> NotificationWhen enabled, you can record up to 30 seconds of video to your private YouTube account.1. Select Enable.2. Enter your YouTube user ID and password.3. Select public or private folder to save. By default, it’s set to private folder.4. Click [Apply]. n `You can check the recorded video at the YouTube homepage “Video Manager” “Uploaded”. `Note that depending on the policies of YouTube, the video may not be uploaded. `If setting to “public”, the video may be exposed to the public. `It is advisable to create and use one YouTube account for each camera. `Even when you have set the YouTube alarm, the video will not be transferred if the event alarm is not set to Enabled (see page 23). `If a continuous motion is detected or the audio alarm occurs, the camera can recognize the next event only after the uploading to YouTube is completed. (In other words, it does not recognize any event until the YouTube upload is finished.)<Picasa> NotificationWhen enabled, camera will send a picture of the event to your Picasa account.1. Enter your Picasa user ID and password.2. Select either public or private folder to save. By default, it’s set to private folder.3. Click [Apply]. n `If you have set the private setting of the video image, no image will be found in portal sites. `Refer to the policy of Picasa for the maximum number of uploaded images. `YouTube and Picasa must be enabled to receive notifications.<My Friends> NotificationWhen enabled, camera will send event notifications to listed user IDs. Notifications can be viewed in Smartcam App or Google Talk.•If this is set to <Enabled>, the video and image link recorded in YouTube and Picasa will be transferred to the listed friends in real time in the event of an alarm.• The video/image alarm will be transferred only if you have set the Youtube and Picasa enabled. Otherwise, no alarm will be triggered.• You will have no video displayed if you don’t have any Youtube ID and access a private content. •Even when you access the Youtube site, no video will be played automatically. Be sure to click the Play icon to play a video. If you fail to play the video, log into the Youtube site and install Flash Player and try again.• The Friend list will have user IDs registered at the Web site (www.samsungsmartcam.com). When an alarm occurs, the PUSH alarm will be notified to the respective smart phones via the Web site.• If you want to receive the notification with Google Talk, follow the instructions below to configure the Google Talk settings.1. xxxxxxxx@xmpp.samsungsmartcam](https://usermanual.wiki/Hanwha-Techwin/SNH-1011N/User-Guide-1731077-Page-23.png)
![2303Monitoring ❖<Google Talk> Notification1) In the friend’s list, it shows the IDs that camera is registered to and Google Talk friends that receives real-time notification from the camera.2) When enabled, you can receive real-time event notification through Google Talk messenger and Smartphone push service.3) To receive instant event notification, add the camera as a friend to your Google Talk messenger account. You have to add the following user ID. (camera serial number@xmpp.samsungsmartcam.com) (i.e., XXXXXXXX@xmpp.samsungsmartcam.com)4) Once camera is invited, you will receive an instant message to enter the private key for authentication. Enter the private key of the camera you are adding.5) Once completed, you can see the Google Talk messenger ID in the camera My Friends list.6) Click [Apply].<Twitter> NotificationWhen enabled, camera will send a notification as a message to your twitter account.1. Click on “Request URL”.2. Click on Get Token.3. Twitter web page will pop-up for authorization.4. Enter your Twitter user ID and password and click on “Authorize app” to get the Access Token.5. You will see the pin number generated. Copy the pin numbers and go back to the camera page and paste the pin number in the Access Token section.6. Click [Apply]. n `The alarm notification will be sent to the specified user account via Twitter.<E-mail> Notification1. Please see the below table for the popular email server information.Gmail Yahoo Yahoo PlusServer Address smtp.gmail.com smtp.mail.yahoo. complus.smtp.mail.yahoo.comPort 465 25 465Use SSL. Use Don’t Use UseUser Authentication on on onID Full email address Only ID without “@yahoo.com”Only ID without “@yahoo.com”Password Email password Email password Email password Sender Full email address Full email address Full email address2. If your email provider is not listed, you need to get the email server information from your email provider.3. Add above information and receiver full email address and then click Add button.<Receiver email address>](https://usermanual.wiki/Hanwha-Techwin/SNH-1011N/User-Guide-1731077-Page-24.png)