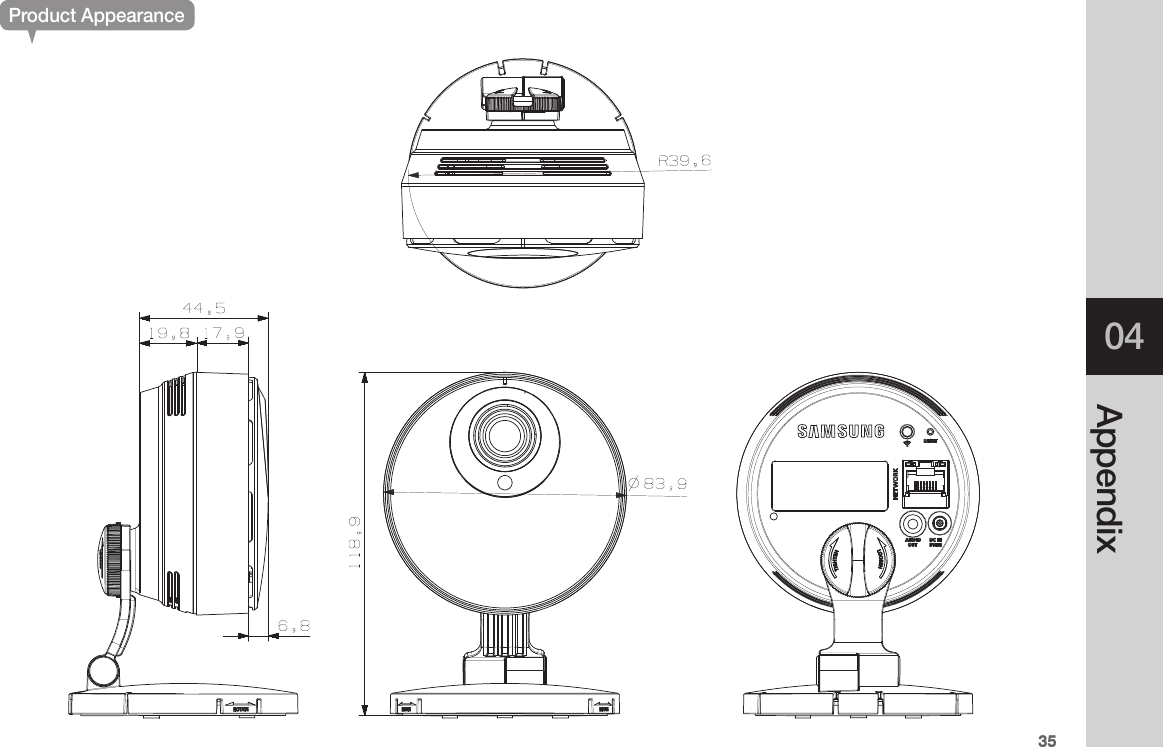
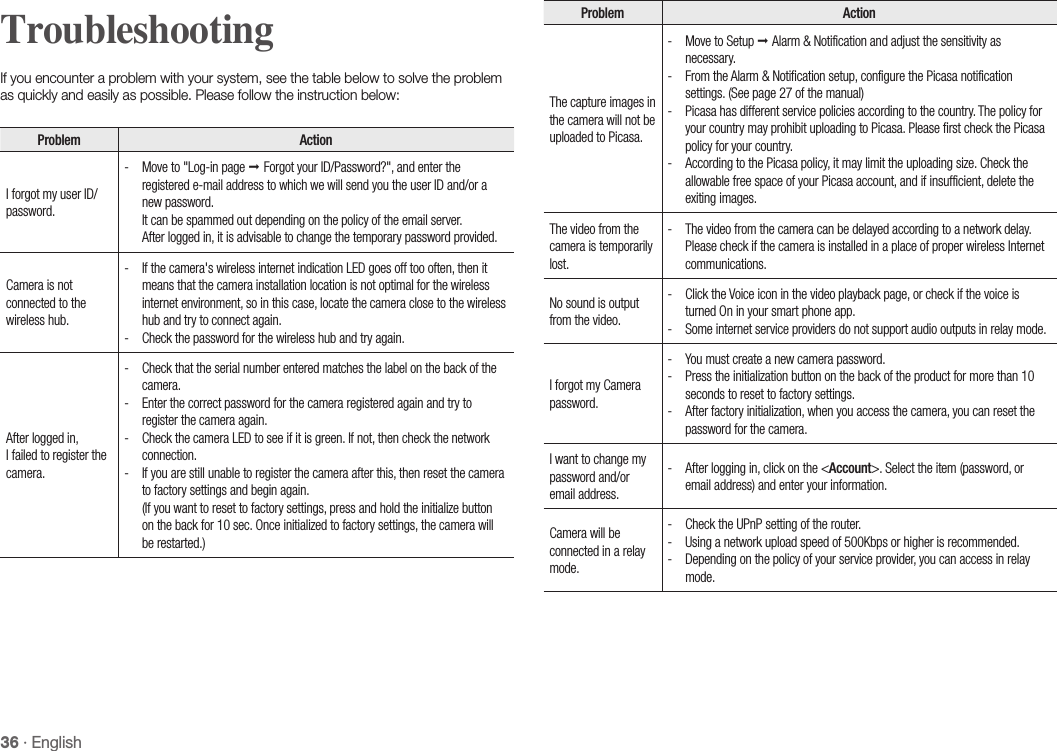
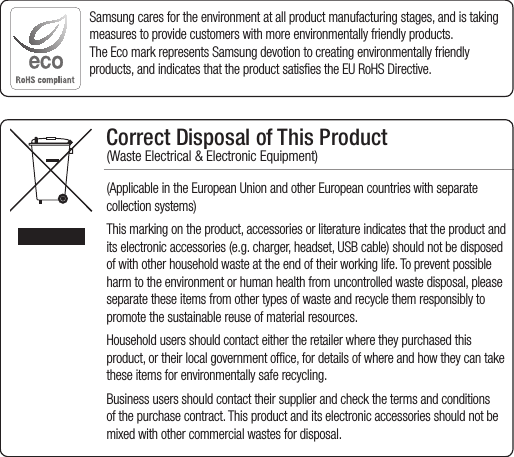
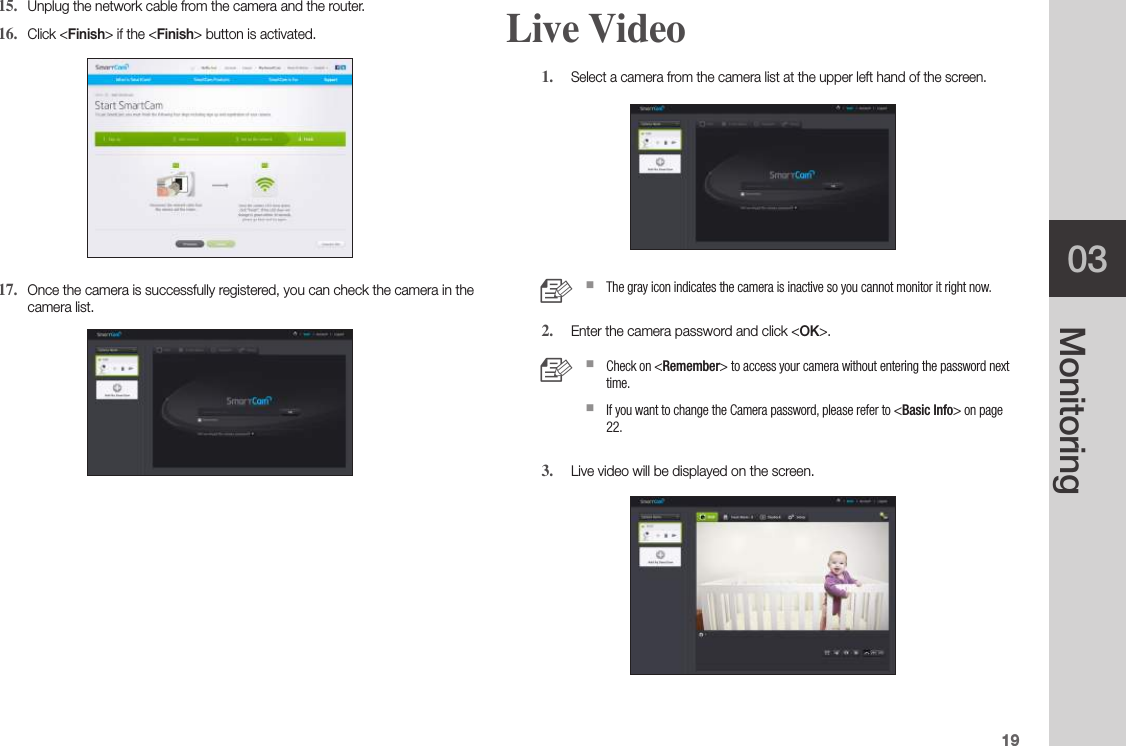
Hanwha Techwin SNHP6412BN SMARTCAM User Manual
Hanwha Techwin Co., Ltd. SMARTCAM
UserManual.wiki
>
Hanwha Techwin
>
SNHP6412BN User Manual
User manual
Navigation menu
Upload a User Manual
Namespaces
Wiki Guide
HTML
PDF
Info
Views
User Manual
Discussion / Help
Navigation


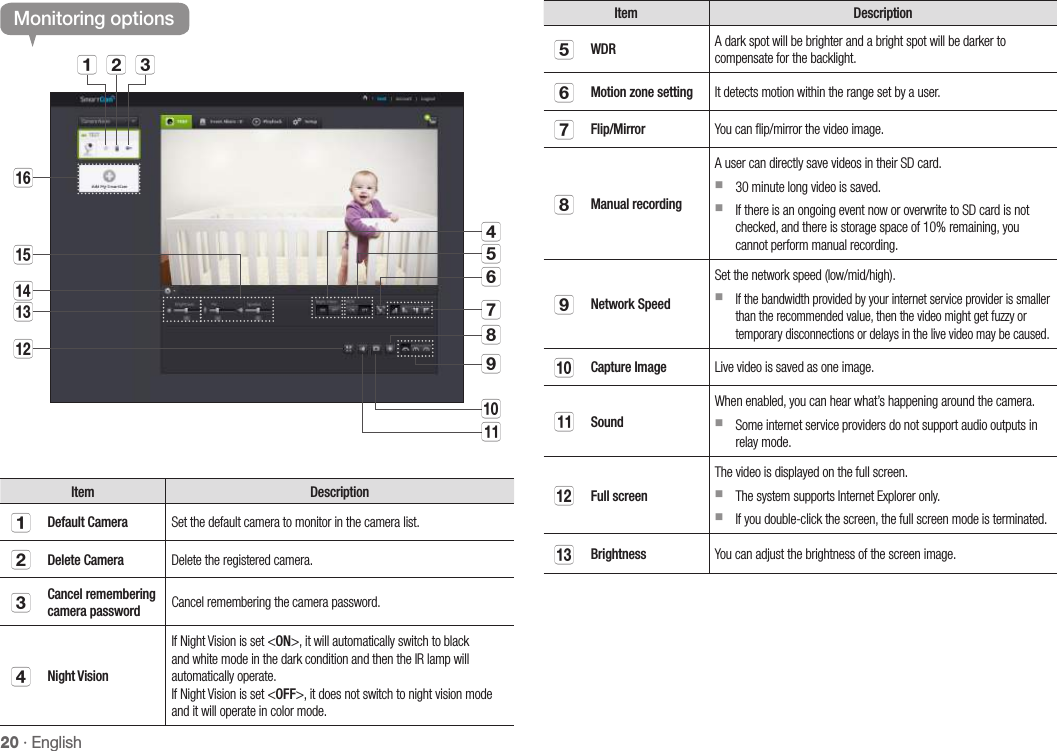
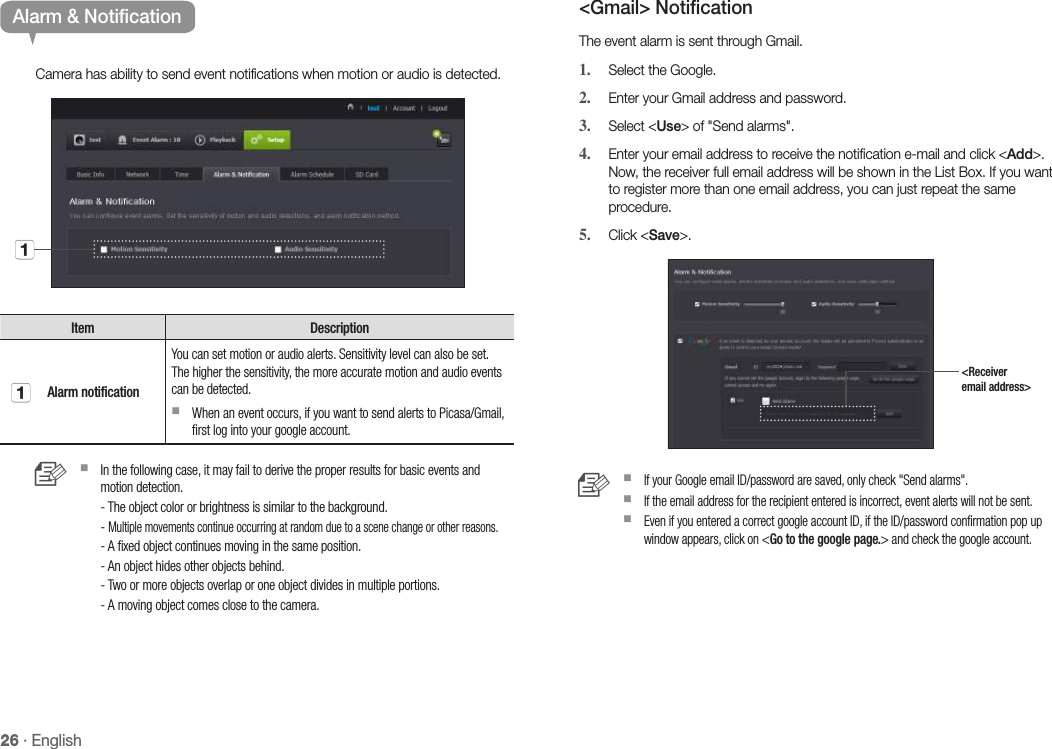
![2103MonitoringItem DescriptionnHide/unhide detailed menu Click on the [ ] icon to unhide or hide detailed setting menu.AudioAdjust the volume of the built-in microphone and speaker of the camera as appropriate. If you set the mic setting to '0', you will not hear the live audio, and it will not be recorded in your SD card. Note that the Two-way audio transfer function is available only with the smart phone application.Add a camera Click the [ ] icon to register an additional camera. ❖Network SpeedProfile Name Resolution Frame rate Recommended bandwidthLow Speed Network VGA 20 fps 0.7MbpsMid Speed Network HD(720P) 15 fps 1MbpsHigh Speed Network Full HD(1080P) 30 fps 2.8Mbps n `What is relay mode?If the network condition is unstable, the camera cannot make a normal connection (P2P), so it will set up a connection in relay mode. In this case, you will see the video for the first seven minutes only. `Relay mode is added feature where the video from the camera is transmitted to Samsung server then retransmitted to the user's computer. `If you have trouble connection to the camera, visit "http://www.samsungsmartcam.com", go to support page, and refer to "Troubleshooting" on it. `It is recommended to use one browser at one time. `The Night Vision video produces a different visibility according to the distance between camera and subject. ❖Motion Zone Setting1) Click the < > icon.2) Drag it to the screen to set the detection area.3) Click on <OK>. If you want to delete the set area, click on <Delete All>. n `The <Motion Detection> function needs to be activated in order to use the motion zone function. `When the motion detection function is activated, any motion will be detected, even if no motion zone is set. `You can set up to 3 motion zones.](https://usermanual.wiki/Hanwha-Techwin/SNHP6412BN/User-Guide-3230844-Page-21.png)