Hi G Tek IGMA31 HAND HELD DATA TERMINAL User Manual USERS MANUAL
Hi-G-Tek Ltd HAND HELD DATA TERMINAL USERS MANUAL
UserManual.wiki
>
Hi G Tek
>
IGMA31 User Manual
USERS MANUAL
Navigation menu
Upload a User Manual
Namespaces
Wiki Guide
HTML
PDF
Info
Views
User Manual
Discussion / Help
Navigation


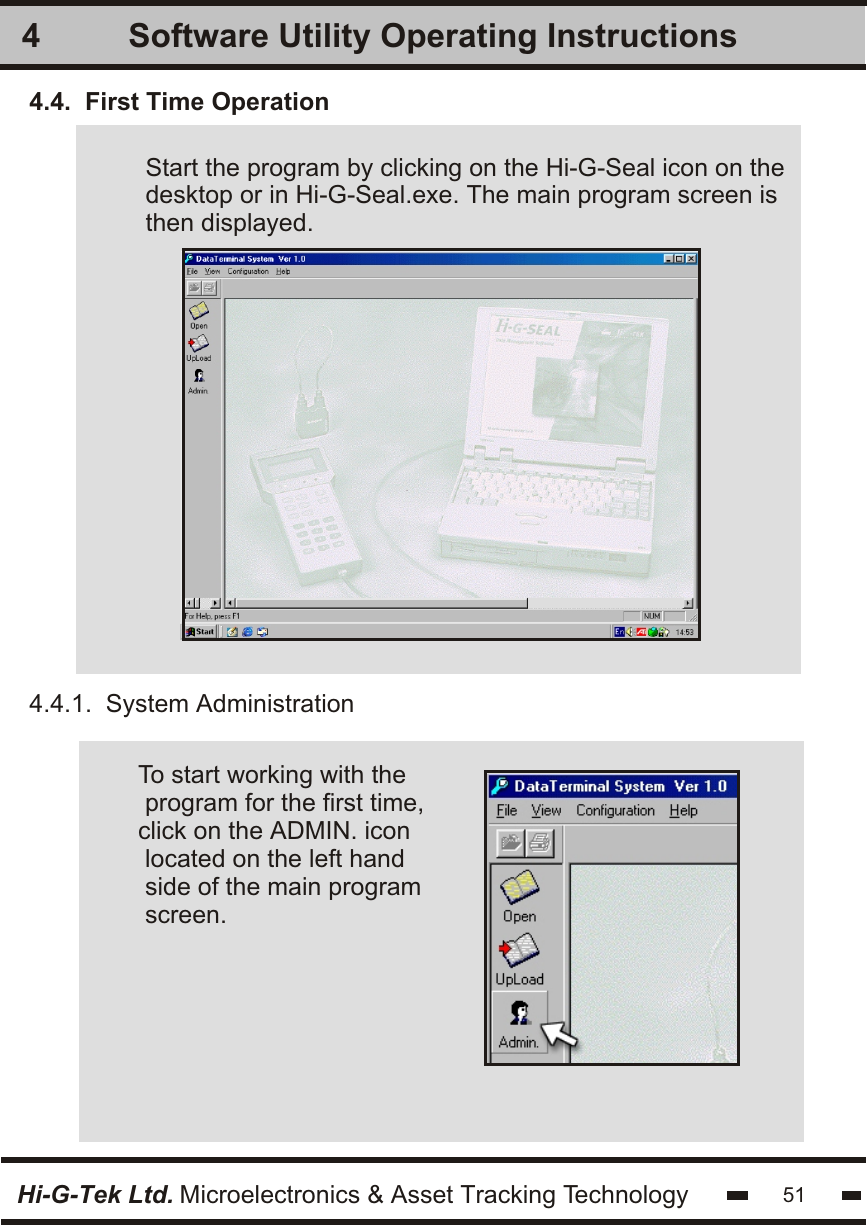
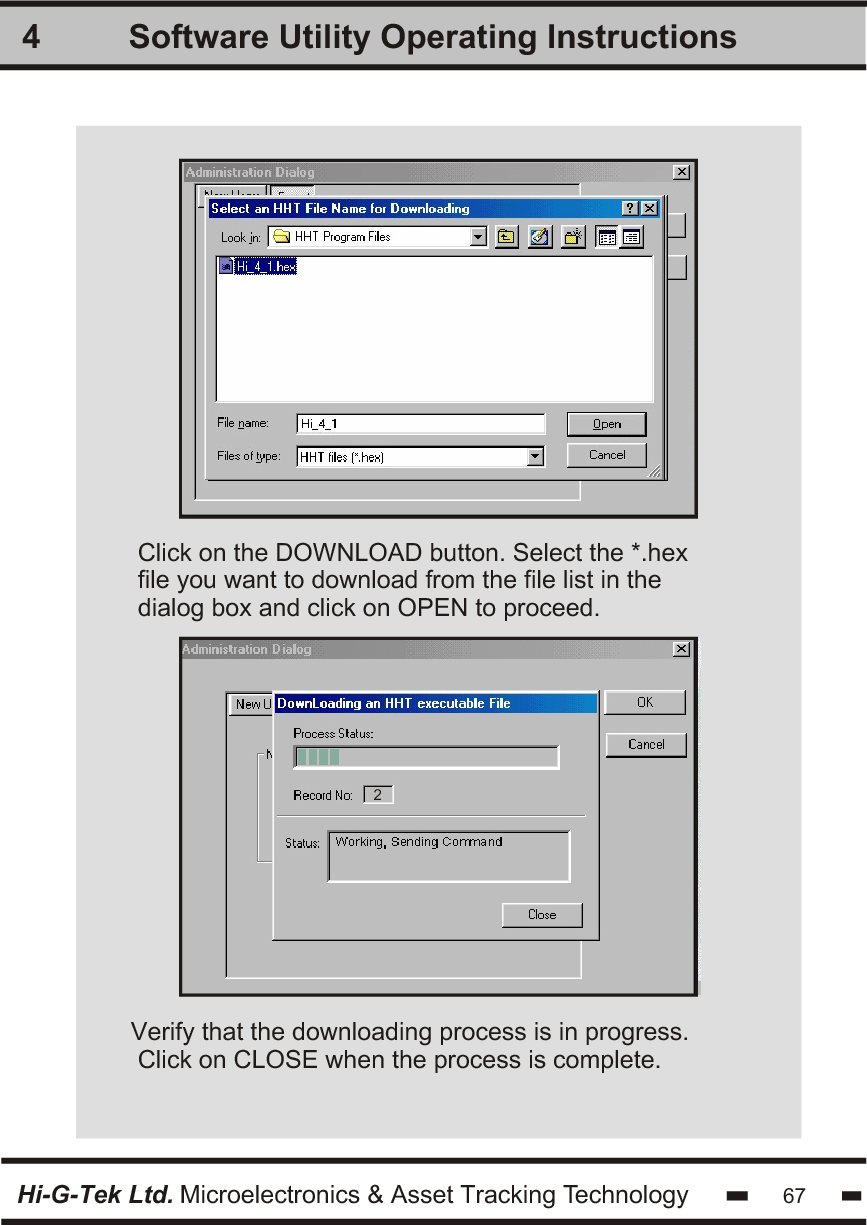
![4.1. Software Installation4.2. Connecting the Terminal to the PC4.3. Software Setup and OperationSoftware Utility Operating InstructionsIt is advisable to close all open programs prior to installation.Insert the Hi-G-Seal Installation CD into the CD drive.From the START menu,click on RUN and then on [disk drive]:/setup.exe. The program will begin installing.Follow the installation instructions as they appear onyour screenBy default, the Hi-G-Seal folder will be stored in the PROGRAM FILES folder.Create a shortcut to Hi-G-Seal.exe by dragging theHi-G-Seal.exe icon from the program folder onto thedesktop.To run the Hi-G-Seal program, double-click on theHi-G-Seal icon on the desktop.4The DataSeal Terminal is connected to the PC via theRS-232 cable supplied.Connect the cable to the terminal jack at the bottom ofthe DataTerminal unitConnect the cable to the PC com portHi-G-Tek Ltd. Microelectronics & Asset Tracking Technology 50](https://usermanual.wiki/Hi-G-Tek/IGMA31/User-Guide-798079-Page-50.png)


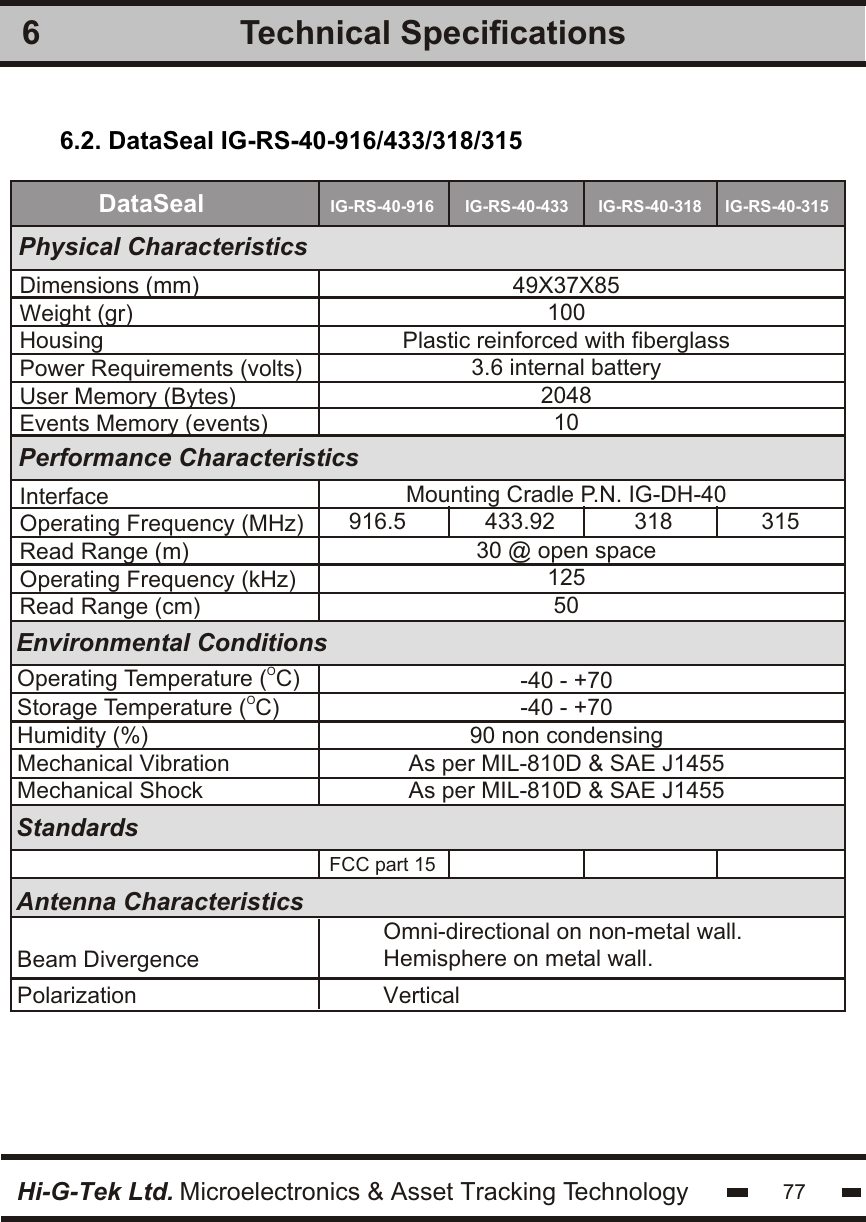
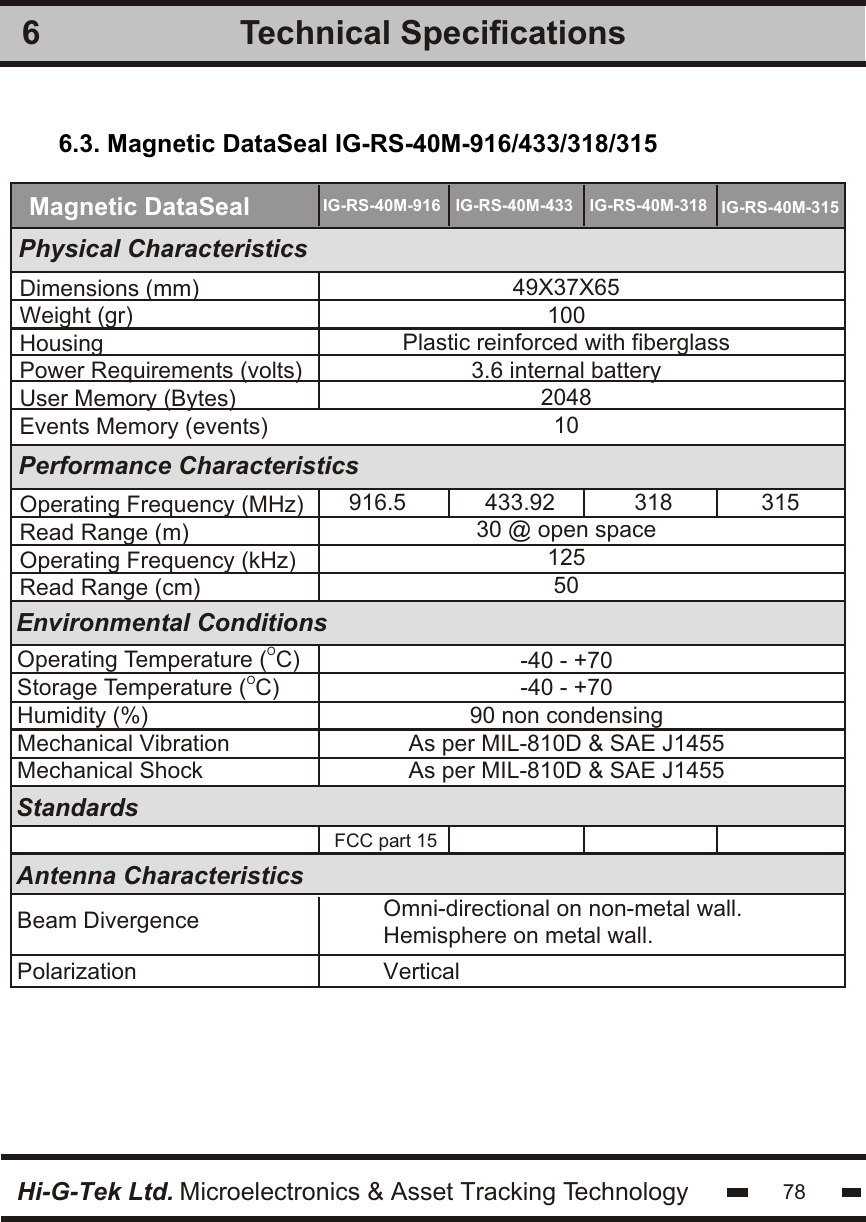
![Environmental ConditionsTechnical Specifications66.1. DataTerminal 125 kHz IG-MA-31/IG-MA-32Hi-G-Tek Ltd. Microelectronics & Asset Tracking Technology 76DataTerminalPhysical CharacteristicsPerformance CharacteristicsIG-MA-31 IG-MA-32RFID Frequency (MHz) -13.56Dimenisons [mm]Weight[gr]Power requirementsMemory210x100x455004xAA Size 1.5V Alkaline batteires190 Seals @55events per SealInterfaceOperating Frequency [KHz]Output power [dbuv/m]Read RangeRS232125110 @ 3m40Operating Temperature [Storage Temperature Humidity [%]Mechanical Vibration & ShockoC]oC][-20 to +70-20 to +7050 Non CondensingHand carried](https://usermanual.wiki/Hi-G-Tek/IGMA31/User-Guide-798079-Page-76.png)