Hi G Tek IGMA31 HAND HELD DATA TERMINAL User Manual USERS MANUAL
Hi-G-Tek Ltd HAND HELD DATA TERMINAL USERS MANUAL
Hi G Tek >
USERS MANUAL

User's Manual
UM4714Ver. 6.03
Hi-G-Tek Ltd. Microelectronics and Asset Tracking Technology
DataTerminal
and
DataSeal
System
DataTerminal System
2
Table of Contents Page
3.1. Battery Installation/Replacement
3.2. Initial Steps
3.3. Screen Contrast
3.4. Keypad Buttons
3.5. SET Procedure
2.1. Seal Installation
2. DataSeal Installation
3. DataTerminal: Operating Instructions:
1.2.1. DataSeal Mounting Fixture
1.2.2. The DataSeal
1.2.3. Seal Wire
1.2.4. The DataTerminal
1.2.5. Communication Cable
1.2.6. Application Software
Hi-G-Tek Ltd. Microelectronics & Asset Tracking Technology
1.3.System Requirements
6
9
9
9
5
13
15
10
10
12
12
16
19
20
21
21
22
23
23
25
26
26
29
30
30
1. Introduction
1.1 About this product
1.2. DataTerminal System Components
3.5.1. Basic SET Procedure
3.5.2. SET Procedure with Badge ID
3.6.1. Basic READ Procedure
3.6.2. READ Procedure with Badge ID
3.7. VRF Data
3.8. RDT Data
3.6. READ Procedure
3
3.9.8.1. Set Password
3.9.8.2. Set Clear Data Password
3.9.8.3. Date Format
4. Software Utility Operating Instructions
3.9.5. Set-up Time
3.9.6. Set-up Zone
3.9.7. Display Version
3.9.8. Configuration
3.9.9. View Org. ID List
3.9.10. View Reader ID
3.9.11. Synchronize Time
3.9. Menu Options
4.1. Software Installation
4.2. Connecting to the PC
4.3. Software Setup and Operation
4.4. First Time Operation
40
40
41
41
42
44
46
46
46
47
Hi-G-Tek Ltd. Microelectronics & Asset Tracking Technology
4.4.1. System Administration
4.4.2. Setting Your Configuration Port
4.4.3. Setting Time Zone
49
50
50
50
51
51
57
58
39
39
3.9.3. Statistics
3.9.4. Set-up Date
3.9.1. View Data
3.9.2. Clear Data
3.9.1.1. View From List
3.9.1.2. View by ID
3.9.2.1 Clear All
3.9.2.2. Clear From List
3.9.2.3. Clear by ID
DataTerminal System
Table of Contents Page
31
32
32
35
36
36
37
37
4
5. Troubleshooting
6. Technical Specifications
5.1. Low Voltage
5.2. Terminal Failure
5.3. RF Communication Failure
5.4. Seal Failure
5.5. System Setup
6.1.DataTerminal 125 kHz IG-MA-31/32
6.2. DataSeal IG-RS-40-916/433/318/315
6.3. Magnetic DataSeal
IG-RS-40M-916/433/318/315
69
70
71
72
73
74
75
76
77
78
Hi-G-Tek Ltd. Microelectronics & Asset Tracking Technology
DataTerminal System
Table of Contents Page
4.5. File Upload
4.6. Viewing Data Files
4.7. DataTerminal Software Upgrade
59
61
65

Introduction
Chapter 1
5
Hi-G-Tek Ltd. Microelectronics & Asset Tracking Technology
The Hi-G-Tek range of products provides a highly reliable and secure
cargo and asset monitoring system utilising state-of-the-art RFID
technologies.
Introduction
1.1. About the Product
1
6
Hi-G-Tek Ltd. Microelectronics & Asset Tracking Technology
The Hi-G-Tek system was developed in order to fill the requirement
of fast, automatic processing of secured cargoes and to provide real
time monitoring of cargoes both in transit and in storage.
The DataSeal is a sophisticated device, which includes a
transmitter/ receiver unit, real-time clock, processor, memory
and sensing circuitry for sealing verification. The Sealing Wire
prevents any attempt of opening, bypassing or tampering with the
seal without alerting the system and recording of the event. The
system combines the technological and operational advantages of
both low frequency close-range data management AND high
frequency long range sealing verification and automatic data
collection.
DataSeal's ability to log data and communicate it through a
Handheld DataTerminal is best used In low frequency/short range
applications. This way the electronic manifest of the sealed cargo
can be written into the DataSeal's memory. The information includes
Vehicle ID, container and invoice numbers, cargo description,
quantities, destination, etc. Capable of logging up to 55 events, the
information can be downloaded into a computerised database for
storage and processing.
Cost-effective, more reliable and more secure than their mechanical
counterparts, the Hi-G-Tek product range will constantly
monitor your assets and alert you to any potential problems
at all times.
The reusable electronic seal automates the processing of secured
cargoes enabling the organization to effectively and economically
process the increasing numbers of containers' traffic in the ports
and between inland destinations.
Thank you for choosing Hi-G-Tek quality products.

Introduction
1
7
Hi-G-Tek Ltd. Microelectronics & Asset Tracking Technology
When used in high frequency/long range applications, the DataSeal
is capable of communicating its ID and status to a distance of up to
30 meters. The DataSeal transmits the information in reply to an
interrogation by the DataReader. The ability of the DataSeal to
communicate with the DataReader at long range enables the use
of the DataSeal in applications such as: tracking and sealing
verification of containers in transit, protection of containers in storage,
remote, automatic data collection from secured cargoes as they pass
through check points, etc.
The handheld DataTerminal is used for writing information into the
DataSeal's memory at the departure point and retrieving the
information at the destination. Events, logged in the DataSeal's
memory are also downloaded into the DataTerminal.
The DataReader is used in long range applications to interrogate the
DataSeals over the high frequency channel for their ID and Status.
The DataReader is also used for writing information into the DataSeal
and retrieving logged information from the DataSeal. Each
DataReader can communicate with numerous DataSeals
simultaneously and verify their presence and status. The DataReaders
can be chained to allow coverage and protection for secured cargoes
in large storage yards and ports. The DataReader has an optional
communication modem which allows the system to transmit the
collected information through available communication channels to
the Control Center. The DataReader is available in both outdoor and
indoor models.
A set of Mounting Fixtures has been developed for the DataSeal
system which allow convenient mounting and removal of the
DataSeal whenever required. The various Mounting Fixtures differ
in the level of protection they provide to the DataSeal as may be
required in various environments.
This User's manual includes all the information required for
installing and operating Hi-G-Tek Electronic Seals and
DataTerminals.
Introduction
Software License Agreement
1
Information in this document is subject to change without notice and
does not represent a commitment on the part of the manufacturer. The
software described in this document is furnished under license
agreement or nondisclosure agreement. It is against the law to copy
the software on any medium except as specifically allowed in the license
or nondisclosure agreement. The purchaser may make one copy of the
software for backup purposes. No part of this manual may be reproduced
or transmitted in any form or by any means, electronic or mechanical,
including photocopying, recording, or information storage and retrieval,
for any purpose other than for the purchaser's personal use, without
written permission.
DataSeal is a tradmark of Hi-G-Tek.
Pentium is a trademark of Intel Corporation.
c
Copyright 2001 Hi-G-Tek Ltd.
All rights reserved.
TM
TM
8
Hi-G-Tek Ltd. Microelectronics & Asset Tracking Technology
DataSeal System Components
1.2
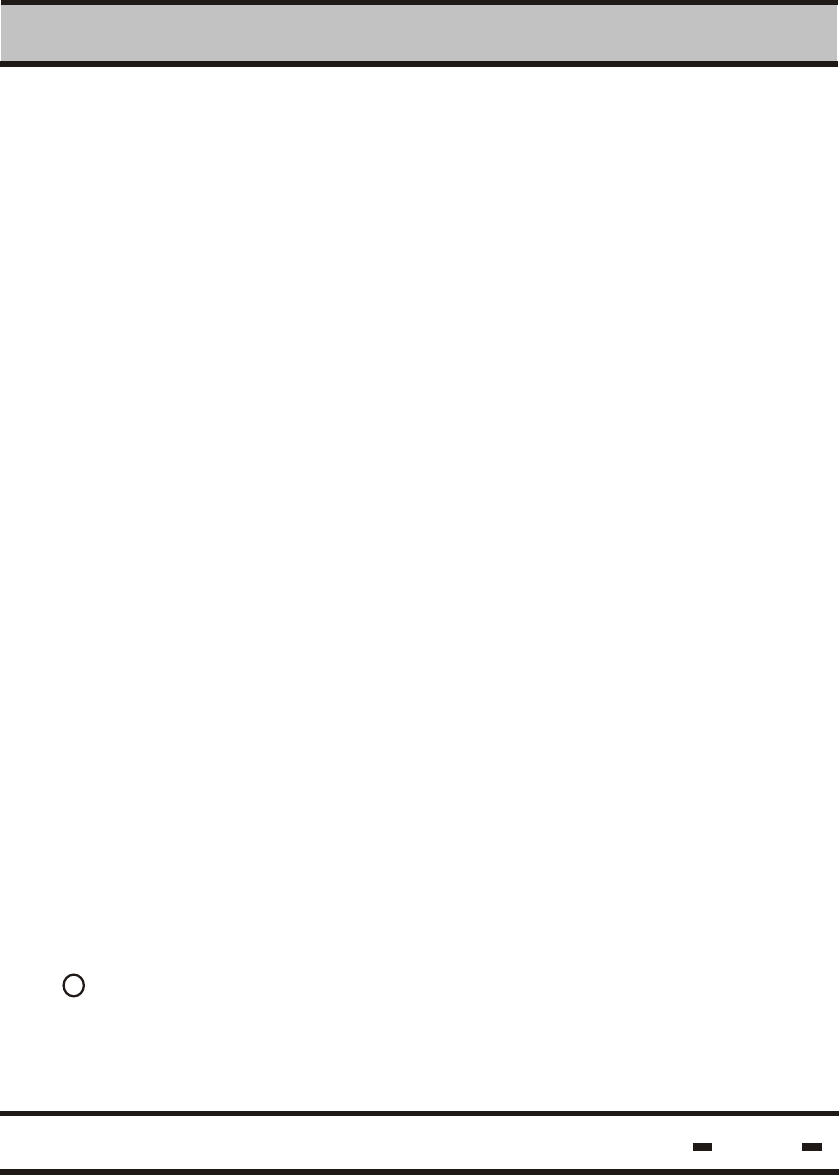
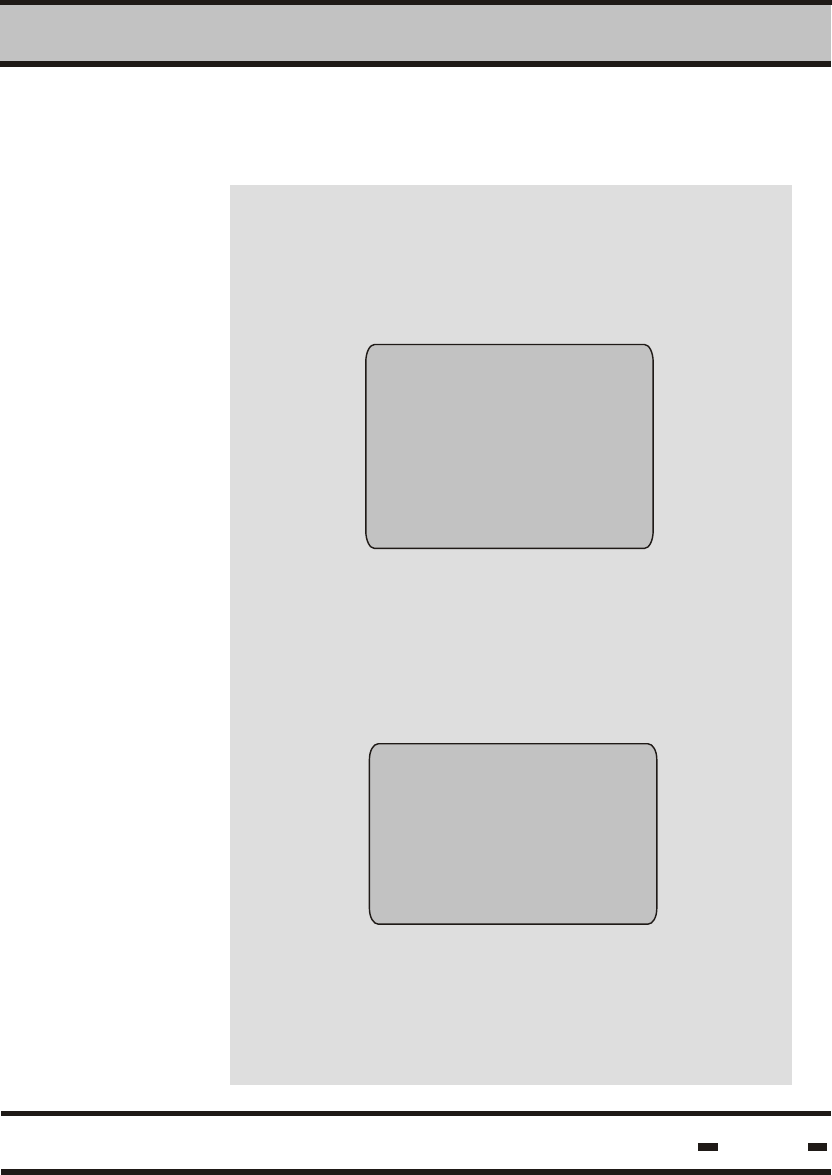
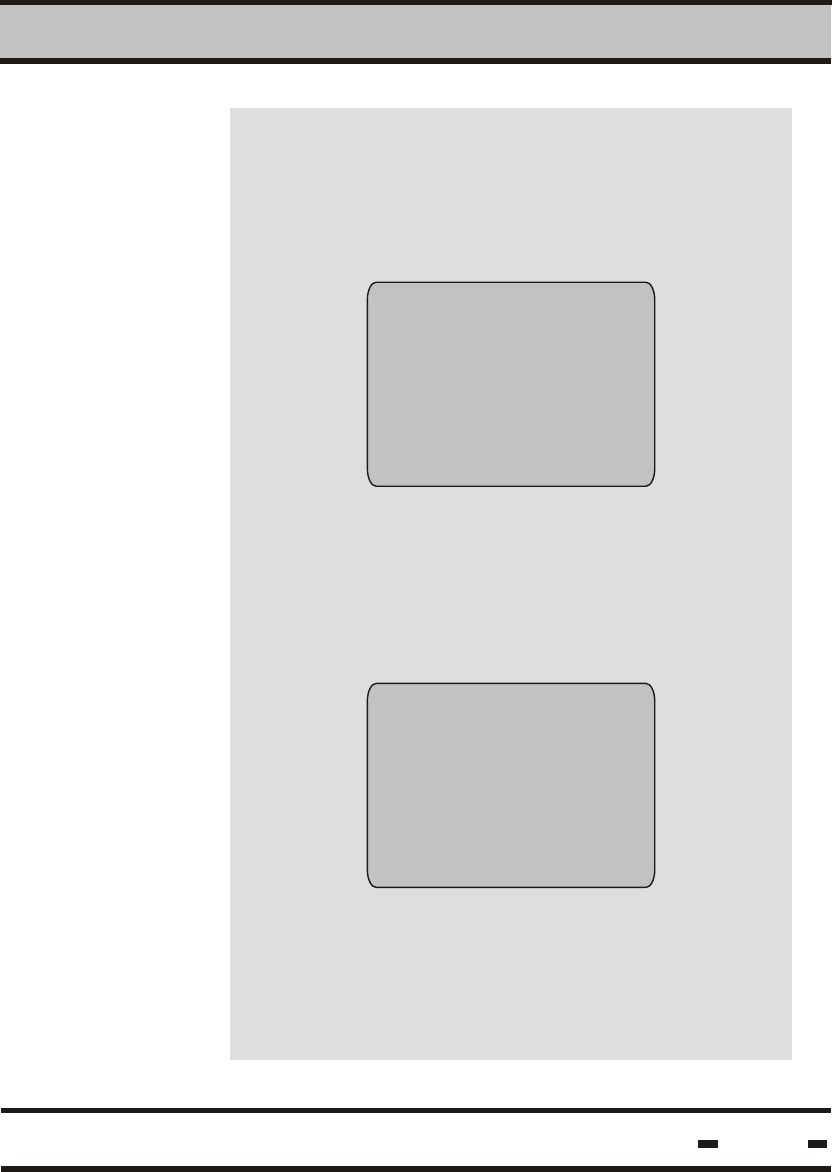
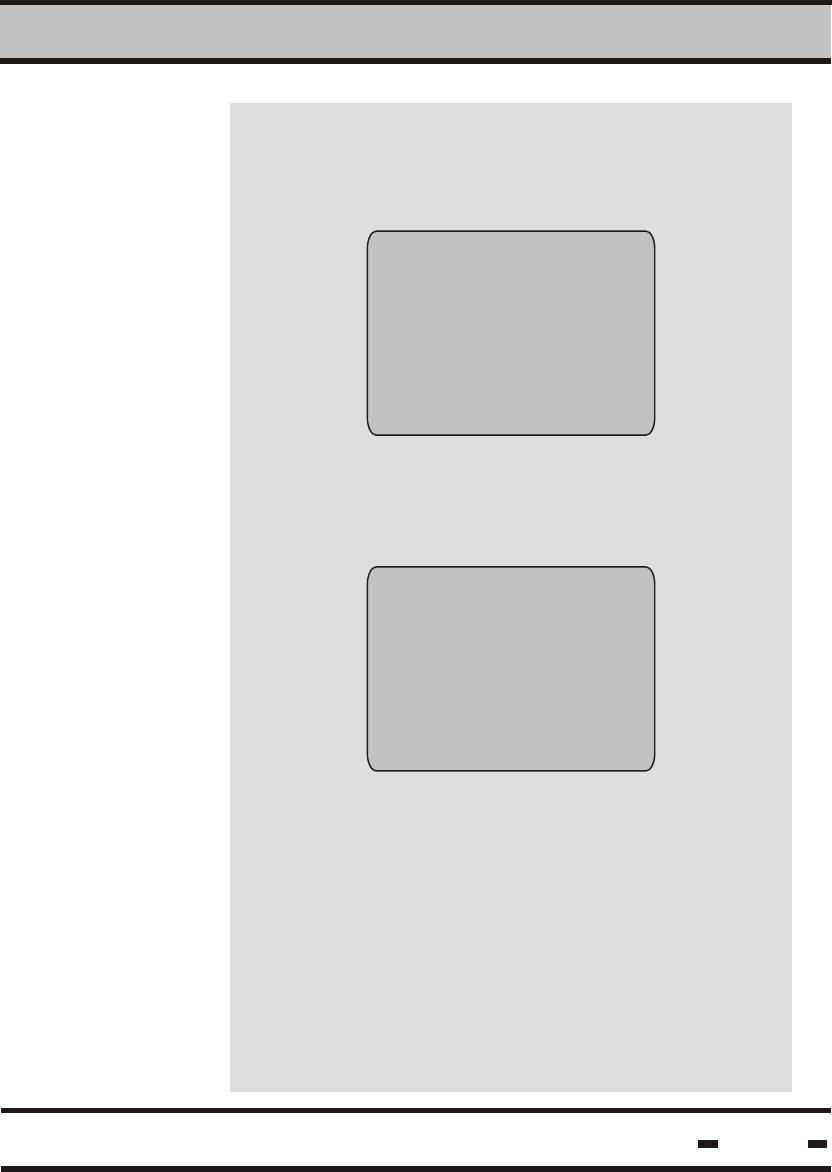
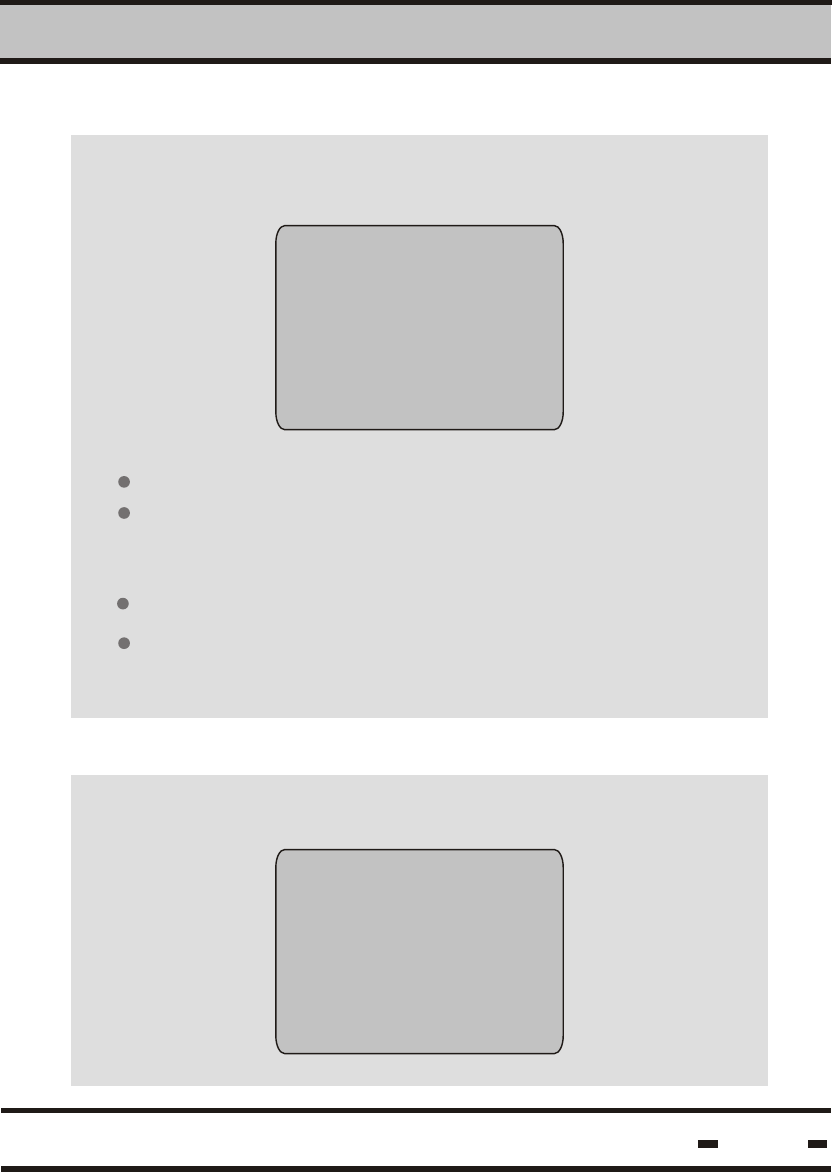
1.2.1. The Mounting Fixture
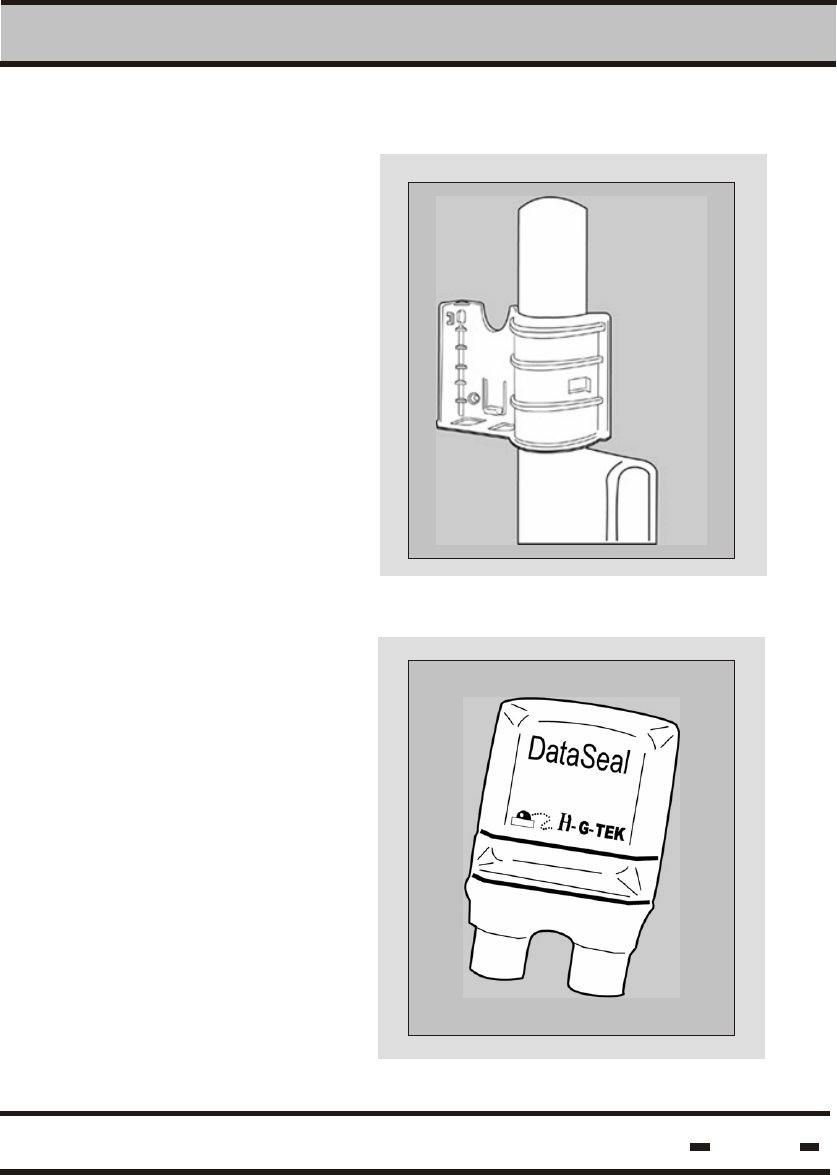
1.2.2. The Seal
Introduction
1
The DataSeal Mounting
Fixture is used to mount
the DataSeal on the
container's keeper bar
or other surface.
The DataSeal unit
contains the electronic
circuitry of the DataSeal
including a battery, a
transceiver, a processor
and memory to record
and store the events and
the relevant information
about the cargo.
9
Hi-G-Tek Ltd. Microelectronics & Asset Tracking Technology
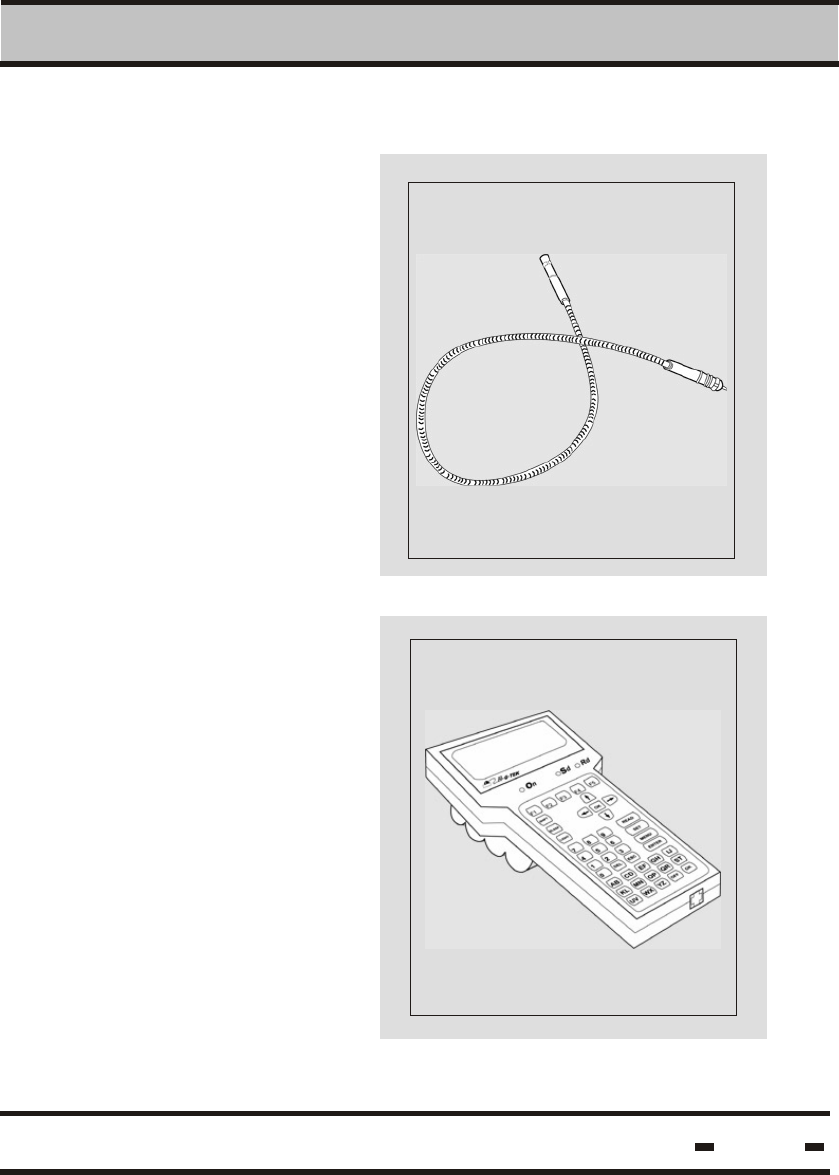
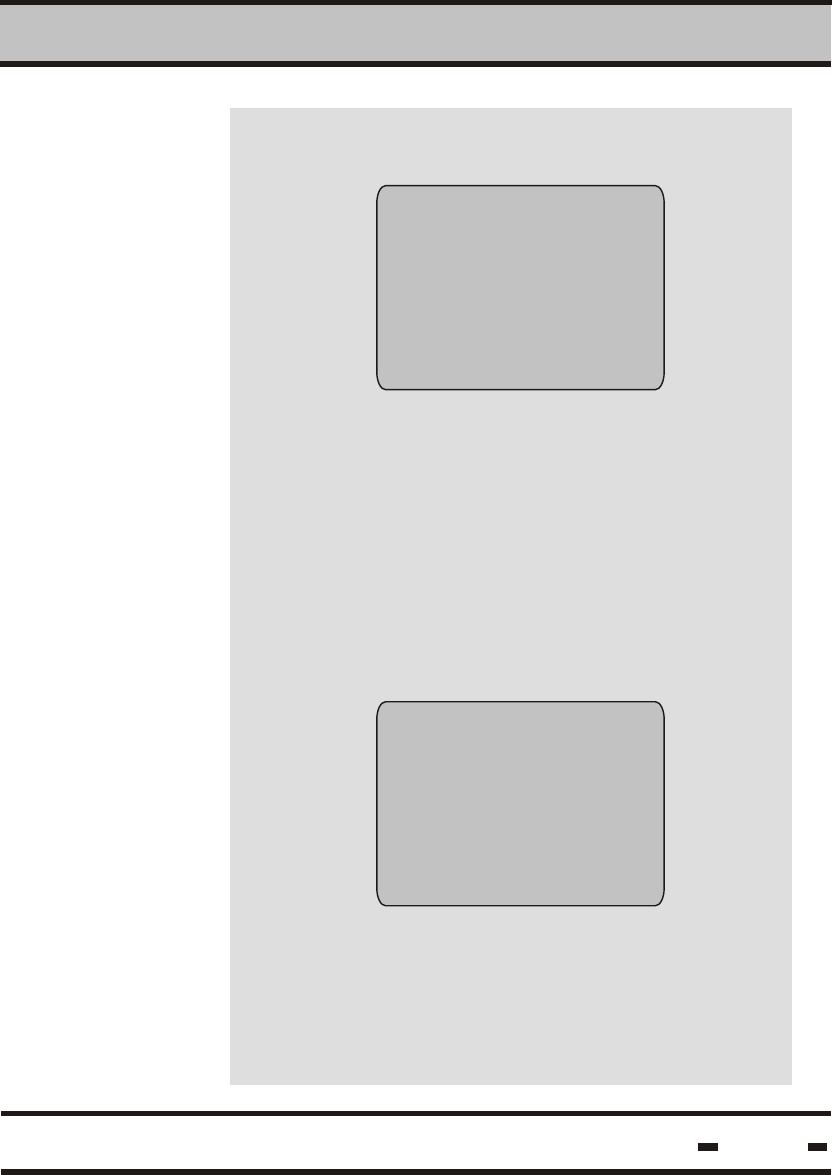
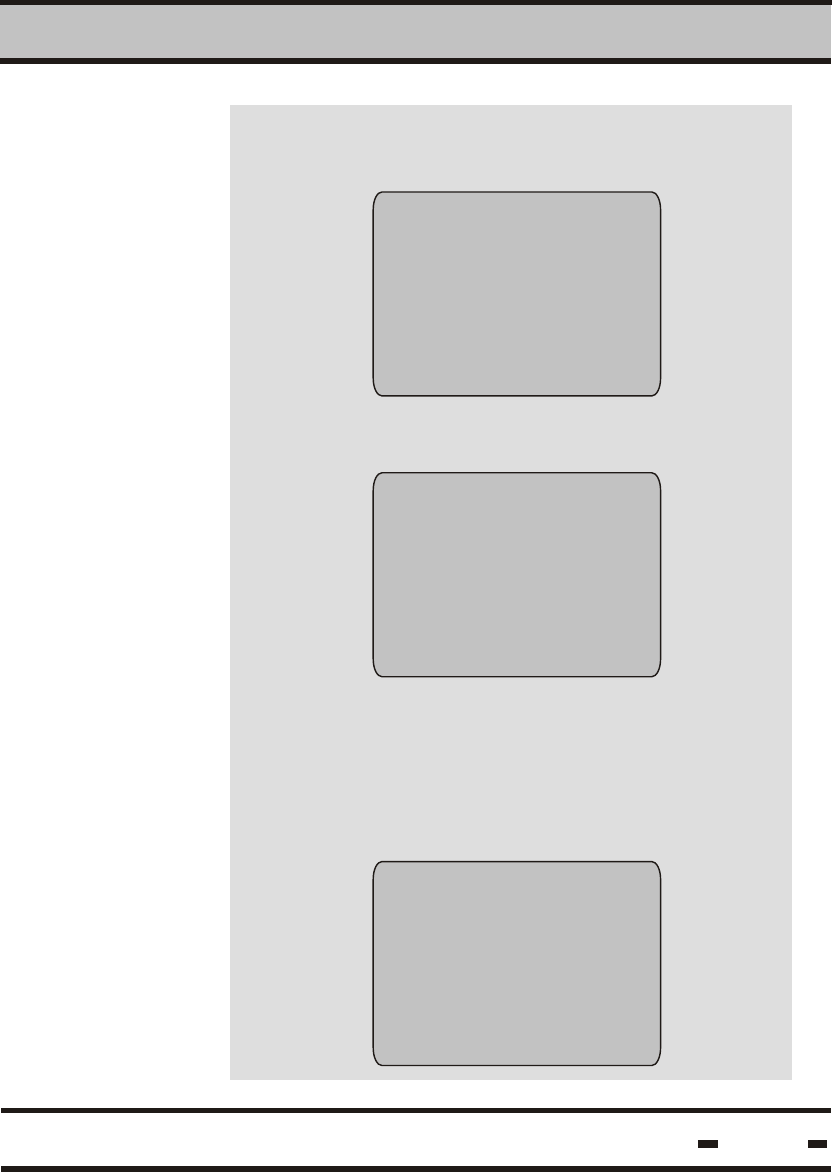
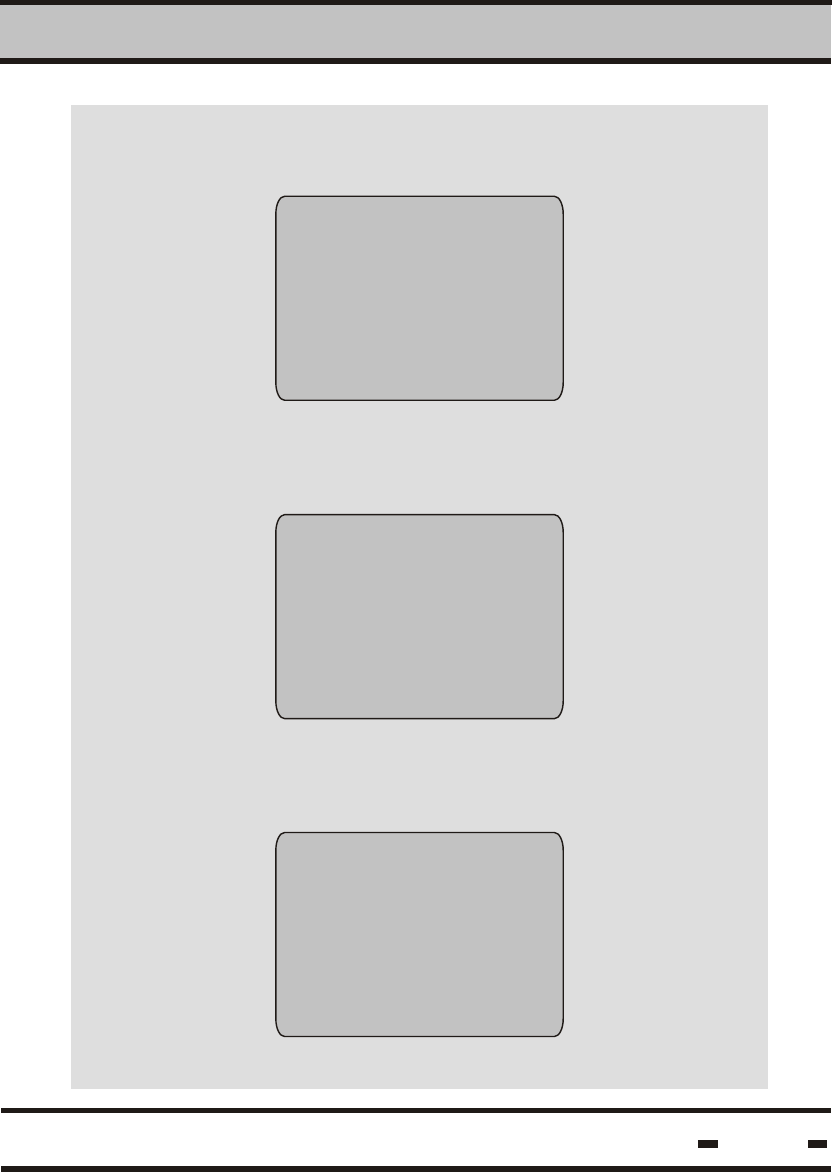
1.2.3. Seal Wire
1.2.4. DataTerminal
Introduction
1
The DataSeal Wire serves
to seal the cargo.
Any tampering with the
DataSeal Wire at any
point during transport is
recorded and reported at
once.
The DataTerminal is
a hand-held terminal used
to enter data into the
system.
10
Hi-G-Tek Ltd. Microelectronics & Asset Tracking Technology
Introduction
1
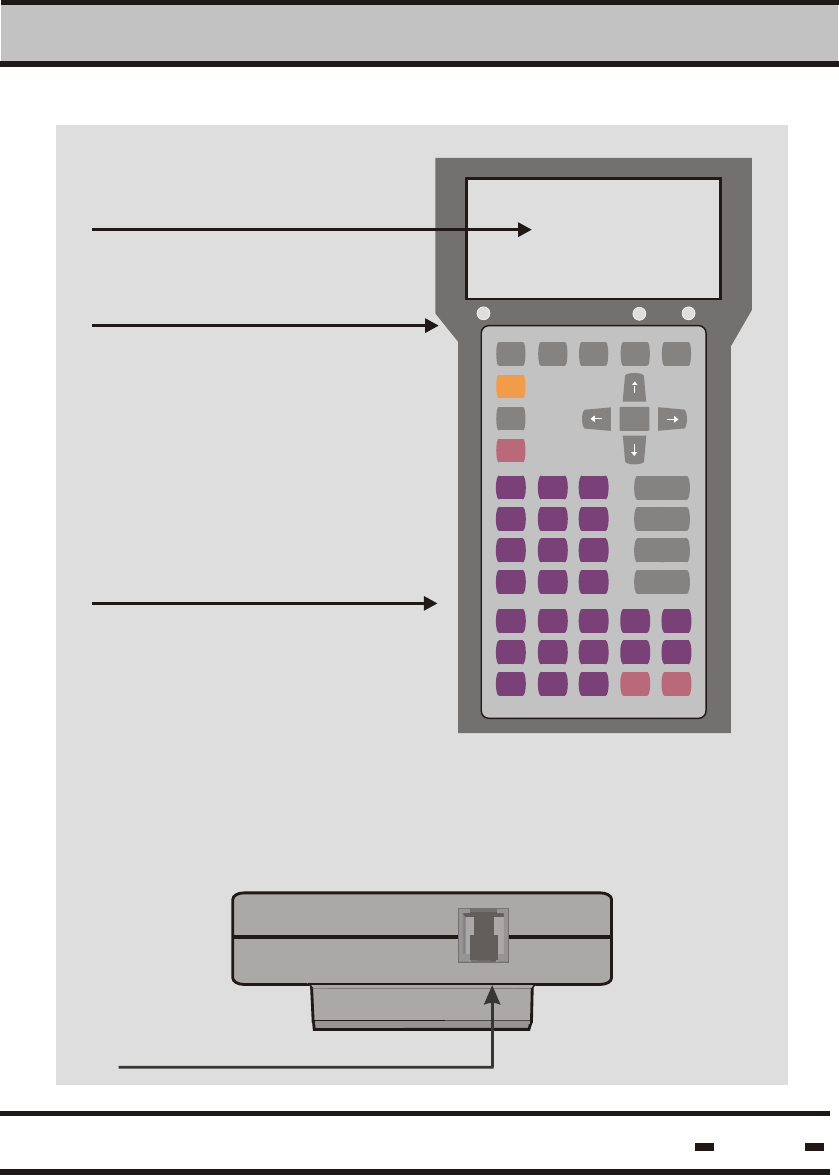
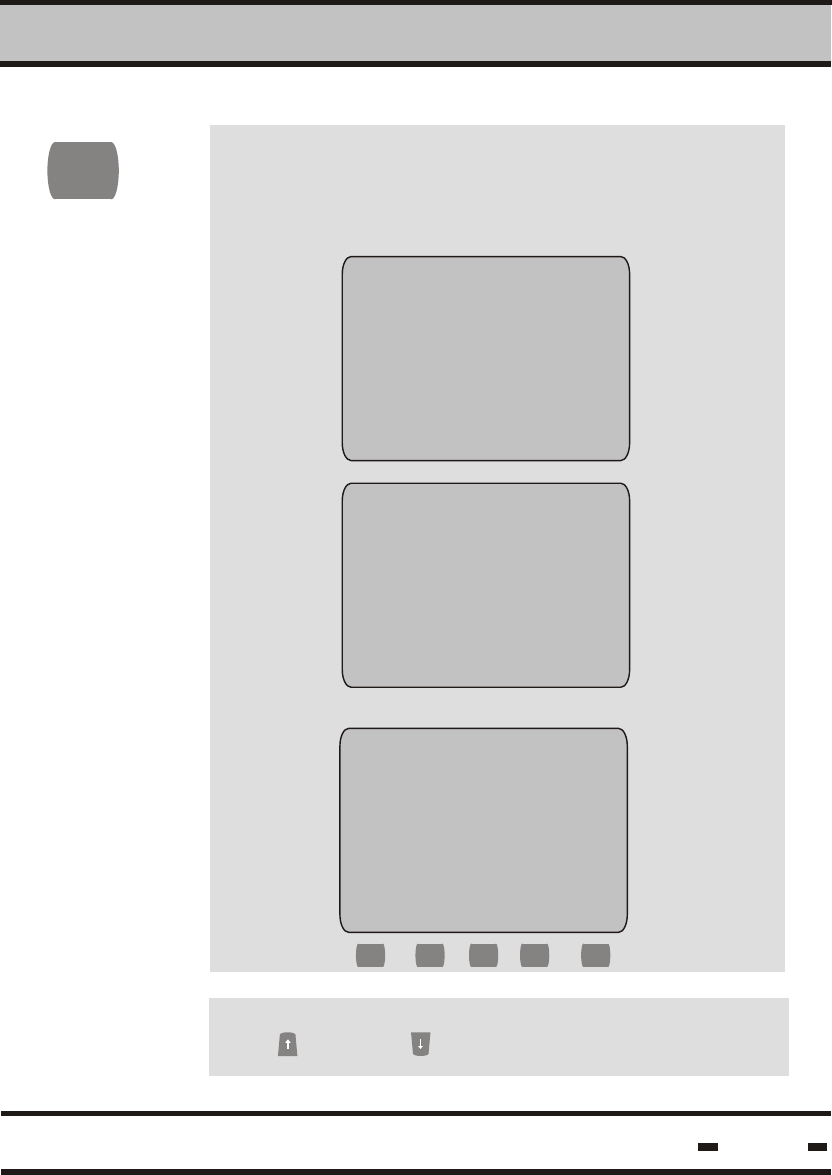
Display Screen
Indicators
Key Pad
F1 F2
SHIFT
SLEEP
LIGHT
OK
READ
SET
MENU
ENTER
7
4
1
0
8 9
6
3
5
2
DEL
A B C D E F G H I J
ST
K L MN OP QR
U V WX Y Z
ESC
OFF ON
Rd
Sd
On/Off
All information is displayed on the
screen in alpha-numeric format.
Green LED: Power is on and
system is OK
Red LED: Power is on, there
is a problem with the unit.
On/Off
Sd
Rd
The terminal is sending data
The terminal is receiving data
The keypad is used to enter
alpha-numeric data into the
Hand-Held Terminal
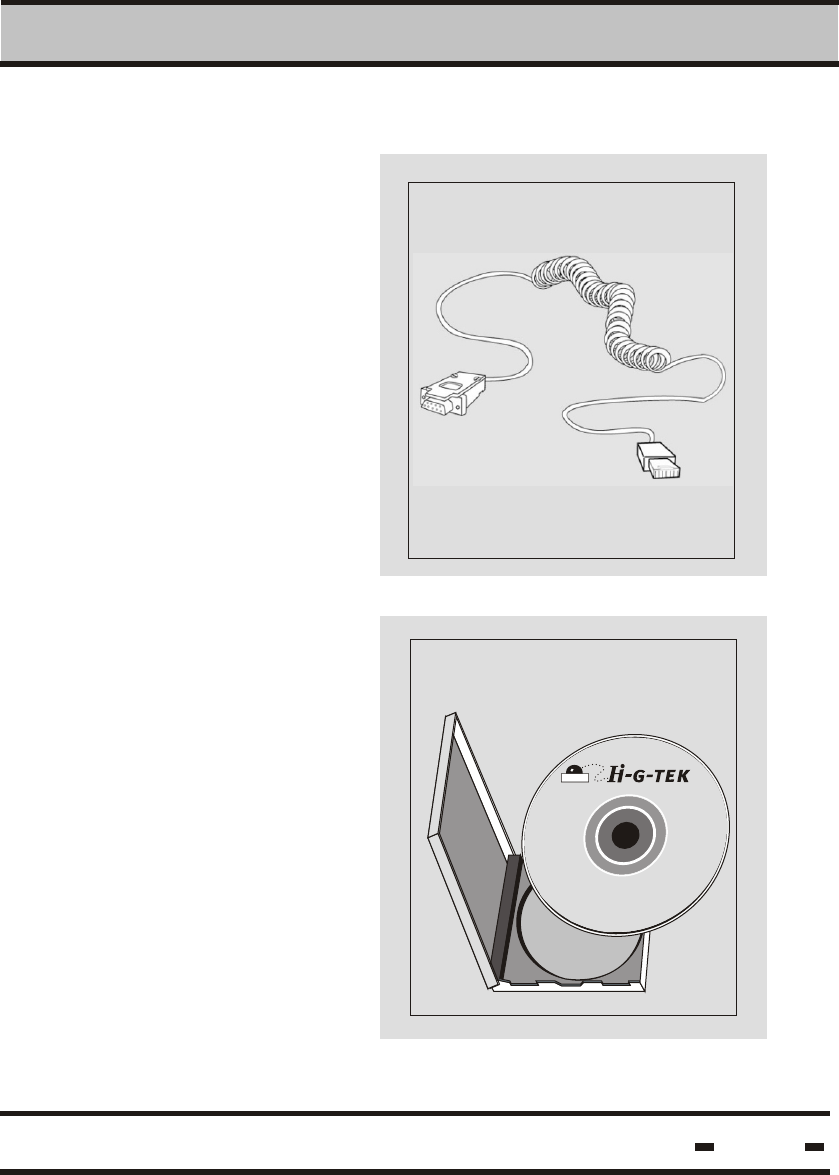
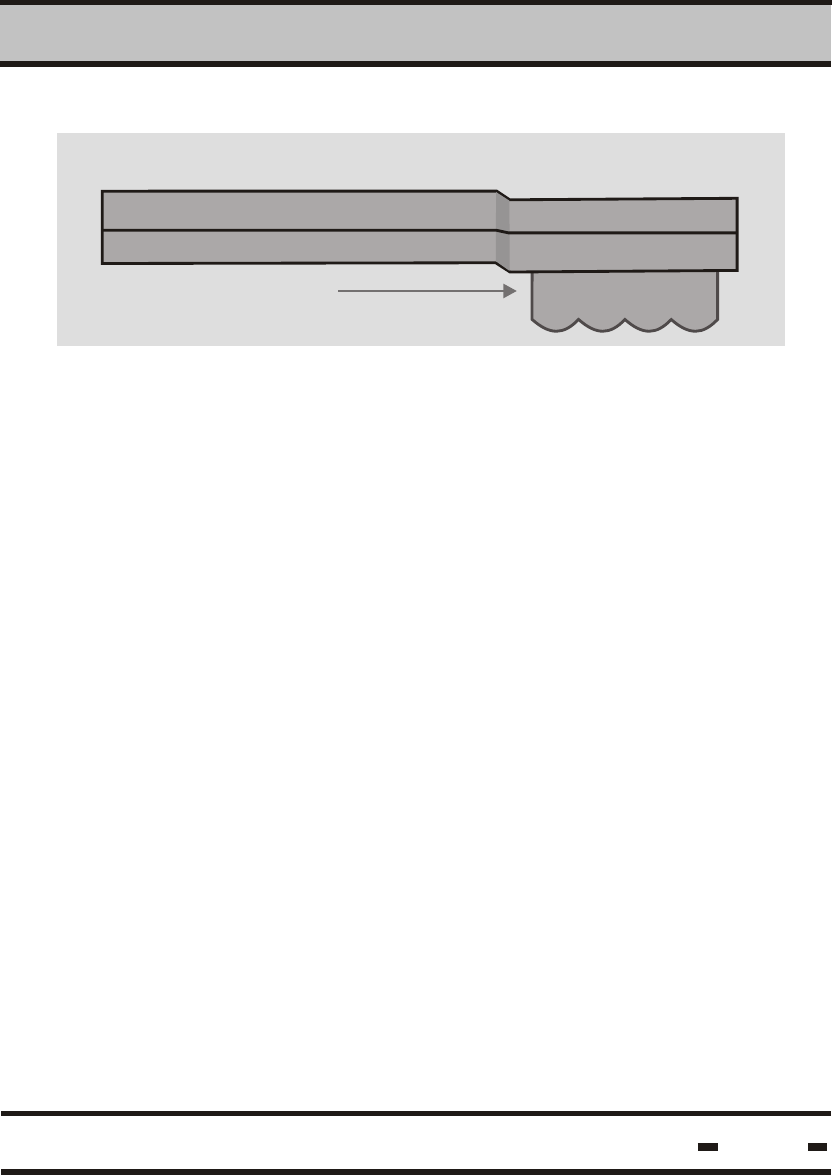
The DataTerminal connects to the computer via a RS-232
communication cable. The cable links theTerminal to the
computer. It is connected to the RS-232 port located on the
base of the DataTermianl and to the RS-232 port on the
computer.
RS-232 communication cable port
11
Hi-G-Tek Ltd. Microelectronics & Asset Tracking Technology
F3 F4 F5
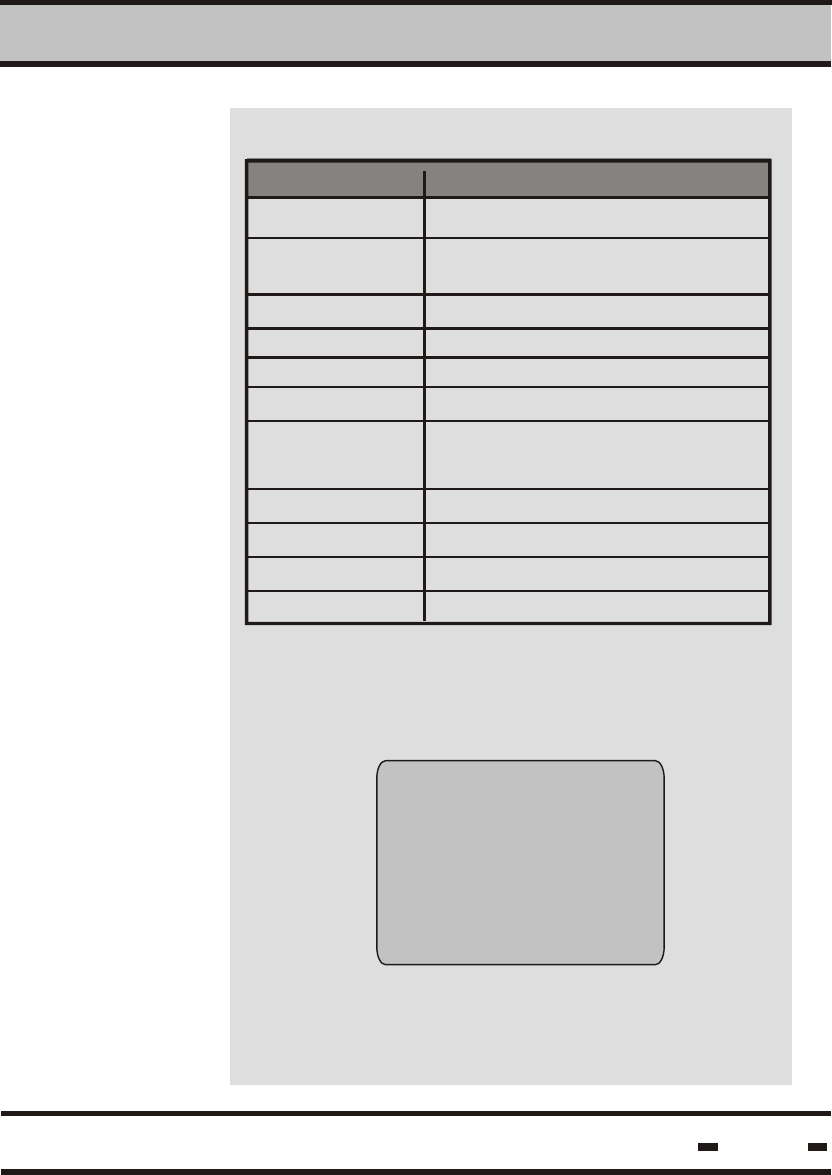
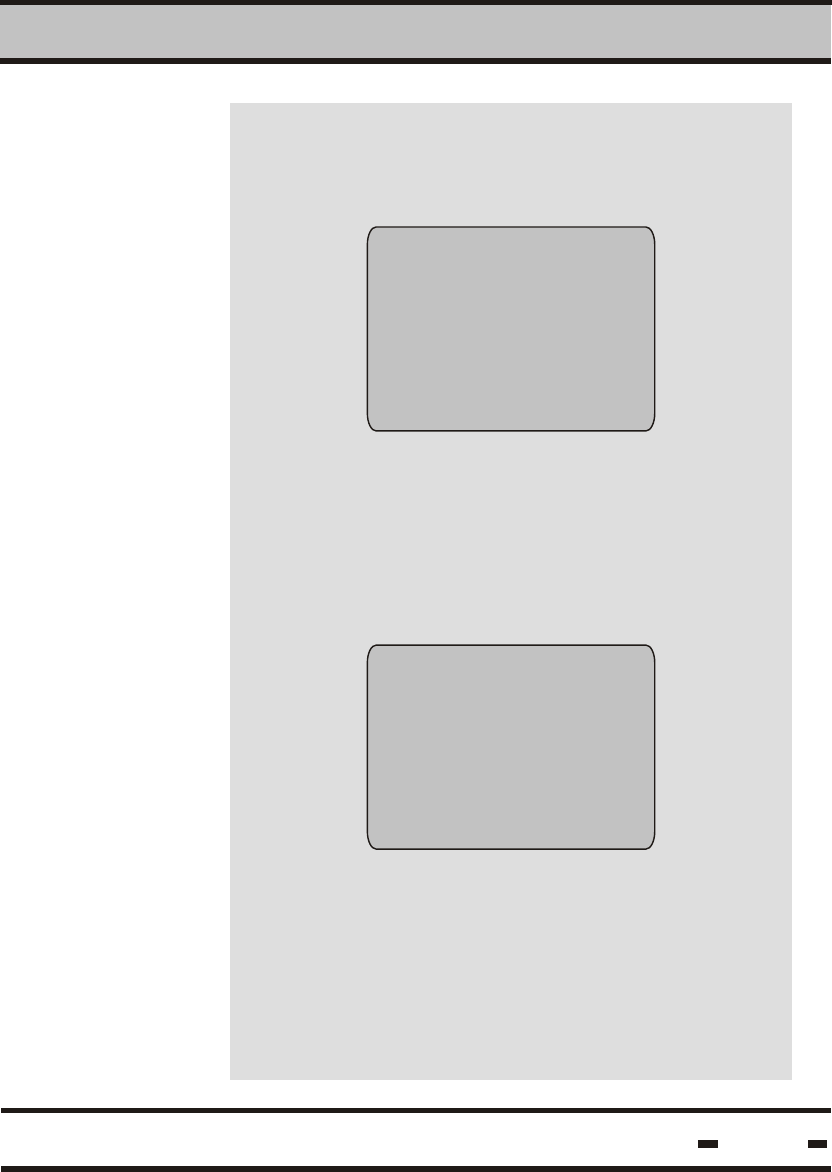
1.2.5. Communication Cable
1.2.6. Application Software
Introduction
1
12
Hi-G-Tek Ltd. Microelectronics & Asset Tracking Technology
The RS232
communication cable
supplied with the
system connects the
DataTerminal to the
PC.
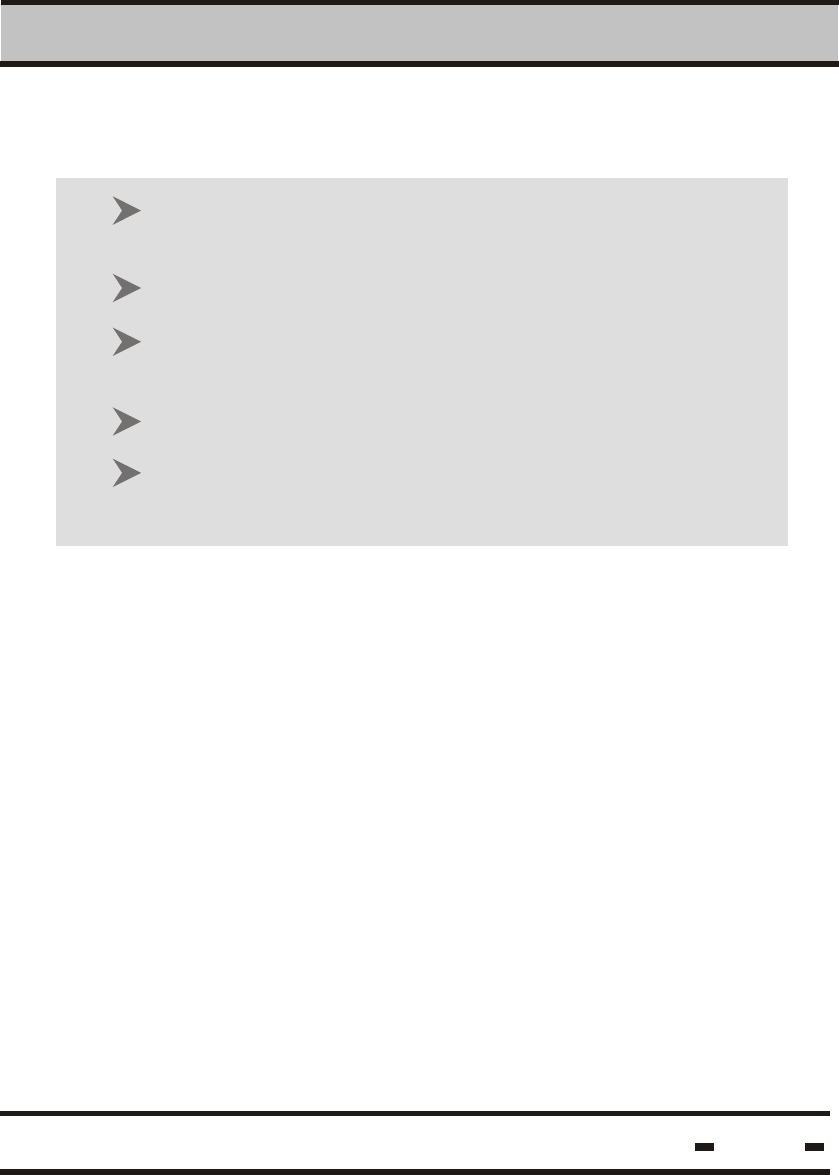
The Application
Software is used to
store and retrieve
event information.
DataTerminal
Application Software
Introduction
1
An IBM PC or compatible with Pentium CPU, running
at 200 MHz or faster.
Minimum 32 MB RAM
Screen resolution: Display set at 800X600 pixels,
16 bit colors
Minimum of 8 MB free on your hard drive.
Free communication port (COM1....COM4)
1.3. Minimum System Requirements
13
Hi-G-Tek Ltd. Microelectronics & Asset Tracking Technology

Hi-G-Tek Ltd. Microelectronics & Asset Tracking Technology 14
This equipment (FCC ID: OB6-IGMA31) has been tested and found
to comply with the limits for a Class B digital device, pursuant to
Part 15 of the FCC rules. These limits are designed to provide
reasonable protection against harmful interference in a residential
installation. This device complies with Part 15 of FCC rules.
Operation is subject to the following two conditions: (1) This device
may not cause harmful interference, and (2) This device must
accept any interference that may cause undesired operation. This
equipment generates uses and can radiate radio frequency energy
and, if not installed and used in accordance with the instructions,
may cause harmful interference to radio communications. However,
there is no guarantee that interference will not occur in a particular
installation. If this equipment does cause harmful interference to
radio or television reception, which can be determined by turning
the equipment off and on, the user is encouraged to try to correct
the interference by one or more of the following measures: a)
Reorient or relocate the receiving antenna. b) Increase the
separation between the equipment and receiver. c) Connect the
equipment to an outlet on a circuit different from that to which the
receiver is connected. d) Consult the dealer or an experienced
radio/TV technician.
Modifications not expressly approved by the manufacturer could
void the user authority to operate the equipment under FCC Rules.
Instructions concerning human exposure to radio frequency
electromagnetic fields: A distance of at least 20cm. between the
equipment and all persons should be maintained during the
operation of the equipment.
The FCC Wants You to Know
FCC Warning

DataSeal
Installation
Chapter 2
Hi-G-Tek Ltd. Microelectronics & Asset Tracking Technology 15
2DataSeal Installation
16
Hi-G-Tek Ltd. Microelectronics & Asset Tracking Technology
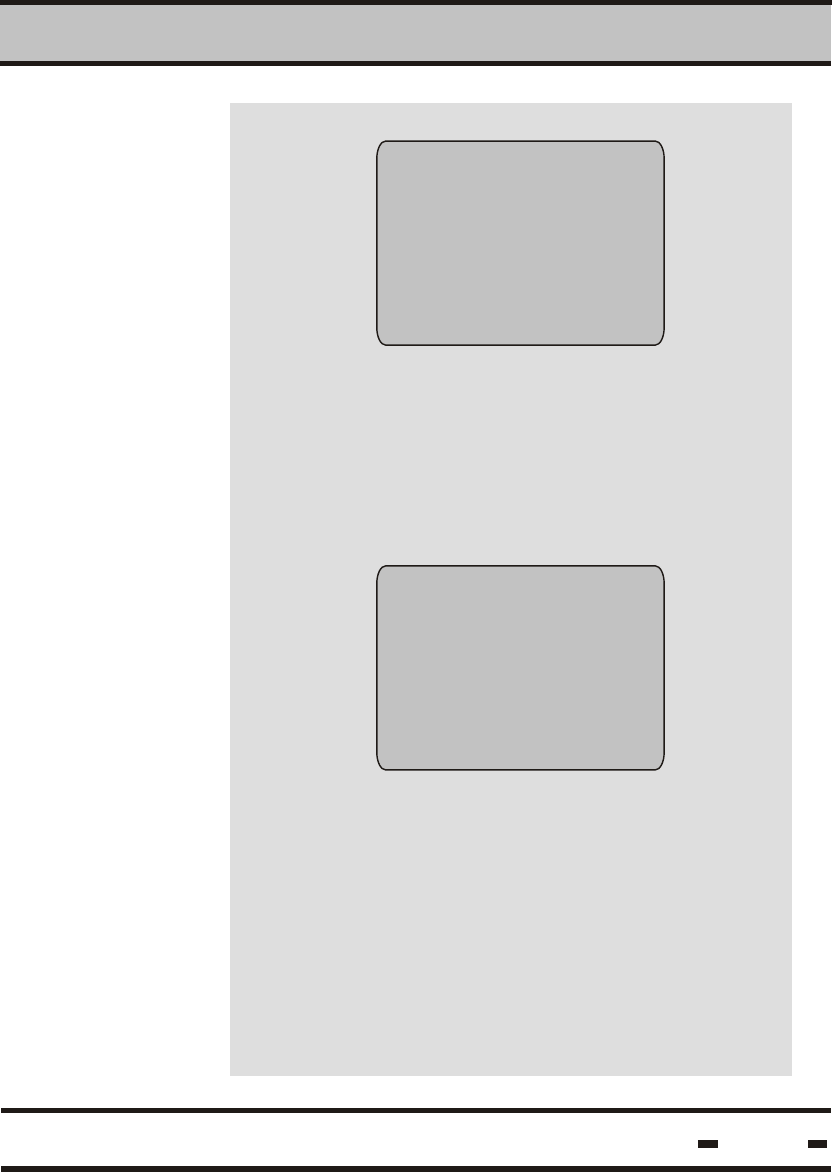
step 1.
Fig. 1
Fig. 3
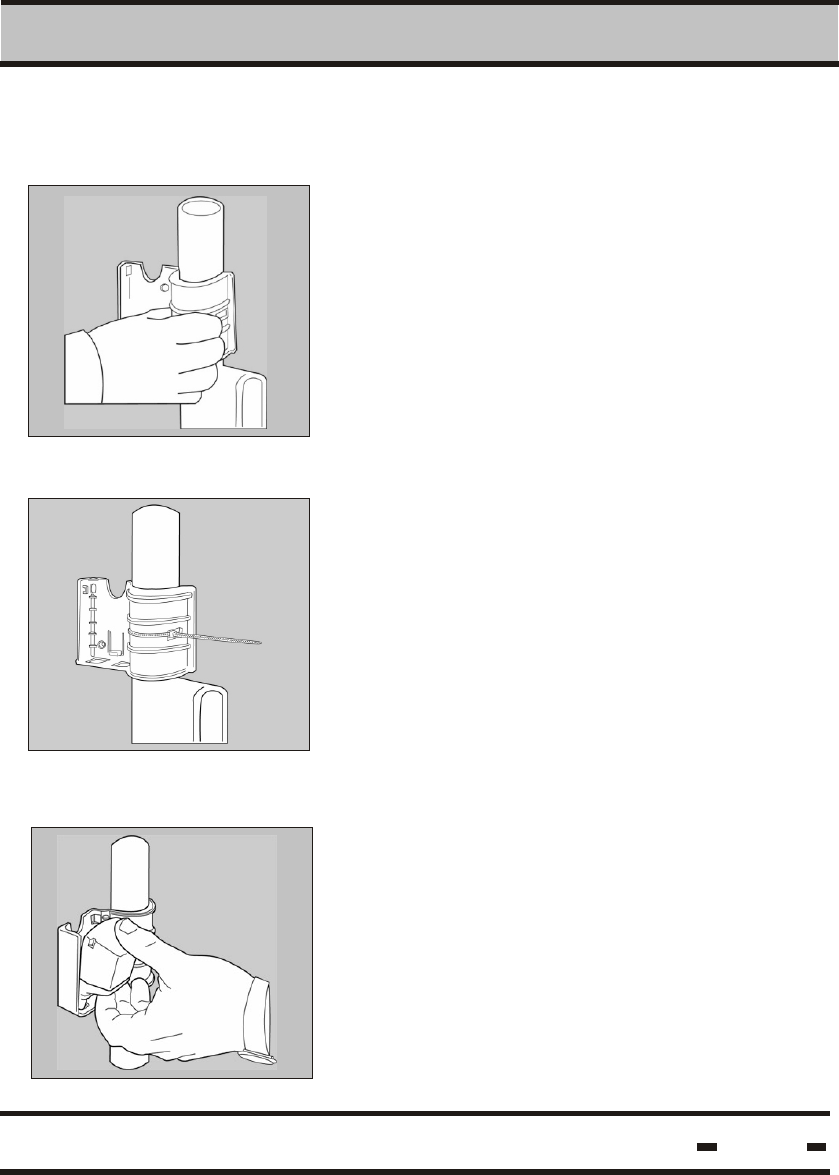
To install the DataSeal Mounting Fixture, attach
the fixture to the keeper bar at the back of the
container (fig.1). A click indicates that the
fixture is in place.
The two side slots may be used to secure the
mounting fixture to the container using a plastic
strap(fig.2)
Fig. 2
0
To install the DataSeal, hold the unit at a 45
angle as illustrated and snap it into place in its
cradle on the DataSeal Mounting Fixture. (fig. 3)
step 2.
2.1 DataSeal Installation
2
Hi-G-Tek Ltd. Microelectronics & Asset Tracking Technology
DataSeal Installation
17
Fig. 5
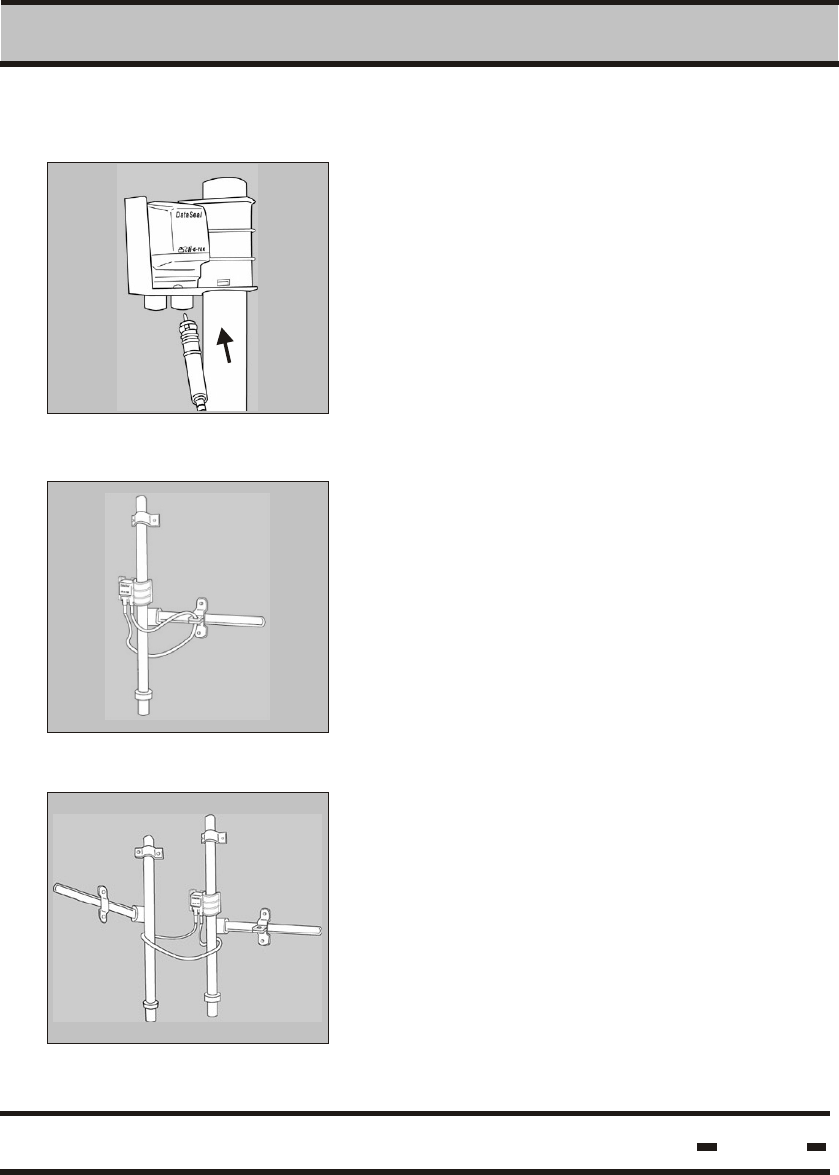
To connect the DataSeal Wire, simply attach
one end of the seal wire conectors to either of
the sockets at the base of the DataSeal (fig 4).
Fig. 4
Loop the wire through the container locking ring
and the keeper bar, then insert the end into
the other socket (fig. 5).
step 3.
Fig. 6
Alternatively, you may loop the wire through both
keeper bars then insert the end into the
other socket (fig. 6).
2
Hi-G-Tek Ltd. Microelectronics & Asset Tracking Technology
DataSeal Installation
18
Step 4: Setting the Seal using the DataTerminal
Press the ON key and verify that the green light is on. Place the
DataTerminal between 5 and 40cm from the seal and press the
SET key.
Step 5: Reading the Seal with the DataTerminal
procedure This is carried out at destination.
Place the DataTerminal between 5 and 40cm from the Seal and press
the READ key. The appearance of the OK notation on the units display
screen and two beeps indicate that everything is in order and no
mishaps have occurred during transport. The TAMPERED notation,
appearing together with a single audible beep indicates that
the seal was tampered with during transport.

DataTerminal
Operating
Instructions
Chapter 3
Hi-G-Tek Ltd. Microelectronics & Asset Tracking Technology 19
DataTerminal - Operating Instructions
3
3.1 Battery Installation/Replacement:
1) The battery compartment is located at the rear of the terminal
behind the terminal screen.
2) Open the battery compartment with a screwdriver.
3) Use Only "AA" size alkaline batteries!
4) Remove the used baterries if required. Insert 4 new alkaline
size "AA" batteries into the compartment ensuring that polarity
matches that indicated.
5) Screw the battery compartment lid back into place.
Battery compartment
Hi-G-Tek Ltd. Microelectronics & Asset Tracking Technology 20
Side View of DataTerminal
WARNING !
RISC OF EXPLOSION IF BATTERY IS REPLACED BY AN INCORRECT TYPE.
DISPOSE OF USED BATTERIES ACCORDING TO THE INSTRUCTIONS.
3
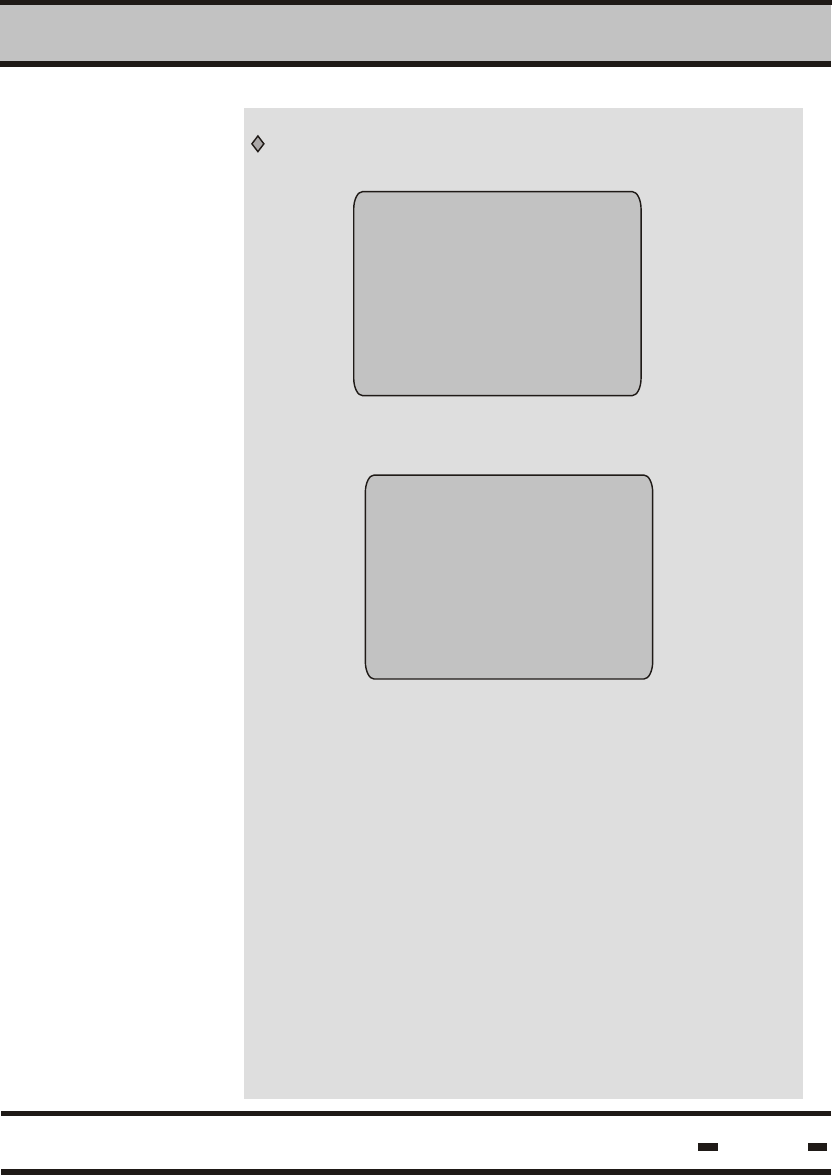
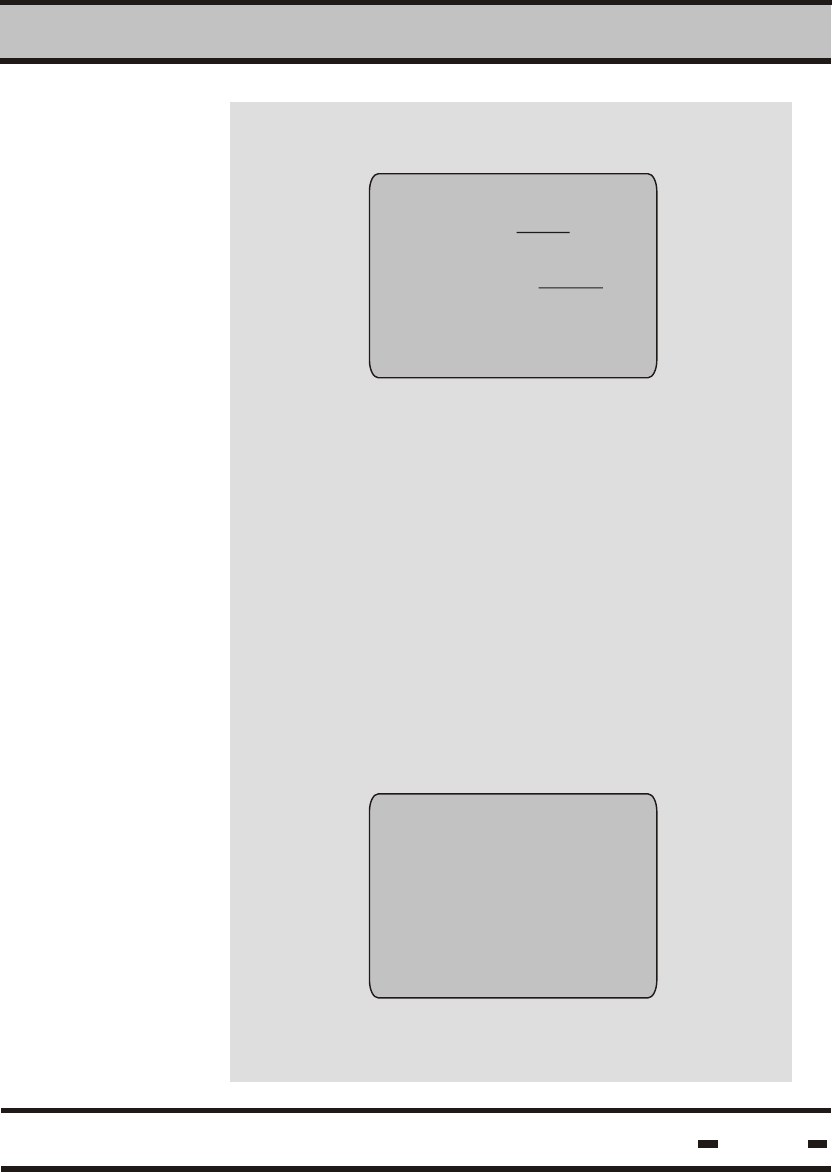
3.2. Initial Steps
3.3. Screen
Contrast
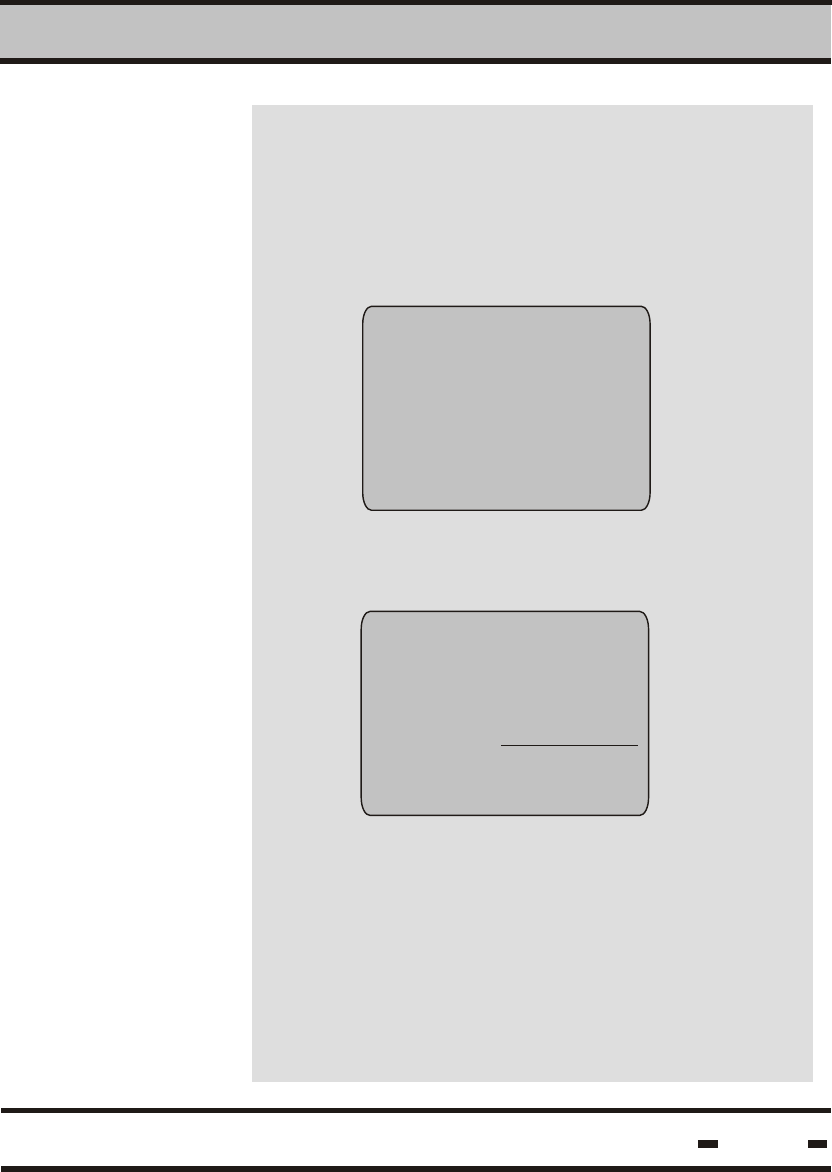
Activate the unit by pressing the ON key and
verify that the green indicator lights up.The
following notice appears on the screen, followed
by the initialization reading
Program memory
testing!
PLEASE WAit
Dataseal
dataterminal
SYSTEM INITIALIZATION
PLEASE WAit
After a few seconds, the screen reads:
Dataseal
dataterminal
date: 03/05/01
TIME 14:03
ON
The screen contrast may be changed using the
up and down arrow keys.
Hi-G-Tek Ltd. Microelectronics & Asset Tracking Technology 21
DataTerminal - Operating Instructions
hlp rdt vrf
F1 F2 F3 F4 F5
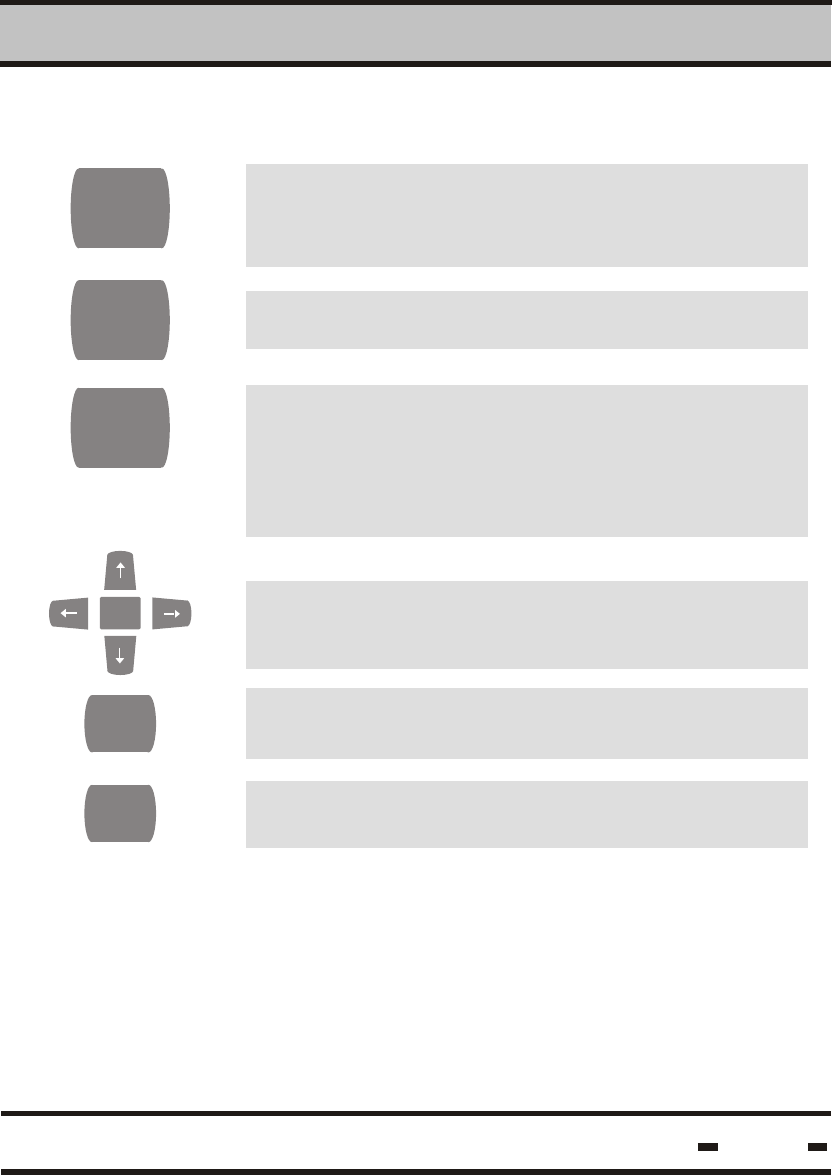
OK OK key and direction arrows
Press the ESC key to return to the previous
menu or to exit the application
Press DEL to delete characters on the terminal
screen
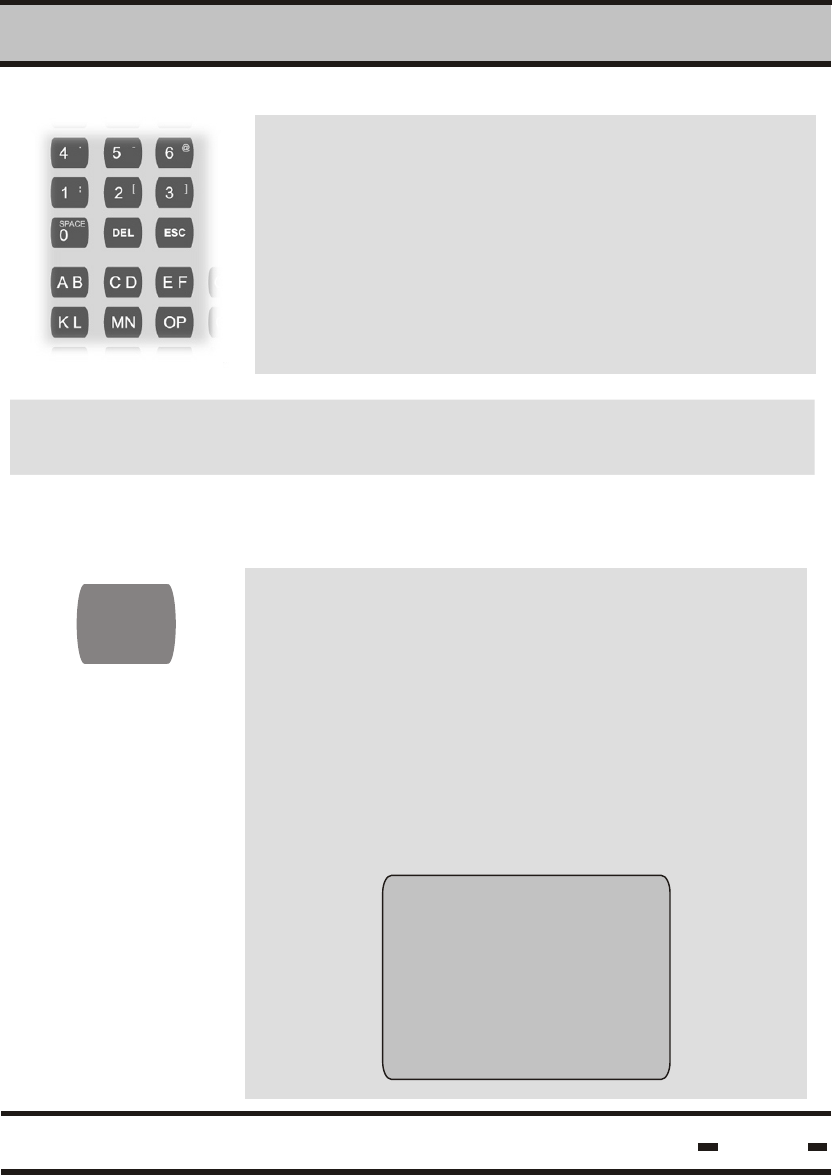
To operate the color coded function keys or
the numerical keys, press the <shift> button
and then the required key.
Sets the seal to SLEEP mode
Used for lighting the screen panel in dimly lit
areas or at night. The backlight function is
activated by pressing the button. To conserve
energy, the light automatically switches off 15
seconds after the button has been released.
3
3.4. Keypad Buttons
SHIFT
SLEEP
LIGHT
DEL
ESC
Hi-G-Tek Ltd. Microelectronics & Asset Tracking Technology 22
DataTerminal - Operating Instructions
3
The Alphanumeric keyboard, situated in the
center and at the bottom of the keypad panel,
is used for entering alphanumeric data.
Hi-G-Tek Ltd. Microelectronics & Asset Tracking Technology
Note: Ensure the seal you are reading is at least 60 cm. (2 ft.) from
any other seal in the vicinity.
23
DataTerminal - Operating Instructions
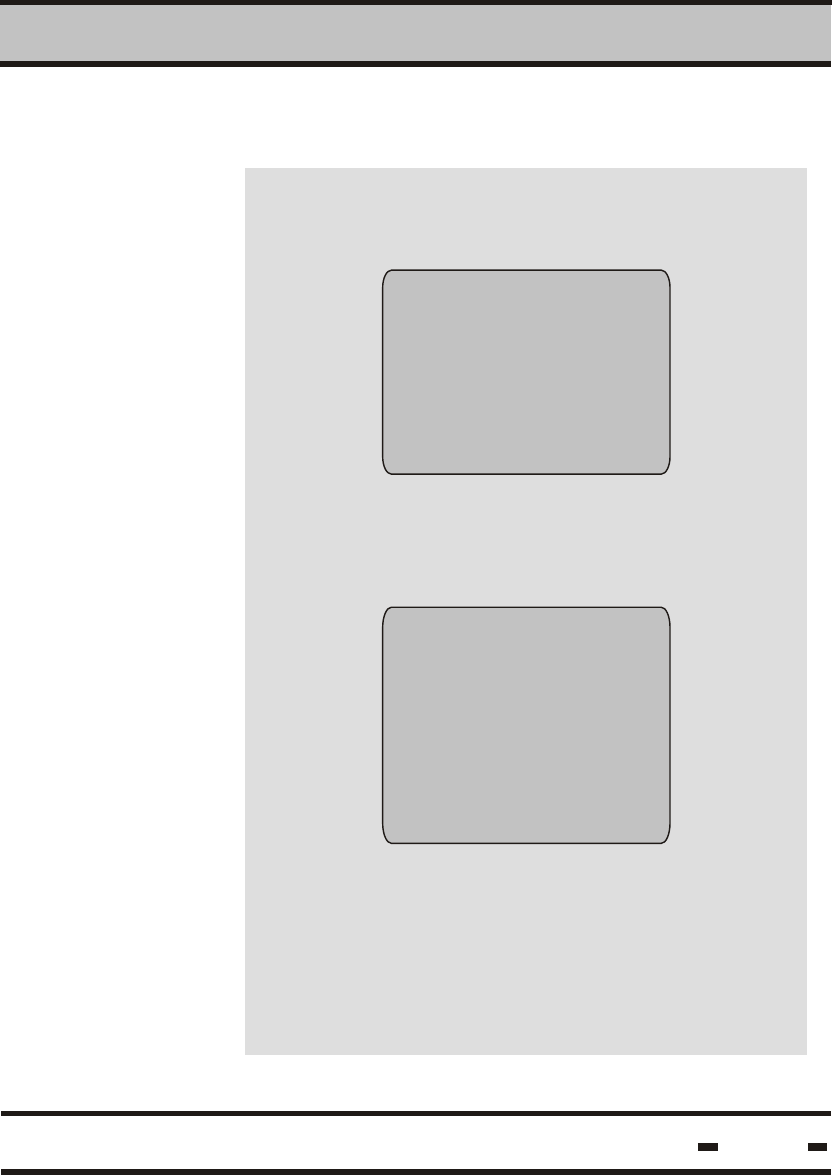
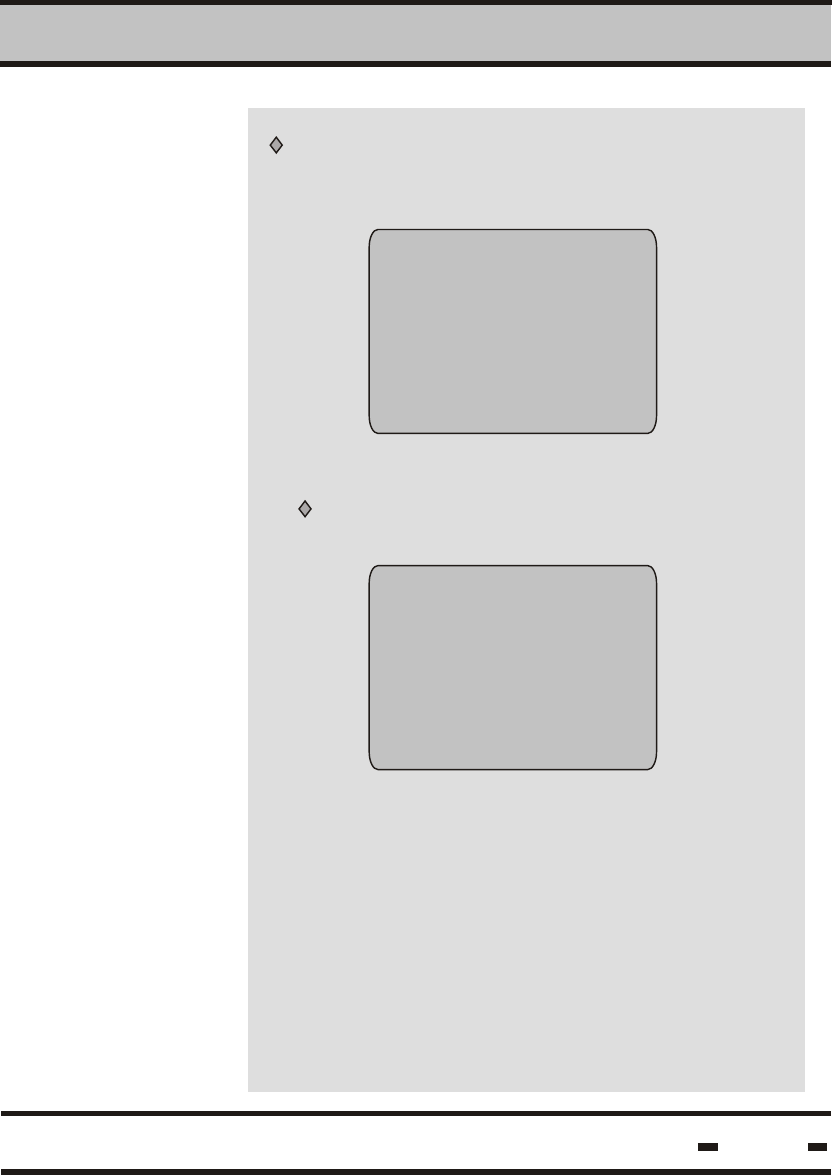
SET
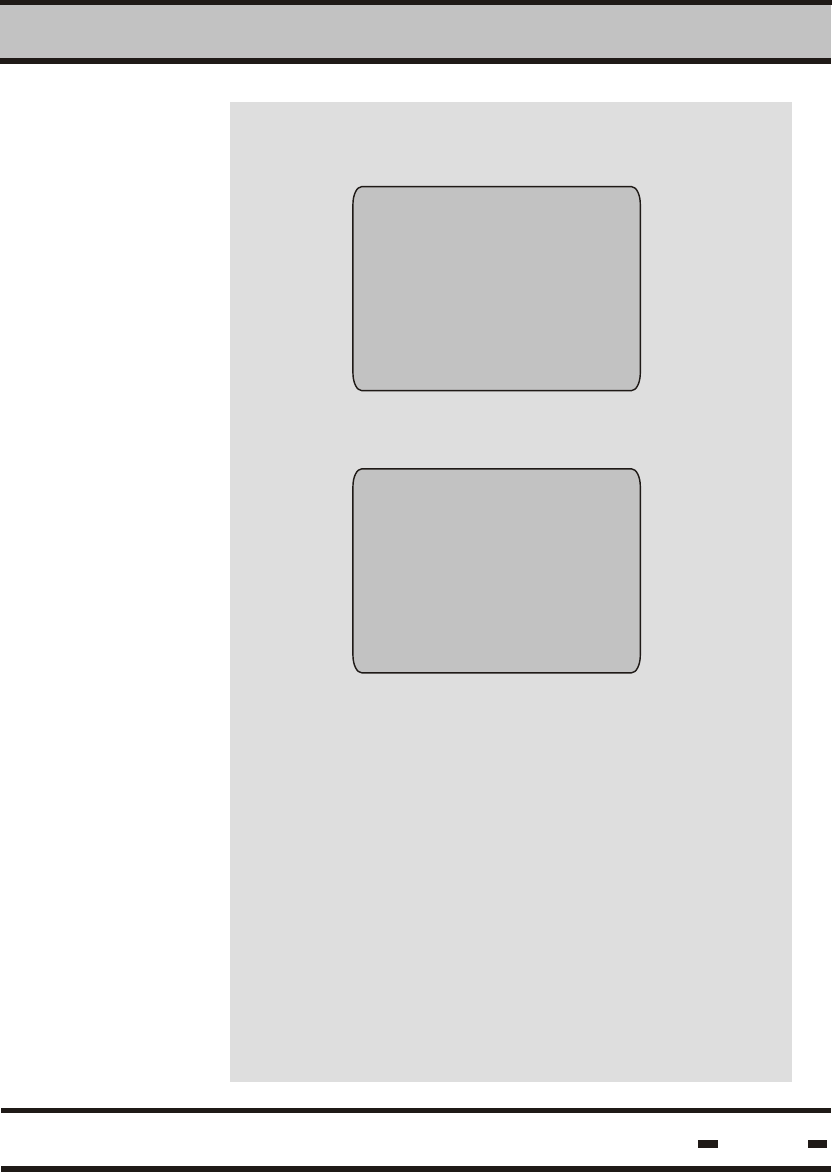
The SET key is located on the right hand side of
the panel, below the arrow keys. To begin a SET
sequence, press the SET key. The seal must be
closed before performing the SET sequence. If
the seal is open, a warning message appears
on the screen. .
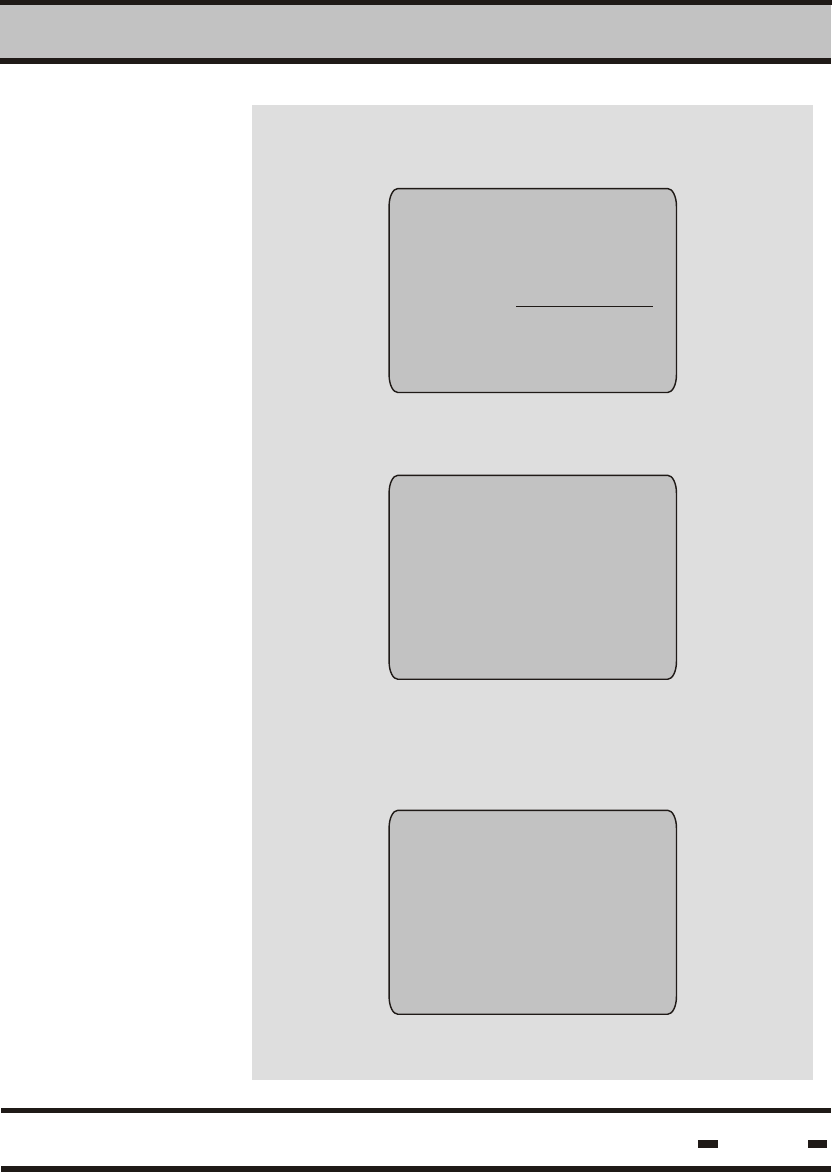
A SET sequence may be entered with or without
cargo manifest information. When the SET key
is pressed, the following screen appears:
3.5. Set Procedure
CID...................
Cont................
Dest................
Point dataterminal at seal
press ok to confirm
3.5.1. Basic Set Procedure
3
Hi-G-Tek Ltd. Microelectronics & Asset Tracking Technology 24
DataTerminal - Operating Instructions
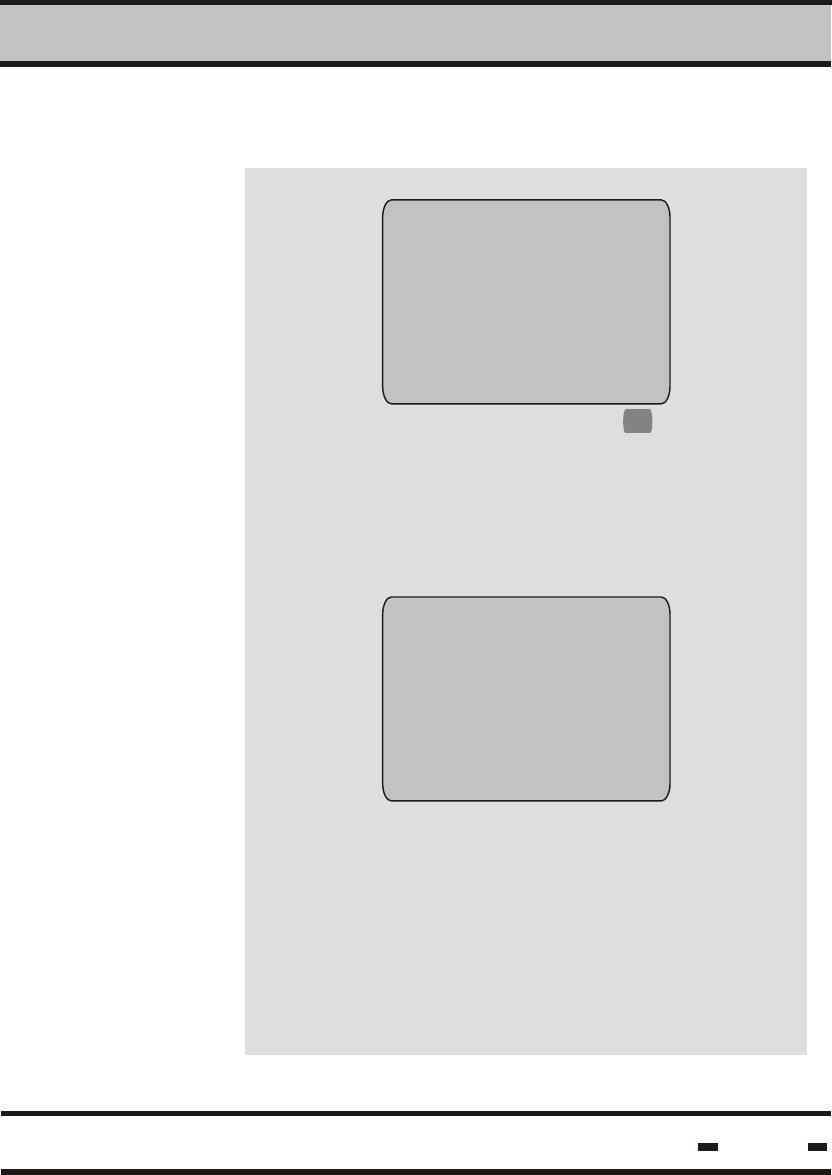
To avoid entering cargo manifest data, press
ESC. The following screen appears:
User data
abort data entry?
No
yes
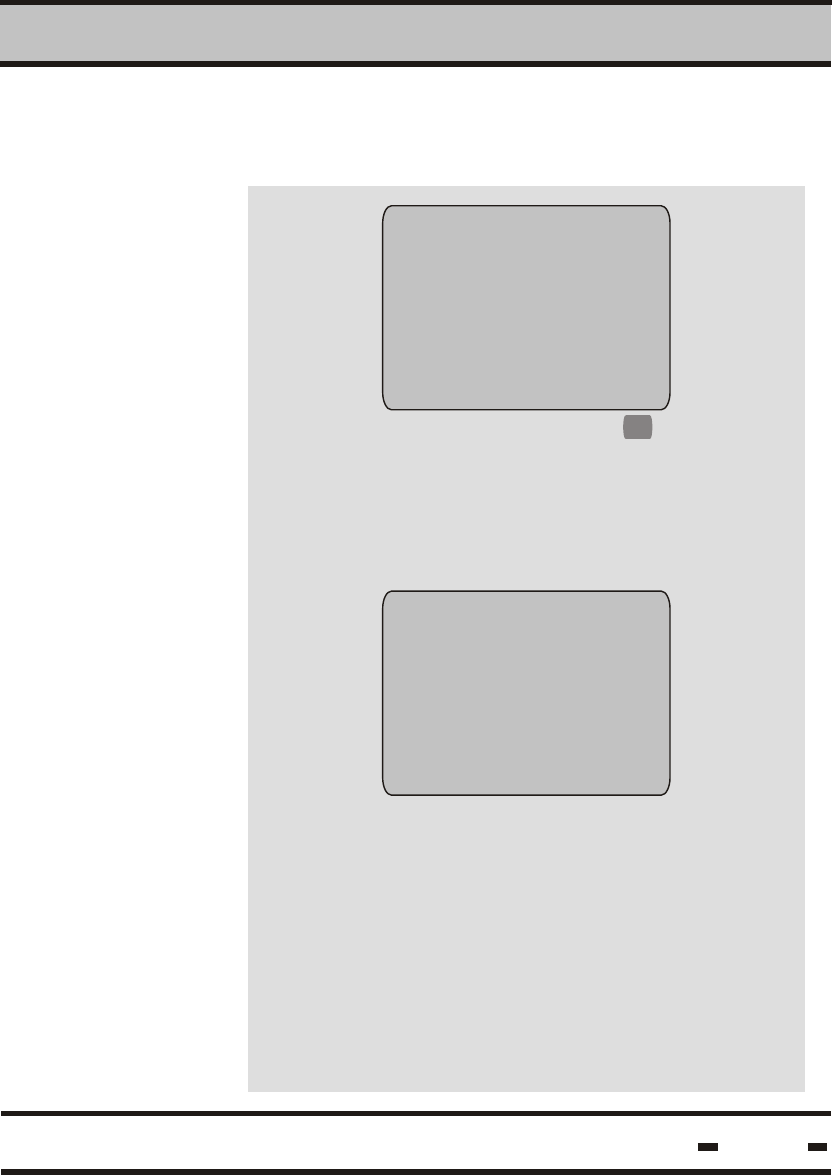
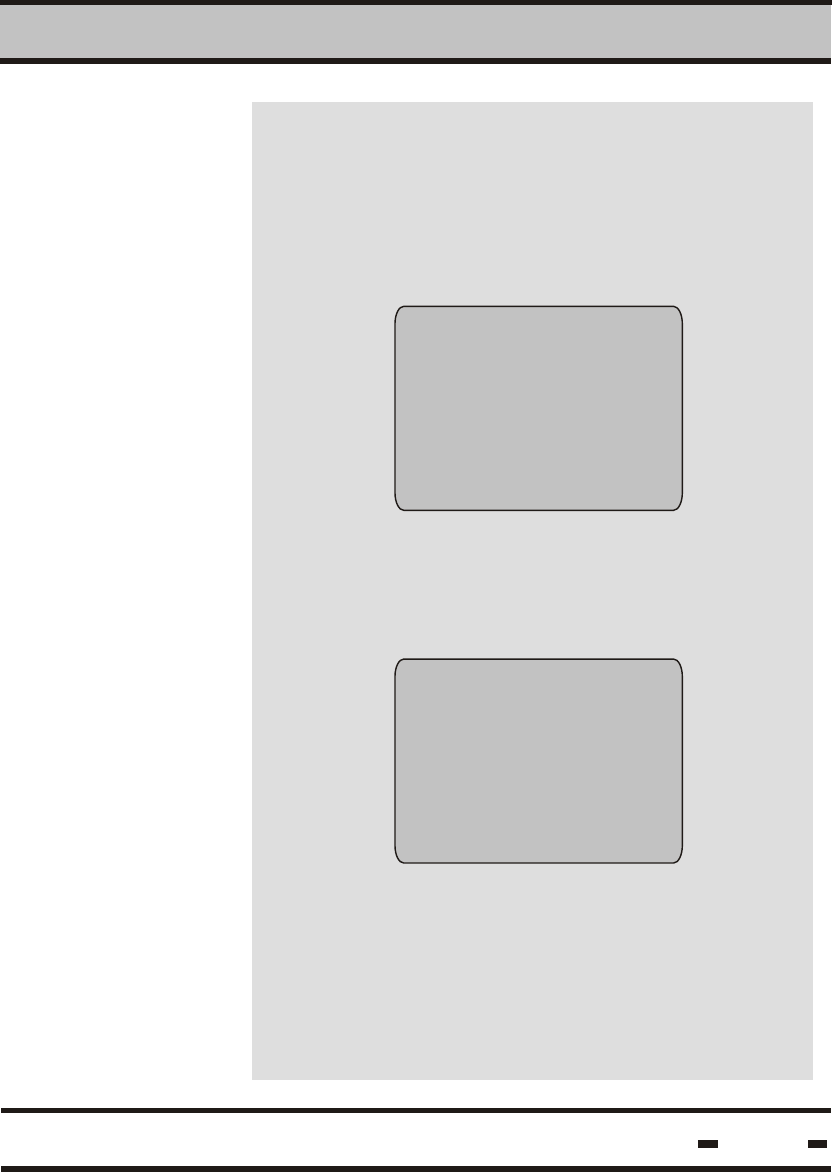
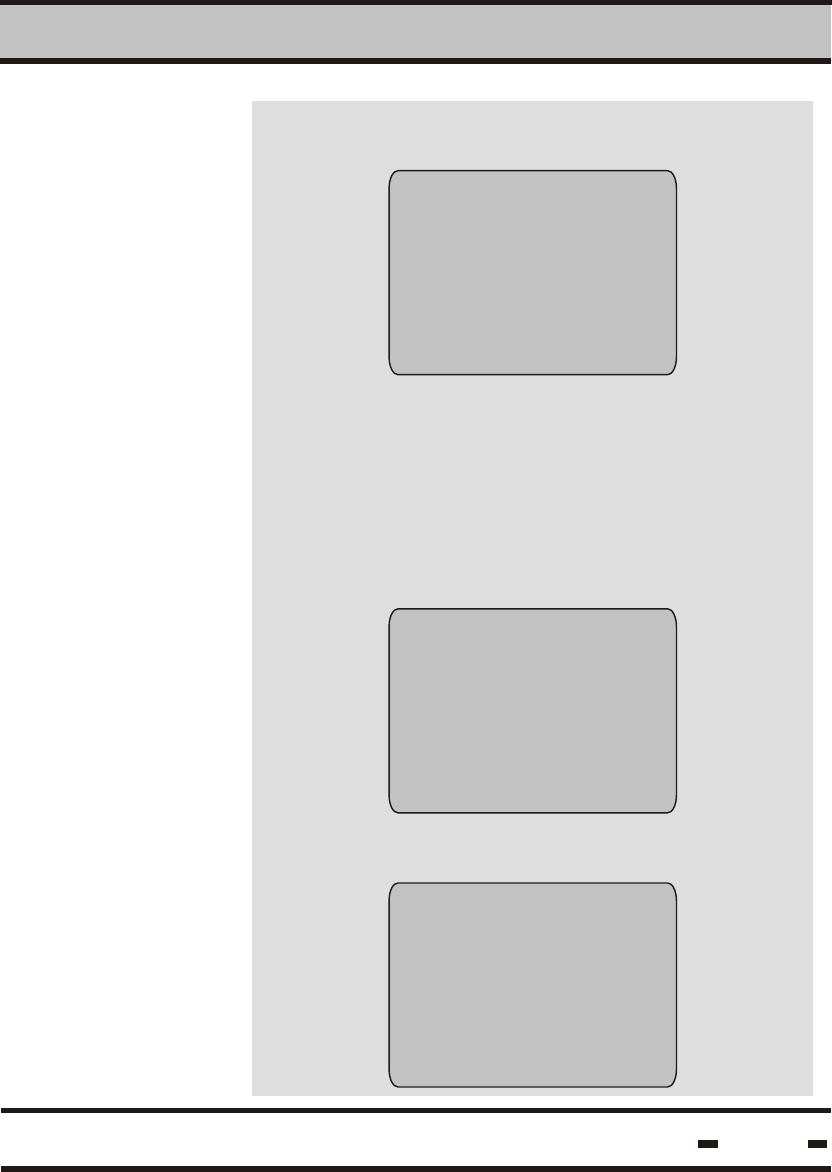
ID..................
ORG ID..........
Stamp: 1516953
seal is set
set at:
03/05/2001 11:53
press ok to continue
To continue setting the seal, scroll to the YES
option. Press OK while pointing the DataTerminal
at the seal. The following screen appears:
3
Hi-G-Tek Ltd. Microelectronics & Asset Tracking Technology 25
DataTerminal - Operating Instructions
Point the bottom of the terminal at the inspector
ID badge and press the READ BADGE key to
enter inspector's information into the terminal.
The following screen appears:
Point hht at
your badge and press
read badge (f5)
Welcome inspector 123
press ok to continue
3.5.2. Set Procedure with Badge ID
F5
BDG
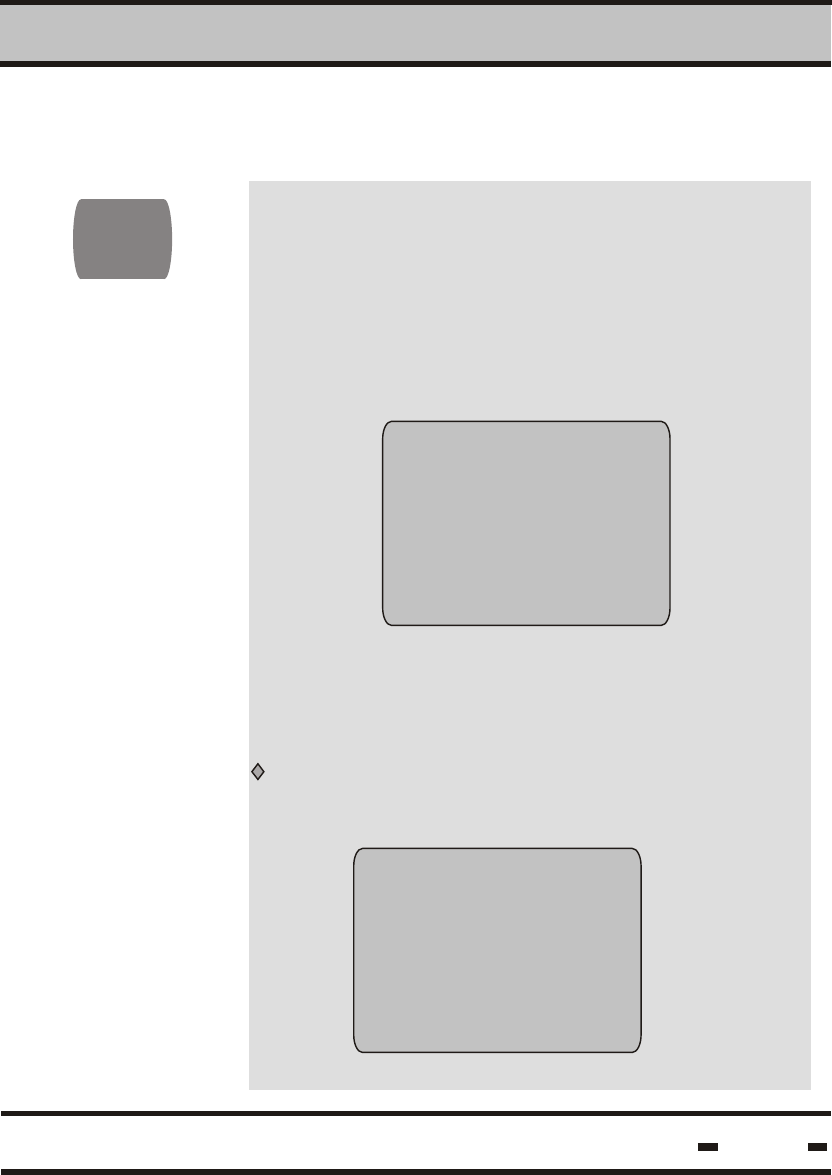
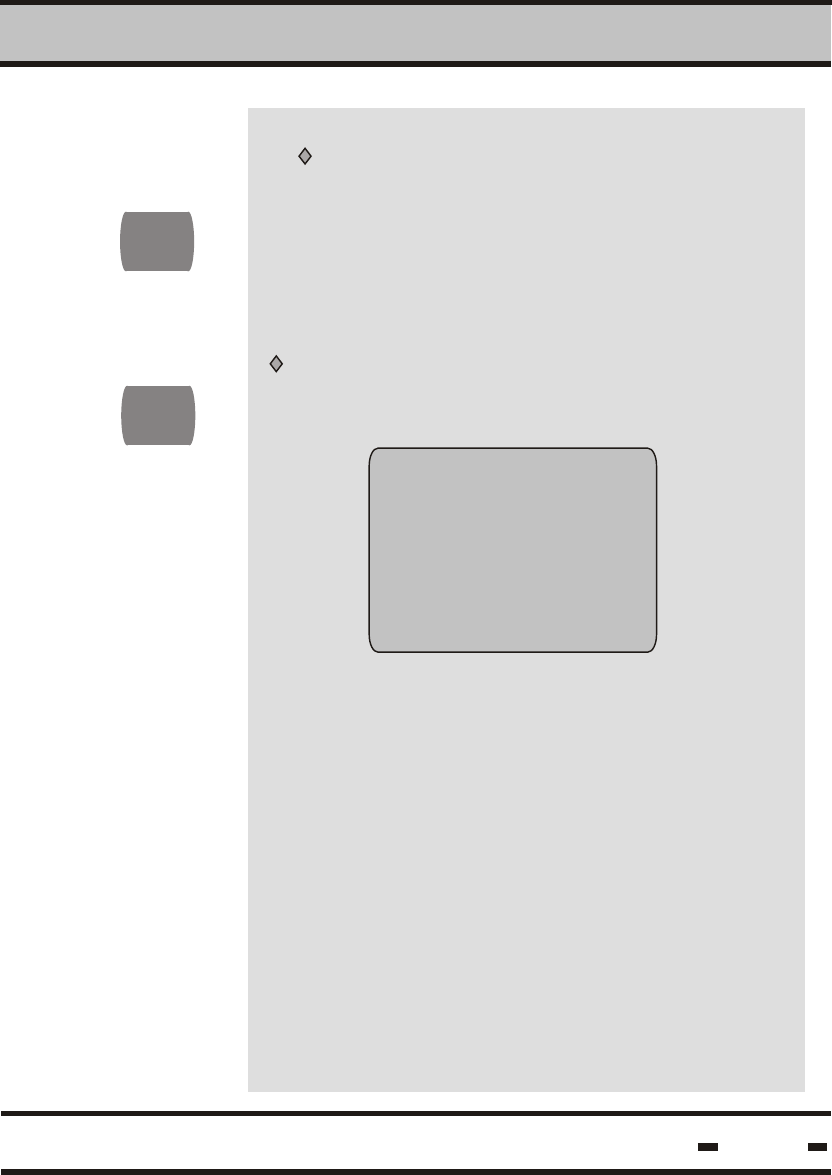
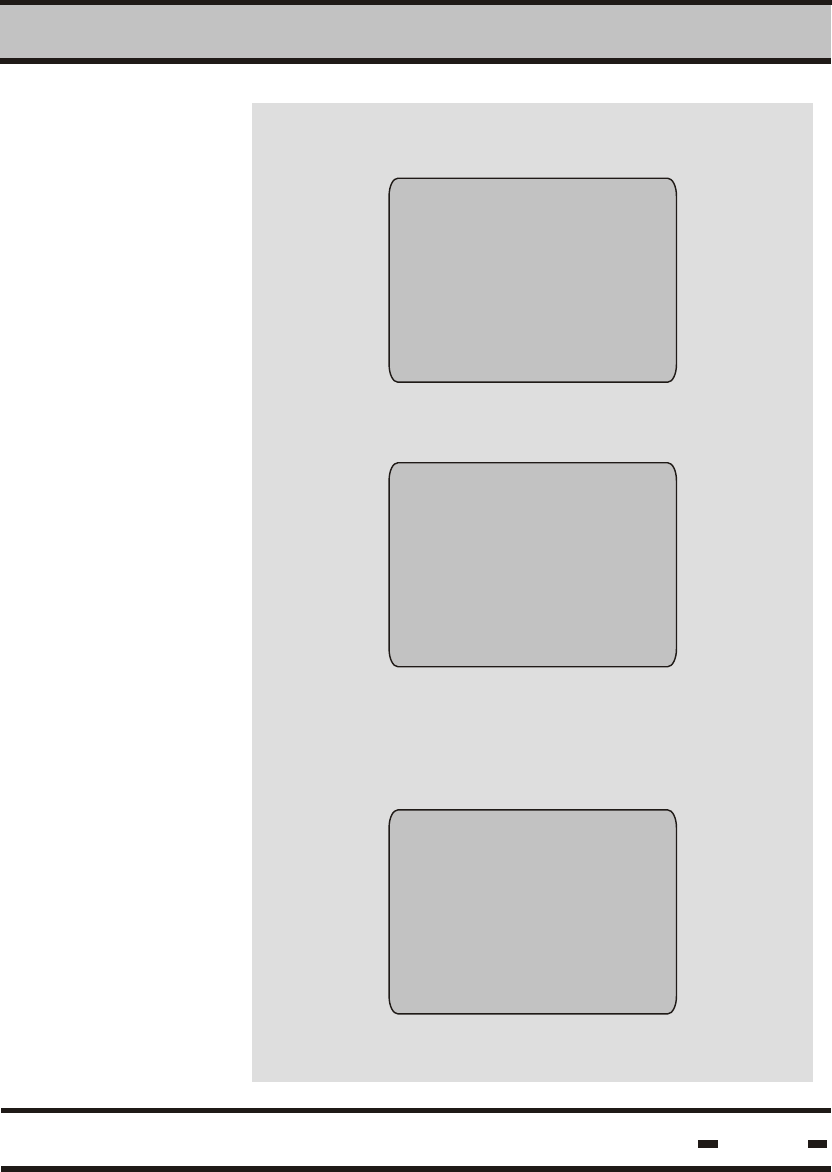
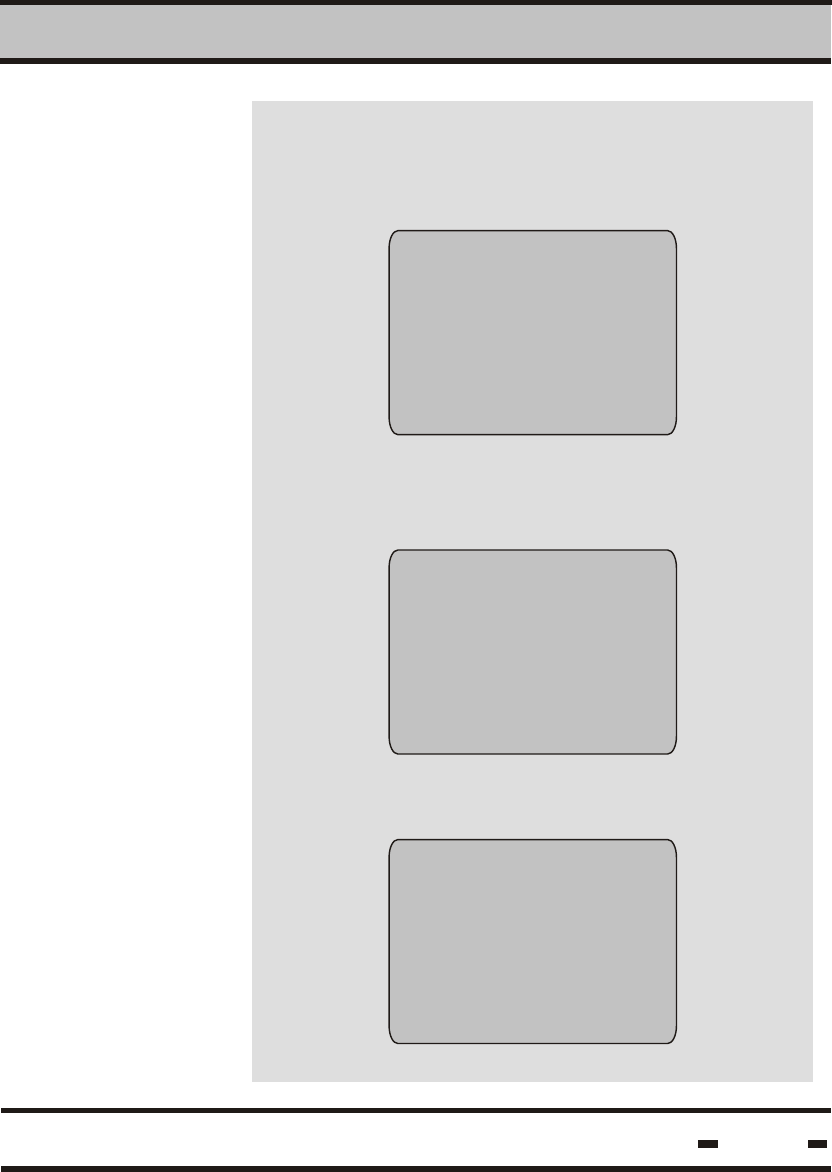
The READ operation allows the User to
retrieve events stored in the seal.
Press on READ to receive information
regarding data stored in the seal. The screen
then reads:
3
READ
Dataseal
read seal
in progress
please wait!
3.6. READ Procedure
Hi-G-Tek Ltd. Microelectronics & Asset Tracking Technology 26
DataTerminal - Operating Instructions
After a short period, one of four possible events
will be displayed:
The seal is not in the terminal database.
The following will be displayed on the screen:
ID: 123456789
not exist. continue?
Yes
no
3.6.1. Basic READ Procedure
3
Hi-G-Tek Ltd. Microelectronics & Asset Tracking Technology 27
DataTerminal - Operating Instructions
If a seal's internal database is identical to that of
the terminal, the following appears on the screen:
ID: 123456789
seal has no new
events
press ok to continue
If the terminal's database memory is full, the
following will appear on the screen:
To delete seals, follow the CLEAR DATA
procedure described in section 3.10.2. of this
manual. The READ process can not be
completed unless the seal has been deleted.
memory is full!
delete unused
seals
press ok to continue
3
The terminal will sound one long beep.
The seal has been tampered with. A TAMP
message will be displayed on the screen:
Id:
org id:
seal #: 123456789
stamp: 11231234
seal is: tamp.
set at:
14/12/01 1 1:29
press ok to continue
Hi-G-Tek Ltd. Microelectronics & Asset Tracking Technology 28
DataTerminal - Operating Instructions
The terminal will sound two confirmation beeps.
The seal has not been tampered with in any
way. The following will be displayed on the
screen:
ID:
org. Id:
seal #: 123456789
stamp: 11231234
seal is: ok.
set at:
14/12/01 1 1:29
press ok to continue
3
Hi-G-Tek Ltd. Microelectronics & Asset Tracking Technology 29
DataTerminal - Operating Instructions
Point the terminal at the inspector's ID badge
and press the READ BADGE key to enter
inspector's information into the terminal.
3.6.2. Read Procedure with Badge ID
Point hht at
your badge and press
read badge (F5)
Welcome inspector 123
point dataterminal at
seal and press ok
to read seal
F5
The screem reads:
BDG
3
Hi-G-Tek Ltd. Microelectronics & Asset Tracking Technology 30
DataTerminal - Operating Instructions
3.7. VRF
DATA
Click on the F4 function key to verify seal
status. This function displays current SEAL
and TAMP status.
F4
3.8. RDT DATA
F3
Click on the F3 function key to READ DATA.
The following screen appears:
Cid: ecge9999999
cont: 8888
dest: 7777
press ok to continue
If there is no data stored, all values will
appear as blanks.

3.9. Menu Options
1 > View Data
2 > Clear Data
3 > Statistics
4 > Setup Date
5 > Setup Time
6 > Setup Zone
7 > Display version
8 > Configuration
9 > View Org. ID List
10> View Reader ID
11> Synchronize Time
Pressing on the menu button displays the
following range of options on the screen:
You may scroll through these functions using the arrow up and down keys.
Pressing the OK key activates the selected function. Pressing the ESC
key will restore the previous reading on the screen.
Data Structure
Before going into details, it is important to understand the basic structure
of the events data organization.
Occurrences that cause an event are: SET (setting the seal), OPEN
(opening the wire) or CLOSE (closing the wire), TAMP (tampering with
the seal i.e. changing the seal resistance) and LOW BAT - low battery
warning, S.SET (seal is soft set), RTC (Date/Time data in RAM and
EEPRPOM is corrupted), DB (Database is corrupted), TIME (time has
been changed) and C.SET (Seal is conditional SET).
Every event that occurs is written and stored in the seal's
event memory. A page can contain up to 55 events. For example, after a
new seal SET occurrence, the page will contain the SET event. If a
tampering event occurs, the next READ operation will show the SET
event and the TAMP event.
3
MENU
Hi-G-Tek Ltd. Microelectronics & Asset Tracking Technology 31
DataTerminal - Operating Instructions
3.9.1.1.
> view from list
Selecting the >View Data function opens a screen
allowing the user a choice of two EVENT display
modes. A function is selected by scrolling through
the list using the up/down arrow keys and then
pressing OK.
If the seal is then opened and closed, the next READ operation will
show four events: SET, TAMP, OPEN, CLOSE.
Selecting > view from list displays a list of seal IDs
from which the User can choose.
To select a seal ID, use the arrow keys to scroll
up or down.
The > view from list procedure also includes an
event counter (ev. cnt) for each seal on the list.
When the counter shows 0000, the seal must be
replaced.
In this example, seal # 1610616839 has 1843
events left.
3
view from list
seal id. ev. cnt
1610616835 2198
1610616836 1075
1610616837 2020
1610616838 0978
>1610616839 1843
view data
> view from list
View by id
3.9.1.
> View Data
Hi-G-Tek Ltd. Microelectronics & Asset Tracking Technology 32
DataTerminal - Operating Instructions
3
Hi-G-Tek Ltd. Microelectronics & Asset Tracking Technology
seal # 1610616839
page #001 of 041
set 03/12 15:20
open: 14 clse: 14
tamp: 03 lb
Tamp 25/03 09:11
close 24/03 12:52
open 24/03 11:40
set 24/03 11:29
Choosing seal 1610616839 shown in the previous
example, displays the following screen:
The screen above shows the first of 41 pages,
meaning seal #1 out of 41.
33
DataTerminal - Operating Instructions
The first two rows of the screen are displayed
alternately.
There are 32 events in that page: 14 OPEN
events, 14 CLOSE events, one SET event and 3
TAMP events. There is also a Low Battery warning
for that seal. Click on OK or ENTER to move on to
the next screen which shows the full event list:
3
Hi-G-Tek Ltd. Microelectronics & Asset Tracking Technology
For a detailed description of a specific event, scroll
up or down the screen to the event and press
ENTER. A detailed event window such as the one
below will be displayed:
ID: 1610616839
stamp: 9876543210
TAMP at:
16/12/2000 17:19
Press ENTER to return to the events screen.
The above screen shows a TAMP event recorded
by seal 1610616839 on 16/12/2000 at 17:19 hours
34
DataTerminal - Operating Instructions
The DataTerminal records the following events:
Event
SET Seal is SET
Description
LOW BAT
TAMP
CLOSE
S.SET
RTC
DB
READ
TIME
C.SET
OPEN Seal wire opened
Seal wire closed
Tampering with the seal - i.e.
changing seal resistance
Low battery warning
Seal is Soft Set
Date/Time data in RAM and
EEPRPOM is corrupted
Database corrupted
Seal was read
Time was changed
Seal is conditional SET
3.9.1.2.
> view by id
After entering the seal ID and pressing OK, the
seal ID screen is on. If an incorrect seal ID has
been entered, the following appears on the screen:
This function allows the user to type in a specific
seal ID. The seal's events are then displayed
on the screen.
3
view by id
enter seal id
--------------------------------
id: ______________
does not exist
press enter
press ok to continue
Hi-G-Tek Ltd. Microelectronics & Asset Tracking Technology 35
DataTerminal - Operating Instructions
Information is obtained in the same manner when
choosing the > view by id option except for the
initial procedure for reaching the desired seal.
3.9.2.
> clear Data
Selecting the > clear Data function opens a
screen that allows the User a choice of three
functions to be selected scrolling through the
list using the up/down arrow keys and then
pressing OK.
3
Selecting the >clear all option erases all seal
data from memory.
Prior to erasing the data, a confirmation request
appears:
3.9.2.1.
> clear all
clear data
> clear all
clear from list
clear by id
clear all data
no
yes
Hi-G-Tek Ltd. Microelectronics & Asset Tracking Technology 36
DataTerminal - Operating Instructions
3.9.2.2.
> clear from list Selecting the > clear from list option displays the
followingon the screen:
Select seal to be deleted and press ENTER. The
following request for confirmation appears on the
screen:
Scroll through the options using the up/down
scrolling keys. Press ENTER to select your
option.
3
3.9.2.3.
> clear by id
Selecting the >clear by id option allows you to
enter the ID number of the seal to be deleted.
clear from list
seal id
00000001029
00000001027
ID: 00000001029
clear?
no
yes
clear by id
enter seal id
---------------
press ok to confirm
Hi-G-Tek Ltd. Microelectronics & Asset Tracking Technology 37
DataTerminal - Operating Instructions
Enter seal ID to be deleted and press ENTER.
Prior to deleting the data, a confirmation request
appears on the screen:
In case a specific ID requested from either
> view data or > clear data menu screens does
not exist in the DataTermianl database, the
screen reads:
3
clear all data
no
yes
ID: _____________
does not exist
press enter
press ok to continue
Select the option required and press ENTER.
Hi-G-Tek Ltd. Microelectronics & Asset Tracking Technology 38
DataTerminal - Operating Instructions
3
3.9.3.
> statistics The STATISTICS function advises the User
regarding the amount of memory left.
Dataseal
dataterminal
free memory for 125 seals
press ok to continue
3.9.4
> setup date
Selecting the SETUP DATE function is displayed
on the screen as follows:
The date may be entered in either European
(DD/MM/YY) or US (MM/DD/YY) format,
depending on your configuration function choice.
See section 3.9.8.3. of this manual for information
regarding configuration procedures.
Enter the new date and press ENTER to set.
setup date
date: 25/03/01
enter new date:
__/__/__
Hi-G-Tek Ltd. Microelectronics & Asset Tracking Technology 39
DataTerminal - Operating Instructions
3.9.5.
> setup time
Selecting the SETUP TIME function is displayed
on the screen as follows:
To change the time, enter digits in HH/MM format.
Press ENTER to set the new time.
3
By default, seal time zone settings are set to
GMT (Greenwich Mean Time). If the User is
located in a different time zone, an offset based
on the time difference must be entered into the
system. For example, the difference in Great
Britain(GMT) is 0, in Egypt +2 and on the East
Coast of the United States -5. When entering the
offset time during the summer months, daylight
saving time should be included in the calculation.
3.9.6.
> setup zone
setup time
current time: 14:27.
enter new time: : .
Selecting the SETUP ZONE function brings the
following on the screen:
Use the up/down scrolling arrows to set the
desired offset. Press ENTER to set the offset.
set time zone
offset hr.:
+00
Hi-G-Tek Ltd. Microelectronics & Asset Tracking Technology 40
DataTerminal - Operating Instructions
3.9.7.
> Display version
Selecting the DISPLAY VERSION function
displays software version information.
3
3.9.8.
> configuration
Selecting the CONFIGURATION function displays
the User configuration menu:
Use the up/down scrolling keys to scroll the
options. Pressing the ENTER key selects the
option.
dataseal
dataterminal
version 2.0
press ok to continue
configuration
set password
set clear data password
date format
Hi-G-Tek Ltd. Microelectronics & Asset Tracking Technology 41
DataTerminal - Operating Instructions
3
Hi-G-Tek Ltd. Microelectronics & Asset Tracking Technology
If the password is not to be used in the SET
operation, select the NO option. To create a
password or to change an existing one, select
YES. The following appears on the screen:
Enter the new password (up to 6 digits) and
press ENTER.
password setting
enter new password
----------------
Selecting the set password option displays the
following on the screen:
password setting
no
yes
Press ok to confirm
42
DataTerminal - Operating Instructions
3.9.8.1
> set password
This option allows the user to decide whether
to use a password for seal SET protection, or
to change an existing password.
In case a wrong password has been entered,
the following appears on the screen:
If a wrong password has been entered, the
entire password selection process must be
repeated. If the User chooses to change the
password, the following is displayed on the
screen:
A new 6 digit password may now be entered.
3
password setting
password incorrect
press ok to continue
password setting
enter new password
----------------
Hi-G-Tek Ltd. Microelectronics & Asset Tracking Technology
Press ok to confirm
43
DataTerminal - Operating Instructions
Any requested change to the password setting
brings the following on the screen:
password setting
enter previous password
________________
press ok to confirm
3
3.9.8.2
>clear data
password
The CLEAR DATA PASSWORD option
allows the User to decide whether to use a
password to protect against database erasure
or to change an existing password.
The following appears on the screen:
clear data
password setting
no
yes
clear data
password setting
enter new
password: .
Hi-G-Tek Ltd. Microelectronics & Asset Tracking Technology
Selecting the YES option for the first time
brings the following on the screen:
44
DataTerminal - Operating Instructions
Any requested change to the password setting
is displayed on the screen as follows:
In case a wrong password has been entered, the
following appears on the screen:
3
clear data
password setting
enter previous
password: .
clear data
password setting
password incorrect
press ok to continue
If a wrong password has been entered, the entire
password selection process must be repeated.
If the User chooses to change the password, the
following appears on the screen:
A new 6 digit password may now be entered.
clear data
password setting
enter new password
_________________
press ok to confirm
Hi-G-Tek Ltd. Microelectronics & Asset Tracking Technology 45
DataTerminal - Operating Instructions
3.9.8.3.
> date format
3.9.9.
> view org. id list
3.9.10.
> view reader id
Selecting the > date format function brings the
following on the screen:
USA format is: MM/DD/YY
European format is: DD/MM/YY
Choosing this function displays the list of
organization ID nicknames on the screen.
This function displays the DataTerminal's unique
ID on the screen.
3
set date format
usa format
europe format
org. List:
1. demo
dataseal
terminal id:
2621455713
press ok to continue
Choose the required format using the up/down
arrow keys. Press ENTER to select the required
option.
Hi-G-Tek Ltd. Microelectronics & Asset Tracking Technology 46
DataTerminal - Operating Instructions
3.9.11
> synchronize time
The seal's clock is likely to drift up to 8 minutes
per quarter. To synchronize the seal clock, select
> synchronize time. If the seal has already been
synchronized, the following message appears:
3
seal time has already
been updated this
quarter
press OK to continue
set number of minutes
to update seal time
using the up/down keys
press OK to continue
process terminated
successfully
press OK to continue
Hi-G-Tek Ltd. Microelectronics & Asset Tracking Technology 47
DataTerminal - Operating Instructions
+
-
If the clock drift has not been corrected, the
User is prompted to add/subtract from the seal's
current time.
After the process has terminated successfully,
the following message appears:
+0

Hi-G-Tek Ltd. Microelectronics & Asset Tracking Technology 48

Chapter 4
Hi-G-Tek Ltd. Microelectronics & Asset Tracking Technology 49
Software
Utility
Operating
Instructions
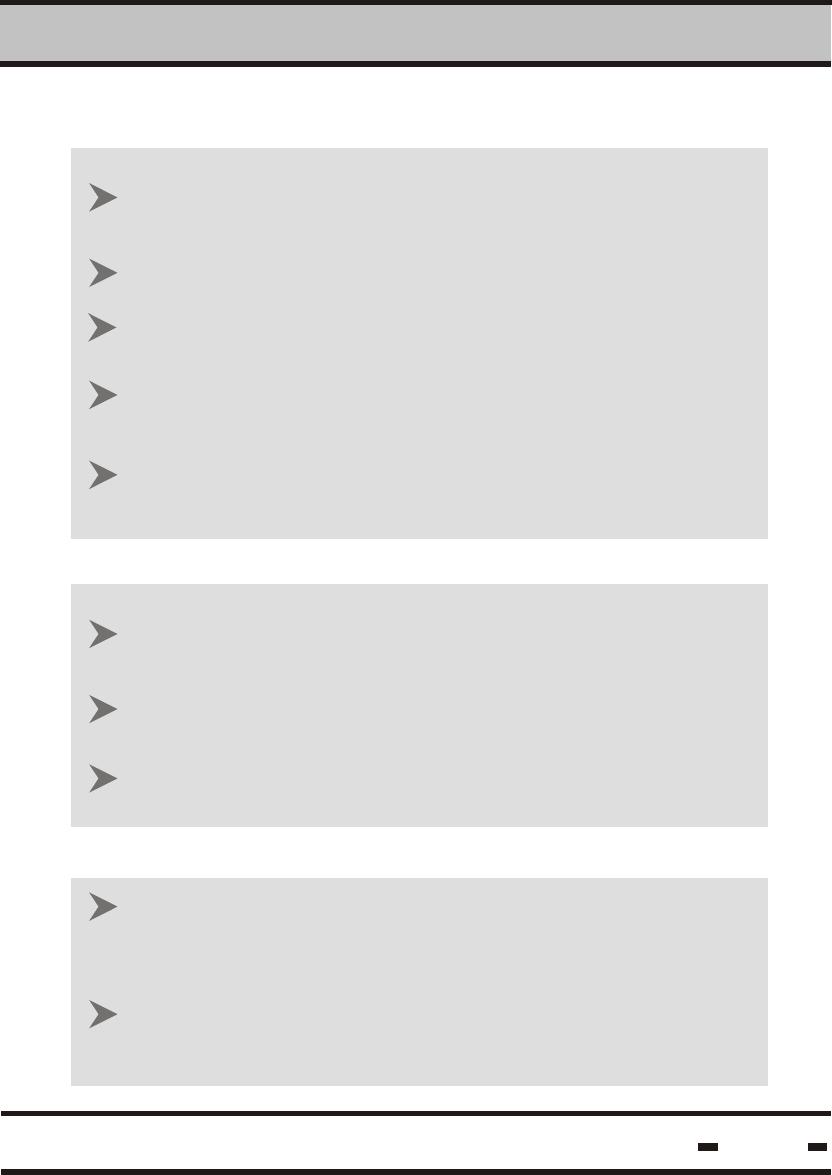
4.1. Software Installation
4.2. Connecting the Terminal to the PC
4.3. Software Setup and Operation
Software Utility Operating Instructions
It is advisable to close all open programs prior to
installation.
Insert the Hi-G-Seal Installation CD into the CD drive.
From the START menu,click on RUN and then on
[disk drive]:/setup.exe. The program will begin installing.
Follow the installation instructions as they appear on
your screen
By default, the Hi-G-Seal folder will be stored in the
PROGRAM FILES folder.
Create a shortcut to Hi-G-Seal.exe by dragging the
Hi-G-Seal.exe icon from the program folder onto the
desktop.
To run the Hi-G-Seal program, double-click on
theHi-G-Seal icon on the desktop.
4
The DataSeal Terminal is connected to the PC via the
RS-232 cable supplied.
Connect the cable to the terminal jack at the bottom of
the DataTerminal unit
Connect the cable to the PC com port
Hi-G-Tek Ltd. Microelectronics & Asset Tracking Technology 50
Software Utility Operating Instructions
4
Hi-G-Tek Ltd. Microelectronics & Asset Tracking Technology
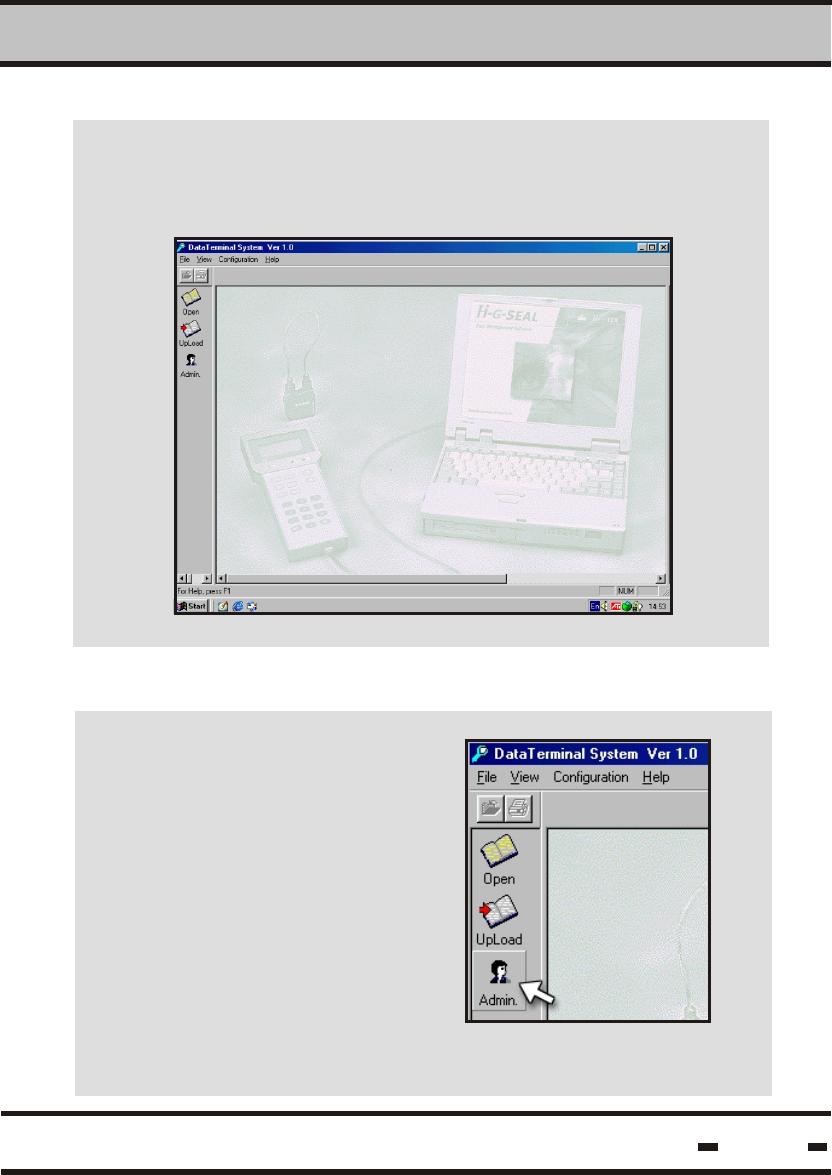
4.4. First Time Operation
4.4.1. System Administration
51
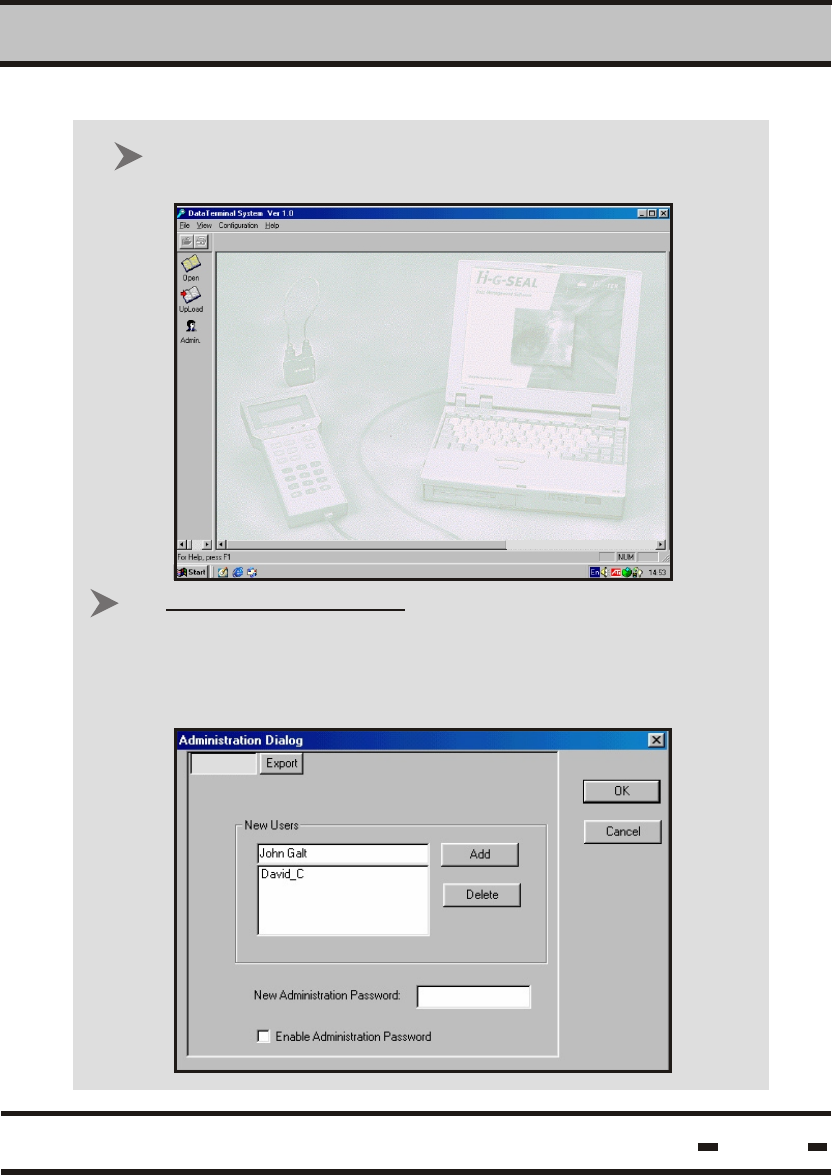
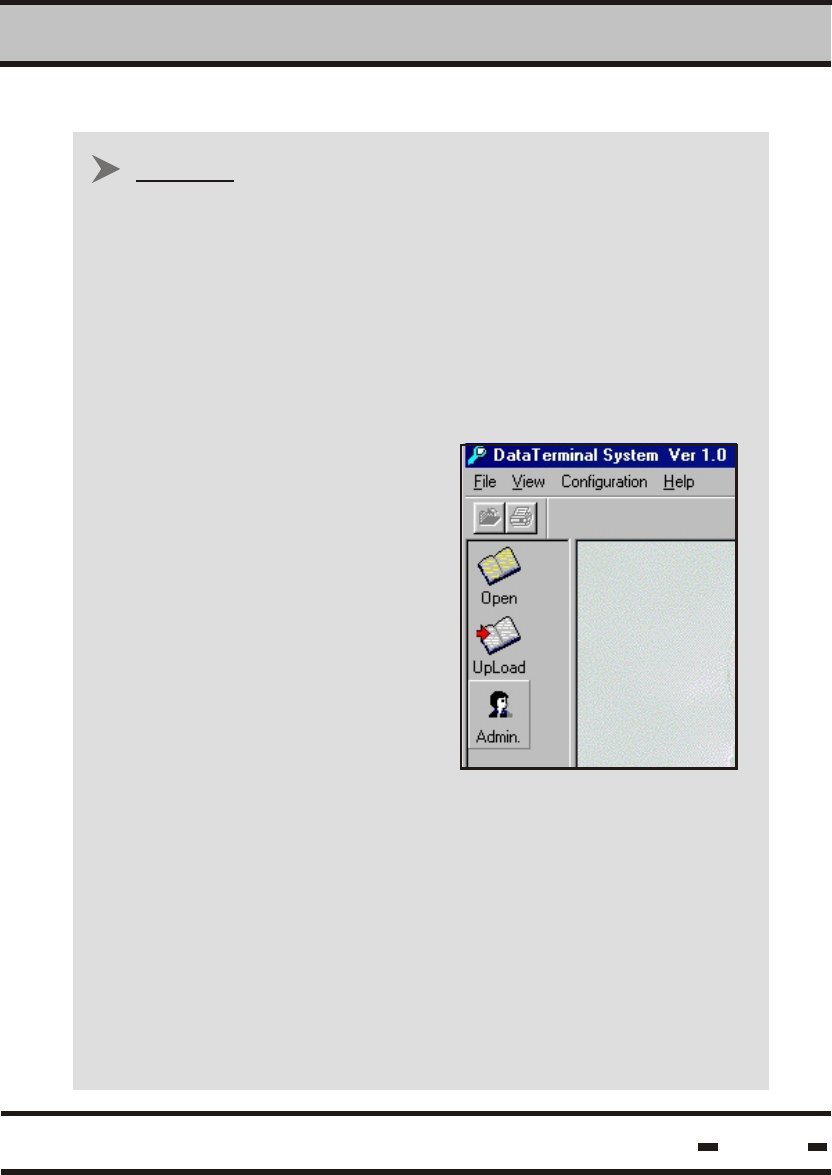
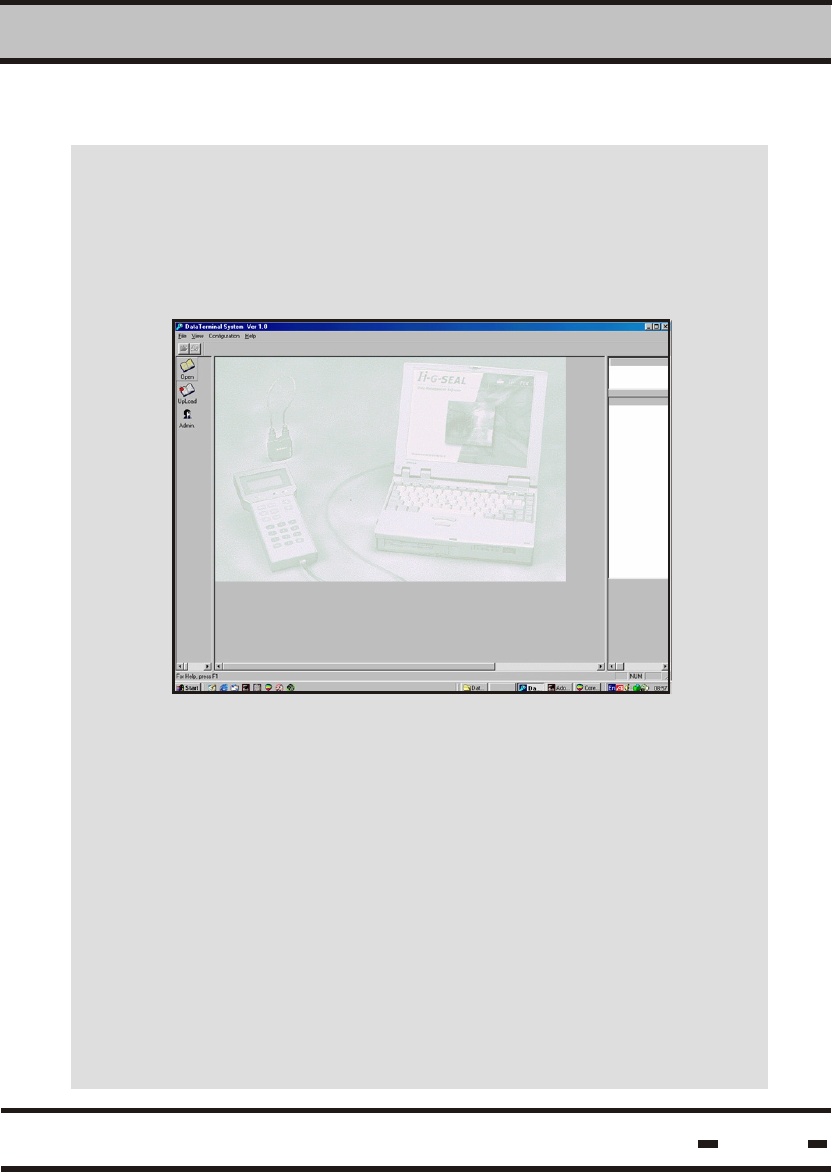
Start the program by clicking on the Hi-G-Seal icon on the
desktop or in Hi-G-Seal.exe. The main program screen is
then displayed.
To start working with the
program for the first time,
click on the ADMIN. icon
located on the left hand
side of the main program
screen.
Software Utility Operating Instructions
4
Hi-G-Tek Ltd. Microelectronics & Asset Tracking Technology 52
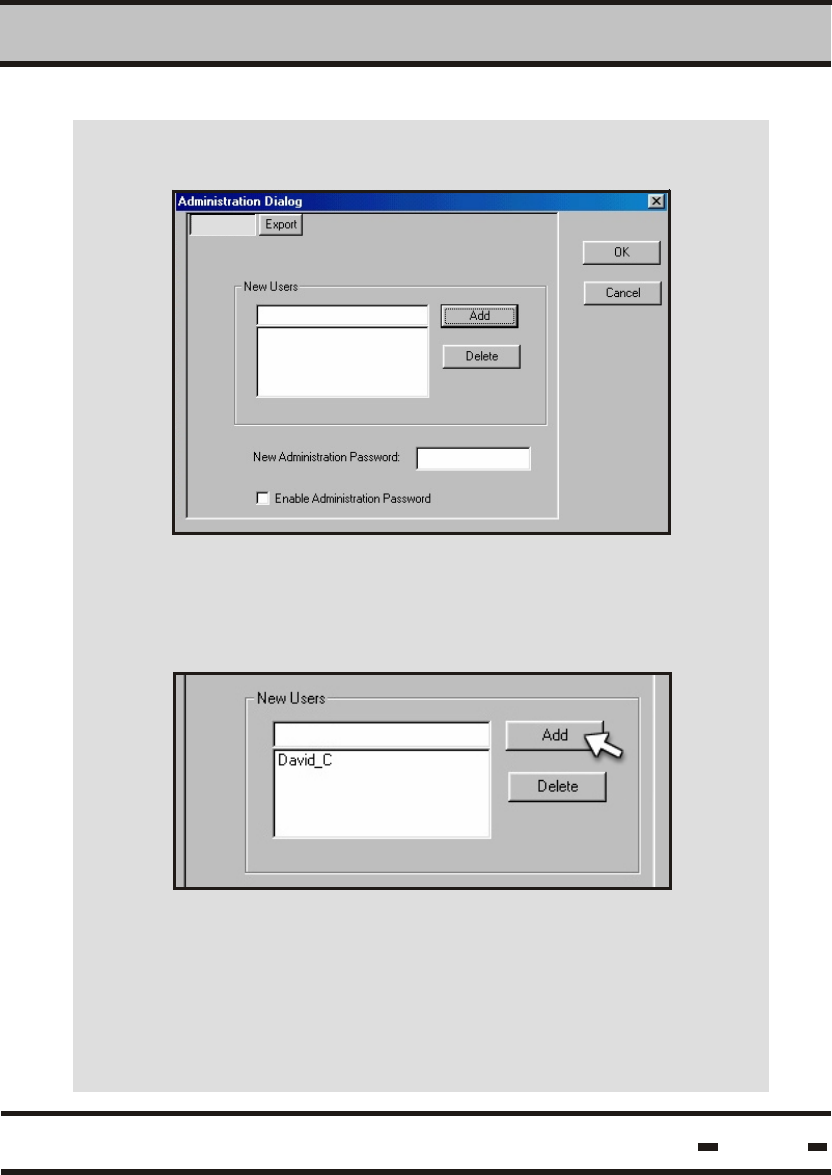
The Administration Dialog screen appears.
Insert a new user name and click on ADD. This
will insert an authorized user name into the system's
data-base.
After the initial operation, every initialization
will require an authorized user name.
New Users
Software Utility Operating Instructions
4
Hi-G-Tek Ltd. Microelectronics & Asset Tracking Technology 53
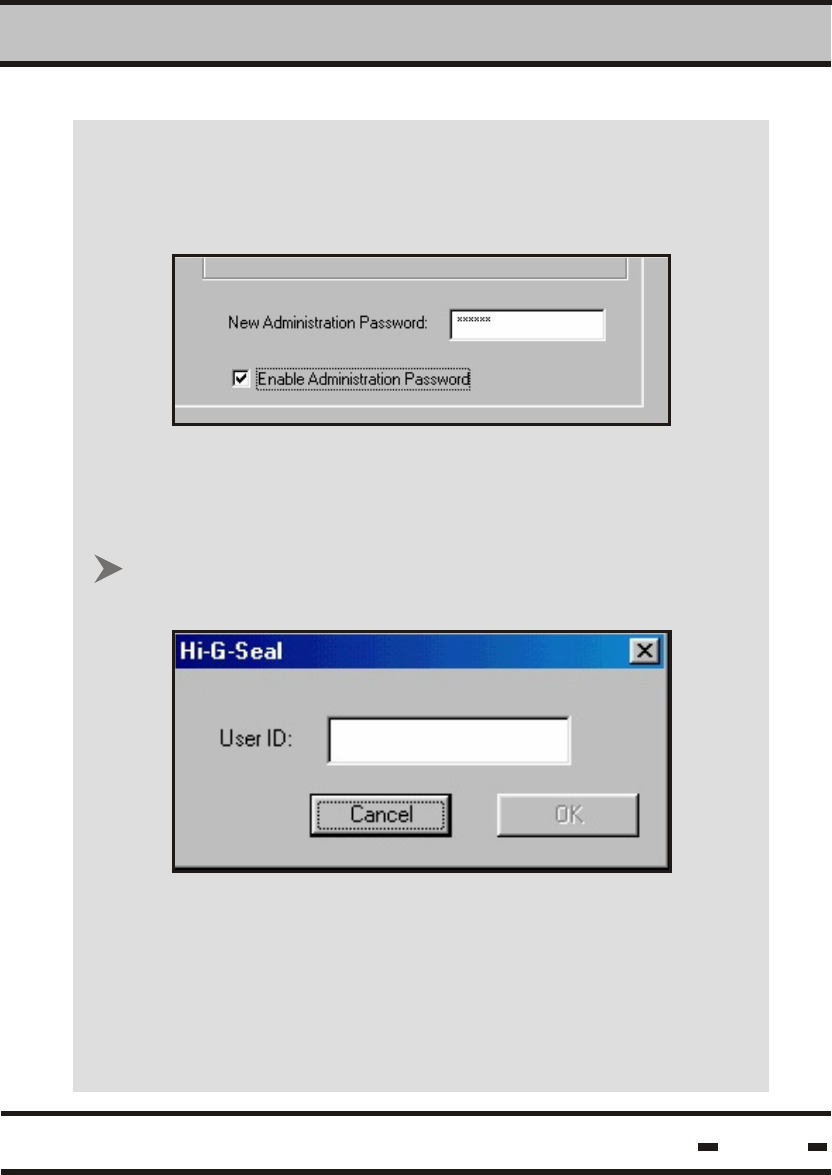
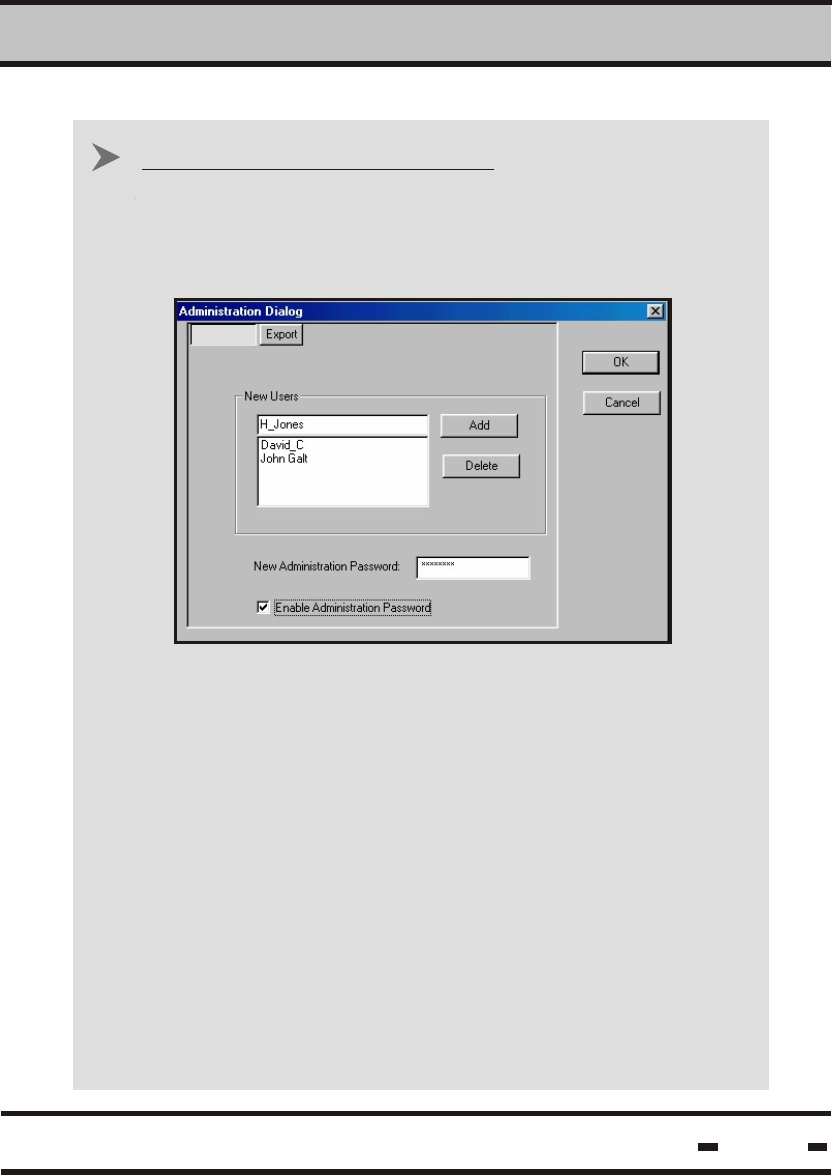
If an administration password is to be used, insert the
password in the NEW ADMINISTRATION PASSWORD
box, and click to enable the administration password.
In this case, entry to the ADMIN. section of the program
will require the administration password.
Upon startup the User is required to insert an authorized
user name.
Once the correct name has been inserted, the OK button
becomes active and allows the User to proceed.
Software Utility Operating Instructions
4
Hi-G-Tek Ltd. Microelectronics & Asset Tracking Technology
Clicking on the OK button brings the User to the main
program screen.
54
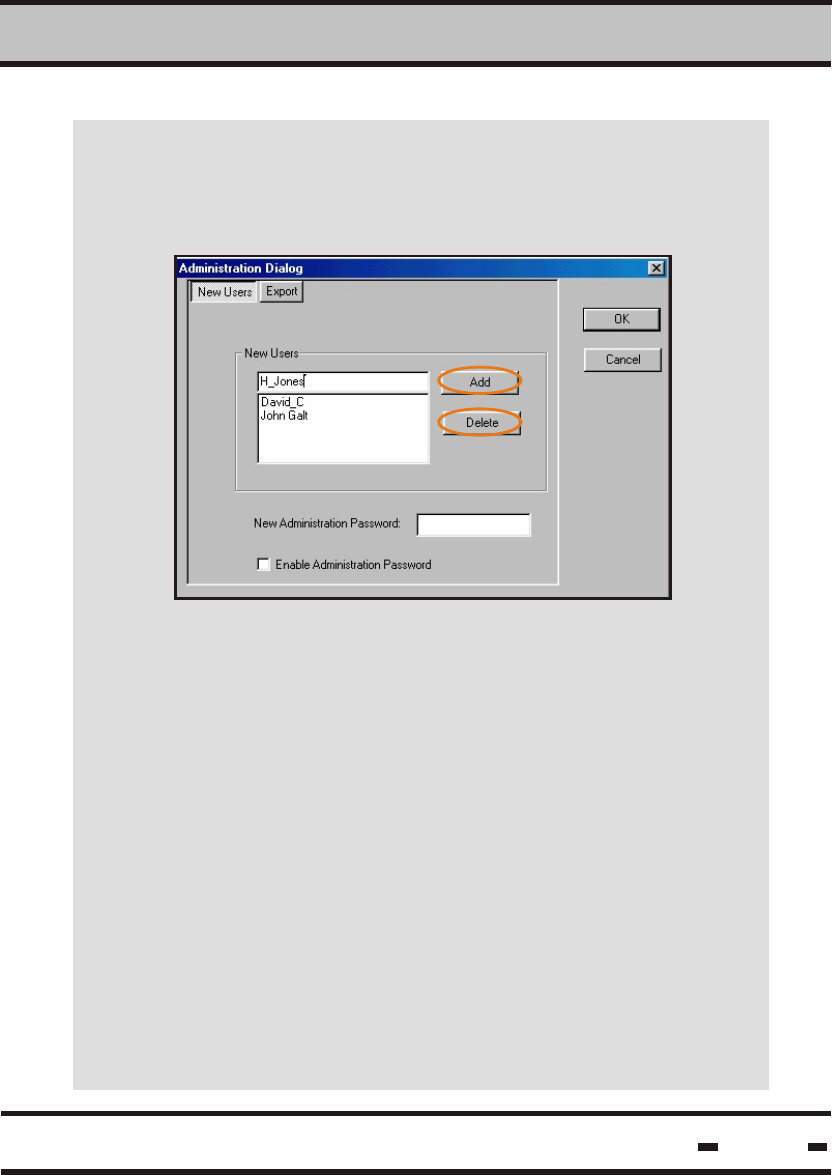
To enter a new or additional user name, type the
required name in the NEW USERS field of the
administration dialog box and click on the ADD button.
Defining New Users.
New Users
Software Utility Operating Instructions
4
Hi-G-Tek Ltd. Microelectronics & Asset Tracking Technology 55
Additional user names or IDs may be entered and
existing ones deleted at all times by clicking on the
ADD or DELETE buttons.
A correct user name must be entered upon initialization
of the application. In the event an incorrect user name
is entered, the application will reject the entry.
Software Utility Operating Instructions
4
Hi-G-Tek Ltd. Microelectronics & Asset Tracking Technology 56
This feature enables the system administrator to
create a password to prevent unauthorized down-
loading of the terminal softwarefrom the PC and
from any unauthorized changes.
After inserting the password in the NEW
ADMINISTRATION PASSWORD field, check the
ENABLE ADMINISTRATION PASSWORD box to
enable the option.
ADMINISTRATION PASSWORD
New Users
Software Utility Operating Instructions
4
Hi-G-Tek Ltd. Microelectronics & Asset Tracking Technology 57
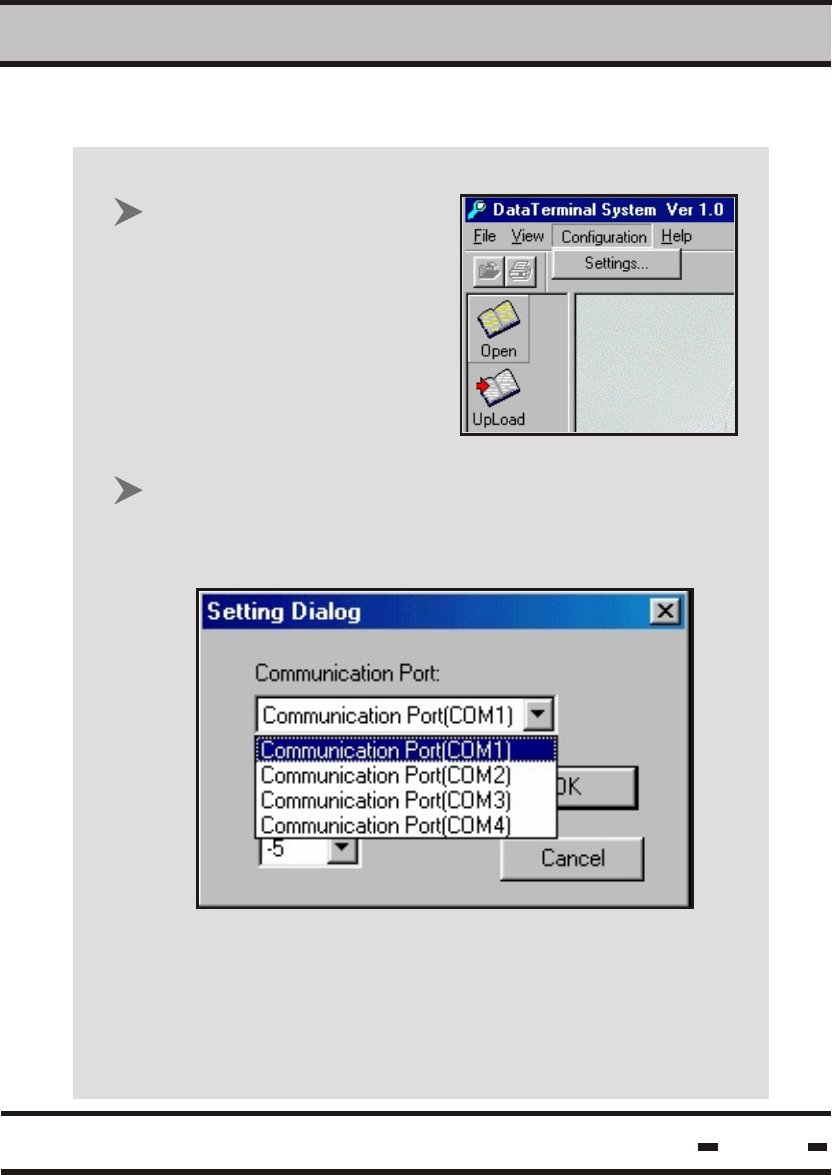
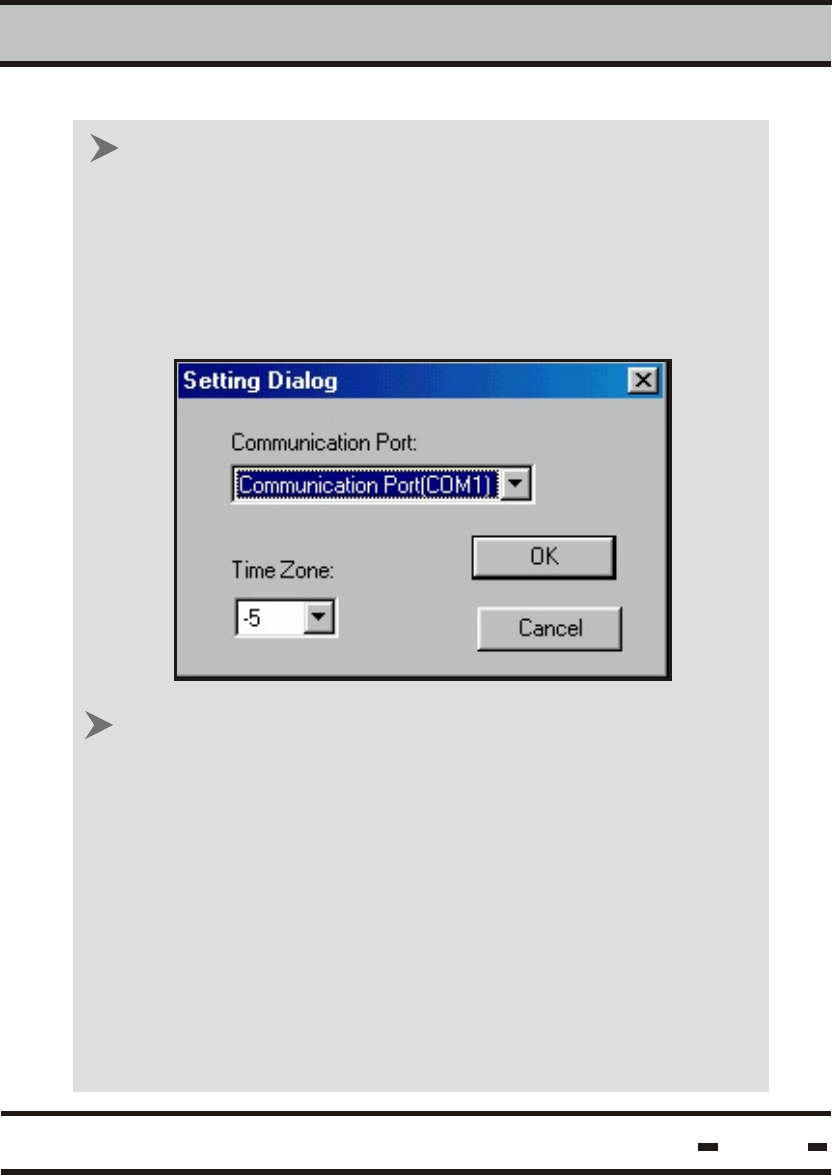
To configure a
communication port, click
on the CONFIGURATION
menu and then on
SETTINGS.
4.4.2. Setting Your Configuration Port
In the SETTING DIALOG box, choose a serial
communicationport to which the DataTerminal - PC
connector cable will be connected.
Software Utility Operating Instructions
4
Hi-G-Tek Ltd. Microelectronics & Asset Tracking Technology
Use the TIME ZONE setting to indicate the time
difference in hours between Greenwich Mean Time
and the zone where the reader is to be used
(for example: London 0, New York -7, Rome +1, etc.).
Note: When calculating time differences, care should
be taken to include daylight saving time (summer/
winter) parameters in the calculation.
Click on OK to confirm the data and to close the
SETTING DIALOG box
58
4.4.3. Setting Time Zone
Software Utility Operating Instructions
4
Hi-G-Tek Ltd. Microelectronics & Asset Tracking Technology
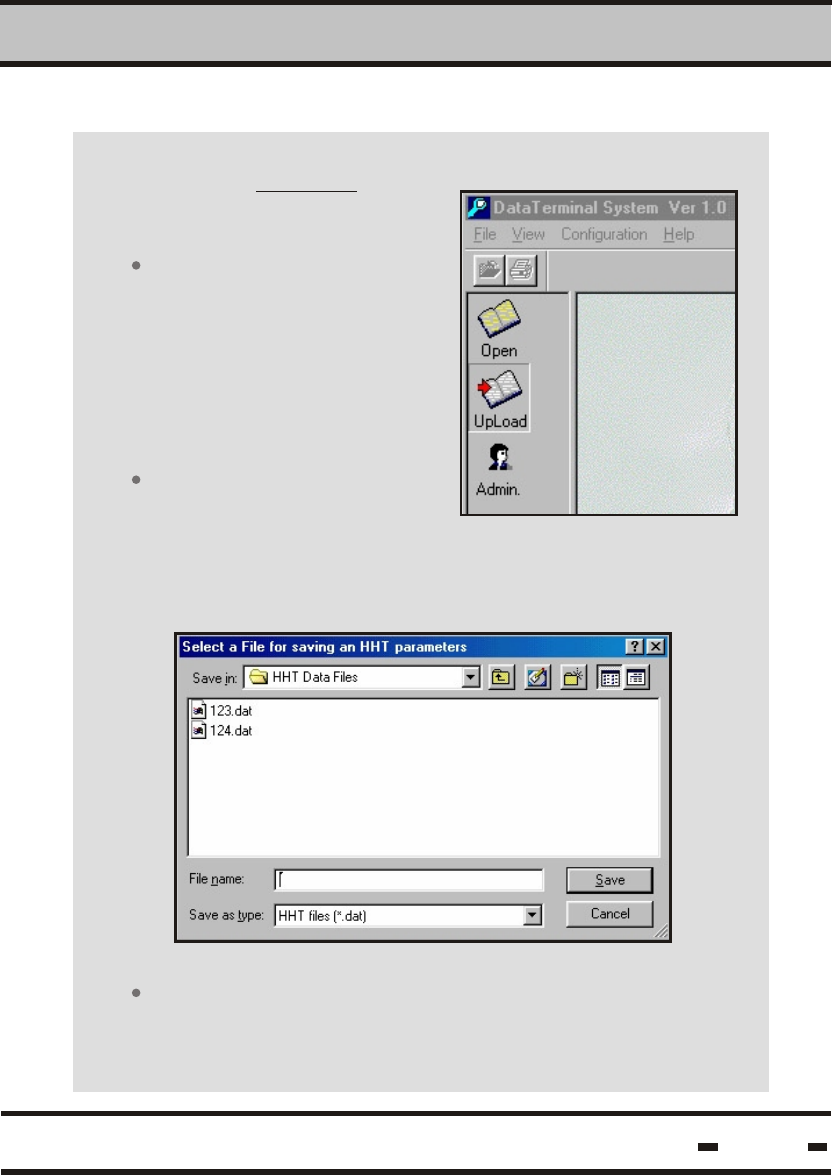
Click on the UPLOAD icon
to upload the data from the
DataTerminal to the PC.
Insert the a file name for the data retrieved from
the terminal and click on SAVE.
Ensure the terminal is
switched on and click on
the UPLOAD icon. The
SELECT A FILE FOR
SAVING dialog box appears.
Connect the terminal to
the PC with the designated
RS232 communication
cable. Ensure the cable is
connected to the COM port
selected in the config.
operation
4.5. File Upload
59
Software Utility Operating Instructions
4
Hi-G-Tek Ltd. Microelectronics & Asset Tracking Technology 60
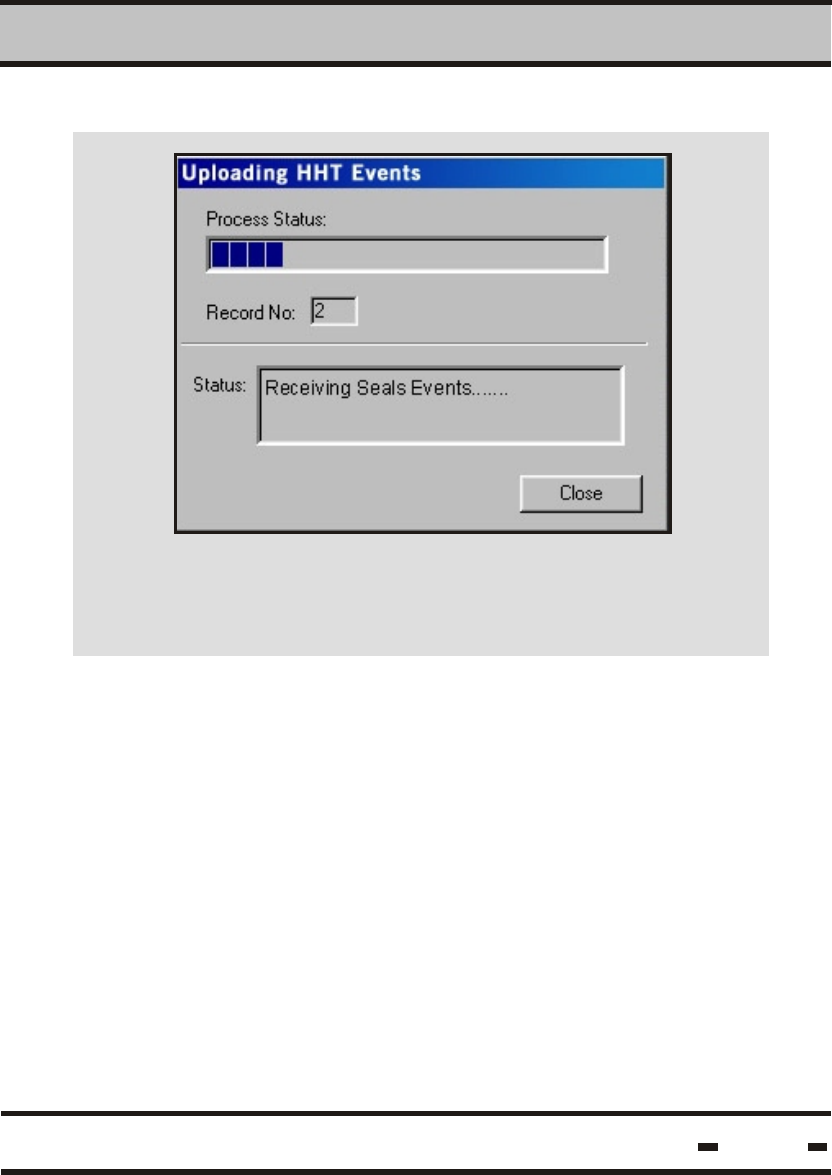
The UPLOADING DataTerminal EVENTS status screen
appears, advising the user of the uploading status.
Software Utility Operating Instructions
4
Hi-G-Tek Ltd. Microelectronics & Asset Tracking Technology
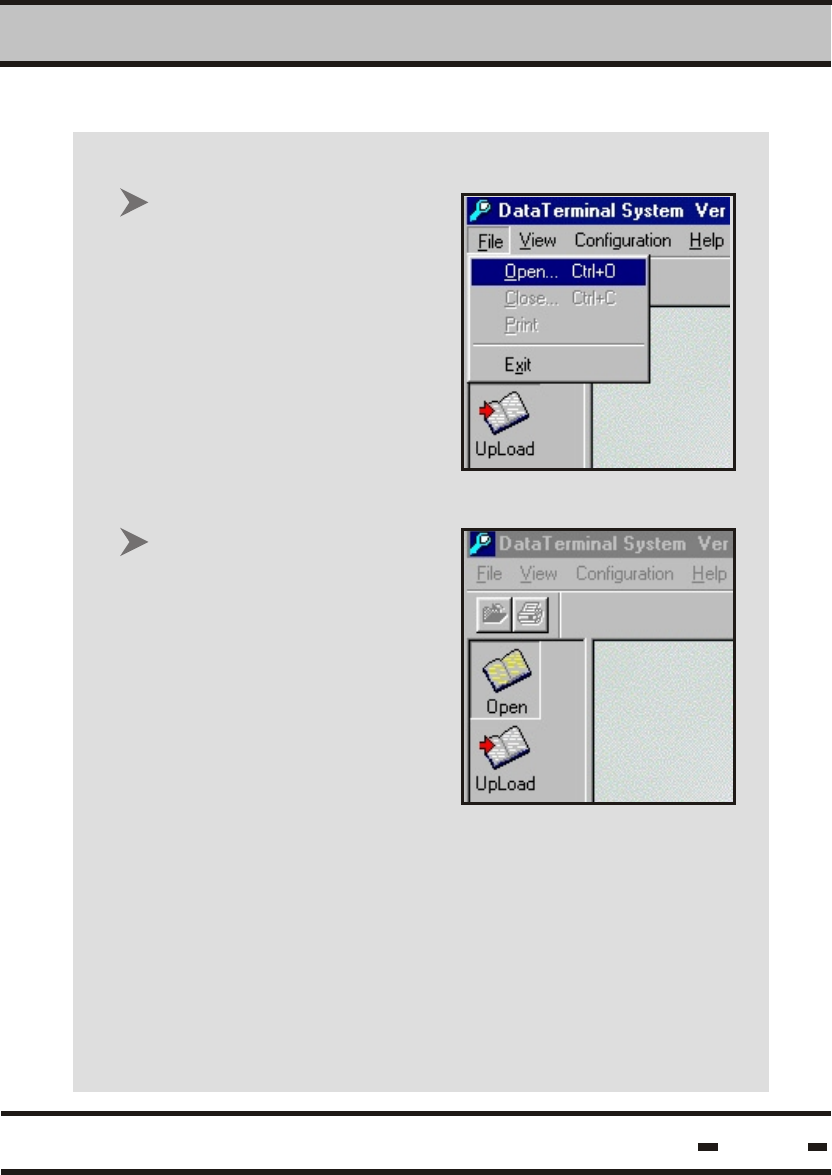
4.6. Viewing Data Files
61
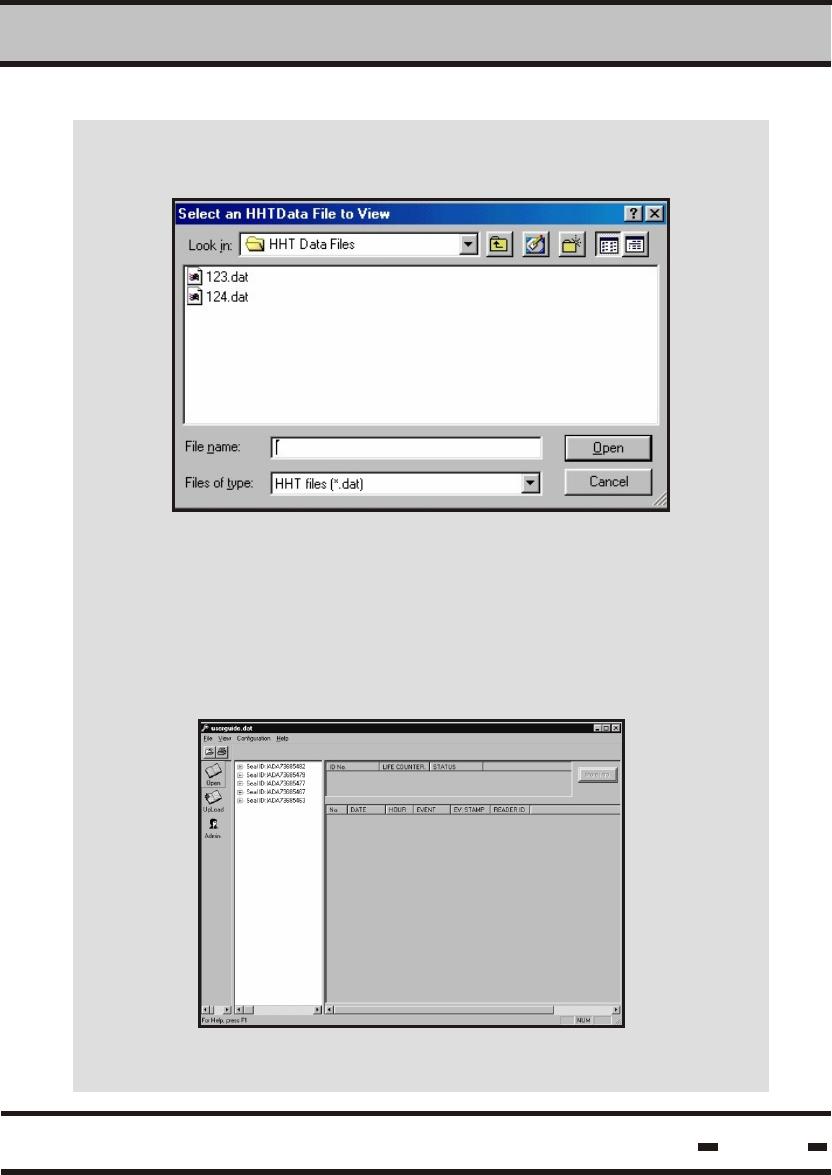
In a similar manner,
clicking on the OPEN
icon situated on the
upper left hand side of
the main menu screen
opens the SELECT FILE
TO VIEW dialog box,
which allows the user to
choose the required
file.
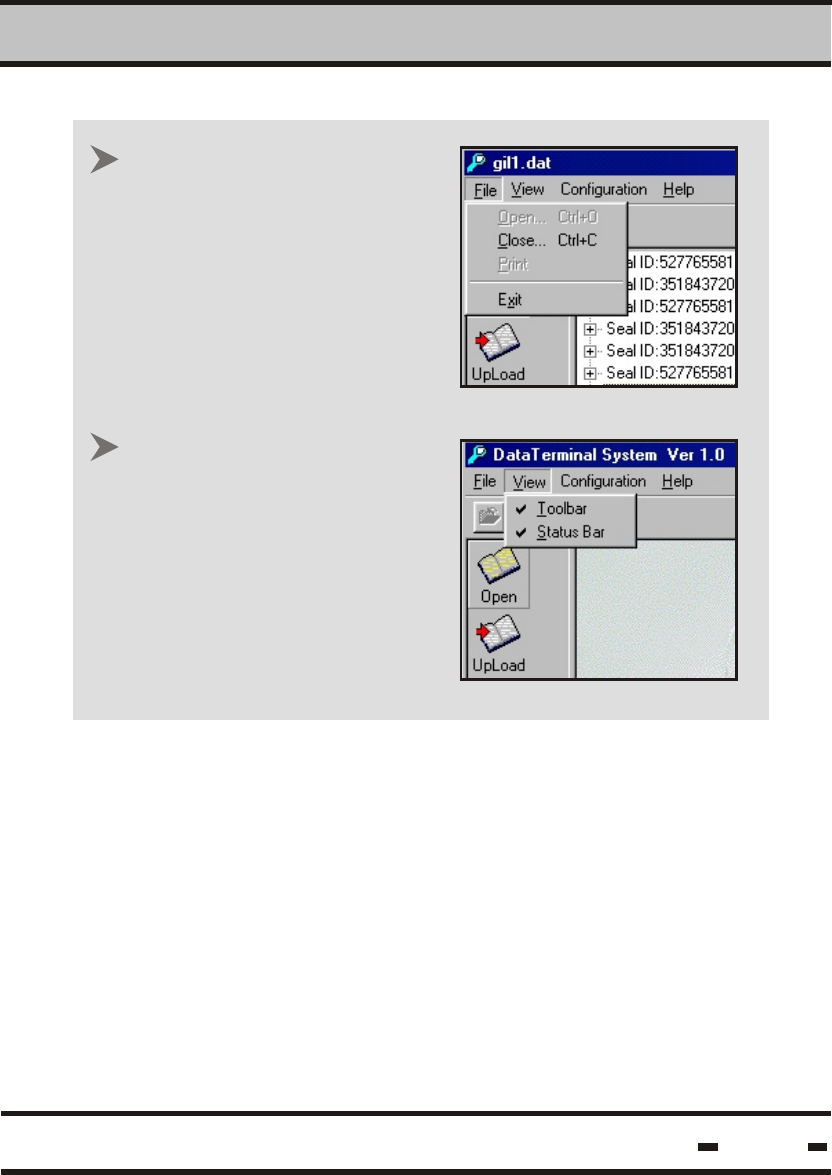
Click on FILE on the
program toolbar. The
drop-down list allows the
User to OPEN a file
(Ctrl+O), CLOSE a file
(Ctrl+C), to PRINT file
data or to EXIT the
program.
Software Utility Operating Instructions
4
Hi-G-Tek Ltd. Microelectronics & Asset Tracking Technology
The View File dialog box containing the list of files
in the program's memory appears.
Click on a file name and then on OPEN to view
file information.
The SELECT FILE TO VIEW dialog box appears.
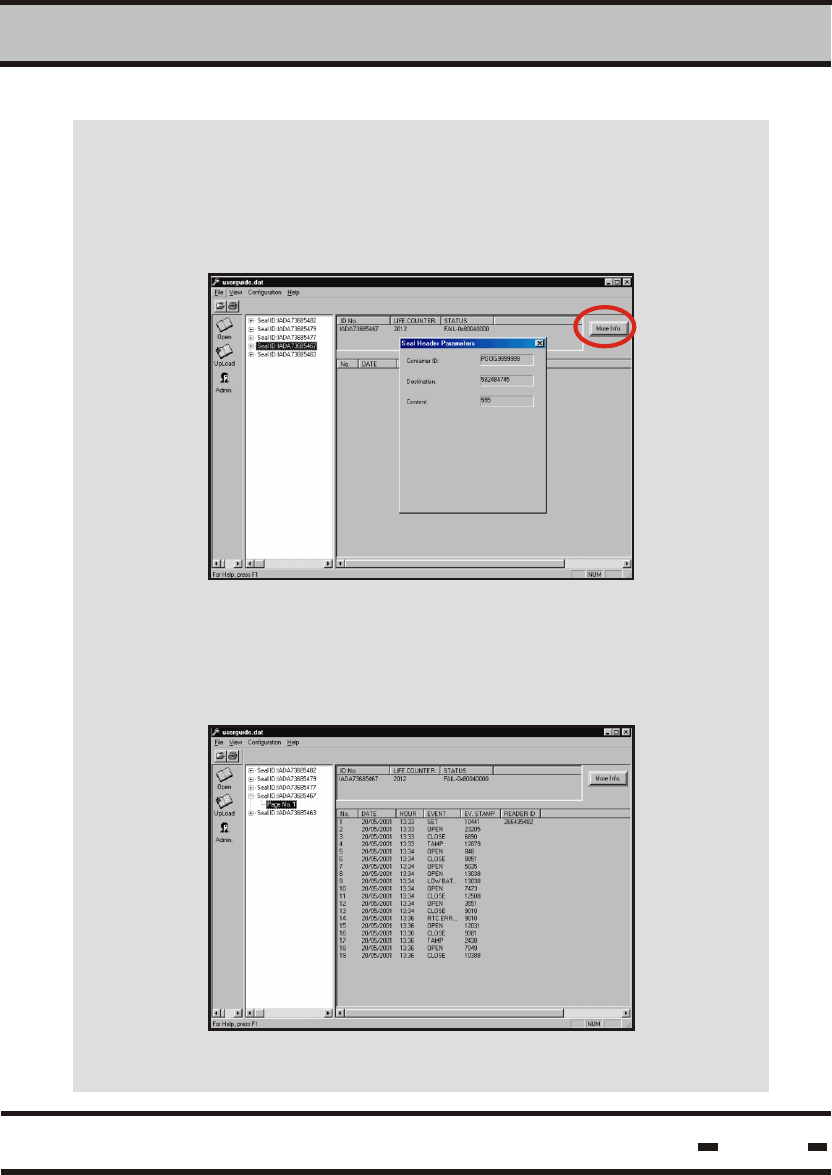
To obtain infomation regarding a file stored in memory,
click on a seal ID number.
62
Software Utility Operating Instructions
4
Hi-G-Tek Ltd. Microelectronics & Asset Tracking Technology
For information regarding Seal Header Paramaters,
such as container ID, Destination and content of the
container, click on the More Info button. This opens
the Seal Header Parameters dialog box.
For information regarding an event occurrence on a
specific seal, click on the sign to the left of a seal
+
ID number.
63
Software Utility Operating Instructions
4
Hi-G-Tek Ltd. Microelectronics & Asset Tracking Technology
Click on the FILE > CLOSE
or Ctrl+C to close the file.
Click on VIEW to open
or close the toolbar and
status bar. The toolbar is
situated beneath the menu
bar and allows the User to
close or print the file with
one click. The status bar is
situated on the bottom of the
program screen.
64
Software Utility Operating Instructions
4
Hi-G-Tek Ltd. Microelectronics & Asset Tracking Technology
Click on the ADMIN.
icon to open the
ADMINISTRATION
DIALOG box.
65
4.7. DataTerminal Software Upgrade
Prior to beginning this operation, ensure that the RS232
cable supplied with the system is connected to both the
DataTerminal and the PC.
EXPORT
NOTE: The download operation erases all information
stored in the terminal database. All information must
be backed-up prior to beginning a download operation.
Software Utility Operating Instructions
4
Hi-G-Tek Ltd. Microelectronics & Asset Tracking Technology 66
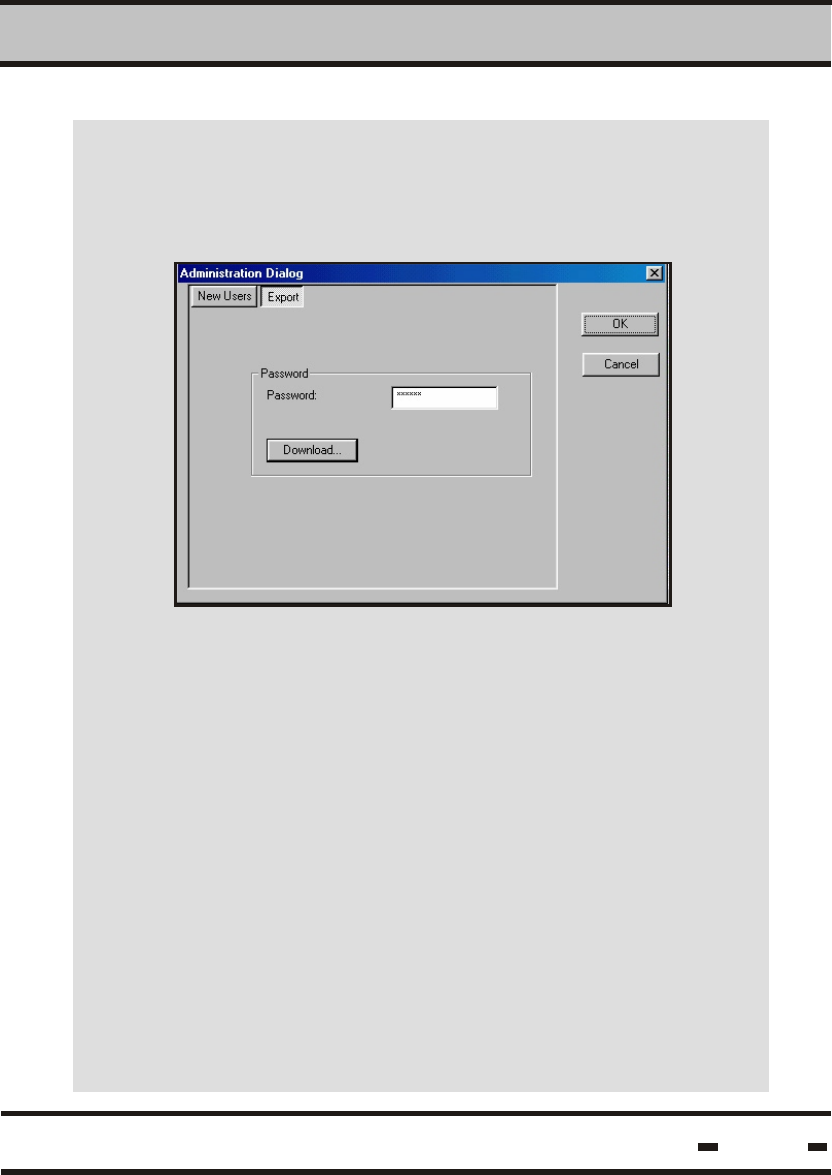
In the Administration Dialog Box, click on the
EXPORT tab to download the DataTerminal
software from the PC.
The download password must be entered in order
to proceed. Enter the factory-set password in the
PASSWORD field (QPWOEI in upper case letters).
Once the correct password has been entered, the
DOWNLOAD button becomes active. Click on the
button to display the FILE DOWNLOAD dialog box.
Software Utility Operating Instructions
4
Hi-G-Tek Ltd. Microelectronics & Asset Tracking Technology
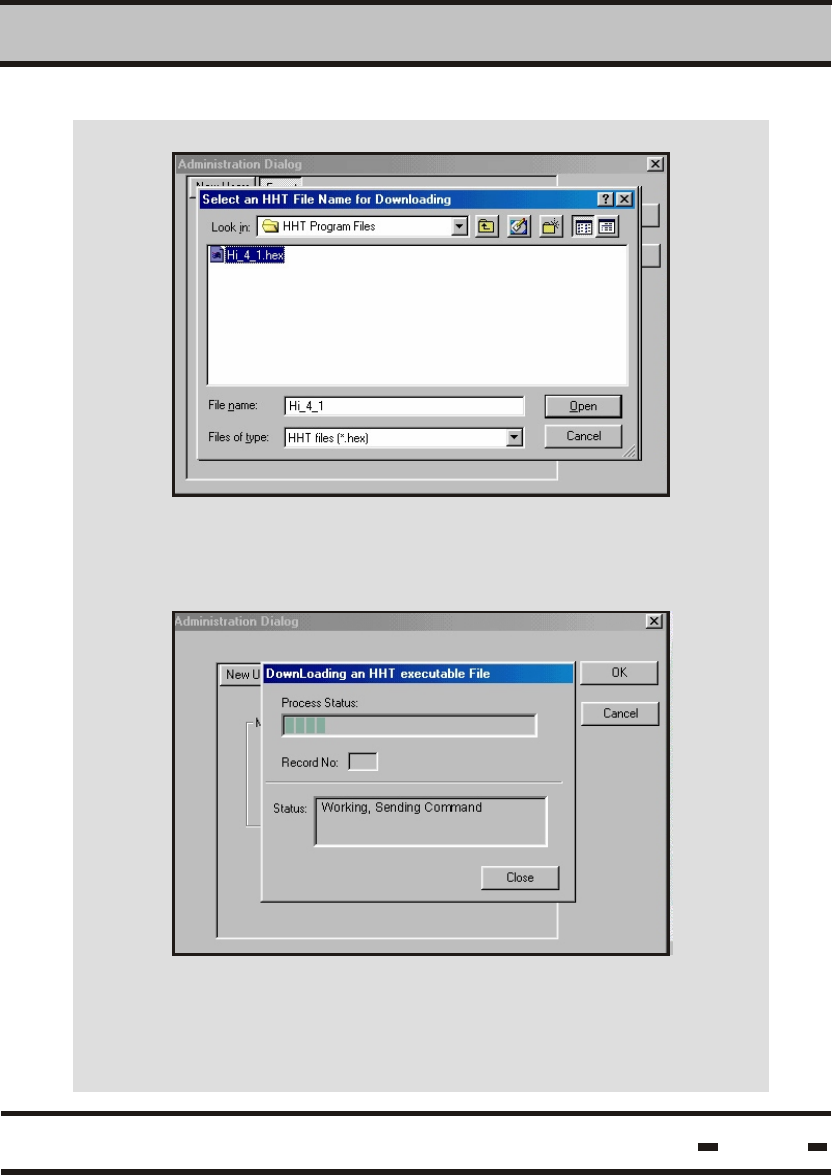
Click on the DOWNLOAD button. Select the *.hex
file you want to download from the file list in the
dialog box and click on OPEN to proceed.
Verify that the downloading process is in progress.
Click on CLOSE when the process is complete.
2
67

Hi-G-Tek Ltd. Microelectronics & Asset Tracking Technology 68

Troubleshooting
and
Problem Solving
Chapter 5
Hi-G-Tek Ltd. Microelectronics & Asset Tracking Technology 69
Troubleshooting
5
5.1. Low Voltage
If the DataTerminal runs low on power during operatoin,
the following message appears, followed by a long beep:
Press OK to continue and turn the DataTerminal off.
Replace the batteries as described in section 3.1.
error #0102
low battery
replace dataterminal
battery
press ok to continue
LOW BAT
Hi-G-Tek Ltd. Microelectronics & Asset Tracking Technology 70
Upon initialization:
During Operation:
If the DataTerminal is low on power when switched on, the
following warning message appears on the screen:
Troubleshooting
5
5.2. Terminal Failure
The Hand-Held Terminal performs an automatic self-test
upon initialization. If there is any technical problem at this
stage, the following message appears on the screen:
If this occurs, call an authorized service center or send the
device to the manufacturer.
error #0101
terminal failed
call service
press ok to continue
Hi-G-Tek Ltd. Microelectronics & Asset Tracking Technology 71
5.3. RF Communication Failure
If there is a communication error between the Hand-Held
Terminal and the seal, the following message appears on
the screen:
If this occurs, try the following:
If all attempts at remedying the fault(s) have failed, call an
authorized service center.
Decrease the distance between DataTerminal and seal
Change the angle between the DataTerminal and the
seal (the optimum angle is when the DataTerminal is
below and parallel to the seal)
5.4. Seal Failure
When the seal has reached its maximum LIFE COUNTER,
the following message will appear on the screen:
The seal must be replaced.
Replace the batteries in the DataTerminal
Try and communicate with another seal
error #2001
rf communication error
press ok to continue.
Hi-G-Tek Ltd. Microelectronics & Asset Tracking Technology 72
Troubleshooting
5
the seal reached its
events limit
replace seal
press ok to continue
If the seal has not been SET, the following message appears
on the screen during a READ or VERIFY operation:
If the seal cannot be read, the following message will
appear on the screen:
id:
the seal is new
press ok to continue.
invalid device
press ok to continue
Hi-G-Tek Ltd. Microelectronics & Asset Tracking Technology 73
Troubleshooting
5
id: 123456789
the seal experienced
low battery
press ok to continue
If the seal battery is low during the reading process, the
screen will read:
Hi-G-Tek Ltd. Microelectronics & Asset Tracking Technology 74
Troubleshooting
5
5.5. System Setup
Some problems may occur if your computer system setup
is not compatible with program requirements. For instance,
if screen resolution is greater than the required 800*600
pixels, the program screen will appear as below:
Despite the visual incompatibility, the screen resolution
will not interfere with the program.

Technical
Specifications
Chapter 6
Hi-G-Tek Ltd. Microelectronics & Asset Tracking Technology 75
Environmental Conditions
Technical Specifications
6
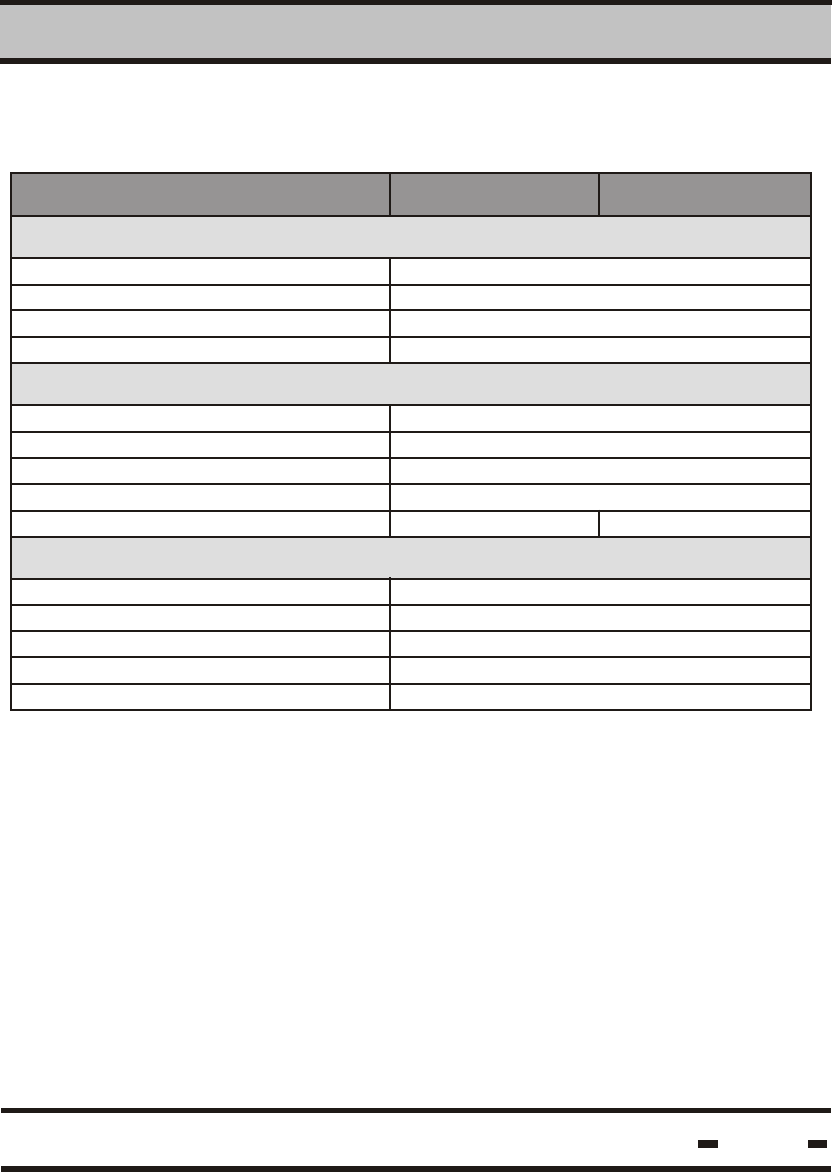
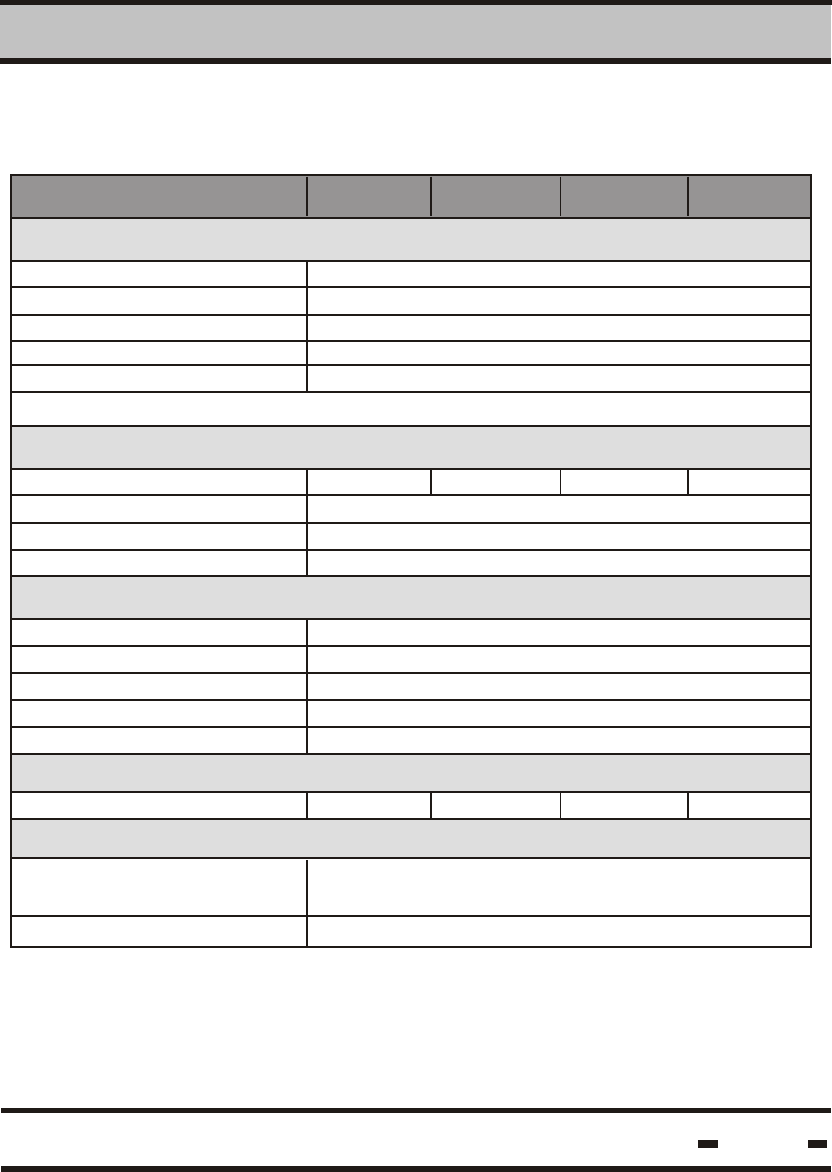
6.1. DataTerminal 125 kHz IG-MA-31/IG-MA-32
Hi-G-Tek Ltd. Microelectronics & Asset Tracking Technology 76
DataTerminal
Physical Characteristics
Performance Characteristics
IG-MA-31 IG-MA-32
RFID Frequency (MHz) -13.56
Dimenisons [mm]
Weight[gr]
Power requirements
Memory
210x100x45
500
4xAA Size 1.5V Alkaline batteires
190 Seals @55events per Seal
Interface
Operating Frequency [KHz]
Output power [dbuv/m]
Read Range
RS232
125
110 @ 3m
40
Operating Temperature [
Storage Temperature
Humidity [%]
Mechanical Vibration & Shock
oC]
oC][
-20 to +70
-20 to +70
50 Non Condensing
Hand carried

6.2. DataSeal IG-RS-40-916/433/318/315
Hi-G-Tek Ltd. Microelectronics & Asset Tracking Technology 77
Technical Specifications
6
Physical Characteristics
Performance Characteristics
O
Operating Temperature ( C)
O
Storage Temperature ( C)
Humidity (%)
Mechanical Vibration
Mechanical Shock
Dimensions (mm)
Weight (gr)
Housing
Power Requirements (volts)
User Memory (Bytes)
Events Memory (events)
Interface
Operating Frequency (MHz)
Read Range (m)
Operating Frequency (kHz)
Read Range (cm)
Standards
Antenna Characteristics
Environmental Conditions
49X37X85
100
Plastic reinforced with fiberglass
3.6 internal battery
2048
10
Mounting Cradle P.N. IG-DH-40
30 @ open space
125
50
-40 - +70
-40 - +70
90 non condensing
As per MIL-810D & SAE J1455
As per MIL-810D & SAE J1455
FCC part 15
DataSeal IG-RS-40-916 IG-RS-40-433 IG-RS-40-318 IG-RS-40-315
916.5 433.92 318 315
Beam Divergence
Omni-directional on non-metal wall.
Hemisphere on metal wall.
Polarization Vertical
Hi-G-Tek Ltd. Microelectronics & Asset Tracking Technology 78
Technical Specifications
6
Physical Characteristics
Performance Characteristics
O
Operating Temperature ( C)
O
Storage Temperature ( C)
Humidity (%)
Mechanical Vibration
Mechanical Shock
Dimensions (mm)
Weight (gr)
Housing
Power Requirements (volts)
User Memory (Bytes)
Events Memory (events)
Operating Frequency (MHz)
Read Range (m)
Operating Frequency (kHz)
Read Range (cm)
Standards
Antenna Characteristics
Environmental Conditions
49X37X65
100
Plastic reinforced with fiberglass
3.6 internal battery
2048
10
30 @ open space
125
50
-40 - +70
-40 - +70
90 non condensing
As per MIL-810D & SAE J1455
As per MIL-810D & SAE J1455
FCC part 15
Magnetic DataSeal
Beam Divergence Omni-directional on non-metal wall.
Hemisphere on metal wall.
Polarization Vertical
6.3. Magnetic DataSeal IG-RS-40M-916/433/318/315
IG-RS-40M-315
IG-RS-40M-318IG-RS-40M-433IG-RS-40M-916
916.5 433.92 318 315

Hi-G-Tek Ltd. Microelectronics & Asset Tracking Technology
Contact Information
Hi-G-Tek Ltd. Microelectronics & Asset Tracking Technology
Hi-G-Tek Ltd. Microelectronics and Asset Tracking Technology
Tel: 972-3-5339359
Fax: 972-3-5339225
http://www.higtek.com
79