Honeywell 760002 Industrial PDA with Scanner User Manual
Honeywell International Inc Industrial PDA with Scanner
UserManual.wiki
>
Honeywell
>
760002 User Manual
>
Manual
Contents
1.
Manual
2.
User manual
3.
user manual
Manual
Navigation menu
Upload a User Manual
Namespaces
Wiki Guide
HTML
PDF
Info
Views
User Manual
Discussion / Help
Navigation


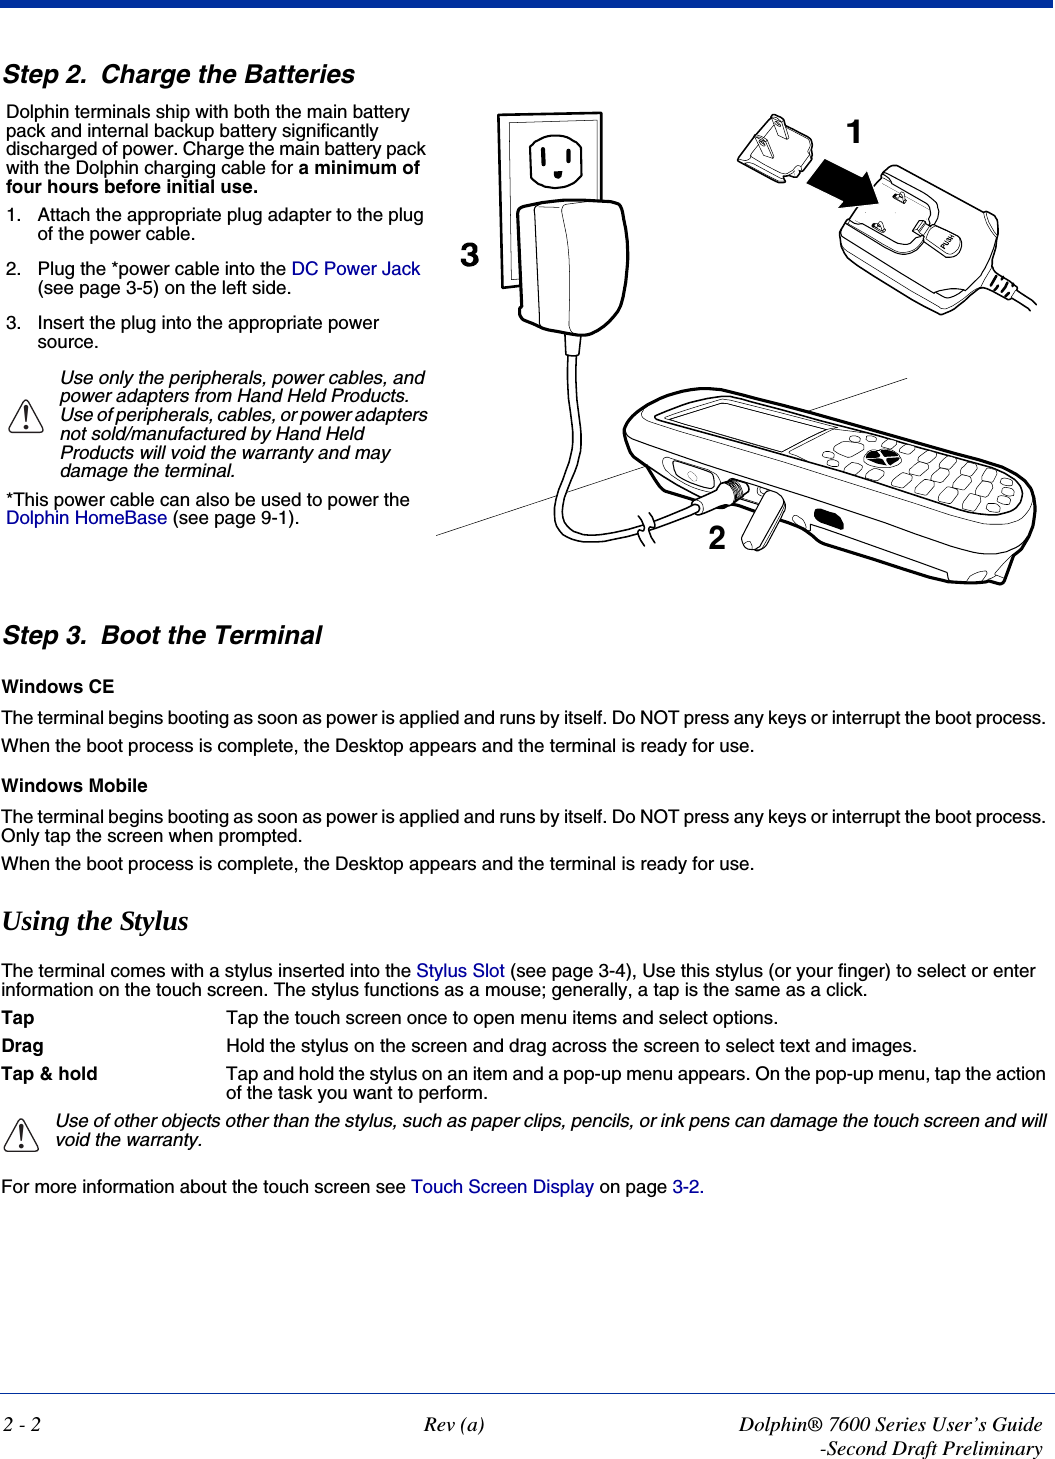

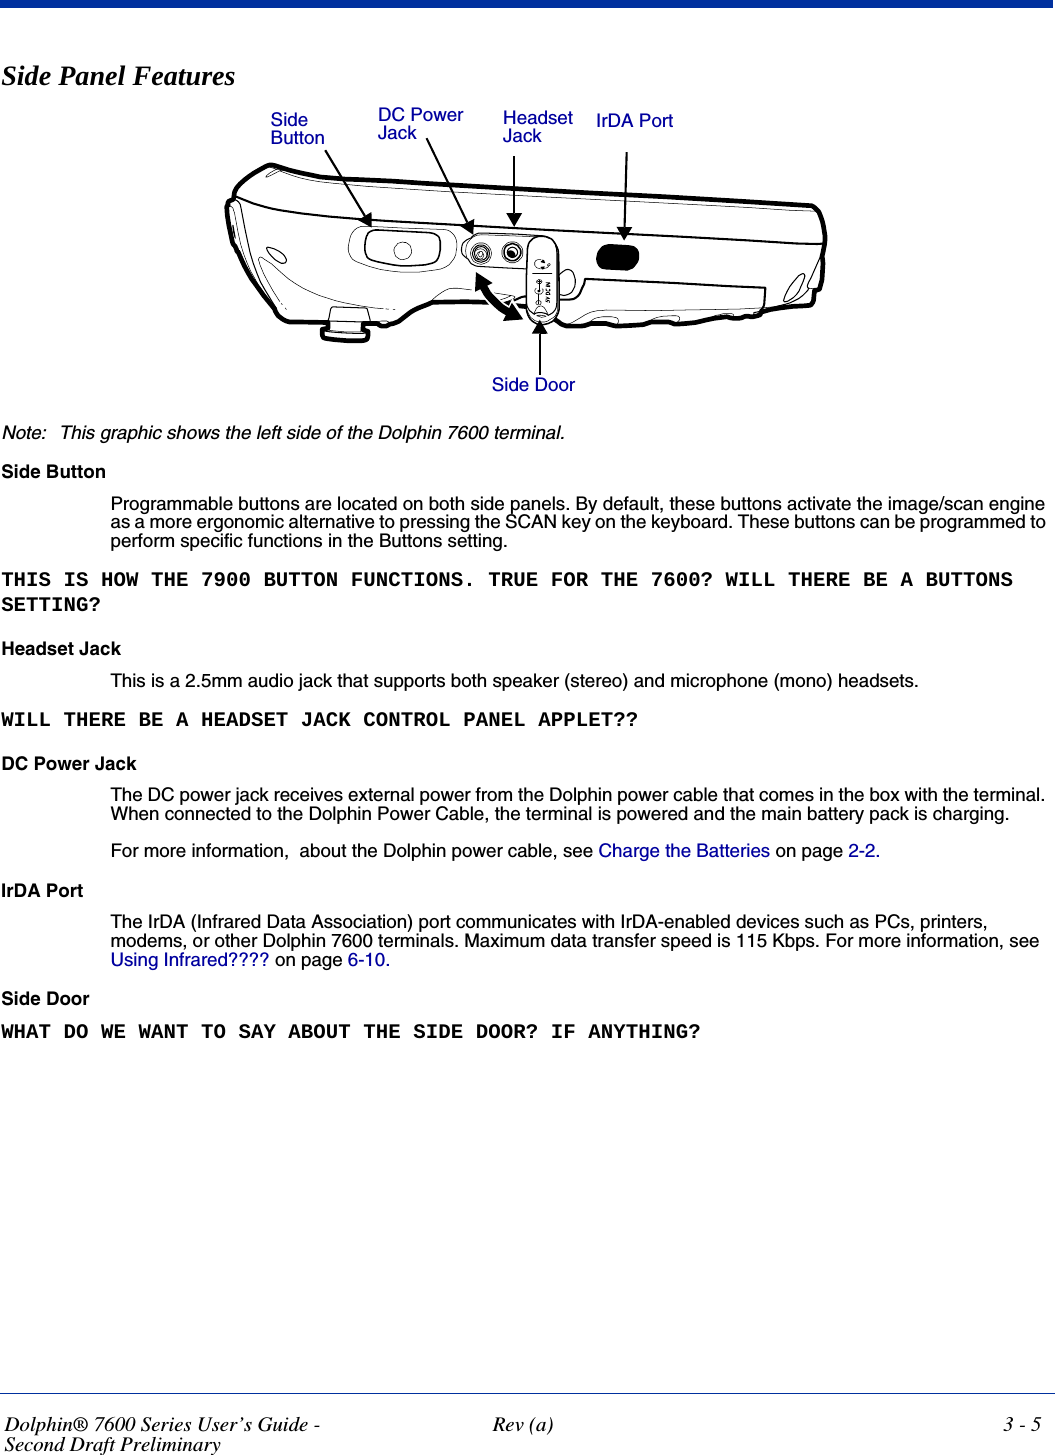
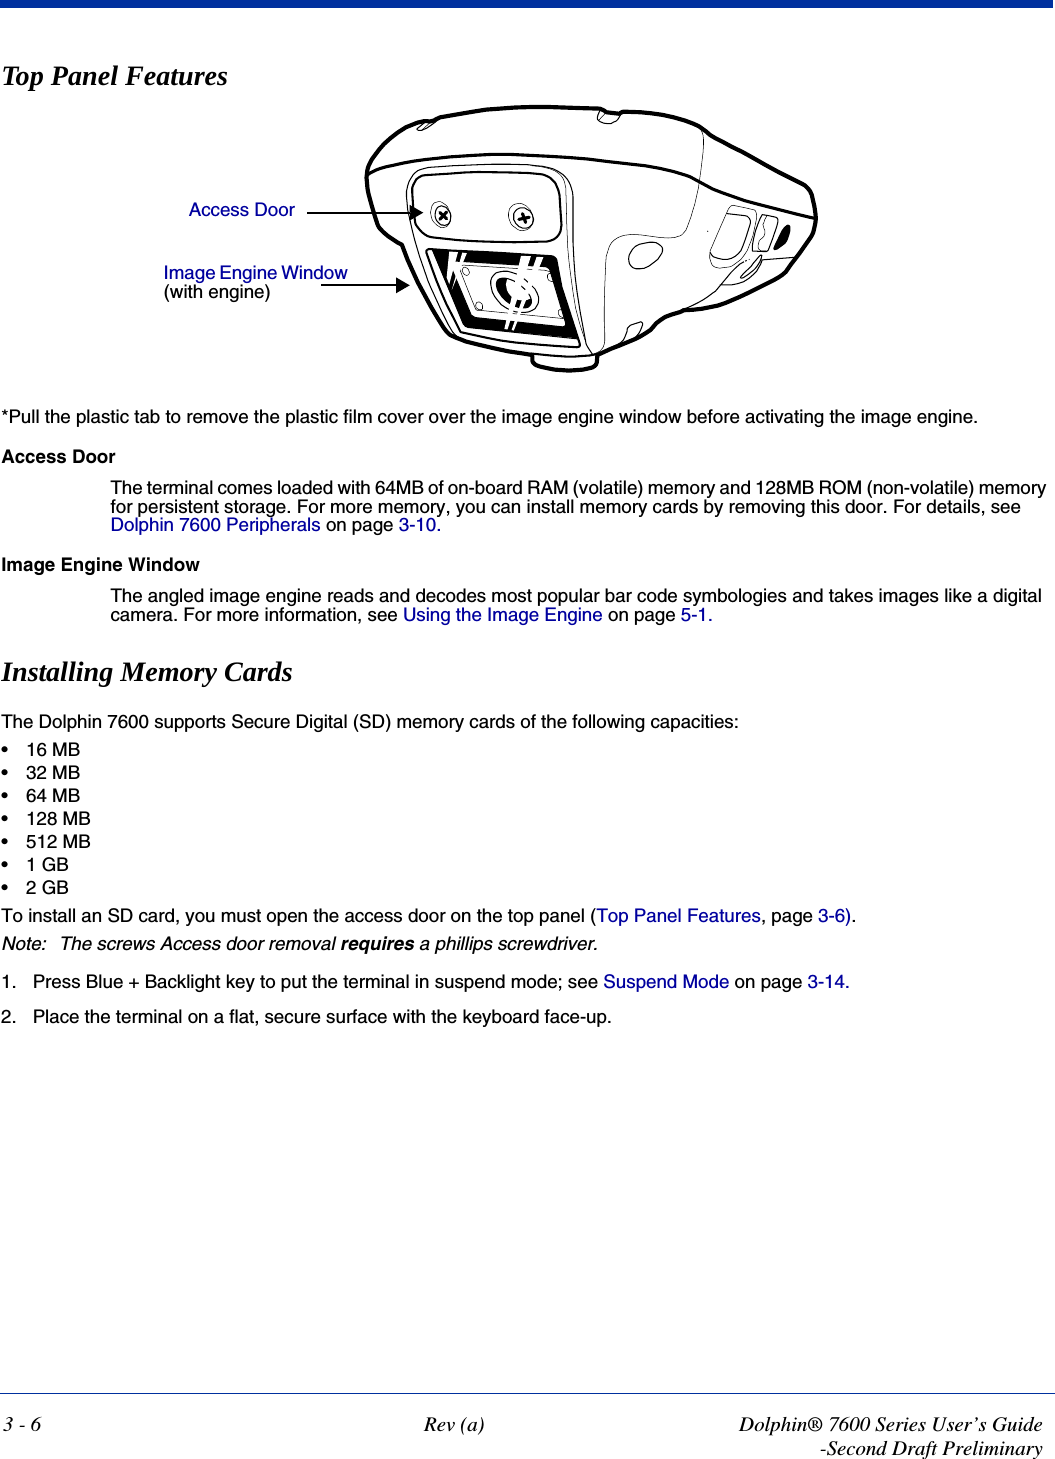
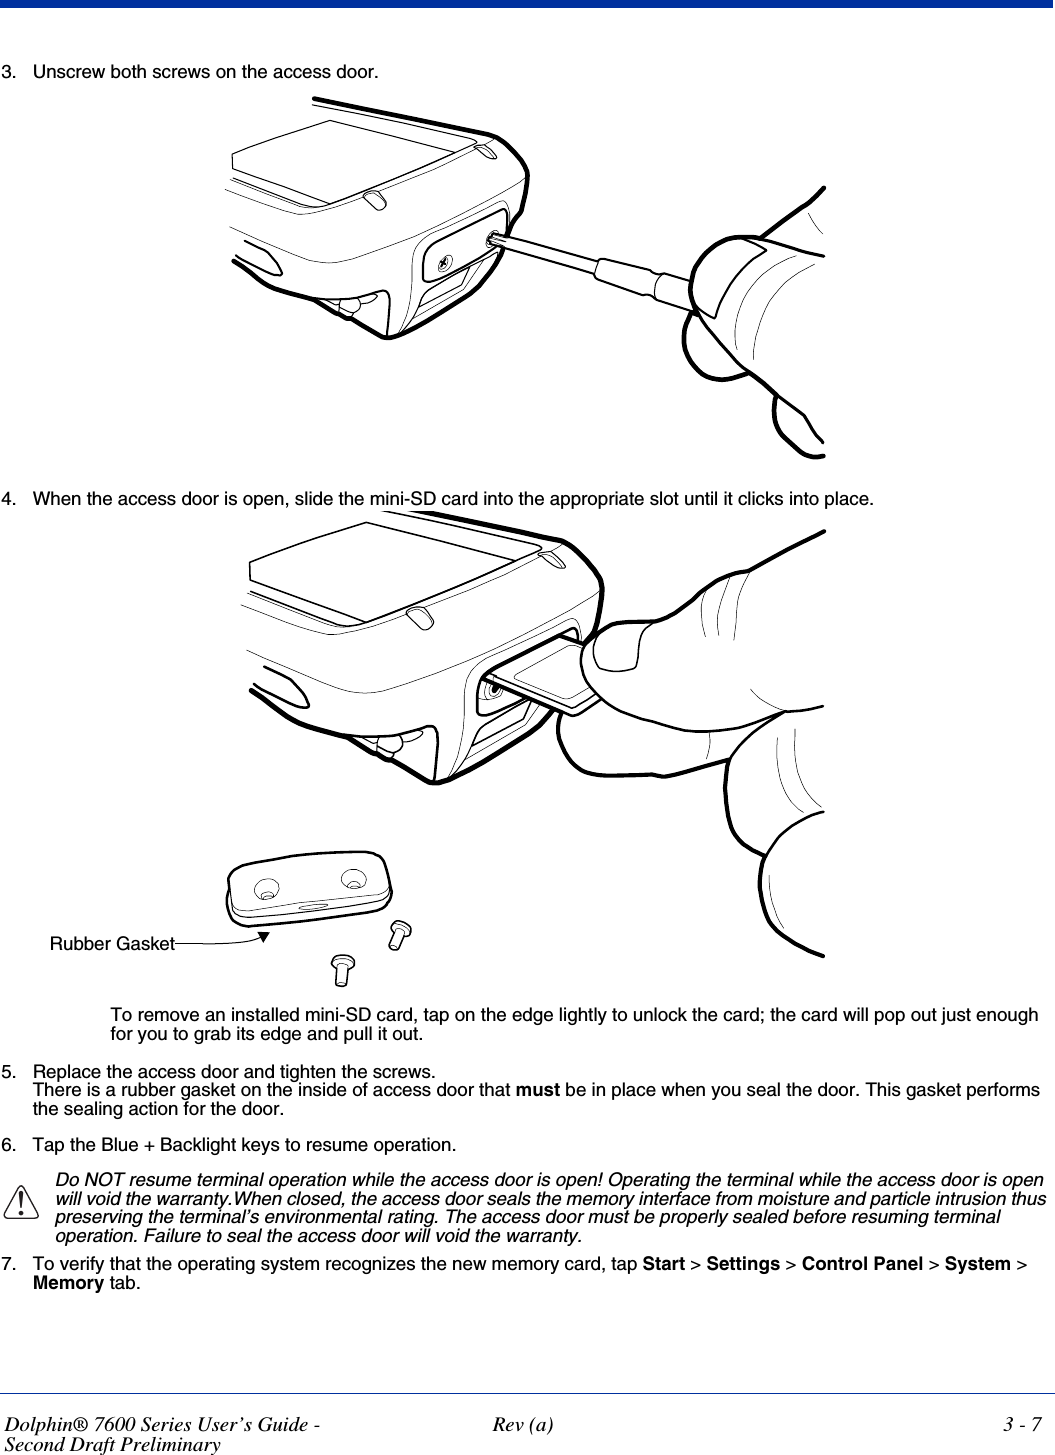
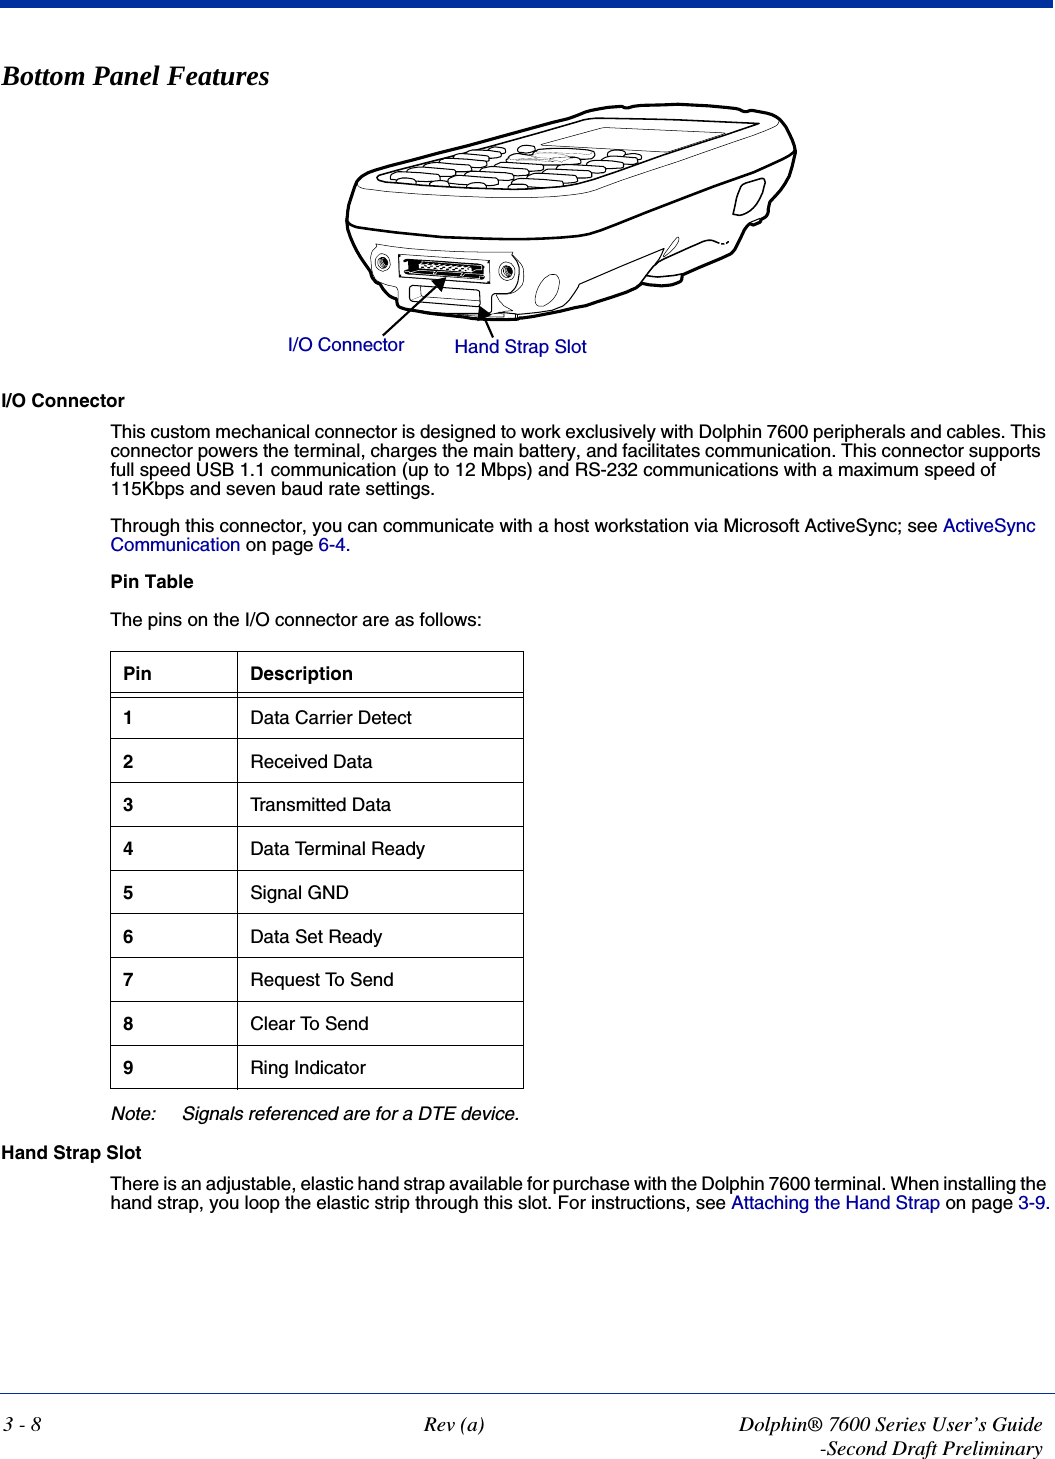
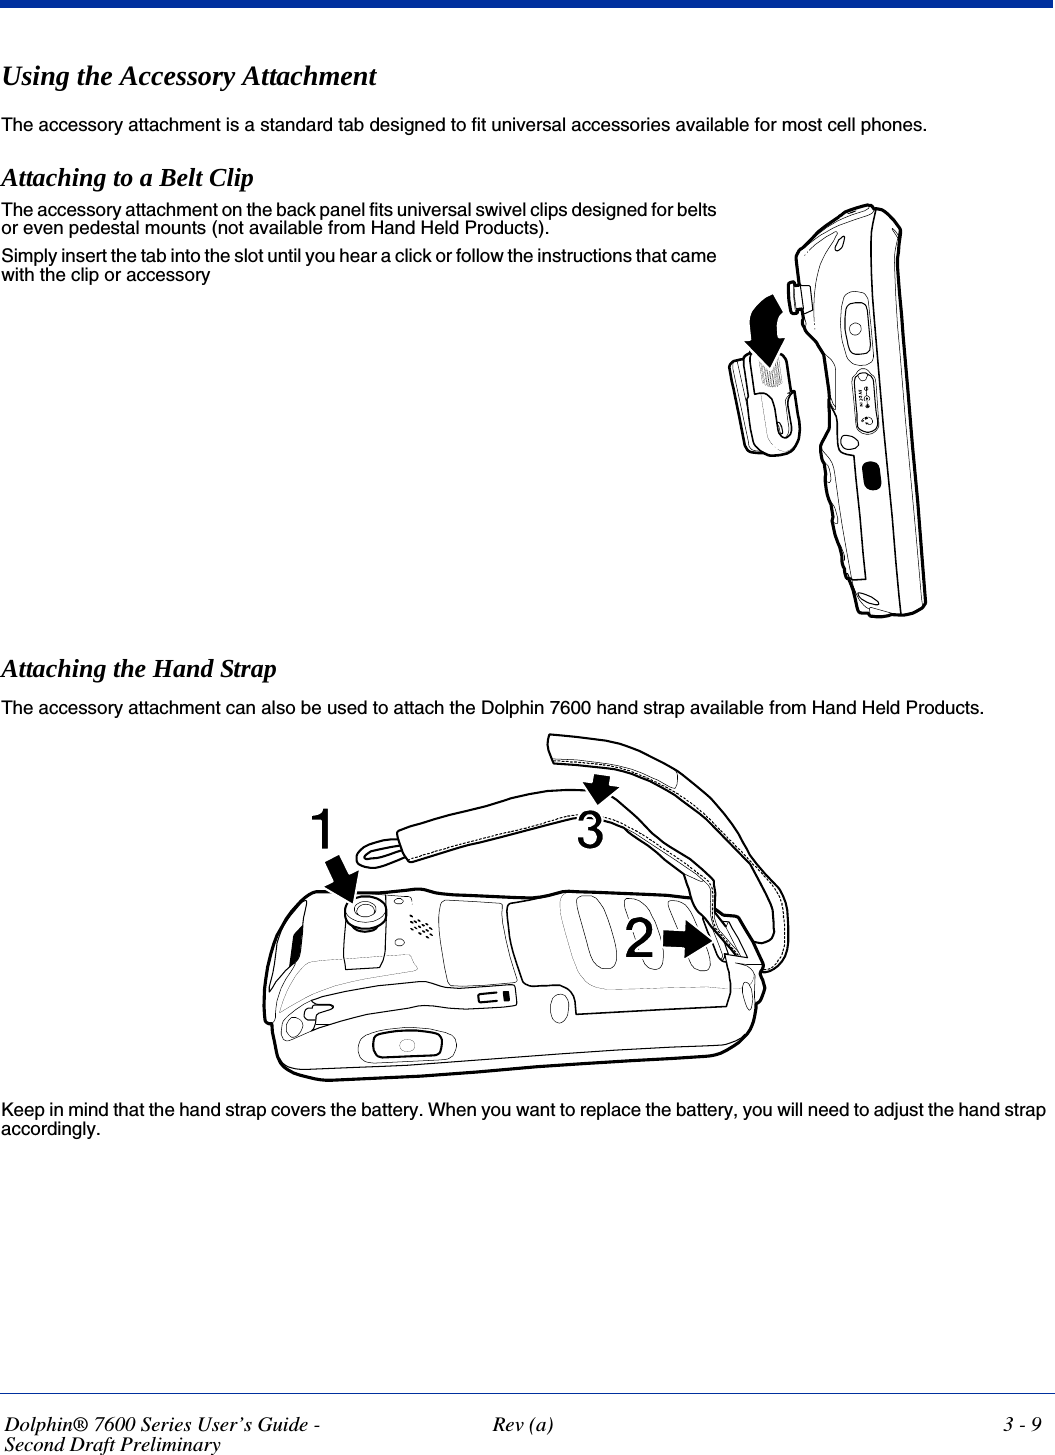
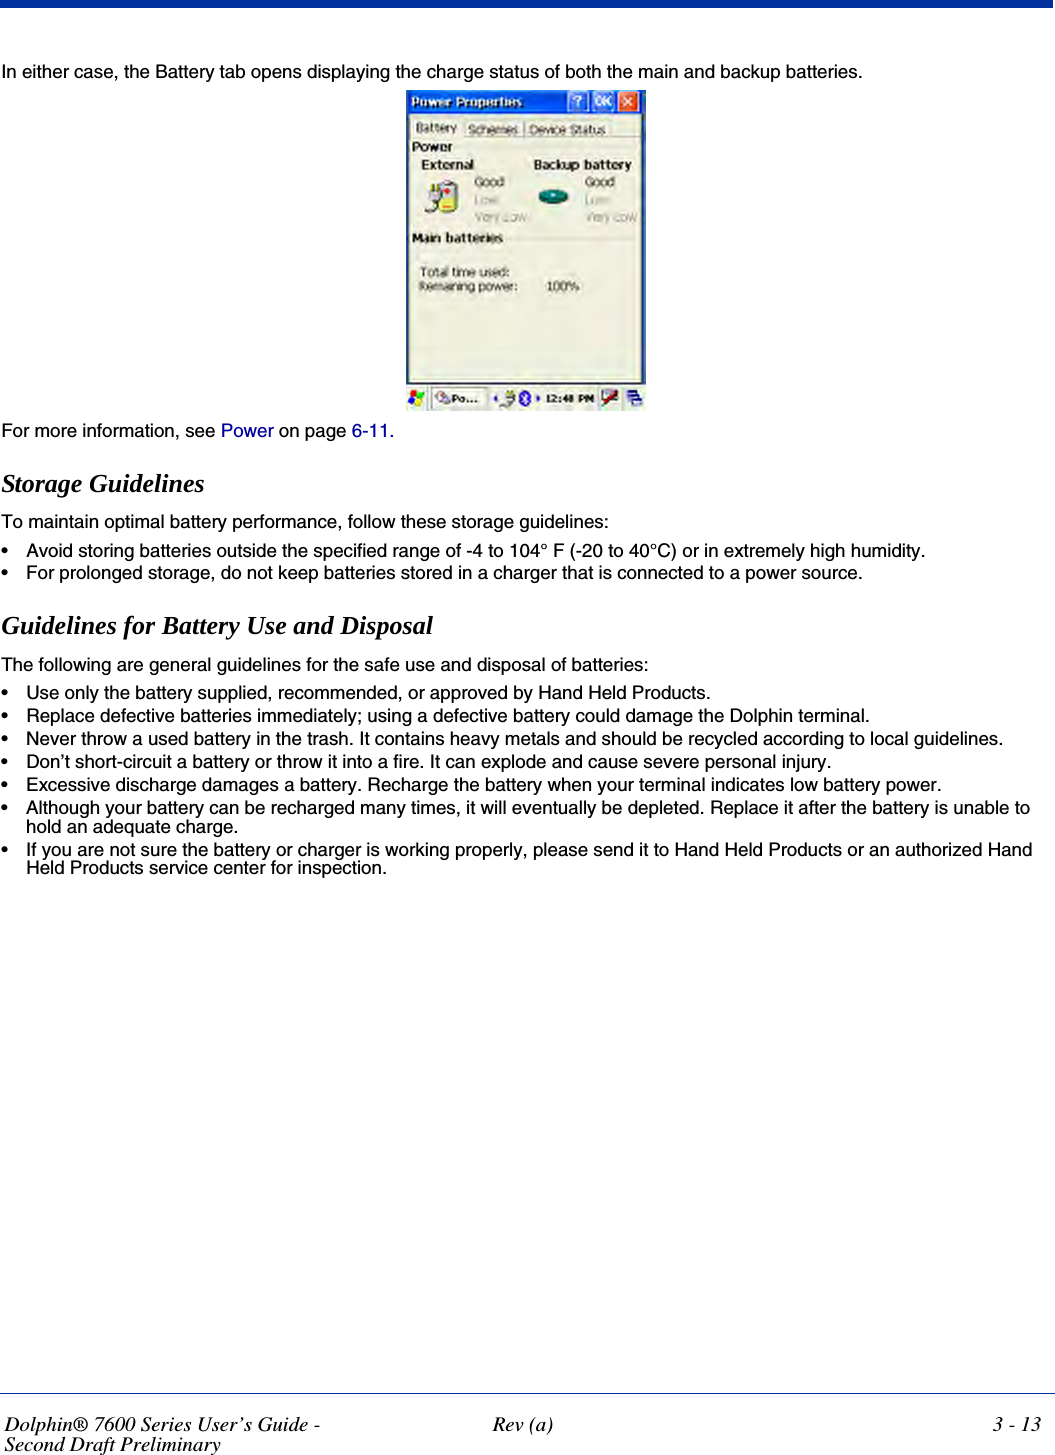
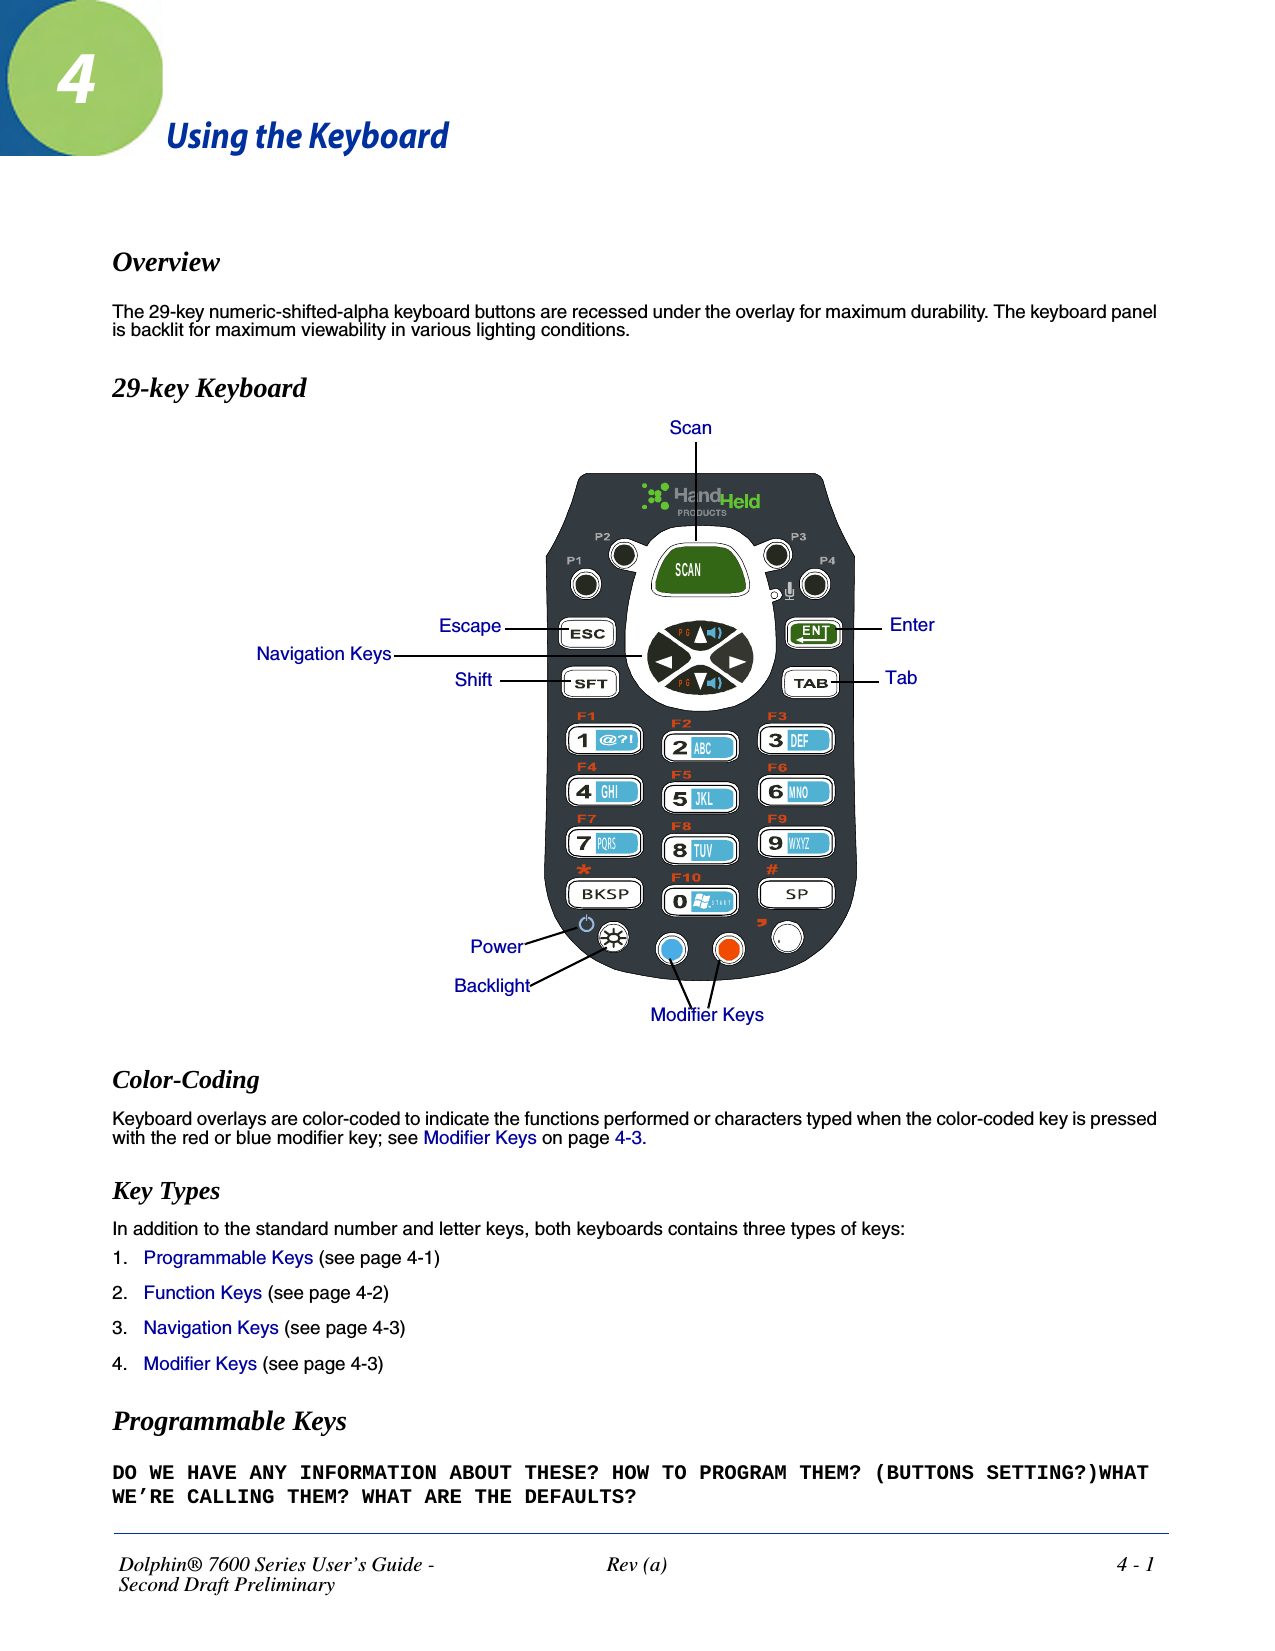
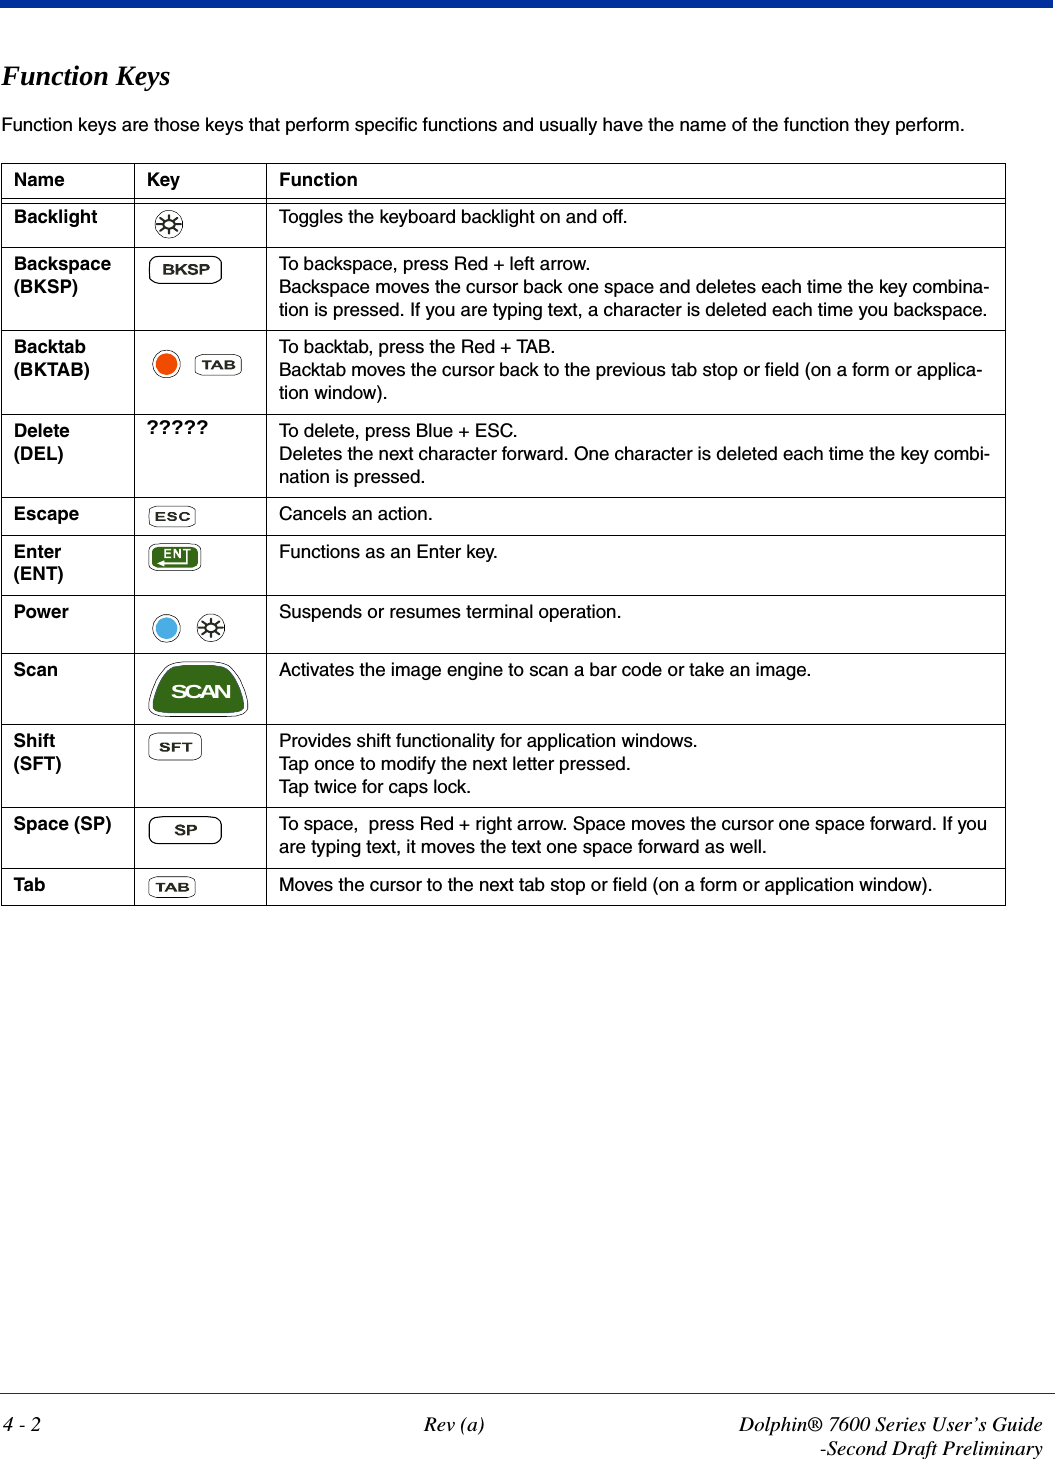
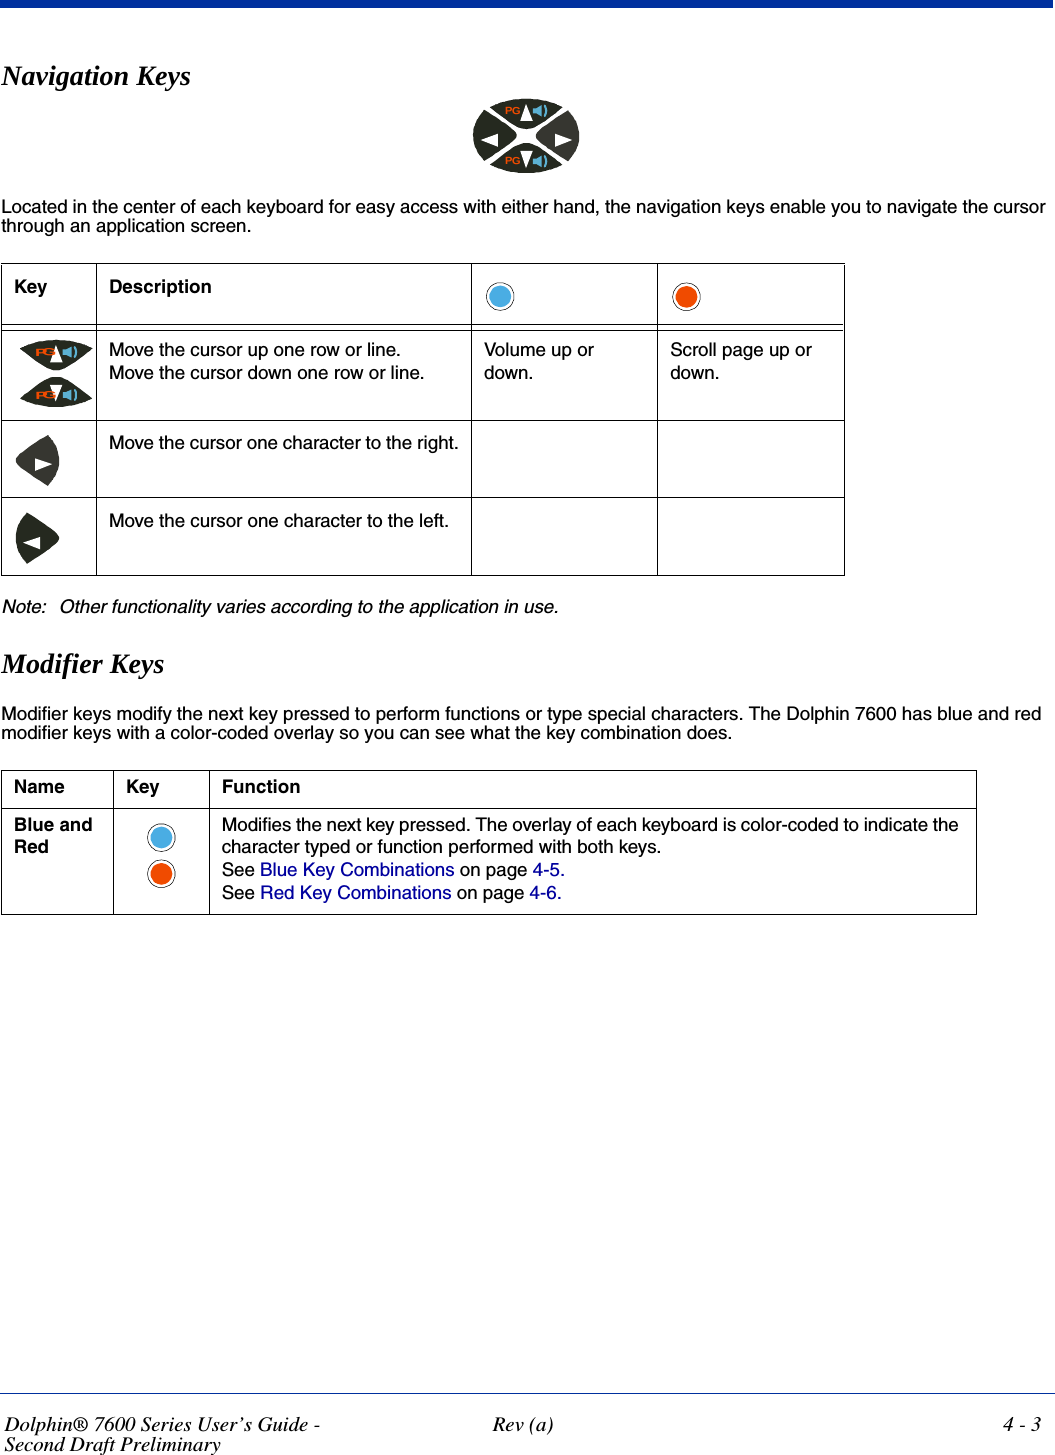
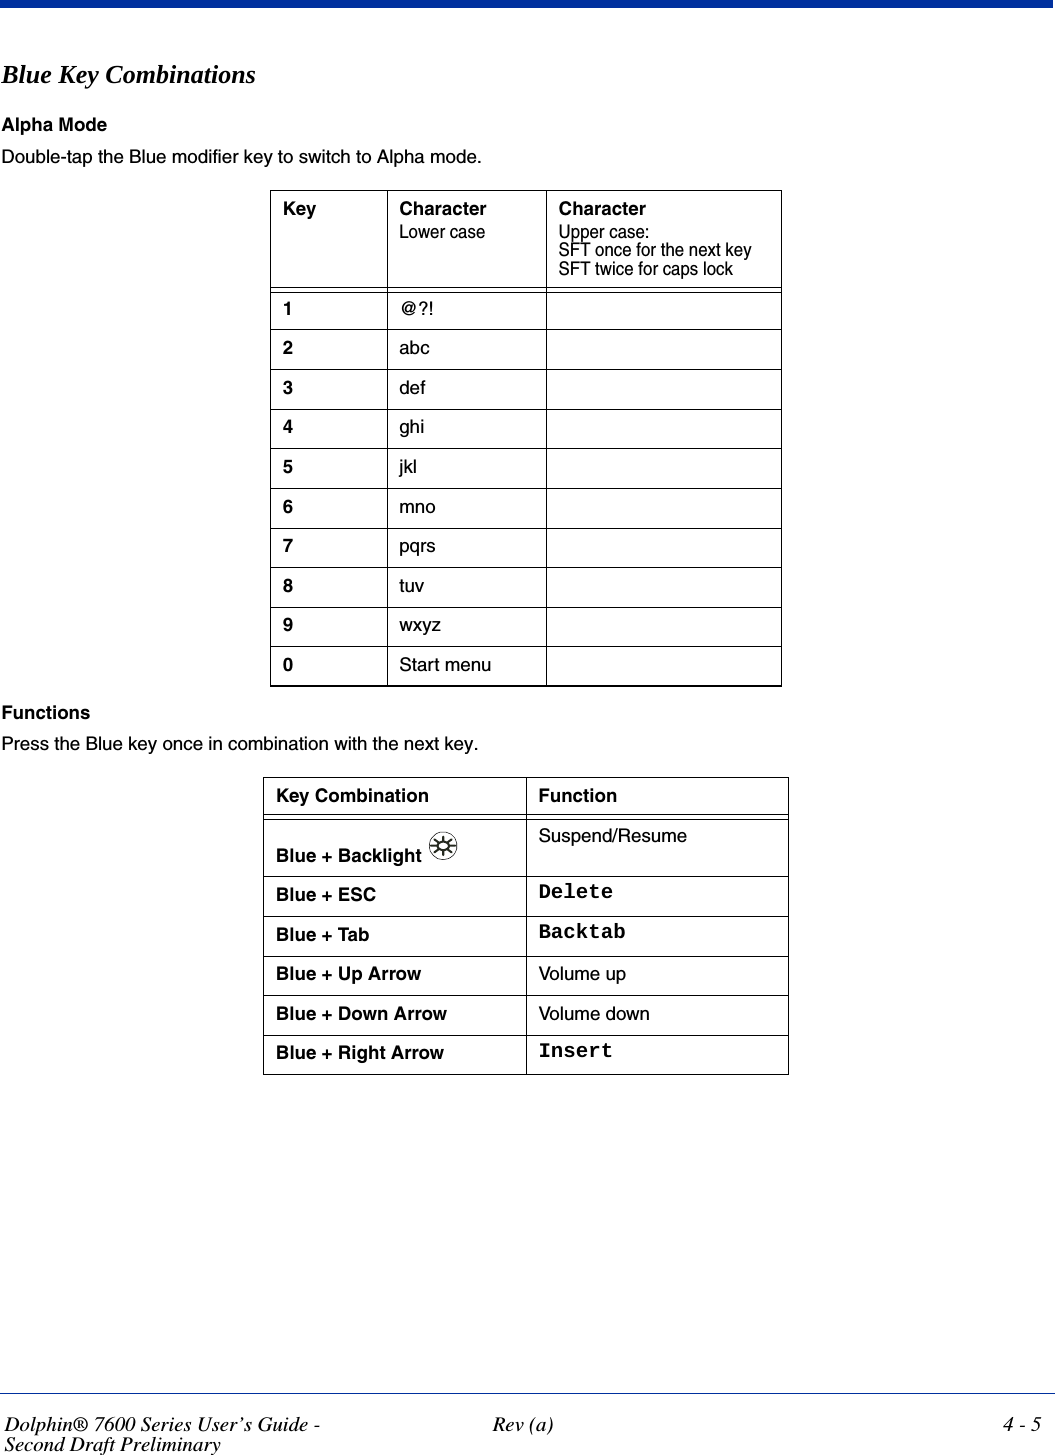
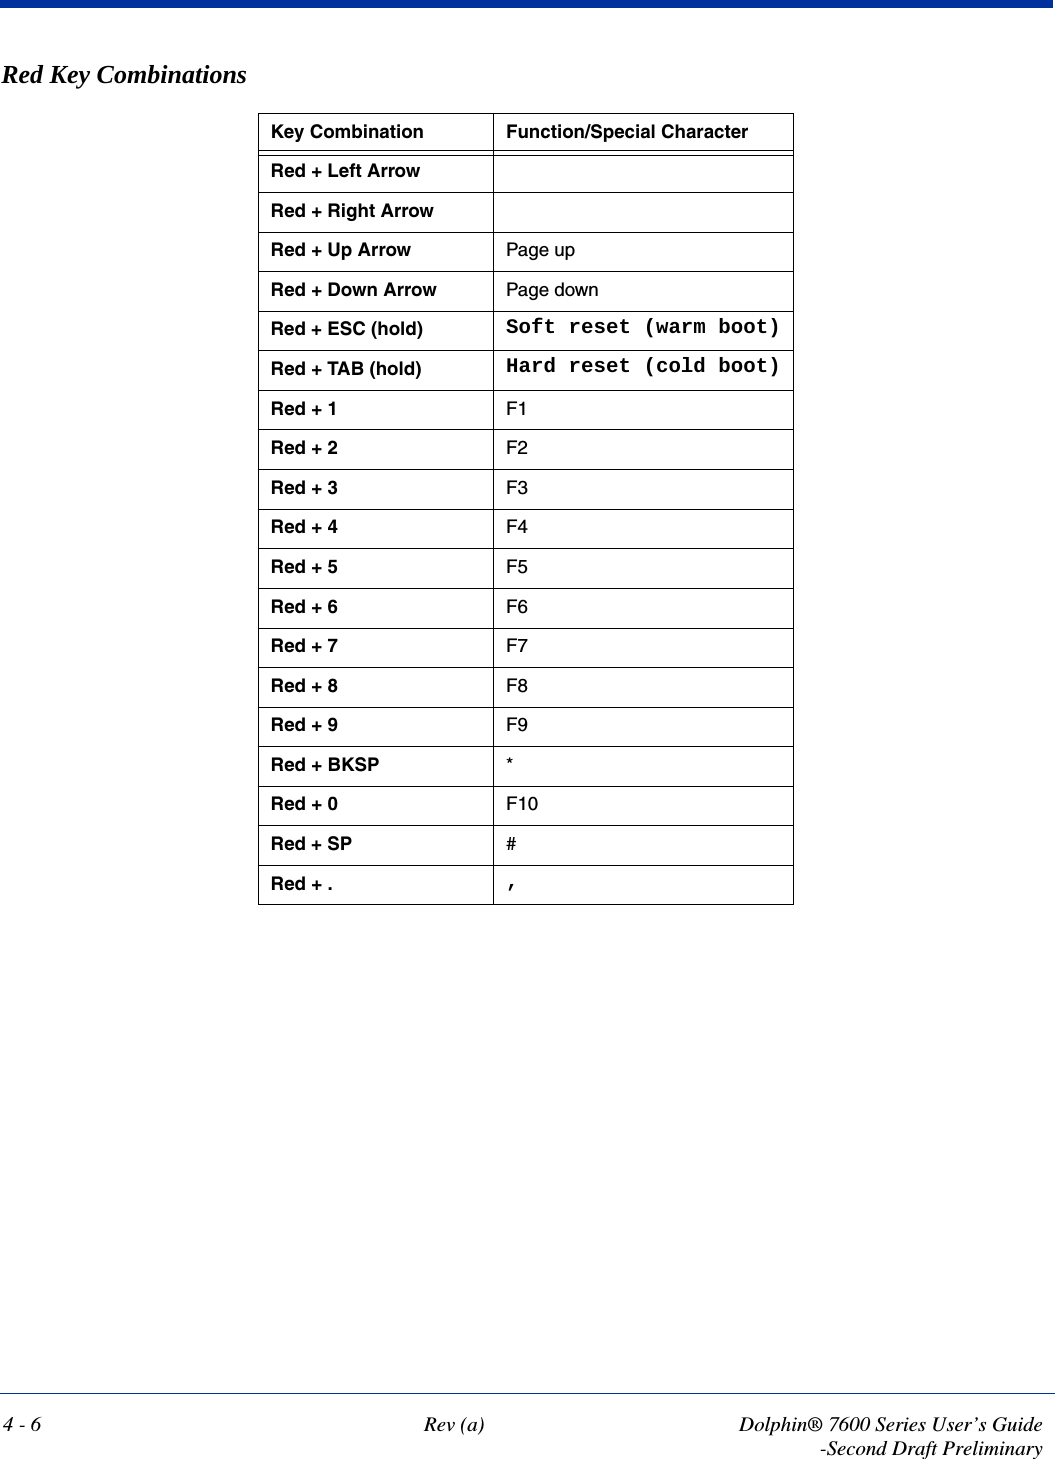
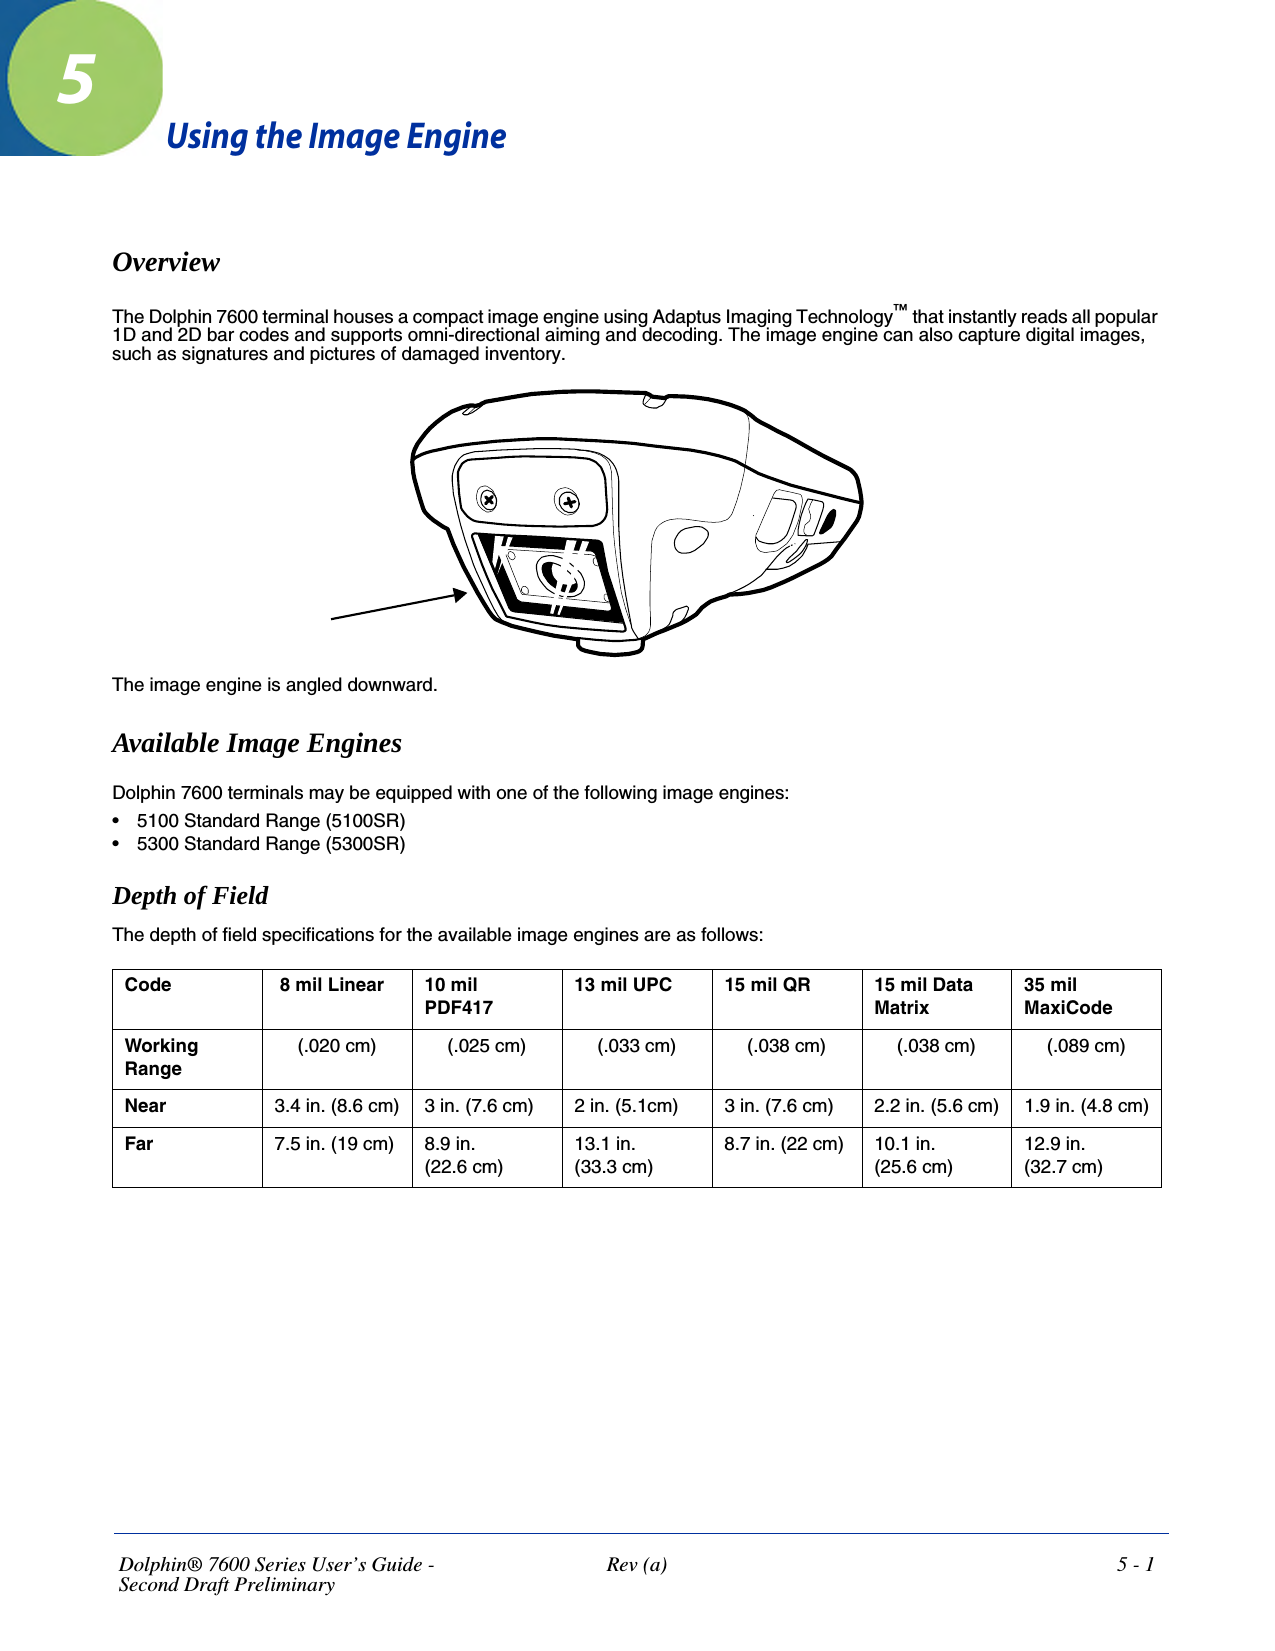
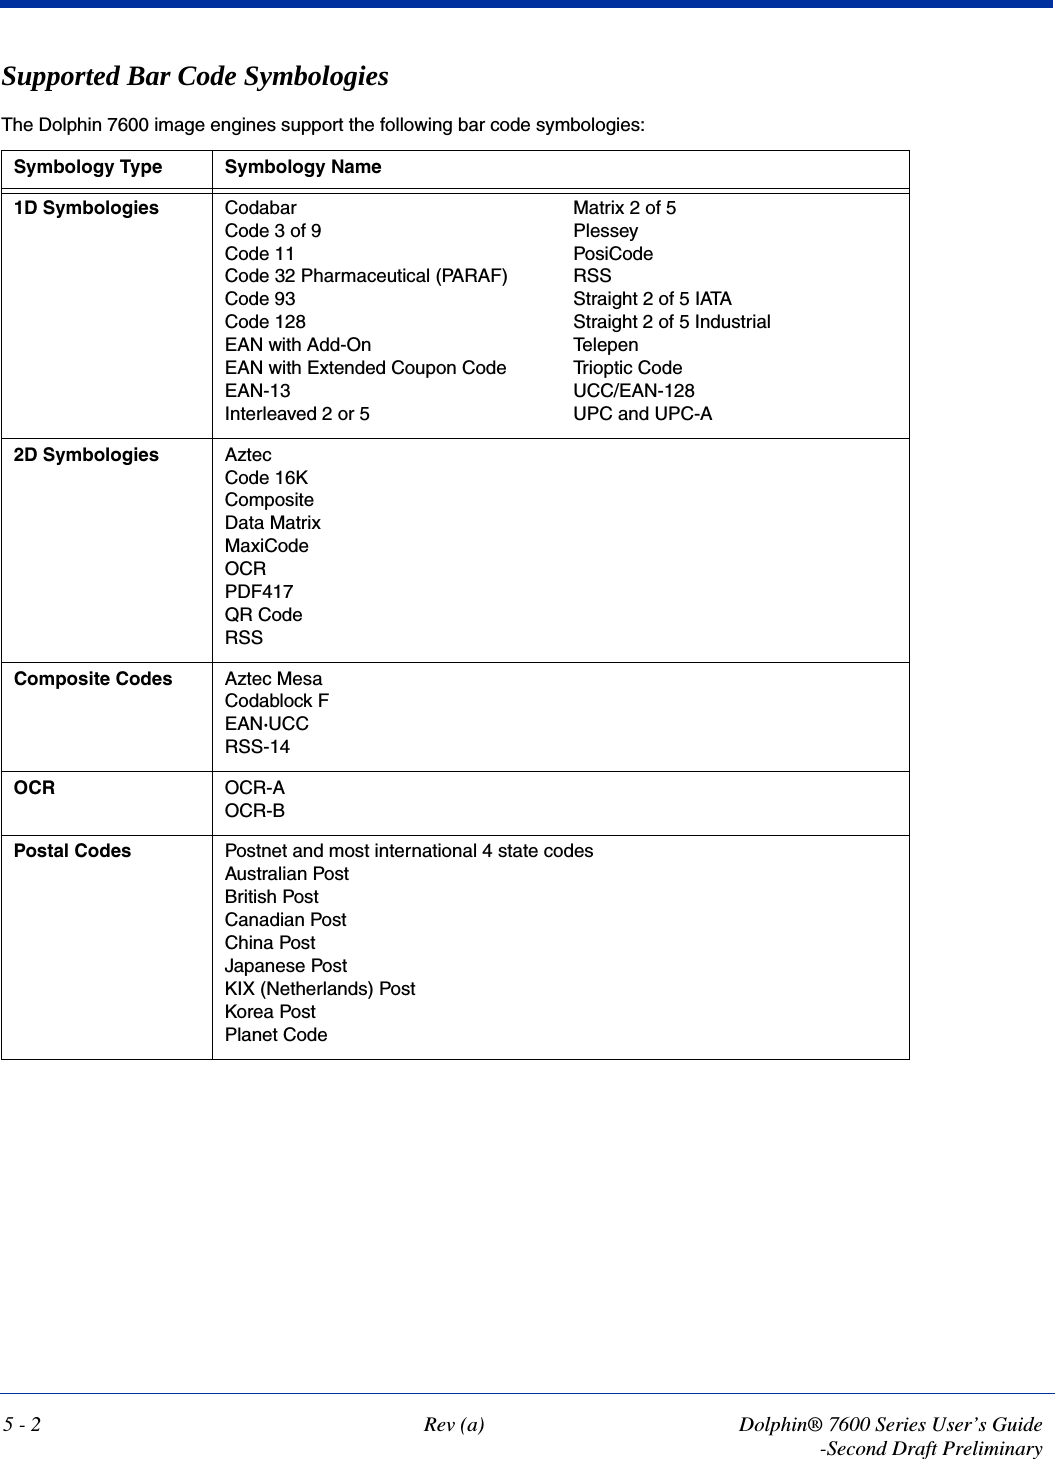
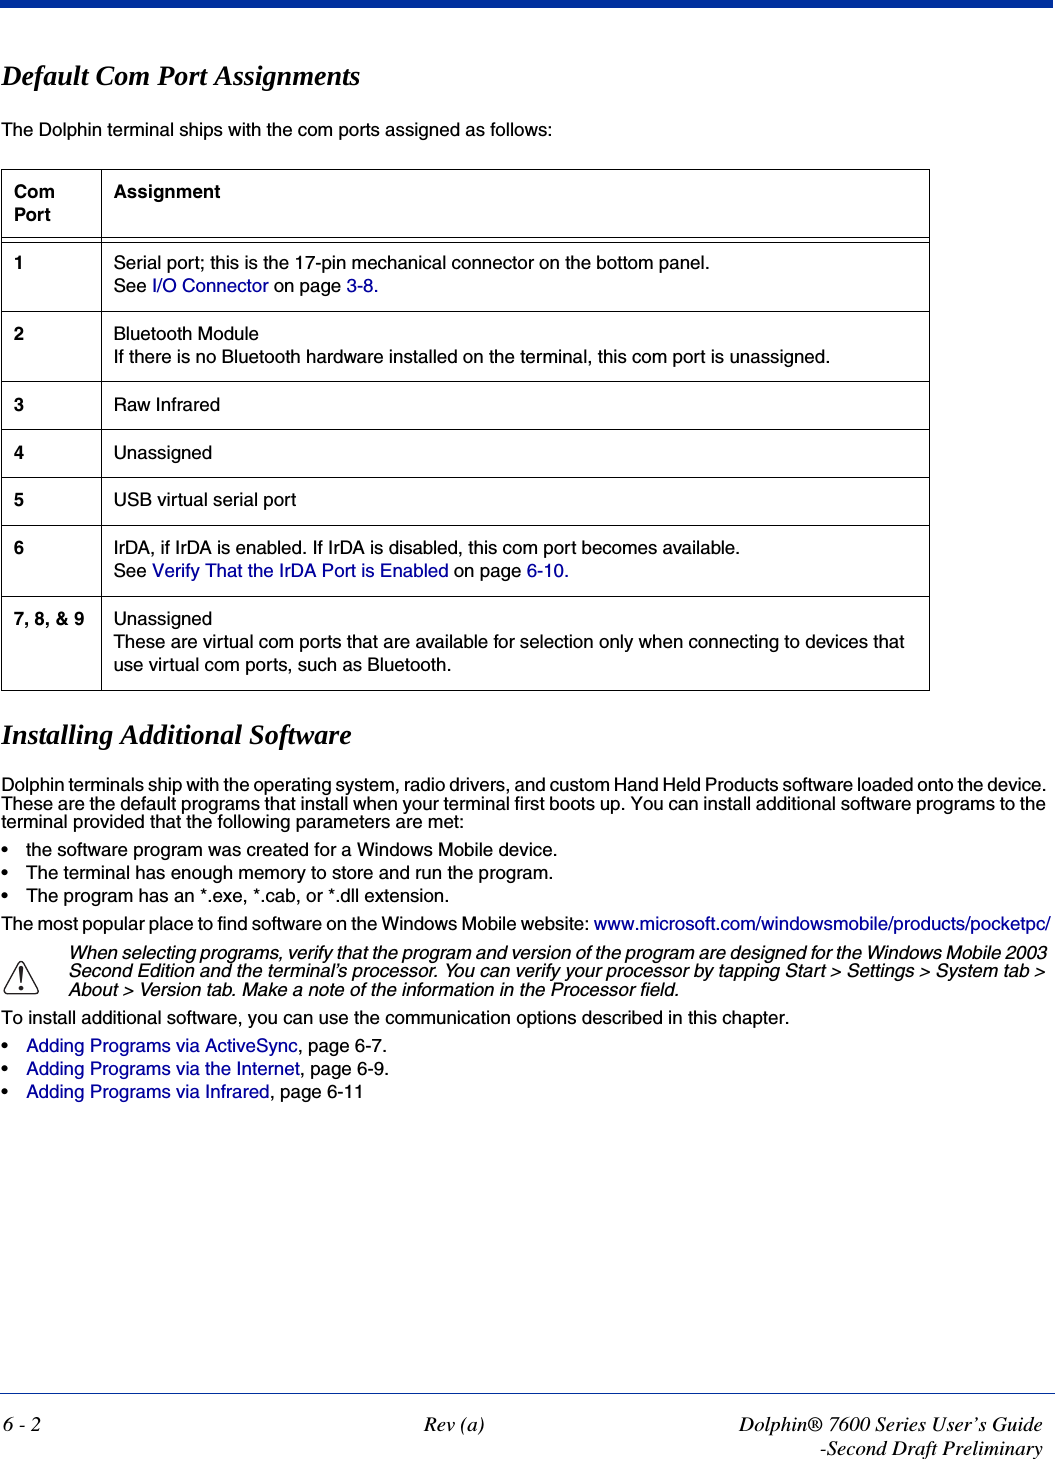
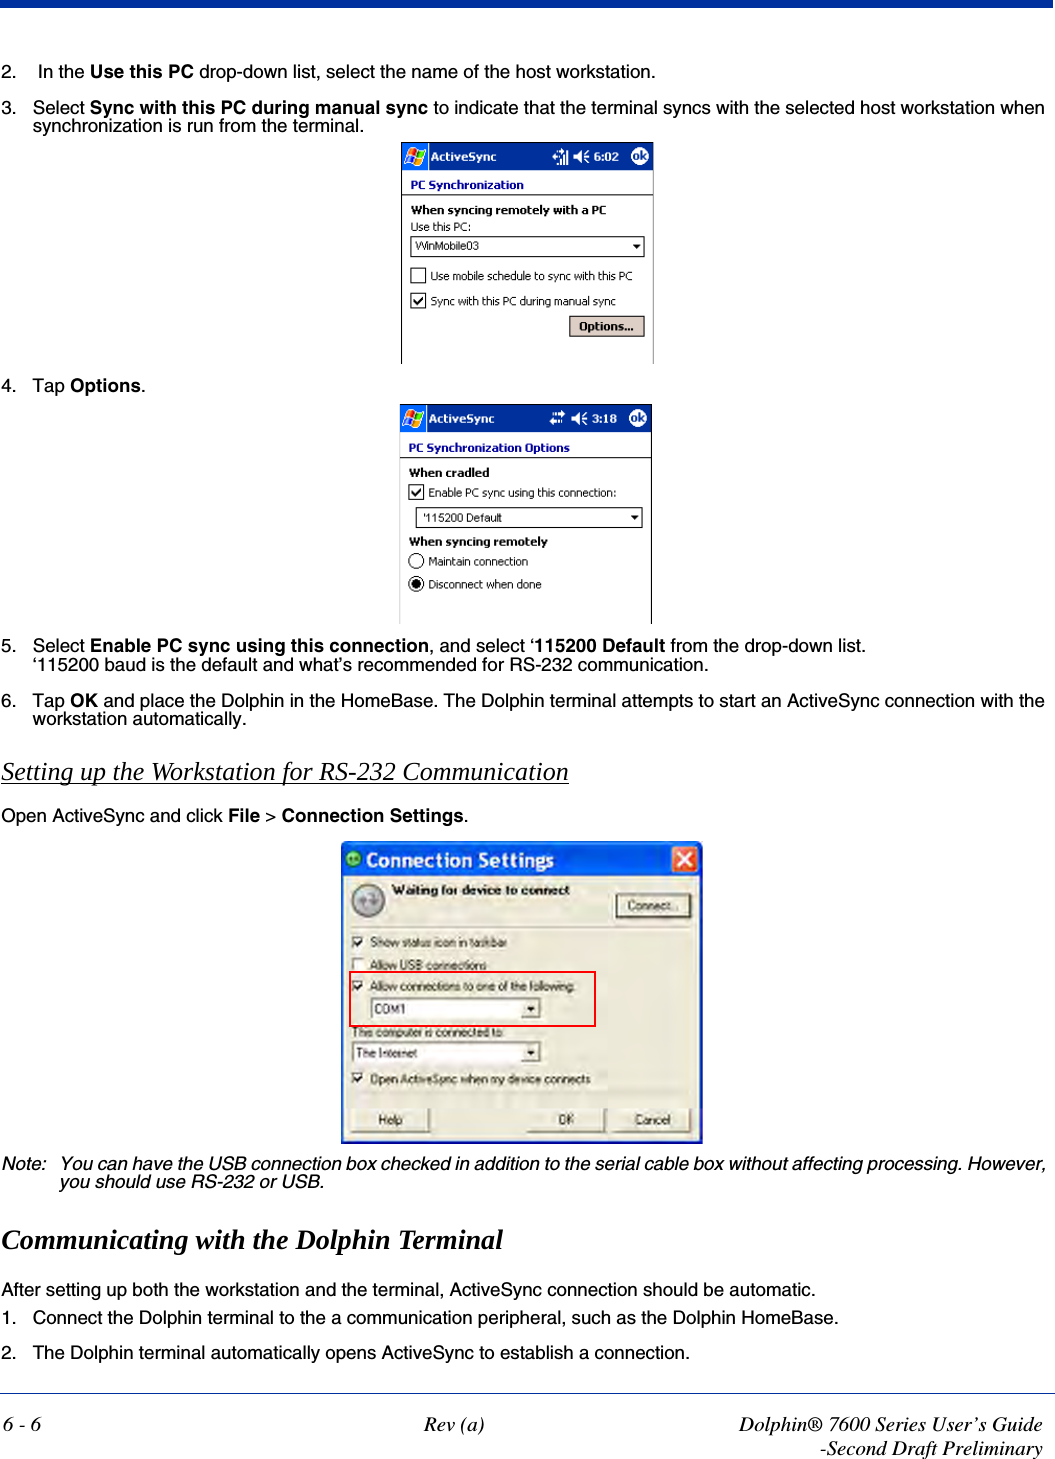
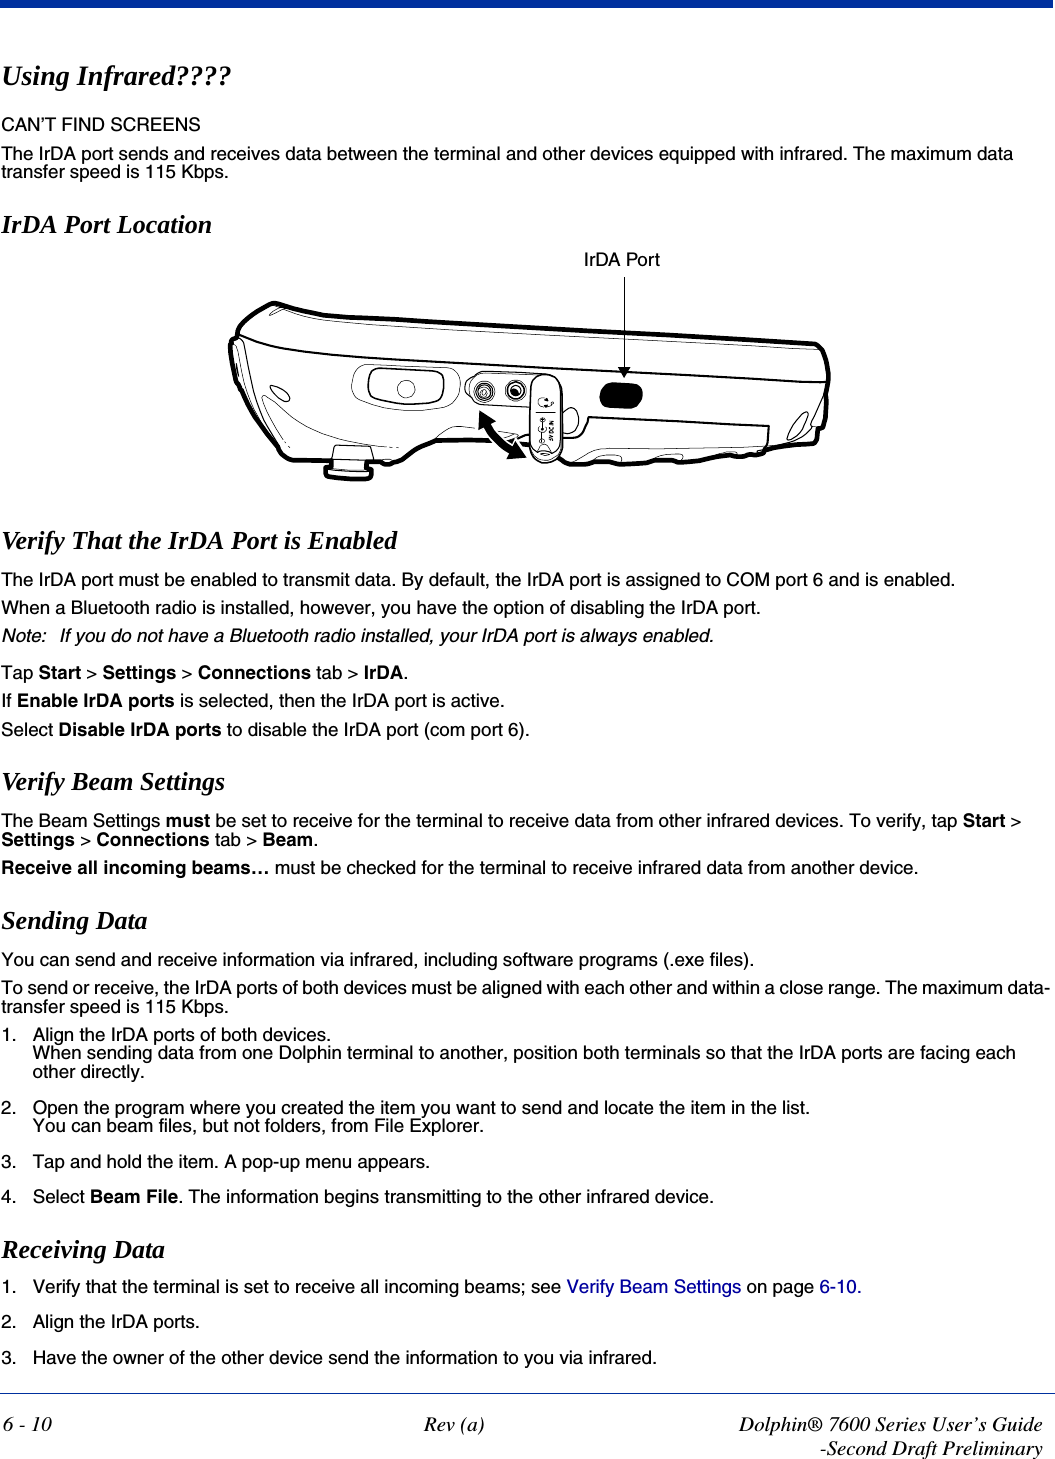
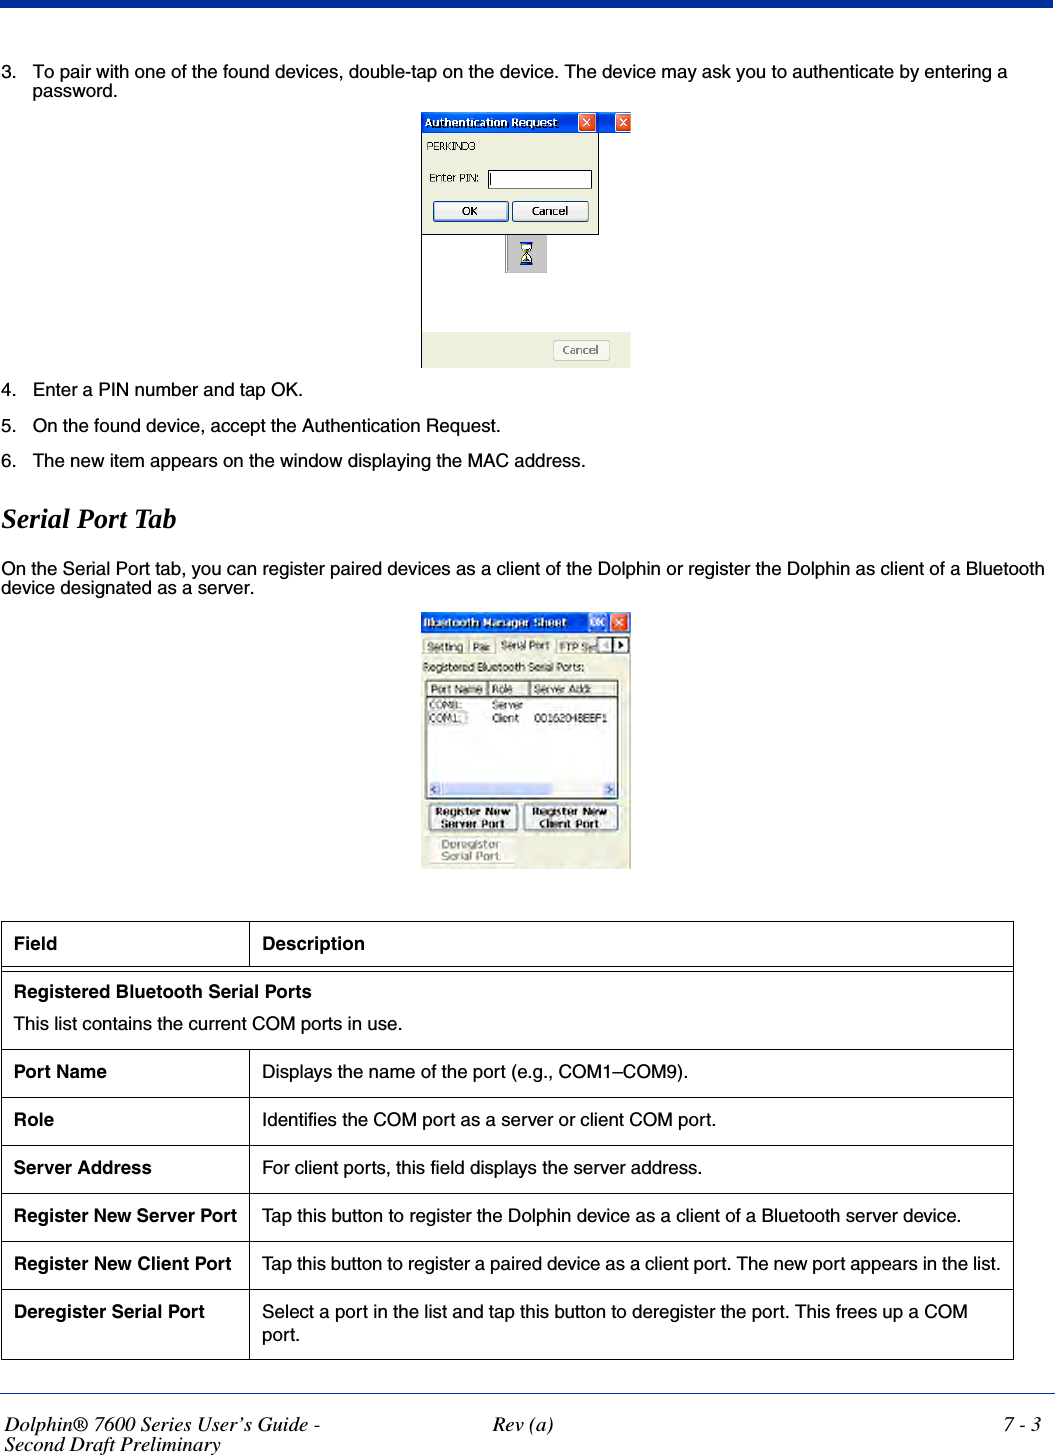
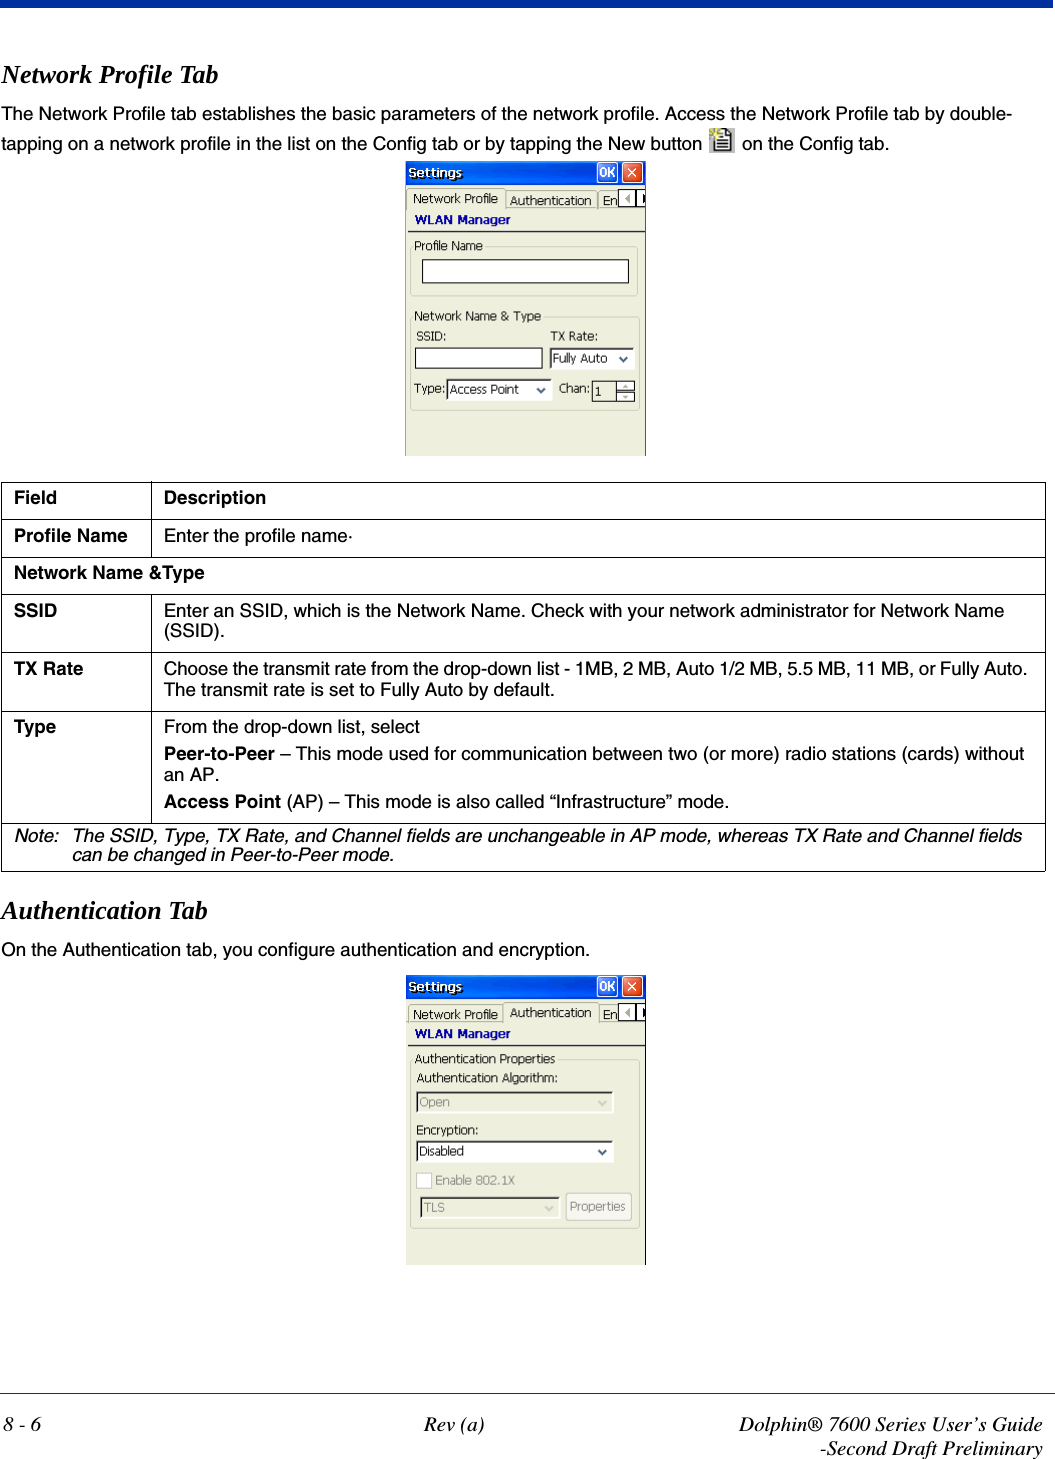
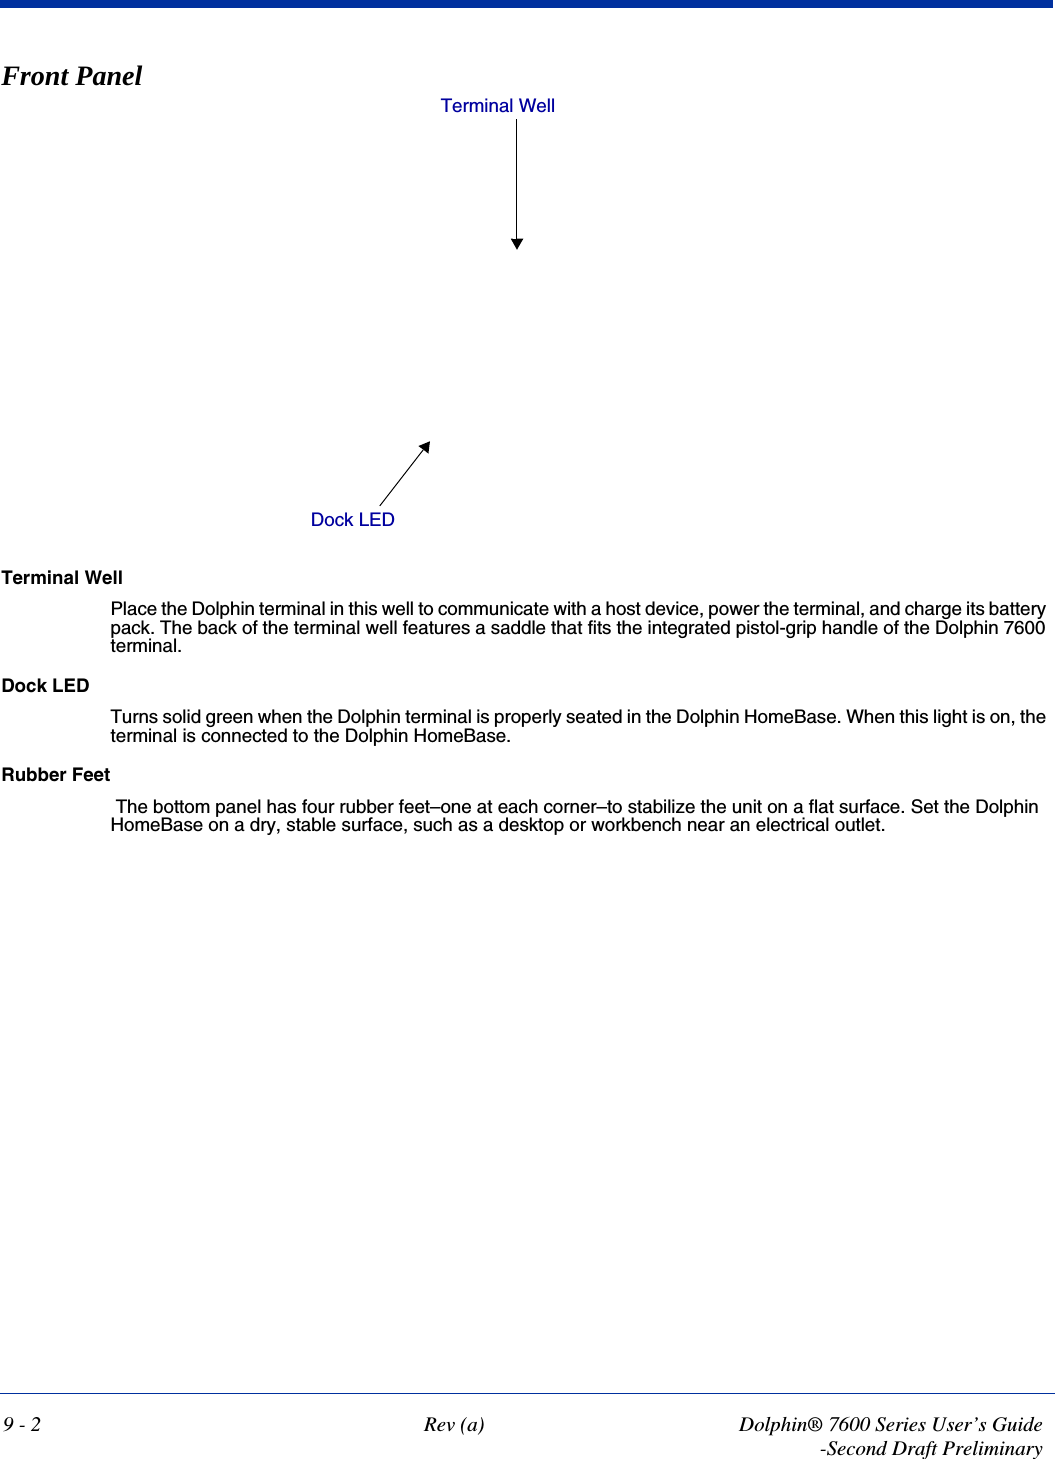
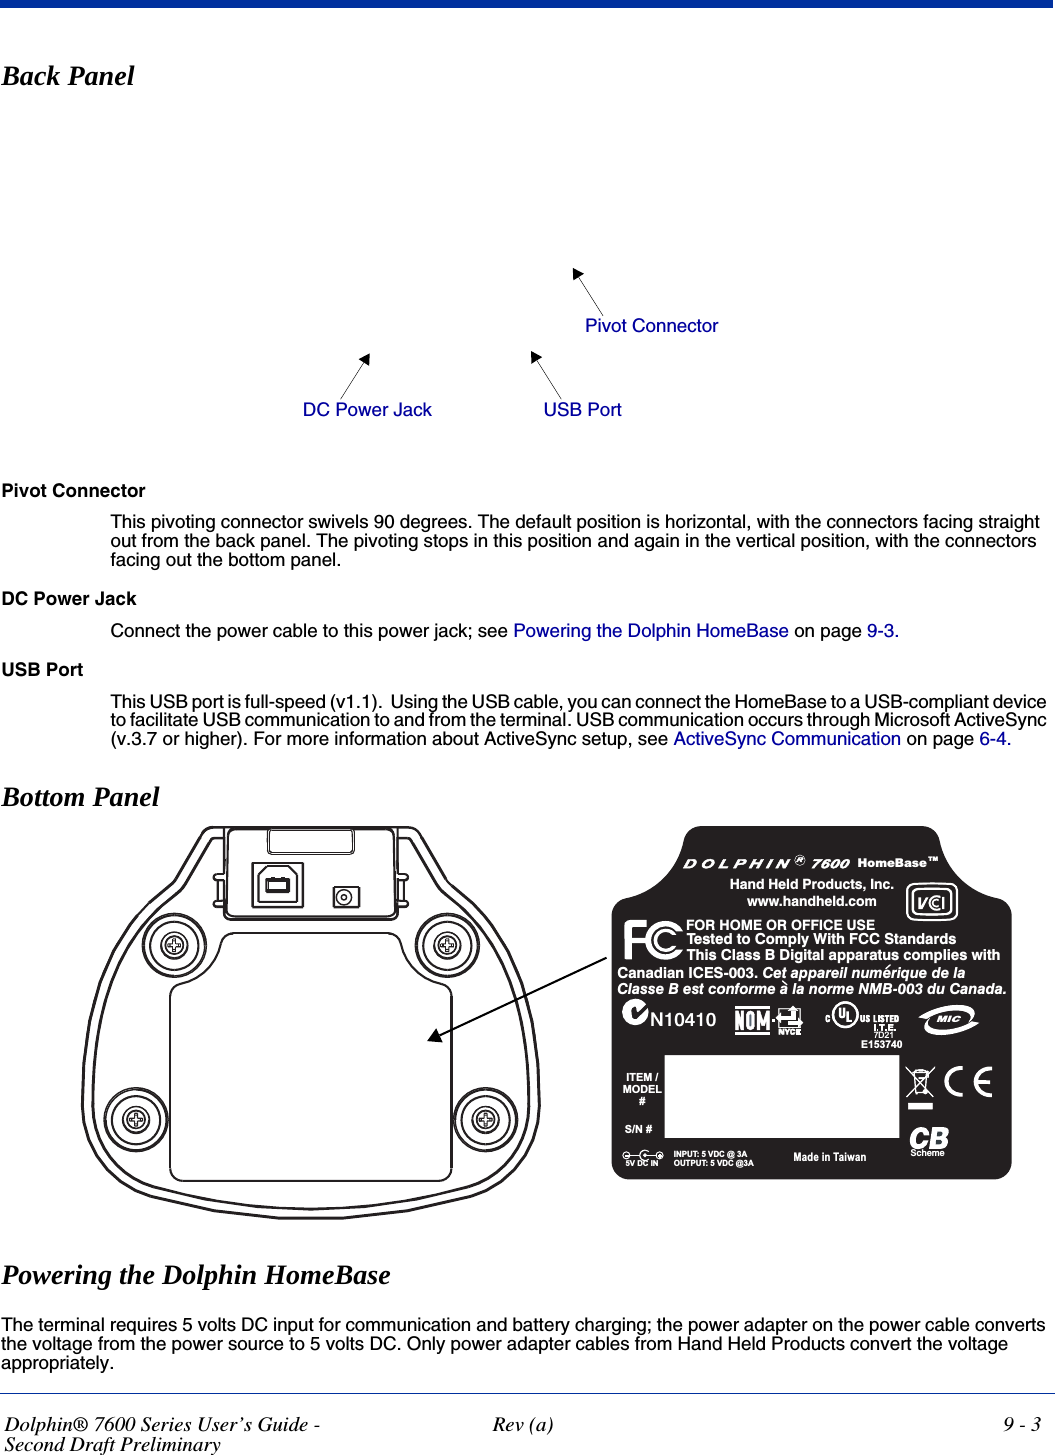
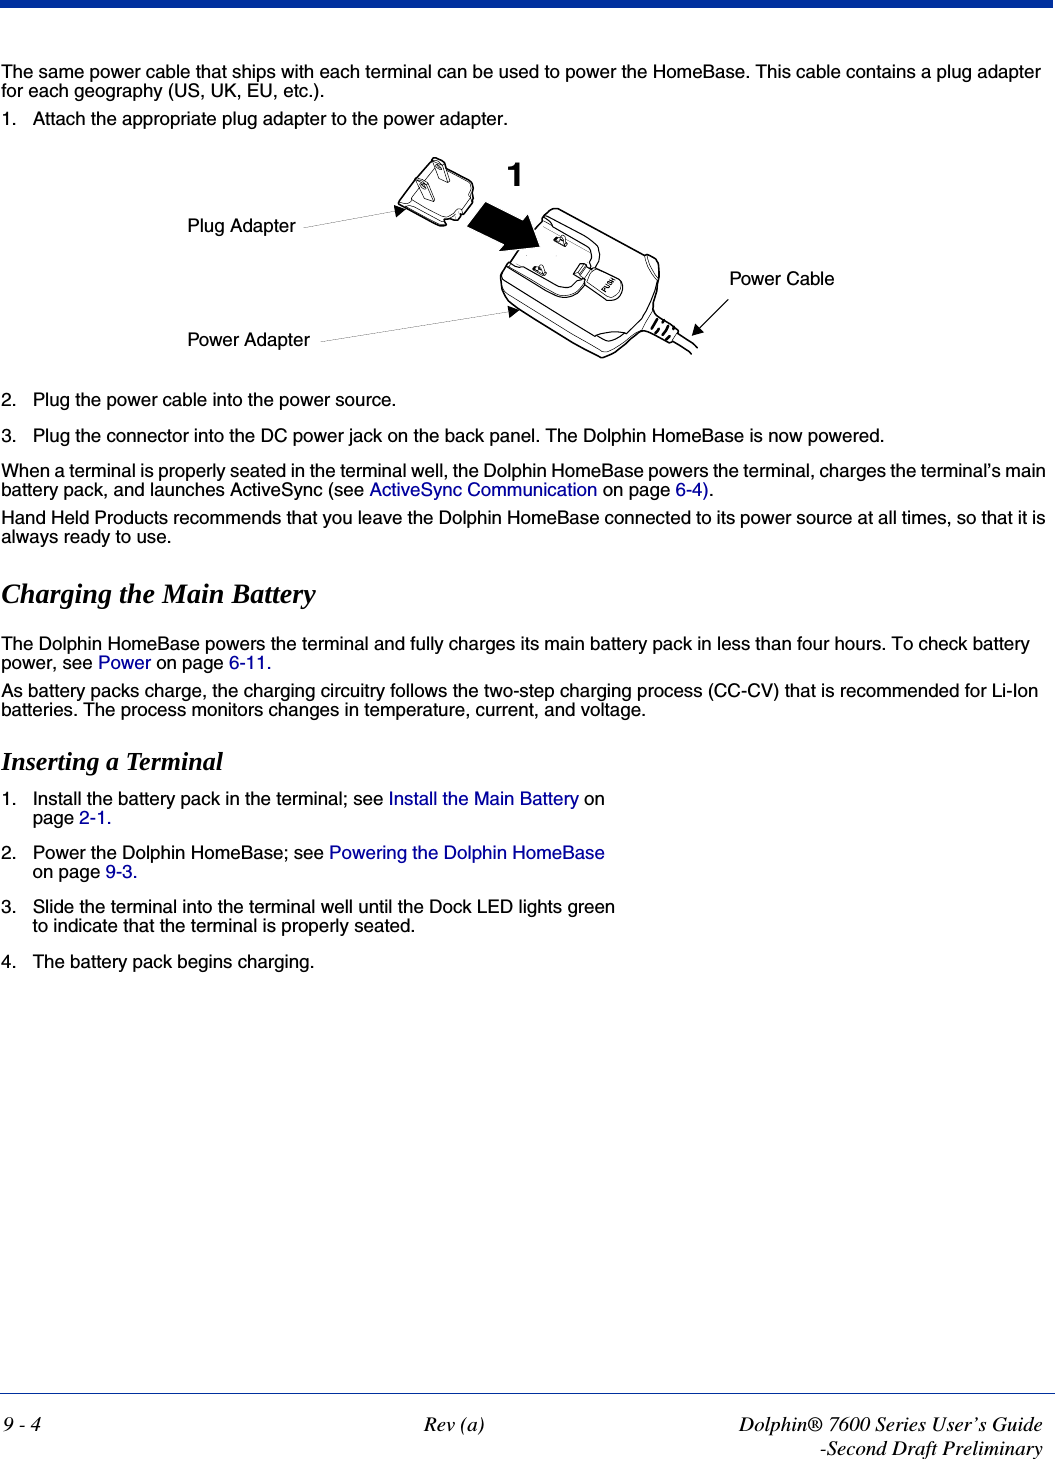
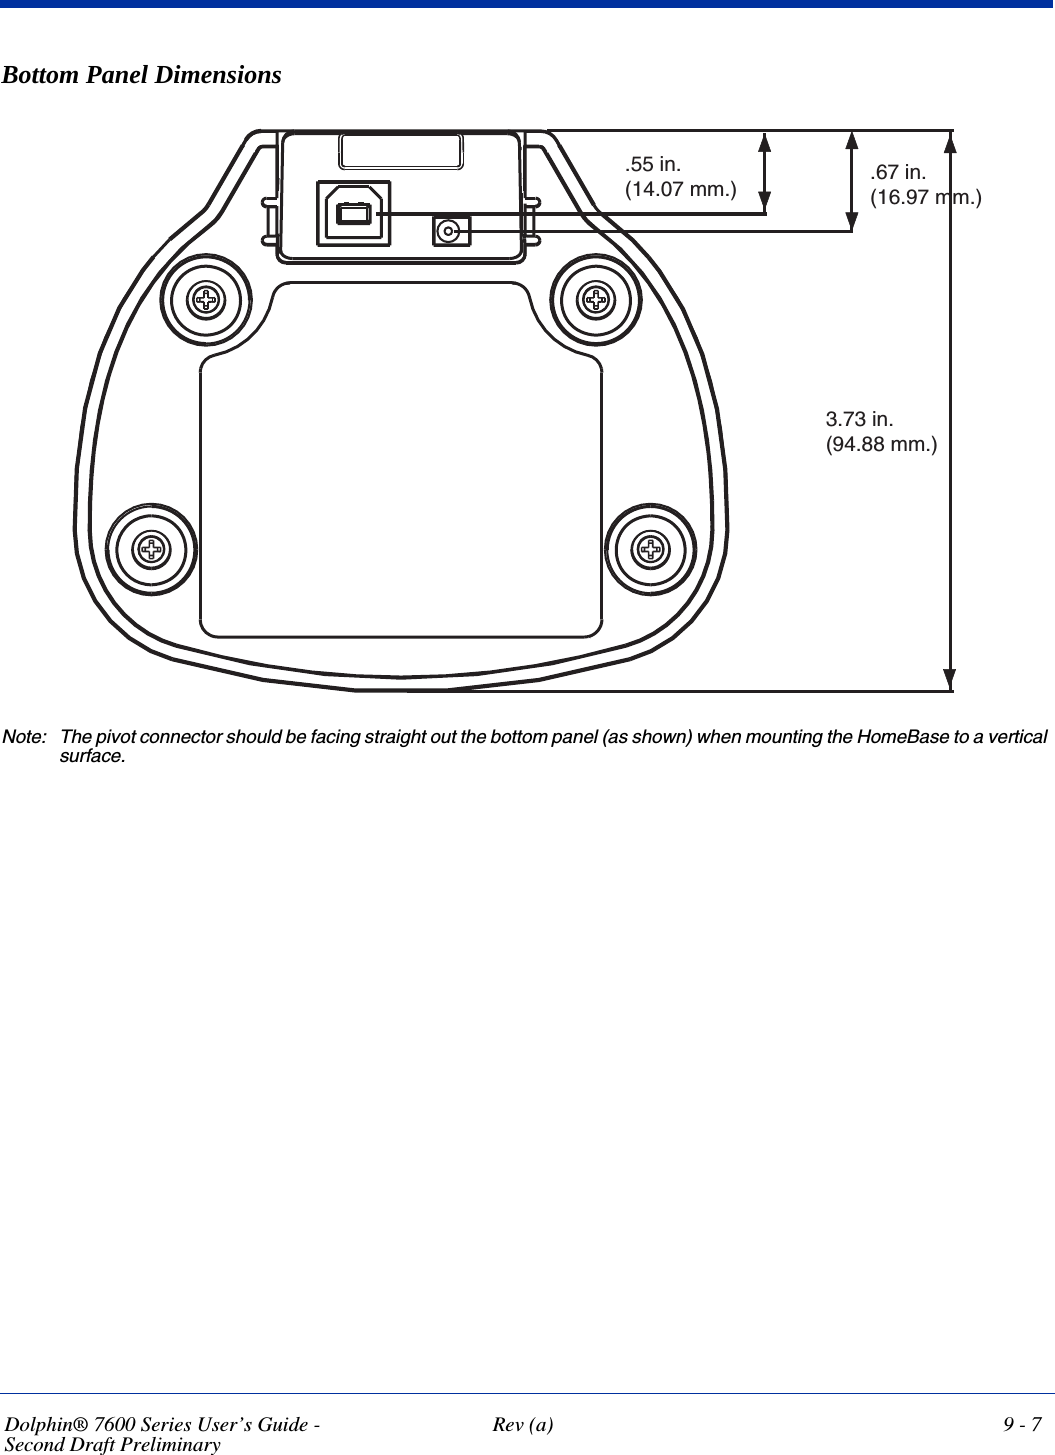
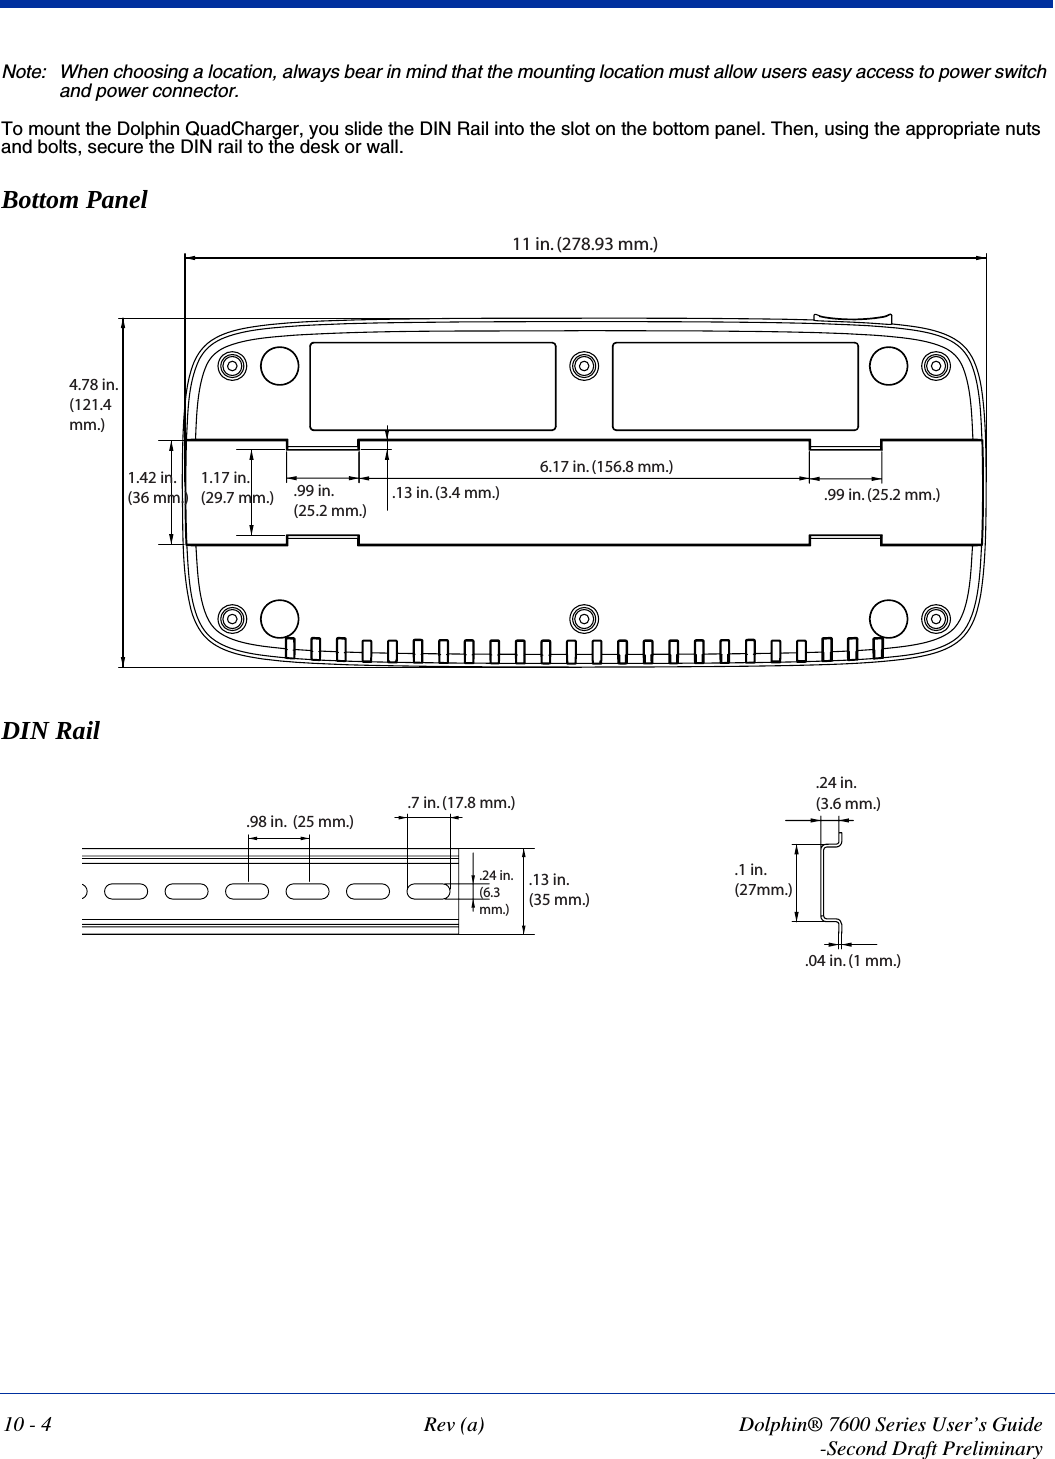
![3 - 12 Rev (a) Dolphin® 7600 Series User’s Guide-Second Draft PreliminaryGuidelines Follow these guidelines to maximize the life of the Dolphin’s internal backup battery:• Keep a charged Li-ion battery pack in the Dolphin terminal. • Keep the Dolphin terminal connected to a power source when the terminal is not in use. Managing Battery PowerData and files saved on the Dolphin terminal may be stored in RAM memory; therefore, maintain a continuous power supply to the terminal to help prevent data loss. When you remove a battery pack, insert another charged battery pack in the Dolphin. If the main battery pack is low, insert the terminal into a charging peripheral to power the terminal and begin recharging the battery.Note: If the main battery is low and the terminal is in suspend mode, pressing the SCAN button does not wake the Dolphin terminal; you must replace the discharged battery with a fully charged battery.Default Low and Critical Battery PointsThe command bar at the bottom of the each screen displays battery warning icons when the main battery reaches low and critical battery points. The Dolphin terminal ships with default low and critical battery points already programmed in the registry:[HKEY_LOCAL_MACHINE\System\CurrentControlSet\Control\Power]Note: Battery power warnings do not appear when the terminal is running on external power.Setting Critical and Low Battery PointsDevelopers can re-reset the default battery points in the RegEdit Power Tool. 1. Tap Start > Power Tools > RegEdit?????. 2. Drill-down to HKEY_LOCAL_MACHINE > System > CurrentControlSet > Control > Power. The CriticalBatt and LowBatt values appear in the list.3. Tap the Value Name to change the Value Data. You can reset the Value Data from 0 (no warning) to 99 (would warn whenever the charge drops below 99%). 4. Tap OK to save changes.Note: For more information about the RegEdit Power Tool, refer to the Dolphin Power Tools User’s Guide, which is available for download at www.handheld.com.Checking Battery PowerPower icons appear in the command bar at the bottom of the window. Double tap on this icon at any time to open the Power system setting. For example, indicates a low battery.You can also tap Start > Settings > Control Panel tab > Power.](https://usermanual.wiki/Honeywell/760002.Manual/User-Guide-723173-Page-28.png)