Honeywell 760002 Industrial PDA User Manual Dolphin 7600 User s Guide Rev D
Honeywell International Inc Industrial PDA Dolphin 7600 User s Guide Rev D
UserManual.wiki
>
Honeywell
>
760002 User Manual
>
user manual
Contents
1.
Manual
2.
User manual
3.
user manual
user manual
Navigation menu
Upload a User Manual
Namespaces
Wiki Guide
HTML
PDF
Info
Views
User Manual
Discussion / Help
Navigation
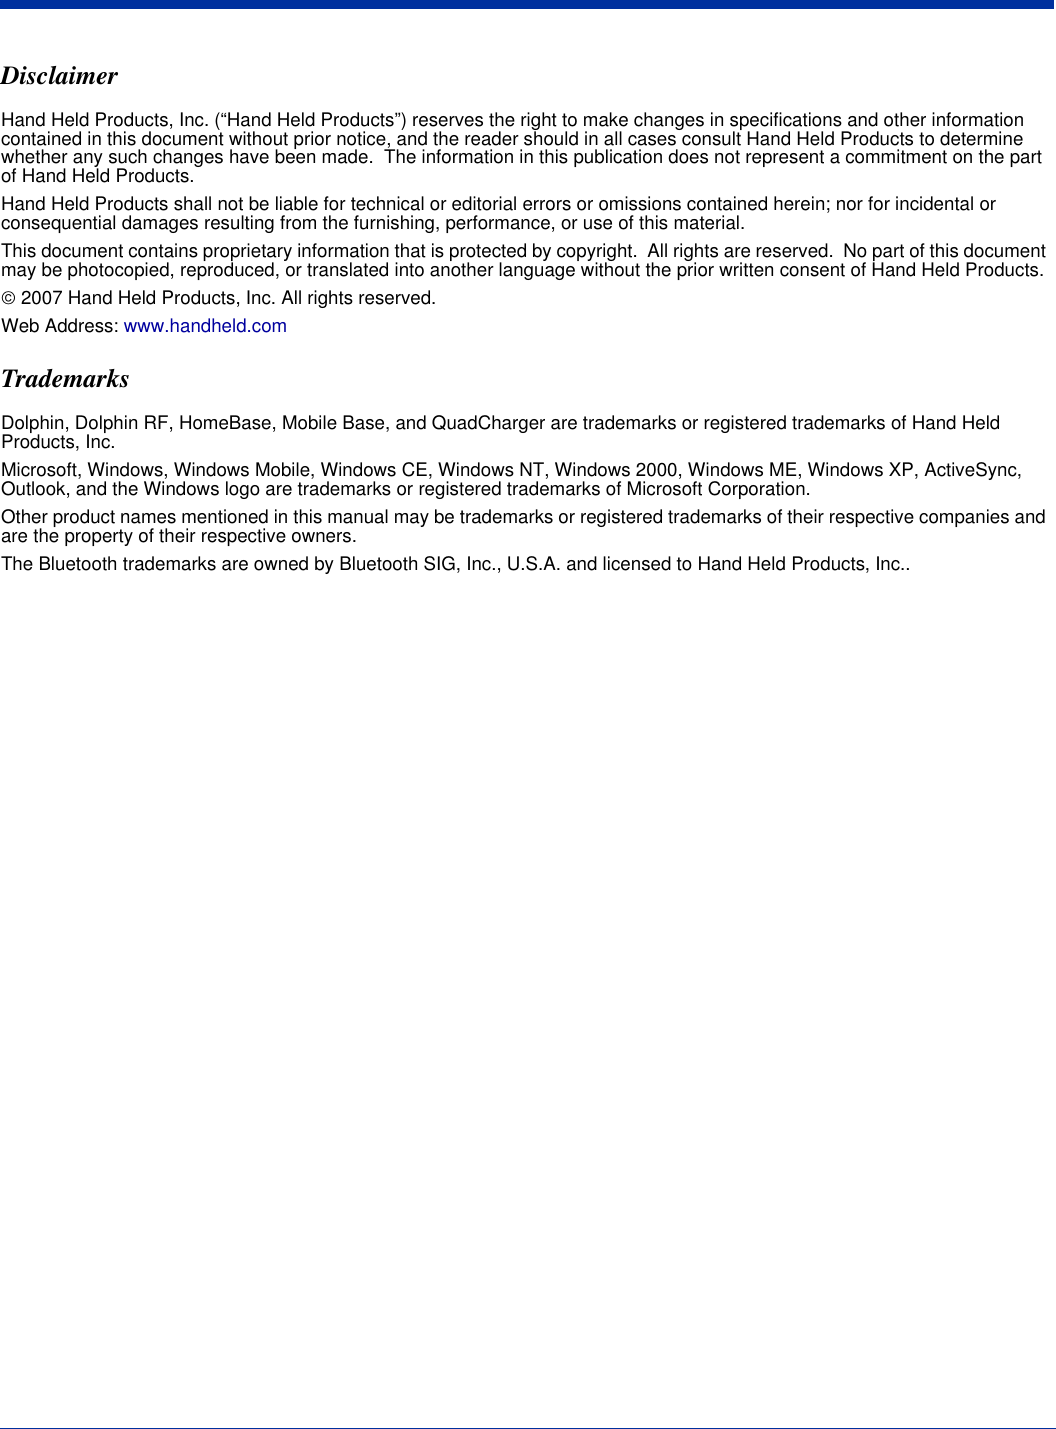


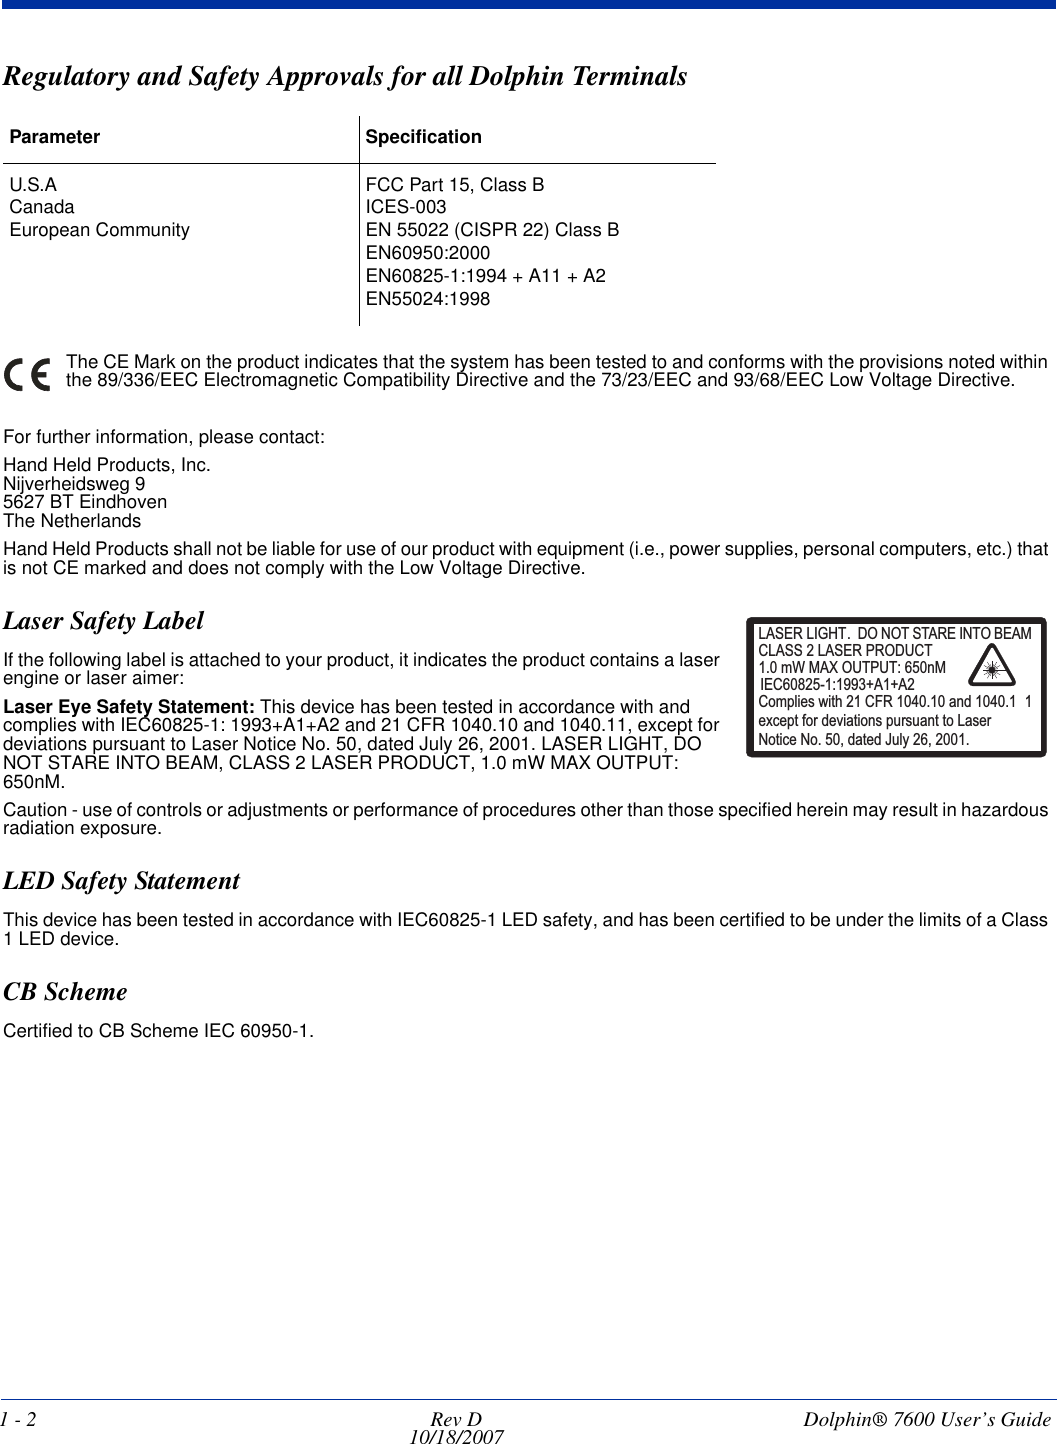

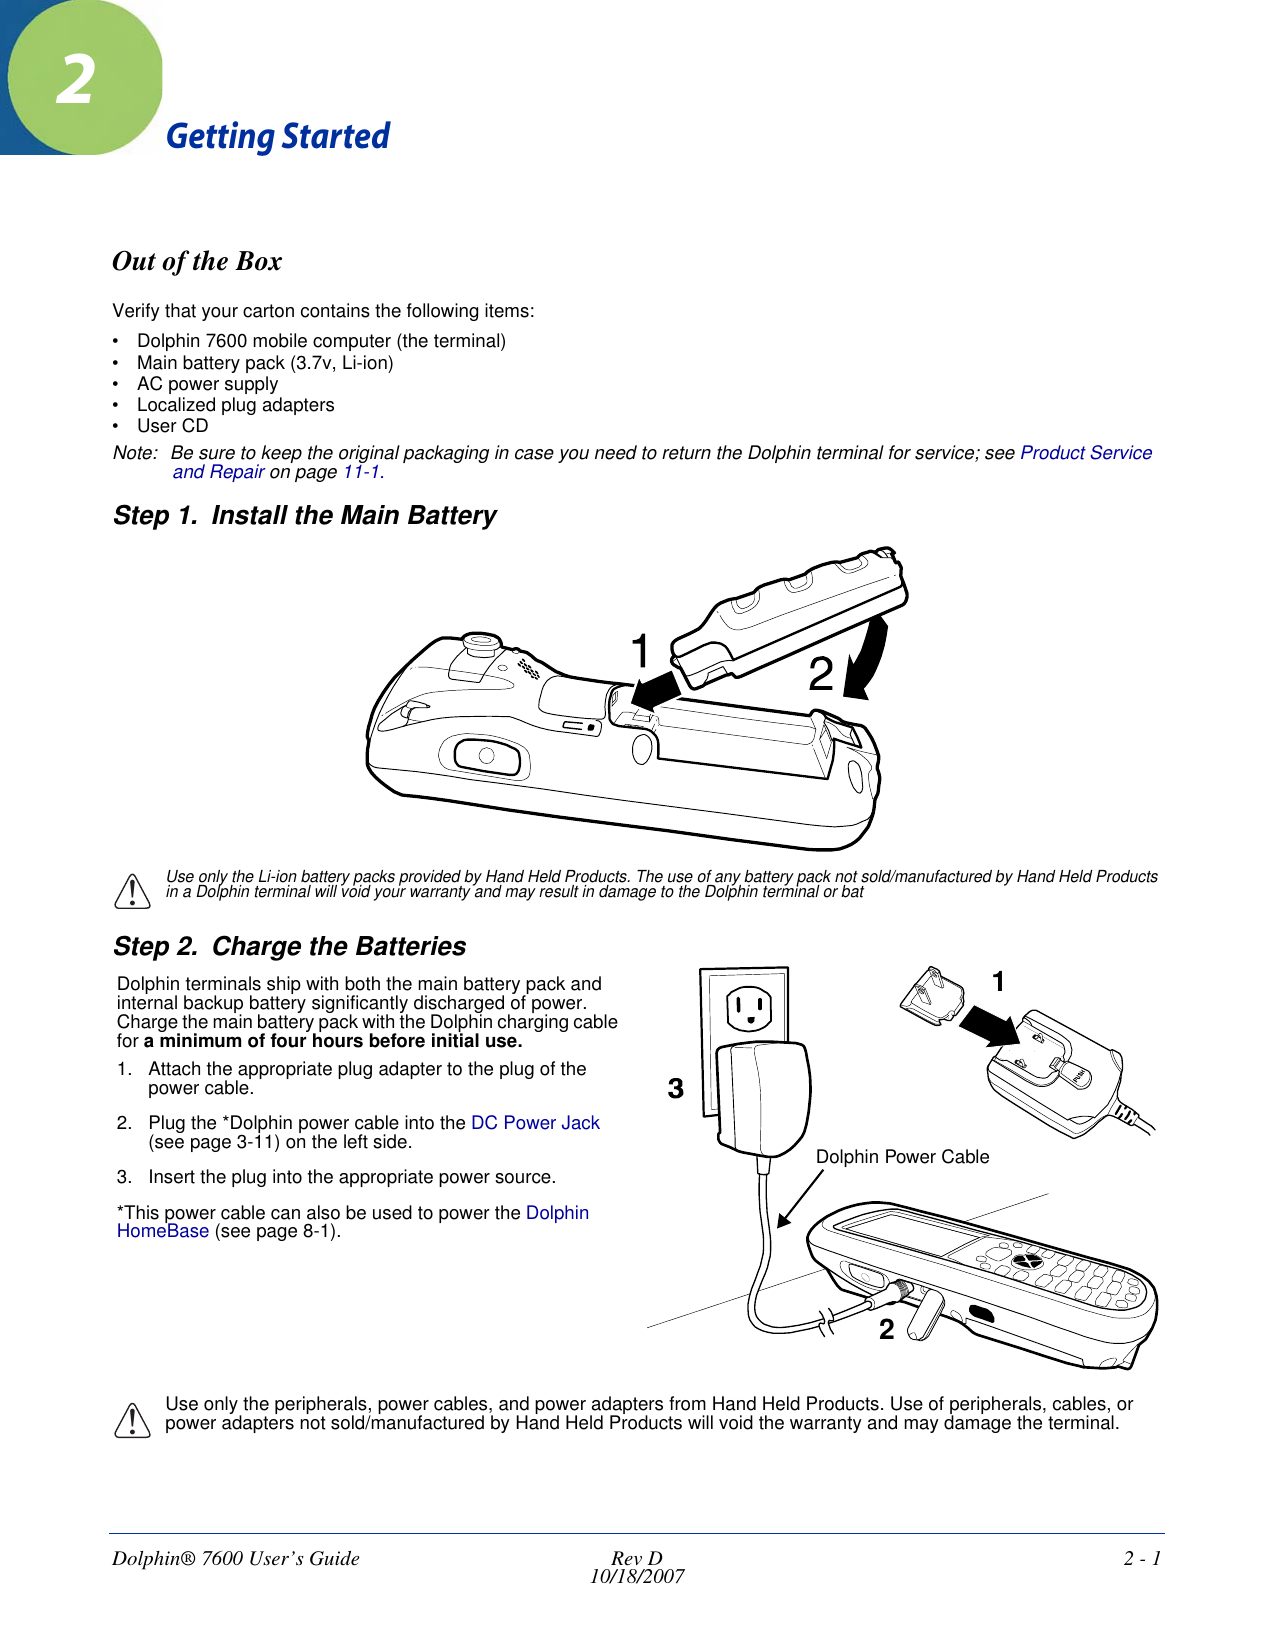
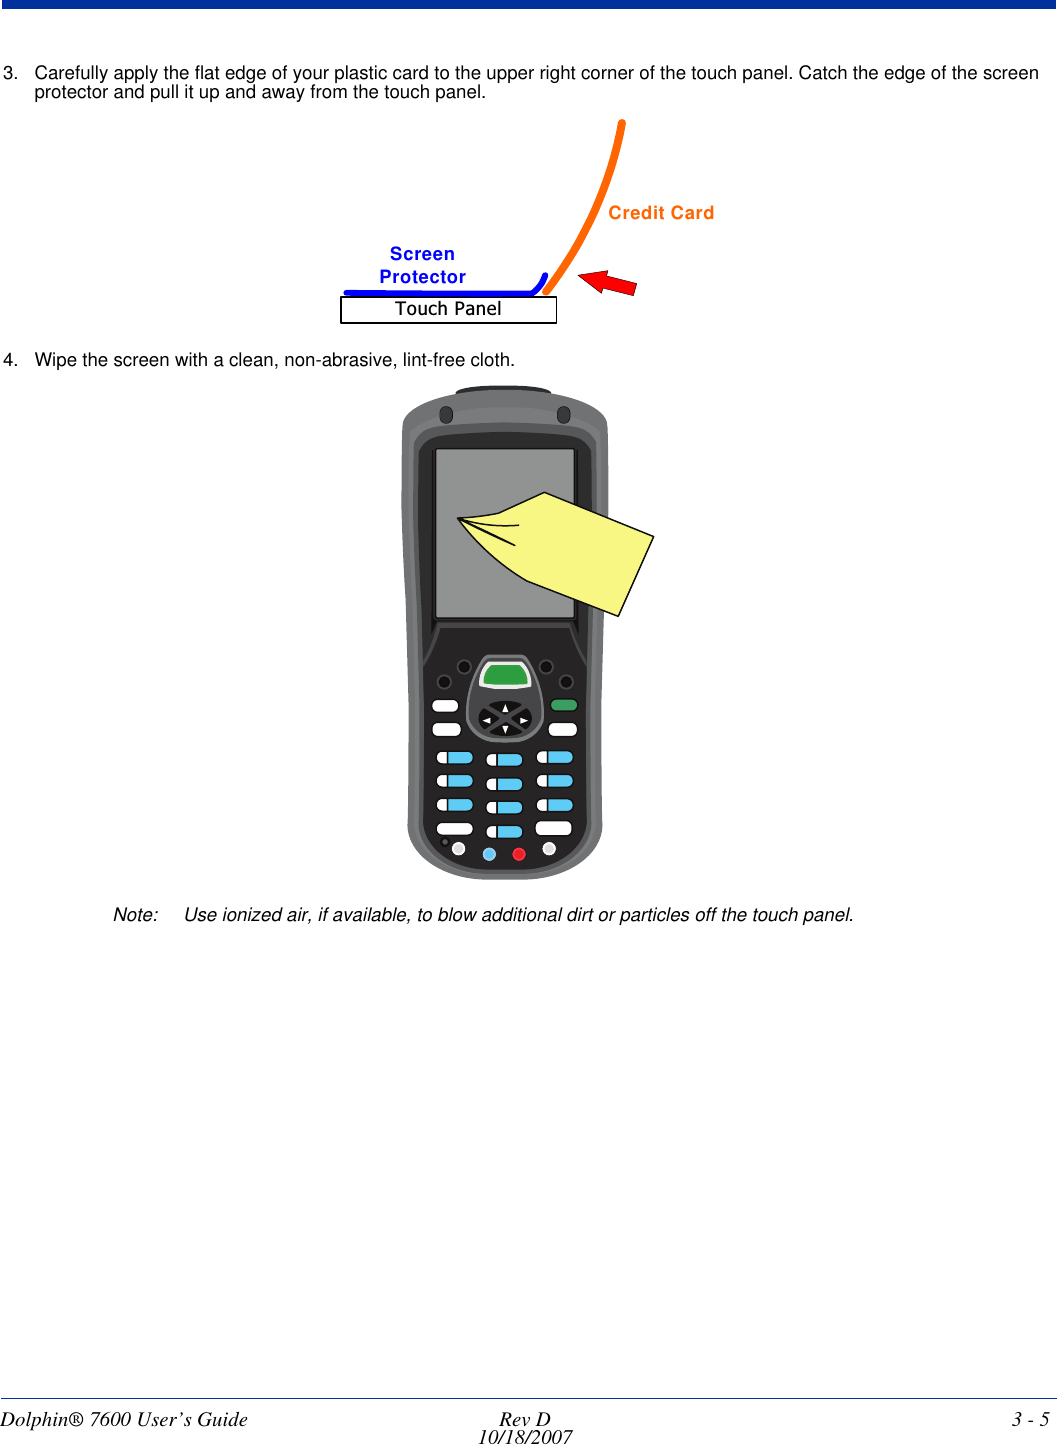
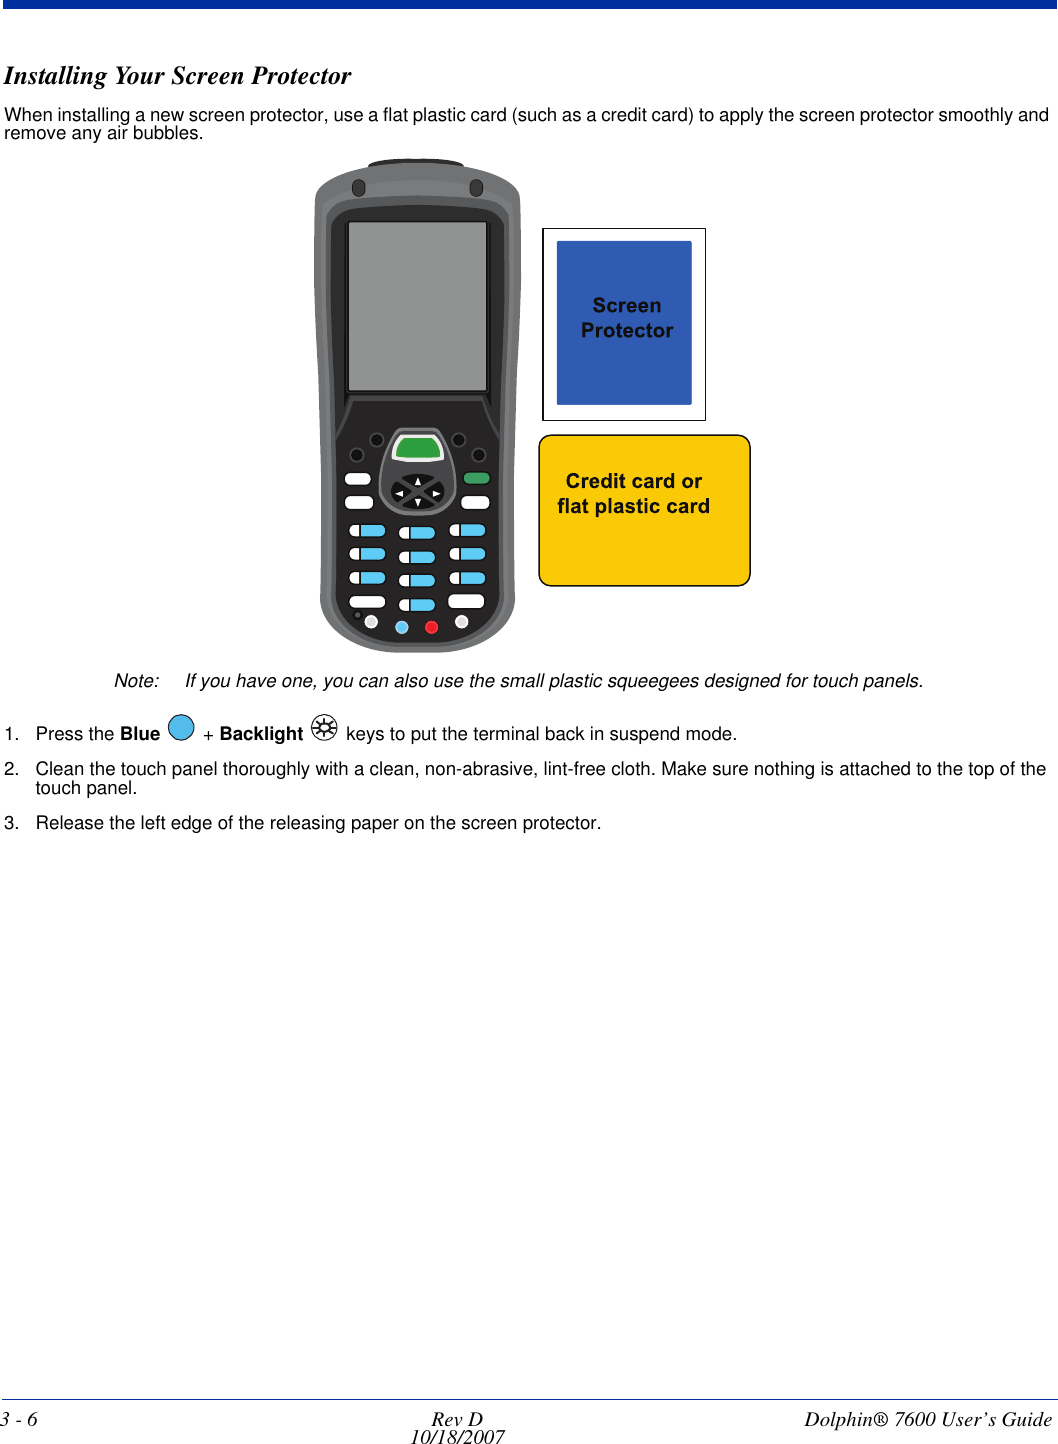
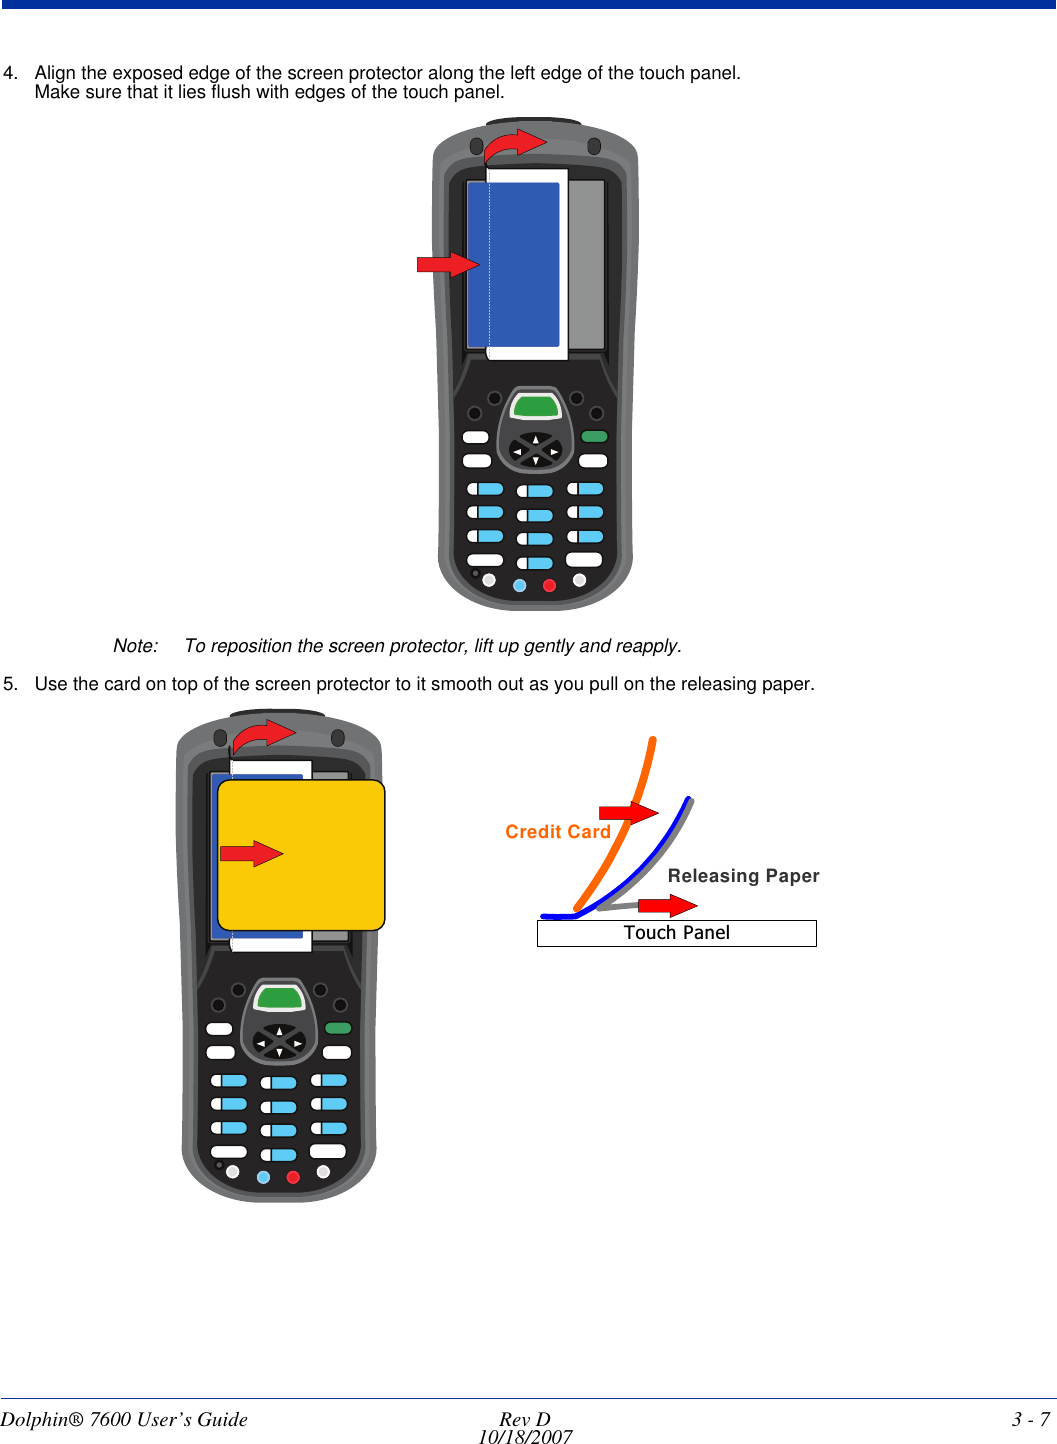
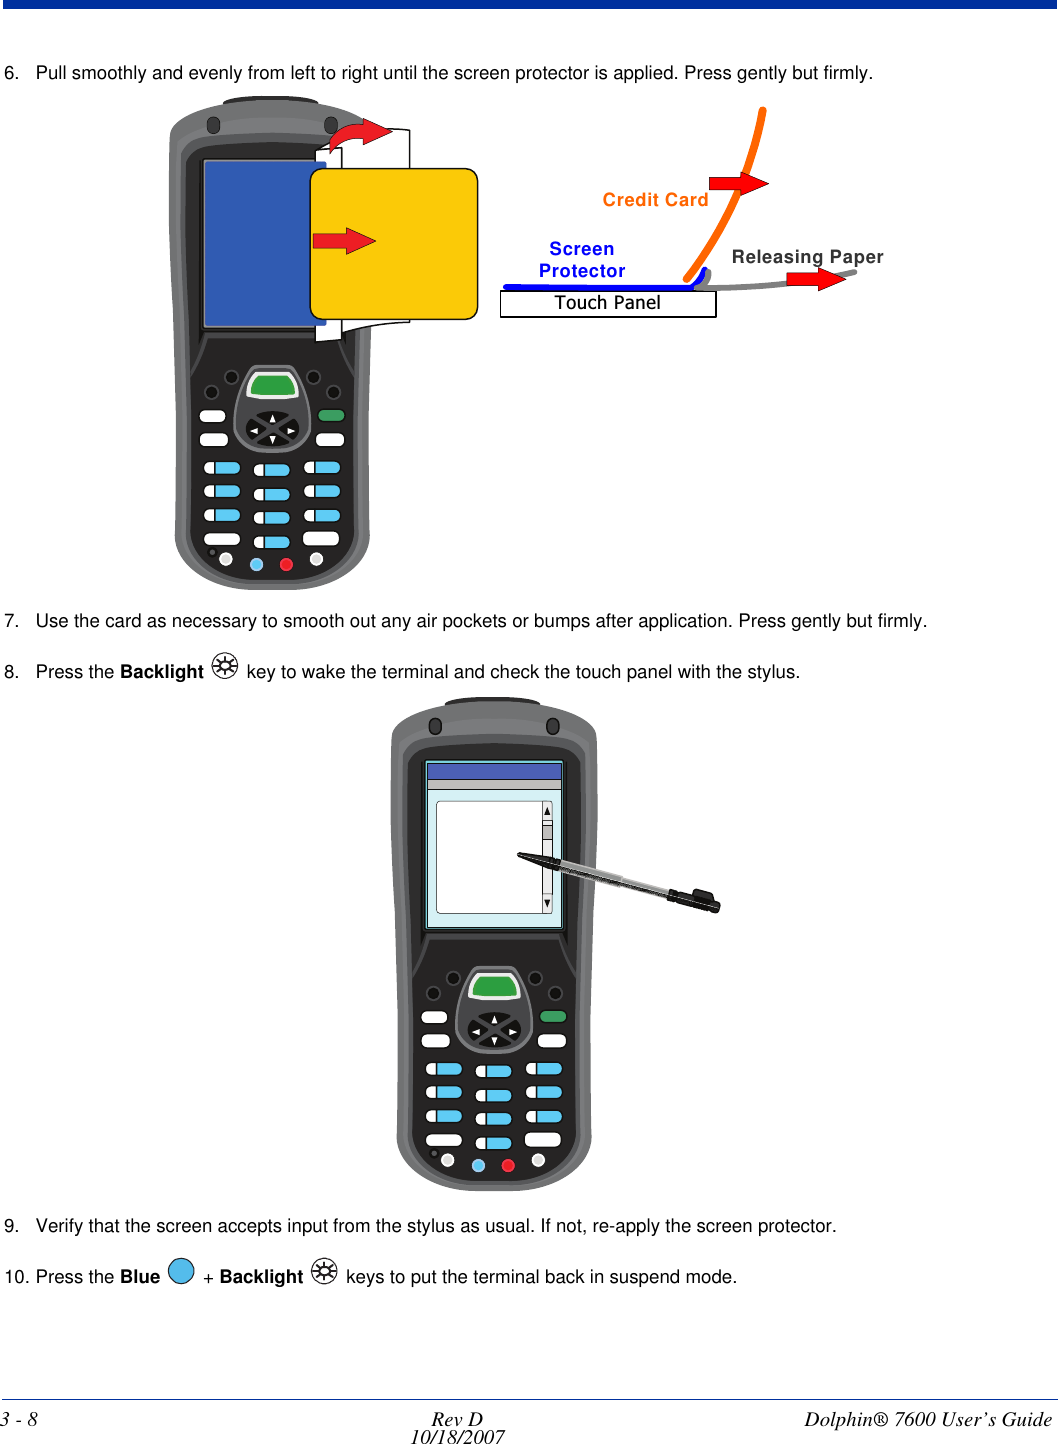
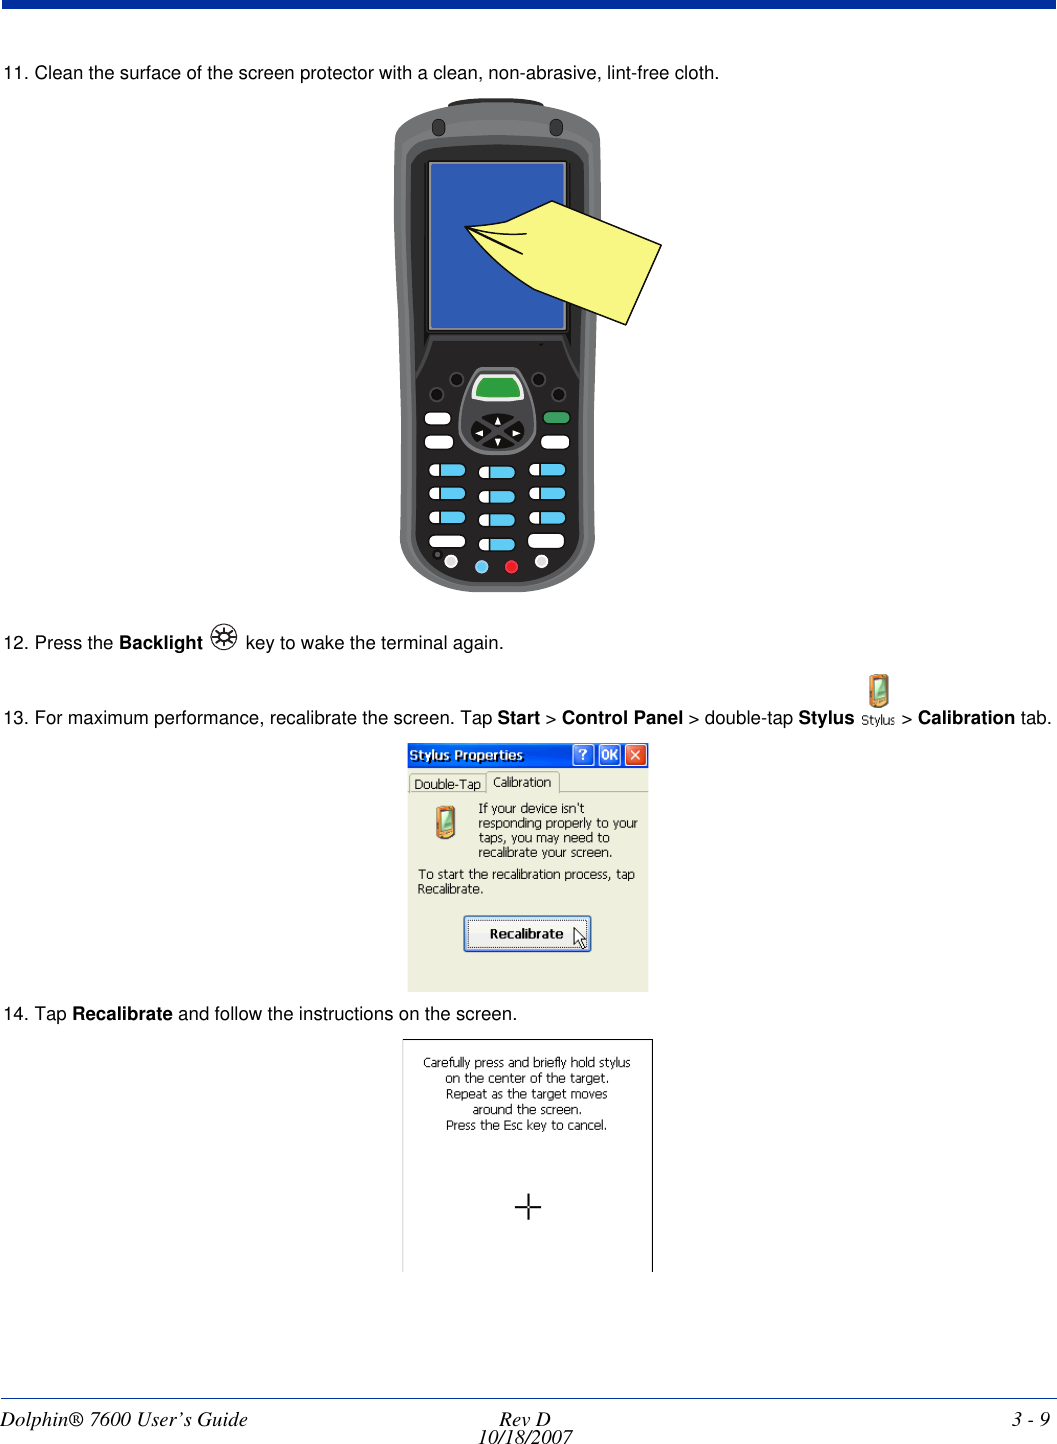
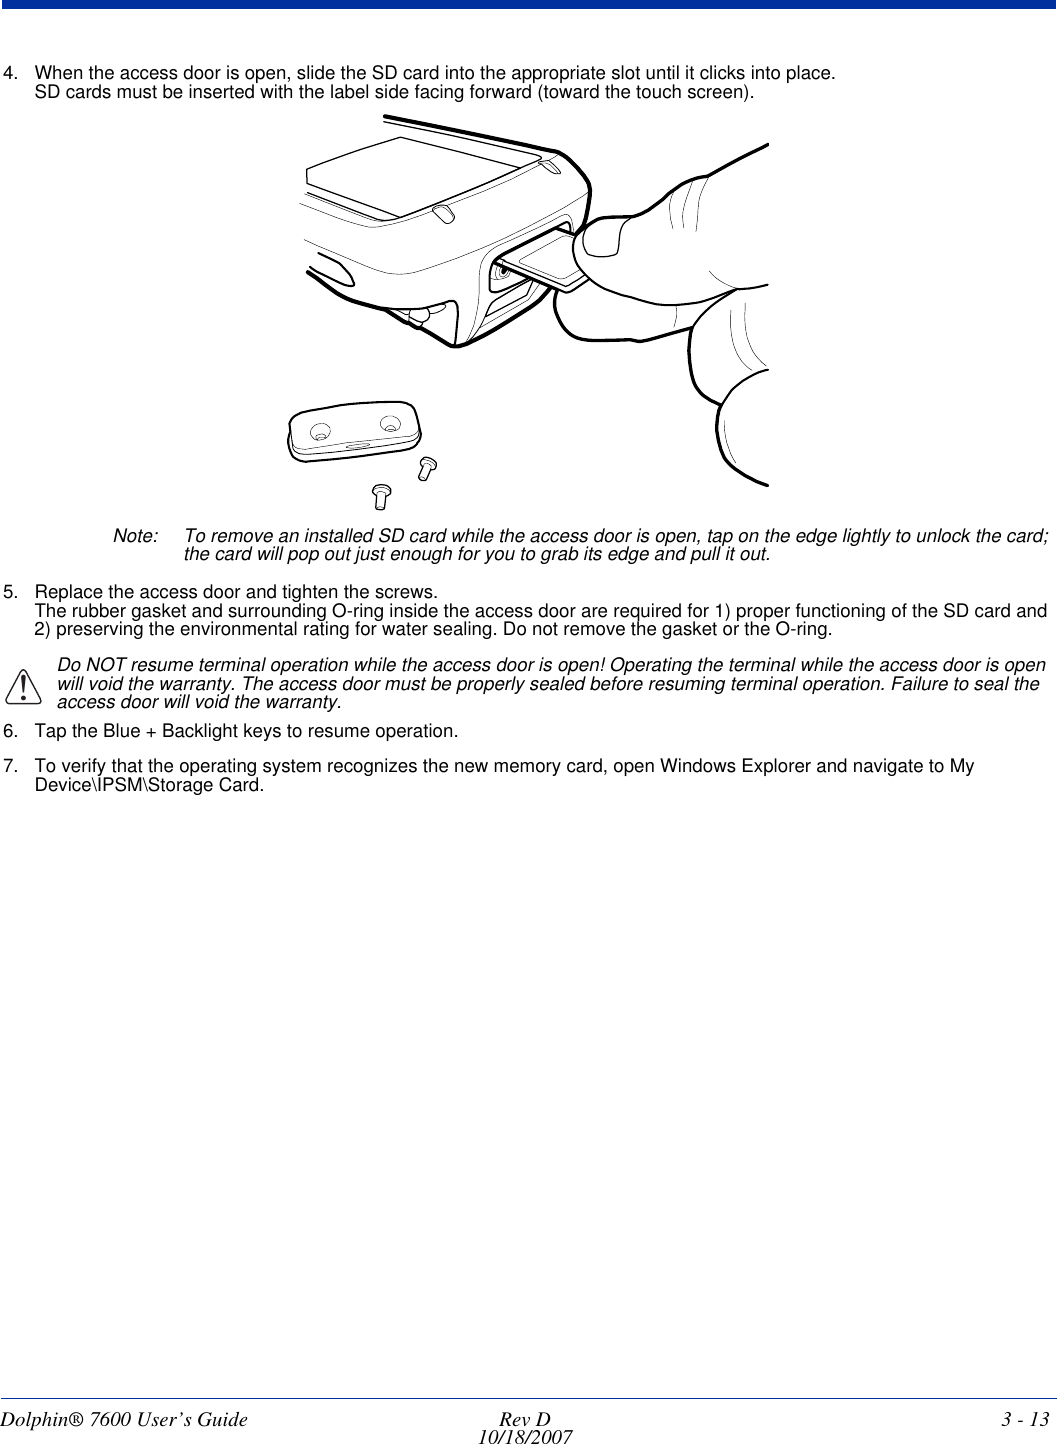
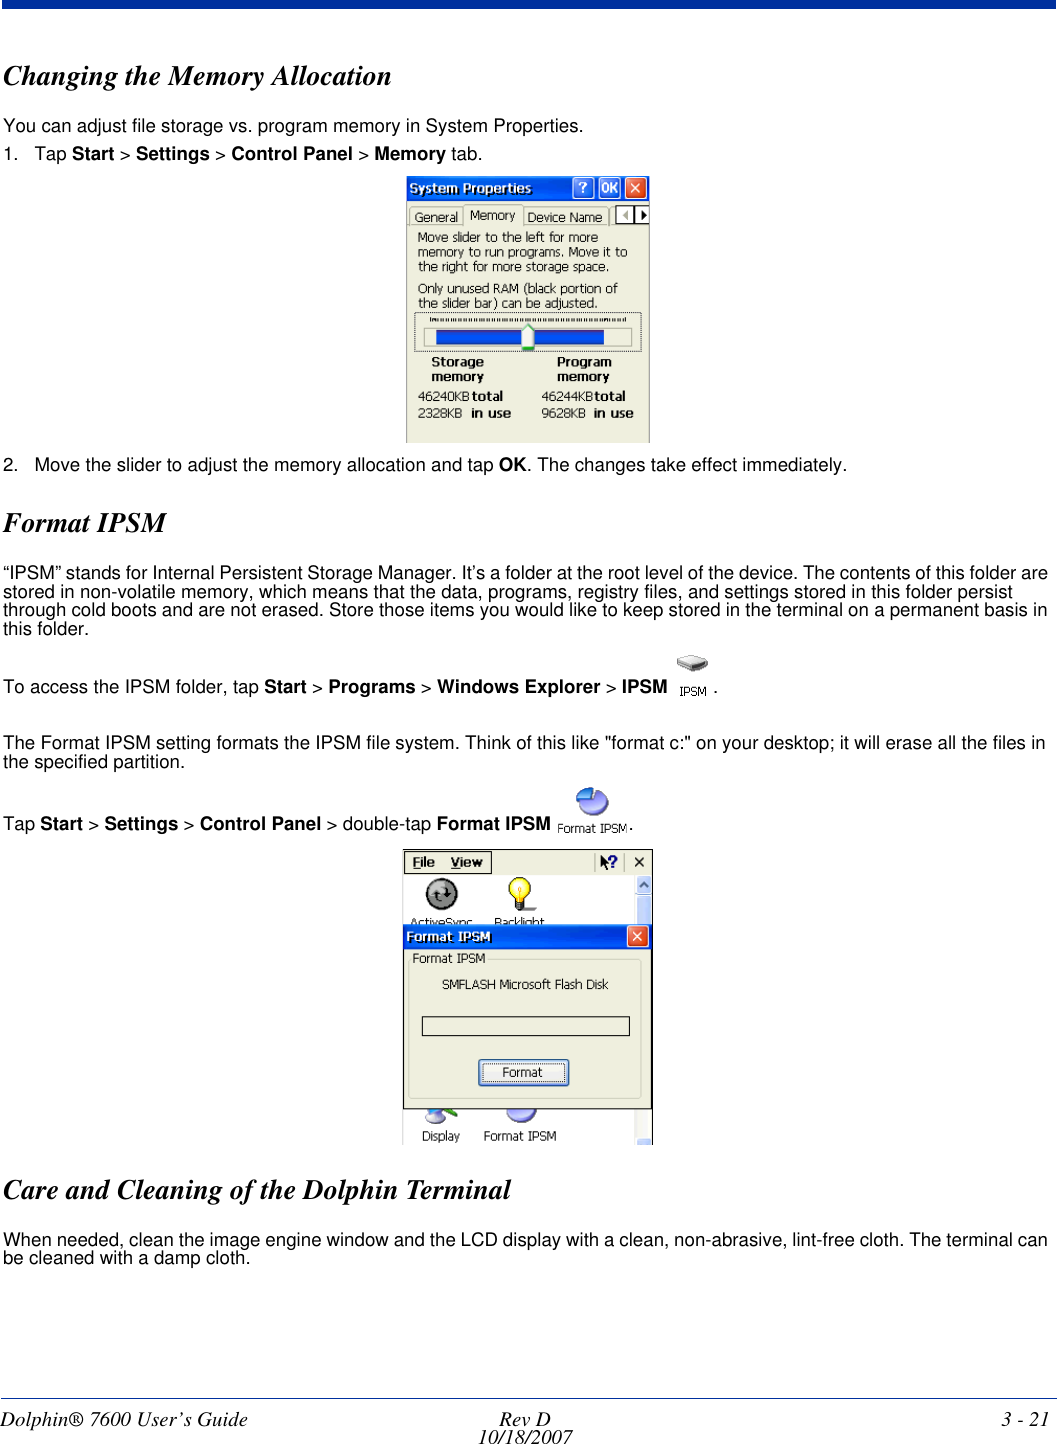


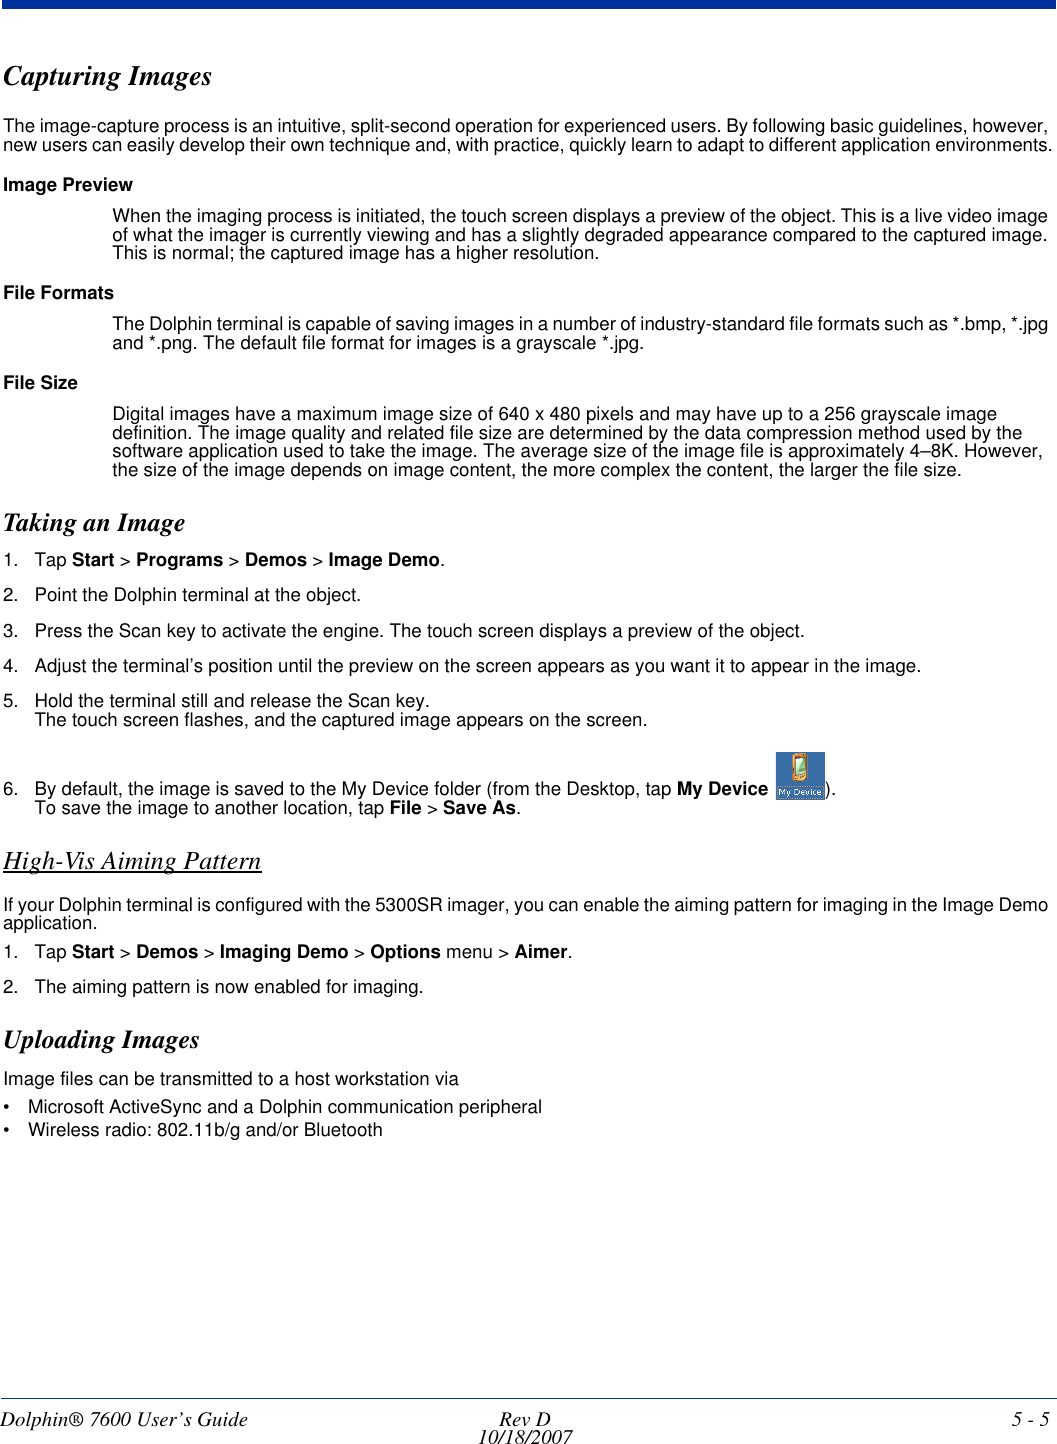

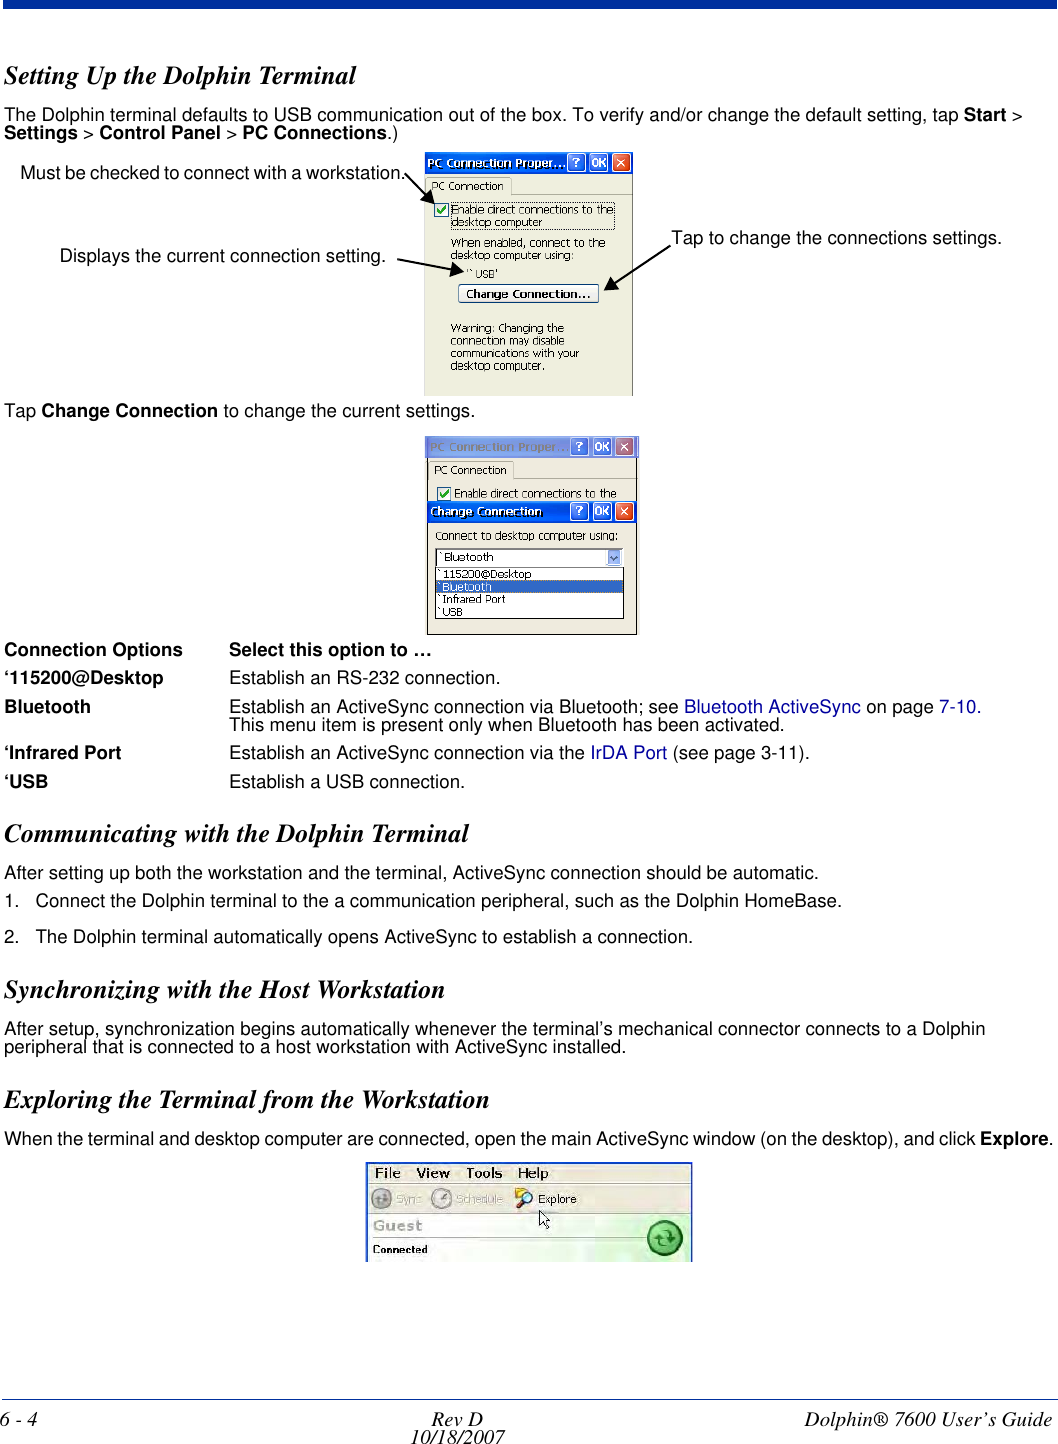
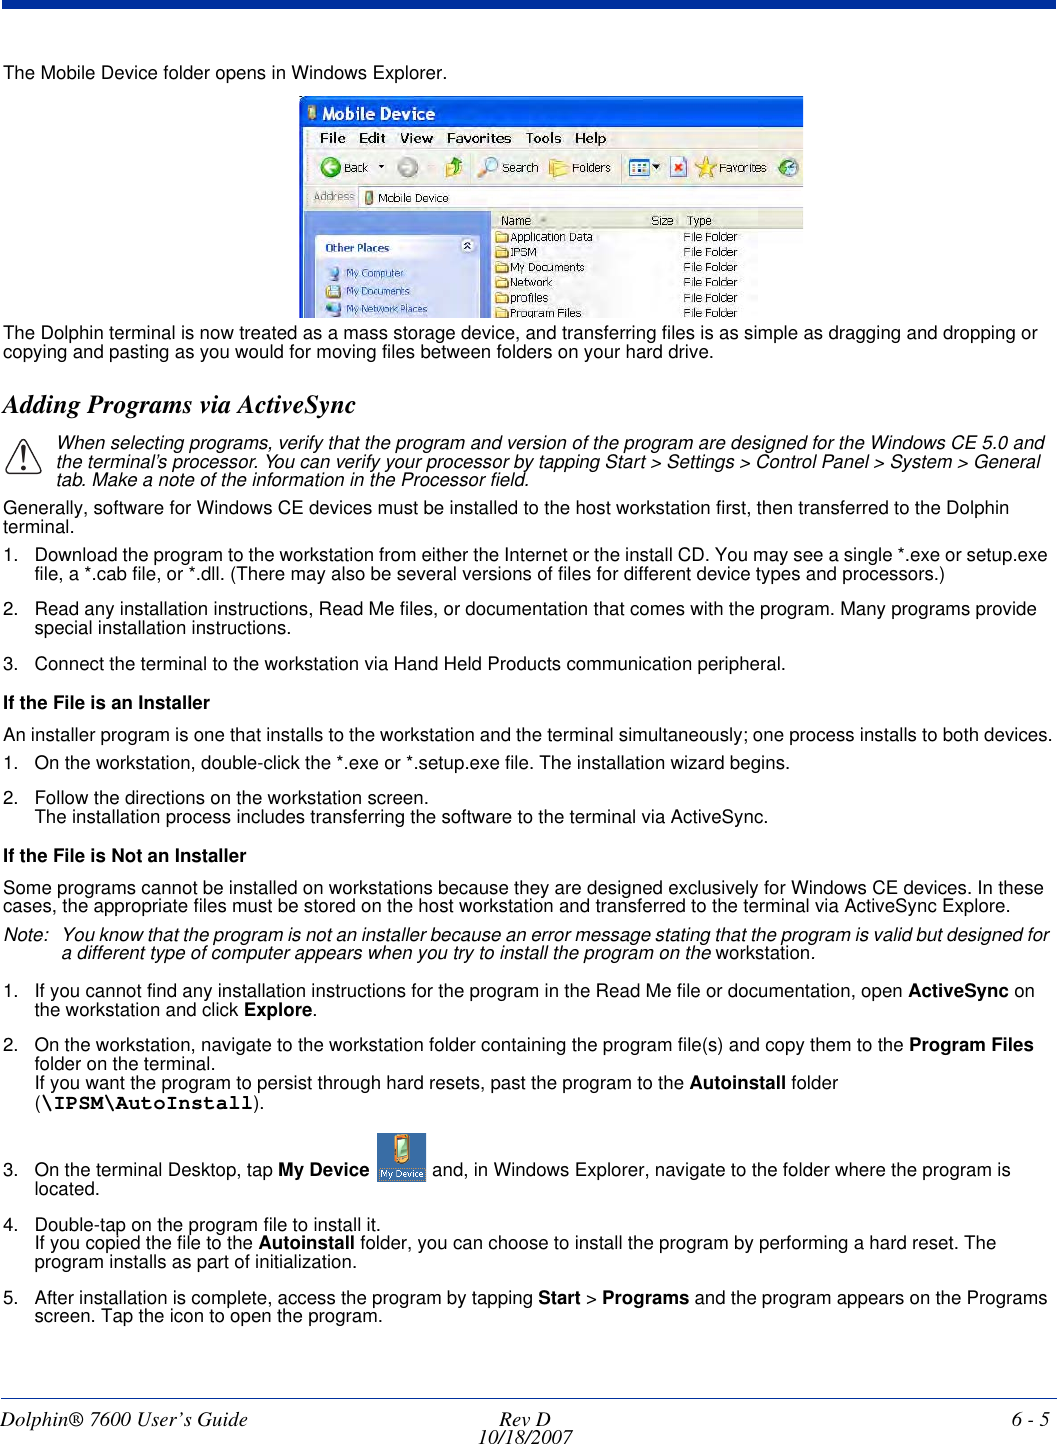
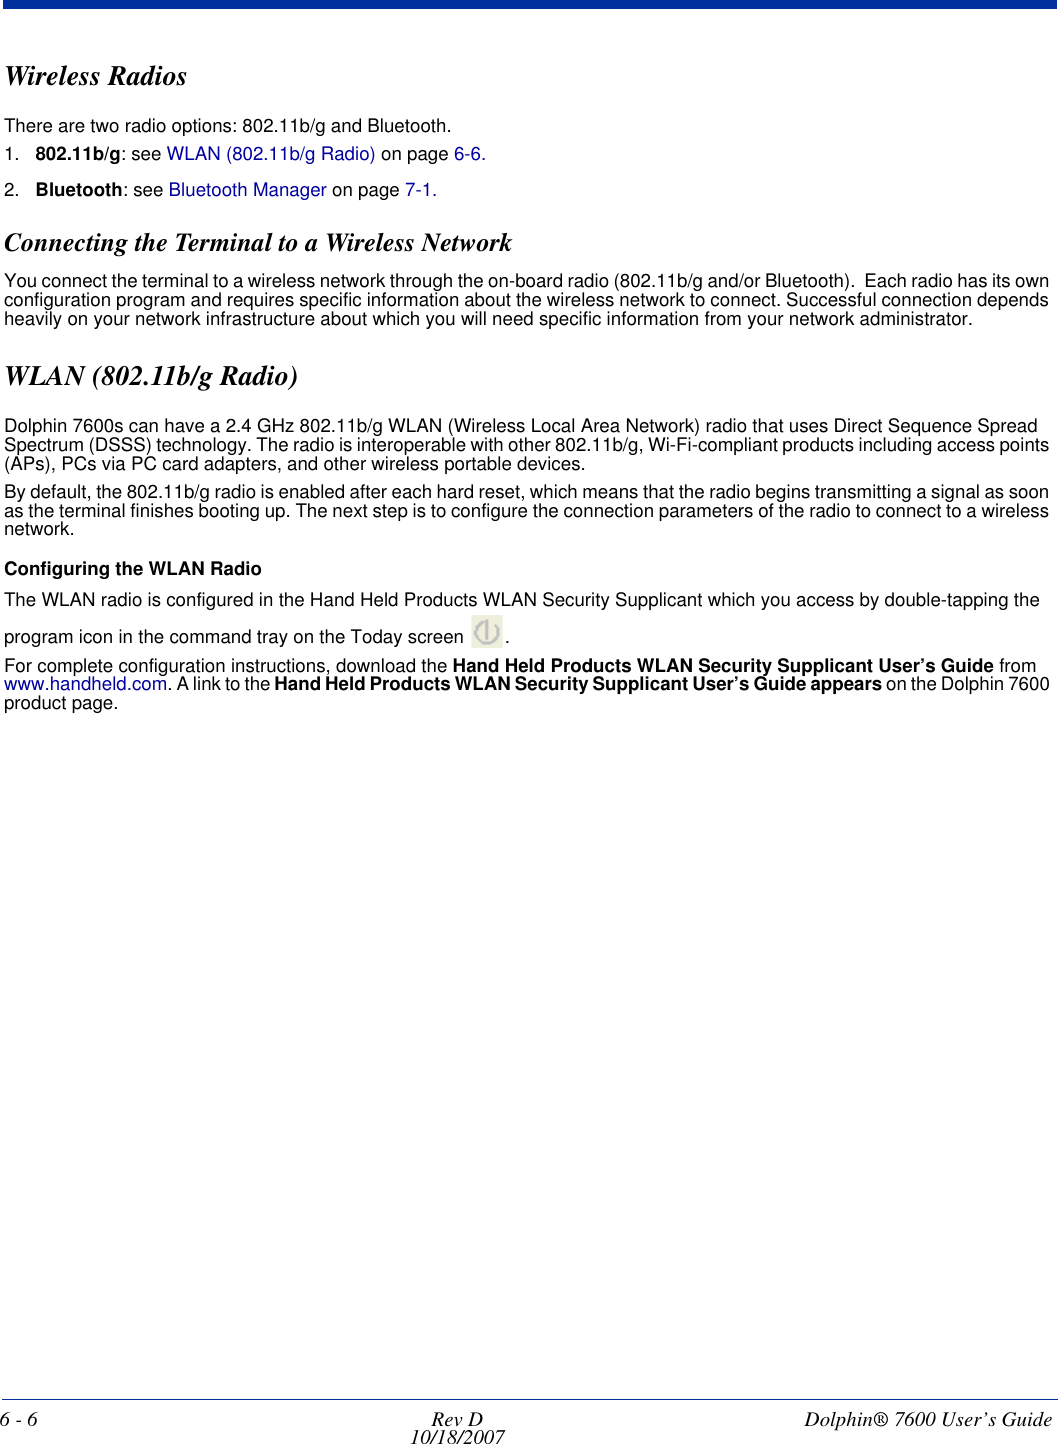

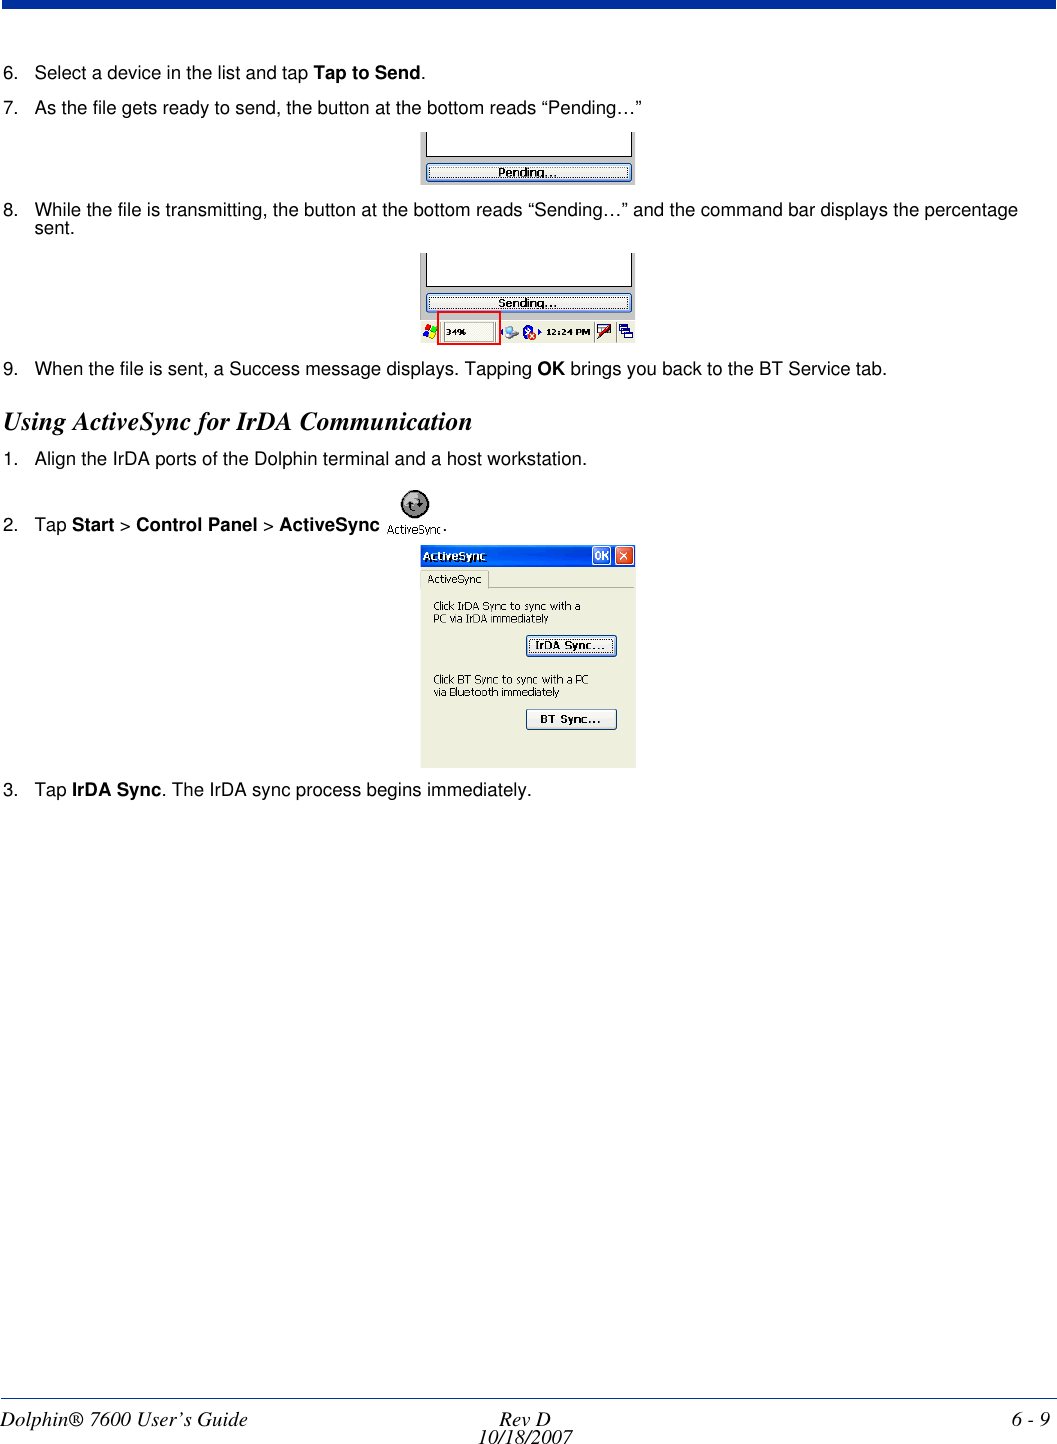
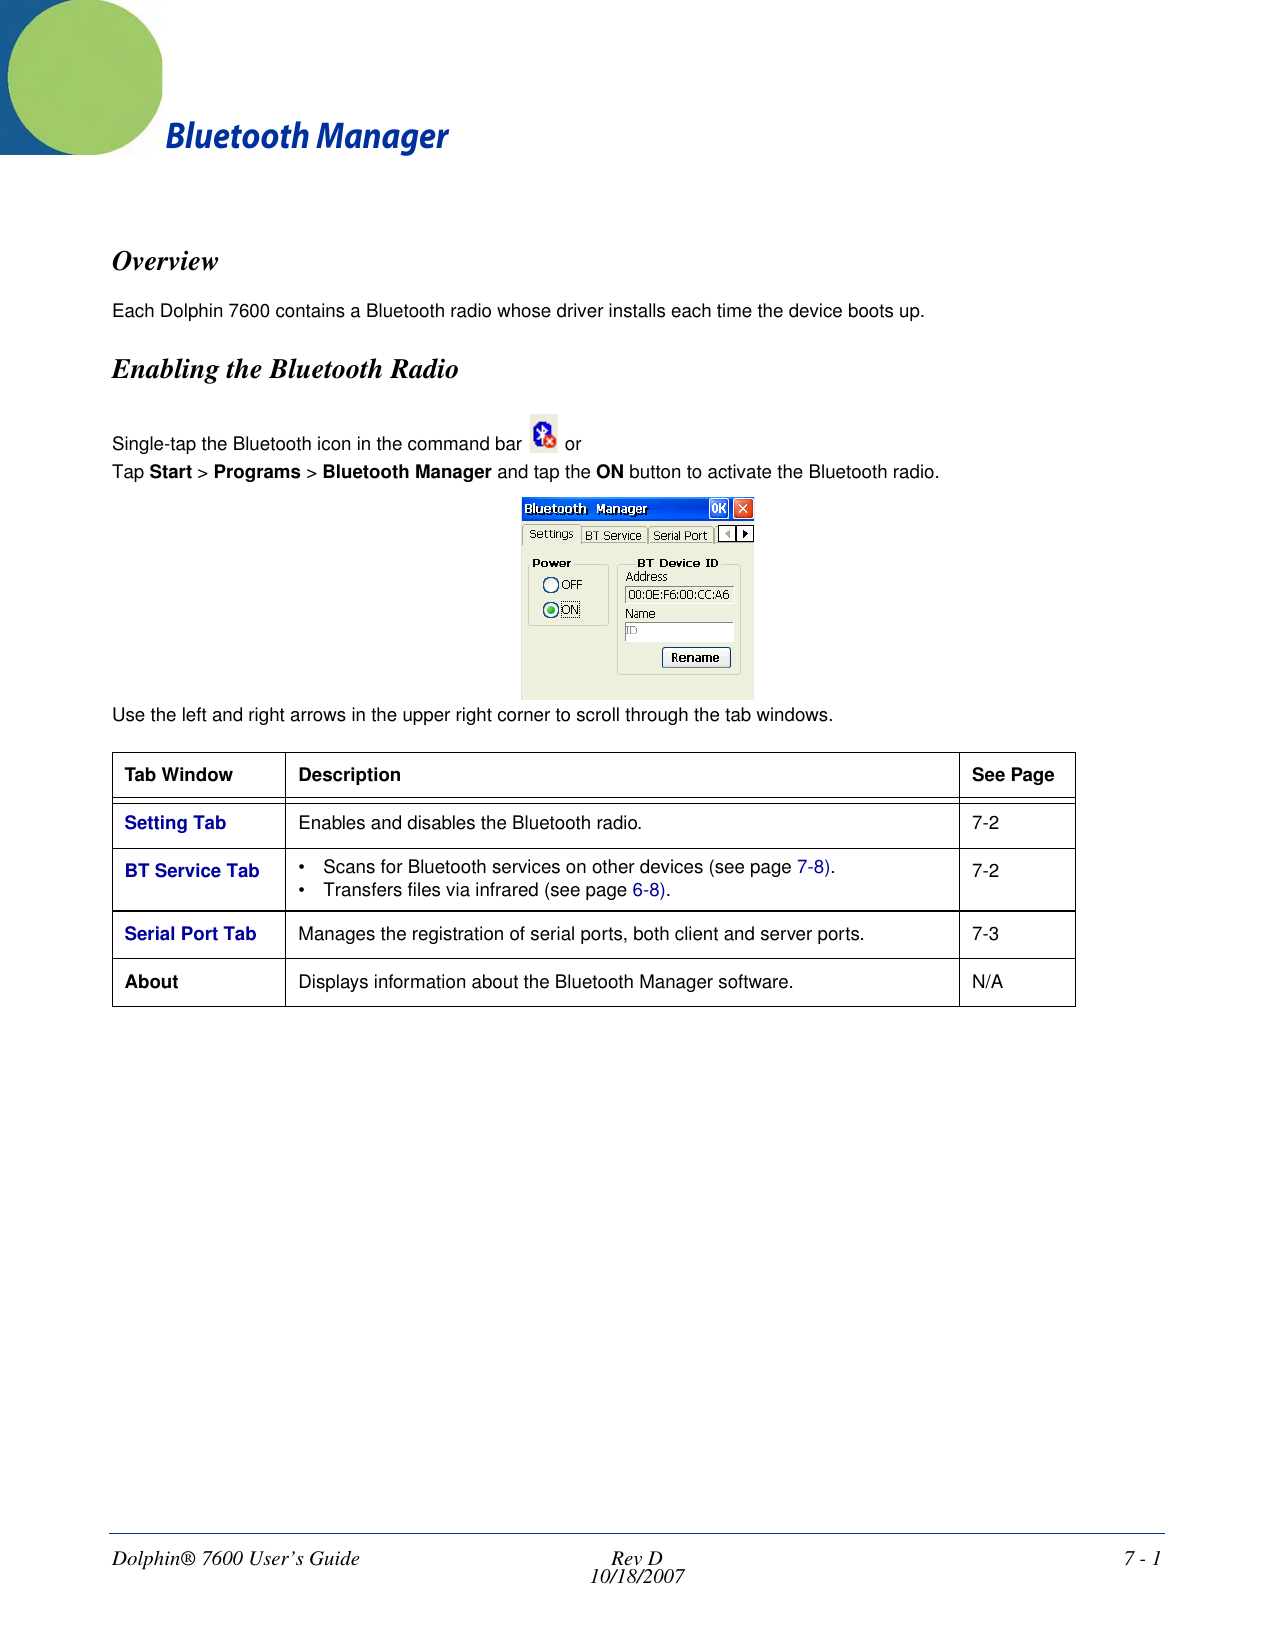
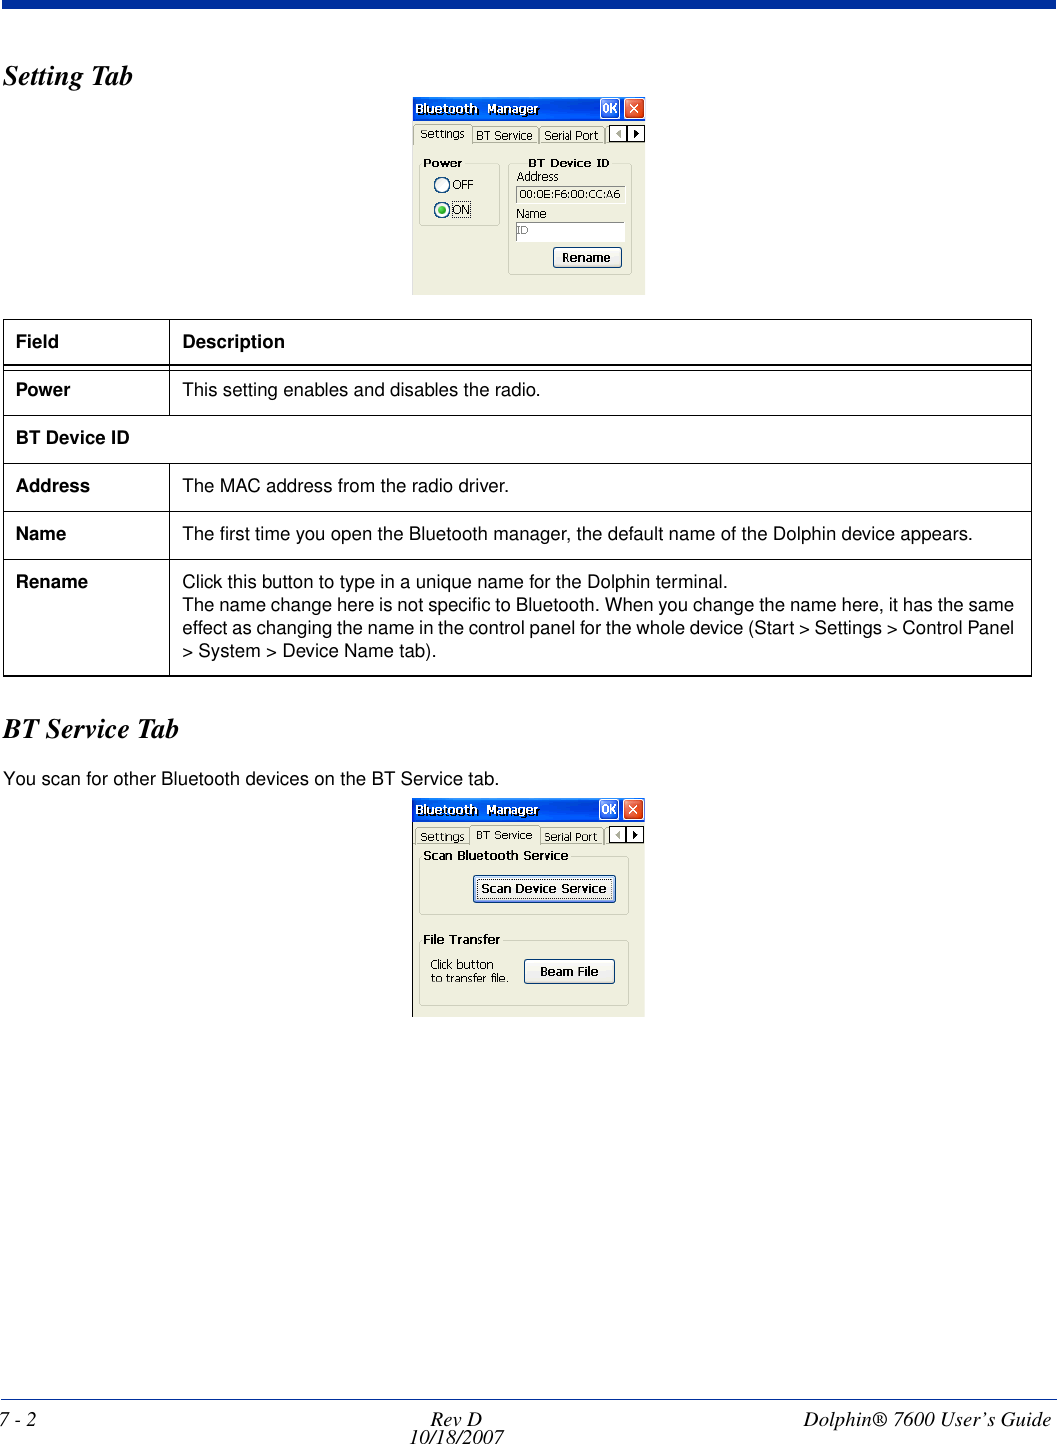
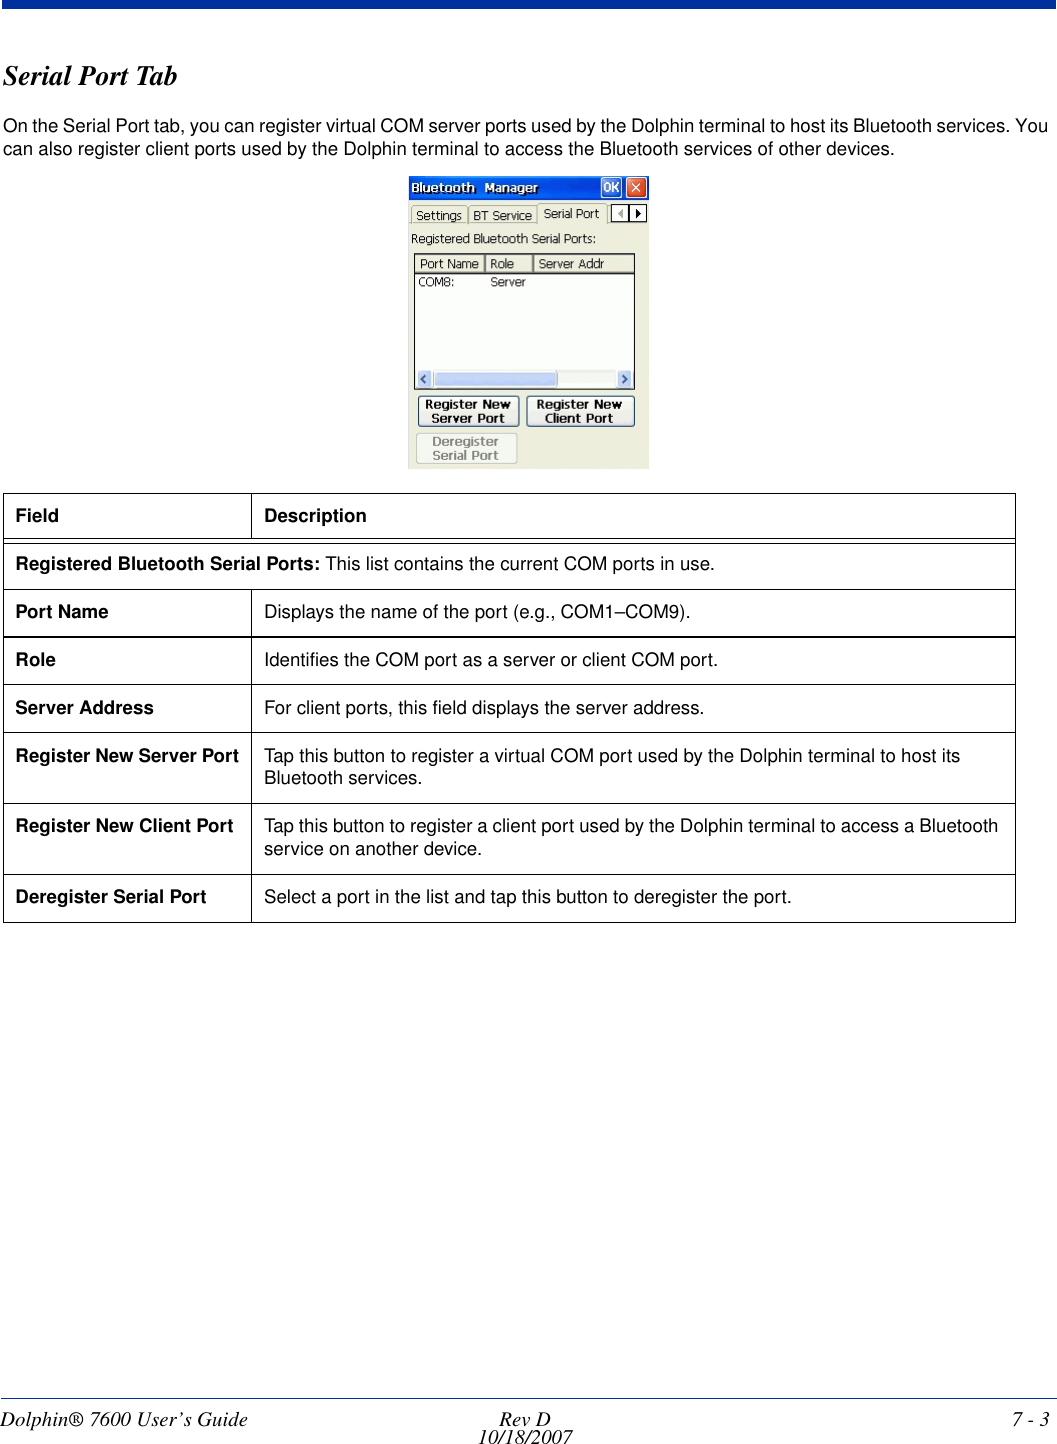
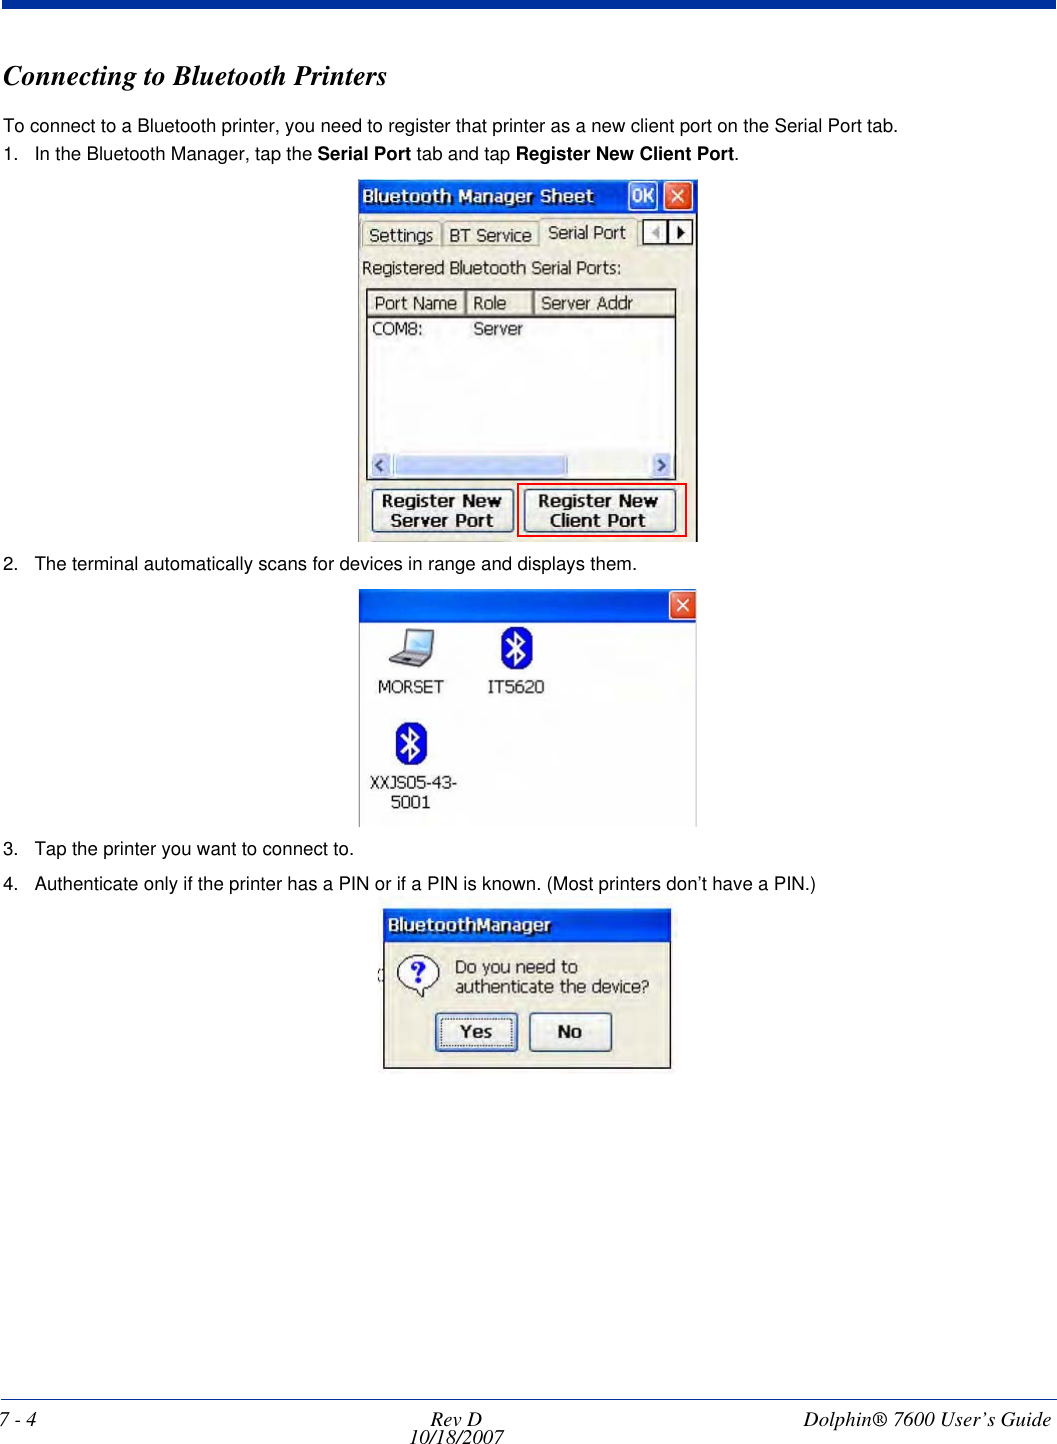
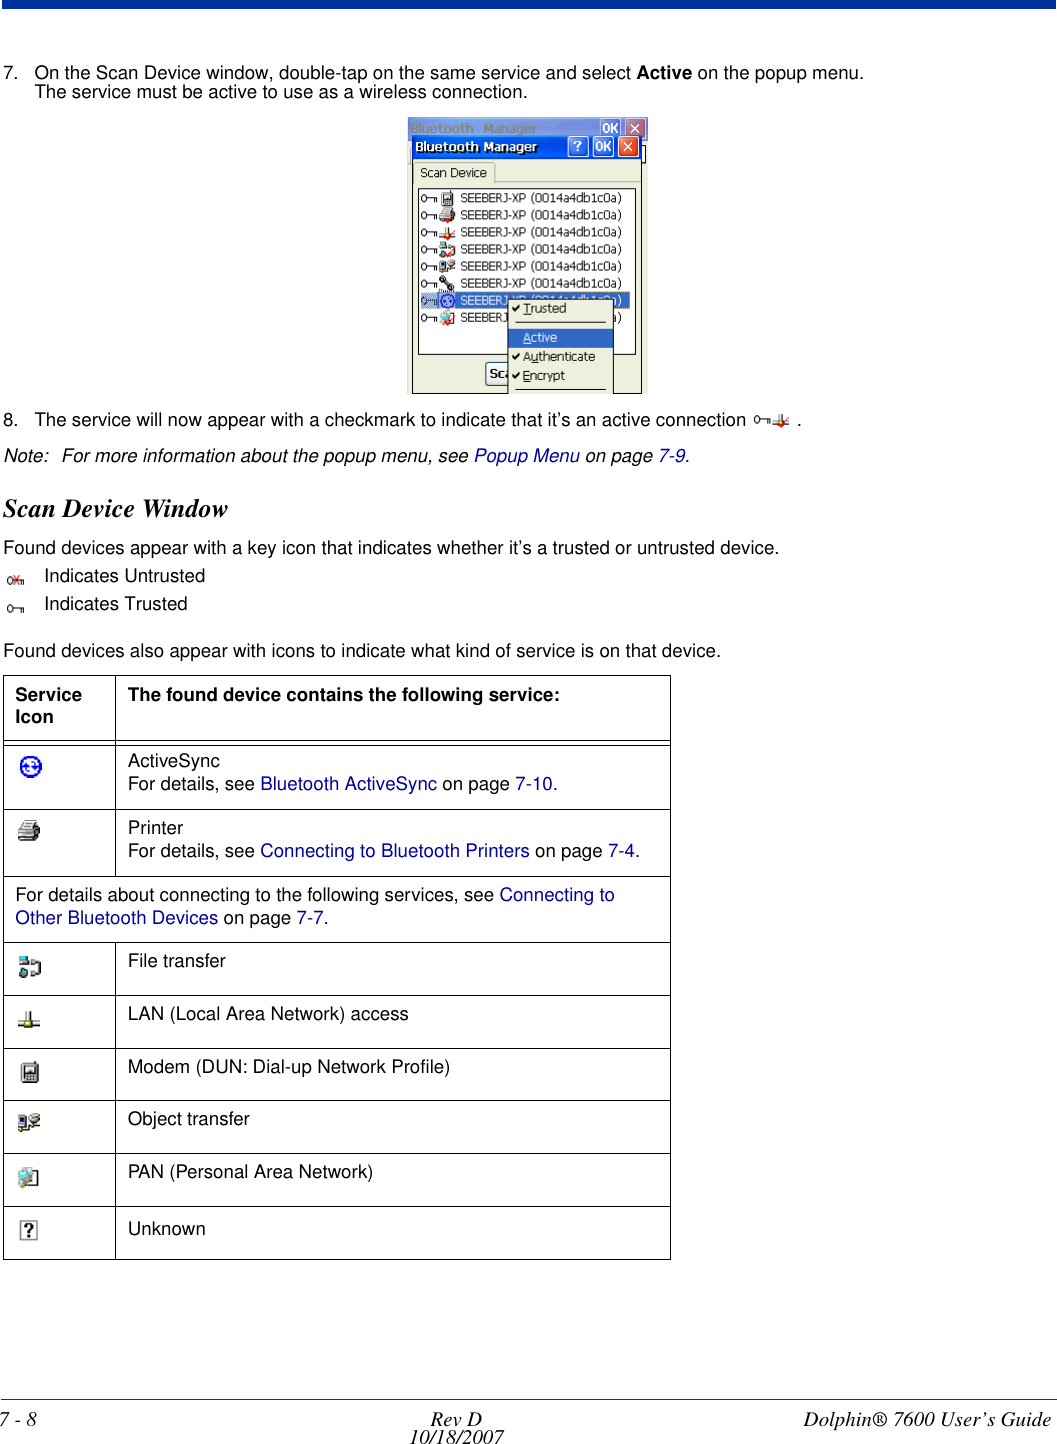
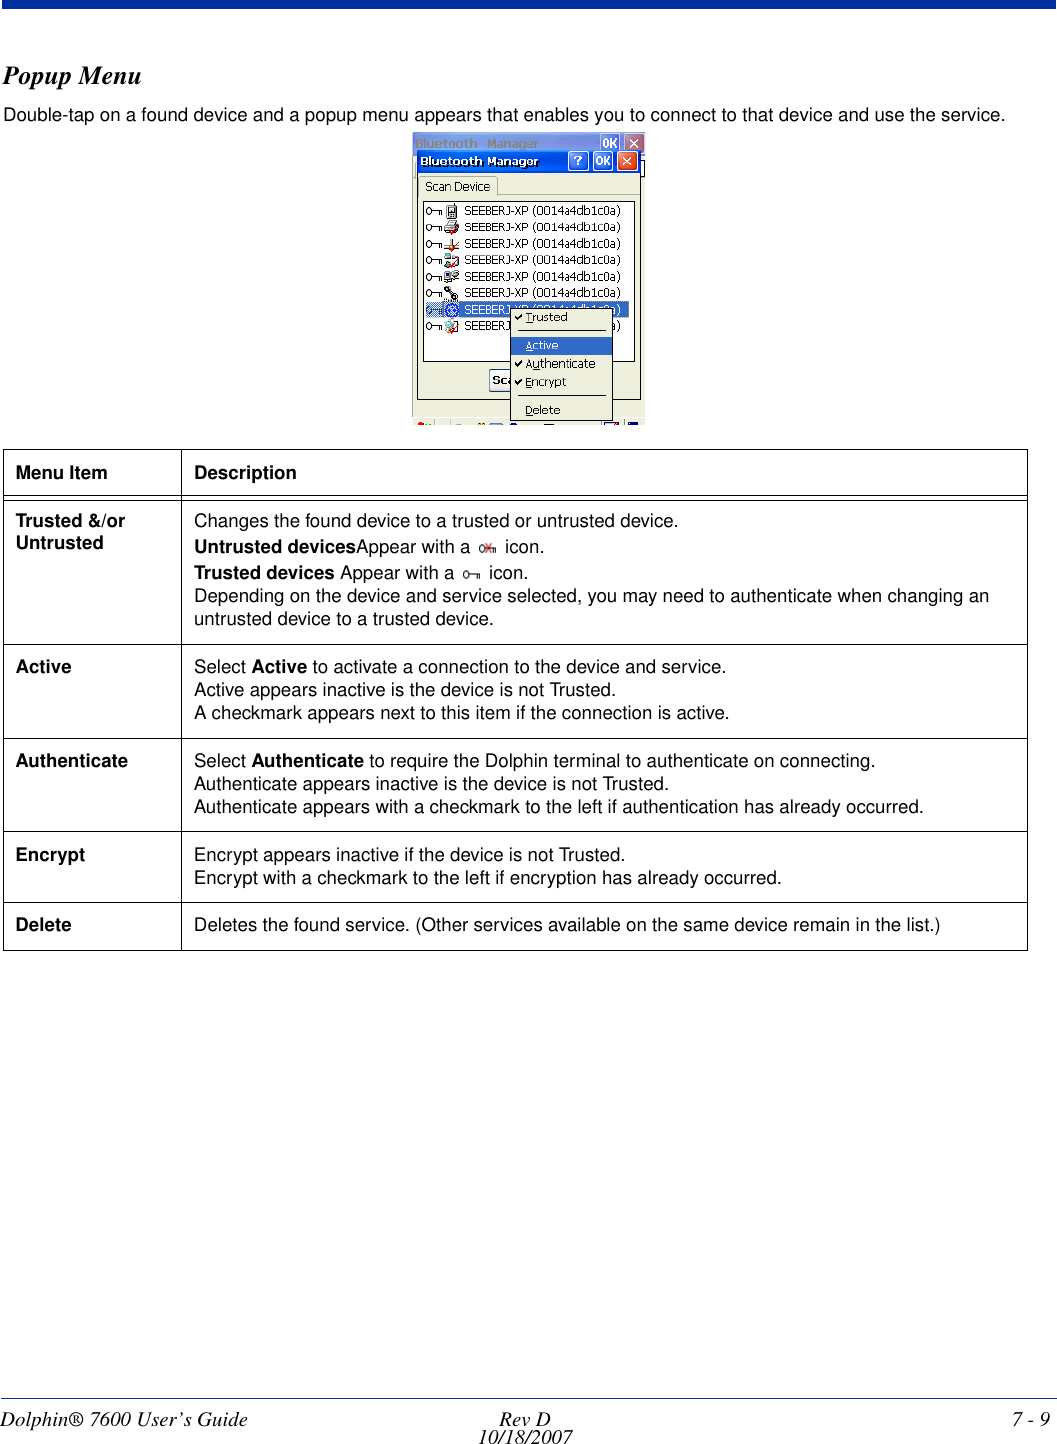
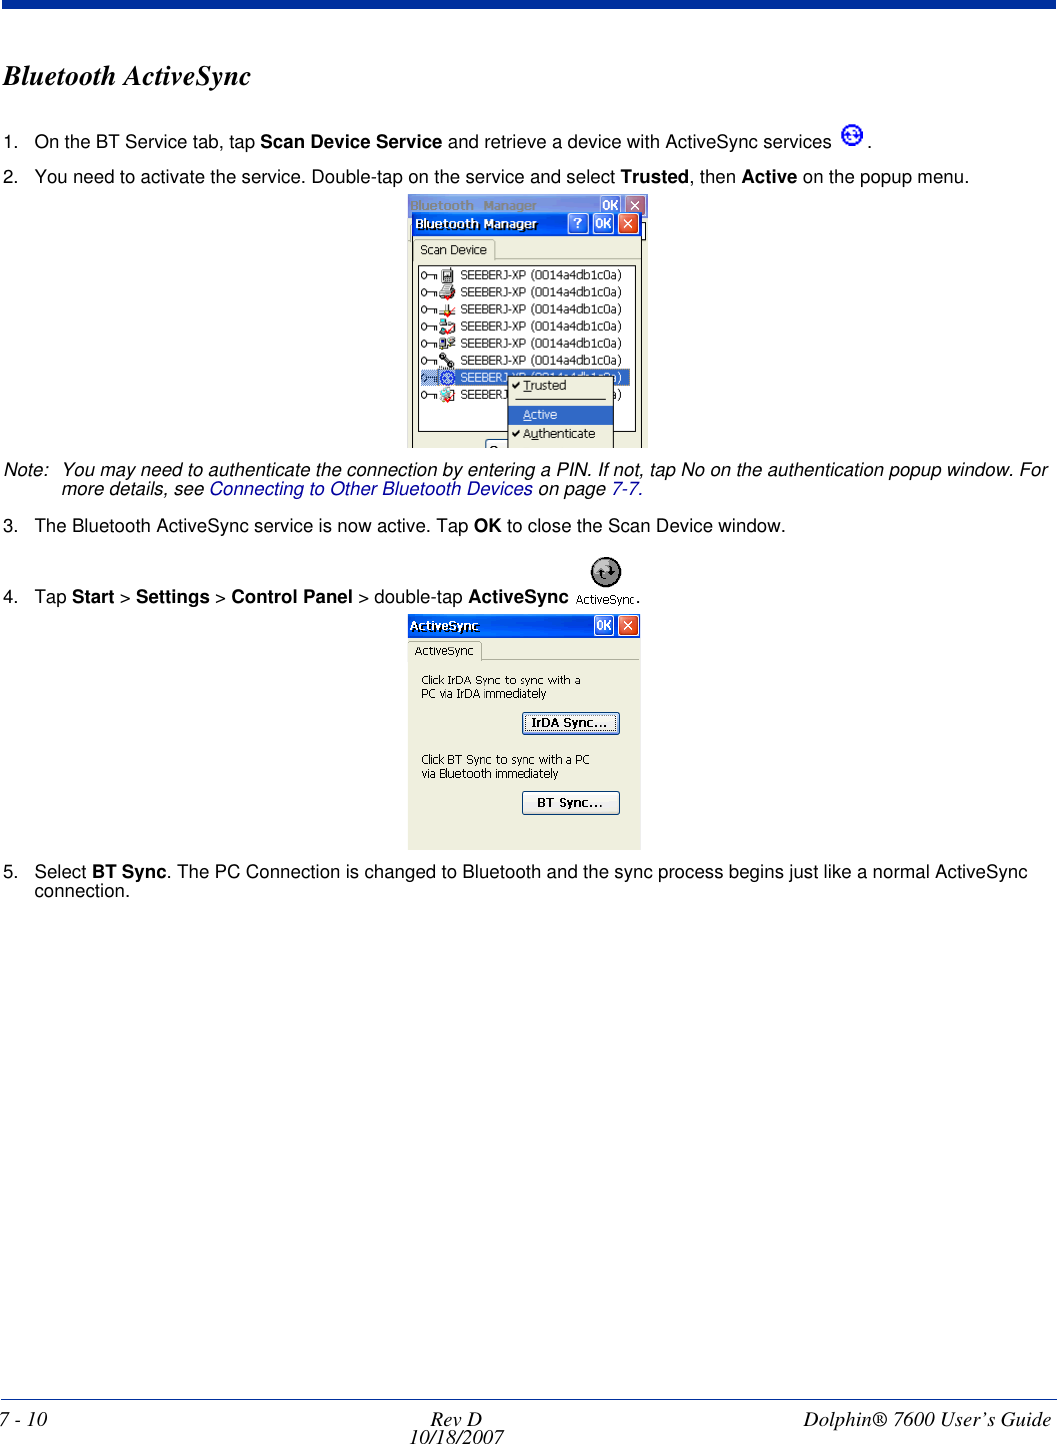
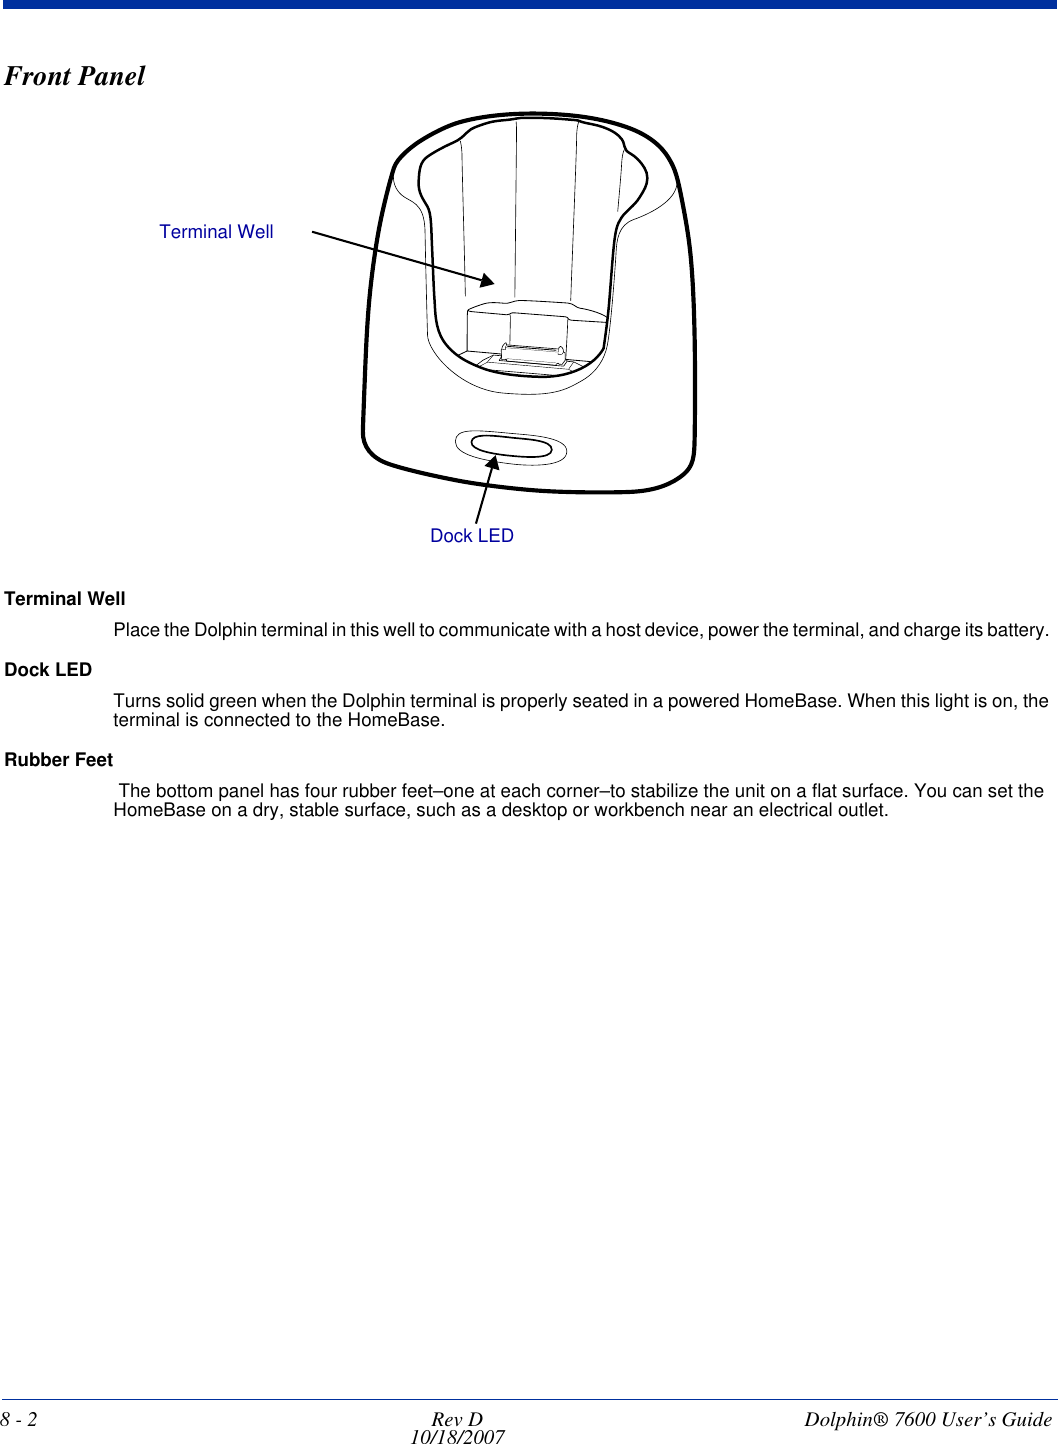
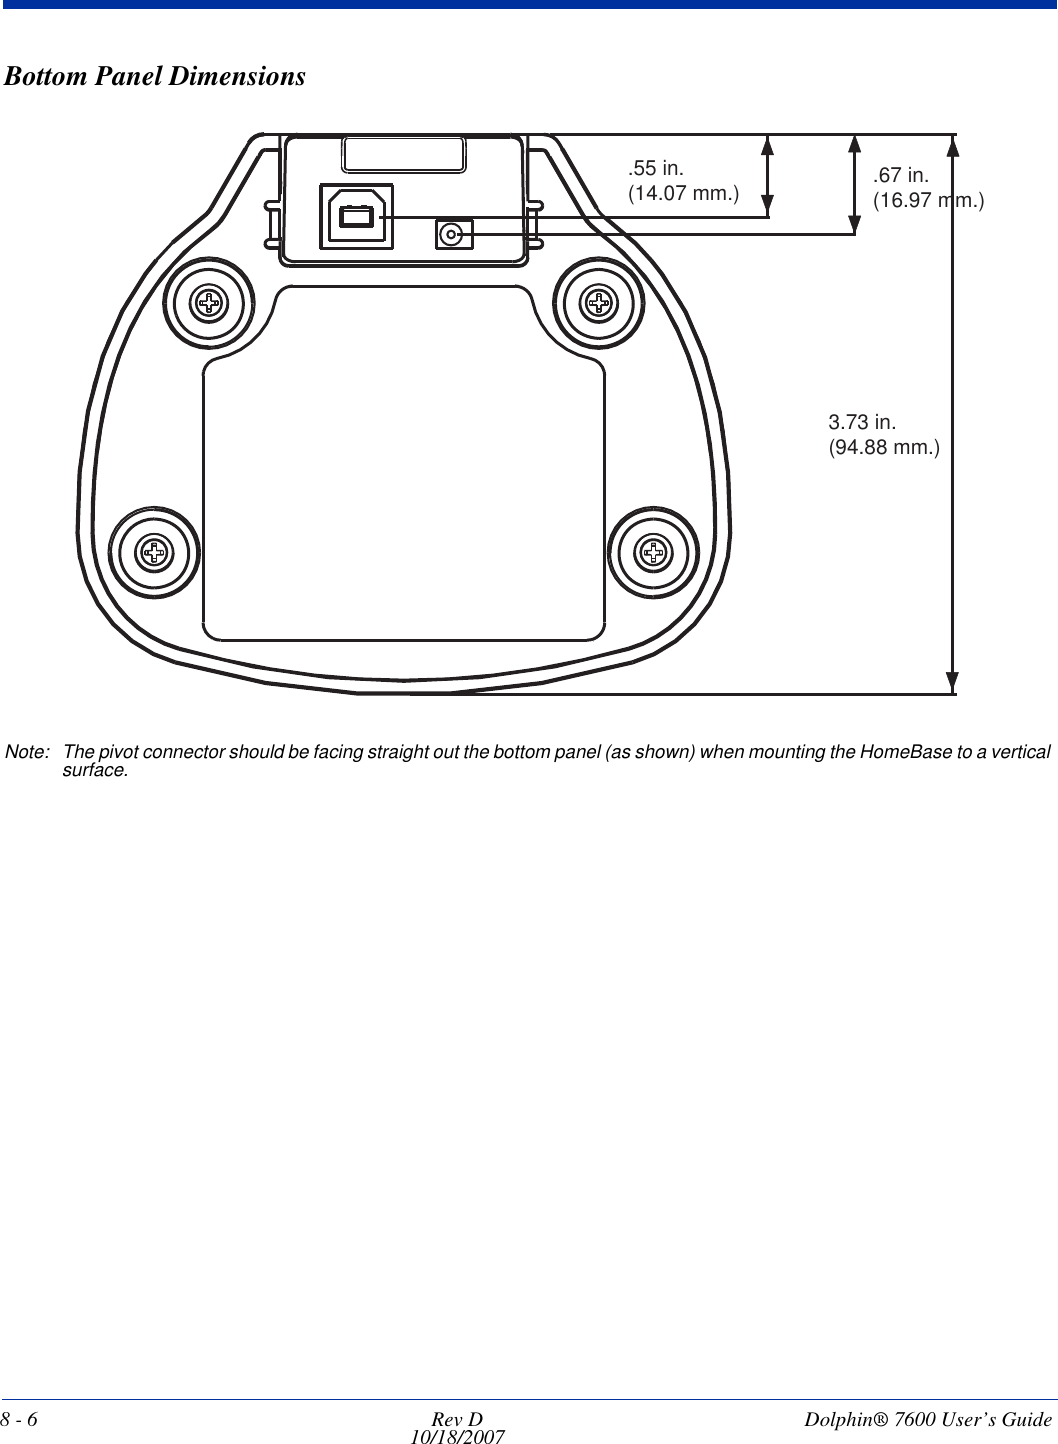
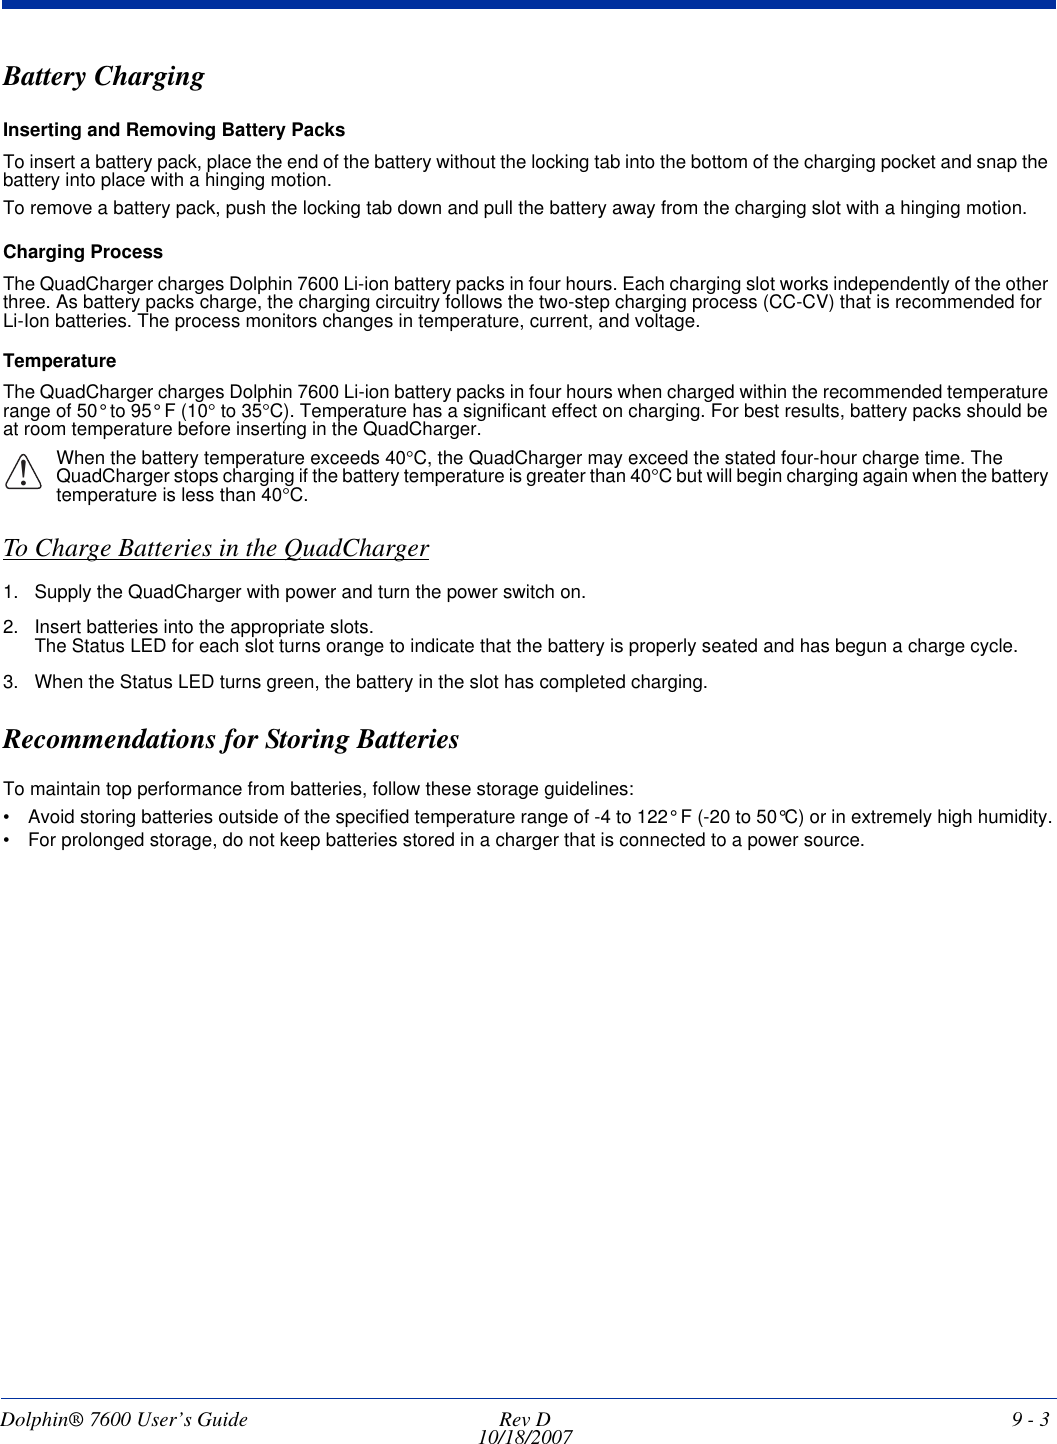
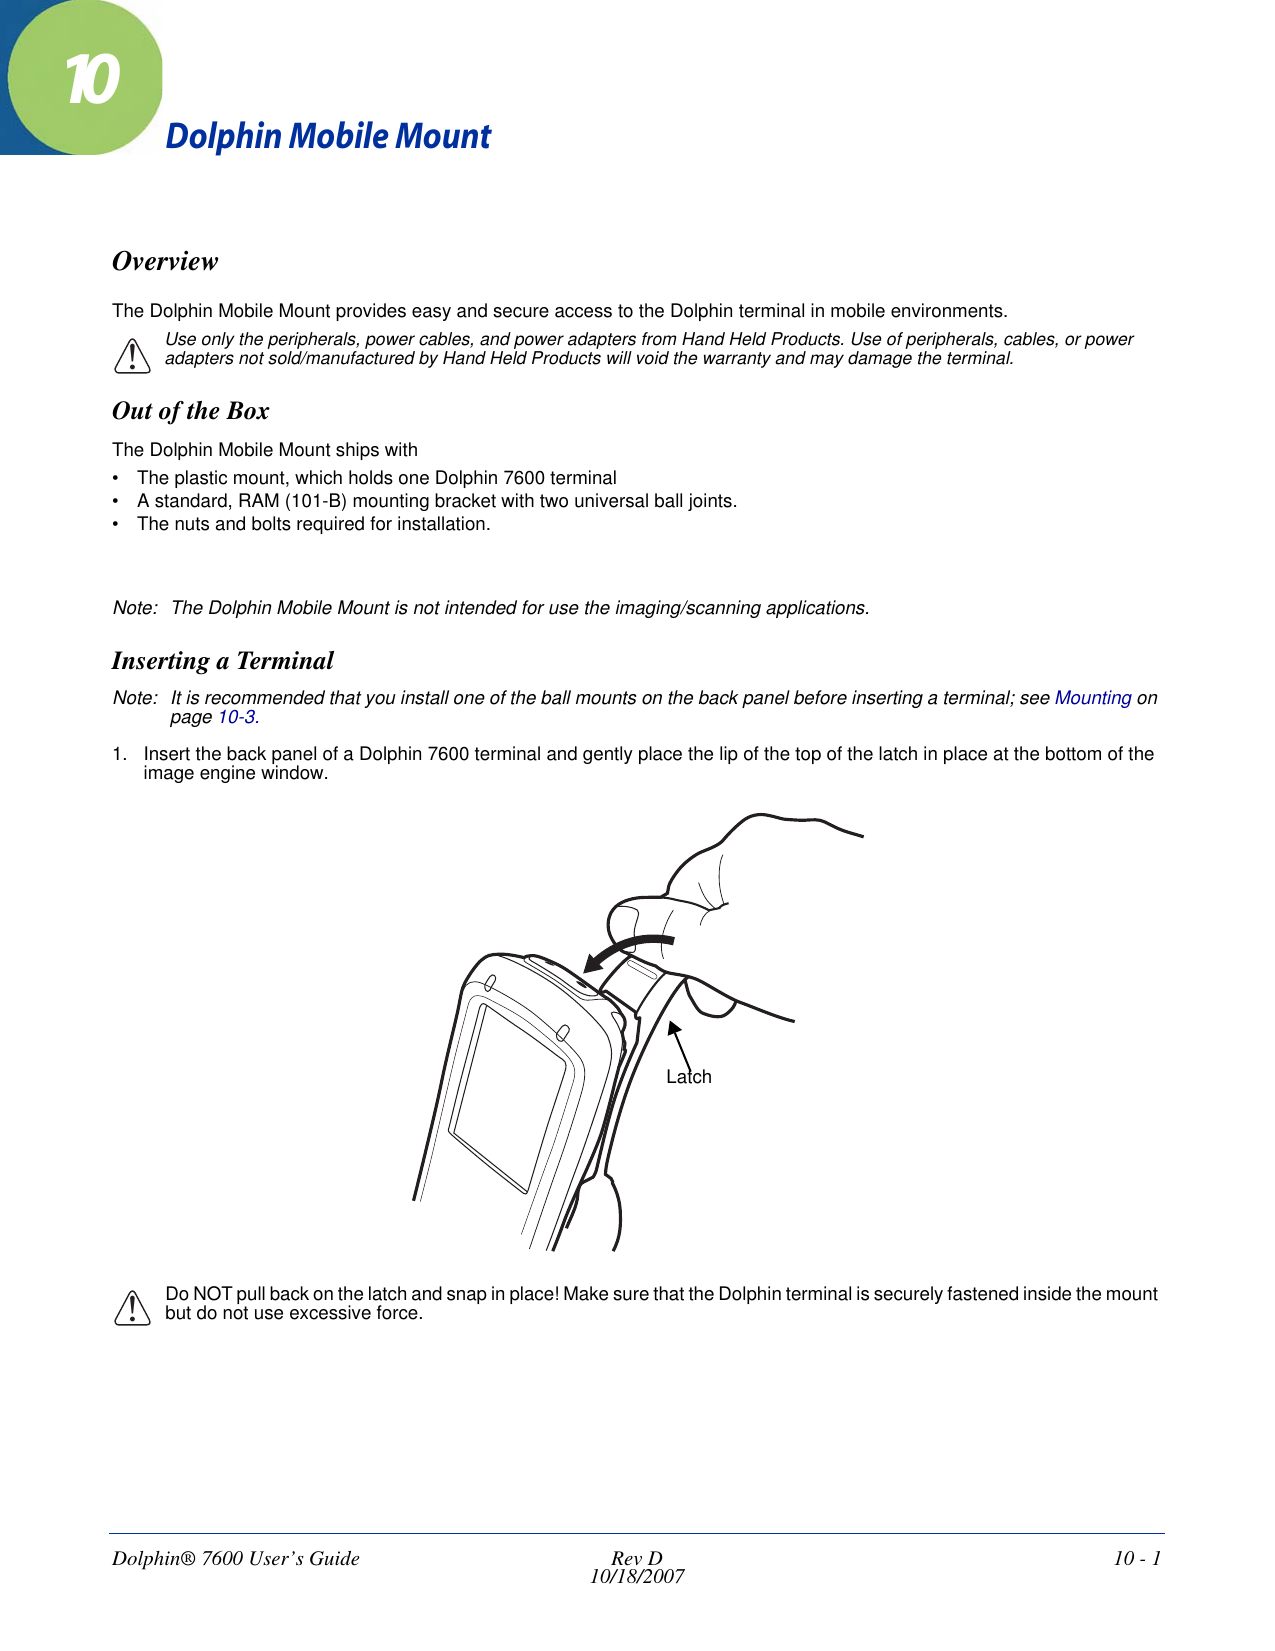
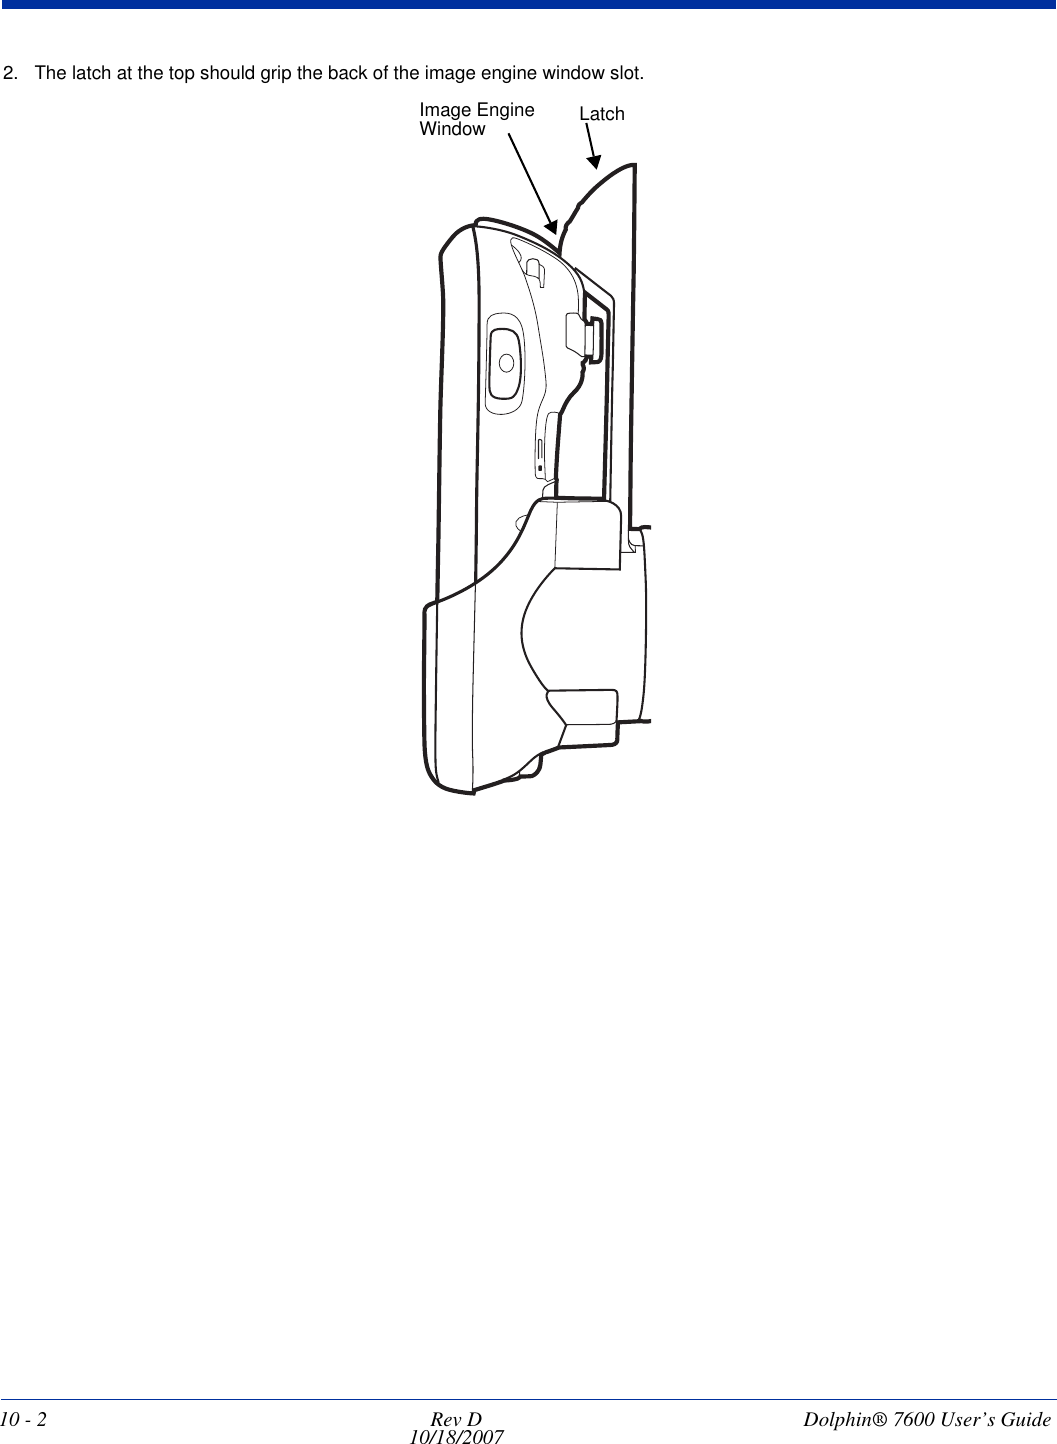
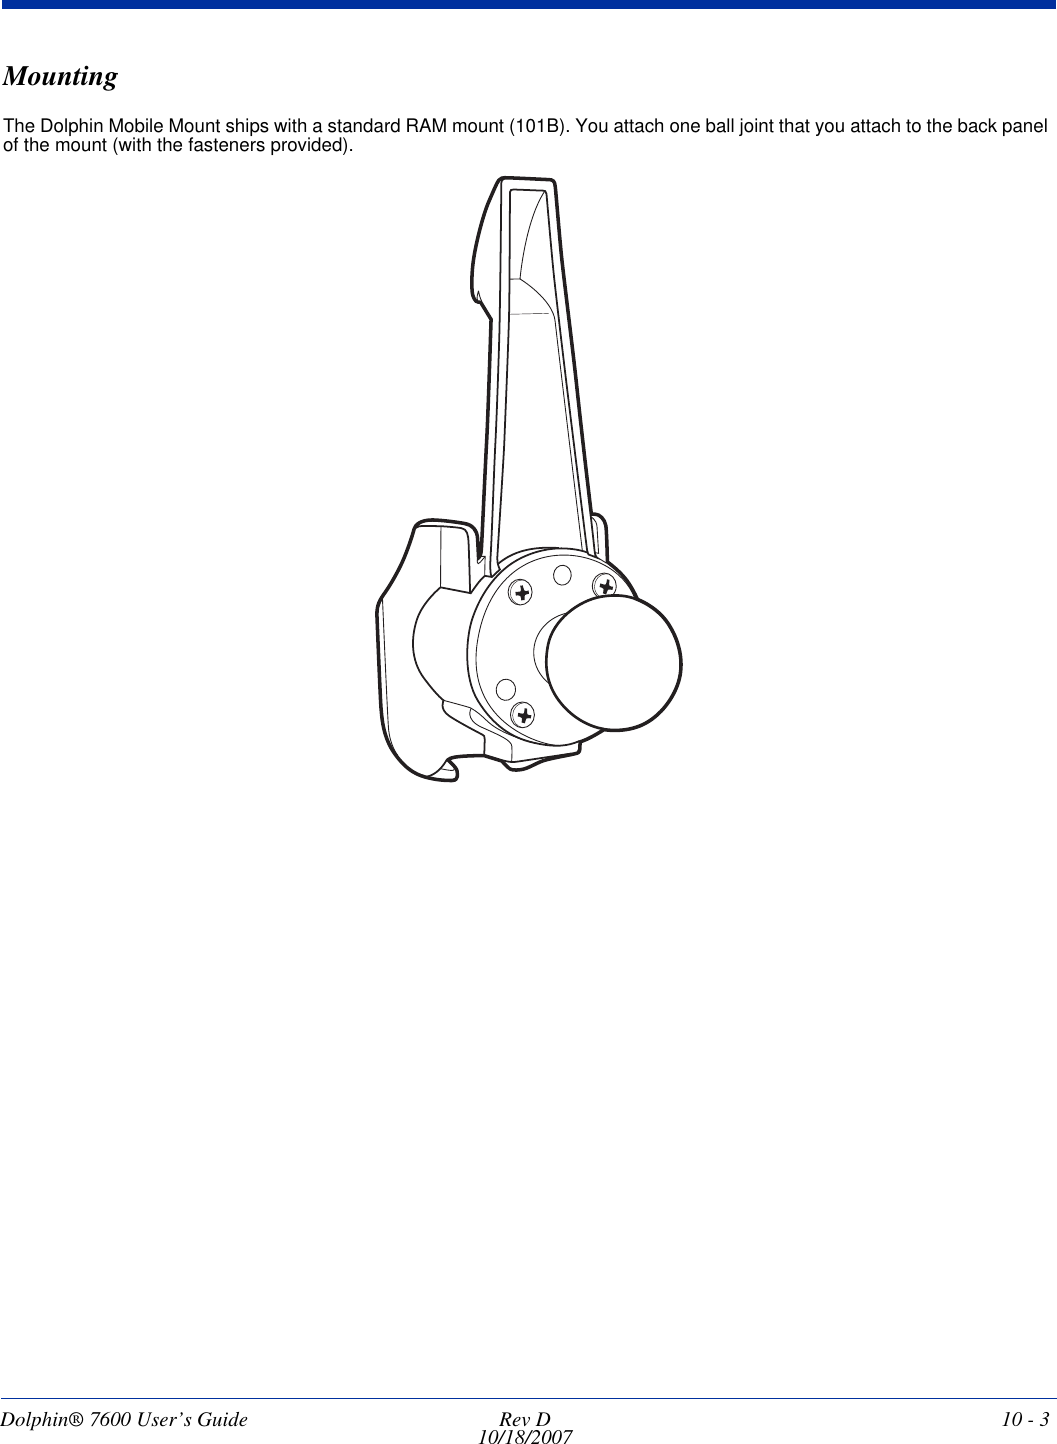
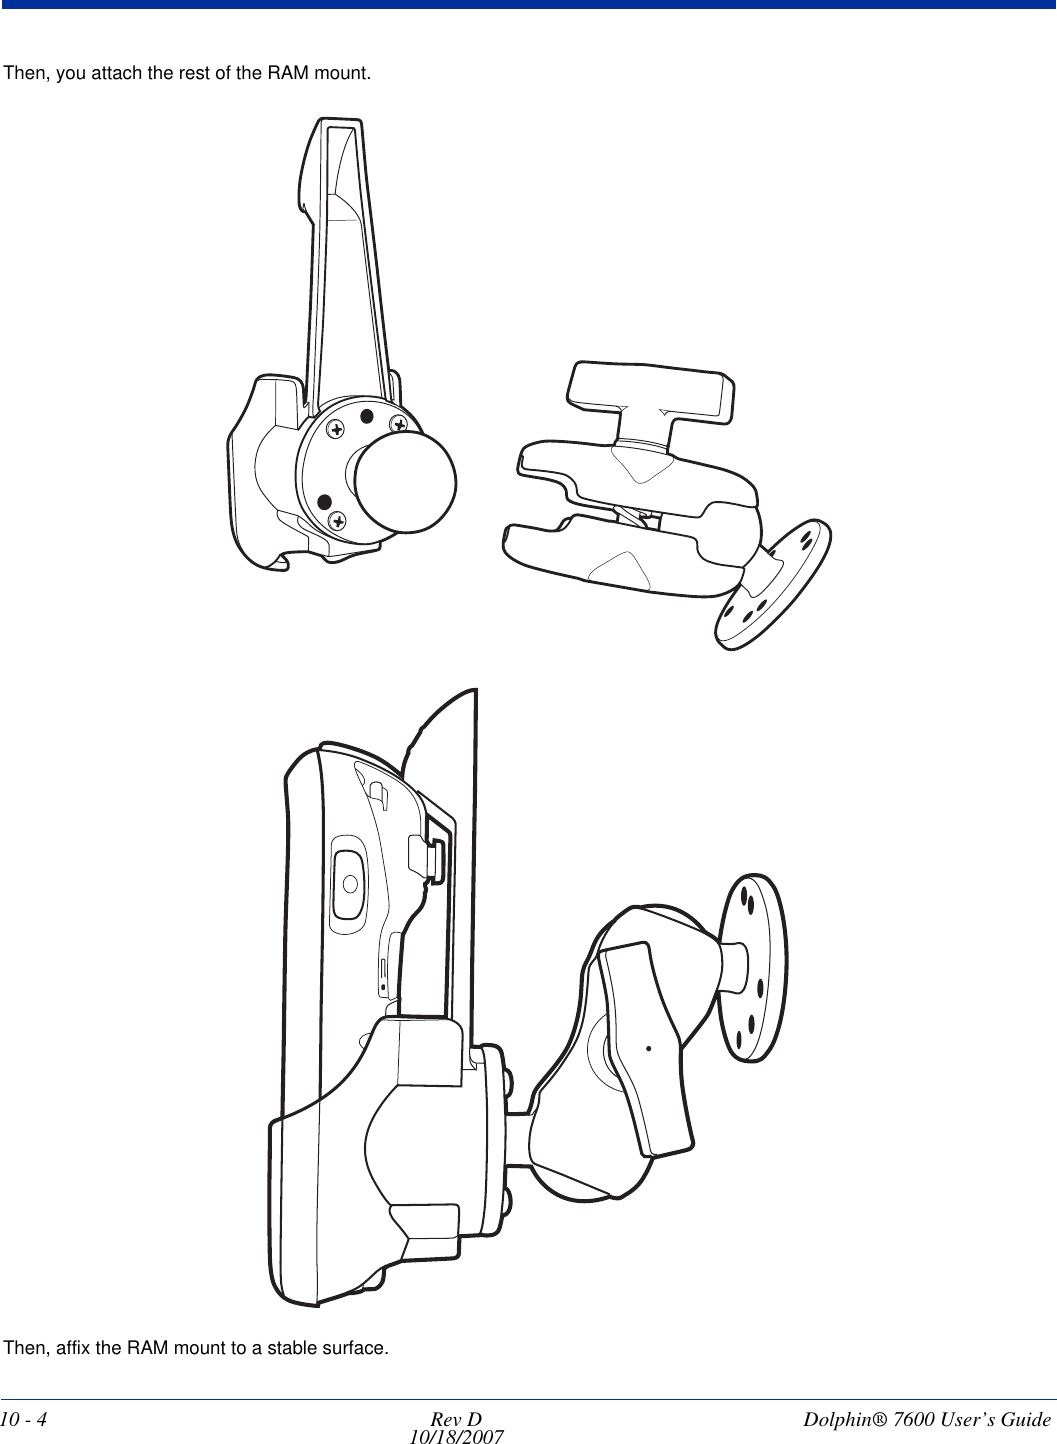
![6 - 8 Rev D10/18/2007 Dolphin® 7600 User’s GuideInfrared CommunicationThe BT Service tab beams files and data between the terminal and other devices equipped via the IrDA port. The maximum data transfer speed is 115 Kbps.IrDA Port Location Transferring Files and InformationNote: We recommend disabling the Bluetooth radio before transferring data via infrared. If the Bluetooth radio remains enabled, the Beam File function will pick up MAC addresses as well as IrDA ports.1. Arrange the hardware so that the infrared port of the Dolphin terminal is aligned with and in range of the infrared port of the other device.2. Tap the Bluetooth icon to open the Bluetooth Manager and tap on the BT Service Tab (see page 7-2). 3. Tap Beam File. ORTap Start > Programs > Beam File.4. The device begins scanning for IrDA enabled devices and displays them on the screen with the device ID and “[IrDA].” 5. Tap to browse for a file to transfer. Navigate to the file location, select it, and tap OK. The name of the file path appears in the File field.IrDA Port](https://usermanual.wiki/Honeywell/760002.user-manual/User-Guide-873421-Page-66.png)