Honeywell 760002 Industrial PDA with Scanner User Manual 76 CE UG
Honeywell International Inc Industrial PDA with Scanner 76 CE UG
UserManual.wiki
>
Honeywell
>
760002 User Manual
>
User manual
Contents
1.
Manual
2.
User manual
3.
user manual
User manual
Navigation menu
Upload a User Manual
Namespaces
Wiki Guide
HTML
PDF
Info
Views
User Manual
Discussion / Help
Navigation

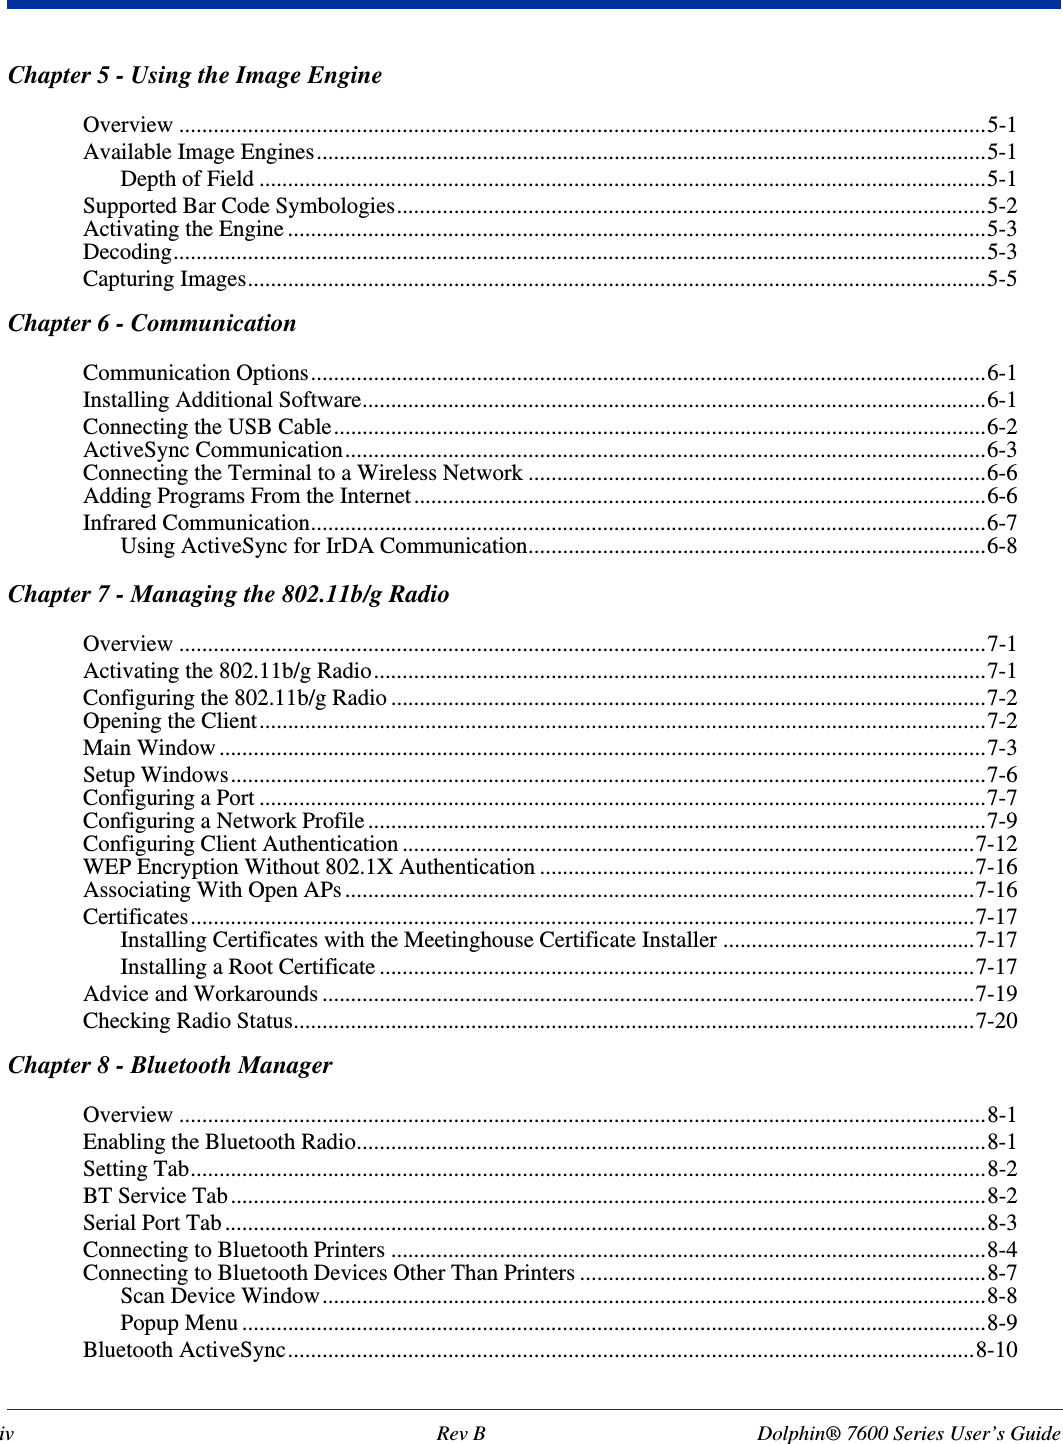

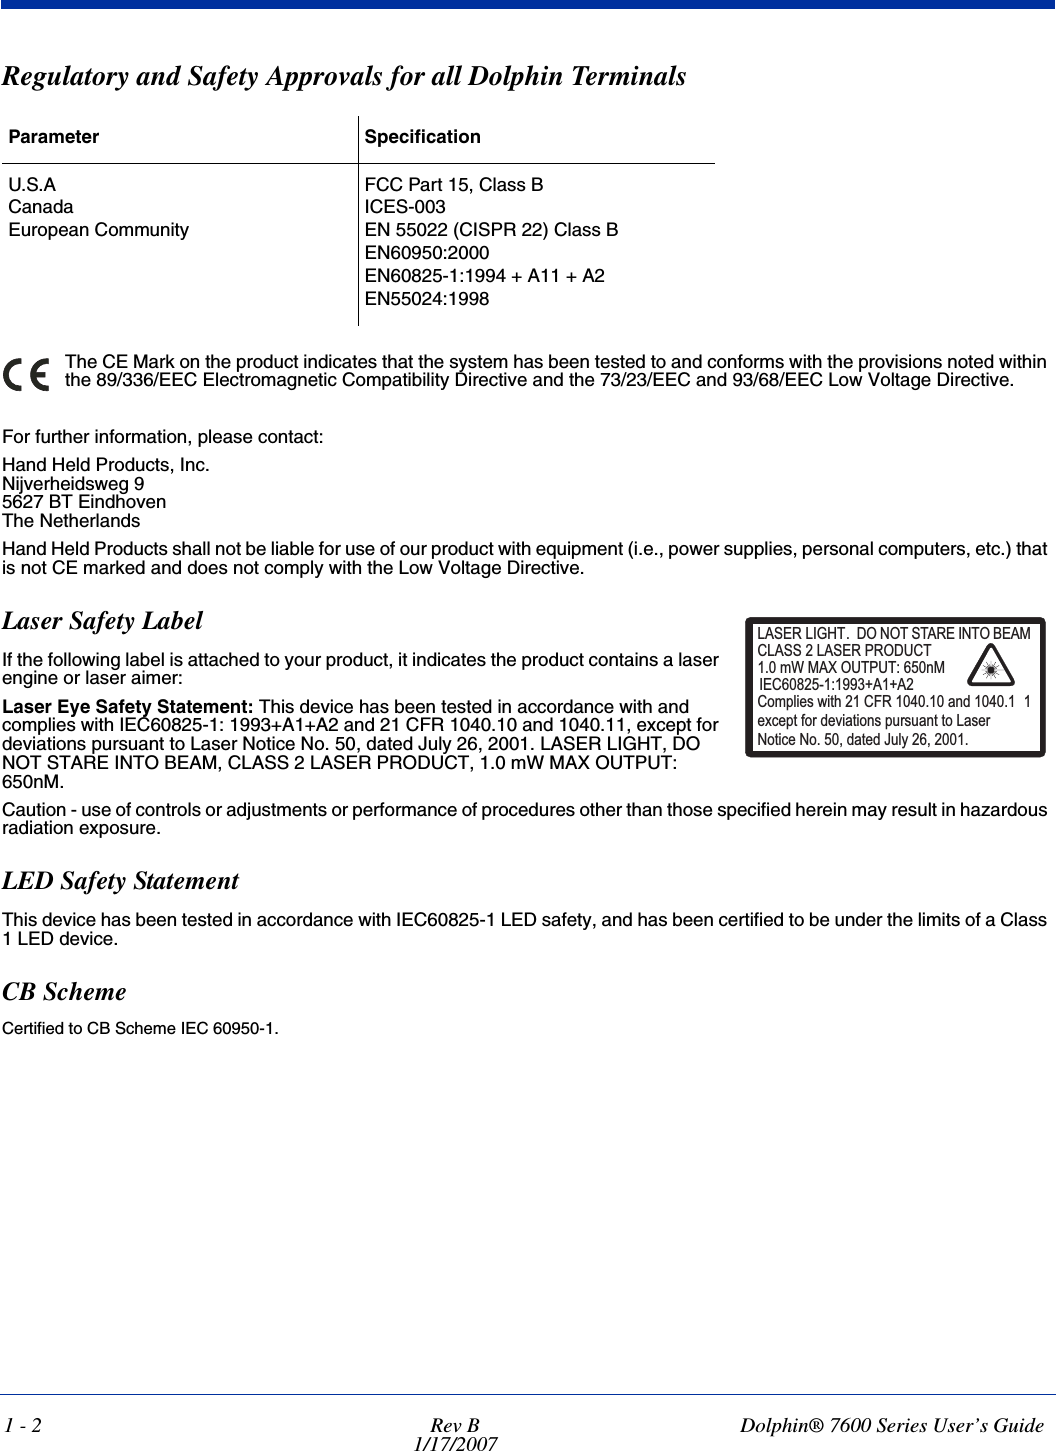

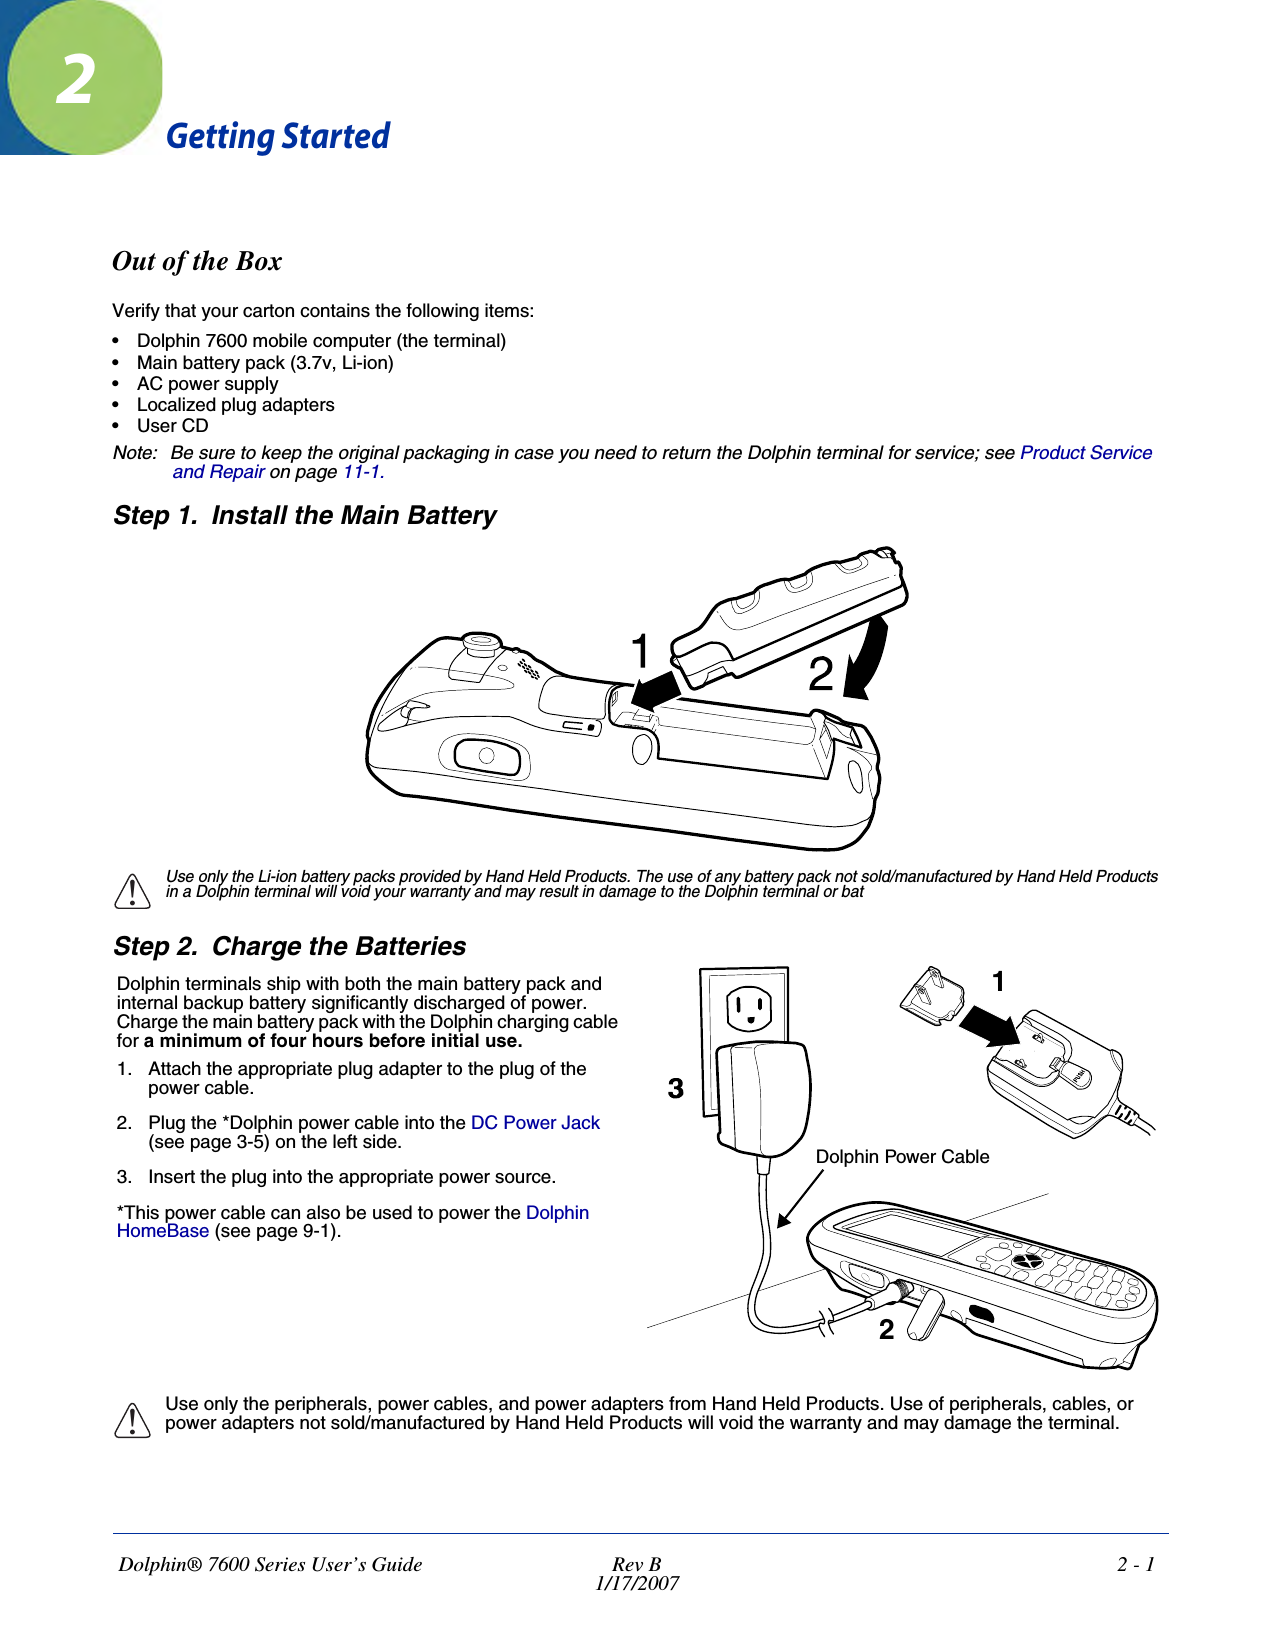

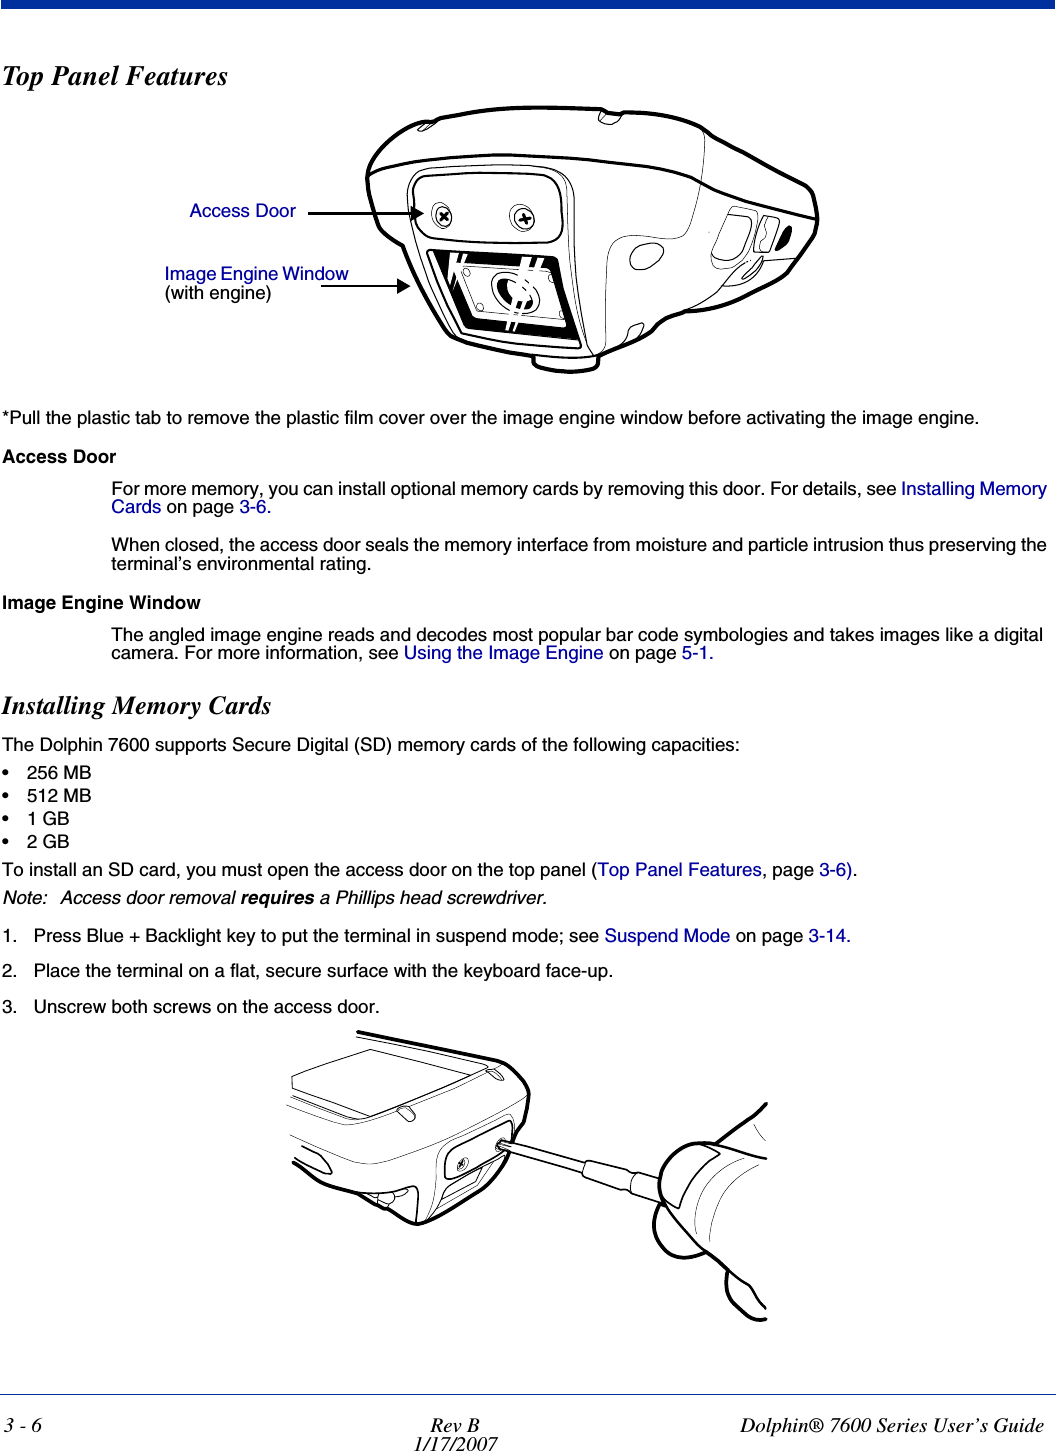


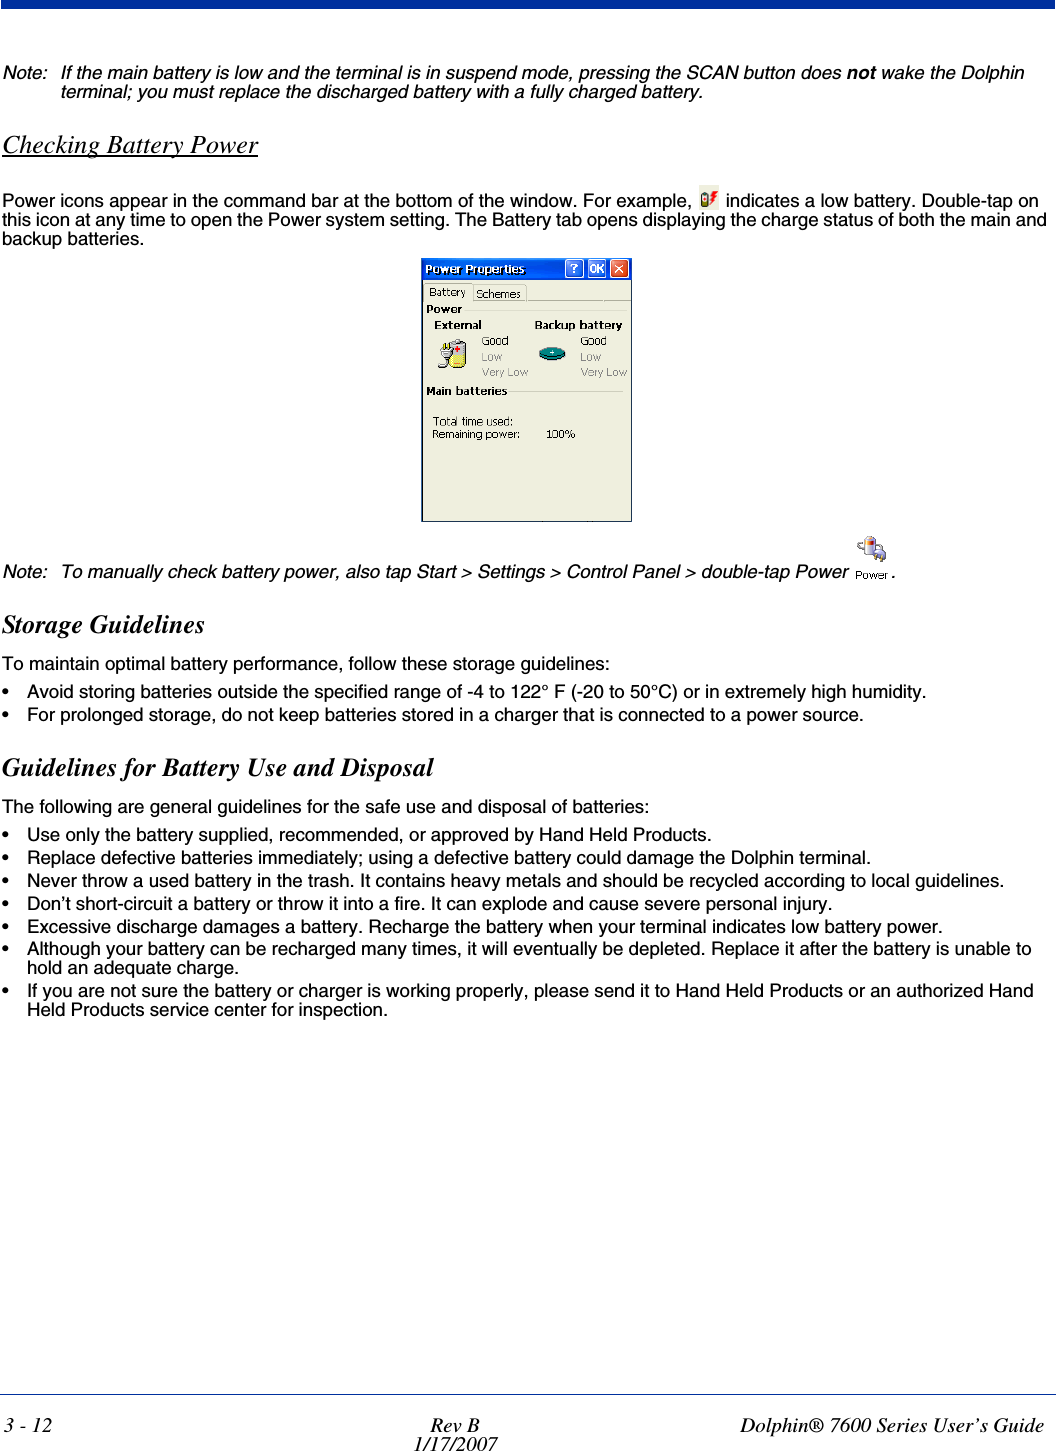


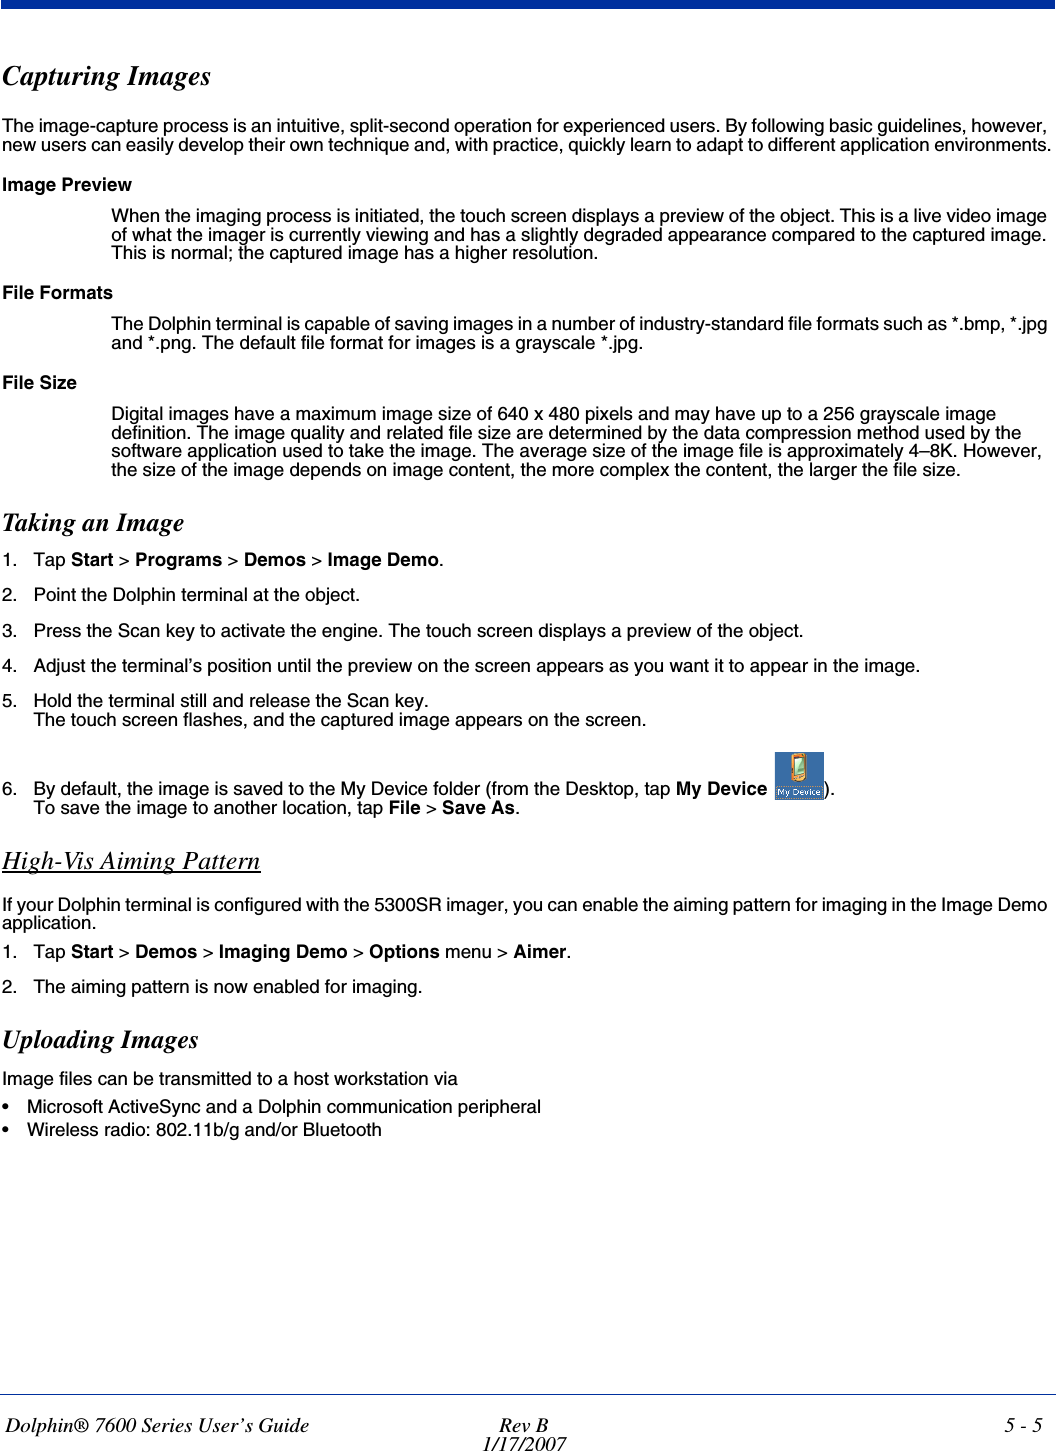


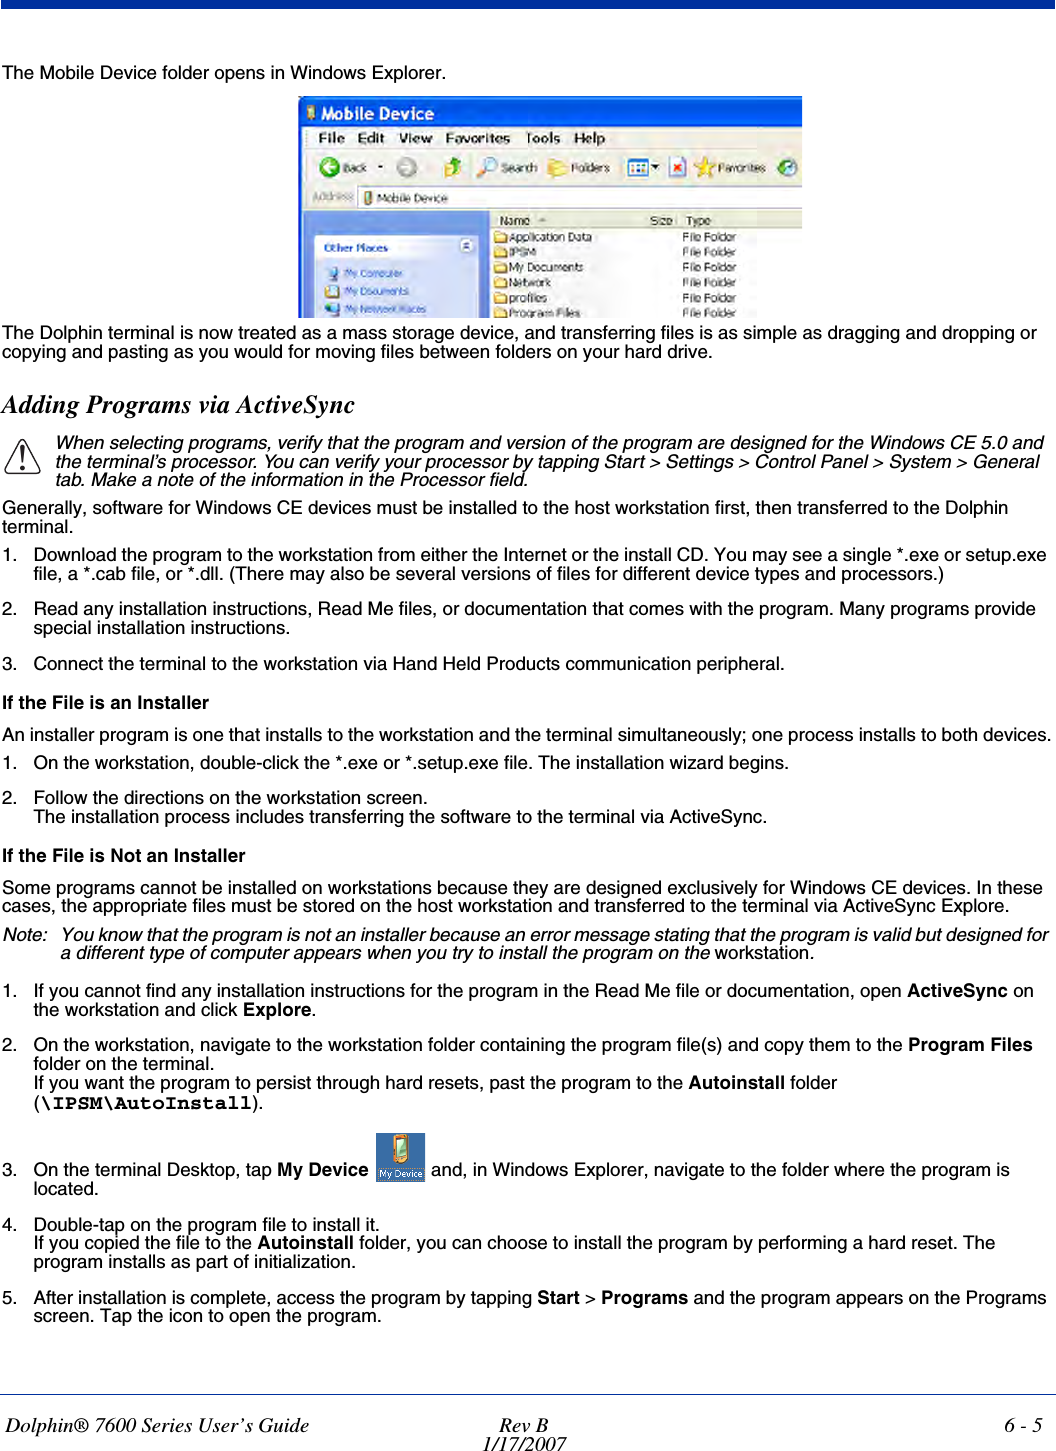
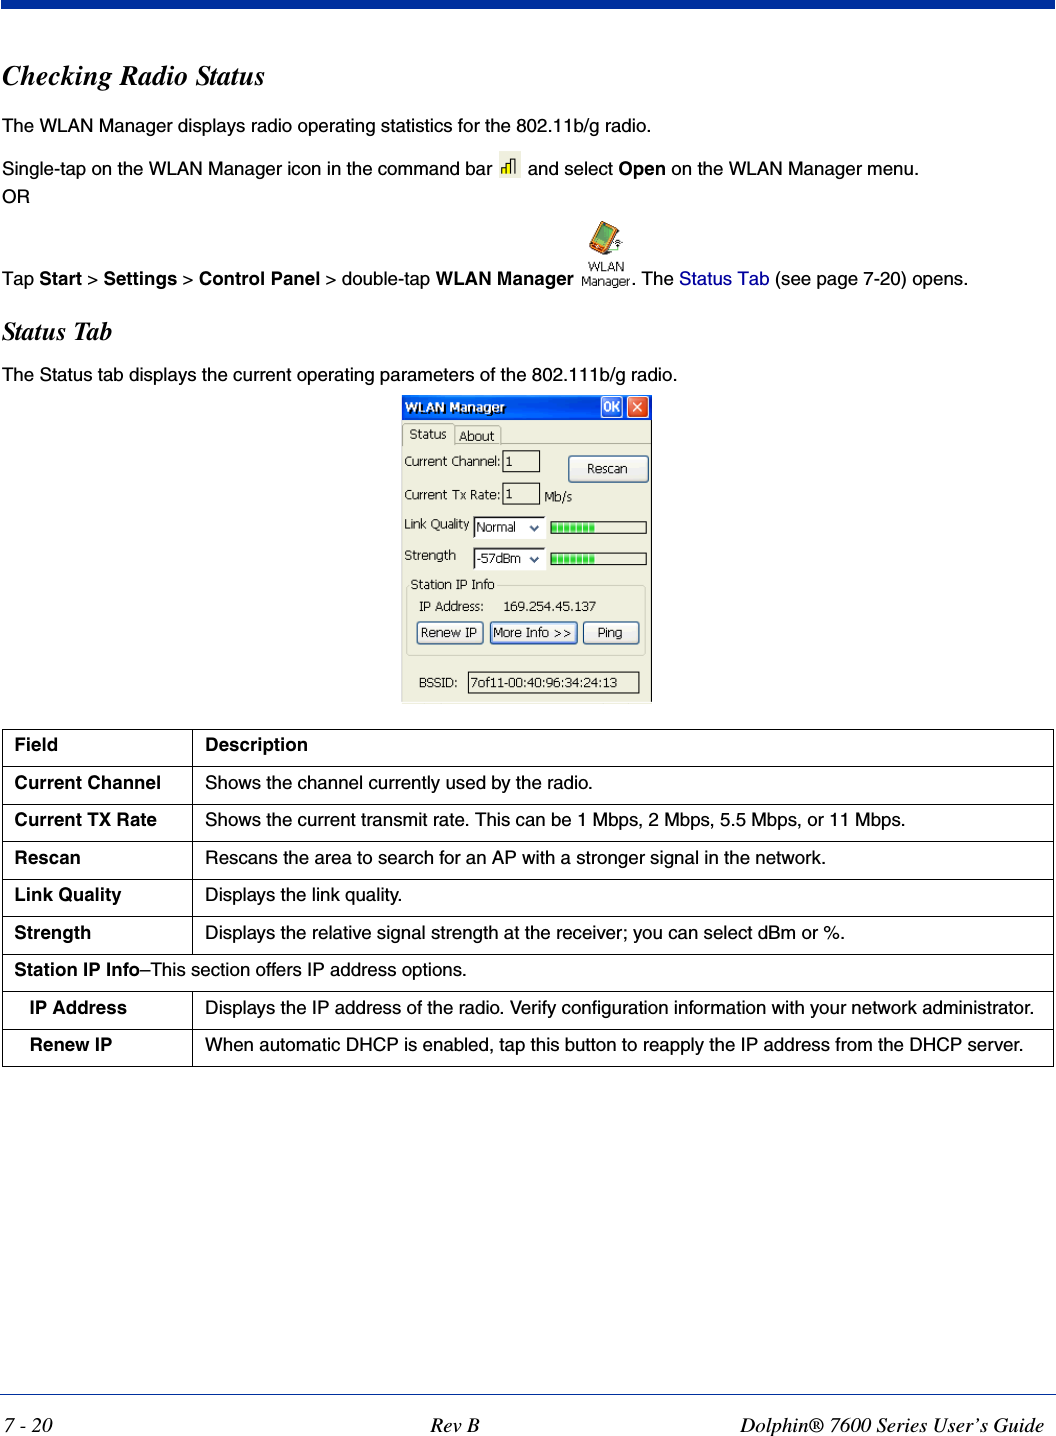
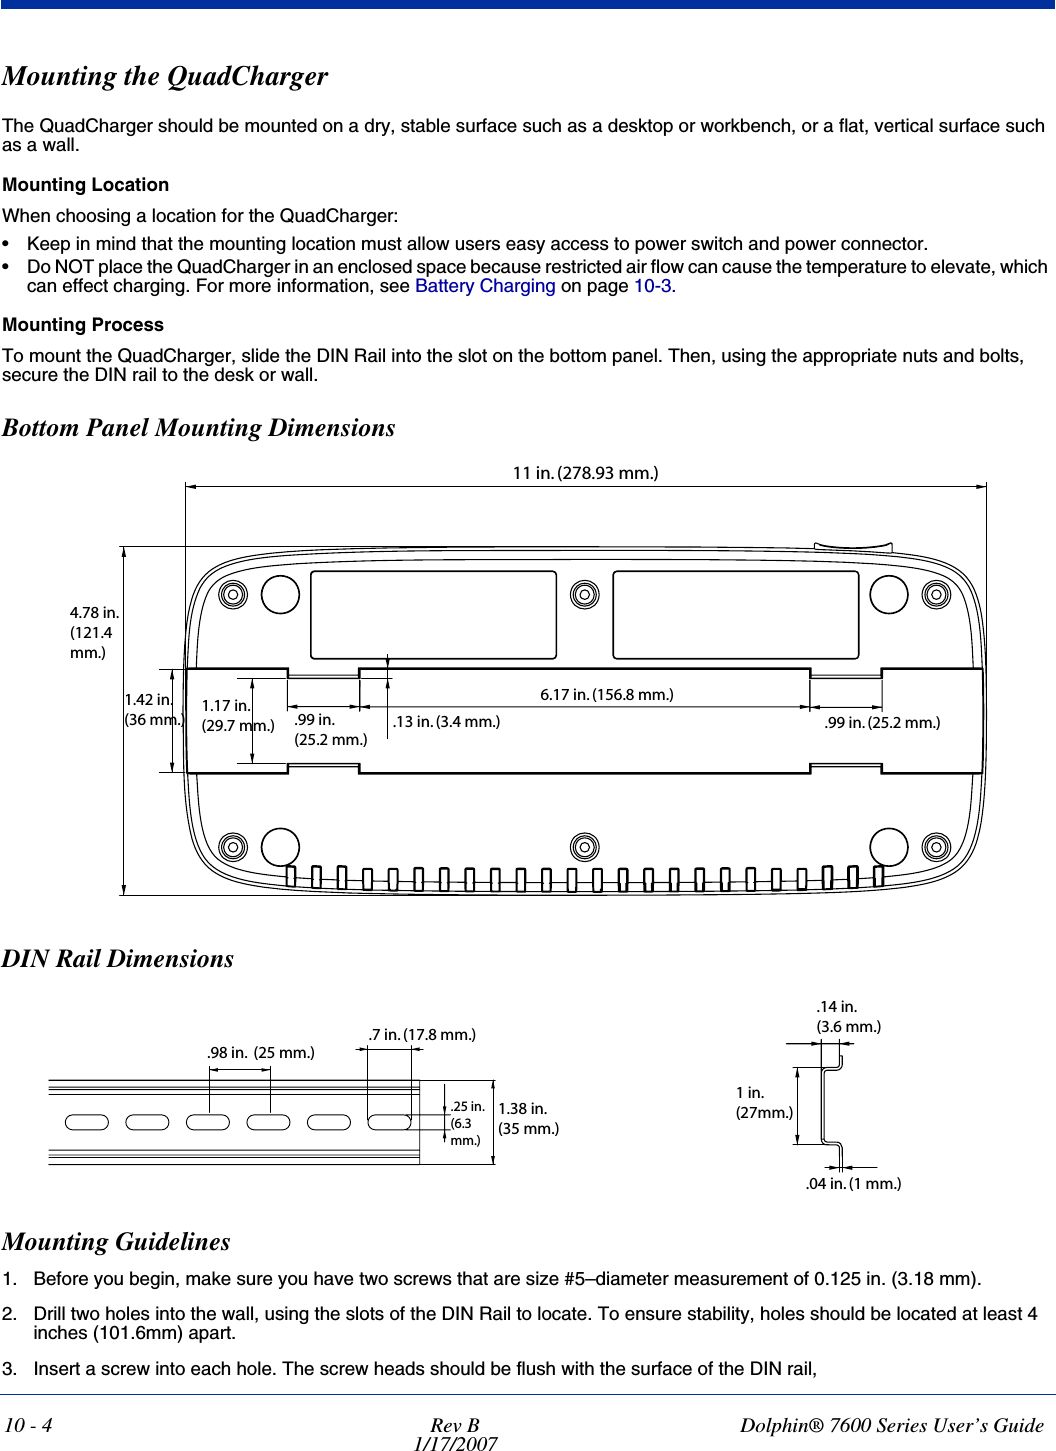
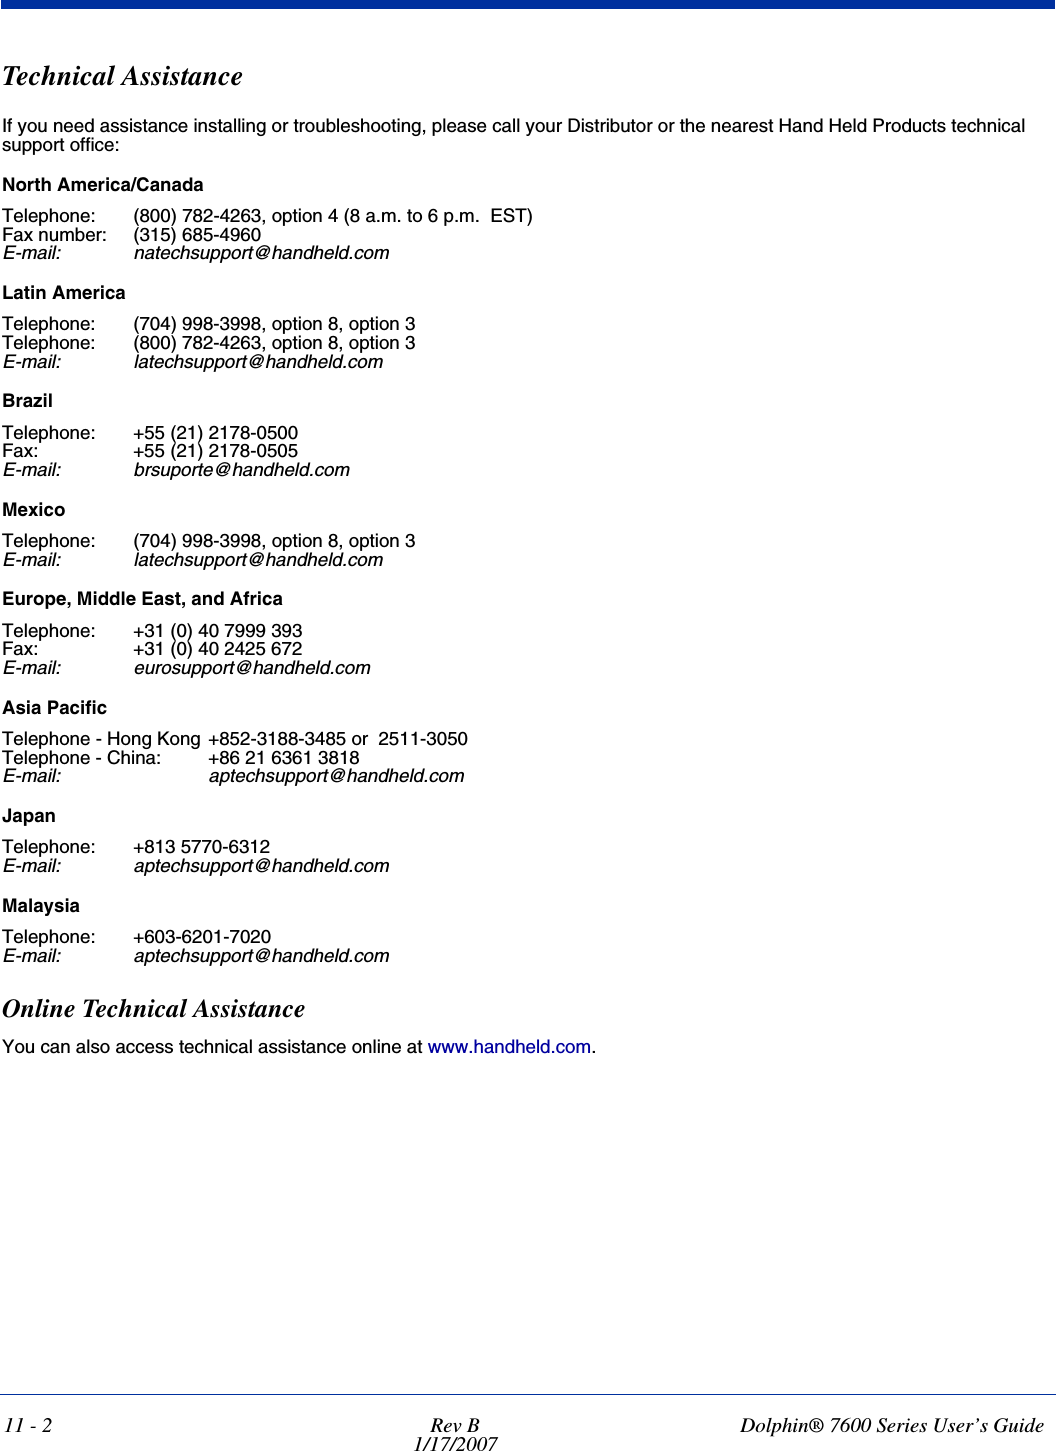
![Dolphin® 7600 Series User’s Guide Rev B1/17/20076 - 7Infrared CommunicationThe BT Service tab beams files and data between the terminal and other devices equipped via the IrDA port. The maximum data transfer speed is 115 Kbps.IrDA Port Location Transferring Files and InformationNote: We recommend disabling the Bluetooth radio before transferring data via infrared. If the Bluetooth radio remains enabled, the Beam File function will pick up MAC addresses as well as IrDA ports.1. Arrange the hardware so that the infrared port of the Dolphin terminal is aligned with and in range of the infrared port of the other device.2. Tap the Bluetooth icon to open the Bluetooth Manager and tap on the BT Service Tab (see page 8-2). Tap Beam File. ORTap Start > Programs > Beam File.3. The device begins scanning for IrDA enabled devices and displays them on the screen with the device ID and “[IrDA].” 4. Tap to browse for a file to transfer. Navigate to the file location, select it, and tap OK. The name of the file path appears in the File field.5. Select a device in the list and tap Tap to Send. IrDA Port](https://usermanual.wiki/Honeywell/760002.User-manual/User-Guide-851771-Page-55.png)

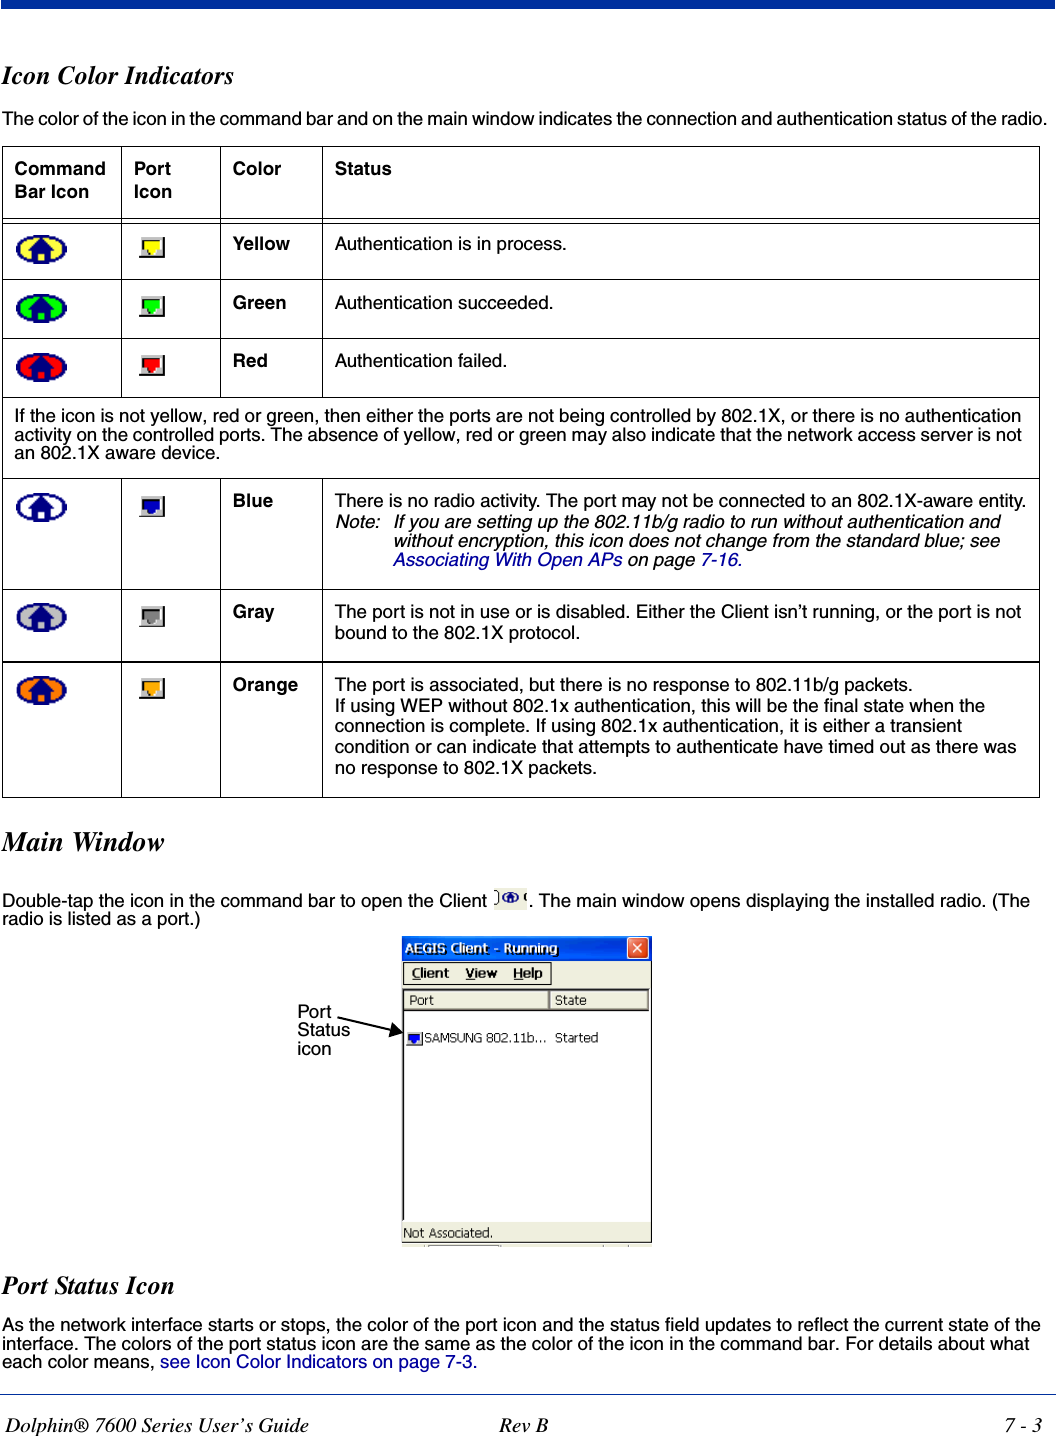
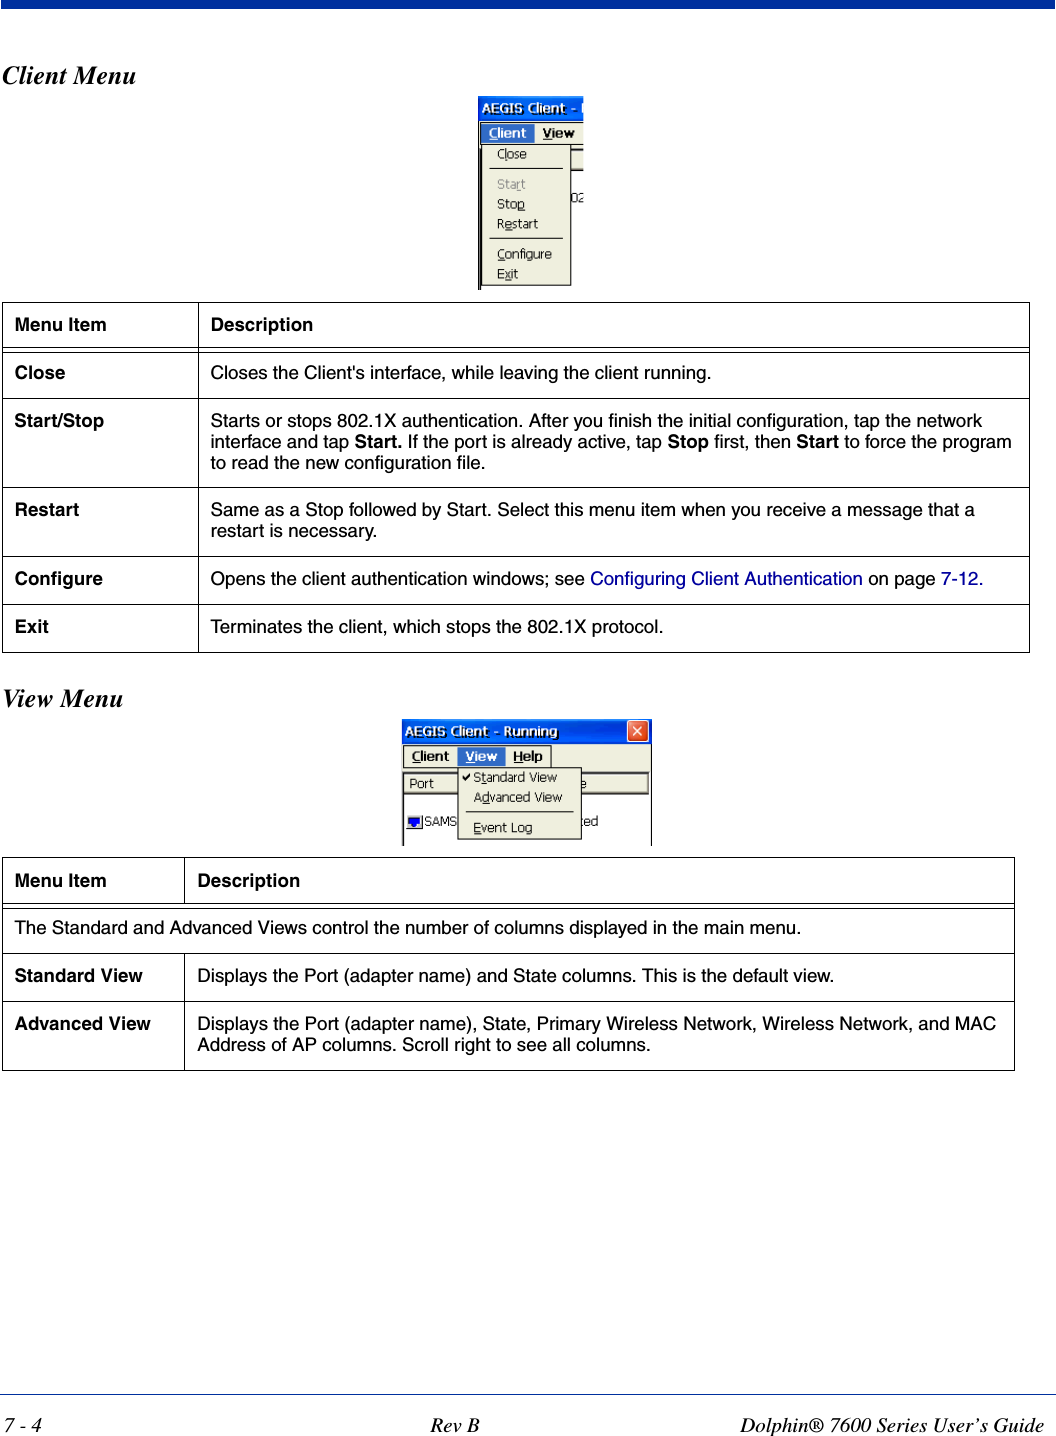
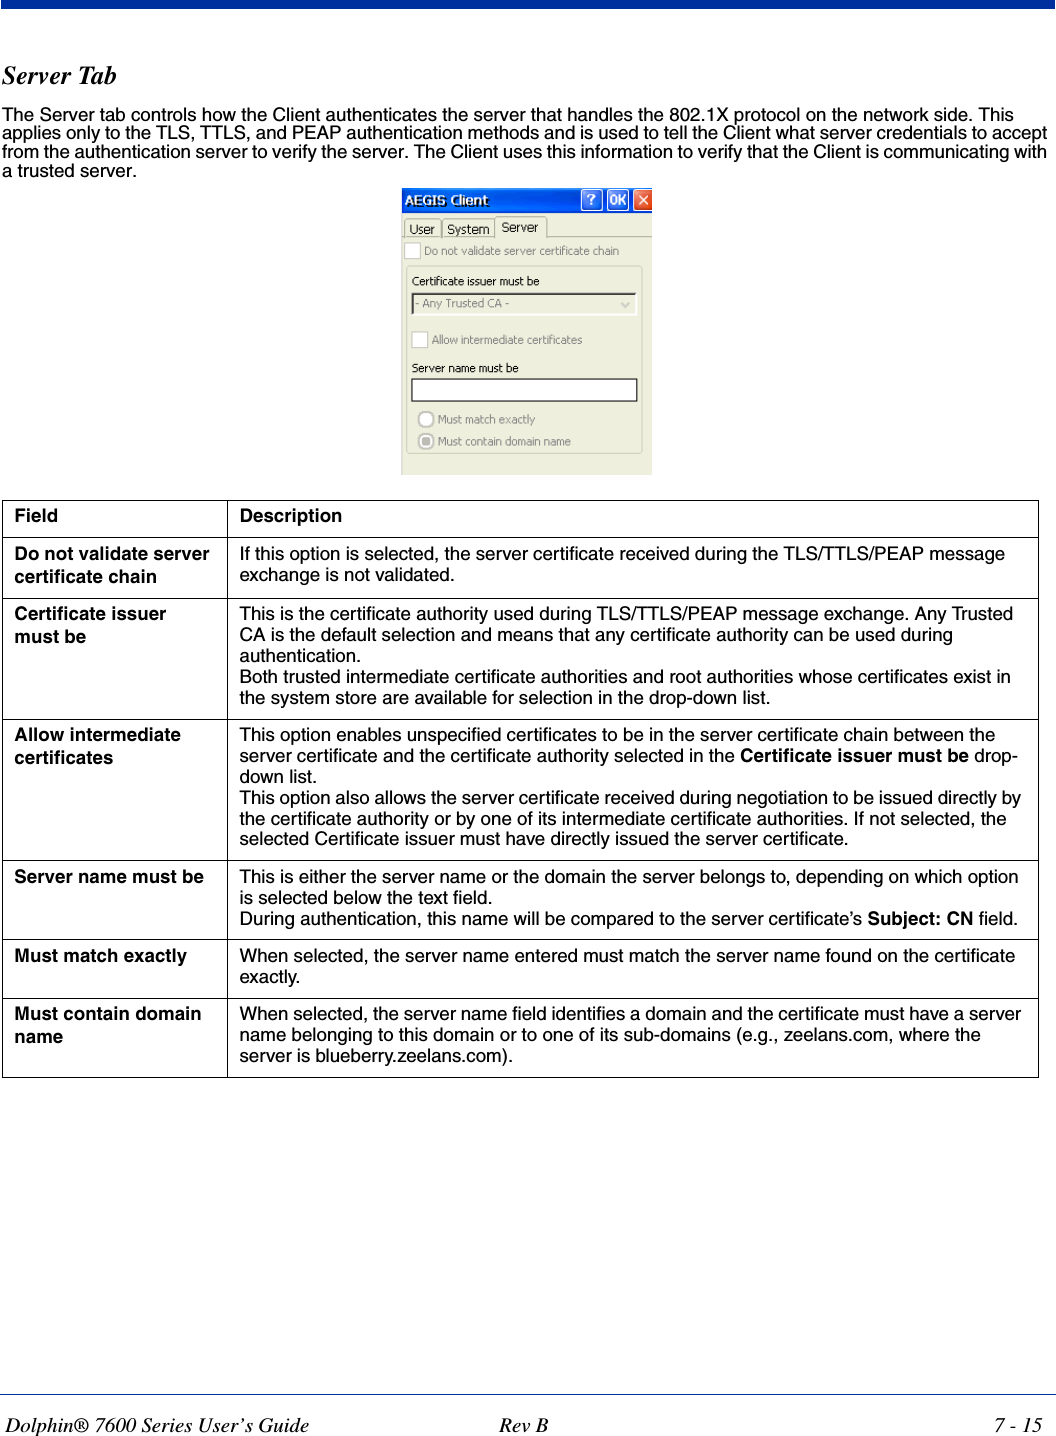
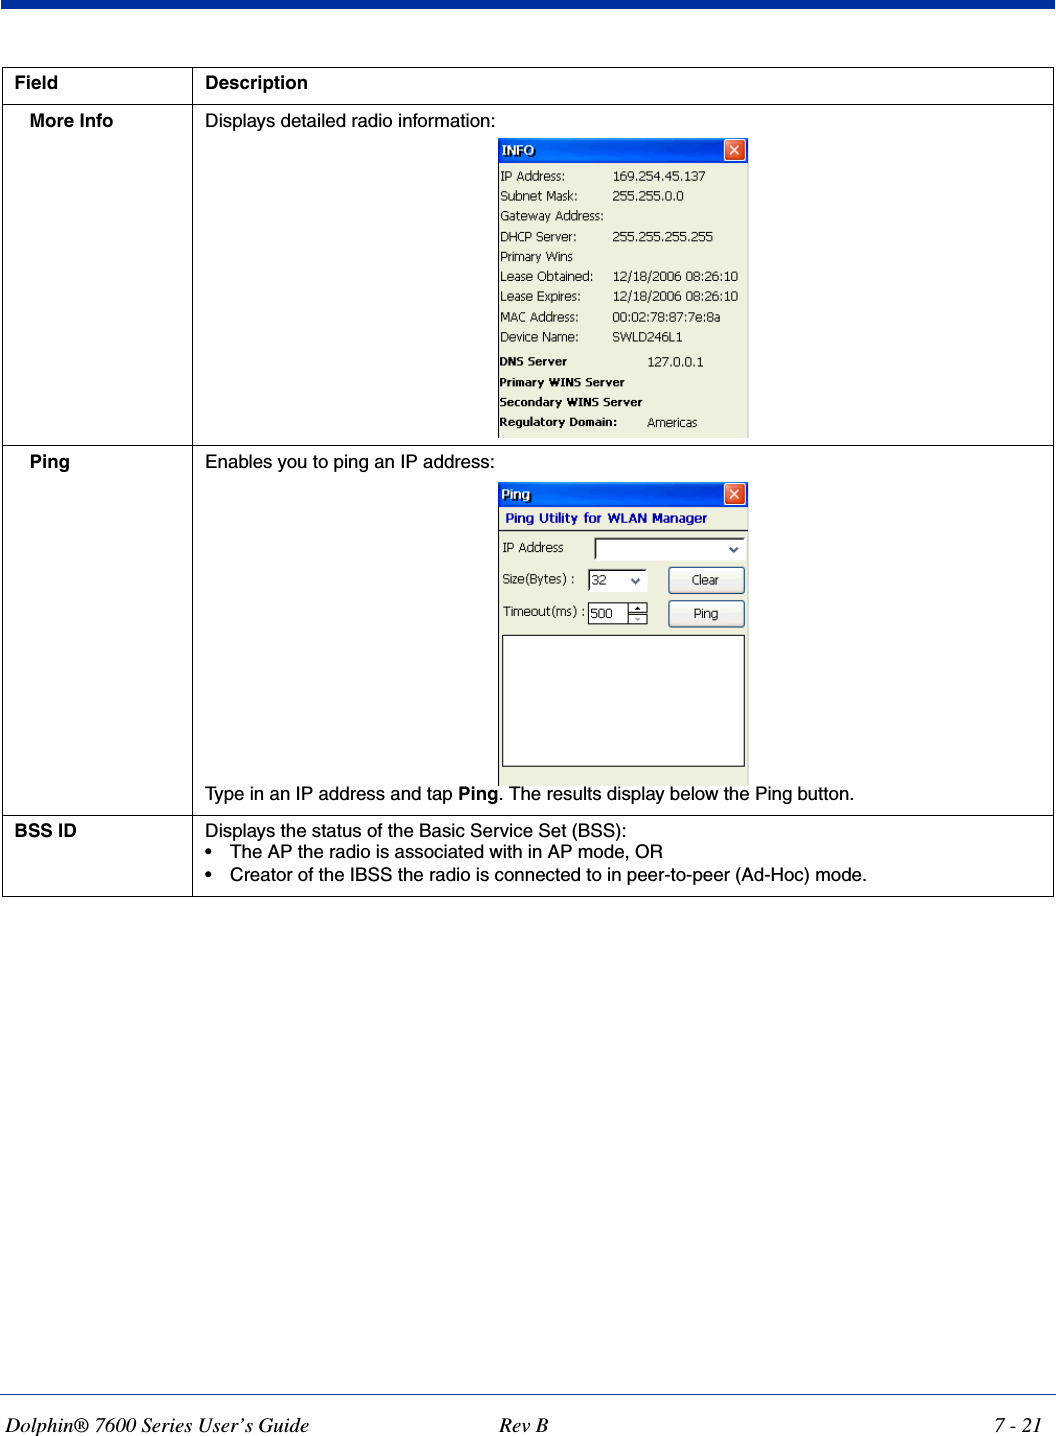
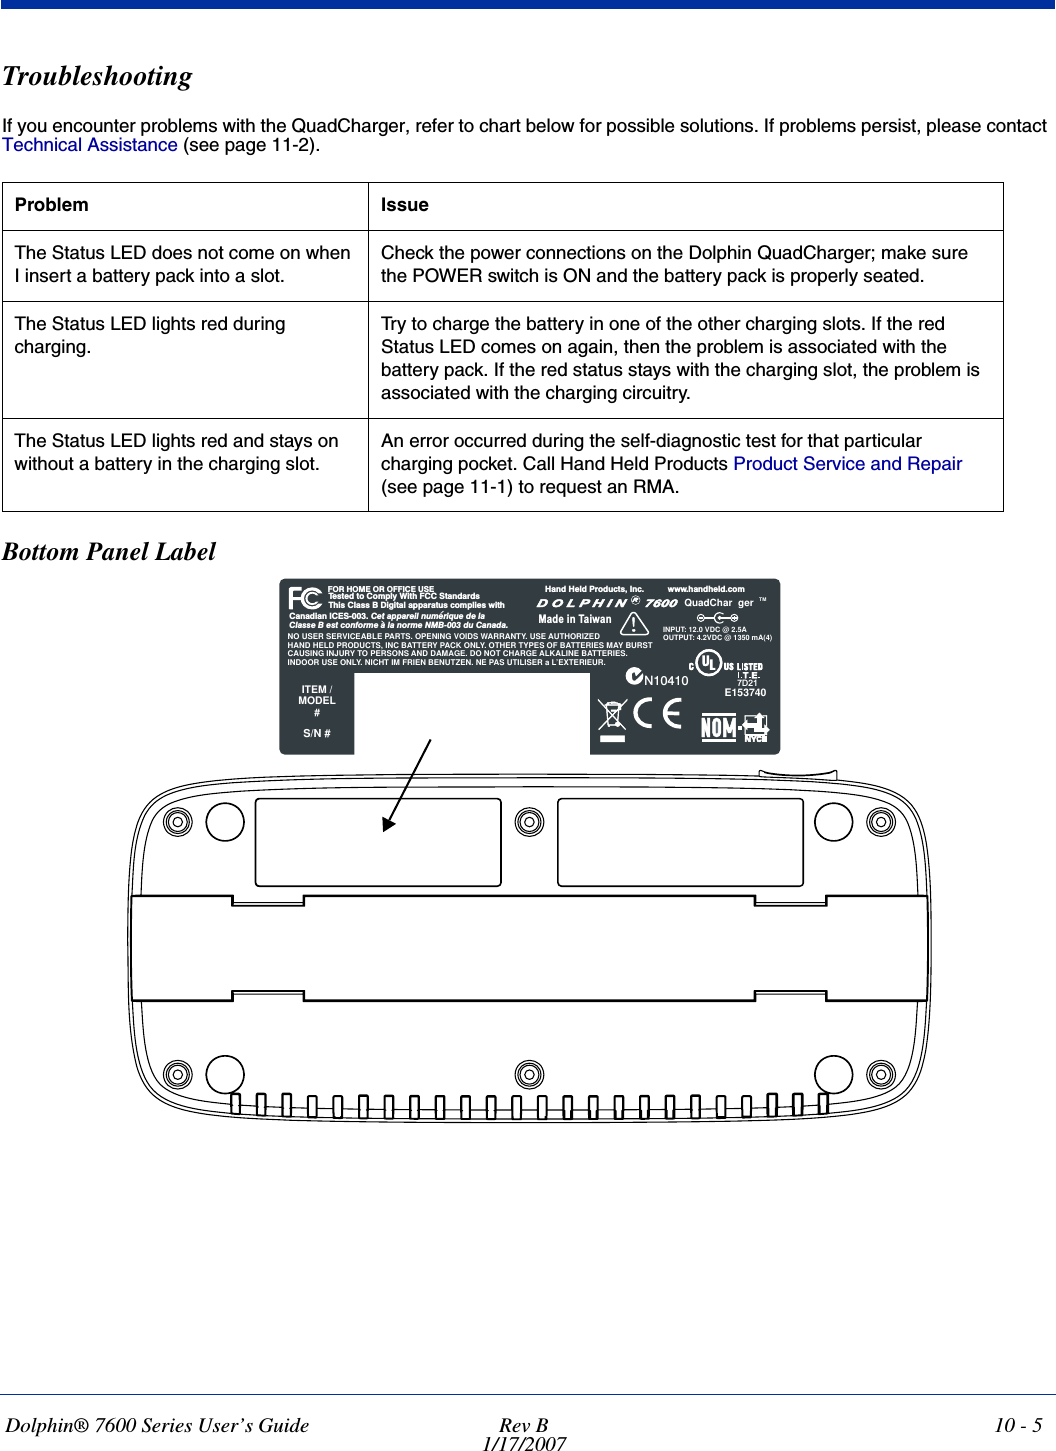
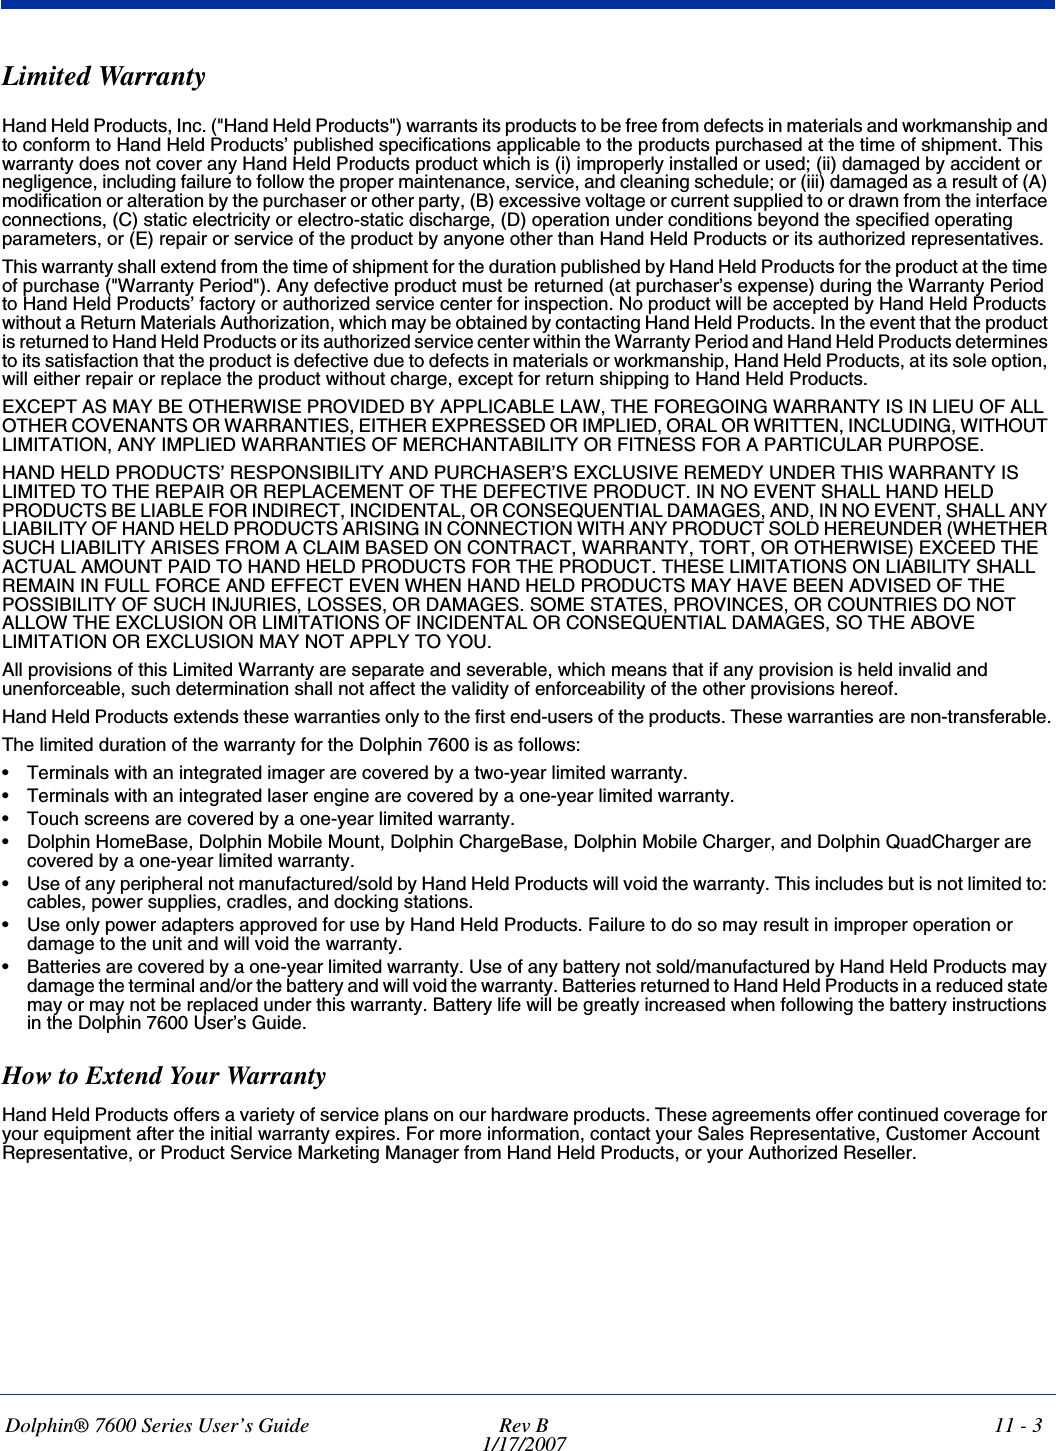
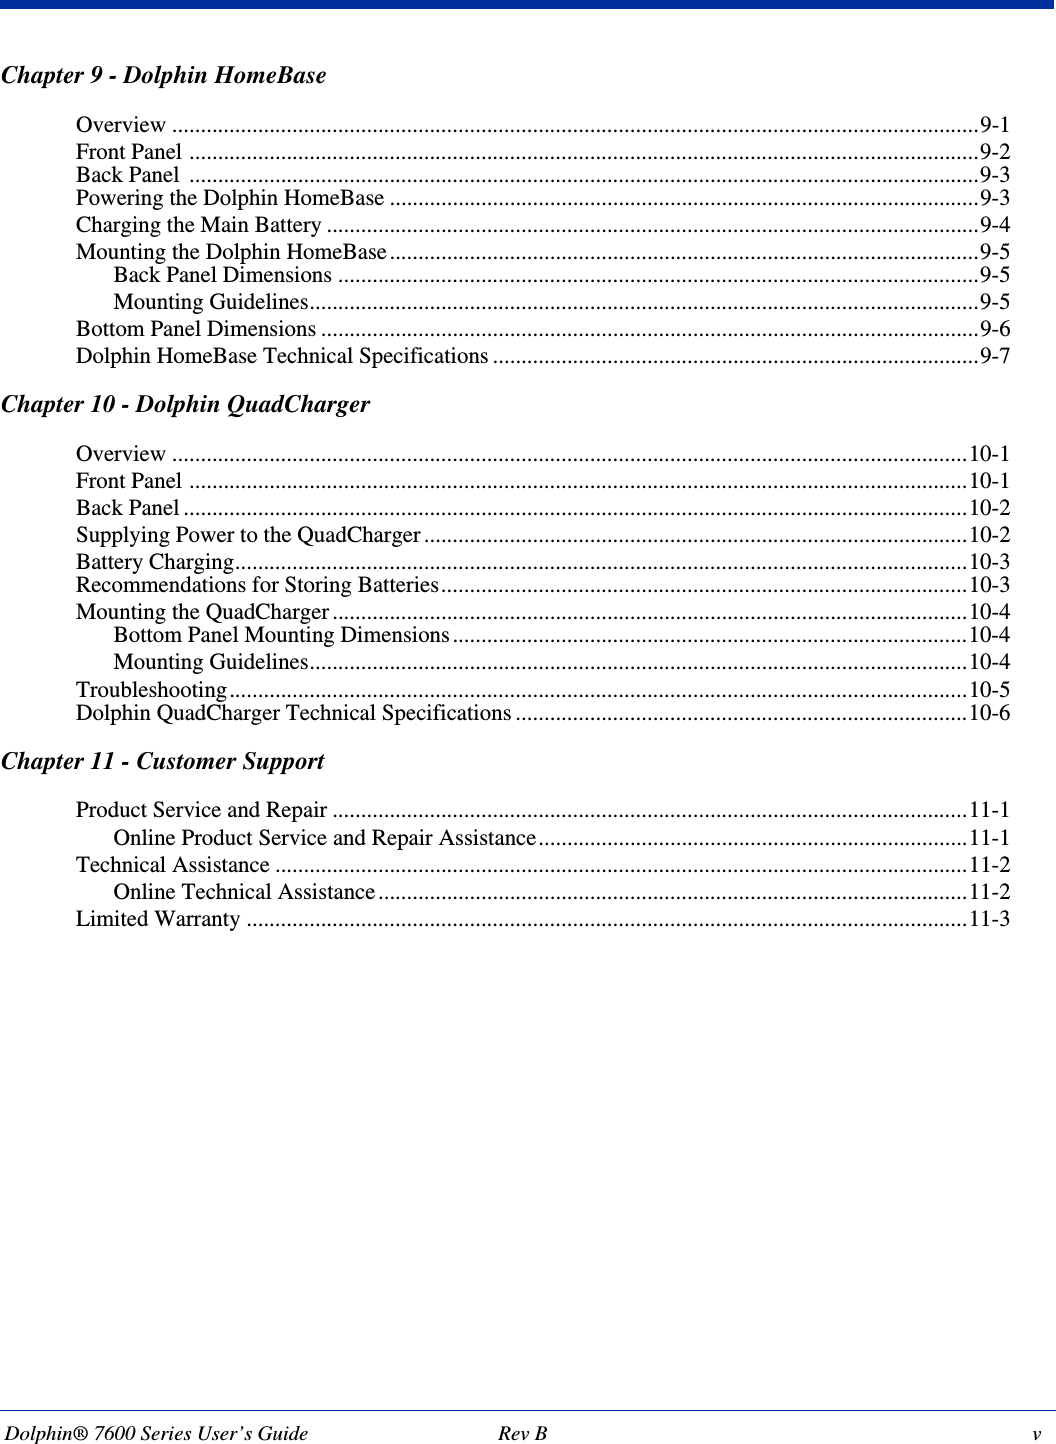
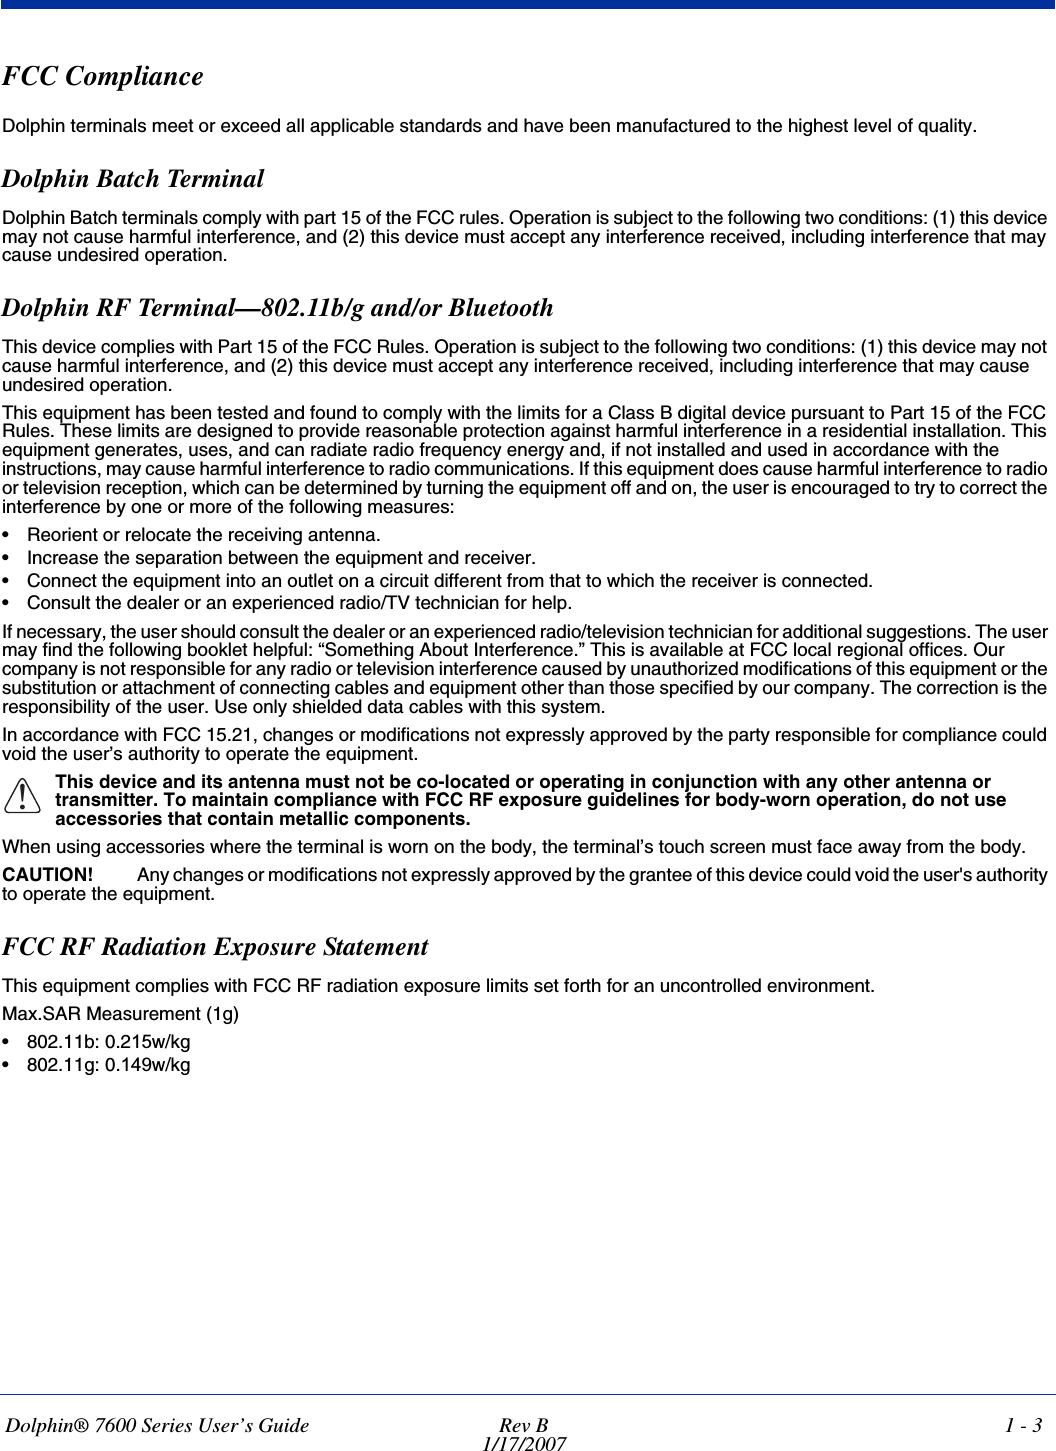
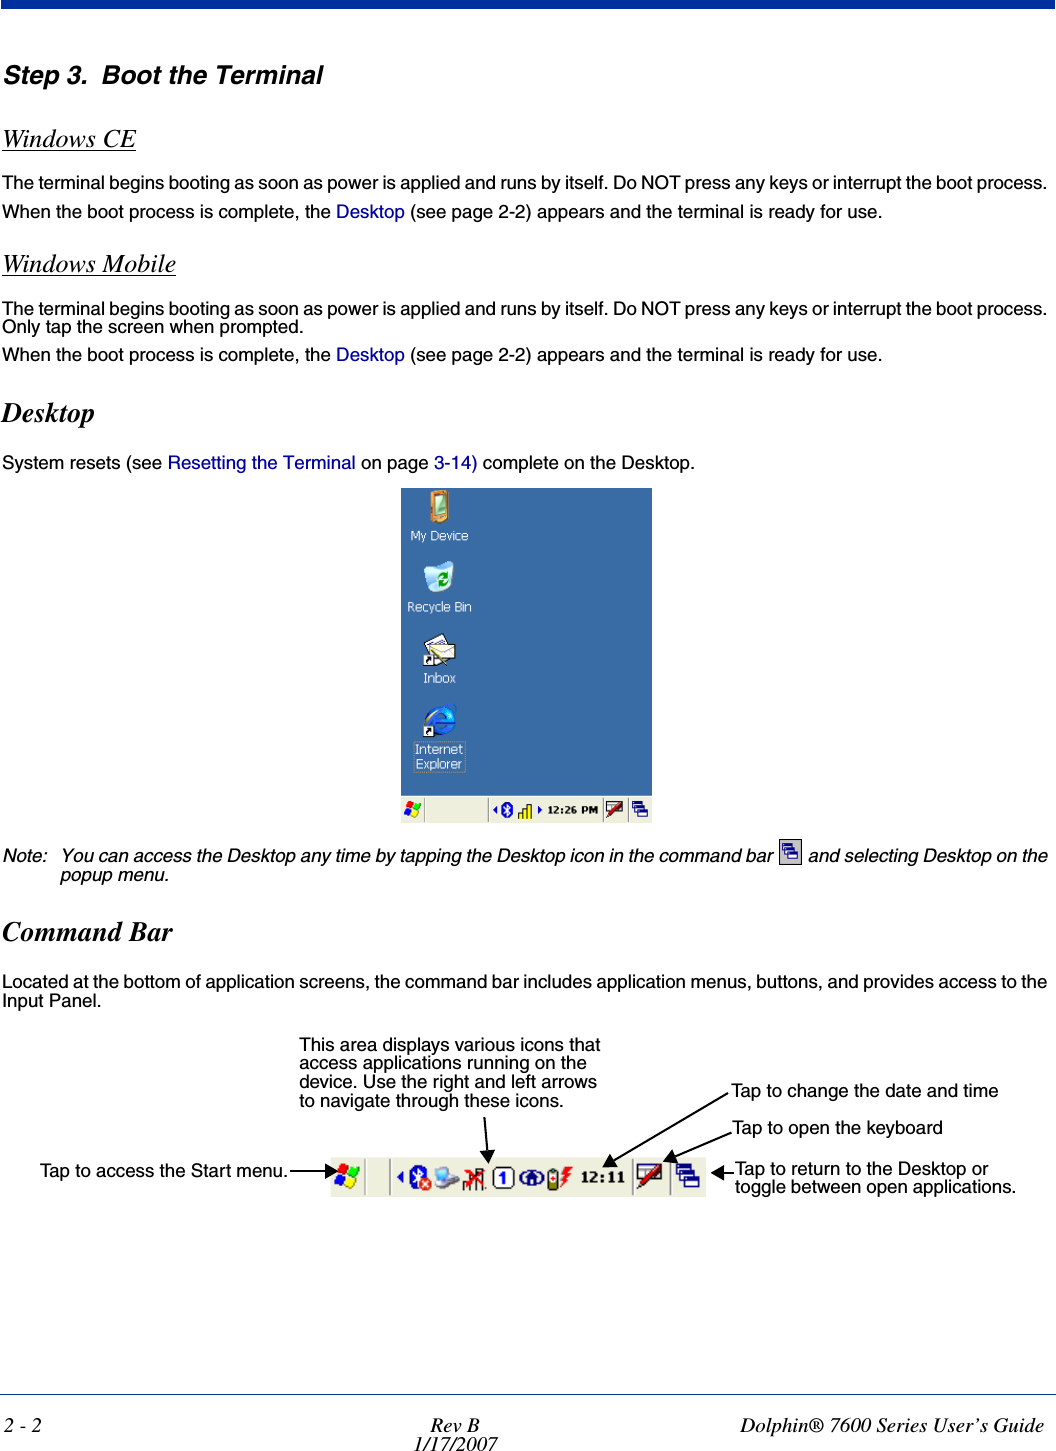
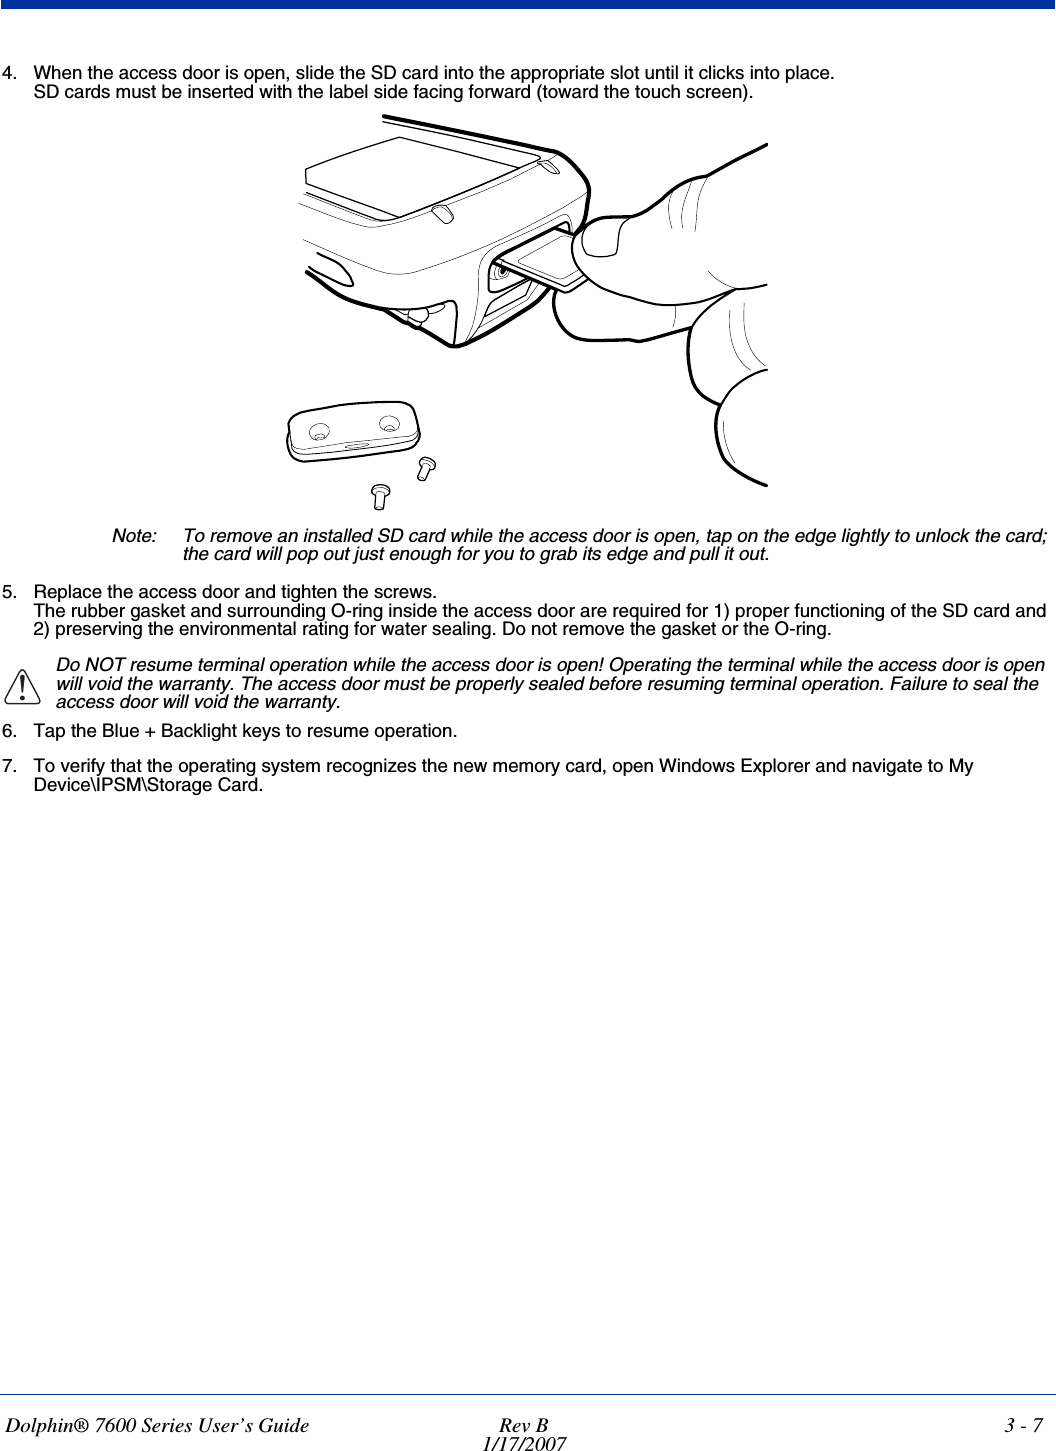
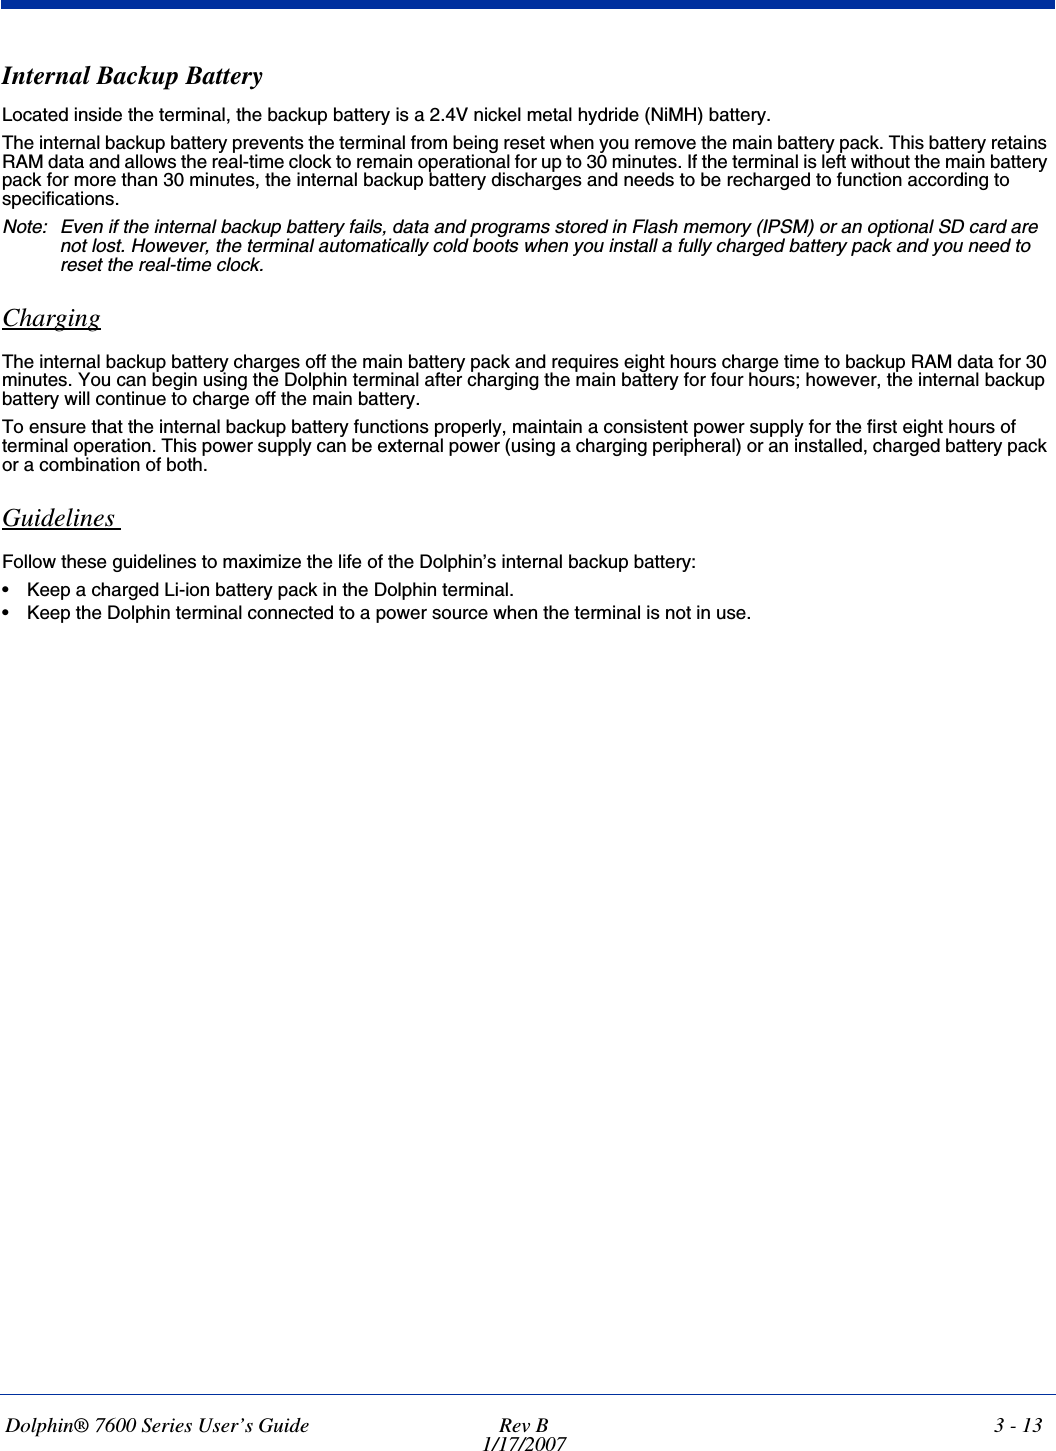
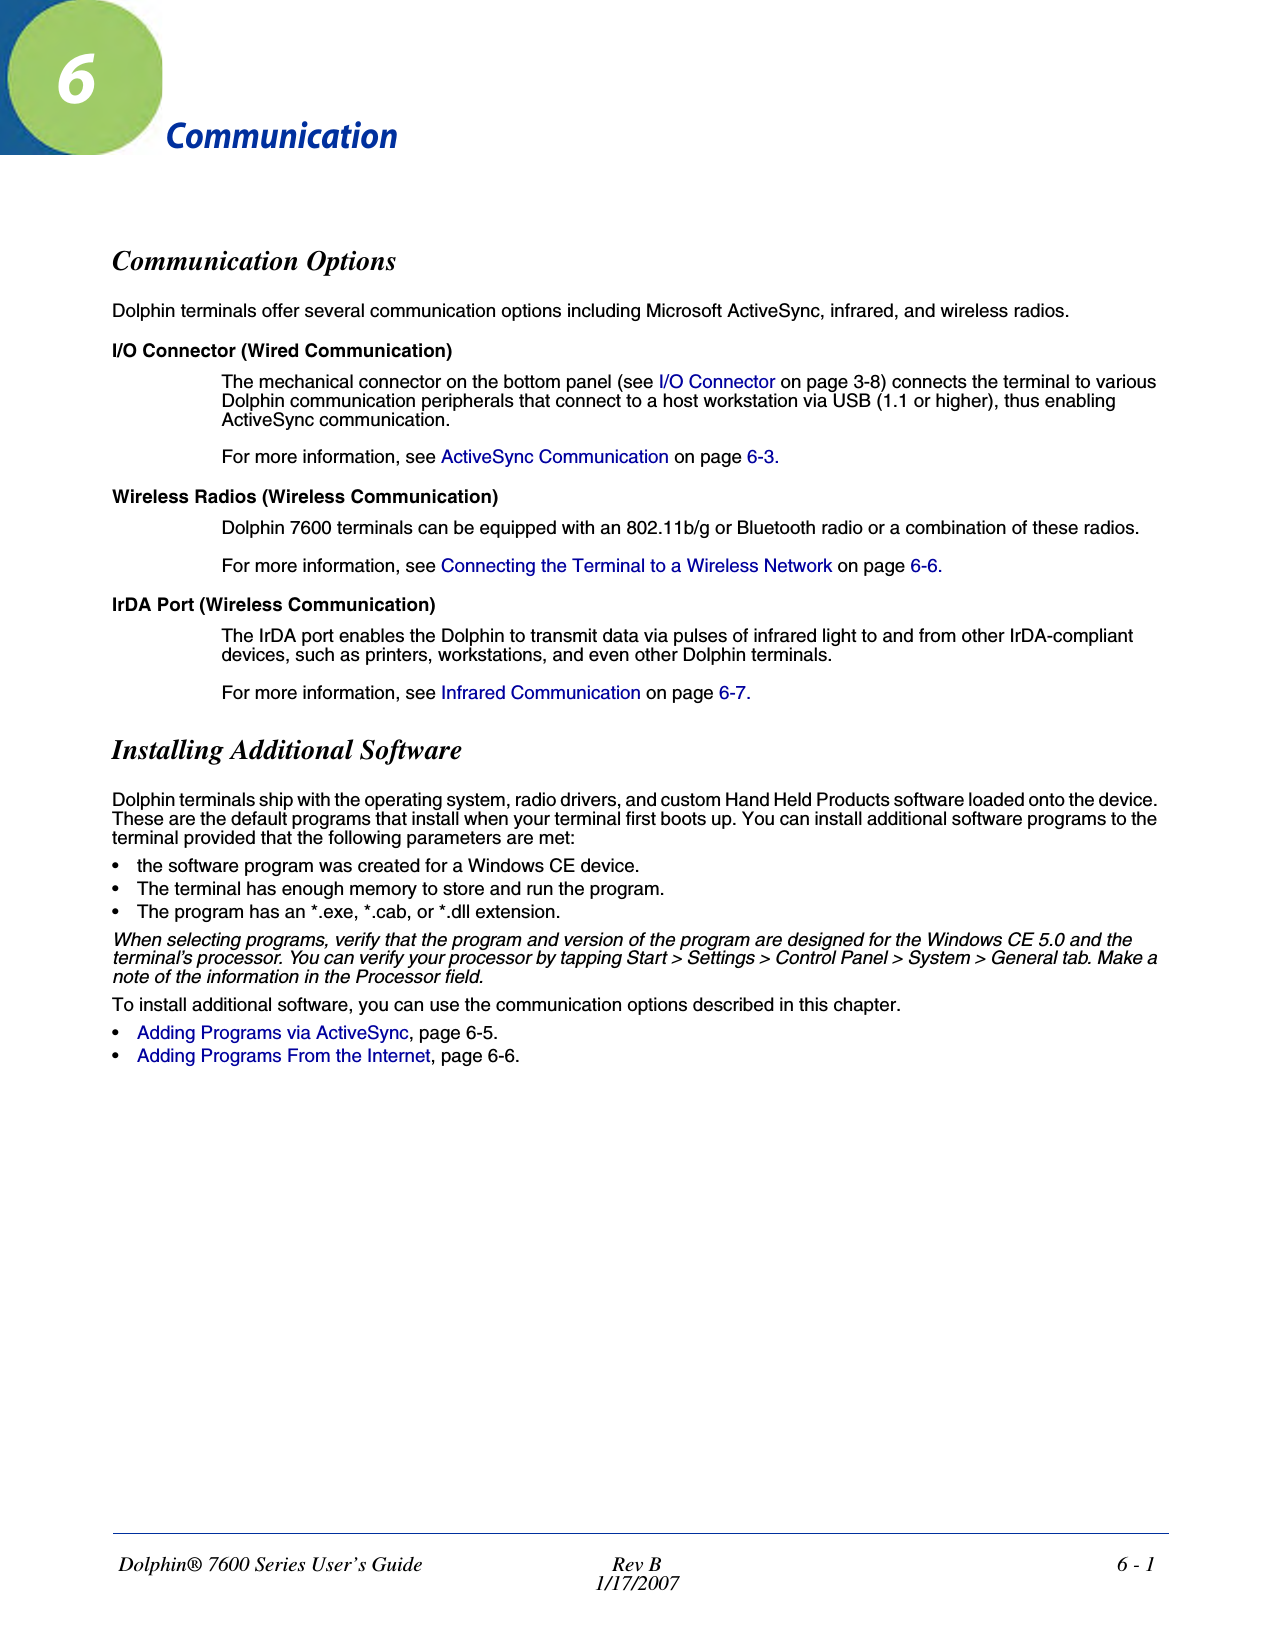
![Dolphin® 7600 Series User’s Guide Rev B 7 - 5Port MenuTap once on a port to open the Port menu.Status BarThe status bar at the bottom of the main window indicates the connection status between the network card and the AP.Depending on the status of connectivity, the status bar displays one of the following:• Not Associated• AP: [AP's SSID] MAC: [AP's BSSID].Event Log Displays the event log in a custom viewer. The Event Log is a text file that contains system information; each entry is listed sequentially with a time/date stamp and text message. Tap Refresh to query the system again and update the log file while you are reading it. If the file gets too large, old entries are automatically deleted. Logging parameters are set on the System Tab (see page 7-14).Menu Item DescriptionEnable Disable The port should be enabled before the protocol is started. Enabling a port is not the same as starting it (see Start/Stop on page 7-4); however, both actions are required for the Client to work. Configure Opens the port configuration window; see Configuring Client Authentication on page 7-12.Delete Selecting Delete has no effect; you cannot remove the radio driver from the device.Menu Item DescriptionStatus Bar](https://usermanual.wiki/Honeywell/760002.User-manual/User-Guide-851771-Page-61.png)
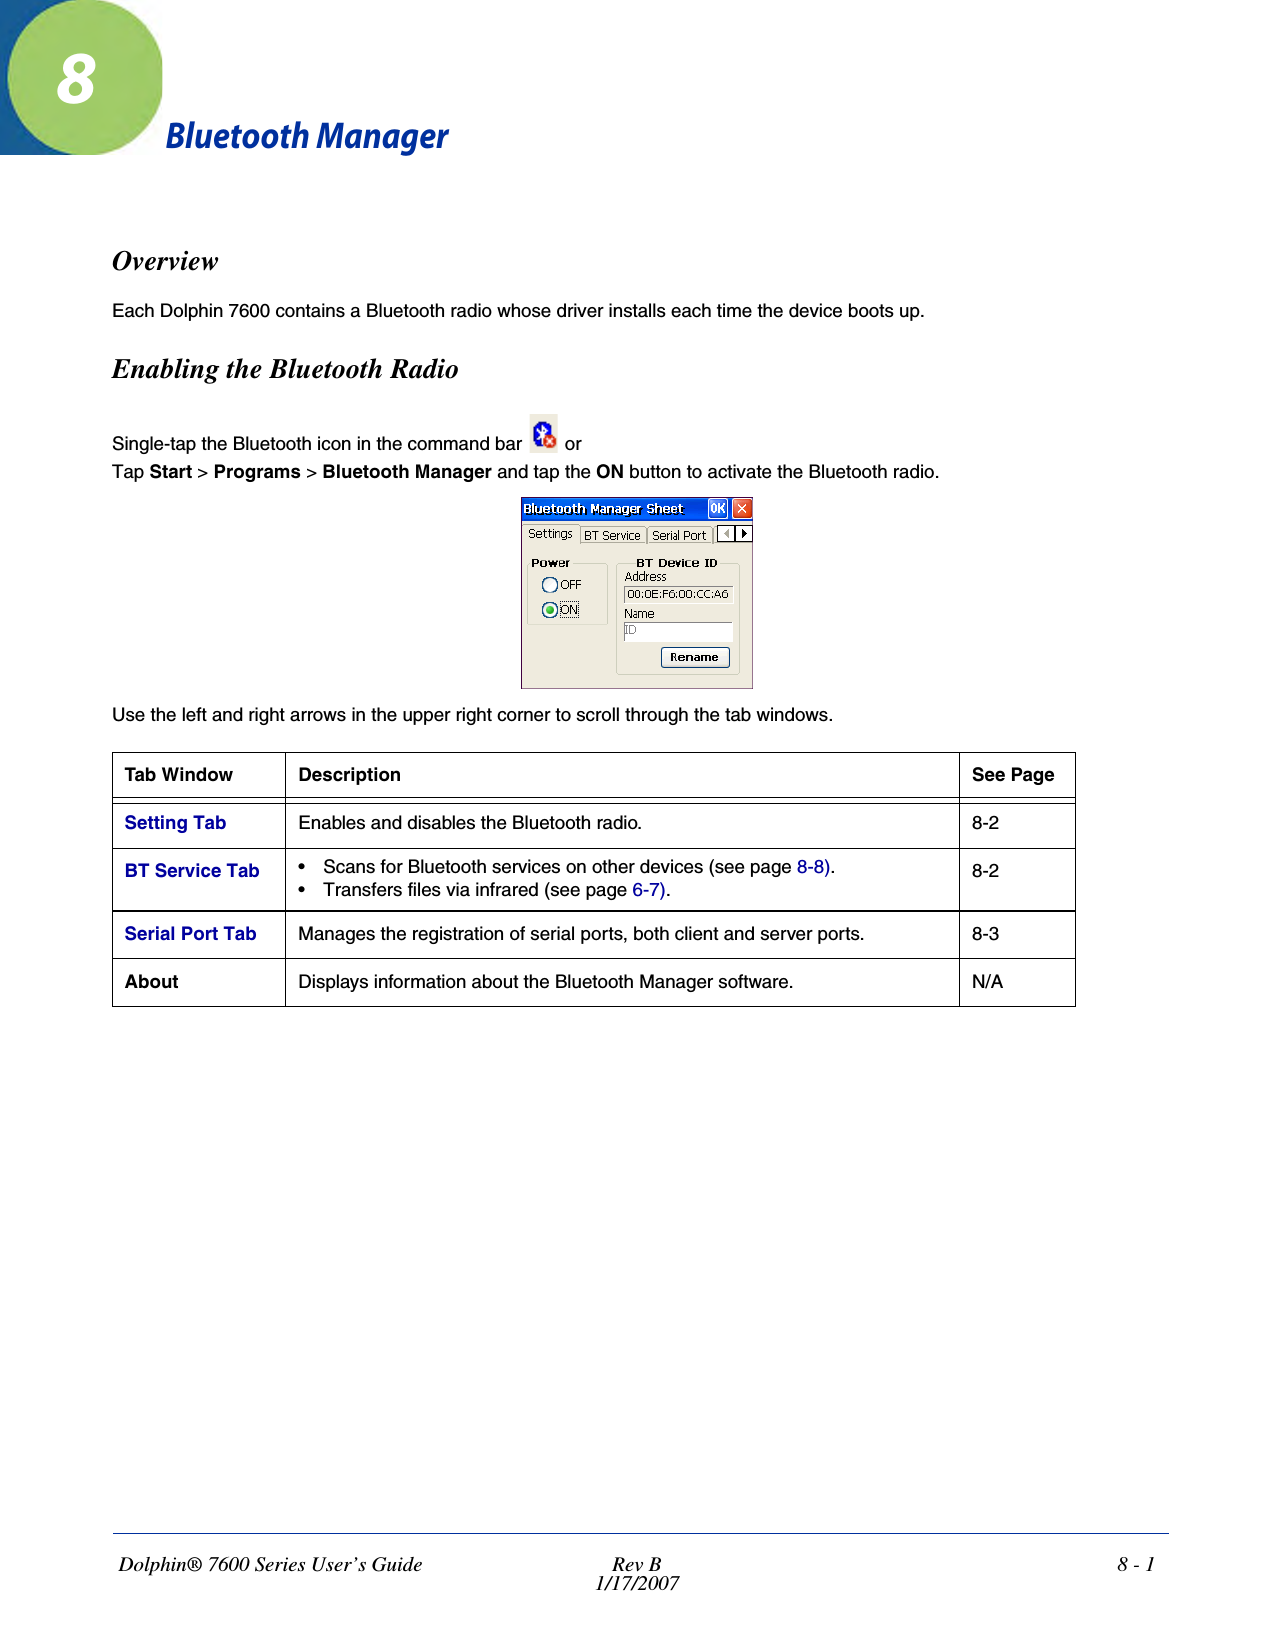
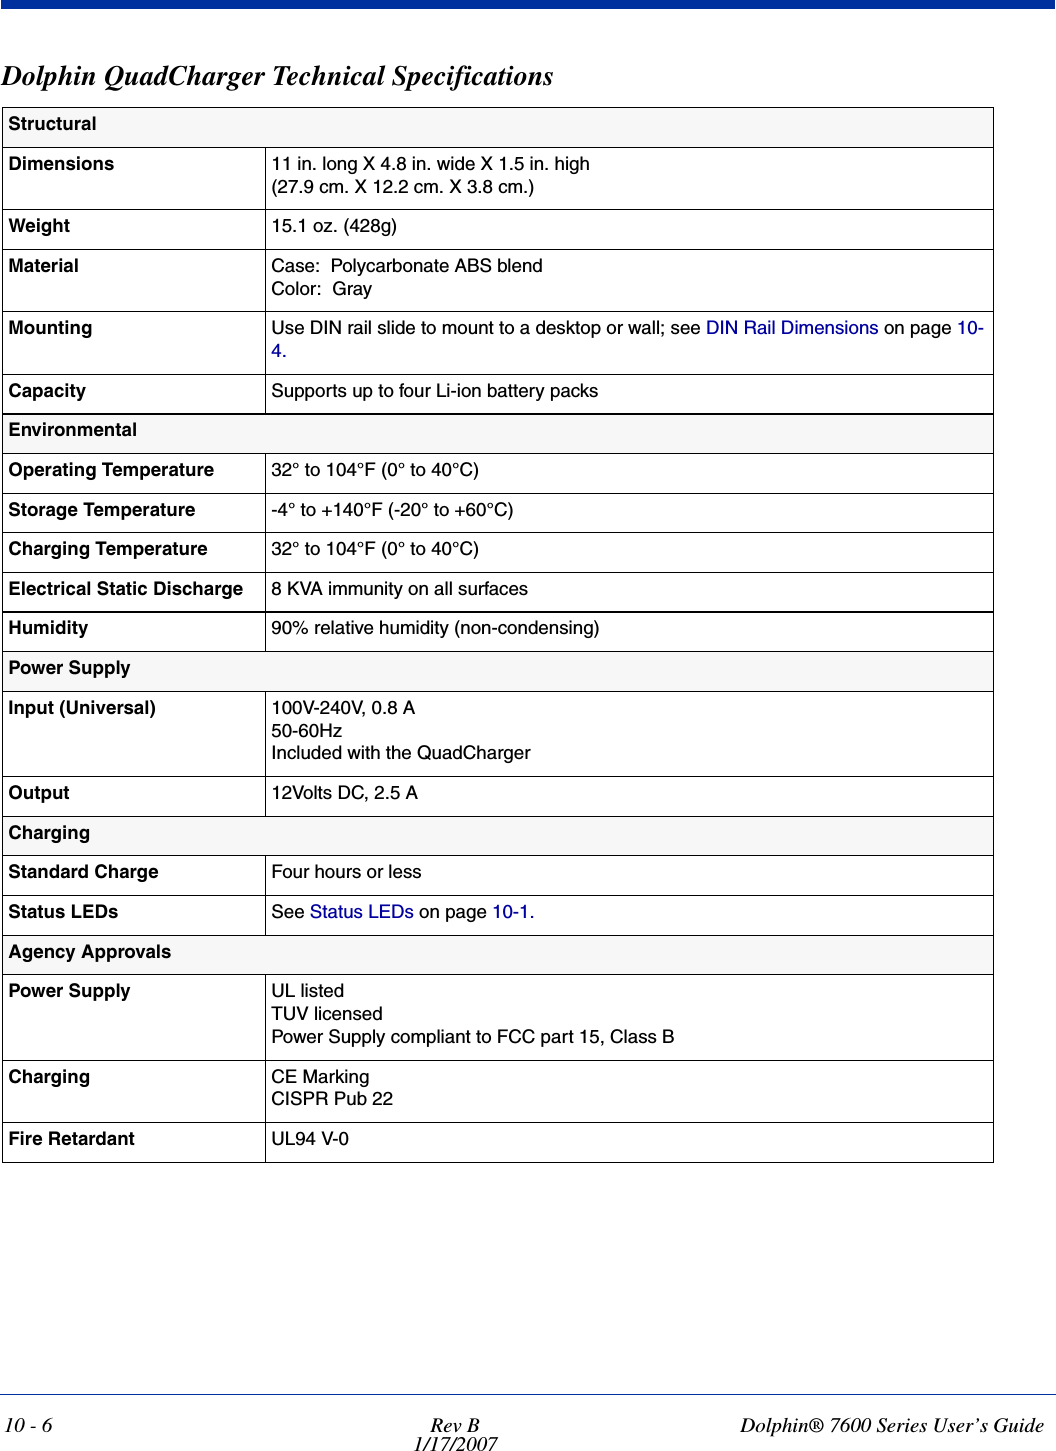
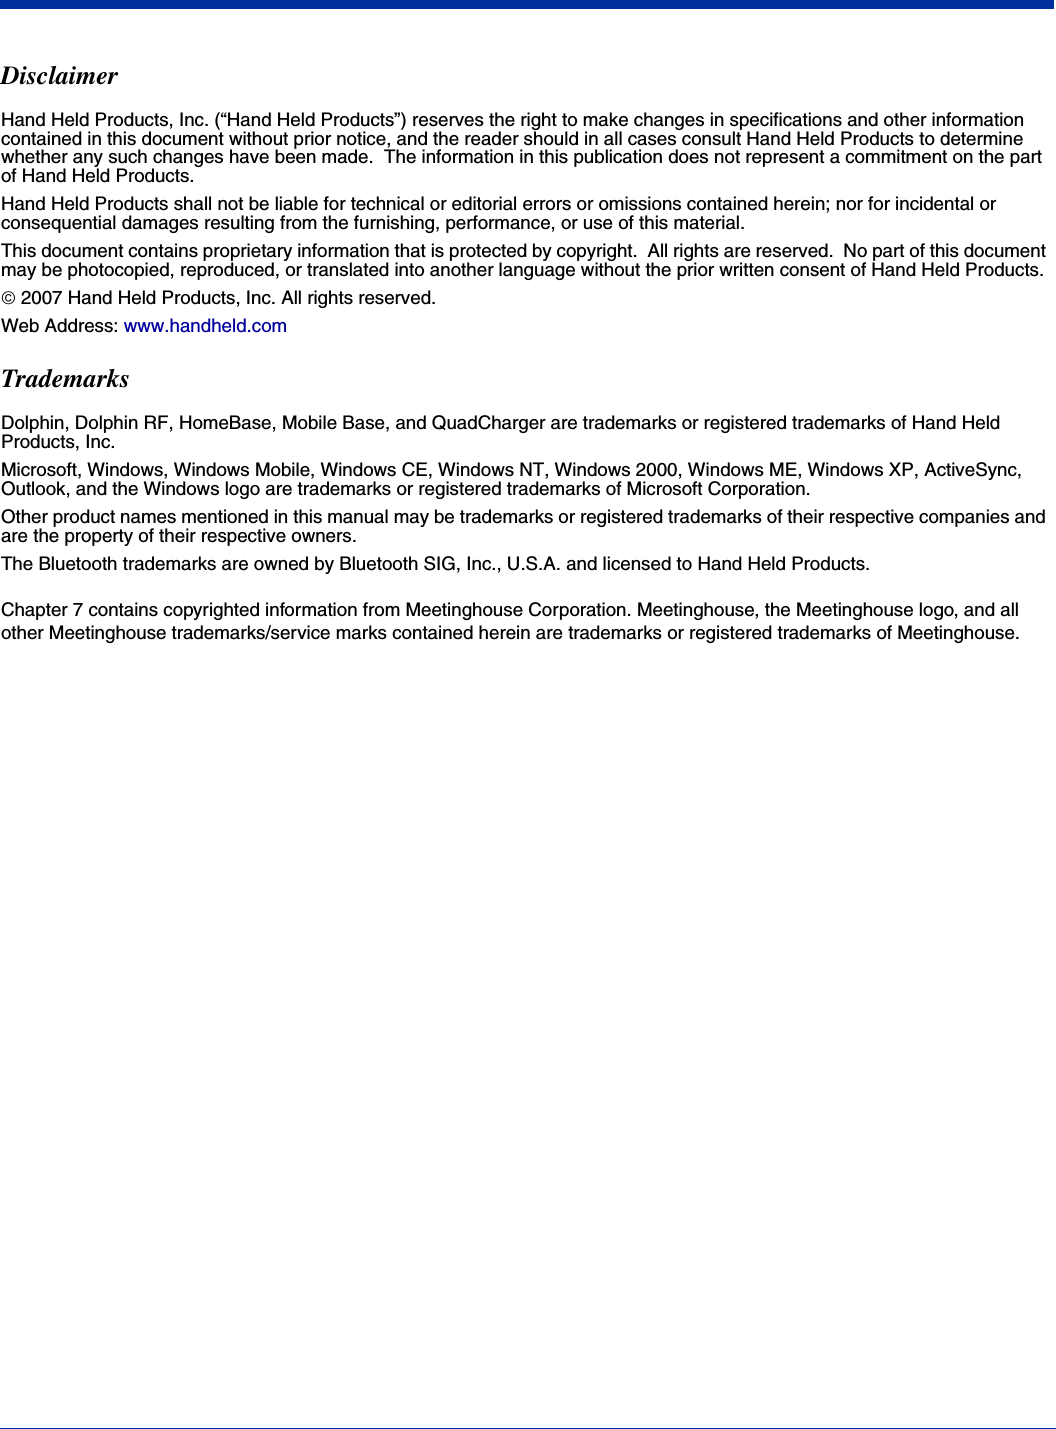
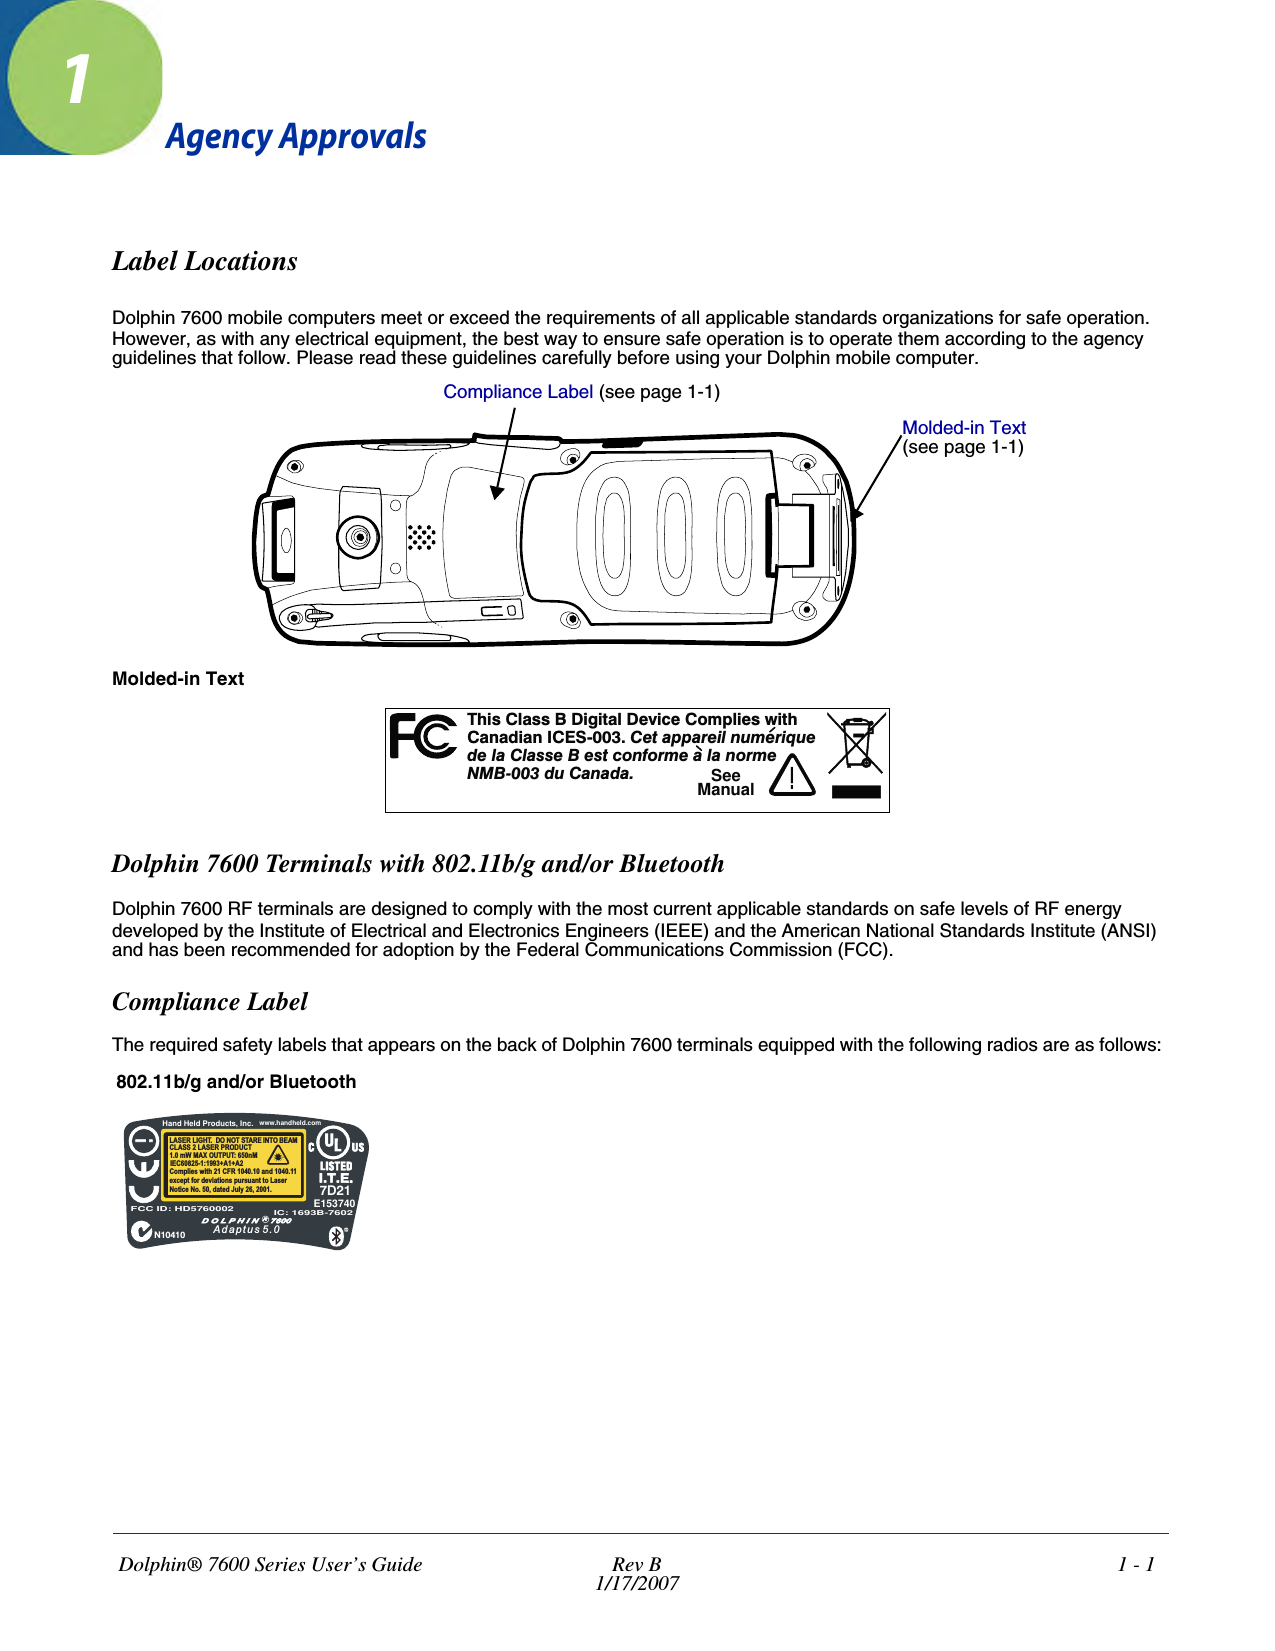
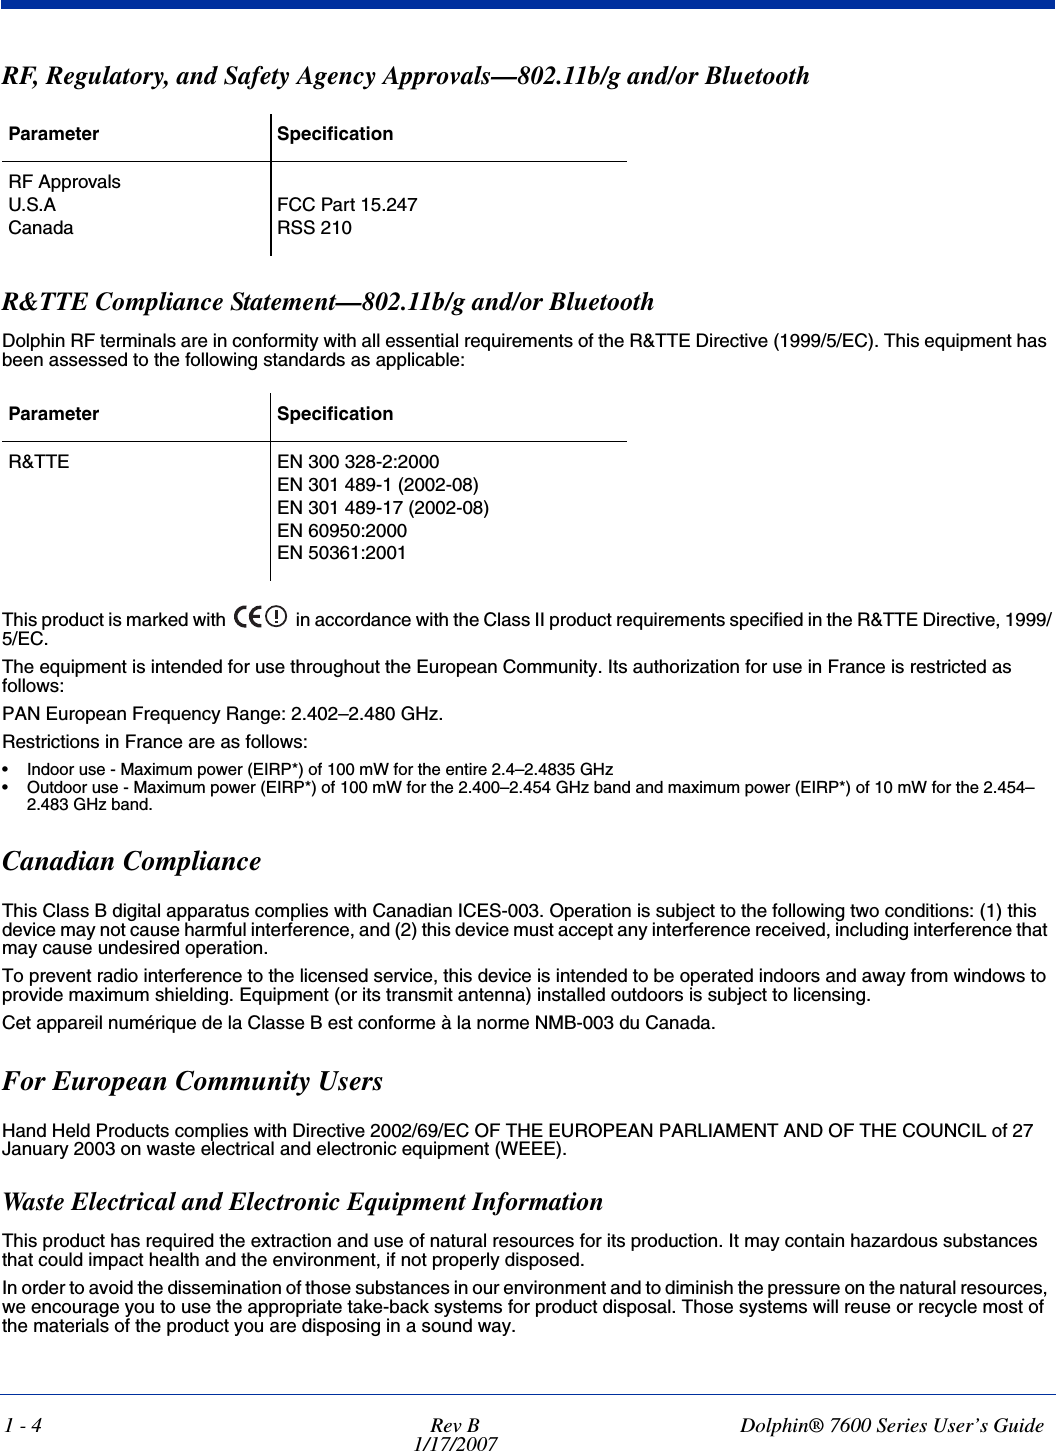
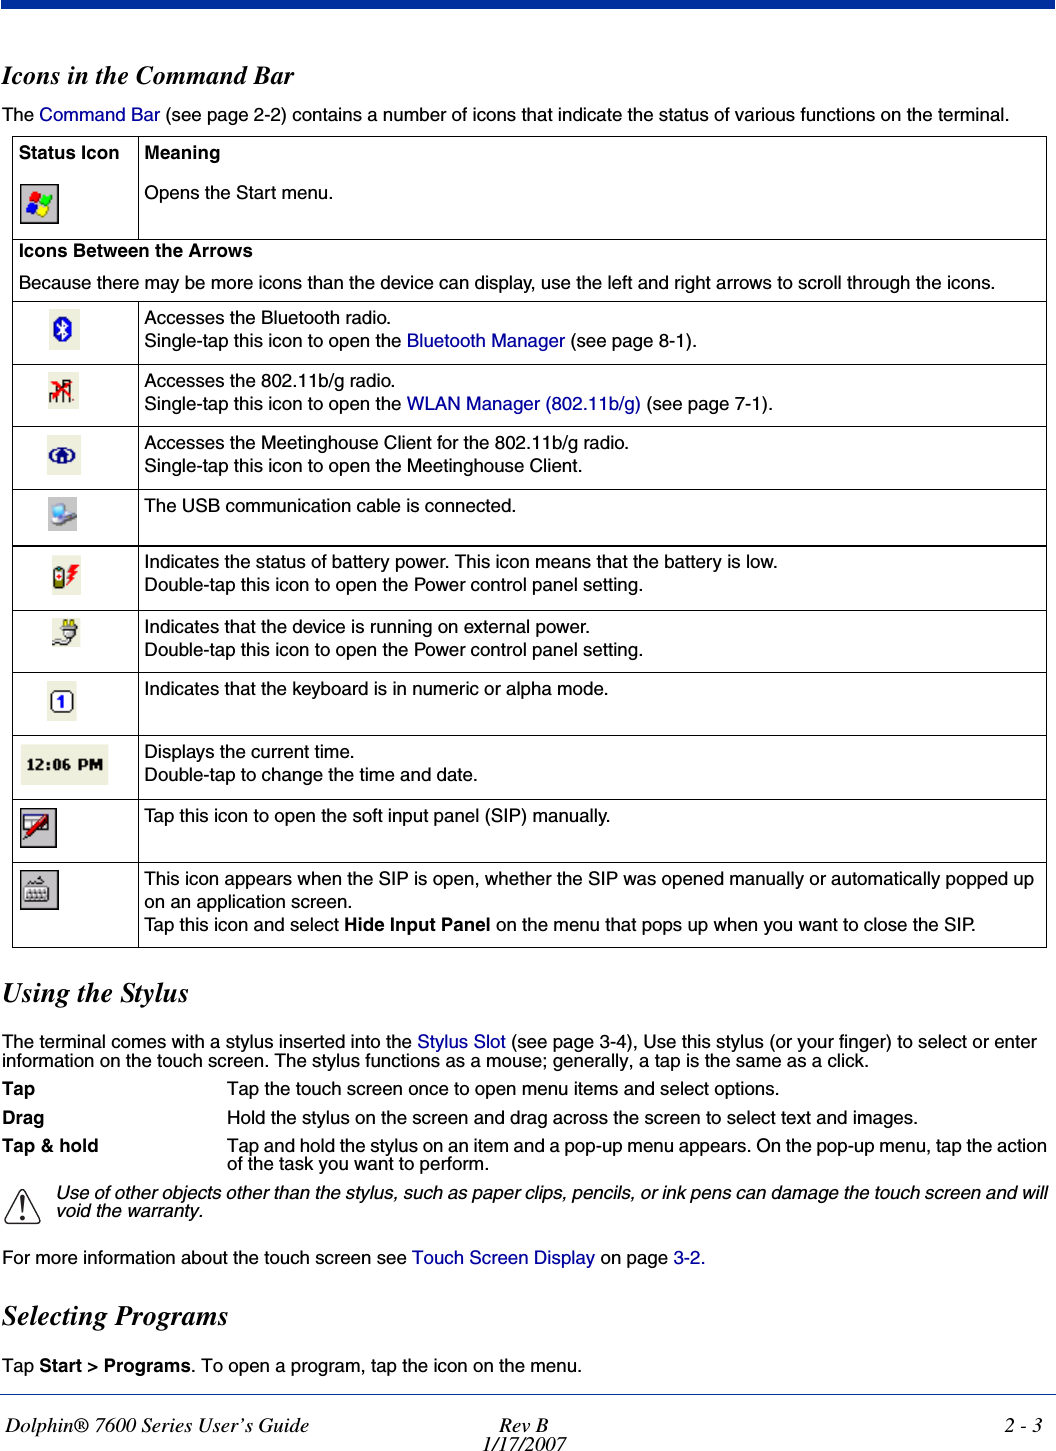
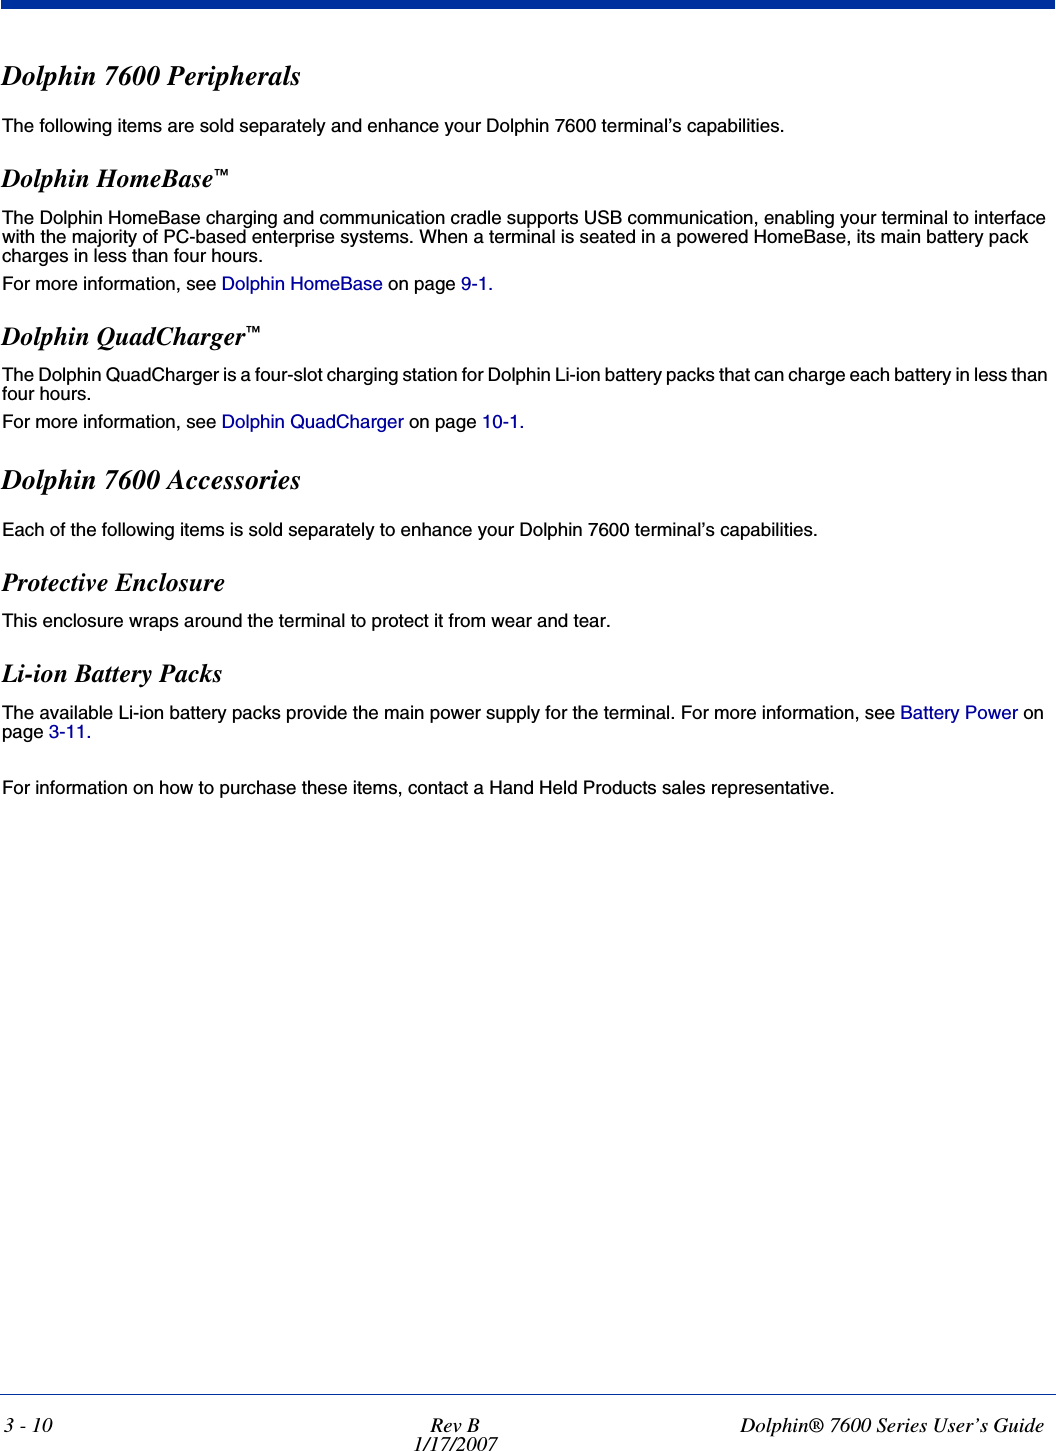
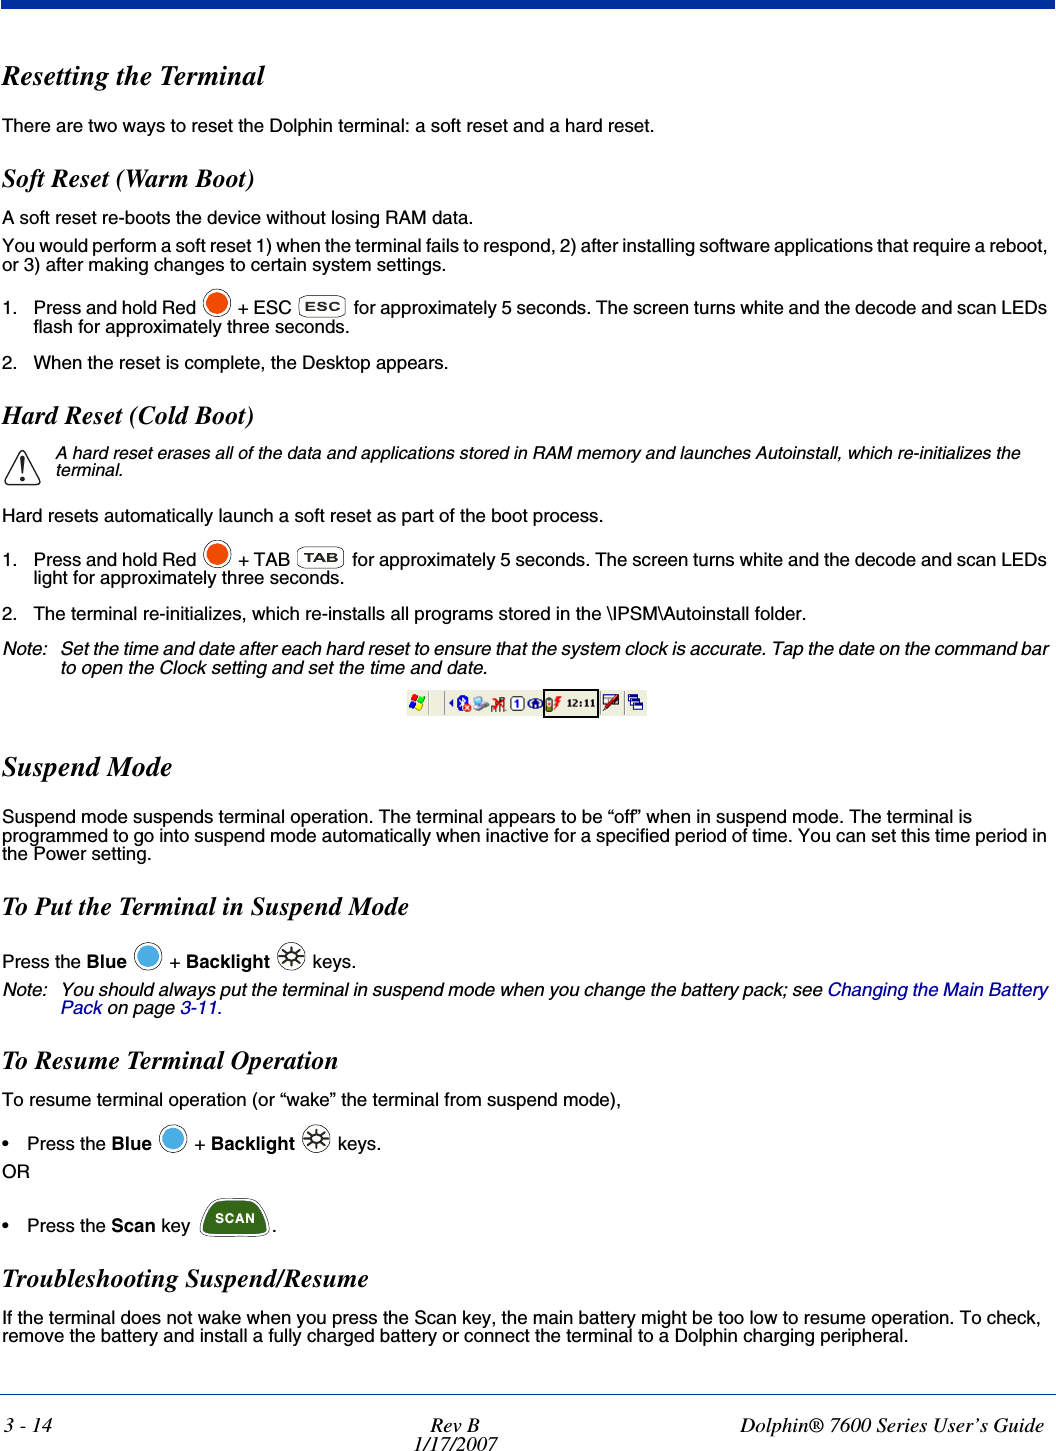
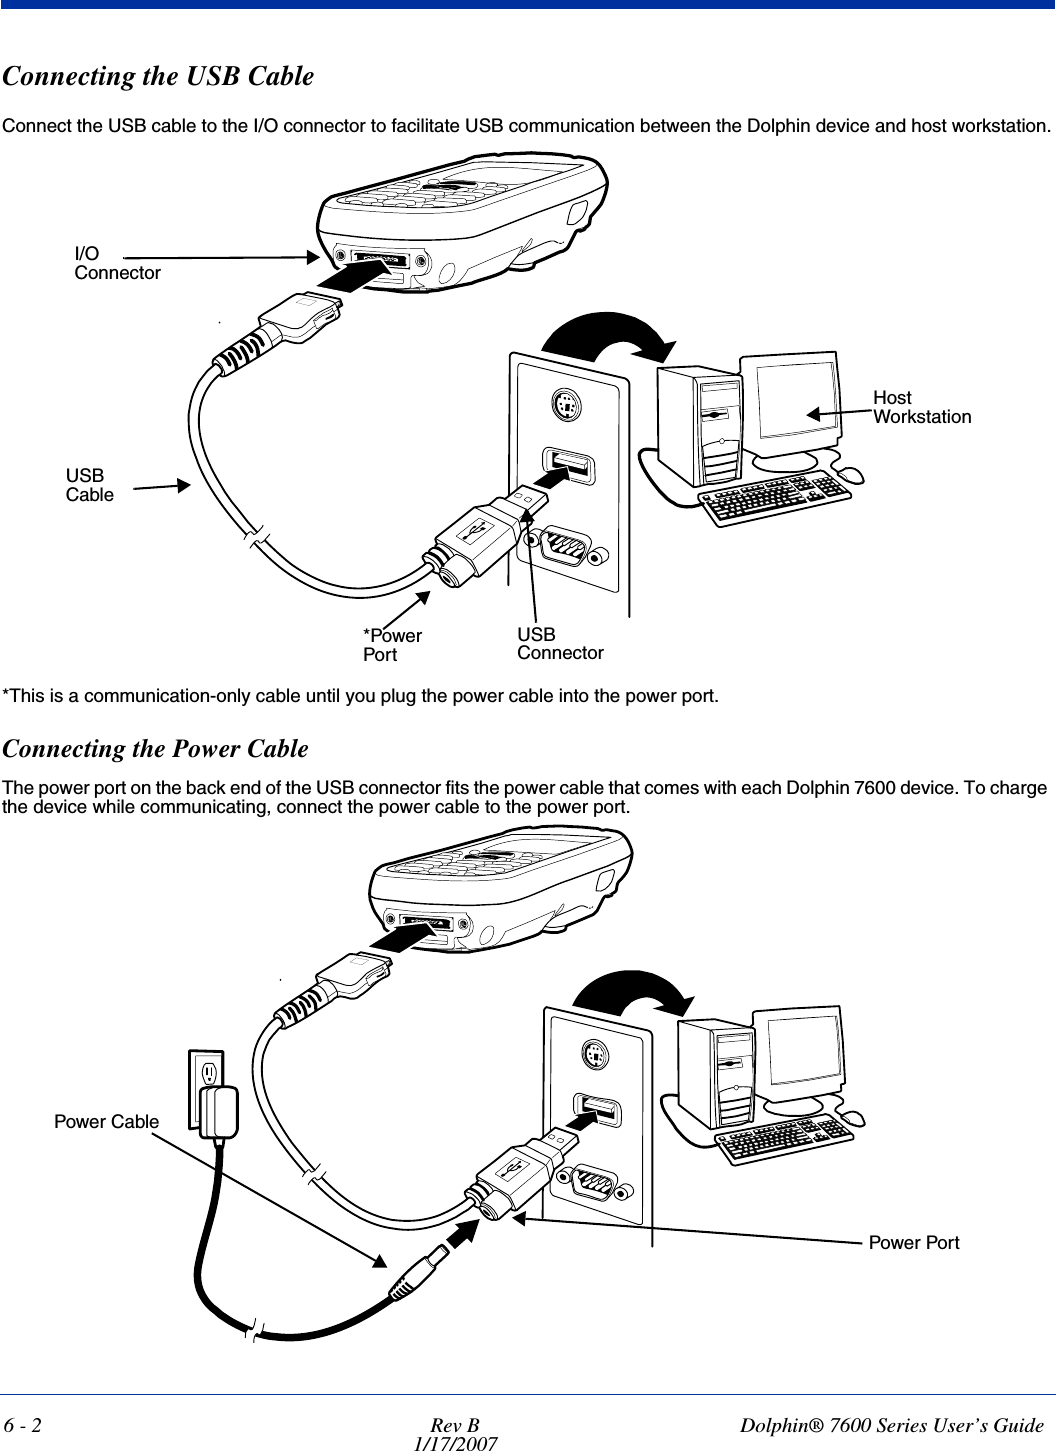
![7 - 14 Rev B Dolphin® 7600 Series User’s GuideSystem TabDefine logging settings and the port manager timeout period.LoggingThe event log is an ASCII text file named “LOG8021X.TXT” located in the directory defined by the WINDIR environment variable (usually the Windows directory). In the text file, the format of the entries is: Time Stamp Message TextTo see the event log on the window, tap View > Event Log. If you wish to start with a blank file or clear the event log, close the Client (so that the icon no longer appears in the command bar) and delete the log file in WIndows Explorer. When you restart the Client, a new log file is created.Field DescriptionLog Level These settings control the detail of the log messages generated by the Client. Each level is cumulative. By default, all errors, warnings, and information events are logged. Each entry records a severity code (of 1 [debug message] to 4 [error] asterisks), a time stamp, and a message.•Errors—Only the most severe conditions are logged.•Warnings—Less severe conditions are logged.•Information—All errors, warnings, and information events are logged. This is the default setting.•Debugging—Creates a log message each time the Client detects or reacts to an event. Be advised that log entries fill memory quickly if the Debugging level is chosen. Do not use the Debugging option for a significant length of time because most internal operations generate messages.To see what the log looks like, see Event Log on page 7-5.Defaults button Tap this button to return log settings to the default settings.Scan List TimeoutThe time interval at which the Client polls the ports. This value should not be changed from the 200-second default unless technical support advises you to do so.Save Credentials for (min)The amount of time the Client saves credentials.Disable Wireless Zero ConfigUse this option only as directed by technical support. Selecting this option disables other wireless utilities.](https://usermanual.wiki/Honeywell/760002.User-manual/User-Guide-851771-Page-70.png)