Honeywell WNMNFHSS Multinode FHSS Radio User Manual WN00 100
Honeywell International Inc. Multinode FHSS Radio WN00 100
UserManual.wiki
>
Honeywell
>
WNMNFHSS User Manual
>
User Manual 2
Contents
1.
User Manual
2.
User Manual 2
3.
Users Guide
4.
Ext Temp Pro Install Guide revised Nov 2008
User Manual 2
Navigation menu
Upload a User Manual
Namespaces
Wiki Guide
HTML
PDF
Info
Views
User Manual
Discussion / Help
Navigation
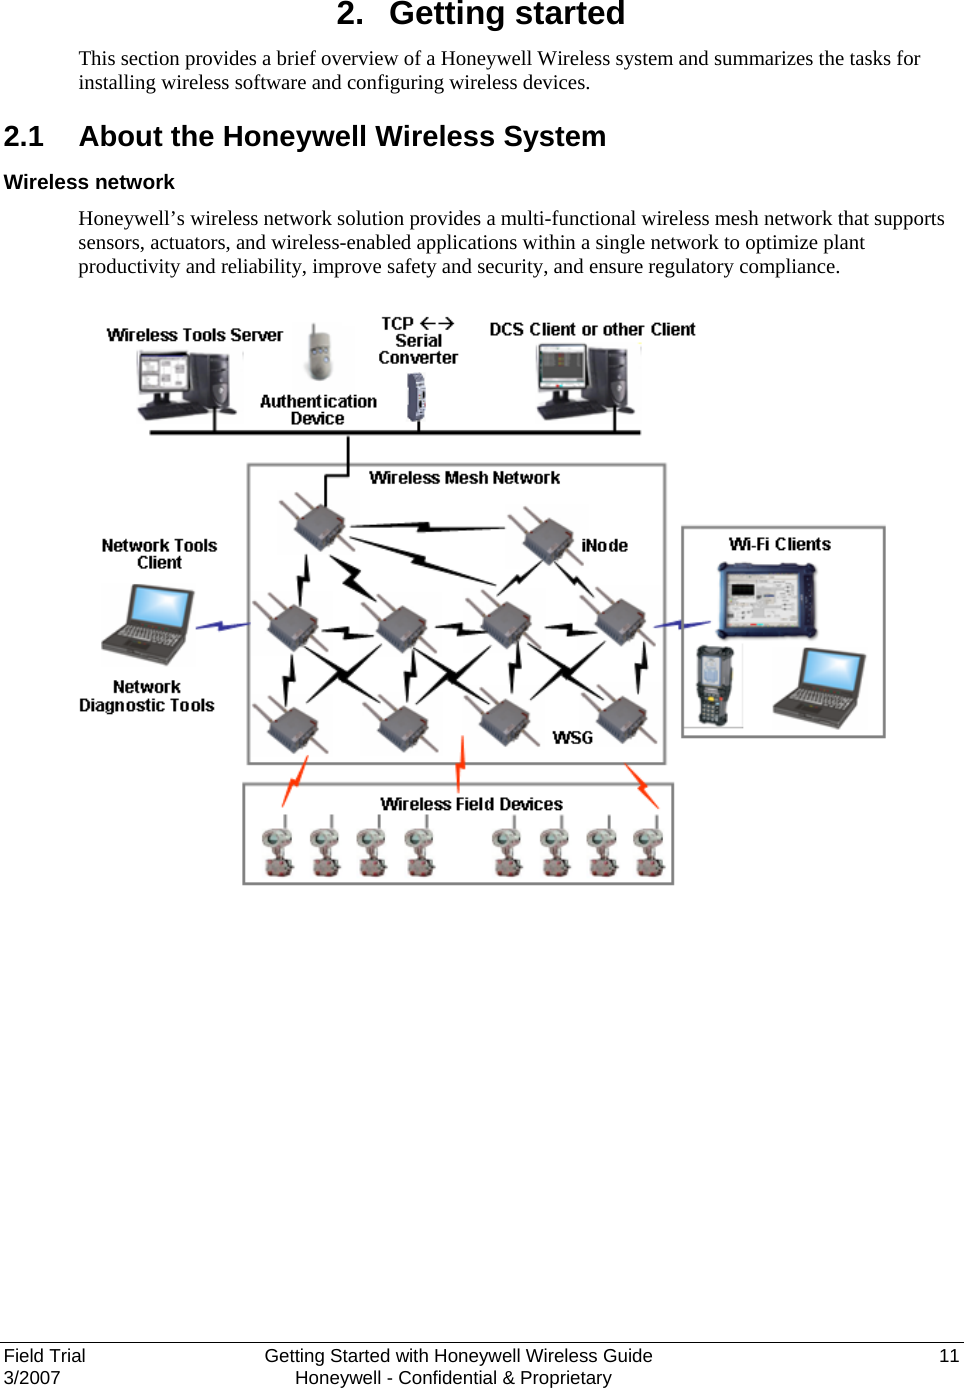
![iv Getting Started with Honeywell Wireless Guide Field Trial Honeywell - Confidential & Proprietary 3/2007 Telephone Contact us by telephone at the numbers listed below. Organization Phone Number United States and Canada Honeywell International Inc. Industry Solutions 1-800-343-0228 Sales 1-800-525-7439 Service 1-800-822-7673 Technical Support Asia Pacific Honeywell Asia Pacific Inc. Hong Kong (852) 23 31 9133 Europe Honeywell PACE Brussels, Belgium [32-2] 728-2711 Latin America Honeywell International Inc. Sunrise, Florida U.S.A. (954) 845-2600 Symbol Definitions The following table lists those symbols used in this document to denote certain conditions. Symbol Definition CAUTION: Indicates a potentially hazardous situation which, if not avoided, may result in minor or moderate injury. It may also be used to alert against unsafe practices. CAUTION symbol on the equipment refers the user to the product manual for additional information. The symbol appears next to required information in the manual.](https://usermanual.wiki/Honeywell/WNMNFHSS.User-Manual-2/User-Guide-829837-Page-4.png)