Huawei Technologies EM820U HSPA+ Module User Manual EM820U QSG English
Huawei Technologies Co.,Ltd HSPA+ Module EM820U QSG English
Contents
- 1. User Manual part 1
- 2. User Manual part 2
- 3. user's manual FCC statement
- 4. user's manual_Rev1
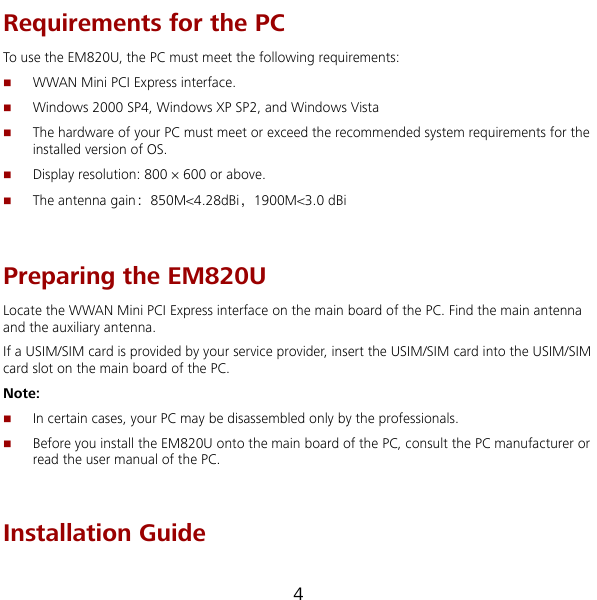
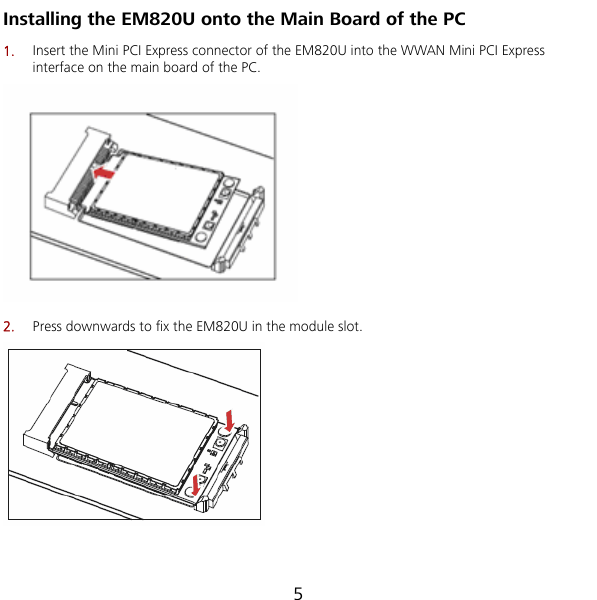
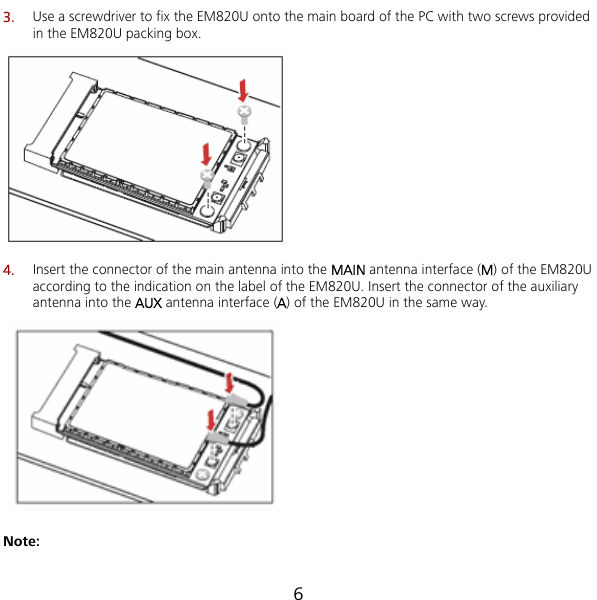
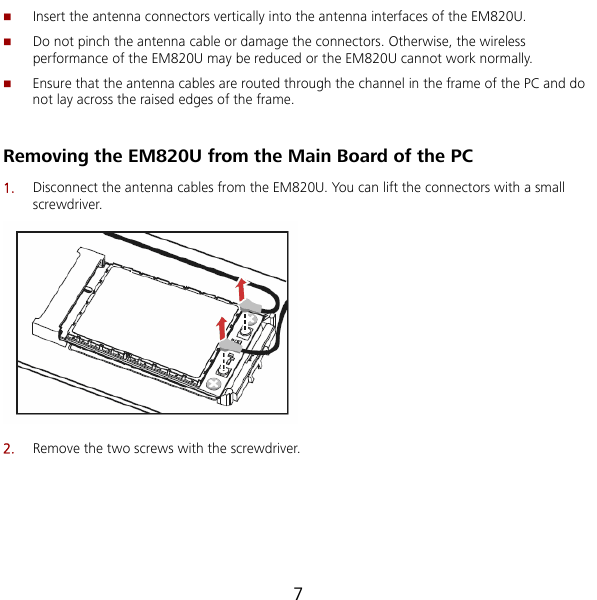
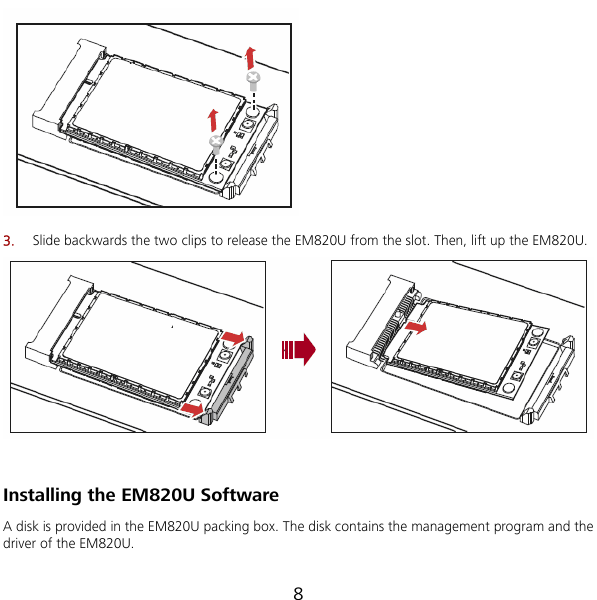
User Manual part 2