Huawei Technologies EM820U HSPA+ Module User Manual
Huawei Technologies Co.,Ltd HSPA+ Module
UserManual.wiki
>
Huawei Technologies
>
EM820U User Manual
>
user's manual_Rev1
Contents
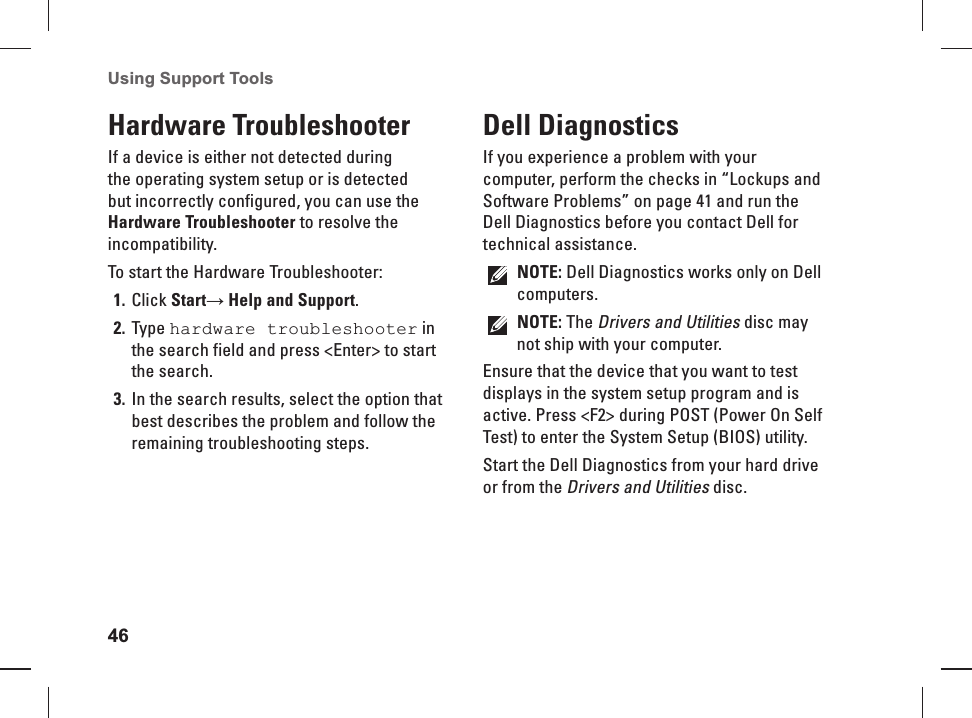
1.
User Manual part 1
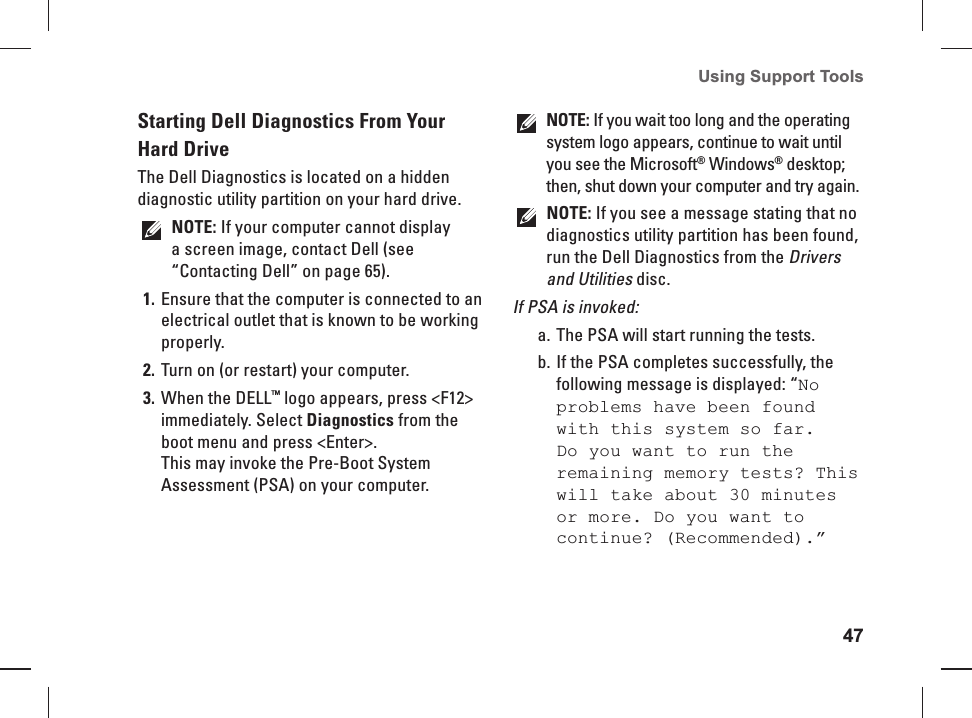
2.
User Manual part 2
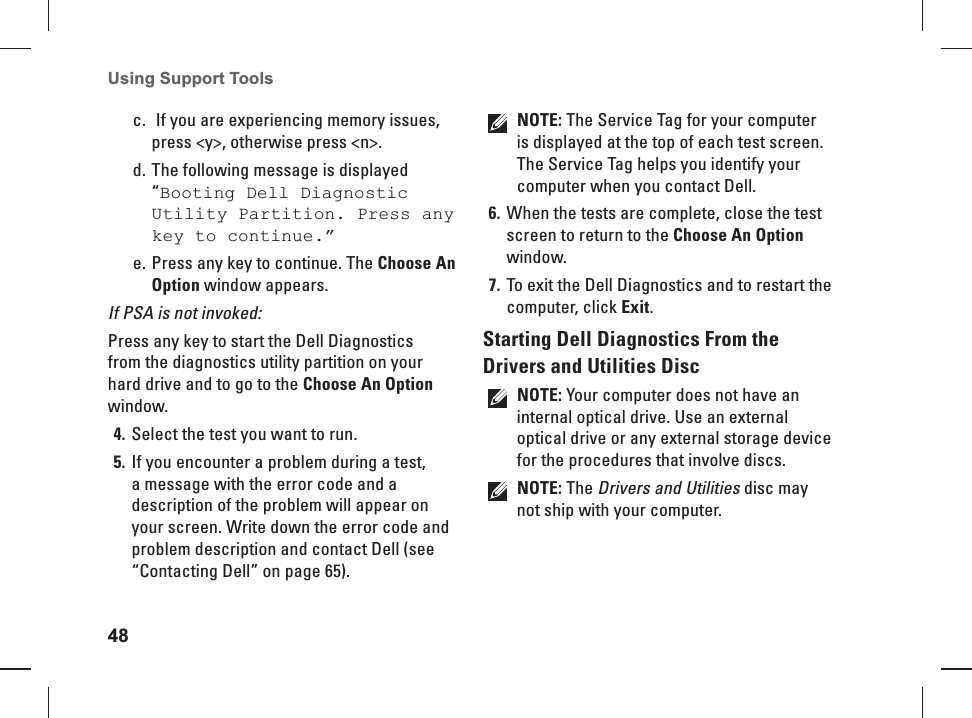
3.
user's manual FCC statement
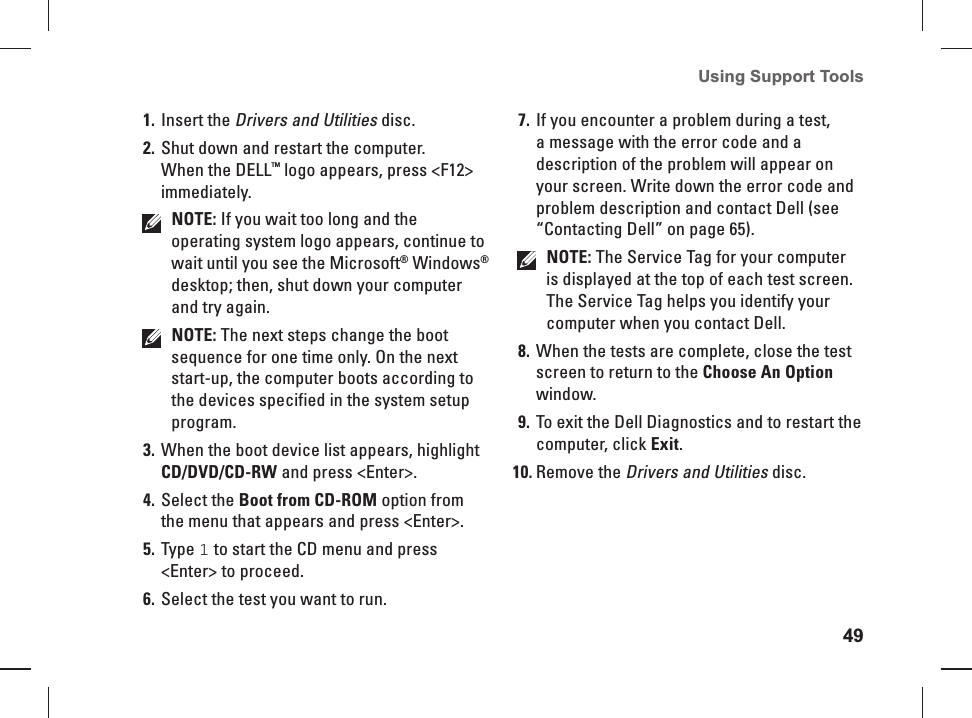
4.
user's manual_Rev1
user's manual_Rev1
Navigation menu
Upload a User Manual
Namespaces
Wiki Guide
HTML
PDF
Info
Views
User Manual
Discussion / Help
Navigation


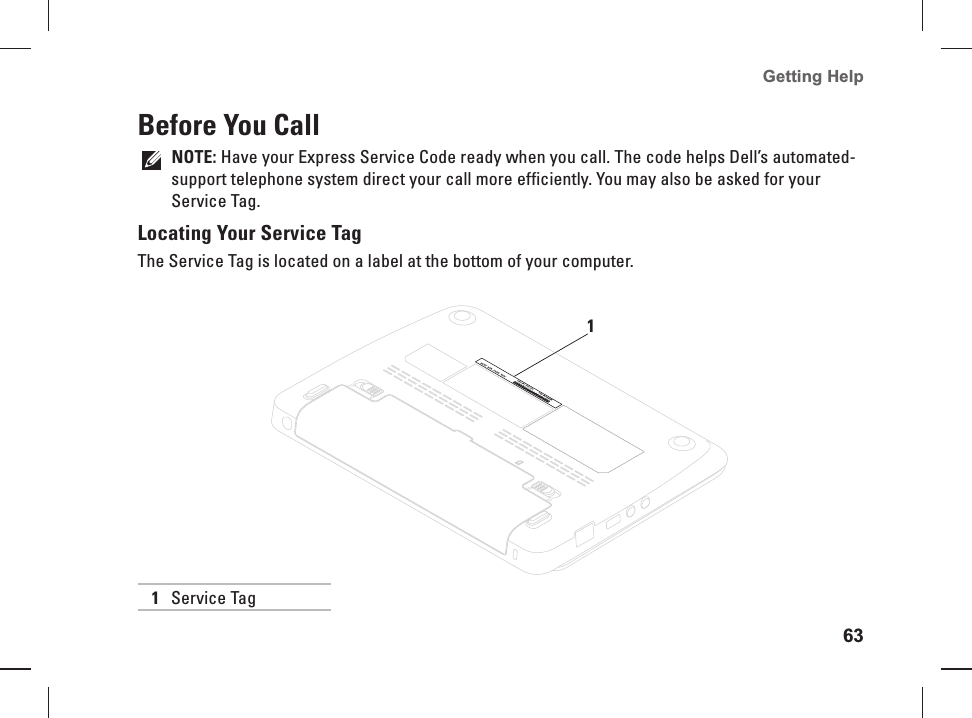
![45Using Support Tools Alert! Previous attempts at booting this system have failed at checkpoint [nnnn]. For help in resolving this problem, please note this checkpoint and contact Dell Technical Support — The computer failed to complete the boot routine three consecutive times for the same error. Contact Dell (see “Contacting Dell” on page 65).CMOS checksum error — Possible system board failure or RTC battery low. Replace the battery (see the Service Manual at support.dell.com/manuals) or contact Dell (see “Contacting Dell” on page 65).Hard-disk drive failure — Possible hard-disk drive failure during POST. Contact Dell (see “Contacting Dell” on page 65).Hard-disk drive read failure — Possible hard-disk drive failure during HDD boot test. Contact Dell (see “Contacting Dell” on page 65).Keyboard failure — Keyboard failure or loose cable. Replace the keyboard (see the Service Manual at support.dell.com/manuals).No boot device available — No bootable partition on hard drive, the hard drive cable is loose, or no bootable device exists.If the hard drive is your boot device, ensure • that the cables are connected and that the drive is installed properly and partitioned as a boot device.Enter system setup and ensure that the boot • sequence information is correct (see the Dell Technology Guide available on your hard drive or at support.dell.com/manuals).No timer tick interrupt — A chip on the system board might be malfunctioning or system board failure. Contact Dell (see “Contacting Dell” on page 65).](https://usermanual.wiki/Huawei-Technologies/EM820U.user-s-manual-Rev1/User-Guide-1331027-Page-47.png)