Hyundai IBT LT32AW000 32" LCD Monitor User Manual 1
Hyundai IBT Corp. 32" LCD Monitor 1
Contents
- 1. Users Manual 1 of 3
- 2. Users Manual 2 of 3
- 3. Users Manual 3 of 3
Users Manual 3 of 3

FCC ID : PJILT32AW000
REPORT NO. : HCT-F04-0601 HYUNDAI C–TECH
ATTACHMENT E -3.
- USER’S MANUAL -

How to Select the Aspect Ratio ................................................. 59
How to Freeze Picture ............................................................... 60
How to view Closed Captions .................................................... 61
How to Set Key-Lock ................................................................ 62
How to Set OSD(On-Screen-Display) Display Time .................... 63
How to Set No Key Operation Auto Power Off ........................... 64
How to Set No Signal Timeout ................................................... 65
How to Set Your Favorite Channels ............................................ 66
How to Set Noise Reduction and Use Factory Preset ................ 67
Displaying Information and Clock .............................................. 68
Choosing Your Language ........................................................... 69
Function Setup
HYUNDAI WIDE LCD TV
59
FUNCTION SETUP
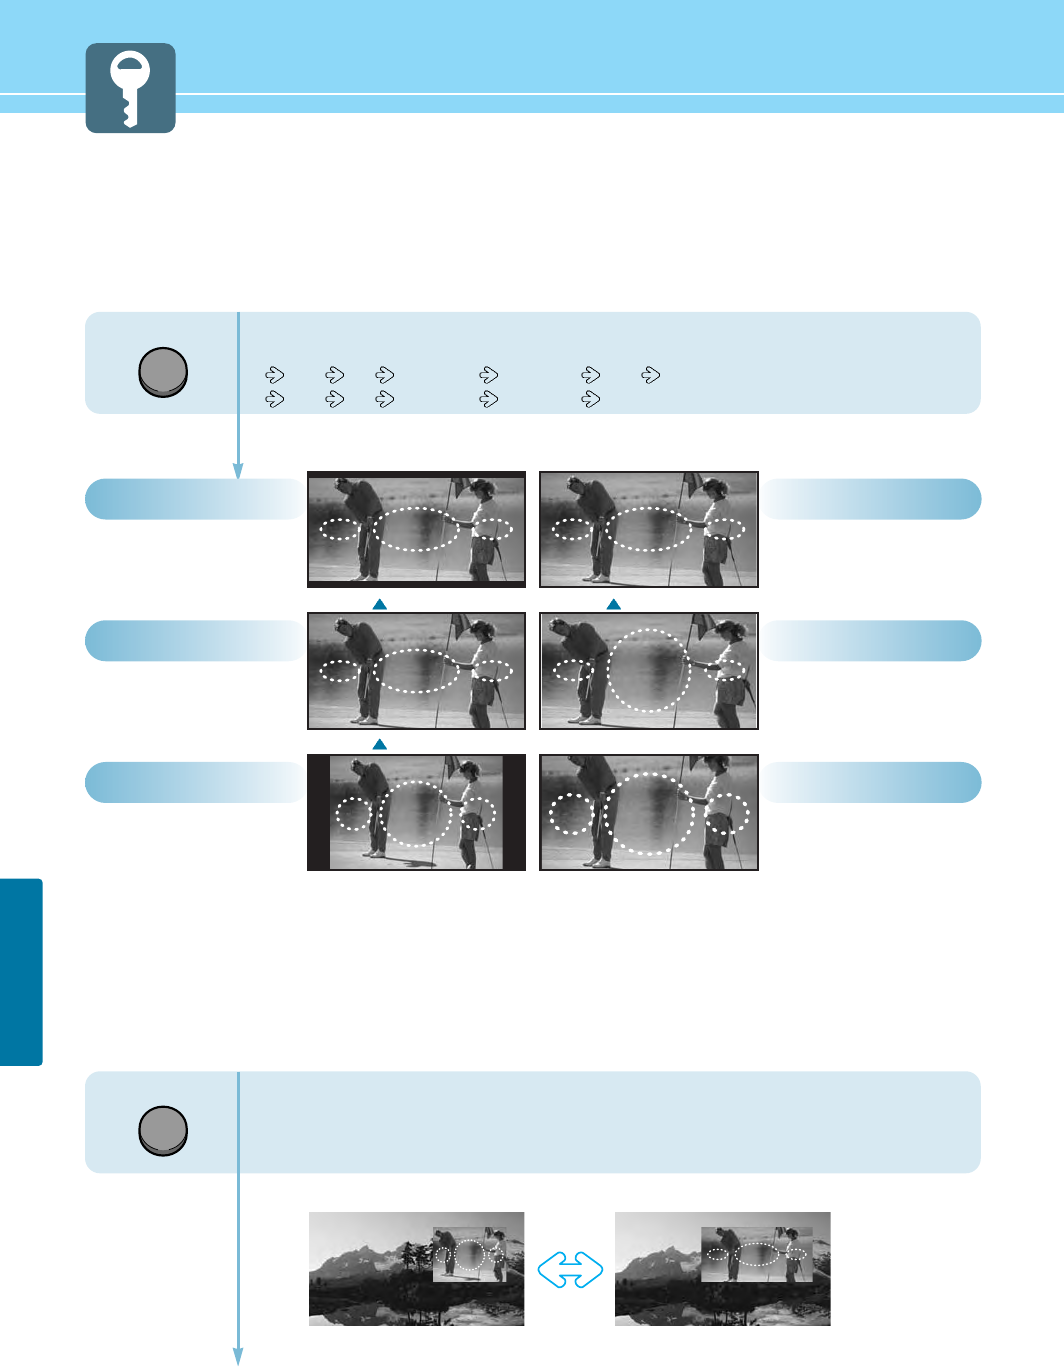
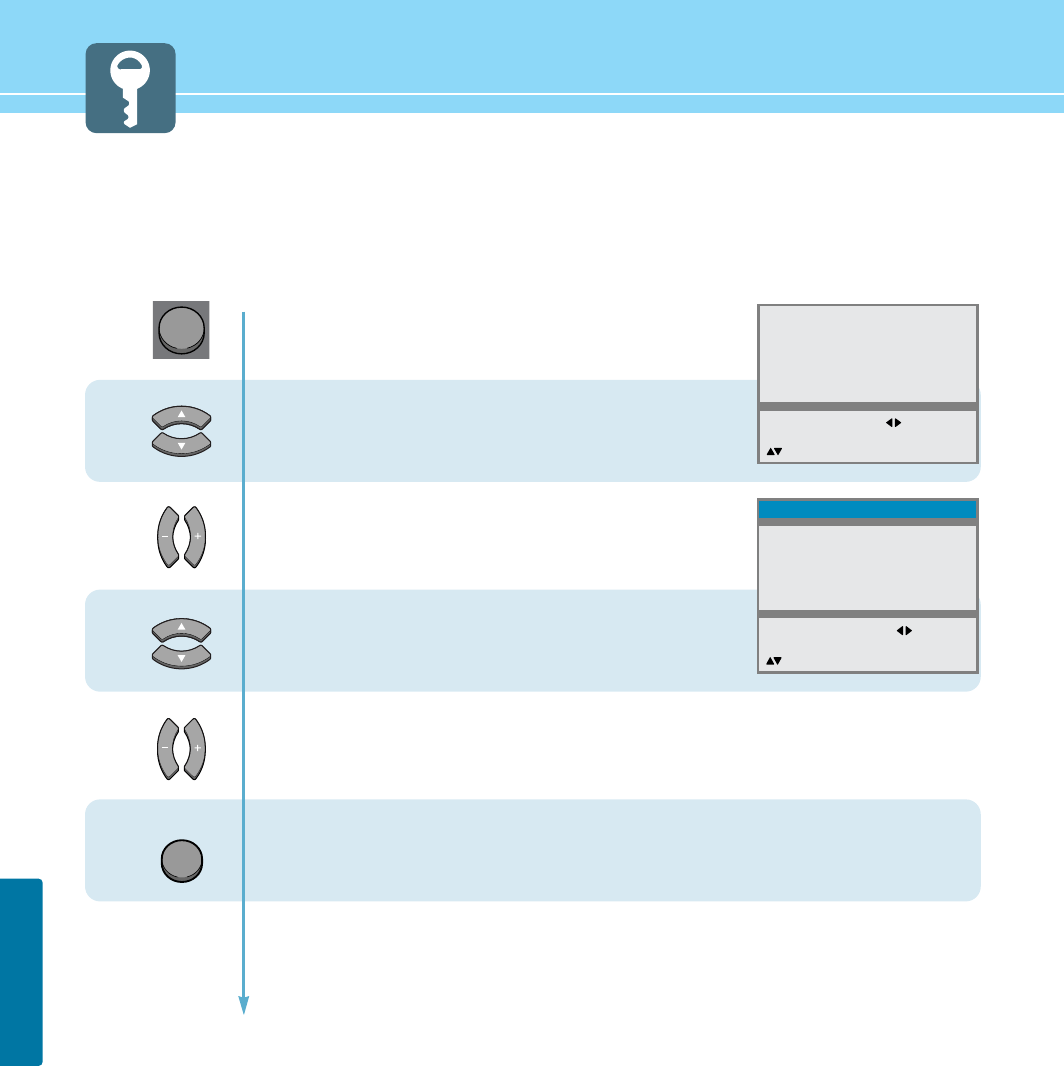
How to Select the Aspect Ratio
- Users can adjust Aspect Ratio as users want.
- This function is available only with the remote control.
Press the ASPECT button, then Aspect Ratio
changes in order below.
15:9 4:3 Zoom 1~5 Panorama 16:9 (HQL260WR)
16:9 4:3 Zoom 1~5 Panorama (HQL320WR)
- In case the PIP mode
When you are viewing the main and PIP images at the same time :
The PIP image will change only from 4:3 to 16:9.
General broadcast picture
is adjusted to 16:9.
16:9
Picture size for panorama
video.
Panorama
General broadcast picture is
adjusted to 16:9.
16:9
The full screen of the
image adjusted to 15:9.
15:9
Zoom in 4:3 in horizontal
and vertical direction.
(This mode is recommended
in letter box format.)
Zoom1~5
General picture size.
4:3
16:94:3
ASPECT
ASPECT
HQL260WR
HQL260WR
HQL320WR
60
FUNCTION SETUP
HYUNDAI LCD TV HQL260WR/320WR
How to Freeze Picture
The user can temporarily stop the playing picture.
OSD menu displays the current aspect ratio.
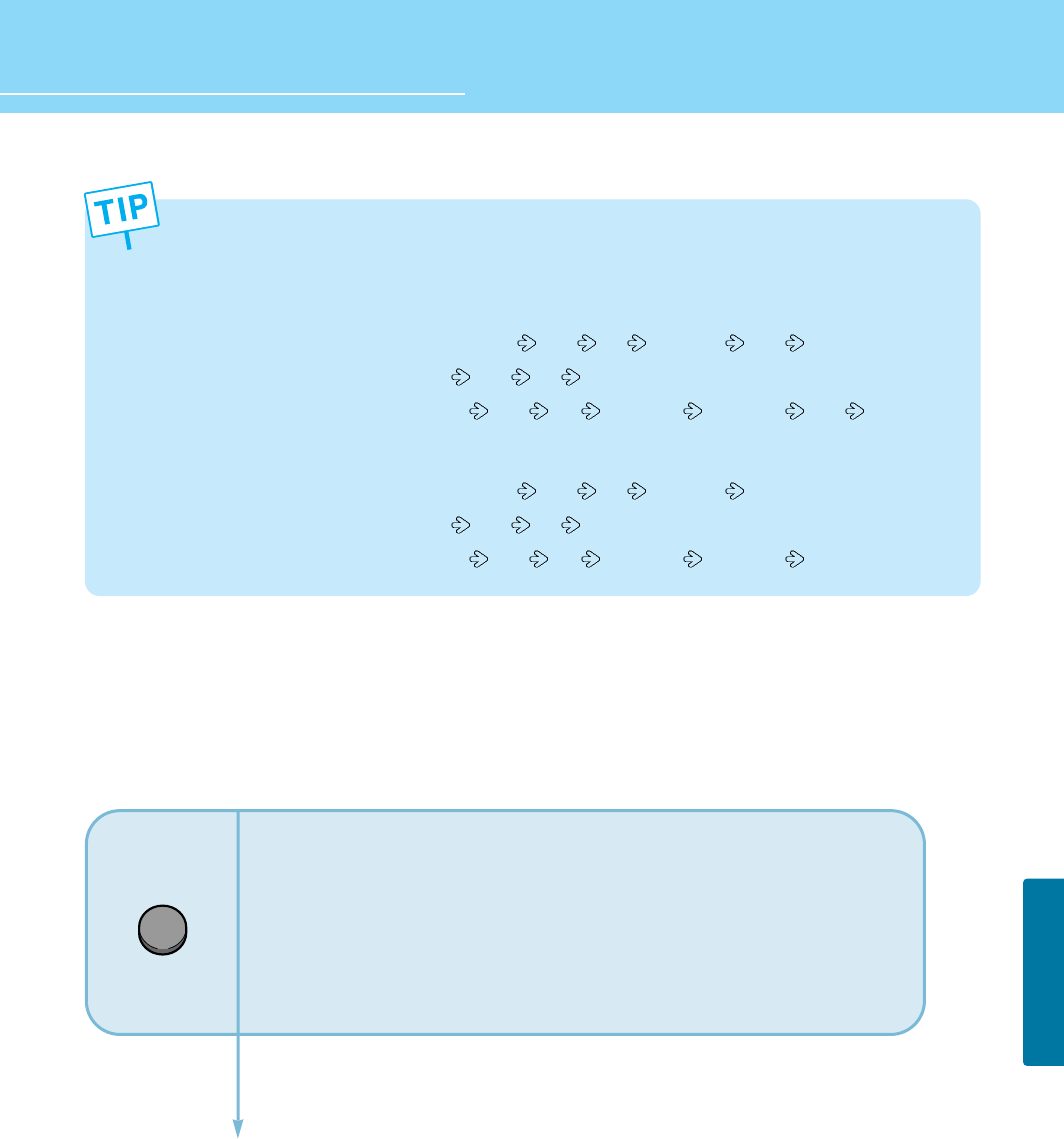
If you press the ASPECT button second time, aspect ratio will be changed according to Input mode as follows :
HQL260WR -
- Under DTV or DVD inputs : Users can select 15:9 4:3 Zoom1~5 16:9 in order.
- Under PC inputs : Users can select 15:9 4:3 in order.
- Under other inputs : Users can select 15:9 4:3 Zoom 1~5 Panorama 16:9 in order.
HQL320WR -
- Under DTV or DVD inputs : Users can select 16:9 4:3 Zoom1~5 in order.
- Under PC inputs : Users can select 16:9 4:3 in order.
- Under other inputs : Users can select 16:9 4:3 Zoom 1~5 Panorama in order.
STILL
Press Still button.
Playing picture is stopped.
* In PIP mode, the main picture stops.
To deselect Still function.
Press Still button once more.
61
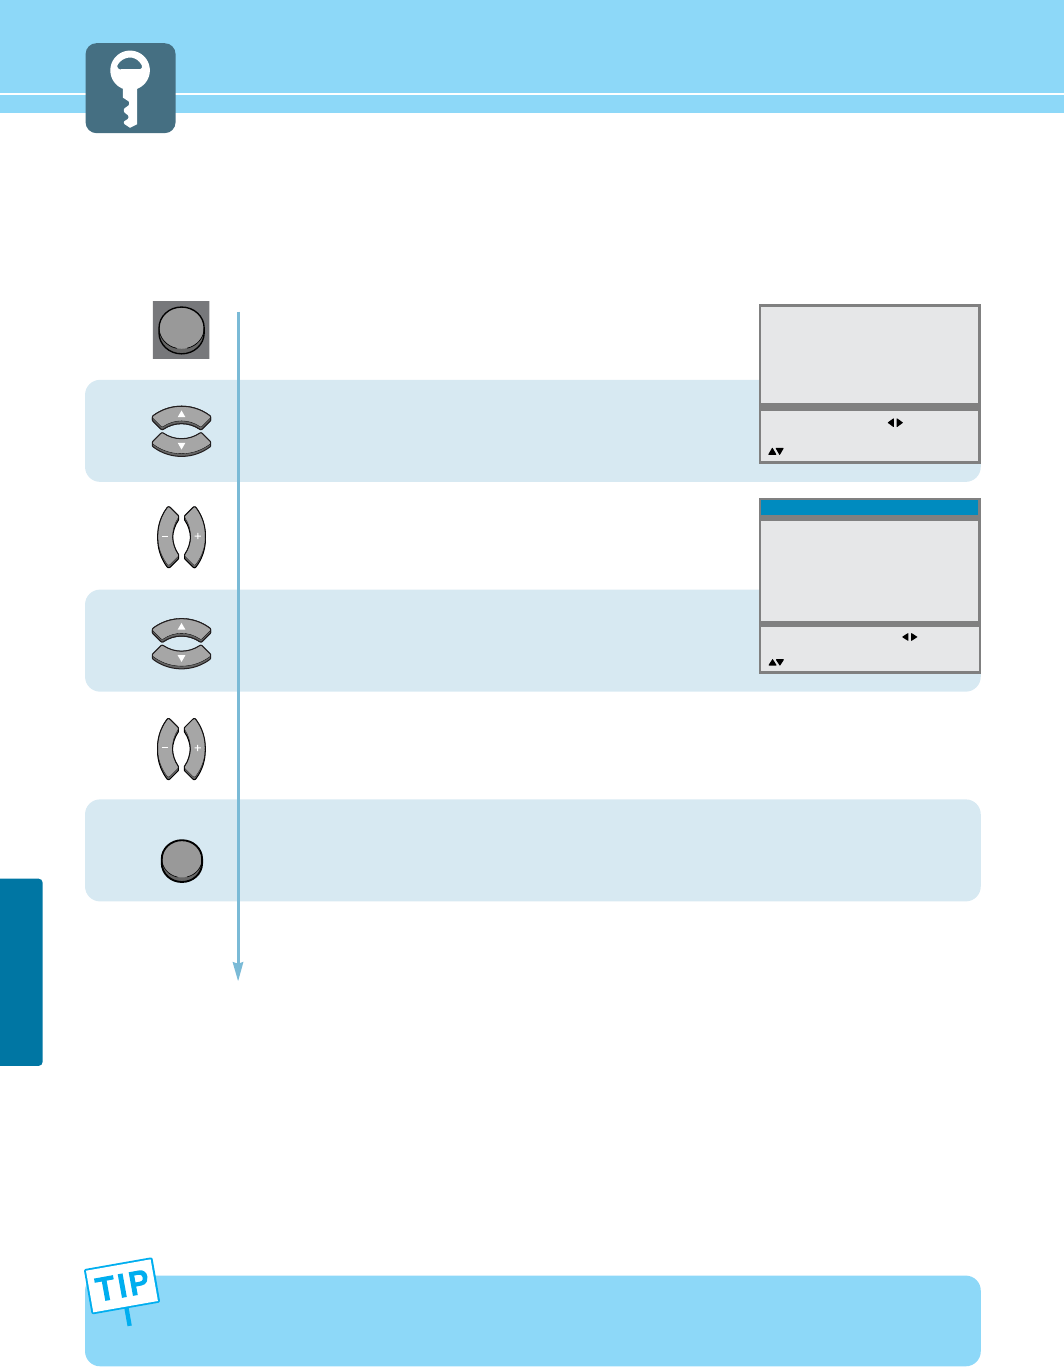
FUNCTION SETUP
1
2
3
4
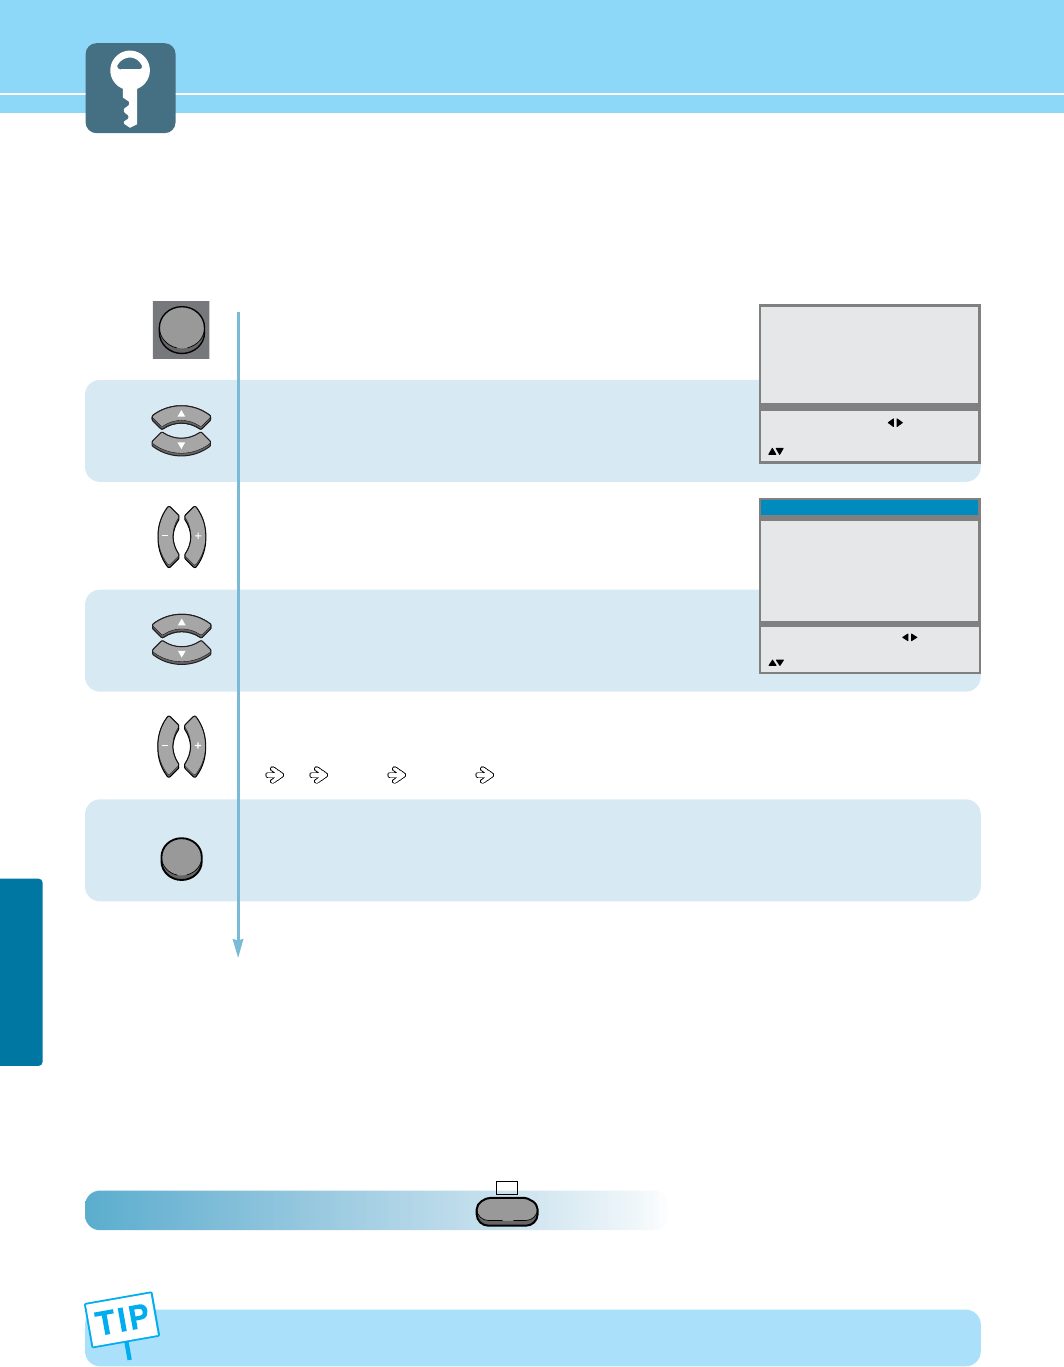
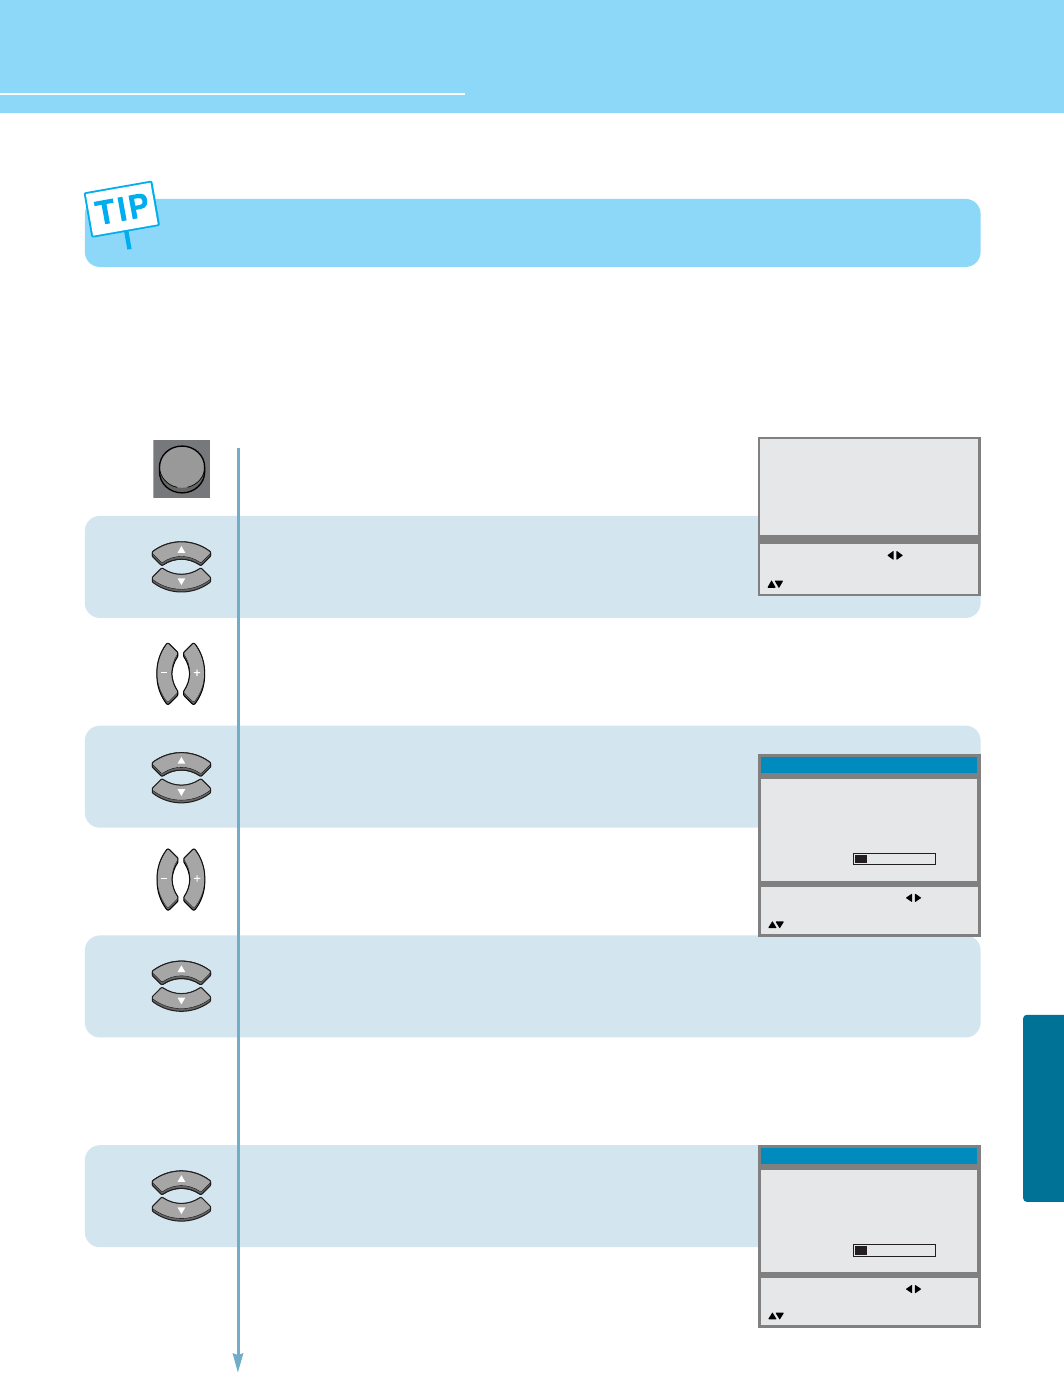
Press Menu button.
Menu items appear on the screen.
Press Up and Down buttons to move to
“Advanced”.
Press Left, Right or OK buttons to select
“Advanced”.
Press Up and Down buttons to move to
“Caption”.
Press Left and Right buttons, then the menu
changes in order below.
Off CC1~4 Text1~4
Press MENU button after the setting is done, and Menu goes to the previous menu.
If the INPUT button is pressed, the menu disappears
Different Channels display different information.
How to view Closed Captions
This is to displays the closed captions that are broadcasted with certain TV shows.
How To Directly Select Closed Caption : Press button.
The selection will switch whenever you press this button on the remote control.
CC
MENU
INPUT
Picture
Sound
Clock
Install
Language
Advanced
MENU : Previous : Select
INPUT : Exit OK : Select
: Position
Caption
Local Lock
Osd Timeout
No Operation Timeout
No Signal Timeout
Favorite Channel
NR
Factory Preset
MENU : Previous : Select
INPUT : Exit
: Position
Advanced
Off
Off
0
0
0
Off
HYUNDAI LCD TV HQL260WR/320WR
62
FUNCTION SETUP
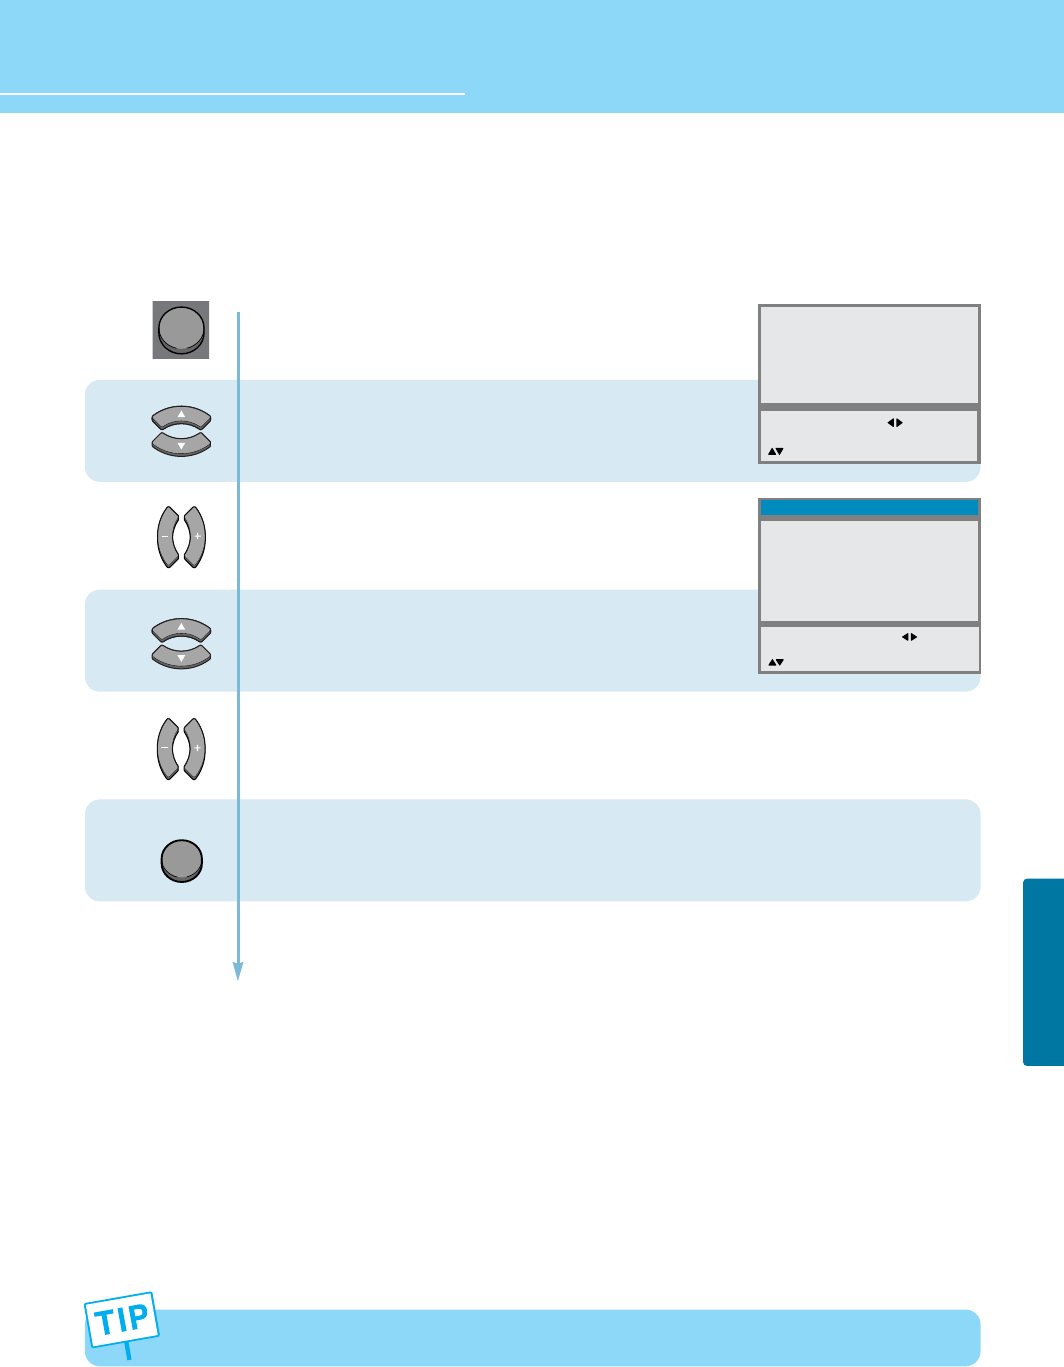
How to Set Key-Lock
This is to lock the control buttons on the front top of LCD TV.
1
2
3
4
Press Menu button.
Menu items appear on the screen.
Press Up and Down buttons to move to
“Advanced”.
Press Left, Right or OK button to select
“Advanced”.
Press Up and Down buttons to move to
“Local Lock”.
Press Left and Right buttons, then the menu
changes in order below.
Off Once Always
Press MENU button after the setting is done, and Menu goes to the previous menu.
If the INPUT button is pressed, the menu disappears.
OFF : With the lock function off, you can control the TV with both
the remote control and the buttons on the TV.
ONCE : The lock function will turn off automatically after you turn
the TV on/off once with the remote control.
ALWAYS : With the lock function always on, you can control the TV
only with the remote control, not with the buttons on the TV.
INPUT
Picture
Sound
Clock
Install
Language
Advanced
MENU : Previous : Select
INPUT : Exit OK : Select
: Position
Caption
Local Lock
Osd Timeout
No Operation Timeout
No Signal Timeout
Favorite Channel
NR
Factory Preset
MENU : Previous : Select
INPUT : Exit
: Position
Advanced
CC1
Off
0
0
0
Off
- This function prevents children from controlling the TV when parents are not home.
- It is available after setting this function with the remote control.
* How to Unlock Local-Lock : Press “-” and “Power” buttons simultaneously(Buttons on the front top of TV).
MENU
63
FUNCTION SETUP
How to Set OSD(On-Screen-Display) Display Time
1
2
3
MENU
4
Press Menu button.
Menu items appear on the screen.
Press Up and Down buttons to move to
“Advanced”.
Press Left, Right or OK button to select
“Advanced”.
Press Up and Down buttons to move to
“Osd Timeout”.
Press Left and Right buttons to adjust the OSD display time.
Whenever you press this button, you can adjust it in 5-second increments from 0 to 60 seconds.
Press MENU button after the setting is done, and Menu goes to the previous menu.
If the INPUT button is pressed, the menu disappears.
- If you do not press the MENU button after adjusting the OSD timeout, the menu screen will disappear
automatically after the set time.
- If you set 0, menu screen will not disappear automatically.
Picture
Sound
Clock
Install
Language
Advanced
MENU : Previous : Select
INPUT : Exit OK : Select
: Position
Caption
Local Lock
Osd Timeout
No Operation Timeout
No Signal Timeout
Favorite Channel
NR
Factory Preset
MENU : Previous : Adjust
INPUT : Exit
: Position
Advanced
CC1
Once
0
0
0
Off
INPUT
HYUNDAI LCD TV HQL260WR/320WR
64
FUNCTION SETUP
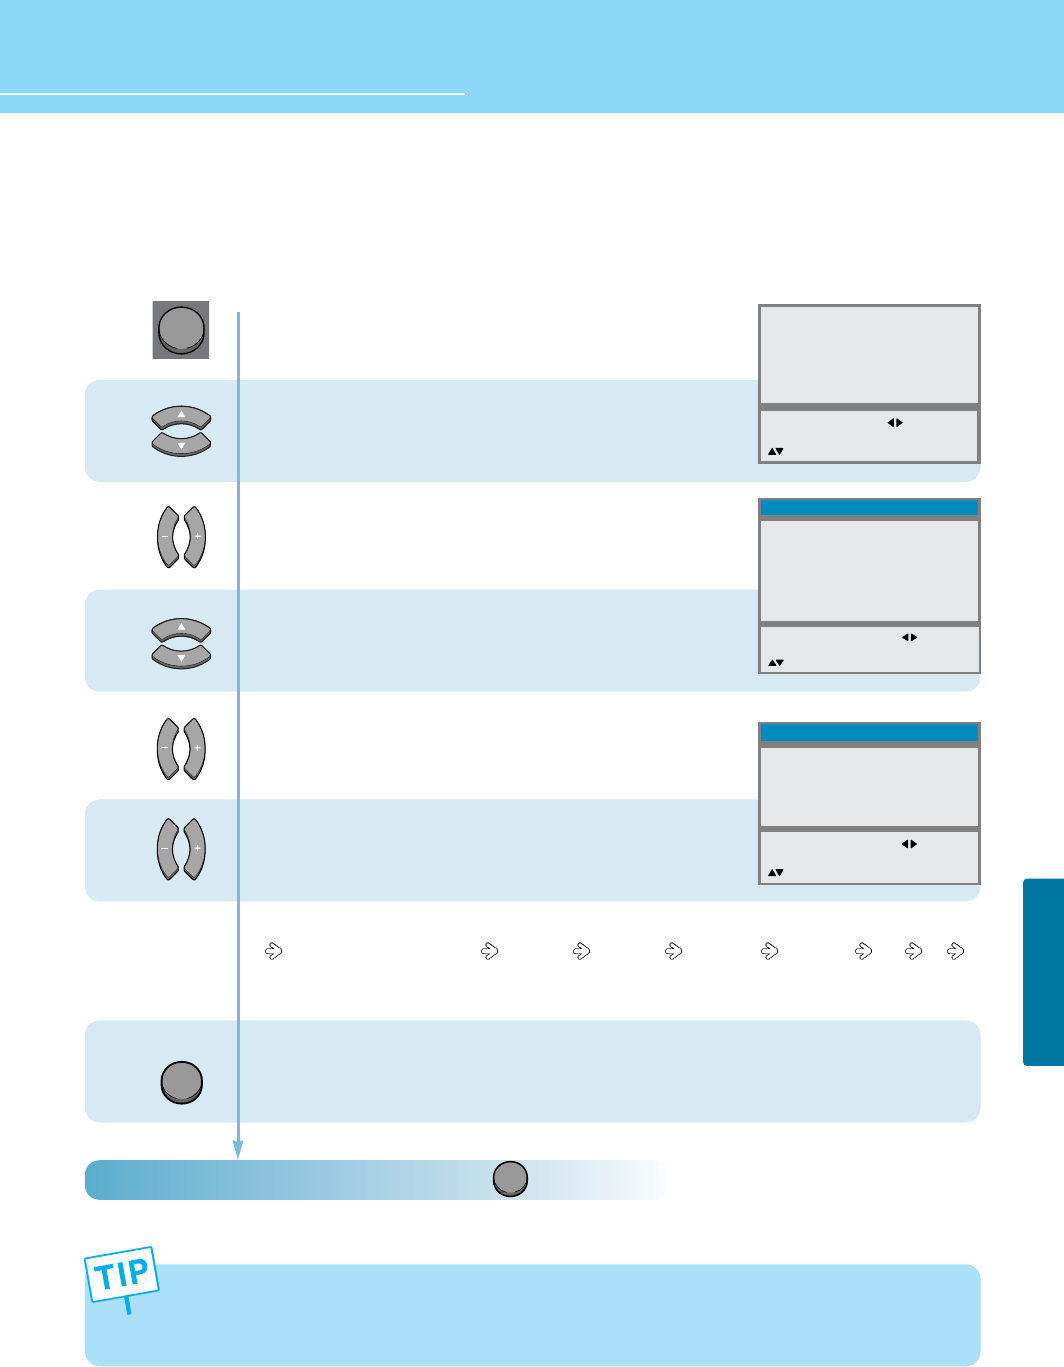
How to Set No Key Operation Auto Power Off
Automatically turns the power off if there is no button pressed for a period of time
after AUTO Wake-Up turns the power on.
1
2
3
4
Press Menu button.
Menu items appear on the screen.
Press Up and Down buttons to move to
“Advanced”.
Press Left, Right or OK button to select
“Advanced”.
Press Up and Down buttons to move to
“No operation Timeout”.
Press Left and Right buttons to adjust the auto power off time.
You can adjust it in 30-minute increments from 0 to 180 minutes.
Press MENU button after the setting is done, and Menu goes to the previous menu.
If the INPUT button is pressed, the menu disappears.
If you set the time to 0, the TV will not use the auto power off function.
Picture
Sound
Clock
Install
Language
Advanced
MENU : Previous : Select
INPUT : Exit OK : Select
: Position
Caption
Local Lock
Osd Timeout
No Operation Timeout
No Signal Timeout
Favorite Channel
NR
Factory Preset
MENU : Previous : Adjust
INPUT : Exit
: Position
Advanced
CC1
Once
10
0
0
Off
MENU
INPUT

How to Set No Signal Timeout
- Automatically turns the power off if there is no broadcast signal for the set time.
- This Function is available only to TV mode.
65
FUNCTION SETUP
1
2
3
If you set the time to 0, the TV will not use the auto power off function.
4
Press Menu button.
Menu items appear on the screen.
Press Up and Down buttons to move to
“Advanced”.
Press Left, Right or OK button to select
“Advanced”.
Press Up and Down buttons to move to
“No Signal Timeout”.
Press Left and Right buttons to adjust
the auto power off time.
You can adjust it in 1-minute increments from 0 to 20 minutes.
Press MENU button after the setting is done, and Menu goes to the previous menu.
If the INPUT button is pressed, the menu disappears.
Picture
Sound
Clock
Install
Language
Advanced
MENU : Previous : Select
INPUT : Exit OK : Select
: Position
Caption
Local Lock
Osd Timeout
No Operation Timeout
No Signal Timeout
Favorite Channel
NR
Factory Preset
MENU : Previous : Adjust
INPUT : Exit
:Position
Advanced
CC1
Once
0
60
0
Off
MENU
INPUT
HYUNDAI LCD TV HQL260WR/320WR
66
FUNCTION SETUP
How to Set Your Favorite Channels
This function allows you to store TV channels or input sources you use frequently.
How To Directly Select Favorite Channel : Press button.
The selection will switch whenever you press the Favorite button on the remote control.
- You can delete the selection by pressing the OK button
- You can set up to 5 in turn.
* While setting this function in CATV mode, if you switch CATV mode to Air TV mode, the previously selected
channels will be skipped, if the channels exceed the range of Air TV channels (1~69 channels).
1
2
3
4
5
Press Menu button.
Menu items appear on the screen.
Press Up and Down buttons to move to
“Advanced”.
Press Left, Right or OK button to select
“Advanced”.
Press Up and Down buttons to move to
“Favorite Channel”.
Press Left and Right buttons to select
“Favorite Channel”.
Favorite Channel menu appear.
Press Left and Right buttons to set
favorite channel or input source.
The channel or input source are changed in order below.
Ch 1~125(CATV), Ch 1~69(TV) AV1 VIDEO AV2 VIDEO AV3 VIDEO AV3 S-VHS DTV PC
You can directly set channel or input source by pressing numeric(0~9), PC, DTV
and Video button.
Press MENU button after the setting is done, and Menu goes to the previous menu.
If the INPUT button is pressed, the menu disappears.
Picture
Sound
Clock
Install
Language
Advanced
MENU : Previous : Select
INPUT : Exit OK : Select
: Position
Caption
Local Lock
Osd Timeout
No Operation Timeout
No Signal Timeout
Favorite Channel
NR
Factory Preset
MENU : Previous : Select
INPUT : Exit
: Position
Advanced
CC1
Once
0
60
5
Off
Ch 1
Ch 125
DTV
AV1 VIDEO
- - - - -
MENU : Previous : Adjust
INPUT : Exit 0~9 : Adjust
: Position OK : Clear
Favorite Channel
MENU
INPUT
FAVORITE

How to Set Noise Reduction and Use Factory Preset
Noise Reduction is to eliminate some noise on the screen and It is not applied to DTV and PC mode.
Press Menu button.
Menu items appear on the screen.
Press Up and Down buttons to move to
“Advanced”.
Press Left, Right or OK button to select
“Advanced”.
Press Up and Down buttons to move to
“NR”.
Press Left and Right buttons to “On/Off”.
Go to step 5
if you need to recall to the default.
Press Up and Down buttons to move to
“Factory Preset”.
Press the OK button.
Then, It will recall to the defult.
(Except for Favorite Channel and Clock)
Press MENU button after the setting is done, and Menu goes to the previous menu.
If the INPUT button is pressed, the menu disappears.
1
2
3
4
5
6
67
FUNCTION SETUP
Picture
Sound
Clock
Install
Language
Advanced
MENU : Previous : Select
INPUT : Exit OK : Select
: Position
Caption
Local Lock
Osd Timeout
No Operation Timeout
No Signal Timeout
Favorite Channel
NR
Factory Preset
MENU : Previous : Select
INPUT : Exit
: Position
Advanced
CC1
Once
0
60
5
Off
Caption
Local Lock
Osd Timeout
No Operation Timeout
No Signal Timeout
Favorite Channel
NR
Factory Preset
MENU : Previous : Select
INPUT : Exit
: Position
Advanced
CC1
Once
0
60
5
Off
MENU
OK
INPUT
HYUNDAI LCD TV HQL260WR/320WR
68
FUNCTION SETUP
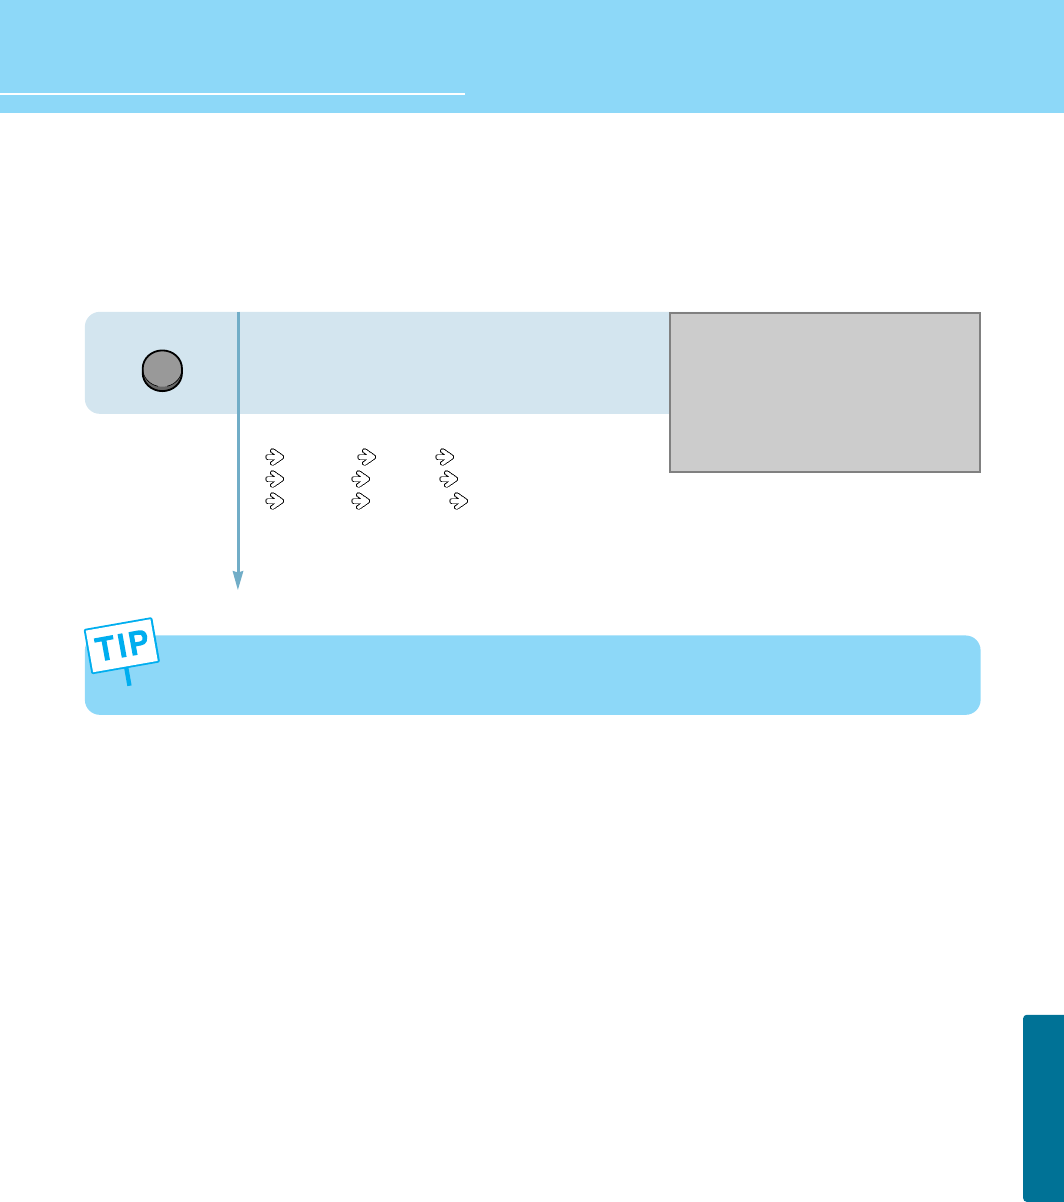
Displaying Information and Clock
- You can view the channel information and setting status by pressing the “INFO” button on the remote control.
- You can view the clock by pressing the “Clock” button on the remote control.
In case of applying TV input
Press the INFO button.
In case of applying DTV input
Press the INFO button.
In case of applying PC input
Press the INFO button.
In case of applying PIP input
Press the INFO button.
In case of viewing only clock information
Press the CLOCK button.
DISPLAY
DISPLAY
DISPLAY
DISPLAY
CLOCK
CATV 8
PM 12:30
Mono
Sleep Off
DTV
PM 12:30
Mono
Sleep Off
1080i@60Hz
PC
PM 12:30
Stereo
Sleep Off
1024x768@60Hz
CATV 8
PM 12:30
DTV
Mono
Sleep Off
1080i@60Hz
PM 12:30
69
FUNCTION SETUP
Choosing Your Language
When you start using your TV for the first time, you must select your language preference in order to display main
menus and sub menues, etc.
1
2
3
4
Press Menu button.
Menu items appear on the screen.
Press Up and Down buttons to move to
“Language”.
Press Left and Right buttons to select
“Language”.
Language menu appears.
Press Up and Down buttons to move
to languge you want.
(English, Français, Deutch, Italian, Español)
Press Left, Right or OK button to select
Language.
When it selects, the “>>” mark is indicated.
Press MENU button after the setting is done, and Menu goes to the previous menu.
If the INPUT button is pressed, the menu disappears.
Picture
Sound
Clock
Install
Language
Advanced
MENU : Previous : Select
INPUT : Exit OK : Select
: Position
English
Français
Deutsch
Italiano
Español
>>
MENU : Previous : Select
INPUT : Exit OK : Select
: Position
Language
MENU
INPUT

How to Set Date and Clock ........................................................ 71
How to Set On/Off Time ............................................................. 72
How to Set Sleep Time ............................................................. 74
Clock Setup
HYUNDAI WIDE LCD TV

71
CLOCK SETUP
How to Set Date and Clock
You can set the current time so that it may be displayed by pressing the “INFO” button. You must also set a clock if
you wish to use the automatic on or off timers.
1
2
3
MENU
4
5
Press Menu button.
Menu items appear on the screen.
Press Up and Down buttons to move to
“Clock”.
Press Left, Right or OK button to select
“Clock”.
Press Up and Down buttons to move to
“Date”.
Press Left and Right buttons to move
between Year-Month-Date.
Press Up and Down or number (0~9) buttons
to set the Date, Month and Year.
Press the Right button and then go to step 6
if you need to set clock.
Press Up and Down buttons to move to
“Clock”.
Press Left and Right buttons to move
between Hour-Minute.
Press Up and Down or number (0~9) buttons
to set the Hour, Minute.
Adjust the Hour using the 24-hour system :
Example : 6 P.M. Press 1 and 8.
Picture
Sound
Clock
Install
Language
Advanced
MENU : Previous : Select
INPUT : Exit OK : Select
: Position
Date
Clock
Wake Up
Clock
Channel
Volume
Off Time
YY/MM/DD
- -
- - : - -
- - -
20
- - : - -
MENU : Previous : Move
INPUT : Exit OK : Clear
: Position
Clock
Date
Clock
Wake Up
Clock
Channel
Volume
Off Time
04/03/22
- - : - -
- - : - -
- - -
20
- - : - -
MENU : Previous : Move
INPUT : Exit OK : Clear
: Position
Clock
8
7
6
72
CLOCK SETUP
HYUNDAI LCD TV HQL260WR/320WR
How to Set On/Off Time
This function allows you to automatically turn on your LCD TV at the preset time.
1
2
3
4
5
6
Press Menu button.
Menu items appear on the screen.
Press Up and Down buttons to move to
“Clock”.
Press Left, Right or OK button to select
“Clock”.
Press Up and Down buttons to move to
“Wake Up(Clock)”.
Press Left and Right buttons to move
between Hour-Minute.
Press Up and Down or number (0~9) buttons
to set the Hour-Minute.
Press the Right button and then go to step 6
if you need to set Channel.
Press Up and Down buttons to move to
“Channel”.
And press Right button to select “Channel”.
Continued on next page ......
- You can erase and reset the Date and Clock by pressing the OK button.
- When the power supply AC main power is cut off, the clock is reset to the value before the Time set.
MENU
Picture
Sound
Clock
Install
Language
Advanced
MENU : Previous : Select
INPUT : Exit OK : Select
: Position
Date
Clock
Wake Up
Clock
Channel
Volume
Off Time
04/03/22
12:30
- - : - -
- - -
20
- - : - -
MENU : Previous : Move
INPUT : Exit OK : Clear
: Position
Clock
Date
Clock
Wake Up
Clock
Channel
Volume
Off Time
04/03/22
12:30
06 : 30
- - -
20
- - : - -
MENU : Previous : Move
INPUT : Exit OK : Clear
: Position
Clock
...... Continued from previous page. (Set the volume level and channel at the time when your LCD TV turns on.)
8
7
9
10
11
12
73
CLOCK SETUP
- You can erase and reset the Wake Up(Clock, Channel), Off time by pressing the OK button.
- Regardless of which Input Mode you set On Time in, your LCD TV will turn on in TV Mode only.
- If the Off time has been set, “Off time 1” or “Off time 2” will be displayed 1 minute or 2 minutes before your
TV turns off.
Press the Up and Down or number (0~9) buttons
to set the Channel.
Press the Right button and then go to step 8
if you need to set the Volume.
Press Up and Down buttons to move to
“Volume”.
Press Left and Right buttons to adjust Volume.
Go to step 10
if you need to set the Off Time.
Press Up and Down buttons to move to
“Off time”.
Press Left and Right buttons to move
between Hour-Minute.
Press Up and Down or number (0~9) buttons
to adjust the Hour-Minute.
Press MENU button after the setting is done, and Menu goes to the previous menu.
If the INPUT button is pressed, the menu disappears.
INPUT
Date
Clock
Wake Up
Clock
Channel
Volume
Off Time
04/03/22
12:30
06 : 30
- - -
20
- - : - -
MENU : Previous : Move
INPUT : Exit OK : Clear
: Position
Clock
Date
Clock
Wake Up
Clock
Channel
Volume
Off Time
04/03/22
12:30
06 : 30
102
20
- - : - -
MENU : Previous : Move
INPUT : Exit OK : Clear
: Position
Clock
Date
Clock
Wake Up
Clock
Channel
Volume
Off Time
04/03/22
12:30
06 : 30
102
50
- - : - -
MENU : Previous : Move
INPUT : Exit OK : Clear
: Position
Clock
HYUNDAI LCD TV HQL260WR/320WR
74
CLOCK SETUP
How to Set Sleep Time
This function is available only with the remote control.
SLEEP
Press the Sleep button, then Sleep Time
changes in order below.
Sleep off Sleep5 Sleep10
Sleep20 Sleep30 Sleep60
Sleep90 Sleep120 Sleep180.
- If the Sleep time has been set, “Sleep 1” or “Sleep 2” will be displayed 1 minute or 2 minutes before your TV
turns off.
Sleep Off

75
CLOCK SETUP

Glossary ..................................................................................... 77
Troubleshooting ....................................................................... 79
Care and Cleaning ..................................................................... 81
Product Specifications ............................................................... 82
Appendix
HYUNDAI WIDE LCD TV

77
APPENDIX
Glossary
Component video Component video is sent through three cables: two color shade (chrominance)
signals and one brightness (luminance) signal. Component video achieves greater
color accuracy than composite video or S-VIDEO by splitting chrominance into
two separate portions.
Composite video Composite video is sent through a single cable. Composite video combines the
color shade (chrominance) and brightness (luminance) information into one video
signal.
S-VIDEO S-VIDEO requires a single cable, which carries the brightness (luminance) and
color (chrominance) signals of the picture separately. S-VIDEO provides better
resolution than composite video, which carries the signals together.
480i Provides 480 lines of resolution. Displays images using interlaced scanning,
which first transmits all the odd lines on the TV screen and then the even lines.
480p Provides 480 lines of resolution. Displays images using progressive scanning,
which transmits each line from top to bottom.
720p Provides 720 lines of resolution. Displays images using progressive scanning,
which transmits each line from top to bottom.
1080i Provides 1080 lines of resolution. Displays images using interlaced scanning,
which first transmits all the odd lines on the TV screen and then the even lines.
1080i is one of the formats used by HDTV (High Definition TV).
Digital television (DTV) A new technology for transmitting and receiving broadcast television signals. DTV
provides higher resolution and improved sound quality over analog television.
HDTV(High Definition TV) HDTV is a new kind of digital TV, creating a high quality picture, high definition.
The HDTV provides a theater-like screen with an aspect ratio of 16:9. Supports
480p or higher.
SDTV(Standard Definition TV) SDTV is a new kind of standard definition digital TV, having a range of lower
resolution than the HDTV. Supports 480i.
Cable Broadcast Receiver A device that receives cable broadcasting. Connecting it to your TV set allows you
to watch a various channels.
(Converter)
Satellite Broadcasting Provides crisp picture and clear audio quality throughout the country via a
satellite.
VHF/UHF VHF (Very High Frequency) is the part of the frequency spectrum from 30 to 300
megahertz. UHF (Ultra High Frequency) is the part of the frequency spectrum
from 300 to 3,000 megahertz.

78
APPENDIX
HYUNDAI LCD TV HQL260WR/320WR
DVD DVD (digital versatile disc) is an optical disc that can store a huge volume of
multimedia such as video, game, and audio application, etc.
Coaxial Cable Coaxial cable is the kind of rounded copper cable, which is generally used for TV
antenna.
LNA(Low-Noise-Ampilfler) Satellite applied technology. It is capable of amplifying weak signals so that any
area experiencing a signal interruption may enjoy a clearer picture quality.
Aspect ratio Refers to the ratio between the width and height of the screen. This TV has a 16:9
(widescreen) aspect ratio, as opposed to a 4:3 aspect ratio.
PIP (Simultaneous Screen) PIP allows you to view two images at the same time in a single screen.
SWAP PIP function provides a main picture (larger image) and sub-picture (smaller
image). The SWAP is designed to swap the sub-picture for the main picture. For
example, while you are watching a main picture on TV and watching a sub-
picture on VCR, you can instantly switch the two pictures by using the SWAP
function.
Picture Mode Picture Mode features the optimal picture quality. There are Custom-Standard-
Sport-Natural-Mild features in order. “User Control” allows you to adjust
Contrast, Brightness, Colour, Tint, etc.
Sound Mode Sound Mode features the optimal sound quality. There are Standard-Music-Film-
Speech-Custom features in order. “User Control” allows you to adjust high
frequency sound, middle frequency sound and low frequency sound.
Channel Tuning The feature allows you to enjoy optimal broadcasting. This product provides
automatic tuning feature for the best broadcasting status. You can tune the
channels manually.
SRS WOW A well-recognized 3D sound technology developed by US SRS Labs, Inc. This
technology delivers the ultimate audio experience only with two speakers as if
through multi-channel speakers.

79
APPENDIX
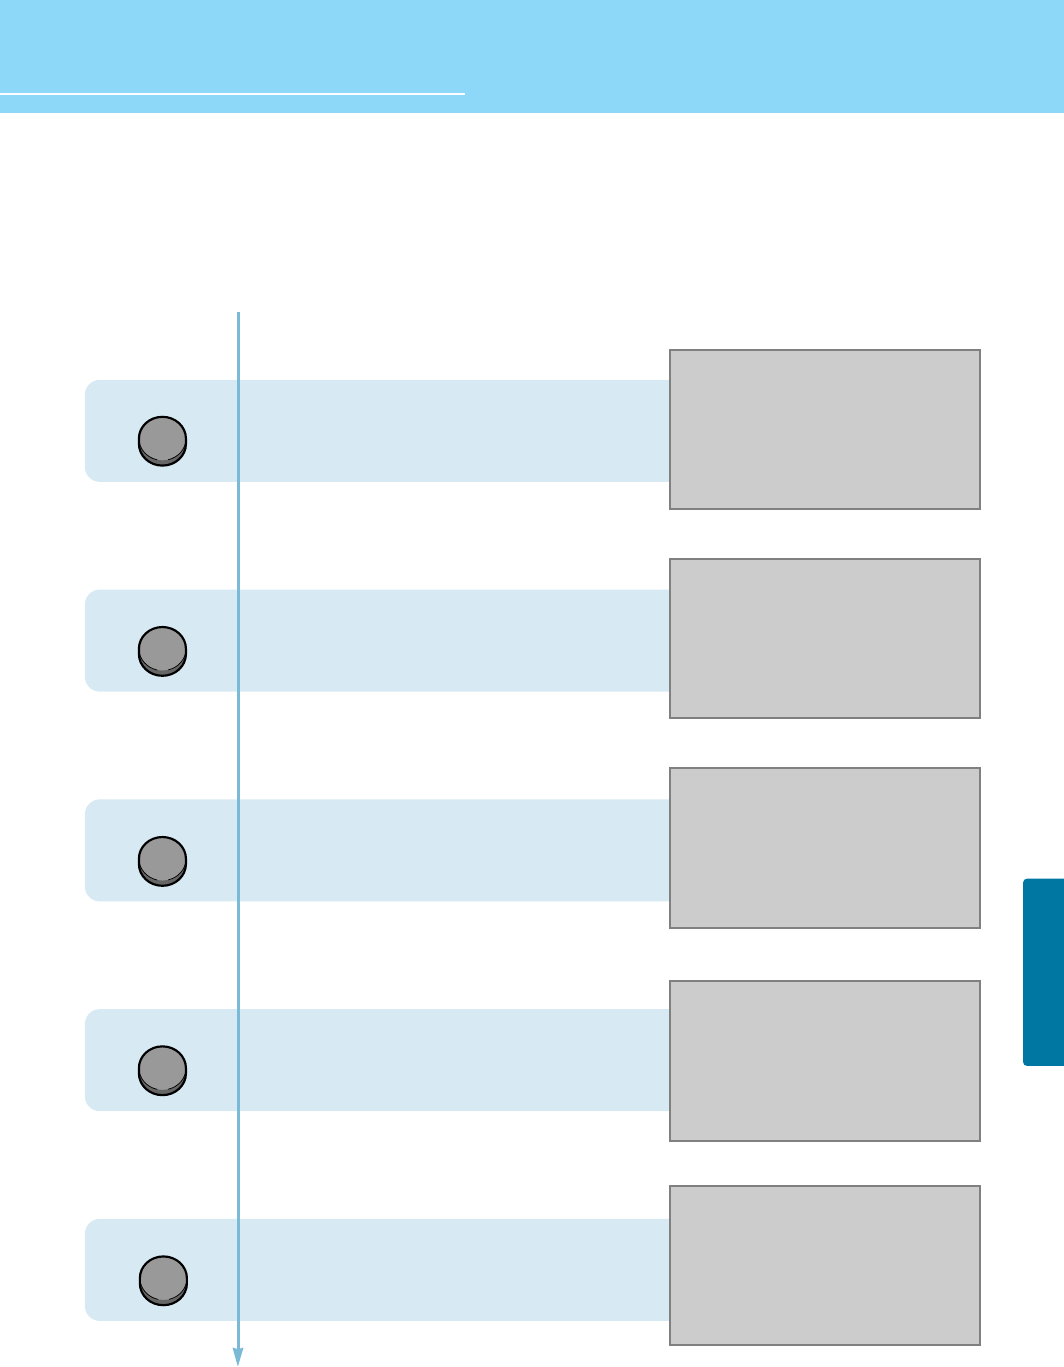
Troubleshooting
Installation Problems
Picture Problems
Symptom
How can I install an
antenna?
TV screen is not clear after
installing an indoors
antenna.
How can I view cable
broadcasting?
Symptom
Neither picture nor
sound comes up.
Picture turns on slowly
after power is on.
Vertical and horizontal lines
and web patterns briefly
appear on the
picture and shake.
Input Source information
only appears on black
screen.
Poor reception on some
channels.
Black and white on some
channels.
TV won’t turn on.
Screen is too bright or too
dark.
Possible solution
Refer to pages 23~24.
Indoors antenna may experience poor reception due to surrounding buildings.
Please install an outdoors antenna or wireless antenna.
Please install a cable broadcasting receiver (Converter).
Possible solution
Check whether power is on.
Check whether the power is cut or whether power cord is properly connected.
Try to plug another product’s power cord to the outlet the LCD TV is plugged into.
This symptom is not a malfunction. This delay is designed to prevent the
distorted and noisy picture when power is on. However, if the picture does not
appear more than 5 minutes after power is on, call a service center.
This symptom may be caused by interference from other electric appliances.
Please avoid using a cordless phone, hairdryer, and electric drill, etc.
Check whether your TV is properly connected to external devices.
Check whether you selected proper channels. Try re-orienting your antenna.
Ensure LNA is activated.
Check other channels for black and white screen. Adjust colour.
Ensure the power cord is plugged.
Adjust brightness.

80
APPENDIX
HYUNDAI LCD TV HQL260WR/320WR
Sound Problems
General
Auto On does not work.
After setting the time,
I turned TV off and turn it on.
The programmed information
has been erased.
Symptom
Too much noise occurs.
No sound while viewing a
cable channel
Picture is OK but sound does
not come out.
One of the speakers does not
produce sound.
Symptom
Remote control won't work.
Where does the S-Video
cable plug in for audio
output?
Strange noises are heard.
I tried to use the TV screen
as a PC monitor
but it doesn’t work.
Ensure to use the remote control or power button on the product to turn off your
TV. If you unplug the power cord, the stand-by consumption power becomes 0
(zero), which causes the programmed time to be erased.
Ensure to use the remote control or power button on the product to turn off your
TV. If you unplug the power cord, the stand-by consumption power becomes 0
(zero), which causes the programmed time to be erased.
Possible solution
Check whether the audio setting is in the Stereo mode. In the Stereo mode, the
sound may be distorted in the area where experiences poor reception or is
located far away from a TV broadcasting station.
Make sure an audio or audio/video component is securely inserted into the
appropriate jacks. Check other channels for sound. Check the volume settings on
the cable broadcasting receiver.
Try to press volume up/volume down buttons of your remote control.
Select sound balance and make proper adjustment. (Page 43)
Check the speaker connection cables.
Possible solution
Check whether there is a blocking object between the remote control and LCD TV.
Make sure your LCD TV is Power On. (In case of normal, LED on the front panel is
in Red.)
Check whether batteries are inserted with proper polarities(+, -).
When the batteries are worn out, replace with new ones.
Connect the two Audio jacks from the S-Video cable to the left and right ports on
the Composite.
Ticking noise during or after watching is caused by the change of ambient
environment such as humidity and temperature, which is characterized by plastic
products. Strange ticking noise occurs because a signal is suddenly transmitted
to the LCD panel. So, this is not a malfunction.
Adjust the resolution referring to the standard signal mode table. Check the
specification of your video card installed in your PC. If your video card does not
work in supported hardware. Try upgrading the video card’s driver.
APPENDIX
81
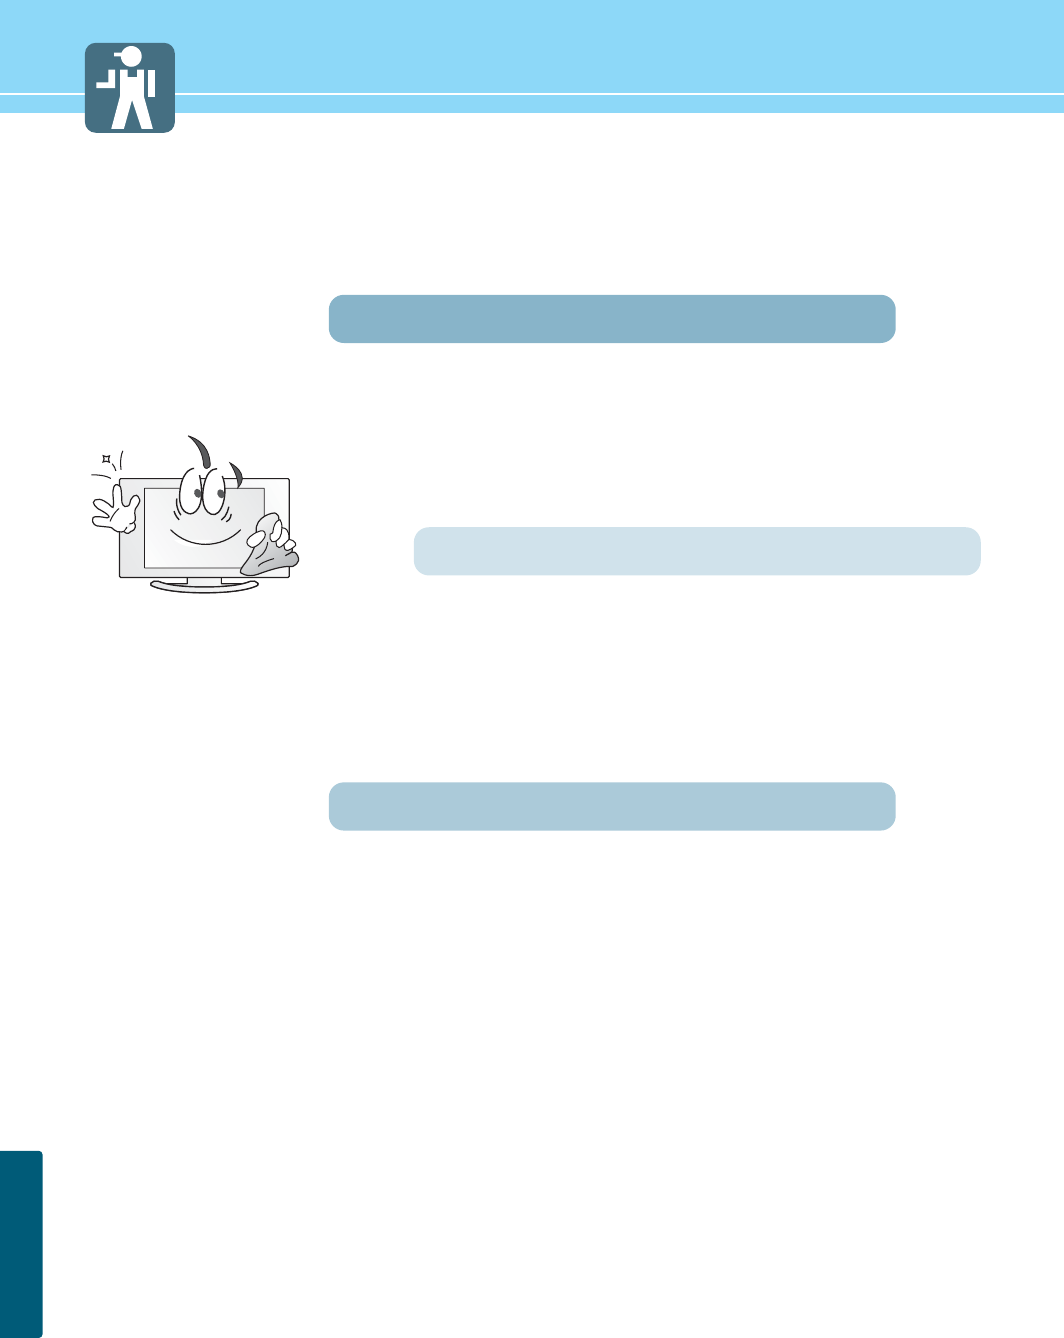
Care and Cleaning
Cabinet Cleaning
Wipe a soft dry cloth.
Do not use inflammables like Benzene or Thinner, or wet clothes.
Do not scratch the panel of TV with a fingernail or pointed object.
Screen Cleaning
Clean the screen with a soft cloth moistened in mild glass
detergent and dry with a soft cloth.
Never use any solvent on the screen such as Acetone, Benzene, or
Thinner, etc.
Cleaning Inside
When the inside needs to be cleaned, contact a service center or
distribution agent where the item is purchased.
It is recommended cleaning is complete before the rainy season.

HYUNDAI LCD TV HQL260WR/320WR
APPENDIX
82
Product Specifications
- Specification is subject to change without notice for performance improvement.
- Specification on ‘dead pixel’ of LCD panel applies to ISO13406-2 Standard.
MODEL
Display
Input/Output
TV/VIDEO
Power
Dimension(W x D x H mm)
Weight
Control Type
HQL320WR
32" Diagonal (16:9)
a-si TFT active matrix
1000 :1
Typical 450
170 (H) /170 (V)
1024 X 768
0.51075 (H) x 0.51075 (V)
RGB Vertical stripe(Asymetric)
1 EA(with common A/V Audio)
2 EA (with Audio)
1 EA (with Audio)
1 EA
D-SUB
1024 X 768 @ 75 Hz
Component Audio(Common)
1 EA
NTSC
AM, FM
CVBS, S-VHS, RGB, Component
AC 100 - 240 V, 50/60 Hz
Typical 140W
Typical 3W
957 x 236 x 495 (with stand)
18 Kg (with stand)
Remote Control, Key Control
HQL260WR
26" Diagonal (15:9)
a-si TFT active matrix
500 :1
Typical 450
170 (H) /170 (V)
1280 X 1024
0.4425 (H) x 0.4425 (V)
RGB Vertical stripe(Asymetric)
1 EA(with common A/V Audio)
2 EA (with Audio)
1 EA (with Audio)
1 EA
D-SUB
1024 X 768 @ 75 Hz
Component Audio(Common)
1 EA
NTSC
AM, FM
CVBS, S-VHS, RGB, Component
AC 100 - 240 V, 50/60 Hz
Typical 120W
Typical 1.8W / (< 2.5W)
814 x 223 x 491 (with stand)
16 Kg (with stand)
Remote Control, Key Control
Size
Type
Contrast Ratio
Luiminance (cd/m2)
Viewing Angle
Resolution
Pixel Pictch (mm)
Pixel arrangement
S-Video
A/V (RCA)
Component(Y/Cb/Cr)
RF
PC Connector
Max. Resolution
Audio
Headphone
Color System
Sound System
Video System
Supply
Consumption
Saving

83
APPENDIX
Model. HQL260WR/320WR
User's Guide
USA
Hyundai ImageQuest America
(C/O : I Display)
5690 Steward Ave. Fremont, CA 94538, USA
Tel : 510-683-0970
Fax : 510-683-0974
GERMANY
Hyundai ImageQuest Europe GmbH
Hajo-Rüter Str. 19, 65239 Hochheim
Tel : 06146 / 904 444
Fax : 06146 / 904 410
e-mail : service@hyundaiq.de
WWW : www.hyundaiq.com
AUSTRALIA
Thomas Electronics Australia Pty Ltd.
3 Sheridan Close
Milperra NSW 2214, Australia
Tel : +61 2 9773 7400
Fax : 61 2 9773 7177
Attn : Ms. Shiely Poniman
JAPAN
Hyundai ImageQuest JAPAN
Shin-Hibiya Bldg, East 5F 1-3-6
Uchisaiwai-Cho, Chiyoda-ku,
Tokyo, Japan 100-0011
Tel : 03-5157-2286
Fax : 03-5157-2284
e-mail : pjkim@iqt.co.kr
C/S P.J.Kim
HYUNDAI IMAGEQUEST LCD TV
P/N 632 0238 100 Rev.00 * The above image may look different from the real product.