IDT Technology TS1X0A Outbreaker Multi-function Watch User Manual TS1X0 M USA EN V0 P70
IDT Technology Limited Outbreaker Multi-function Watch TS1X0 M USA EN V0 P70
UserManual.wiki
>
IDT Technology
>
TS1X0A User Manual
User Manual
Navigation menu
Upload a User Manual
Namespaces
Wiki Guide
HTML
PDF
Info
Views
User Manual
Discussion / Help
Navigation
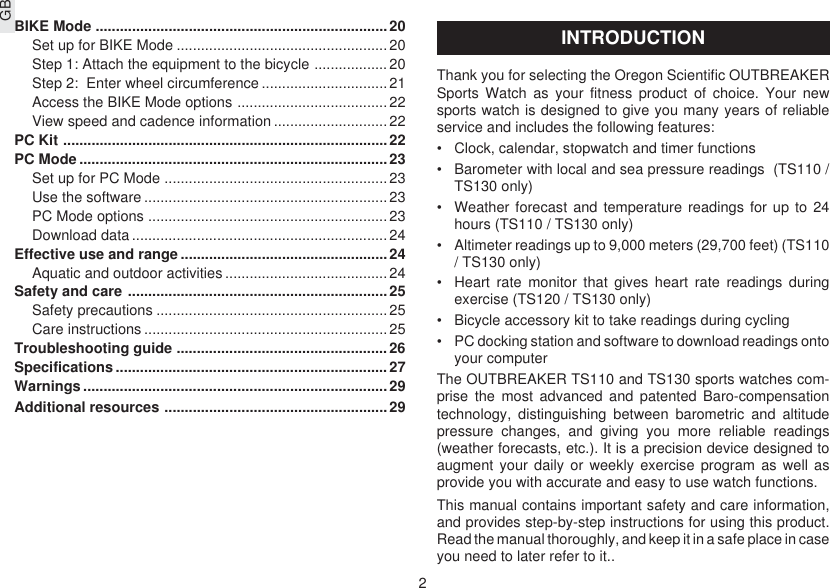

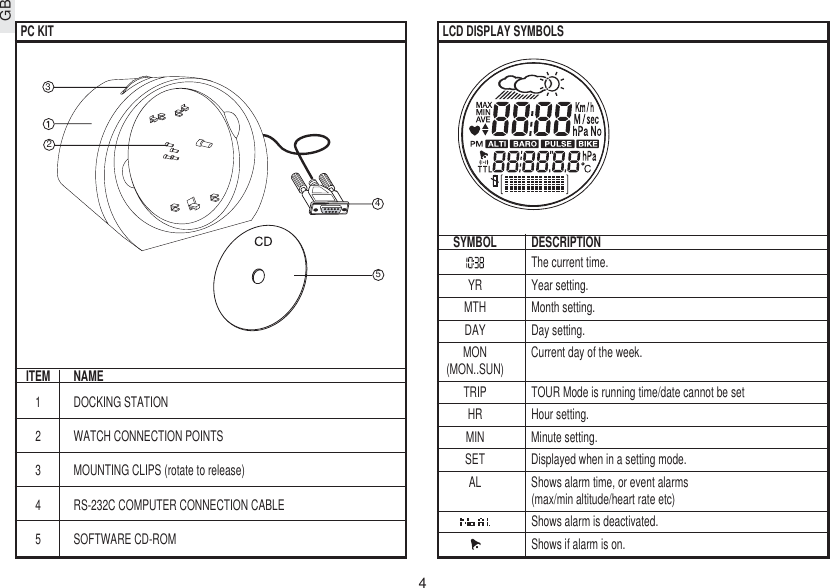
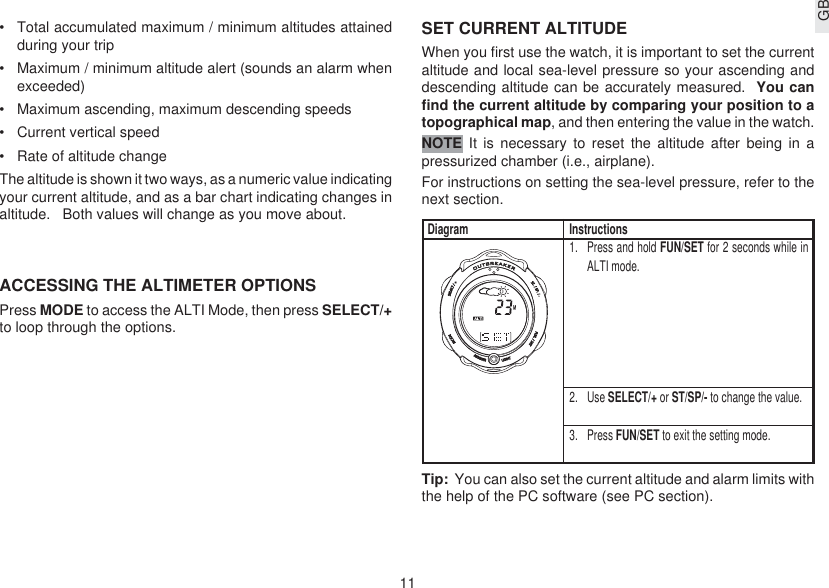
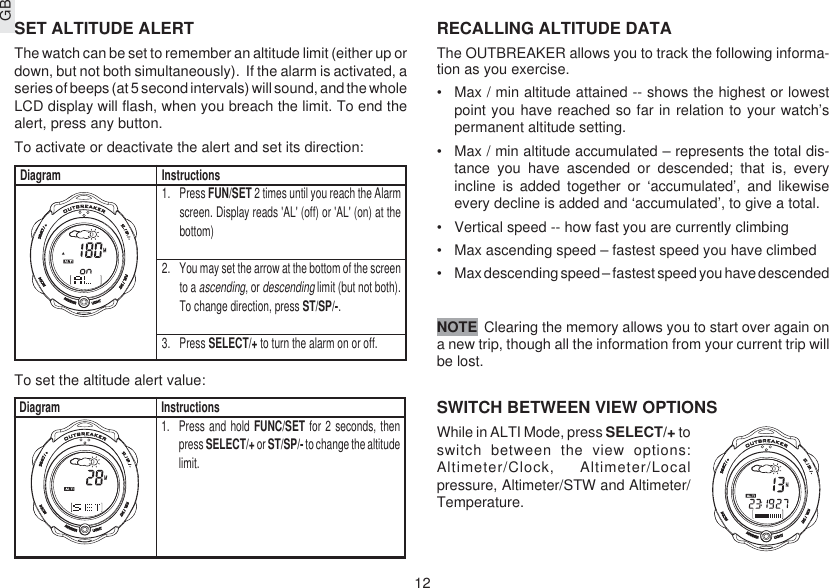
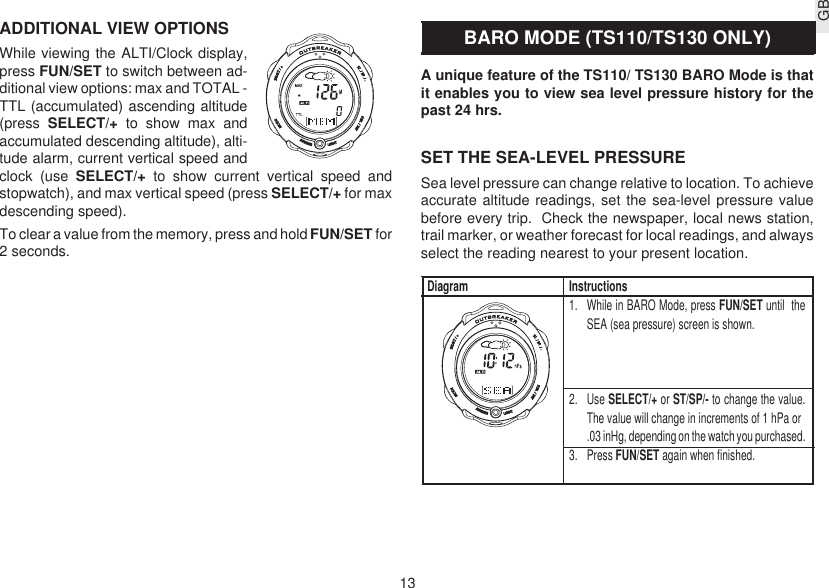
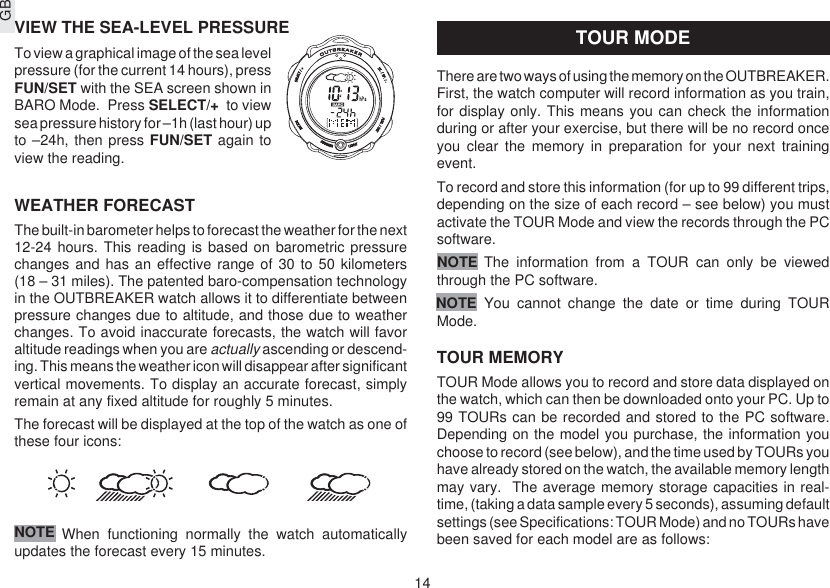
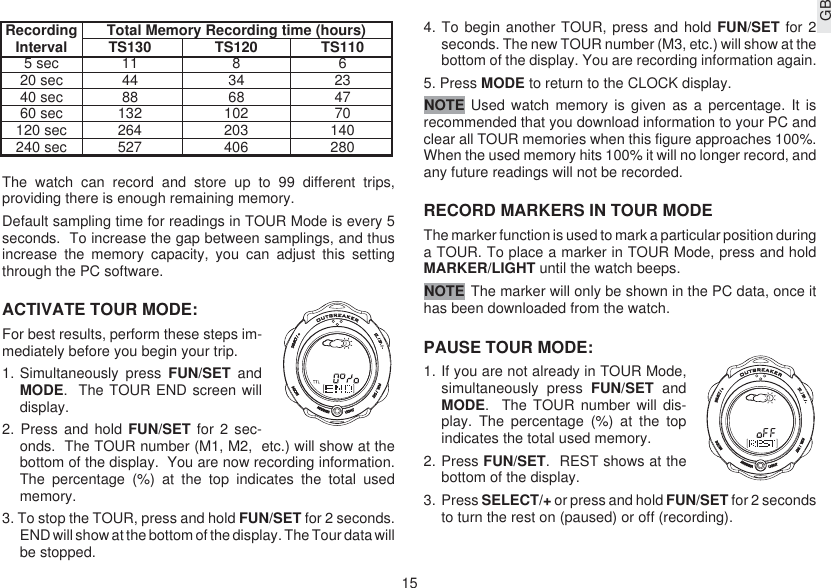
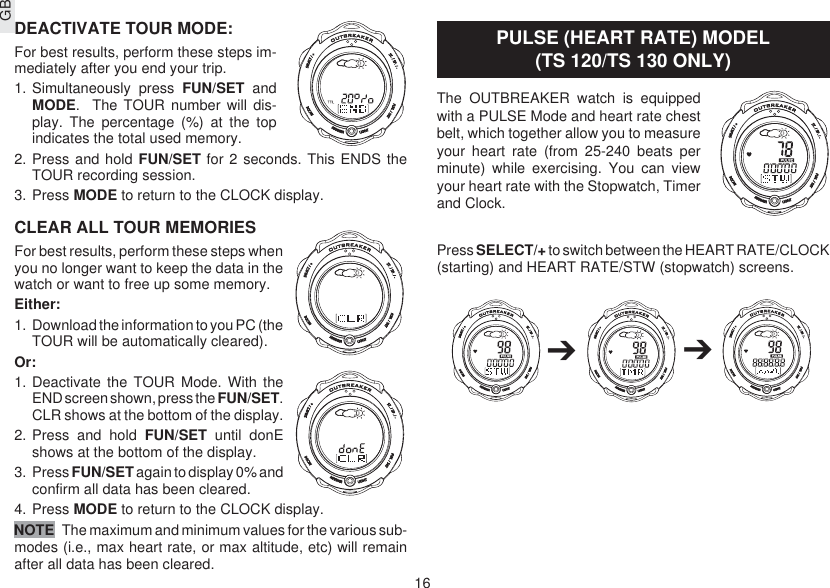
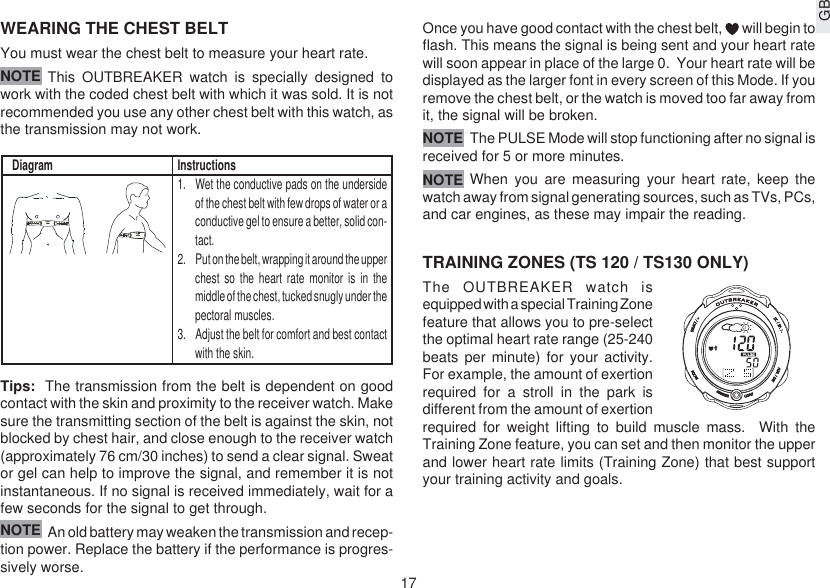
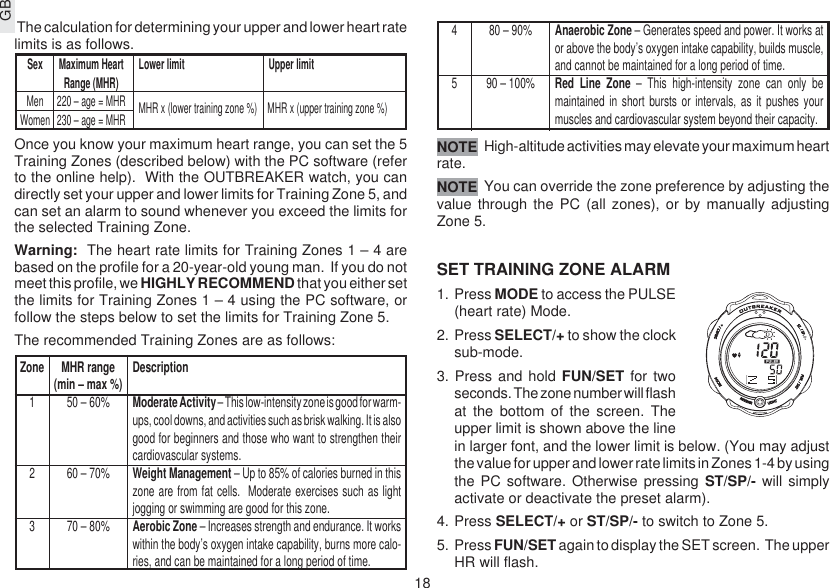
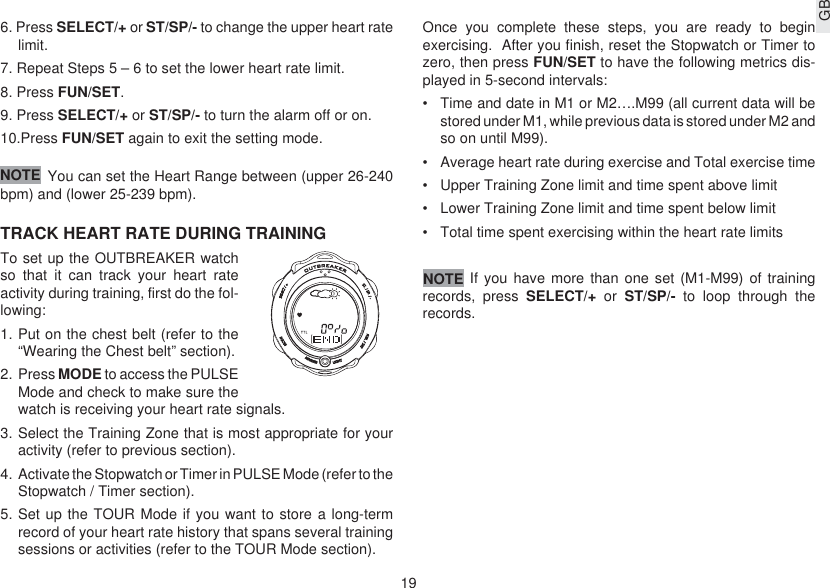

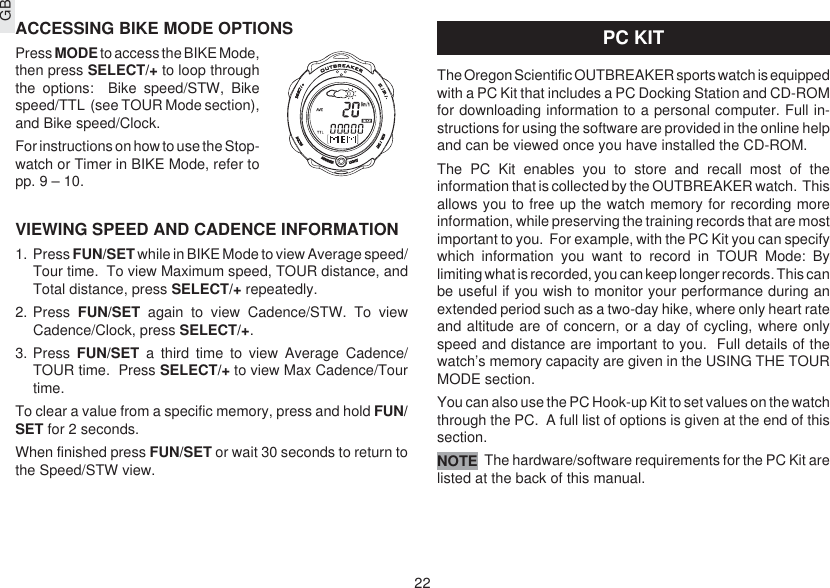
![23GBPC MODESET UP FOR PC MODETo use the features of the PC Mode, you will need the PC Kit(includes PC docking station, connector cable, and the instal-lation software CD-ROM), and a PC or laptop computer.To set up for PC Mode:USING THE SOFTWAREDouble-click on the Oregon Scientific icon. Once the softwareopens, click on Help for information about the function yourequire.PC MODE OPTIONSYou can perform the following tasks by using the CD-ROMsoftware supplied.Diagram Instructions1. Connect the PC Docking Station to your computer. Forbest results, turn the computer off before you connect.2. Install the software using the CD-ROM (first-time useonly). The process is automatic, and requires you torespond to self-explanatory prompts.Once the software is installed, an Oregon Scientific iconwill be placed on your desktop.3. Remove the Lycra watch strap. Mount the watch on thedocking station, making sure the contact points on thestation and the watch are aligned. Press the MODEbutton to switch to PC Mode.The cadence, speed and heart rate functionswill be temporarily disabled when you use the watch inPC Mode.NOTEAccess/recall information/ on the PC•All information recorded in TOURMode, including temperature, altitude,local pressure, heart rate, wheelspeed, cadence, trip distance, etc,[Provided this data has been selectedin “Data should be stored” in the“Configuration menu” (see softwarehelp menu)].•Back up/import and export data•Define user data•Display graphical chart and print table•Give data overview with a specifieddurationChange watch settings on the PC•Date and time (set to PC time, or amanual setting)•Time, and event alarm (3 eventalarms, 1 daily alarm, and select alarmduration)•Current sea-level pressure•Altitude limits•Weather icon•Upper and lower heart rate limits forTraining Zones 1 – 5.•Wheel circumference/diameter•TOUR Mode data recording anddownload options•Choose a serial port (Com 1 to Com 4)•Sampling rate (1 second and up)](https://usermanual.wiki/IDT-Technology/TS1X0A/User-Guide-401533-Page-23.png)