INTO TECH REALDISPLAY DVR BD User Manual Part 1
Intotech Inc. DVR BD Users Manual Part 1
UserManual.wiki
>
INTO TECH
>
REALDISPLAY User Manual
>
Users Manual Part 1
Contents
1.
Users Manual Part 1
2.
Users Manual Part 2
Users Manual Part 1
Navigation menu
Upload a User Manual
Namespaces
Wiki Guide
HTML
PDF
Info
Views
User Manual
Discussion / Help
Navigation


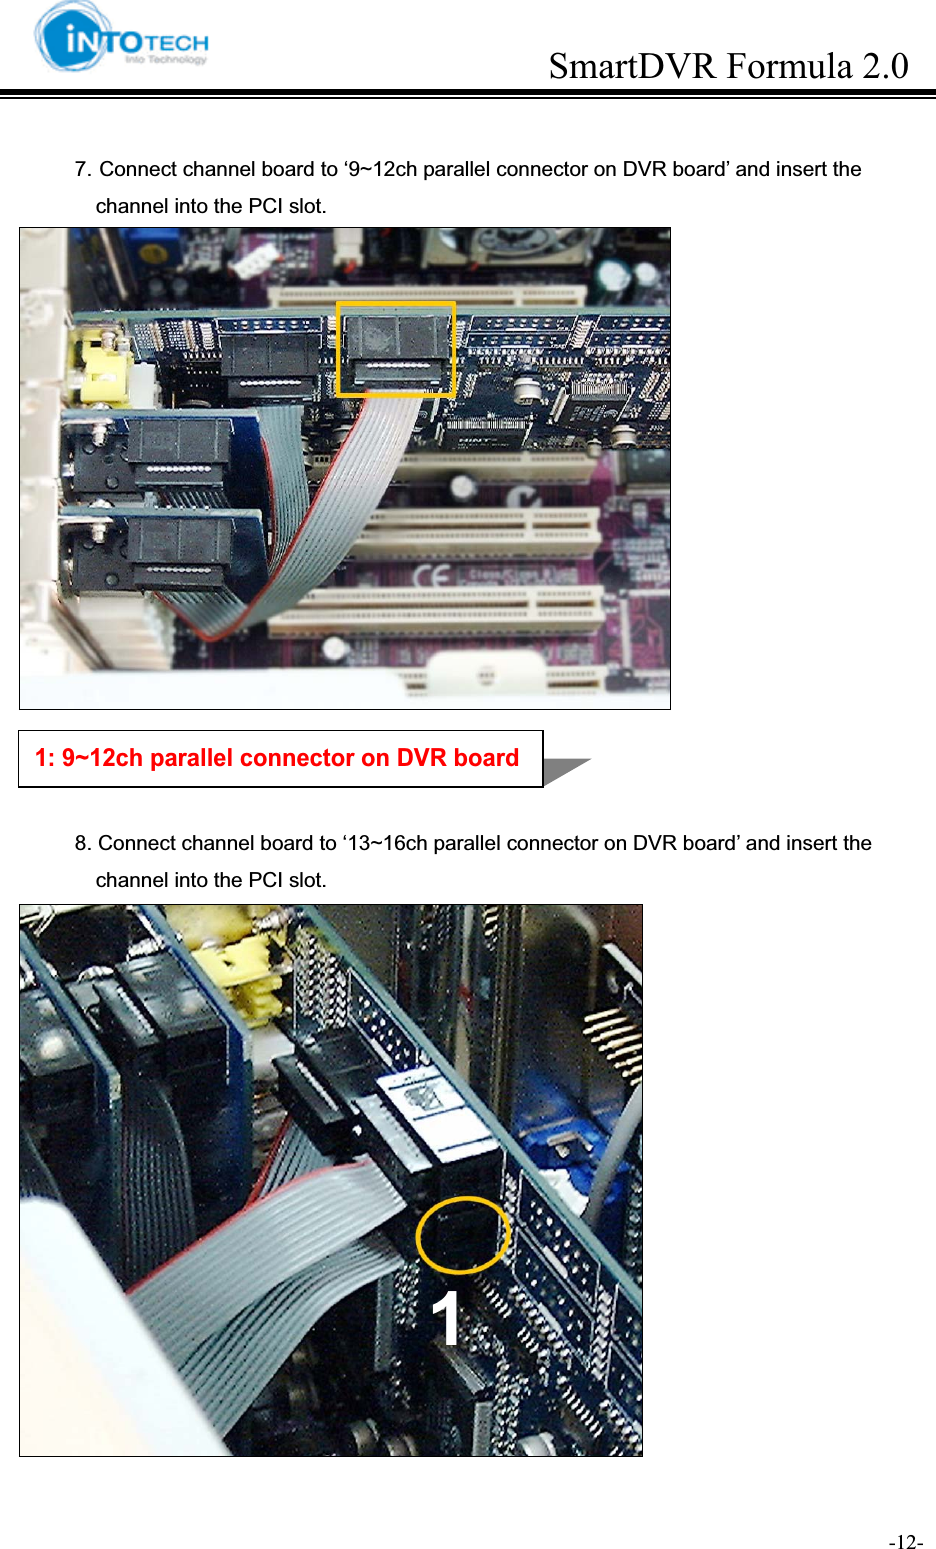
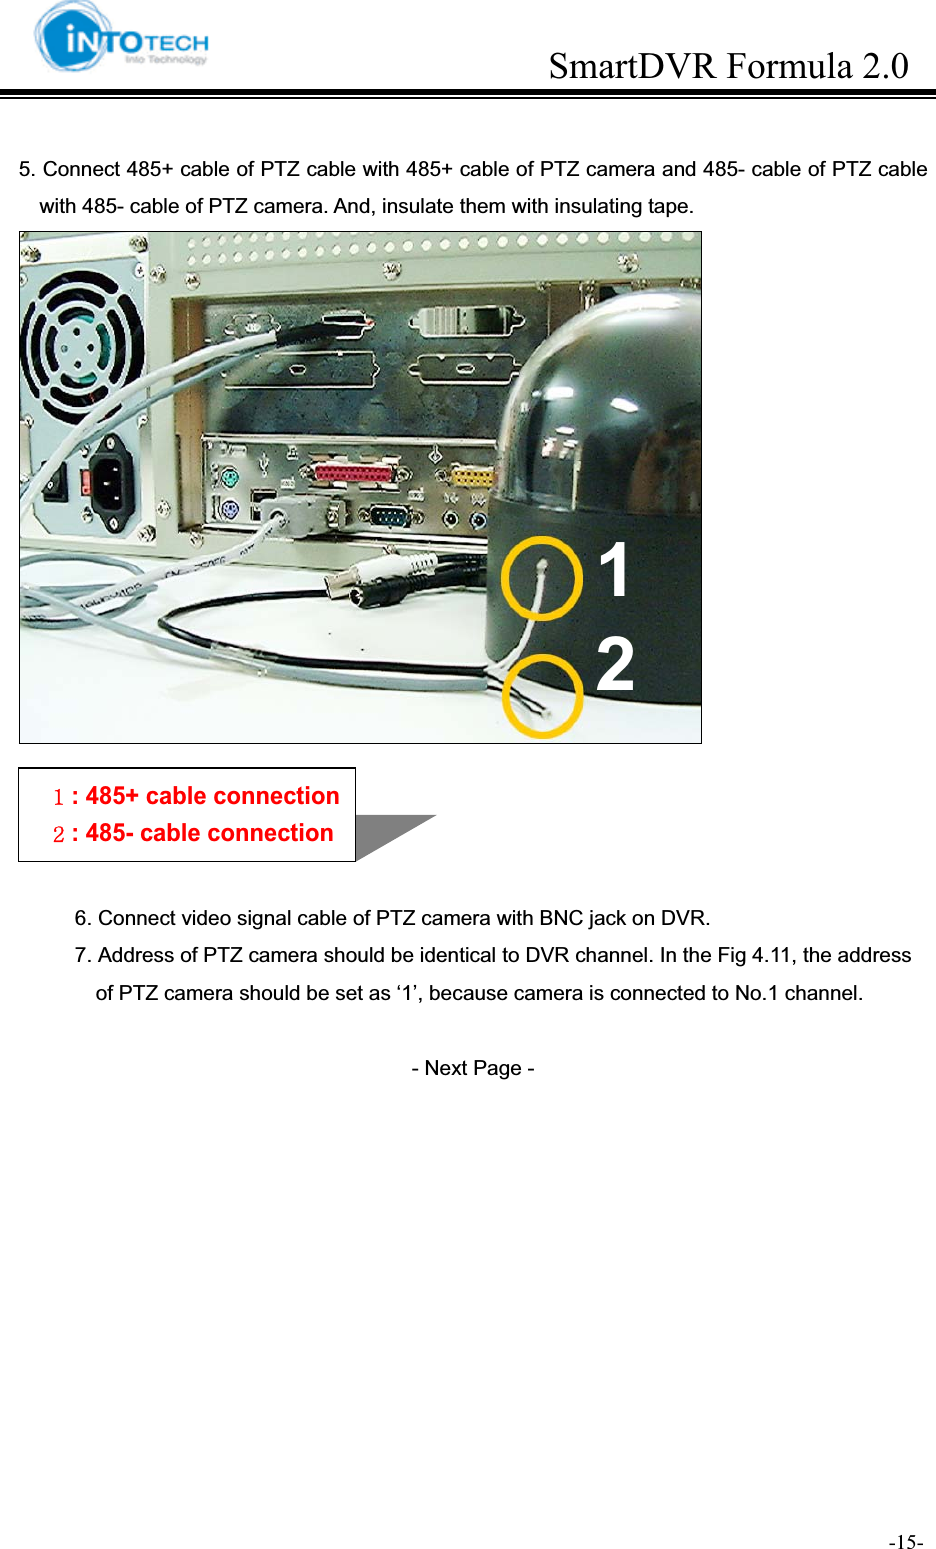
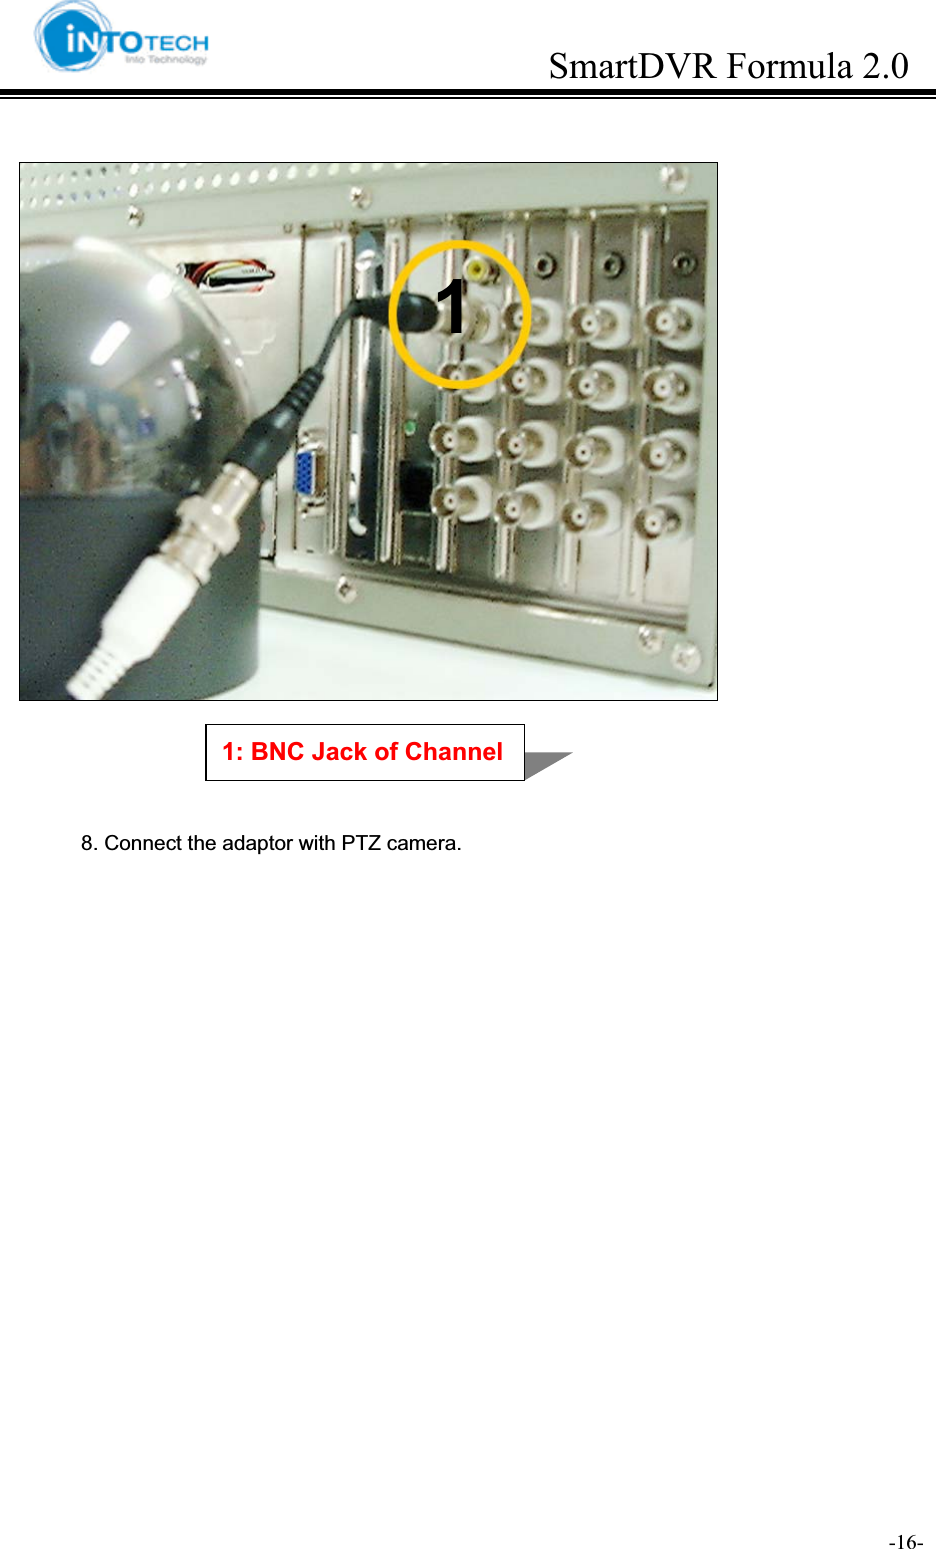
![GGGGGGGGGGGGGGGGGGGGGGGGGGGGGGGSmartDVR Formula 2.0G -13-G2-1-3. PTZ installation ]A. PTZ Cable Connection. 1. Insert the plug of PTC cable into the PC case through proper hole. 2. Insert the plug of PTC cable into the ‘PTZ parallel connector on DVR board’. Position of ‘PTZ parallel connector’ might be different up to DVR model. Please refer to ‘2.1 DVR board drawing’ for parallel connector position. 1: 13~16ch parallel connector on DVR2311: PTZ parallel connector on DVR boardཛGPlug of PTZ cable ཛྷG485 cable of PTZ cableGཝGSerial Port of PTZ cableG](https://usermanual.wiki/INTO-TECH/REALDISPLAY.Users-Manual-Part-1/User-Guide-441217-Page-13.png)

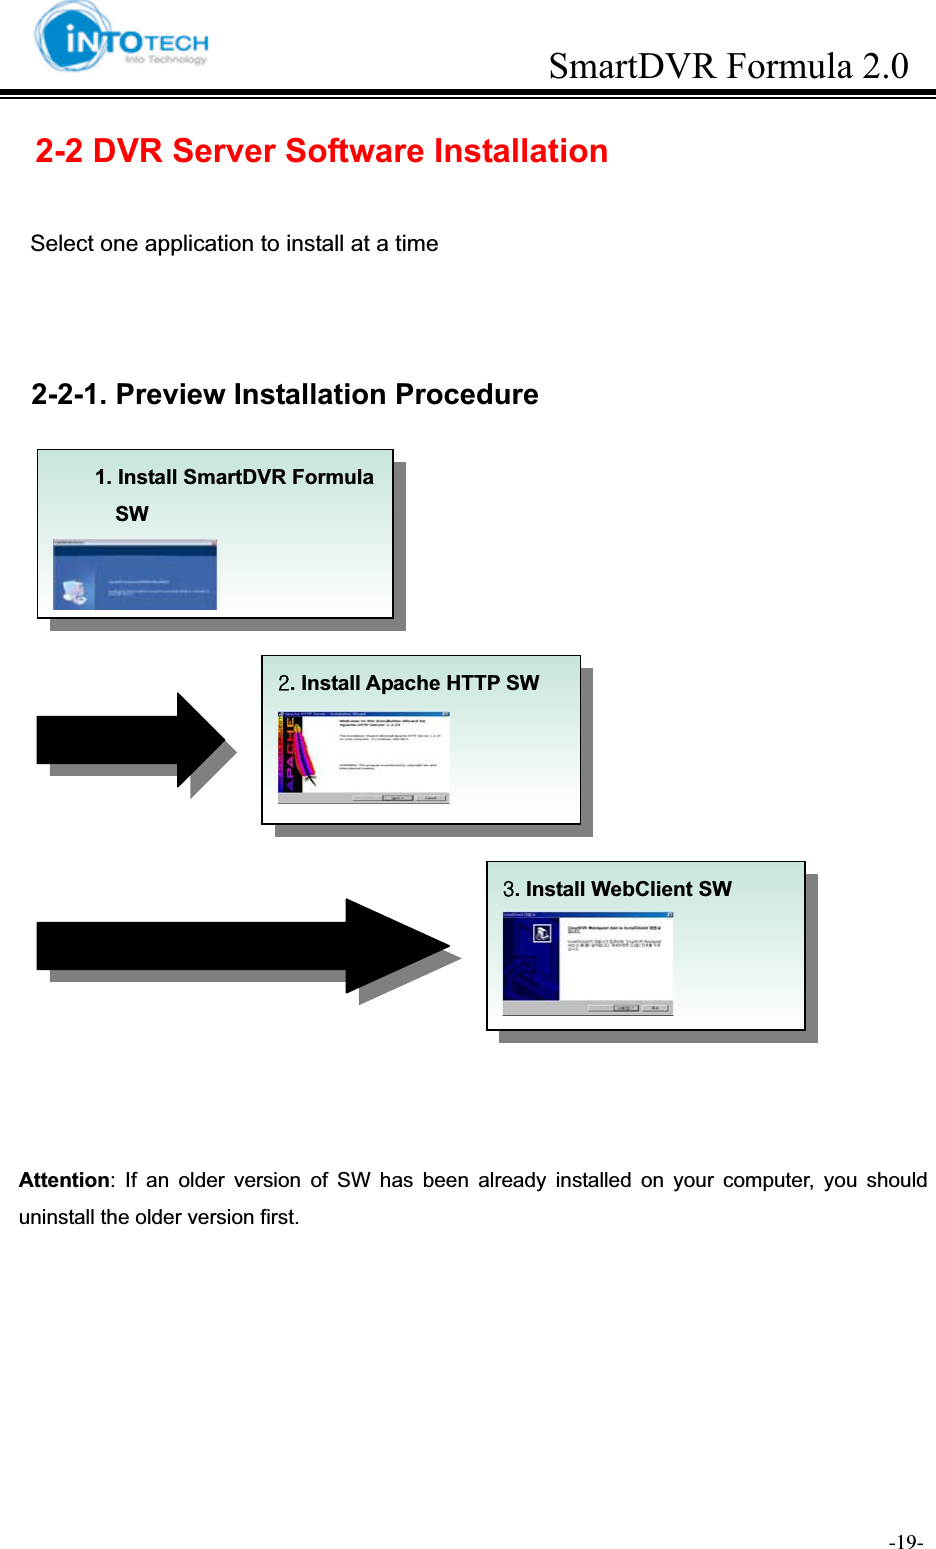
![GGGGGGGGGGGGGGGGGGGGGGGGGGGGGGGSmartDVR Formula 2.0G -20-G2-2-2. Install DVR Server Software (Important)Run the Setup.exe ( ) file. InstallShield Wizard is executed. Press the [Next] button - Next Page – Installation Procedure1. Install SmartDVR Formula SW 2. Install Apache HTTP SW 3. Install WebClient Formula SW](https://usermanual.wiki/INTO-TECH/REALDISPLAY.Users-Manual-Part-1/User-Guide-441217-Page-20.png)
![GGGGGGGGGGGGGGGGGGGGGGGGGGGGGGGSmartDVR Formula 2.0G -21-G3. If you accept all the terms of the License Agreement, Press the [Yes] button 4. Select the folder of destination and Press the [Next] button.](https://usermanual.wiki/INTO-TECH/REALDISPLAY.Users-Manual-Part-1/User-Guide-441217-Page-21.png)
![GGGGGGGGGGGGGGGGGGGGGGGGGGGGGGGSmartDVR Formula 2.0G -22-G5. Press the [Finish] button to complete installation. 6. Driver Auto installer for Windows XP. 7. Press the [Yes] button to complete Auto Driver Installation Reboot system for stable operation](https://usermanual.wiki/INTO-TECH/REALDISPLAY.Users-Manual-Part-1/User-Guide-441217-Page-22.png)
![GGGGGGGGGGGGGGGGGGGGGGGGGGGGGGGSmartDVR Formula 2.0G -23-G2-2-3. Apache Web Server Installation 1. Run Apache Web Server[ ] program. 2. The screen will display as following: Click [Next] button. 3. Read the license agreement. If you agree click [I accept…] and click [Next] button.](https://usermanual.wiki/INTO-TECH/REALDISPLAY.Users-Manual-Part-1/User-Guide-441217-Page-23.png)
![GGGGGGGGGGGGGGGGGGGGGGGGGGGGGGGSmartDVR Formula 2.0G -24-G 4. Confirm Apache Server information and click [Next] button. 5. Insert Network Domain, Server Name, Administrator’s Email Address. (For formality purpose only. Insert any address.) Select [Run as a service for All Users – Recommended]. Click [Next] button.](https://usermanual.wiki/INTO-TECH/REALDISPLAY.Users-Manual-Part-1/User-Guide-441217-Page-24.png)
![GGGGGGGGGGGGGGGGGGGGGGGGGGGGGGGSmartDVR Formula 2.0G -25-G 6.Select [Complete] for Setup Type. Click [Next] button. 7. Click [Next] button. Attention: Do not change directory.](https://usermanual.wiki/INTO-TECH/REALDISPLAY.Users-Manual-Part-1/User-Guide-441217-Page-25.png)
![GGGGGGGGGGGGGGGGGGGGGGGGGGGGGGGSmartDVR Formula 2.0G -26-G 8. Click [Install] button and start installation. 9. Click [Finish] button when completion of installation program.](https://usermanual.wiki/INTO-TECH/REALDISPLAY.Users-Manual-Part-1/User-Guide-441217-Page-26.png)
![GGGGGGGGGGGGGGGGGGGGGGGGGGGGGGGSmartDVR Formula 2.0G -29-G2-2-4.Web Client Formula Installation1. Run Web Client Formula ( ) file. 2. The InstallShield Wizard will display as following: Click [Next] button. 3. Read License Agreement carefully. When accept of agreement click [Yes] button.](https://usermanual.wiki/INTO-TECH/REALDISPLAY.Users-Manual-Part-1/User-Guide-441217-Page-29.png)
![GGGGGGGGGGGGGGGGGGGGGGGGGGGGGGGSmartDVR Formula 2.0G -30-G4. Click [Finish] after completion of installation.](https://usermanual.wiki/INTO-TECH/REALDISPLAY.Users-Manual-Part-1/User-Guide-441217-Page-30.png)