INTO TECH REALDISPLAY DVR BD User Manual Part 2
Intotech Inc. DVR BD Users Manual Part 2
UserManual.wiki
>
INTO TECH
>
REALDISPLAY User Manual
>
Users Manual Part 2
Contents
1.
Users Manual Part 1
2.
Users Manual Part 2
Users Manual Part 2
Navigation menu
Upload a User Manual
Namespaces
Wiki Guide
HTML
PDF
Info
Views
User Manual
Discussion / Help
Navigation
![GGGGGGGGGGGGGGGGGGGGGGGGGGGGGGGSmartDVR Formula 2.0G -31-G2-2-3. Uninstall DVR Server program 1. Under the Start menu in Windows, go to Setting and then to Control Panel 2. Double click the Add or Remove Programs 3. Select DVR System Plus and Click on Change/Remove button. 3. Click Remove button and Press the [Next] button. 4. Press the Finish button to complete uninstalling DVR program. The uninstall program will delete all DVR system files on your hard disk. However, it does not delete the video images and the log files already saved in the hard drive of your DVR PC.](https://usermanual.wiki/INTO-TECH/REALDISPLAY.Users-Manual-Part-2/User-Guide-441218-Page-1.png)
![GGGGGGGGGGGGGGGGGGGGGGGGGGGGGGGSmartDVR Formula 2.0G -42-G3) Store 1 : Check the HDD where you want to use for storage 2 : Indicates total HDD space for selected HDD in [1]. 3 : Select to use overwrite function EX> Start to overwrite when HDD Free space becomes 512 MB 4 : Display Picture Quality and Setting stored-frame Display frame number of each channel (30Frame per Second) : Higher FPS provides more natural image Setting compress quality](https://usermanual.wiki/INTO-TECH/REALDISPLAY.Users-Manual-Part-2/User-Guide-441218-Page-12.png)
![GGGGGGGGGGGGGGGGGGGGGGGGGGGGGGGSmartDVR Formula 2.0G -46-Gୖ Network Configuration ୖ(White IP setup) < ㉘㥉 㤸 > < Before setup > < After setup > 1 : Click White IP in [1]. 2 : If ‘Add IP’ is activated please insert IP address. 3 : Cllick [2] button and IP address will be added to White IP List. (Black IP setup) < Before setup > < After setup > 1 : Click Black IP in [1]. 2 : If ‘Add IP’ is activated please insert IP address. 3 : Click [2] button to add IP in Black IP List.](https://usermanual.wiki/INTO-TECH/REALDISPLAY.Users-Manual-Part-2/User-Guide-441218-Page-16.png)
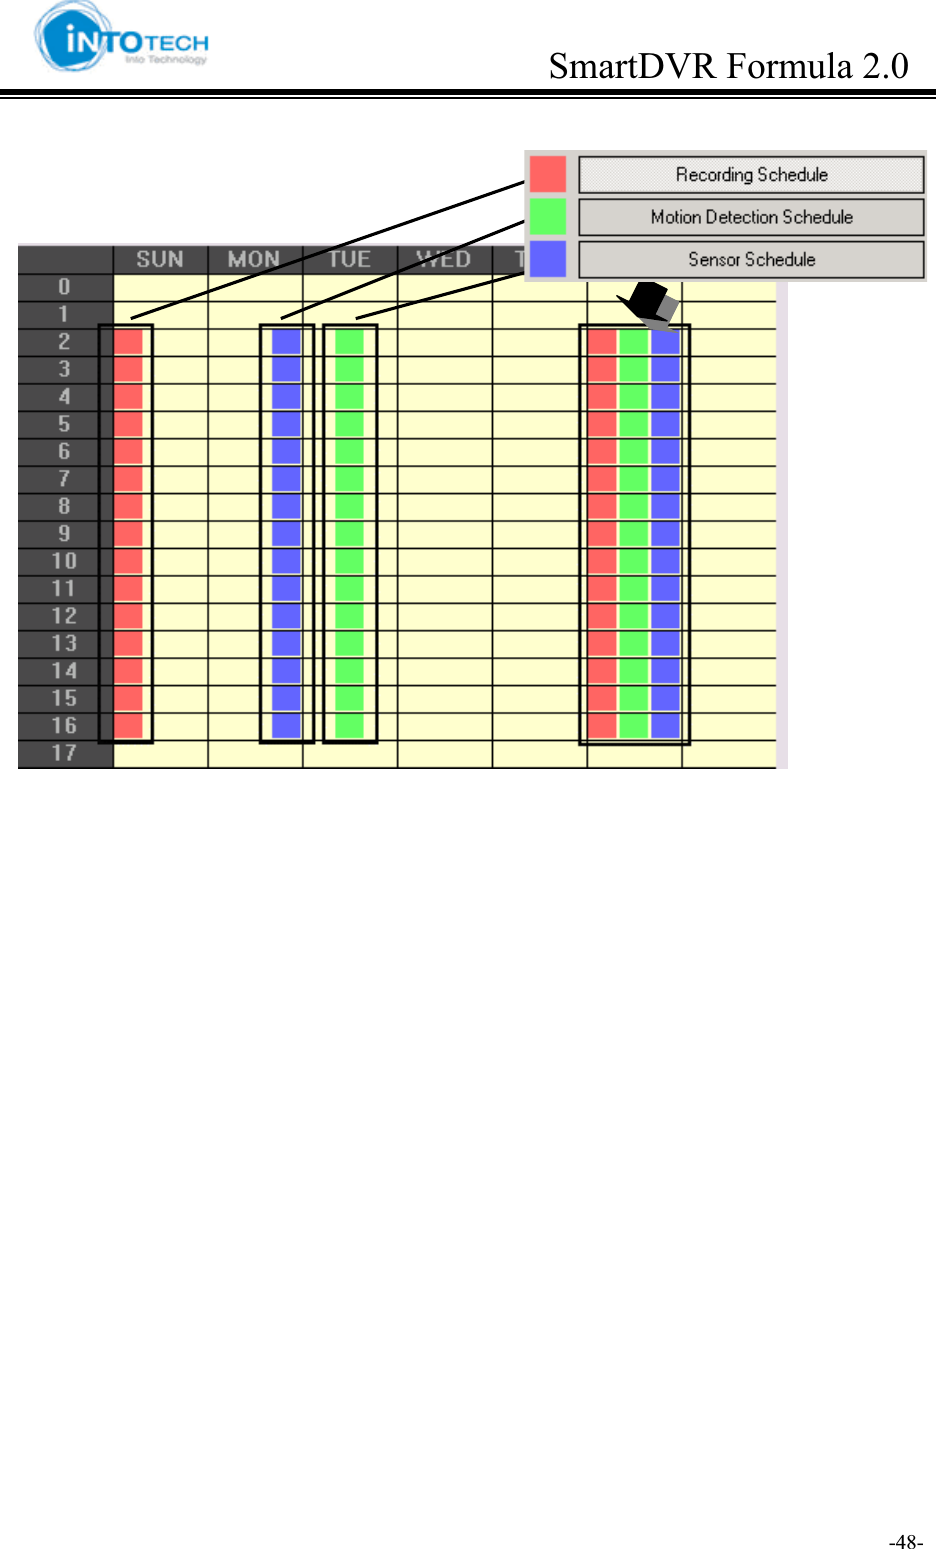
![GGGGGGGGGGGGGGGGGGGGGGGGGGGGGGGSmartDVR Formula 2.0G -47-G5) Schedule 1, 3 : Setup Recording, MD, Sensor schedule. 2 : Choose channel in [1]. [1, 3 Schedule setup] Draw> Click Mouse-Left button to Drag Erase>Click Mouse-Right button to Drag](https://usermanual.wiki/INTO-TECH/REALDISPLAY.Users-Manual-Part-2/User-Guide-441218-Page-17.png)

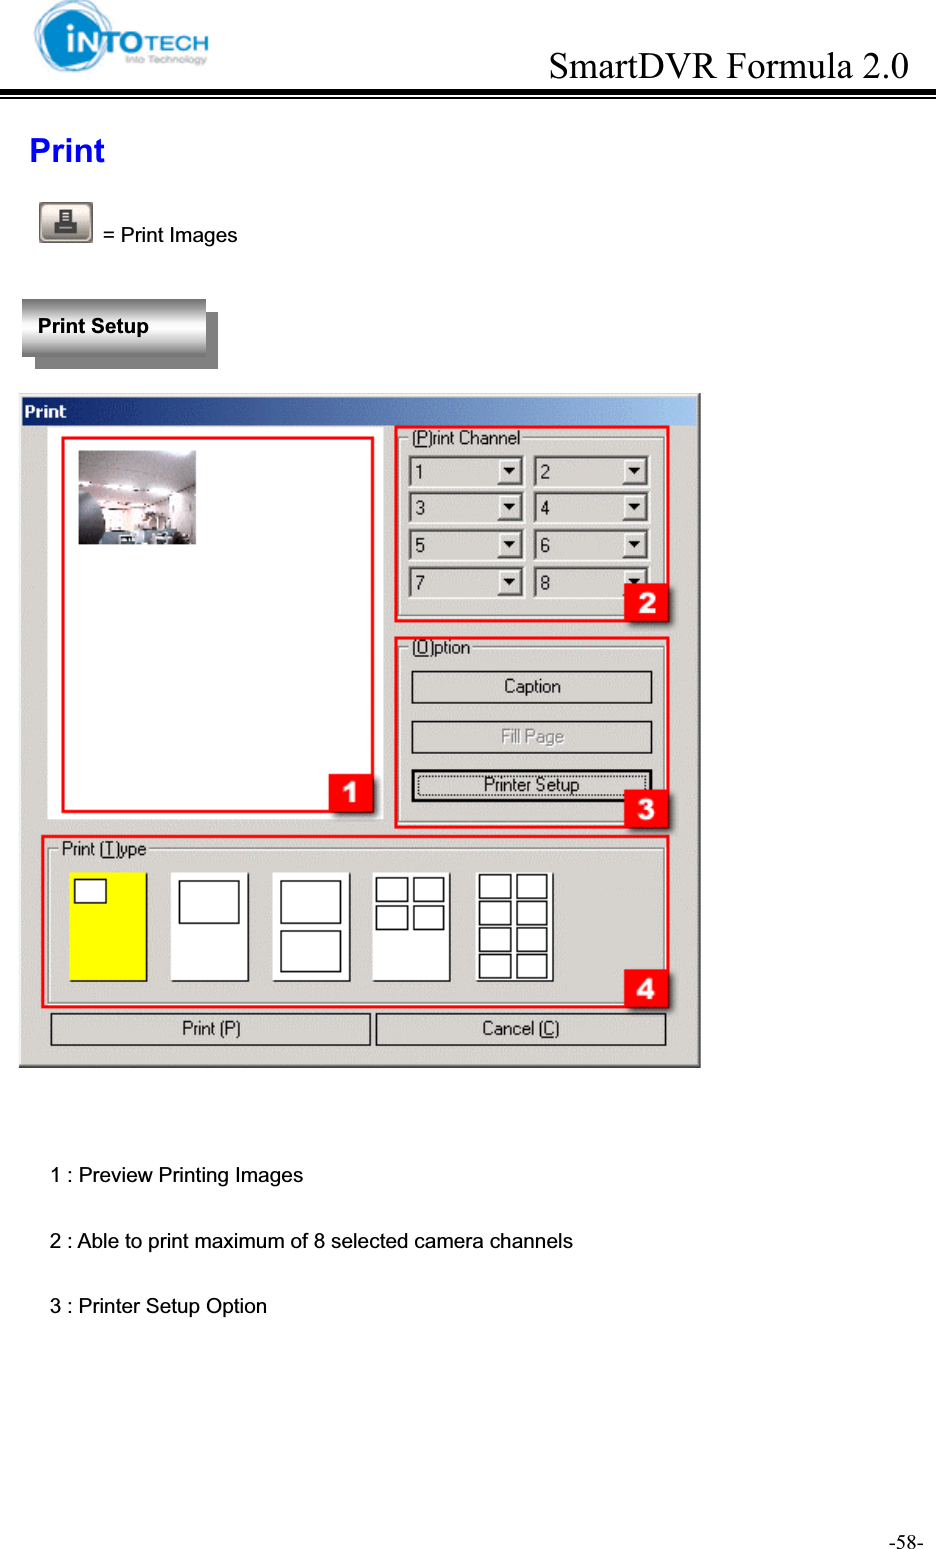
![GGGGGGGGGGGGGGGGGGGGGGGGGGGGGGGSmartDVR Formula 2.0G -59-G<Print Configuration> Click the [OK] button to print 4 : 1 CH original copy size 1 channel image print out 1channel double size image print out2 channels double size images print4 channels images print out 8 channels images print out](https://usermanual.wiki/INTO-TECH/REALDISPLAY.Users-Manual-Part-2/User-Guide-441218-Page-29.png)
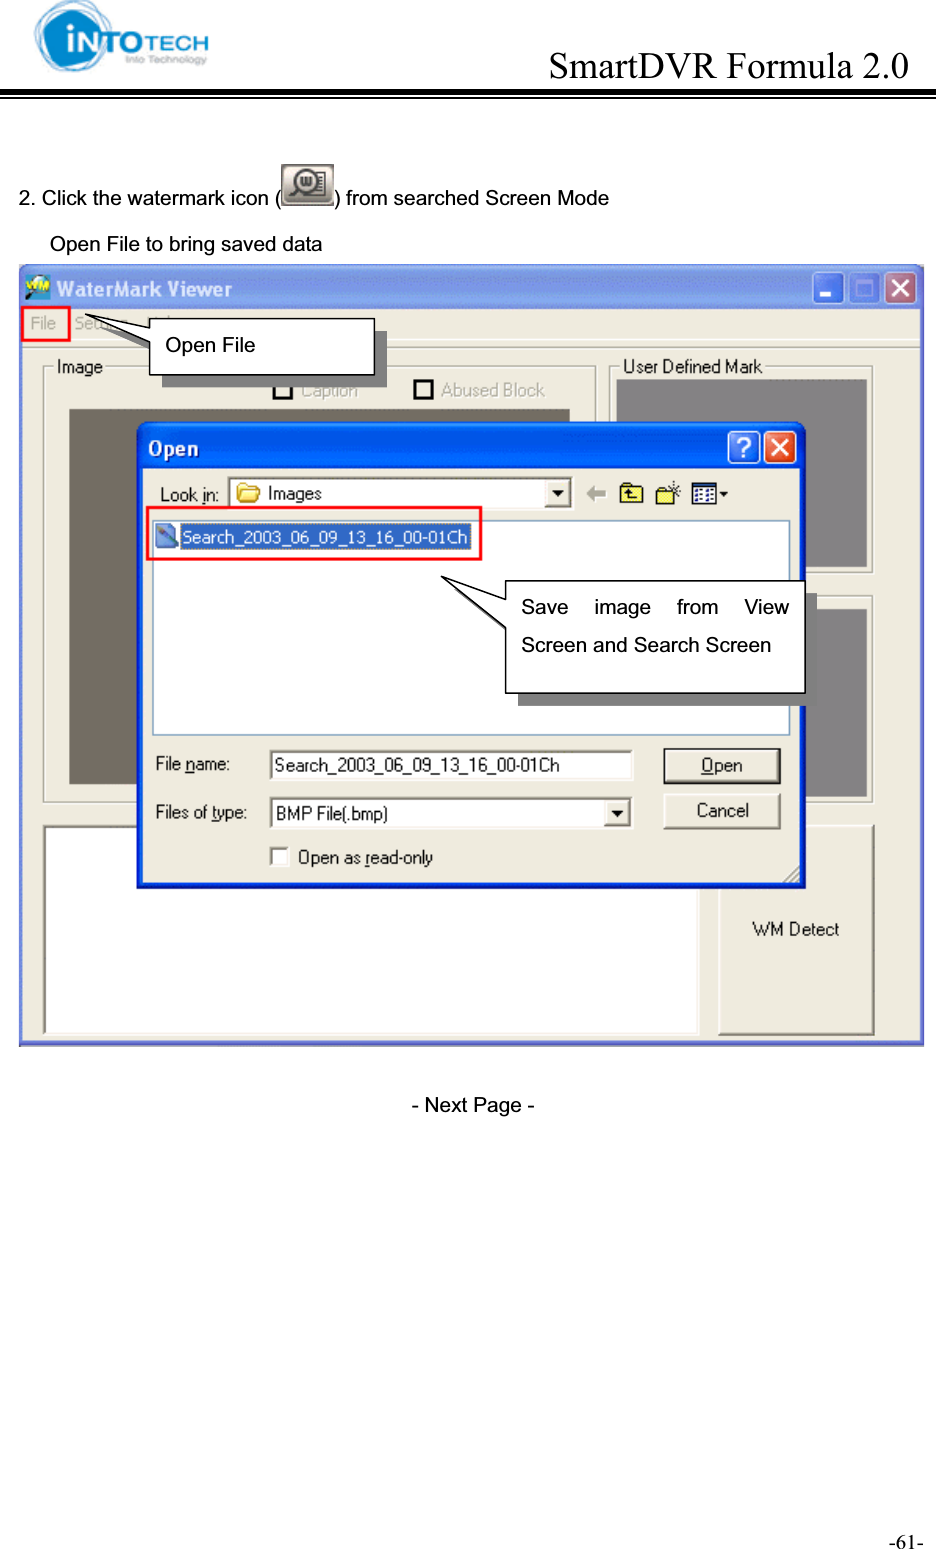
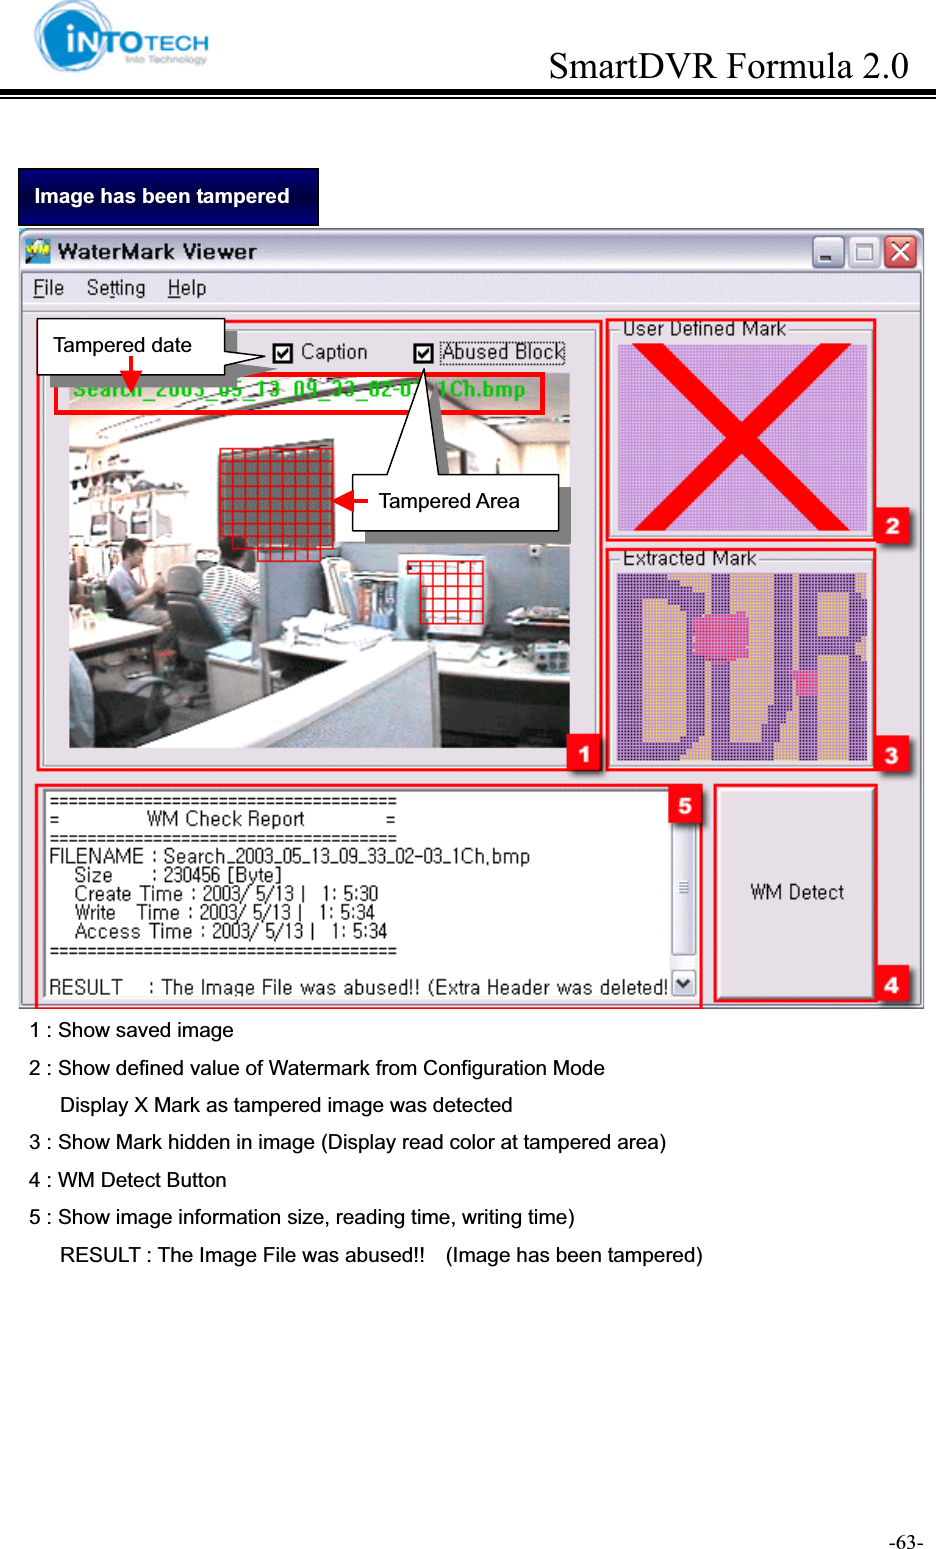
![GGGGGGGGGGGGGGGGGGGGGGGGGGGGGGGSmartDVR Formula 2.0G -62-G3.Click the [WM Detect] to watermark 1 : Show saved image. 2 : Show defined Mark by user at Configuration Mode 3 : Show Mark hidden in real image 4 : Show information related to image (Size, file formation time, modified time, process time) RESULT : It is an Original Image !! = Show that images has not been tampered 5 : WM Detect button Image has not been tampered](https://usermanual.wiki/INTO-TECH/REALDISPLAY.Users-Manual-Part-2/User-Guide-441218-Page-32.png)
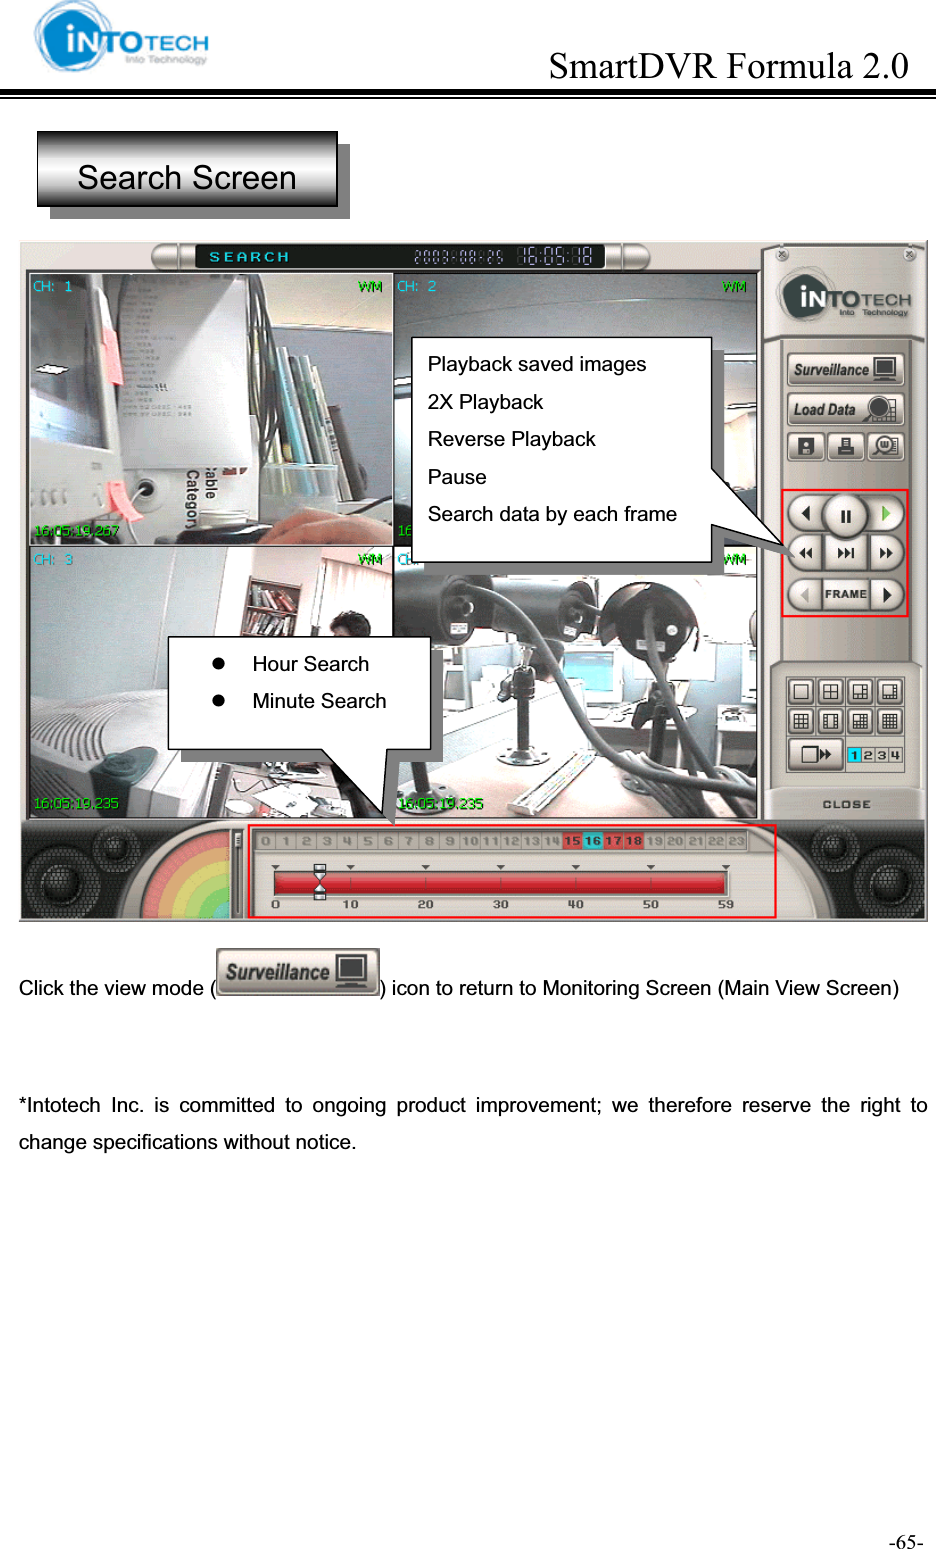
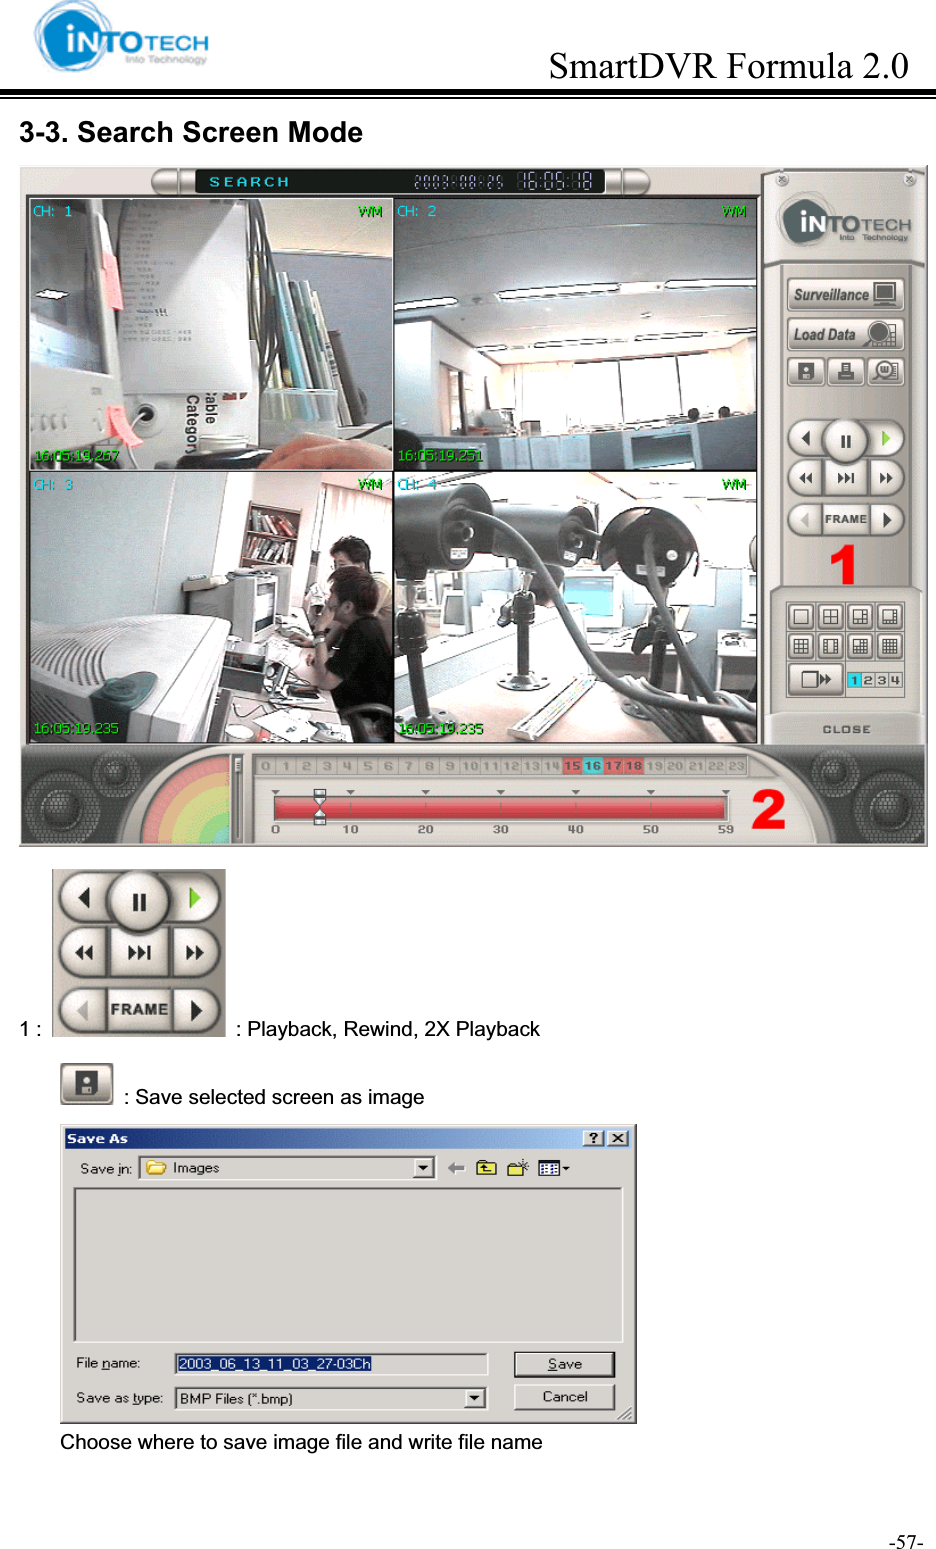
![GGGGGGGGGGGGGGGGGGGGGGGGGGGGGGGSmartDVR Formula 2.0G -64-GSearch 1. Move to Search Screen Mode and then Click the calendar ( ) Icon 2. Select Search Date and then Click [Load] Button - Next Page - Date of saved data Current Date](https://usermanual.wiki/INTO-TECH/REALDISPLAY.Users-Manual-Part-2/User-Guide-441218-Page-34.png)