IXI Mobile OGOCT25E CT-25E with GSM/ EDGE and Bluetooth User Manual
IXI Mobile, Inc. CT-25E with GSM/ EDGE and Bluetooth
UserManual.wiki
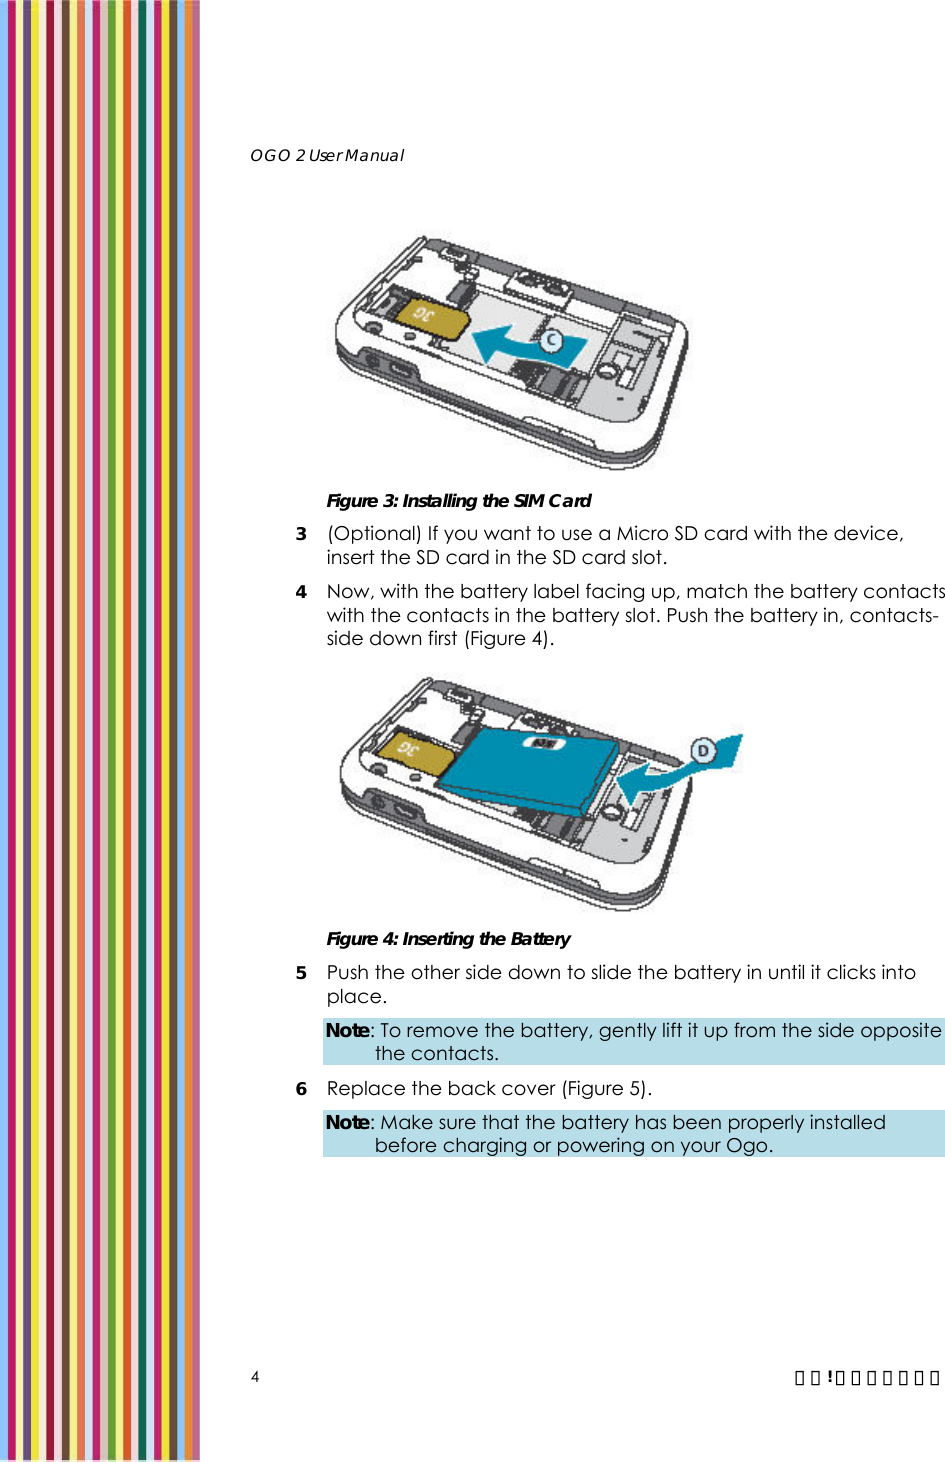
>
IXI Mobile
>
OGOCT25E User Manual
users manual
Navigation menu
Upload a User Manual
Namespaces
Wiki Guide
HTML
PDF
Info
Views
User Manual
Discussion / Help
Navigation


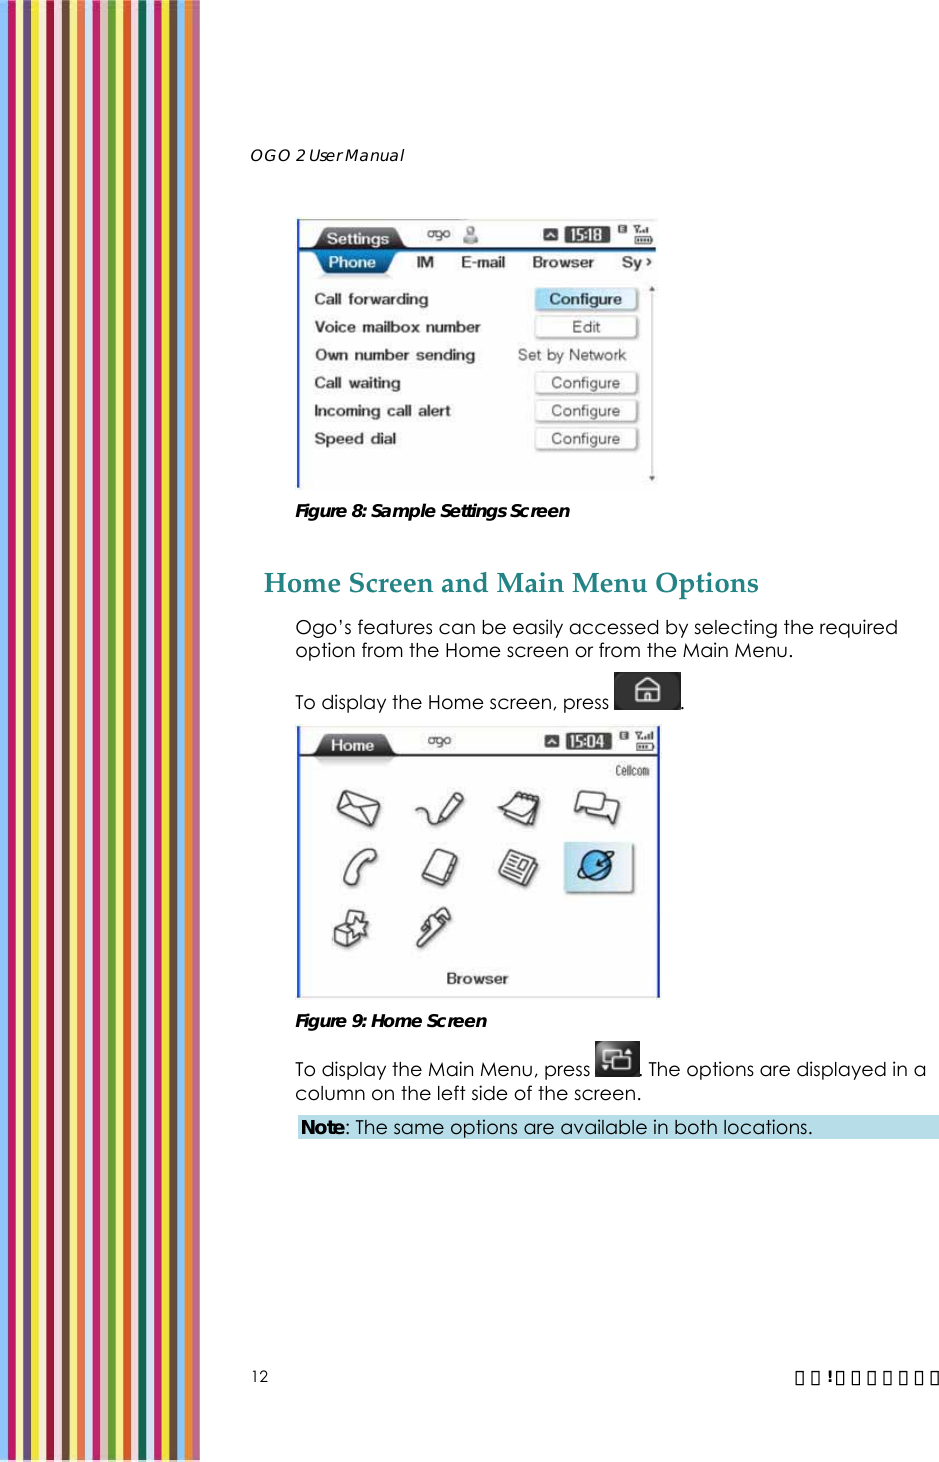
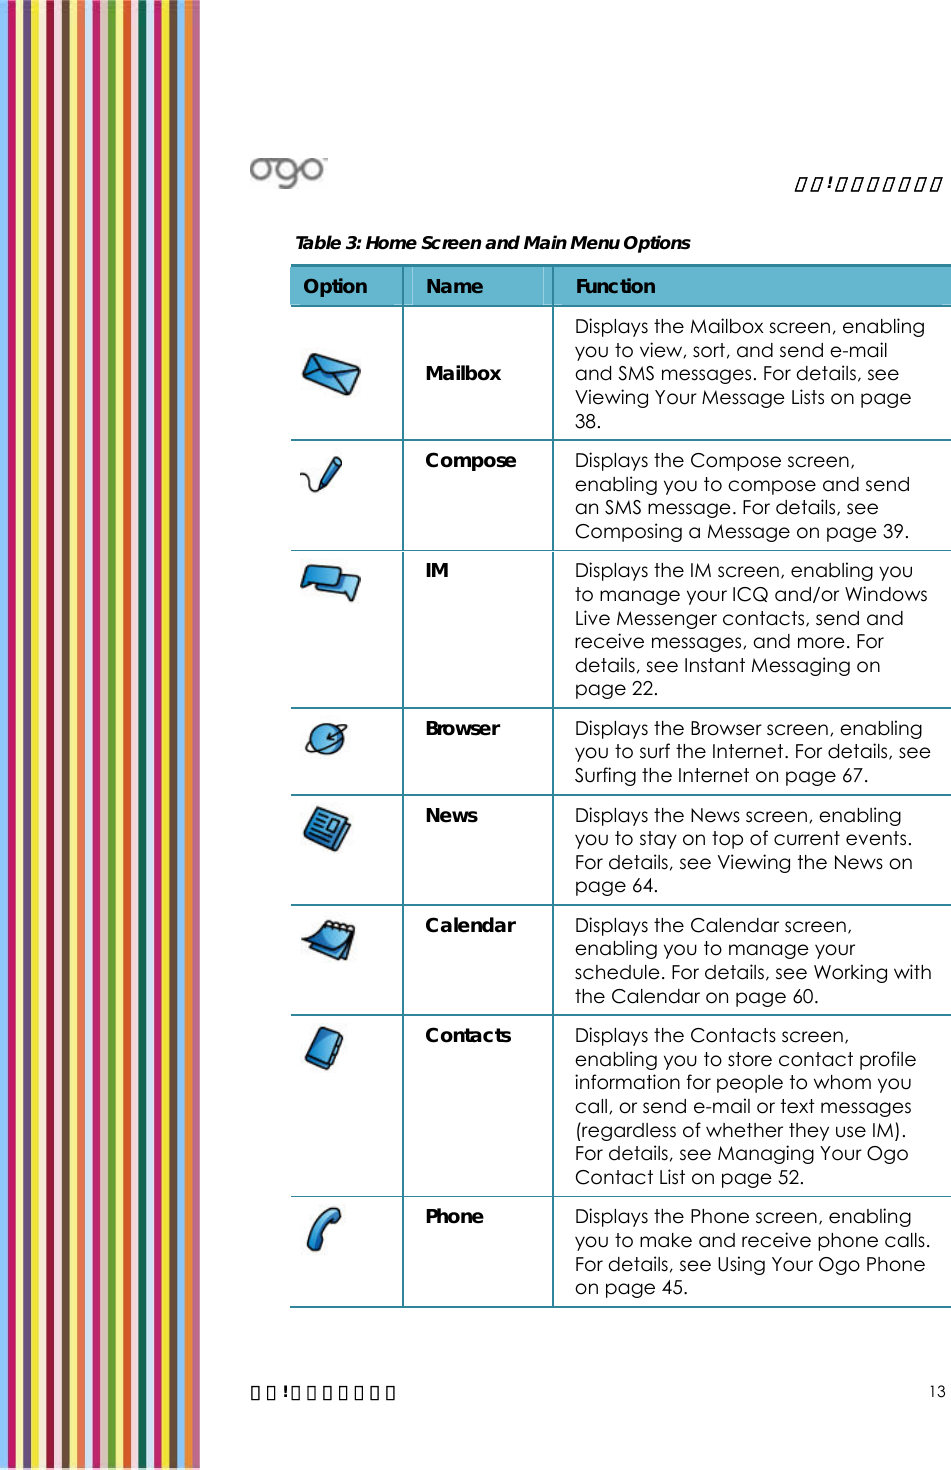
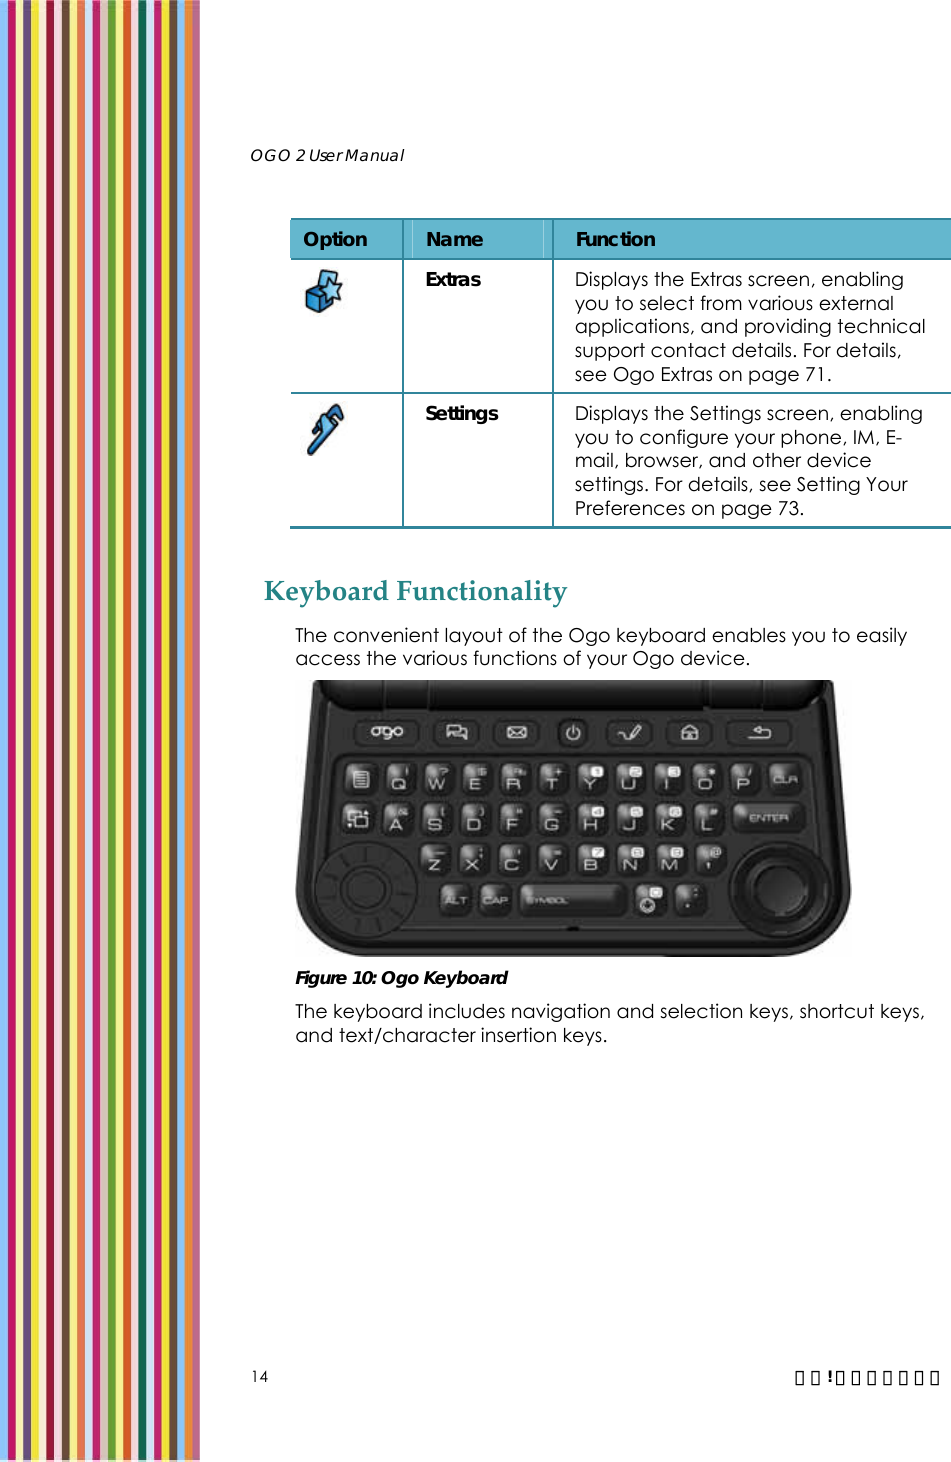
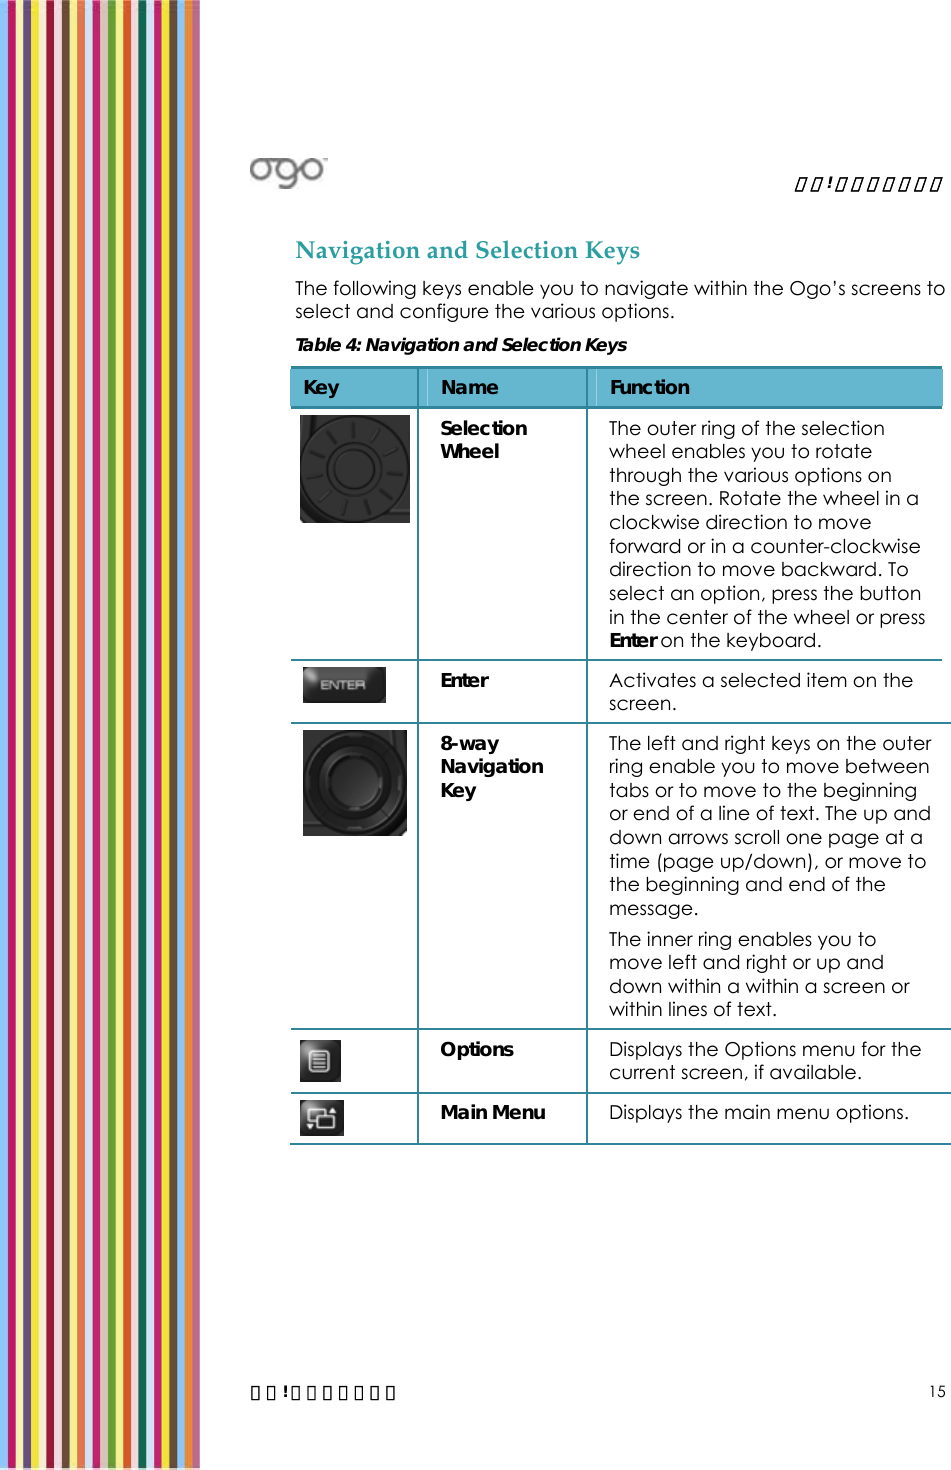
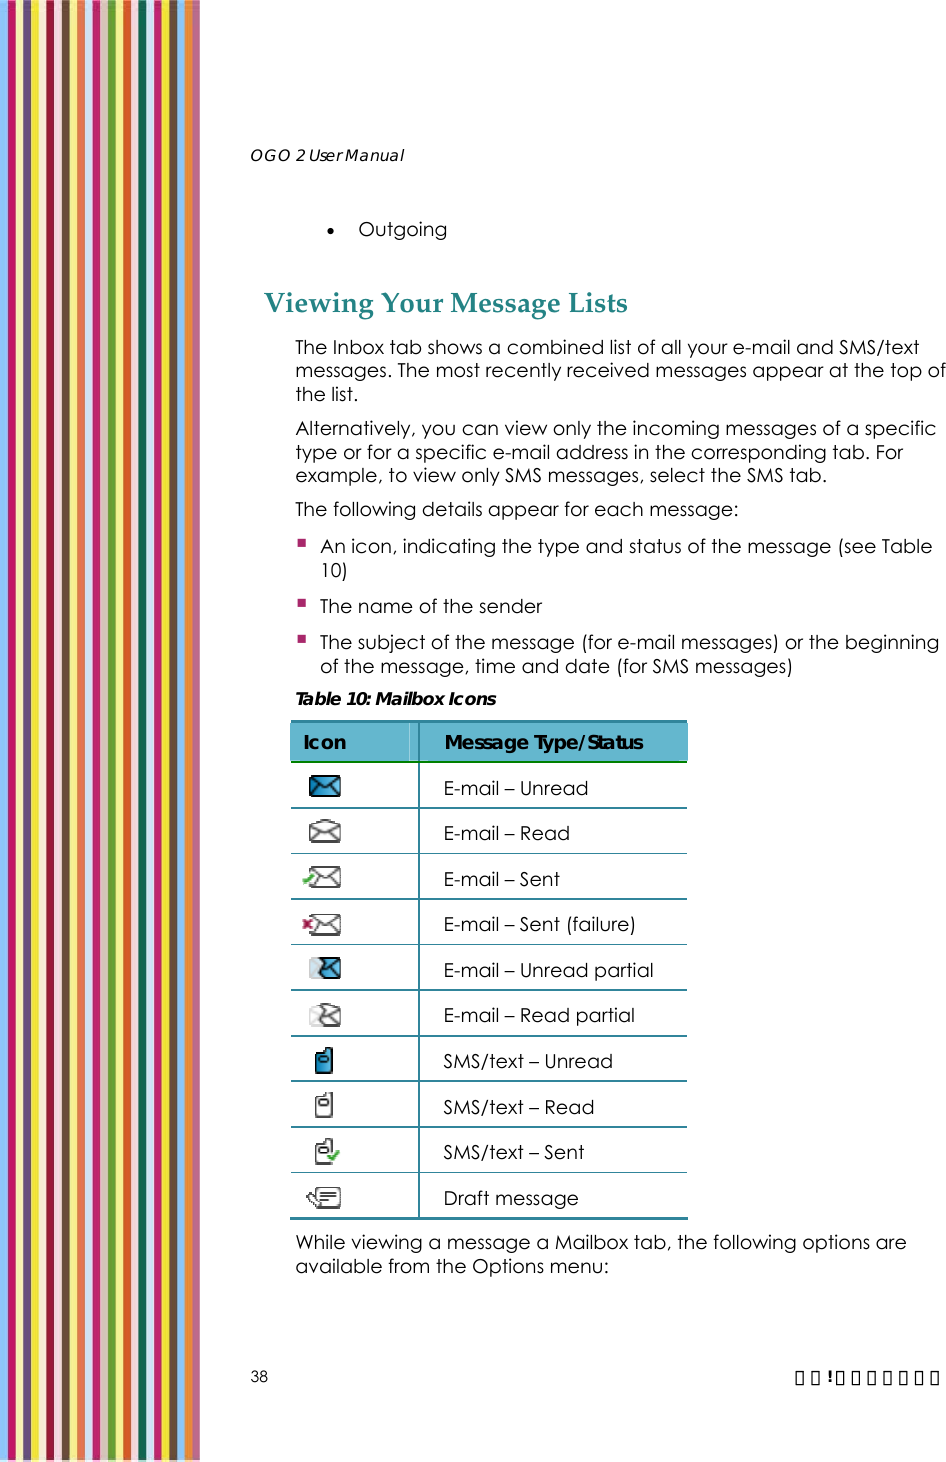
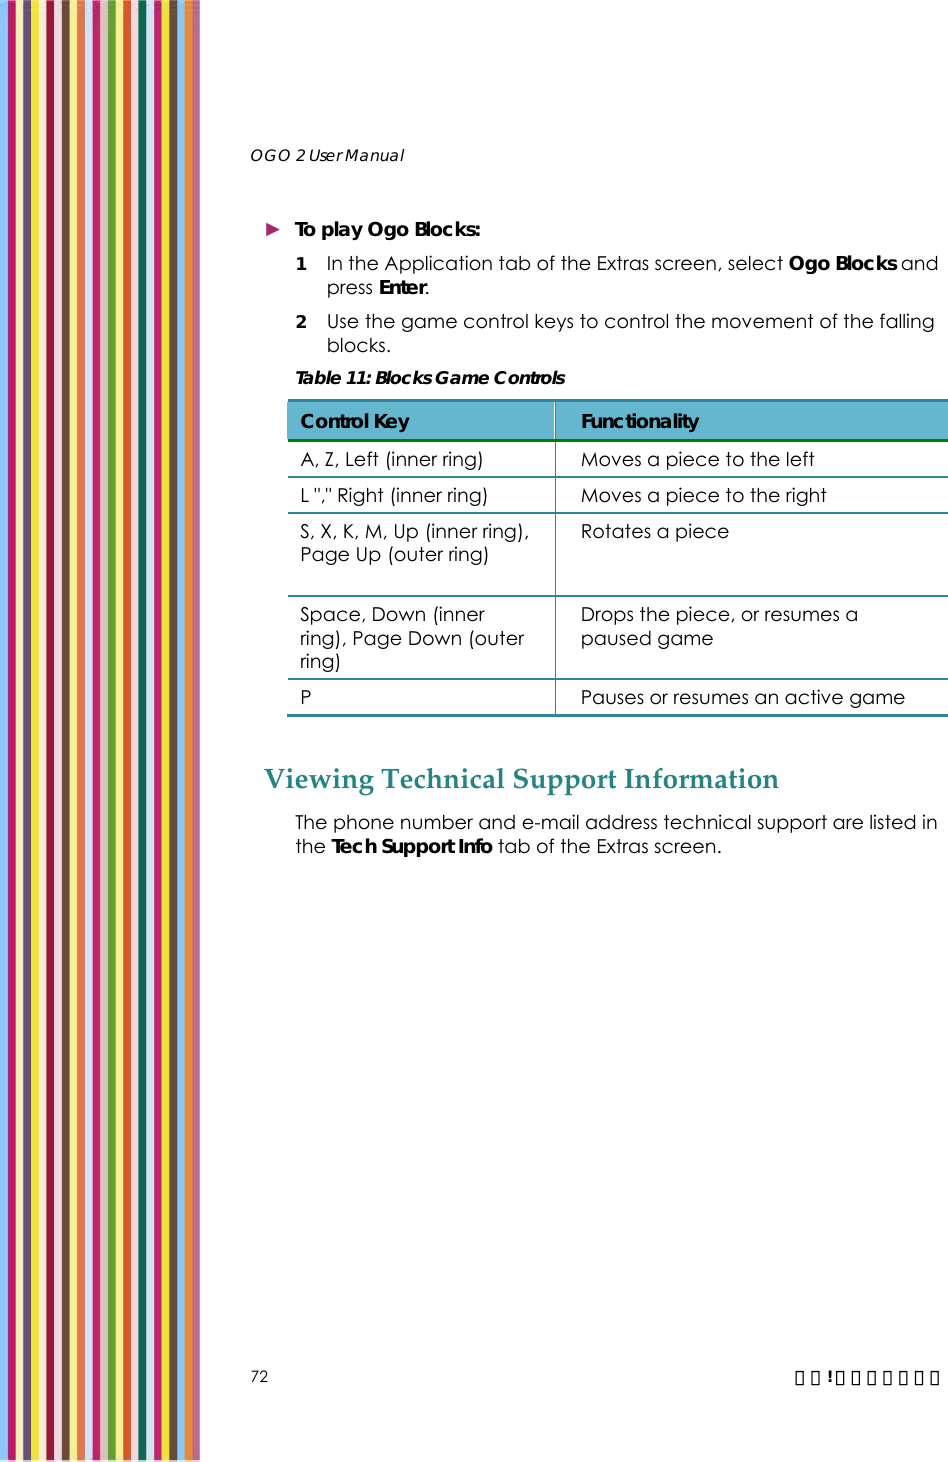
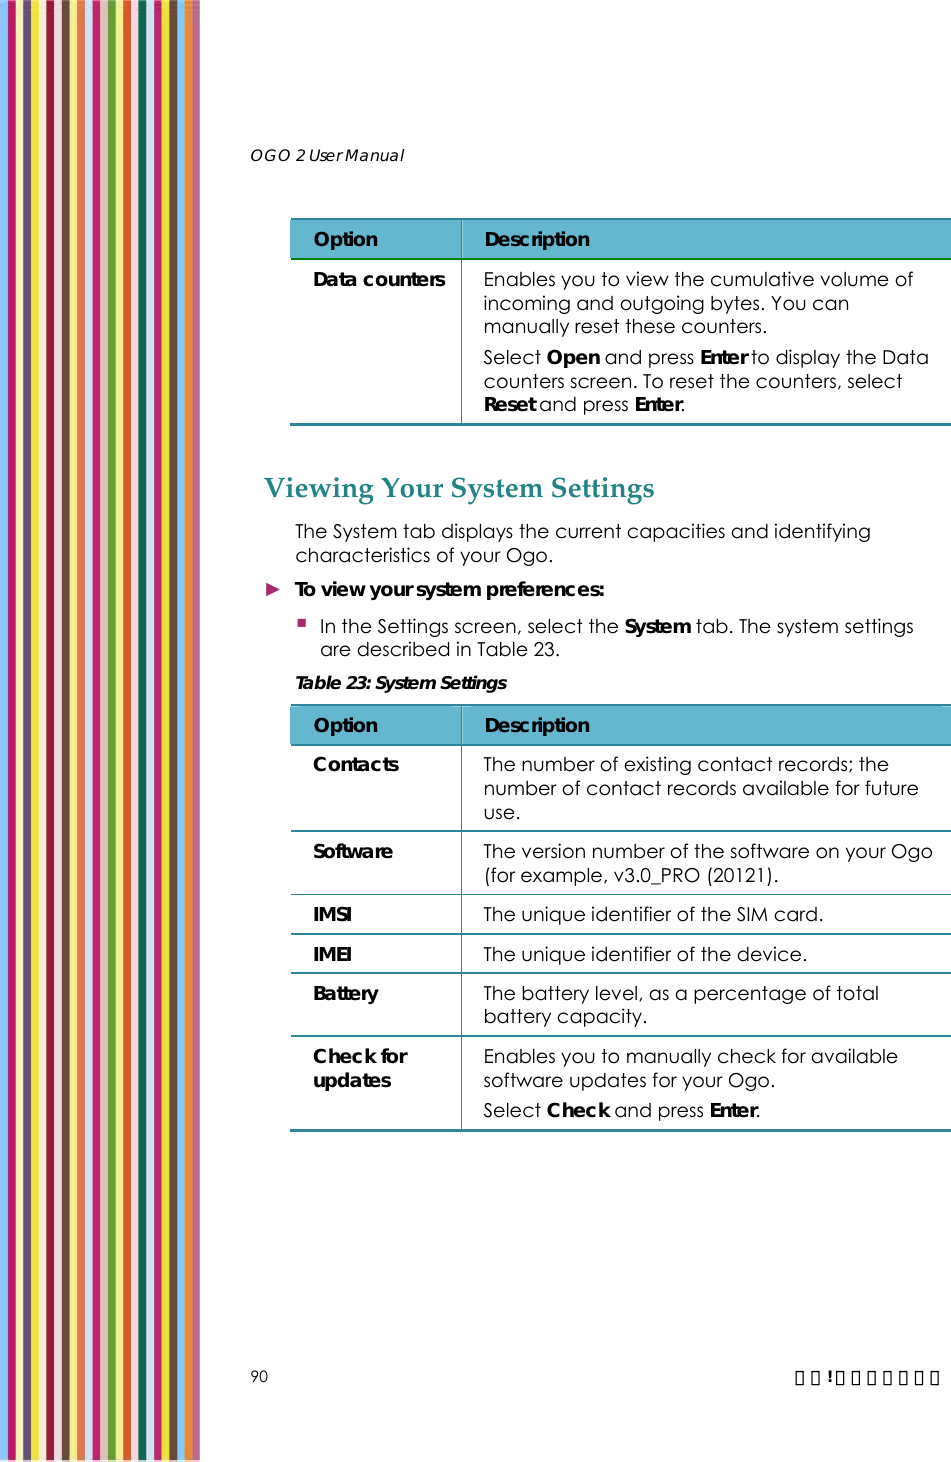
![OGO 2 User Manual 2 錯誤! 尚未定義樣式。 Features The key features of your Ogo include: Text and Instant Messaging: Dash off a quick text message or connect with contacts on your ICQ or MSN Instant Messenger lists. Ogo's finger friendly full-featured keyboard makes it fast, efficient and easy. E-mail Anywhere: Download and reply to email from multiple accounts. Ogo lets you manage messages from MS-Exchange, POP3, IMAP4, and MSN Hotmail accounts easily and efficiently, whether you're sitting in a restaurant, riding the bus, or relaxing on the beach. With Ogo you can handle attachments with ease. Download and view Word documents, PDFs, photos and more. Ogo keeps you on top of your world, wherever you are. And Ogo's PUSH email feature means you get email as soon as it hits your inbox, so there's no need to wait. Ogo keeps you in touch. RSS News Feeds: Stay in touch with your world. Download RSS news feeds for up to the moment news, information and alerts about the subjects you care about most. Voice Calls: Ogo’s full-featured and easy to use mobile phone functionality makes it that much easier to stay connected. Connect to The Web: Browse the web from practically anywhere. Blog, browse, check out your MySpace, EBay bids or the latest news and gossip - with Ogo you're in touch. Contact List and Calendar: Ogo's Personal Information Manager lets you carry your calendar and contacts’ information with you. Note: Some of the services described in this manual may not be available from your wireless carrier. Accessories Your Ogo is provided with the following accessories: 3.7V Li-ion battery 920mAh (120 hours standby, 2.5 hours usage) Charger with mini-USB connection 註解 [CS1]: Please verify accuracy](https://usermanual.wiki/IXI-Mobile/OGOCT25E/User-Guide-801412-Page-12.png)