IXI Mobile OGOCT25E CT-25E with GSM/ EDGE and Bluetooth User Manual
IXI Mobile, Inc. CT-25E with GSM/ EDGE and Bluetooth
users manual
OGO 2
User Manual

OGO 2 User Manual
ii

錯誤
!
尚未定義樣式。
iii
This Page should have any Legal Notices, copyright information, disclaimers etc
Even though there is the Warrantee section at the end
OGO 2 User Manual
iv
Table of Contents
Introducing the Ogo....................................................................... 1
Features.................................................................................................2
Accessories .............................................................................................2
Getting Started............................................................................... 3
Installing the SIM Card, SD Card, and Battery..............................................3
Charging the Battery ................................................................................5
Checking the Battery Power.......................................................................5
Identifying the Low Battery Warnings .................................................6
Working with the Ogo .................................................................... 7
Interacting with Your Ogo - Terminology .....................................................7
Powering On Your Ogo for the First Time .....................................................8
External LEDs..........................................................................................9
Overview of the Ogo Screen ......................................................................9
Status Bar ..............................................................................................10
Operations Area ..................................................................................11
Home Screen and Main Menu Options .......................................................12
Keyboard Functionality ...........................................................................14
Navigation and Selection Keys .........................................................15
Shortcut Keys........................................................................................16
Inserting Text........................................................................................ 17
Using Text Insertion Keys......................................................................17
Working with QuickText.......................................................................18
Using the Foreign Character Palette ................................................19
Checking for Messages and Open Chats..................................................... 21
Instant Messaging........................................................................ 22
Using the Instant Messaging Wizard to Set Up Your Account.........................22
Setting Up Your Windows Live Messenger Account.......................23
Setting Up Your ICQ IM Account.......................................................24
Working with the IM Screen.....................................................................26
IM Status Icons .....................................................................................27
Changing Your Status .............................................................................28

錯誤
!
尚未定義樣式。
v
Sending an Instant Message....................................................................28
Adding Emoticons to Your Instant Messages ..................................29
Receiving an Instant Message..................................................................29
Closing an IM Chat Session...................................................................... 30
Managing Your IM Contacts .....................................................................30
Adding an IM Contact .......................................................................30
Viewing Contact Information ............................................................30
Assigning an Alerticon to an IM Contact.........................................31
Blocking/Unblocking an IM Contact ................................................31
Deleting an IM Contact......................................................................32
Signing In.............................................................................................33
Signing Out...........................................................................................33
E-Mail and SMS/Text Messaging................................................... 34
Setting Up Your E-Mail Accounts...............................................................34
Using the E-Mail Wizard to Set Up Your Account ............................34
Setting Up Your Windows Live Mail Account...................................35
Setting Up Your Gmail or Custom Email Account...........................36
Accessing the Mailbox............................................................................. 37
Viewing Your Message Lists .....................................................................38
Composing a Message ............................................................................ 39
Working with Messages...........................................................................40
Opening a Message ...........................................................................40
Viewing an Attachment.....................................................................40
Forwarding a Message .......................................................................41
Replying to a Message .......................................................................41
Deleting a Message ............................................................................42
Finding a Message ..............................................................................43
Checking for New Messages .............................................................43
Viewing Your Sent Messages .............................................................43
Using Your Ogo Phone.................................................................. 45
Dialing a Call......................................................................................... 45
Handling Incoming Calls..........................................................................47
Answering a Call – Ogo is On, Cover is Closed...............................47
Handling an Incoming Call – Cover is Open...................................47
OGO 2 User Manual
vi
Handling Multiple Calls............................................................................48
Making another Call While Talking on the Phone...........................48
Receiving another Call While Talking on the Phone ......................48
Swapping Calls ....................................................................................49
Joining Calls (Conferencing) .............................................................49
Ending a Call.........................................................................................49
Muting/Unmuting a Call ..........................................................................49
Viewing Your Call Lists............................................................................50
Call Timers............................................................................................ 51
Managing Your Ogo Contact List................................................... 52
Adding Contacts.....................................................................................53
Deleting Contacts................................................................................... 54
Working with Contact Groups...................................................................54
Creating a Group................................................................................54
Adding Contacts to Groups ..............................................................55
Sending a Message to a Group........................................................55
Viewing/Editing Contact Profiles ............................................................... 55
Assigning an Alerticon to a Contact ................................................56
Working with the Address Clipboard..........................................................56
Creating a Contact from the Clipboard .........................................57
Exporting Contacts.................................................................................58
Importing Contacts ................................................................................58
Synchronizing Your Contact List ............................................................... 59
Working with the Calendar........................................................... 60
Adding an Appointment........................................................................... 61
Opening/Editing an Appointment..............................................................62
Deleting an Appointment.........................................................................62
Deleting Old Appointments...................................................................... 63
Deleting All Appointments .......................................................................63
Receiving Appointment Reminders............................................................ 63
Synchronizing Your Calendar ................................................................... 64
Viewing the News......................................................................... 65
Accessing News Feeds ............................................................................ 65
Adding a News Feed ...............................................................................66
Surfing the Internet ..................................................................... 67
Searching the Internet............................................................................68
Requesting a Specific URL .......................................................................68

錯誤
!
尚未定義樣式。
vii
Working with Bookmarks.........................................................................68
Adding a Bookmark ............................................................................69
Removing a Bookmark .......................................................................69
Adding a Folder...................................................................................69
Opening a Bookmark..........................................................................70
Viewing Your Browsing History................................................................. 70
Ogo Extras ................................................................................... 71
Playing Ogo Blocks.................................................................................71
Viewing Technical Support Information...................................................... 72
Setting Your Preferences.............................................................. 73
Setting Your Phone Preferences................................................................74
Setting Your IM Preferences.....................................................................77
Setting Your E-mail Preferences ...............................................................78
Setting Your Browser Preferences.............................................................80
Setting Synchronization Preferences .........................................................82
Setting Device Preferences......................................................................82
Setting Your Calendar Preferences............................................................85
Setting Your Sounds Preferences..............................................................86
Setting the Time and Date....................................................................... 88
Setting Your Network Preferences.............................................................89
Viewing Your System Settings..................................................................90
Important Safety Information ...................................................... 91
Radio Frequency (RF) Energy...................................................................91
RF Interference/Compatibility ...........................................................91
Potentially Explosive Atmospheres............................................................ 92
Using Device Safely While Driving.............................................................92
Accessories ........................................................................................... 92
Batteries and Battery Chargers ................................................................92
Repetitive Motion Injuries........................................................................93
Caring for Your Device and Charger .......................................................... 93
Device Service.......................................................................................94
Radio Frequency Signals .........................................................................94
FCC Compliance Statement .....................................................................95
Battery Safety Precautions ...................................................................... 95
Danger!.................................................................................................96
RF Exposure..........................................................................................97
Health and Safety Information .................................................................97
OGO 2 User Manual
viii
Exposure to Radio Frequency (RF) Signals.......................................97
SAR Information ...................................................................................98
Warrantee and Conditions............................................................ 99

錯誤
!
尚未定義樣式。
ix
OGO 2 User Manual
x

錯誤
!
尚未定義樣式。
錯誤! 尚未定義樣式。 1
Introducing the Ogo
Ogo is an easy-to-use handheld device which offers a variety of
mobile communication methods including e-mail, instant messaging,
SMS, RSS, voice and Web browsing. Ogo's interface and functionality
were designed to enhance Web2.0 usability featuring a high
resolution screen, built-in stereo speakers and external memory slot for
an optimal visual/audio experience. The full keyboard and sleek
design encourage user interaction for constant connectivity to live
communities and user-content generated sites.
Ogo also features the revolutionary OgoClip™ concept – a variety of
optional, replaceable, tubular components, such as a 2.0 mega pixel
camera, a music streamer, a Blue tooth handset and even a bottle
opener. OgoClips allow users to personalize and accessorize their
Ogo, keeping up with the newest mobile add-ons as they are made
available.
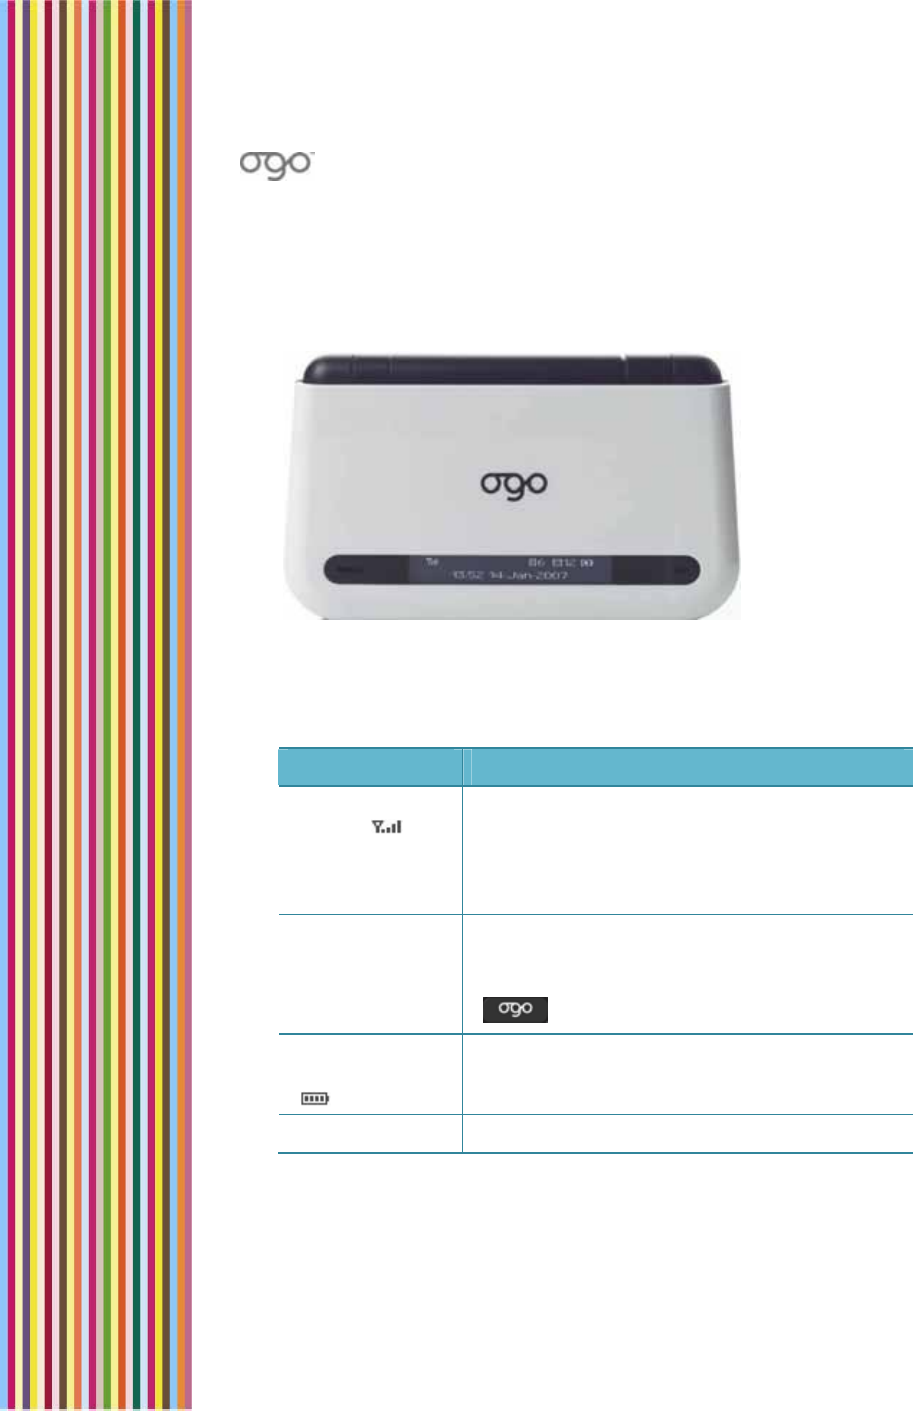
Figure 1: Ogo Device
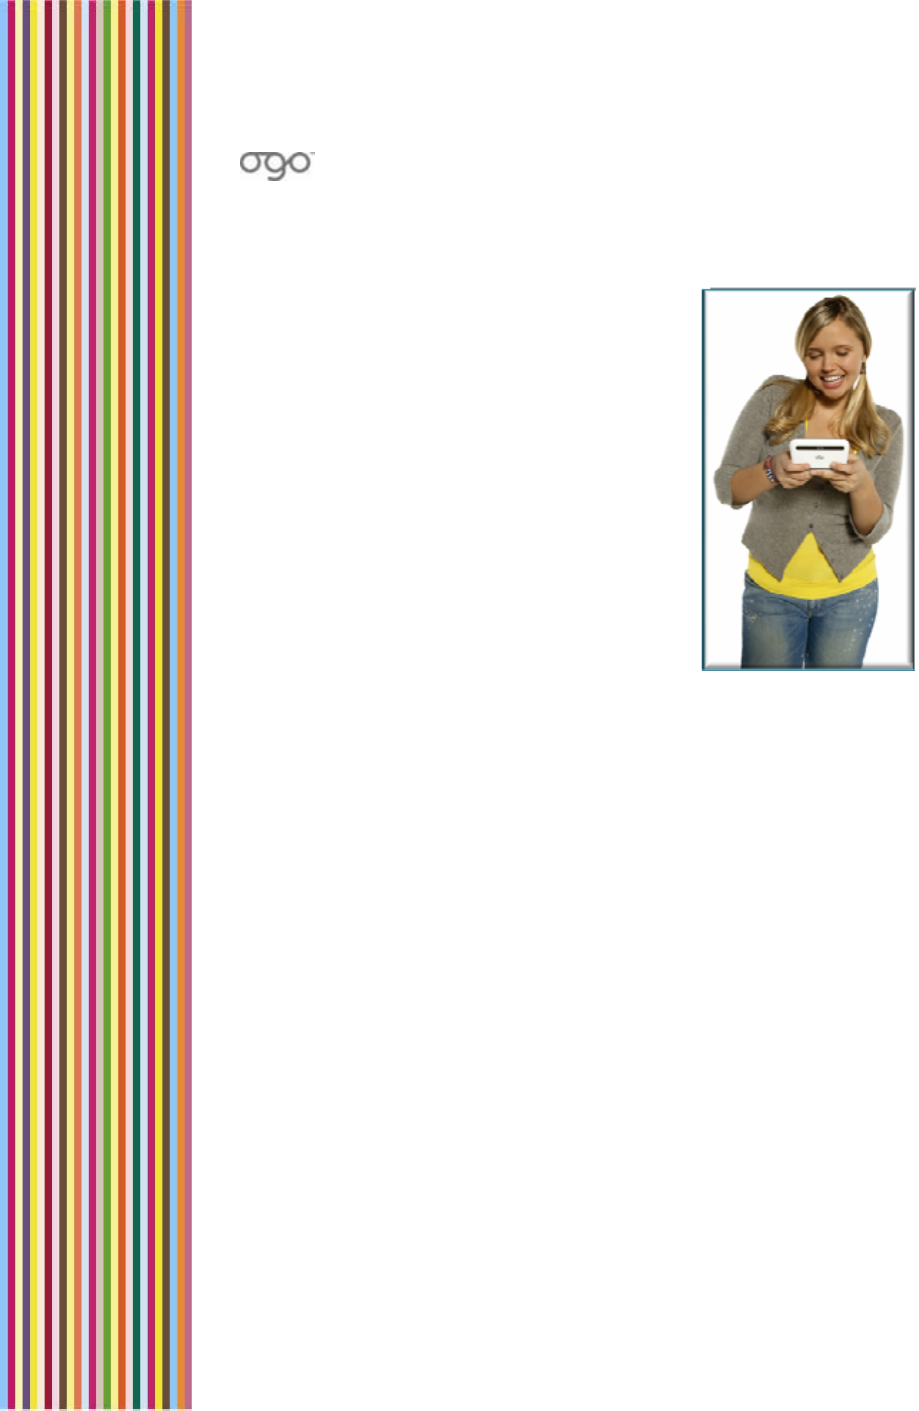
Ogo is designed for people on the go. When closed, your Ogo is only
2.5 cm. in thickness and weighs in at a mere 159 grams.

OGO 2 User Manual
2 錯誤! 尚未定義樣式。
Features
The key features of your Ogo include:
Text and Instant Messaging: Dash off a quick text message or
connect with contacts on your ICQ or MSN Instant Messenger lists.
Ogo's finger friendly full-featured keyboard makes it fast, efficient
and easy.
E-mail Anywhere: Download and reply to email from multiple
accounts. Ogo lets you manage messages from MS-Exchange,
POP3, IMAP4, and MSN Hotmail accounts easily and efficiently,
whether you're sitting in a restaurant, riding the bus, or relaxing on
the beach. With Ogo you can handle attachments with ease.
Download and view Word documents, PDFs, photos and more.
Ogo keeps you on top of your world, wherever you are. And Ogo's
PUSH email feature means you get email as soon as it hits your
inbox, so there's no need to wait. Ogo keeps you in touch.
RSS News Feeds: Stay in touch with your world. Download RSS news
feeds for up to the moment news, information and alerts about the
subjects you care about most.
Voice Calls: Ogo’s full-featured and easy to use mobile phone
functionality makes it that much easier to stay connected.
Connect to The Web: Browse the web from practically anywhere.
Blog, browse, check out your MySpace, EBay bids or the latest
news and gossip - with Ogo you're in touch.
Contact List and Calendar: Ogo's Personal Information Manager
lets you carry your calendar and contacts’ information with you.
Note: Some of the services described in this manual may not be
available from your wireless carrier.
Accessories
Your Ogo is provided with the following accessories:
3.7V Li-ion battery 920mAh (120 hours standby, 2.5 hours usage)
Charger with mini-USB connection
註解 [CS1]: Please verify
accuracy
錯誤
!
尚未定義樣式。
錯誤! 尚未定義樣式。 3
Getting Started
Before you can begin to enjoy your Ogo, you need to insert the
following components into the device:
SIM card
Battery
Micro SD card (optional, for additional storage space)
It is then recommended that you fully charge the battery.
Installing the SIM Card, SD Card, and Battery
Before you use your Ogo, you need to insert the SIM card and battery
into the device. If you choose to use a Micro SD card with your Ogo, it
should be inserted at the same time.
► To install the SIM card and battery:
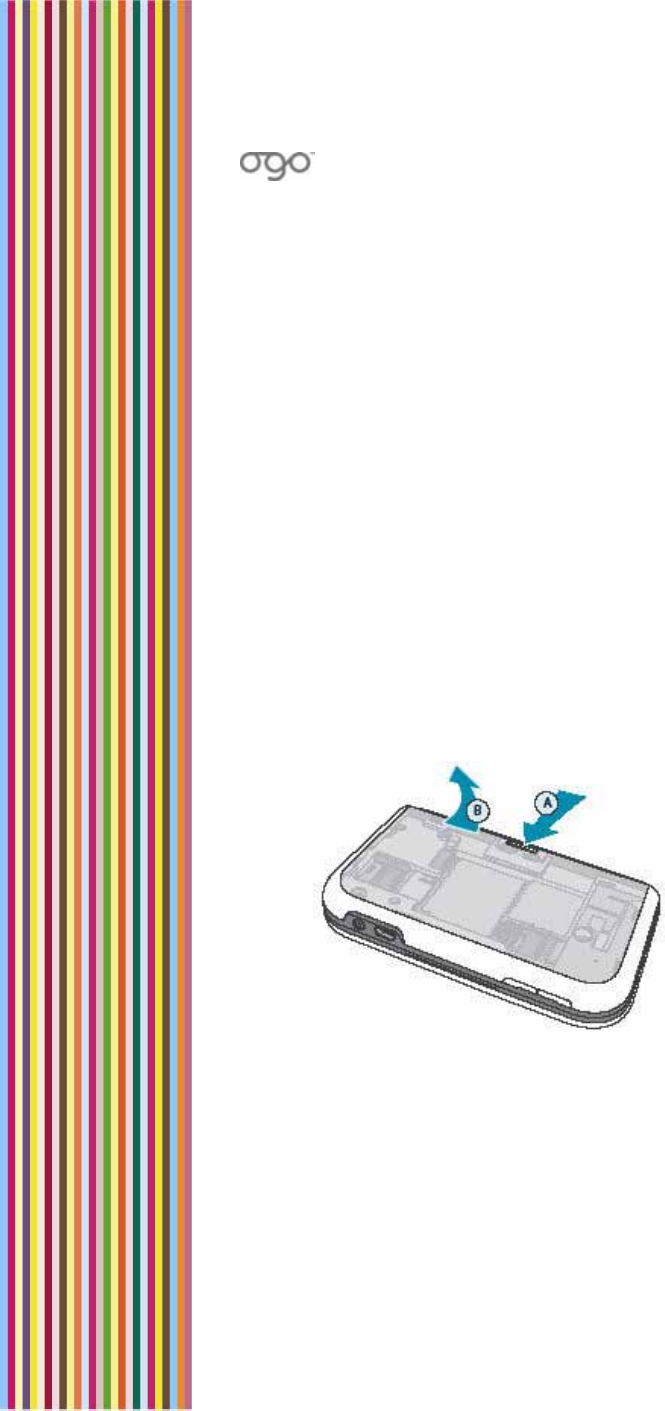
1 Turn your Ogo over and remove the back cover (Figure 2).
Figure 2: Removing the Back Cover
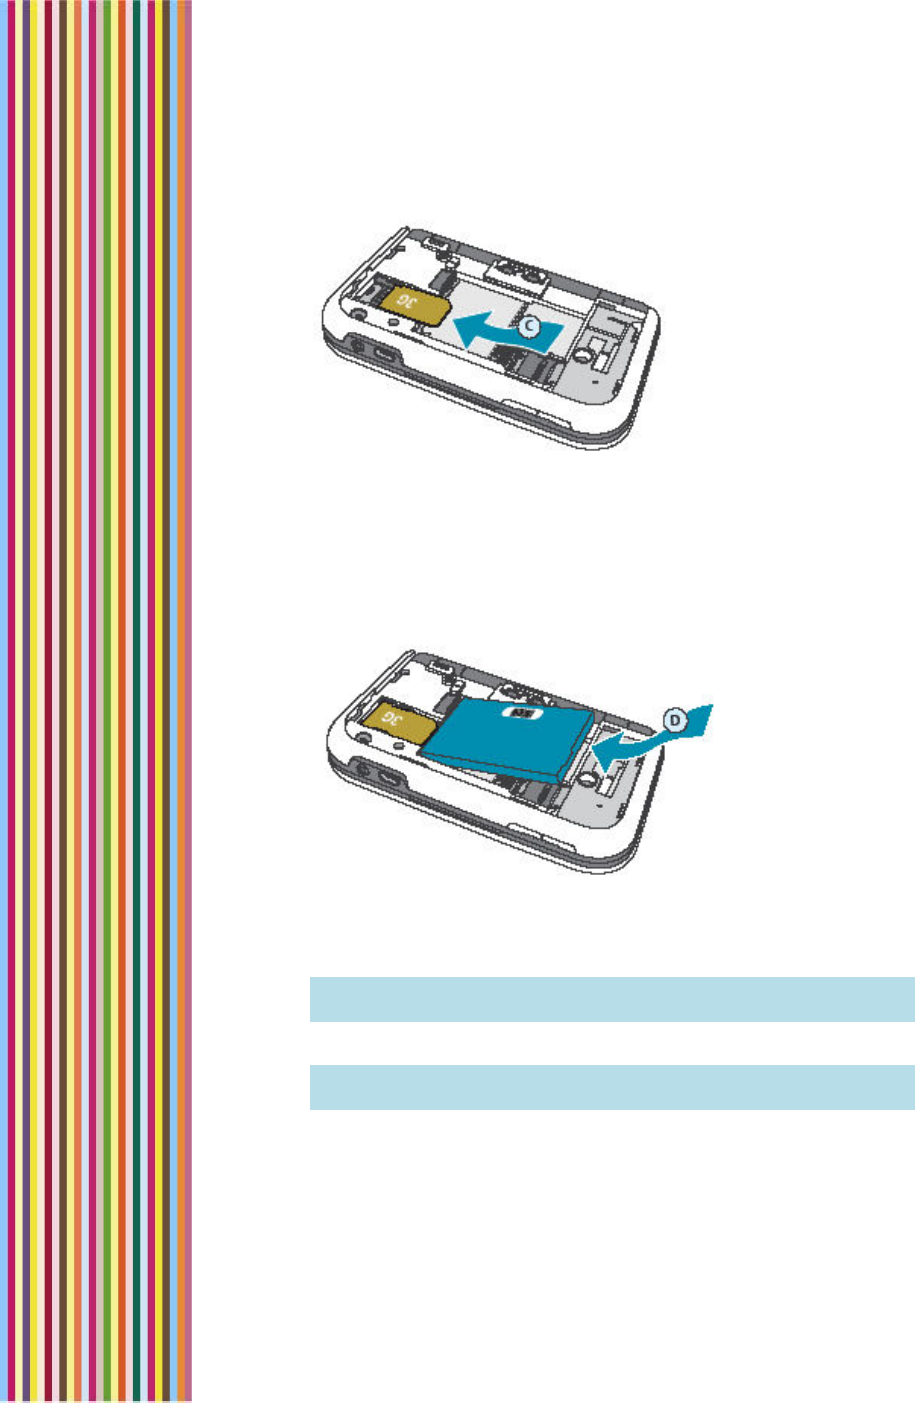
2 With its label facing up, gently slide the SIM card into the SIM card
slot. Make sure the SIM card’s angled corner matches the angled
corner of the SIM card slot.
Note: Be careful not to scratch the SIM card's metal contact as it
can easily be damaged.
OGO 2 User Manual
4 錯誤! 尚未定義樣式。
Figure 3: Installing the SIM Card
3 (Optional) If you want to use a Micro SD card with the device,
insert the SD card in the SD card slot.
4 Now, with the battery label facing up, match the battery contacts
with the contacts in the battery slot. Push the battery in, contacts-
side down first (Figure 4).
Figure 4: Inserting the Battery
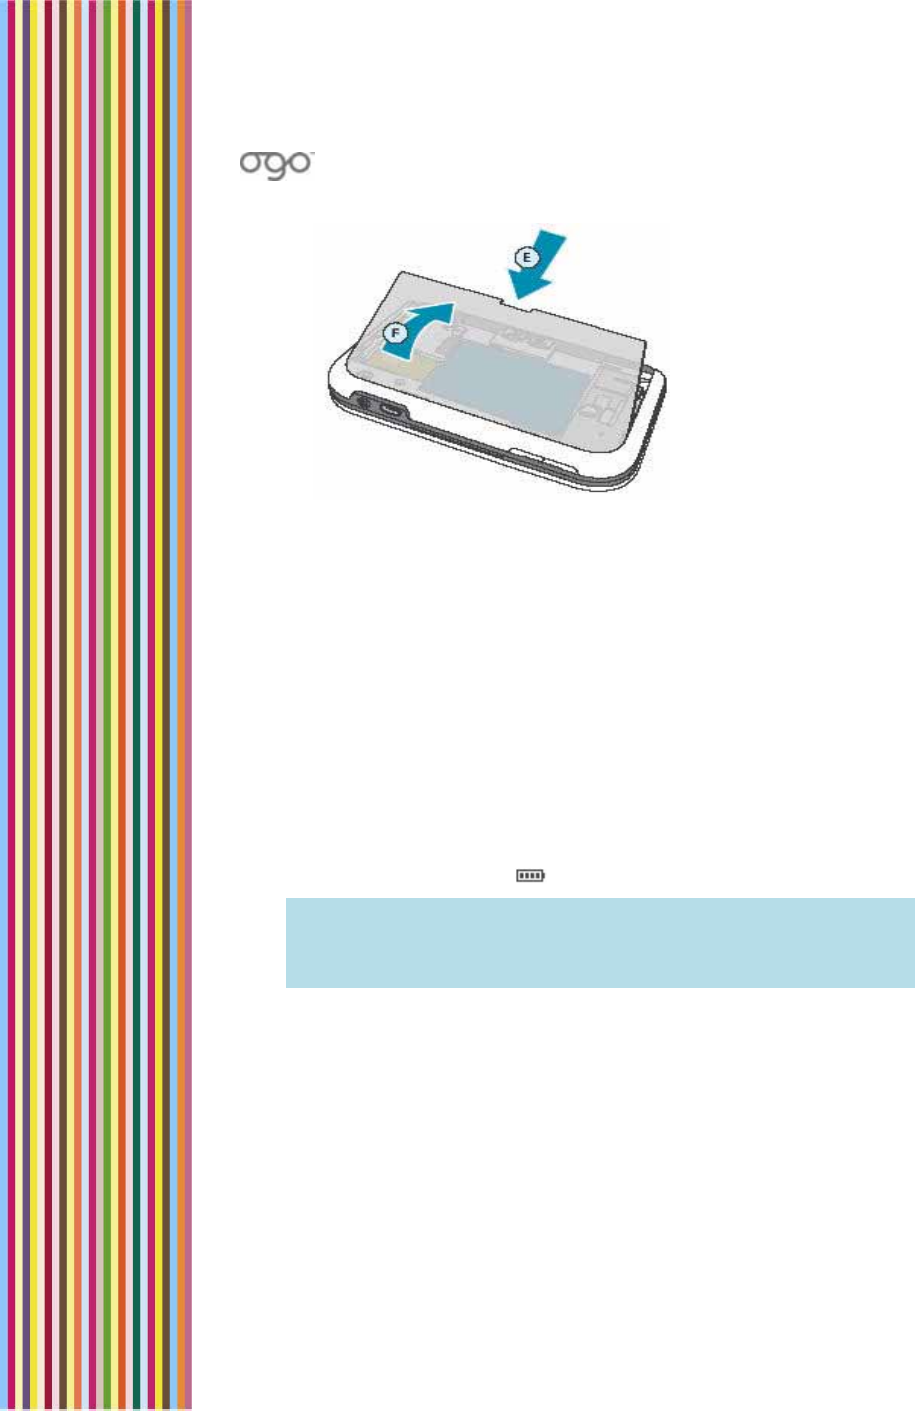
5 Push the other side down to slide the battery in until it clicks into
place.
Note: To remove the battery, gently lift it up from the side opposite
the contacts.
6 Replace the back cover (Figure 5).
Note: Make sure that the battery has been properly installed
before charging or powering on your Ogo.
錯誤
!
尚未定義樣式。
錯誤! 尚未定義樣式。 5
Figure 5: Closing the Back Cover
Charging the Battery
The first time you charge the battery, it is recommended that you
charge it for 8 consecutive hours.
► To charge the battery:
1 With the battery properly installed, connect the charger’s power
plug to the charging socket on the front of your Ogo.
2 Plug the AC adapter into an electrical outlet.
While the battery is charging, the battery charge level icon flashes,
indicating that the battery is charging. When the battery is fully
charged, the flashing stops and the battery charge level icon
displays four solid bars .
Note: When your Ogo is powered off and the charger is
connected, the screen indicates that the battery is charging.
The charging indicator shows one of two states: Battery
Charging or Battery Fully Charged.
Checking the Battery Power
Ogo’s battery life is dynamically calculated based on your current
usage. For example, when you are sending a lot of e-mails or
participating in numerous IM chat sessions, the battery power
weakens faster than when your device is inactive, but powered on.
The approximate power level is indicated by the number of bars on
the battery level icon, which appear on both the status bar and the
external LED panel.

OGO 2 User Manual
6 錯誤! 尚未定義樣式。
Note: The approximate remaining percentage of battery power is
listed in the System tab of the Settings screen.
Identifying the Low Battery Warnings
When battery power becomes low, a Battery Low pop-up message
appears. When this happens, charge your Ogo as soon as possible.
If the battery level becomes critically low, the Battery Low! pop-up
message appears. In this case, you must shut down the device and
recharge its battery. For more information, see Charging the Battery
on page 5.
In the event that the battery dies or an unexpected power loss occurs,
the only information that can be lost is:
• A message being composed that has not been saved as a draft.
• Information entered into a currently-open contact record but not
yet saved.
• Text typed in an IM chat window that has not been sent.
錯誤
!
尚未定義樣式。
錯誤! 尚未定義樣式。 7
Working with the Ogo
To make it easy for you to enjoy Ogo, we
recommend that your take a few minutes to
get acquainted with the screen, the
keyboard, and a few of the general features.
Interacting with Your Ogo -
Terminology
In this manual, the following terms have
been used in the instructions to describe the
ways in which you interact with your Ogo:
Select refers to moving the focus on the screen to a tab, field,
button or option. The selected option is highlighted on the screen.
Items are selected using either the 8-way Navigation Key or the
Selection Wheel. For more information, see Navigation and
Selection Keys on page 15.
Scroll refers to moving up or down within the items in a list or menu,
for example, the Options menu.
Press always refers to the pressing of physical keys on the keyboard.
Pressing Enter confirms a selection. This is accomplished by pressing
the Enter key or by pressing the center of the Selection Wheel.
Insert refers to the entering of text using the keyboard when
completing forms or composing messages. After inserting the
required text, simply select the next option (without pressing Enter).
For more information, see Inserting Text on page 17.
Pressing the Options key displays the Options menu. The available
options vary according to your current location in the application.
Pressing Enter when a checkbox option is highlighted toggles the
setting between selected (checked) and cleared (unchecked).

OGO 2 User Manual
8 錯誤! 尚未定義樣式。
Powering On Your Ogo for the First Time
Once your Ogo is charging (or fully charged), hold down the Power
key until the backlight of the screen turns on and the Ogo logo is
displayed.
The first time you turn on your Ogo, a setup wizard appears, ready to
guide you through the initial stages of setting up your device settings.
The first screen of the Messaging Wizard prompts you to select a
language.
Once you have set the language, you are ready to begin to use your
Ogo.
► To set the language:
1 When prompted, scroll to the language that you want to use on
the device and press Enter.
2 Select Next and press Enter to continue. A welcome message is
displayed in the selected language, and the Instant Messaging
Wizard is automatically launched.
You can set up your instant messaging and e-mail accounts now,
or you can close the wizard and come back and complete the
process later.
For a description of the Instant Messaging Wizard, see Using the
Instant Messaging Wizard to Set Up Your Account on page 22.
For a description of the E-mail Wizard, see Using the E-Mail Wizard
to Set Up Your Account on page 34.
錯誤
!
尚未定義樣式。
錯誤! 尚未定義樣式。 9
External LEDs
When the cover of your Ogo is closed, an external LED pane displays
information about the system status, new messages, IM status, battery
level, and more.
Figure 6: LED Display
The items described in the table below appear on the LED display,
from left to right.
Table 1: LED Display Items
Status Bar Item Description
Signal
strength
The number of vertical bars indicates the
strength of Ogo’s network connection. If a G
appears in the status, the GPRS service is on. If
an E appears in the status, the Edge service is
on.
New Message
Indicator An icon indicating the presence of one or
more recent messages.
Tip: To view a list of the messages, press
.
Battery charge
level
The number of vertical bars indicates the
battery charge level.
Time Displays the current time and date.
Overview of the Ogo Screen
The Ogo screen is divided into two main areas:
OGO 2 User Manual
10 錯誤! 尚未定義樣式。
Status Bar
Operations Area
Status Bar
The Ogo status bar appears at the top of your Ogo screen, and
displays information about the system status, new messages, headset
connection, IM status, battery level, and more.
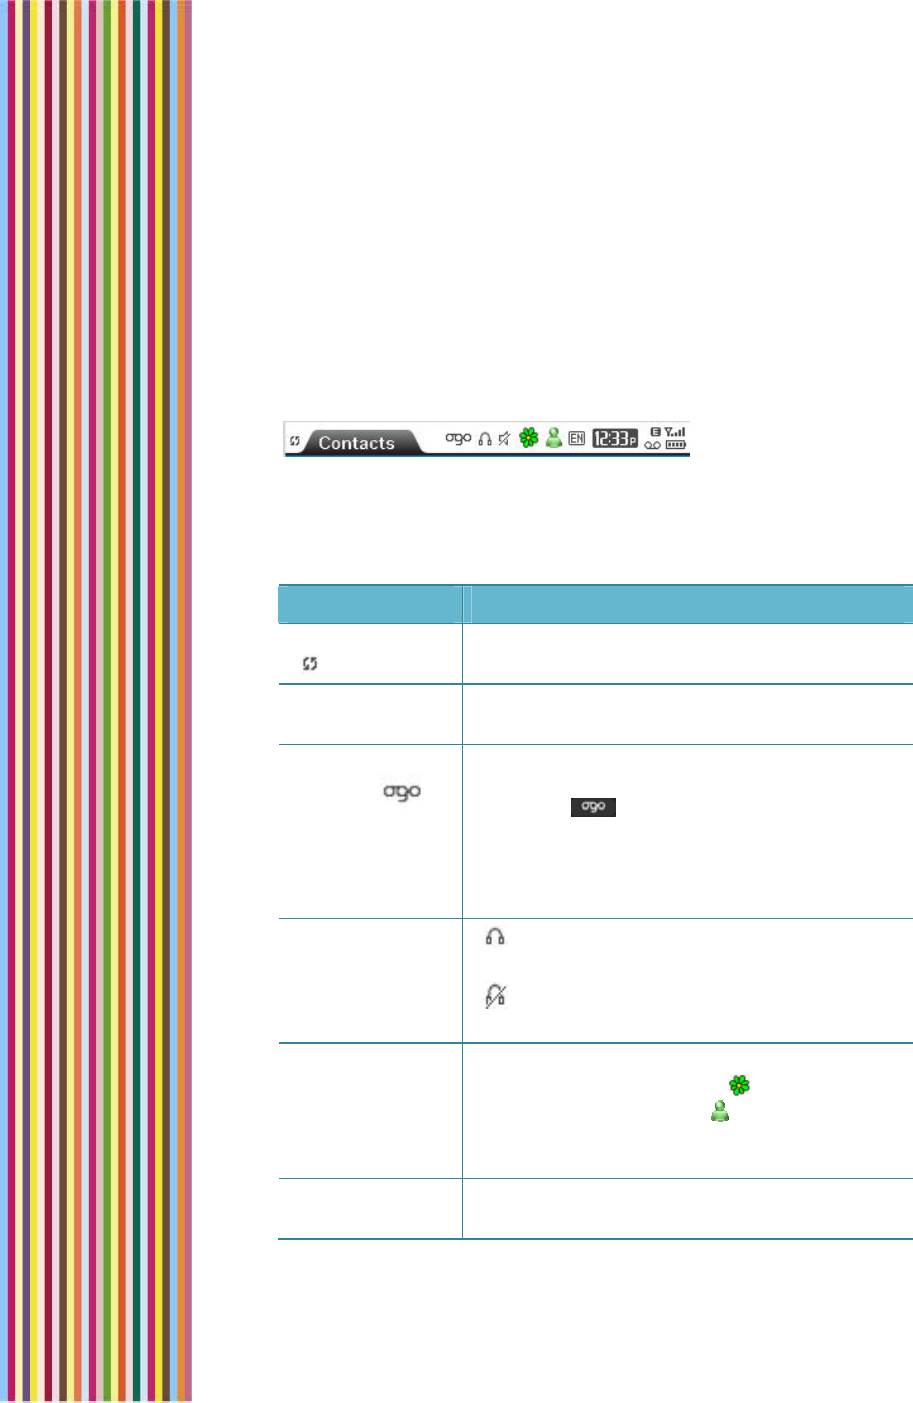
Figure 7: Sample Status Bar
The items described in the following table appear on the status bar,
from left to right.
Table 2: Status Bar Items
Status Bar Item Description
Synchronization
Indicates when the synchronization process is
in progress (it is not displayed at other times).
Screen indicator Indicates the current screen (e.g., Home, IM,
Phone).
Ogo
indicator
Spins and flips over when you have new
unread messages (e-mail, SMS/text, or IM). If
you press key to check new messages
but leave some messages unread, the Ogo
indicator gently moves up and down. For
more information, see Checking for Messages
and Open Chats on page 21.
Headset
connection
icons
- A headset is connected to the Ogo
device.
- A headset is not connected to the Ogo
device.
IM status
Indicates the status of the configured
messaging service(s) – ICQ and/or
Windows Live Messenger . For IM status
icons and descriptions, see IM Status Icons on
page 27.
Language Indicates the system language in use on your
Ogo (for example, EN for English).
錯誤
!
尚未定義樣式。
錯誤! 尚未定義樣式。 11
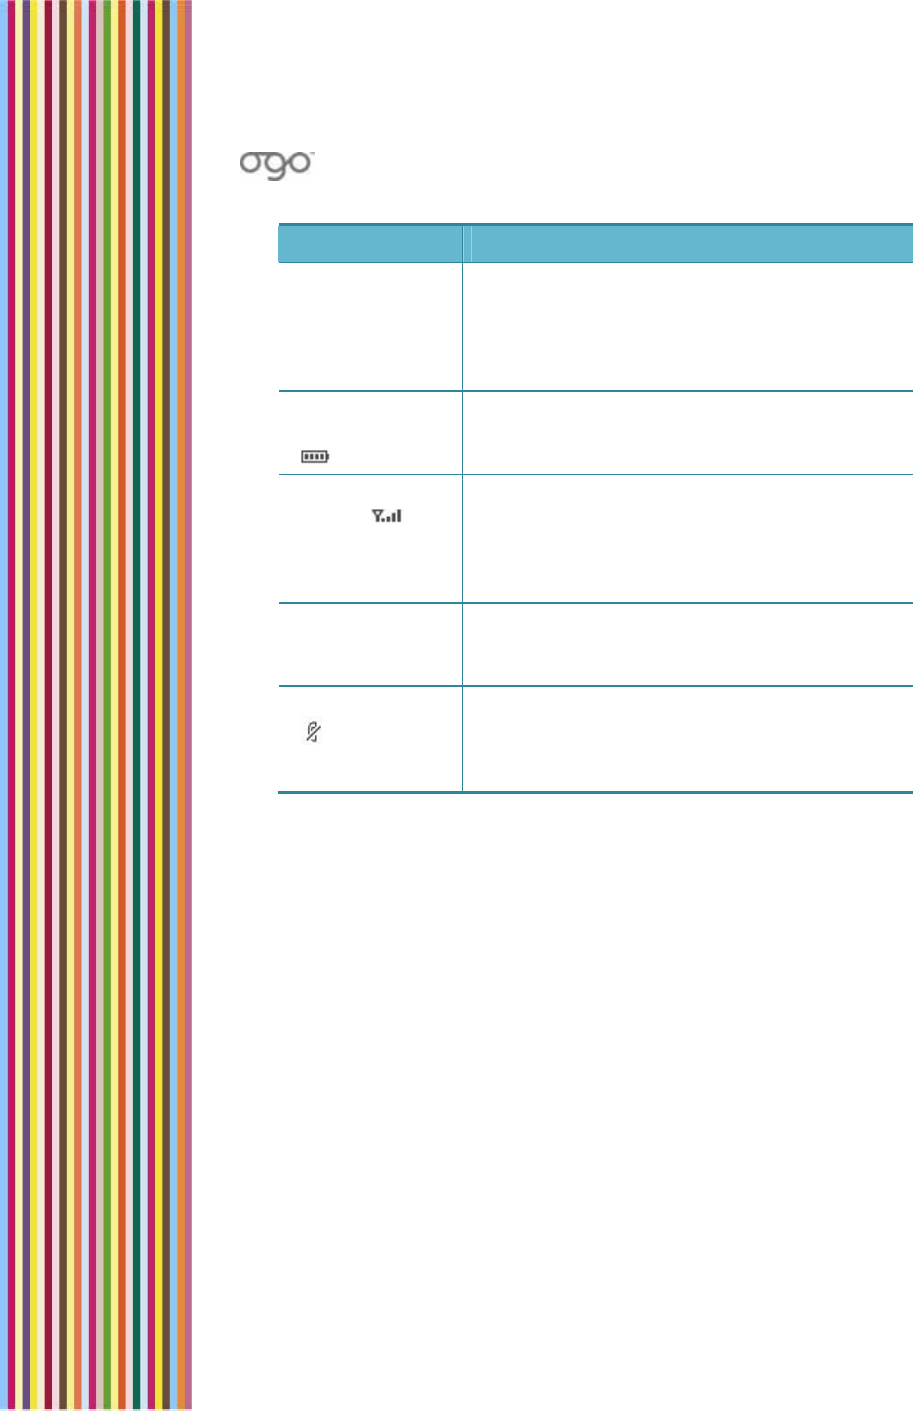
Status Bar Item Description
Time Displays the current time and date. You can
manually adjust the device's time and date or
receive the time and date from the network.
For more information, see Setting the Time
and Date on page 88.
Battery charge
level
The number of vertical bars indicates the
battery charge level. For more information,
see Checking the Battery Power on page 5.
Signal
strength
The number of vertical bars indicates the
strength of Ogo’s network connection. If a G
appears in the status, the GPRS service is on. If
am E appears in the status, the Edge service is
on.
Send/Receive
icon Appears as an animation during a
send/receive action and disappears from the
status bar when the action is complete.
Mute icon
Indicates that your Ogo’s audio is muted (it is
not displayed at other times). For more
information, see Muting/Unmuting a Call on
page 49.
Operations Area
The Operations area appears below the Ogo status bar (which
displays the name of the active screen).
The content and layout of the Operations area vary according to the
currently selected screen and active functionality.
Many of your Ogo screens are made up of multiple pages or tabs.
The names of the available tabs appear immediately below the Ogo
status bar.
For example, Figure 8 shows a sample of the Settings screen, which
includes multiple tabs (Phone, IM, E-mail, Browser, and so on).
You can move between the tabs by pressing the right and left keys on
the external ring of the 8-way navigation key. The > on the tab bar
indicates that you can scroll to the right to access additional tabs.

OGO 2 User Manual
12 錯誤! 尚未定義樣式。
Figure 8: Sample Settings Screen
Home Screen and Main Menu Options
Ogo’s features can be easily accessed by selecting the required
option from the Home screen or from the Main Menu.
To display the Home screen, press .
Figure 9: Home Screen
To display the Main Menu, press . The options are displayed in a
column on the left side of the screen.
Note: The same options are available in both locations.
錯誤
!
尚未定義樣式。
錯誤! 尚未定義樣式。 13
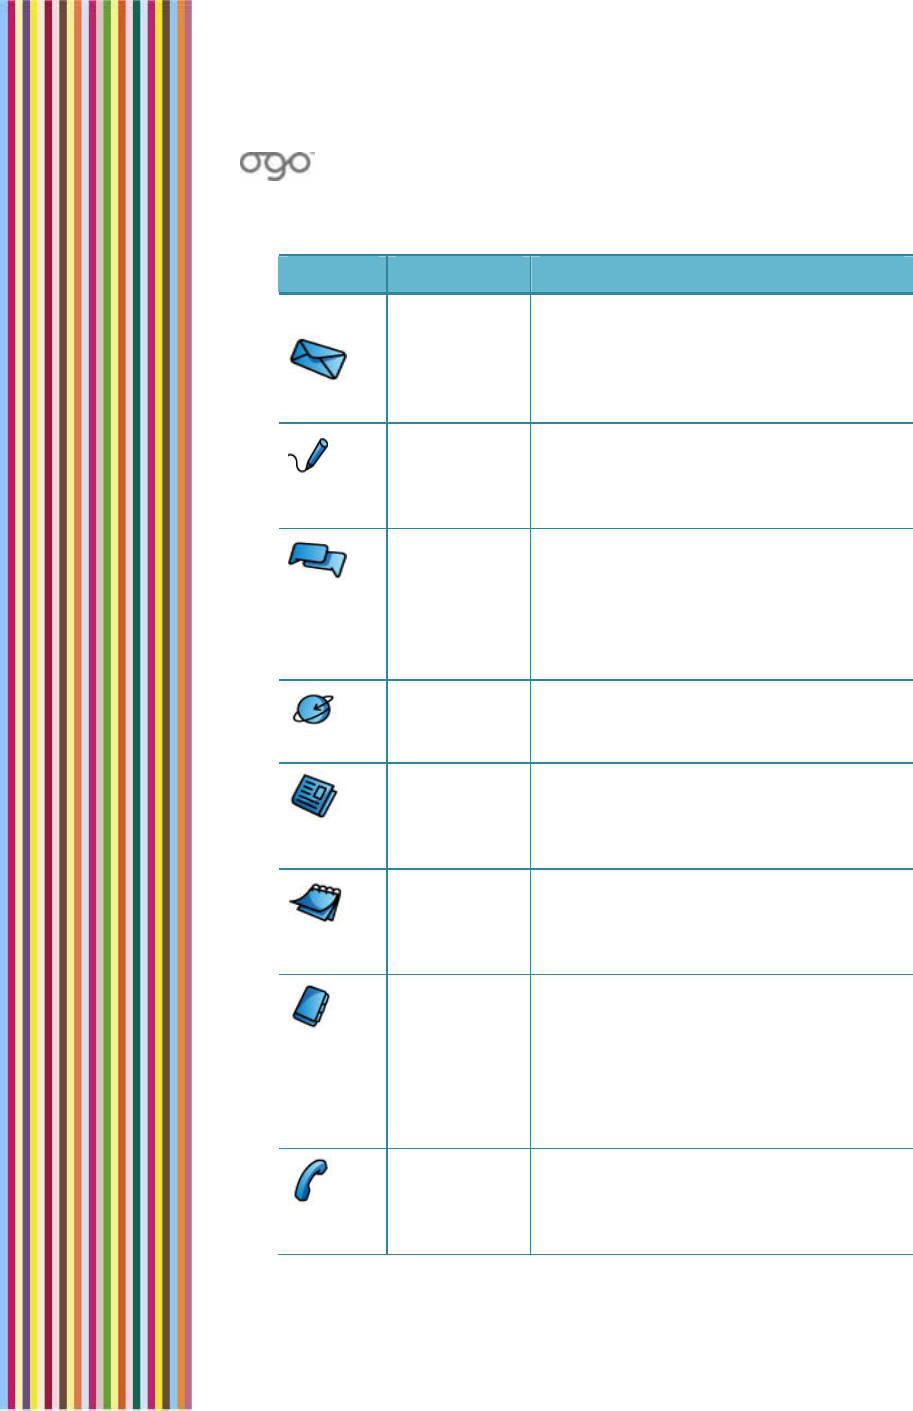
Table 3: Home Screen and Main Menu Options
Option Name Function
Mailbox
Displays the Mailbox screen, enabling
you to view, sort, and send e-mail
and SMS messages. For details, see
Viewing Your Message Lists on page
38.
Compose Displays the Compose screen,
enabling you to compose and send
an SMS message. For details, see
Composing a Message on page 39.
IM Displays the IM screen, enabling you
to manage your ICQ and/or Windows
Live Messenger contacts, send and
receive messages, and more. For
details, see Instant Messaging on
page 22.
Browser Displays the Browser screen, enabling
you to surf the Internet. For details, see
Surfing the Internet on page 67.
News Displays the News screen, enabling
you to stay on top of current events.
For details, see Viewing the News on
page 64.
Calendar Displays the Calendar screen,
enabling you to manage your
schedule. For details, see Working with
the Calendar on page 60.
Contacts Displays the Contacts screen,
enabling you to store contact profile
information for people to whom you
call, or send e-mail or text messages
(regardless of whether they use IM).
For details, see Managing Your Ogo
Contact List on page 52.
Phone Displays the Phone screen, enabling
you to make and receive phone calls.
For details, see Using Your Ogo Phone
on page 45.
OGO 2 User Manual
14 錯誤! 尚未定義樣式。
Option Name Function
Extras Displays the Extras screen, enabling
you to select from various external
applications, and providing technical
support contact details. For details,
see Ogo Extras on page 71.
Settings Displays the Settings screen, enabling
you to configure your phone, IM, E-
mail, browser, and other device
settings. For details, see Setting Your
Preferences on page 73.
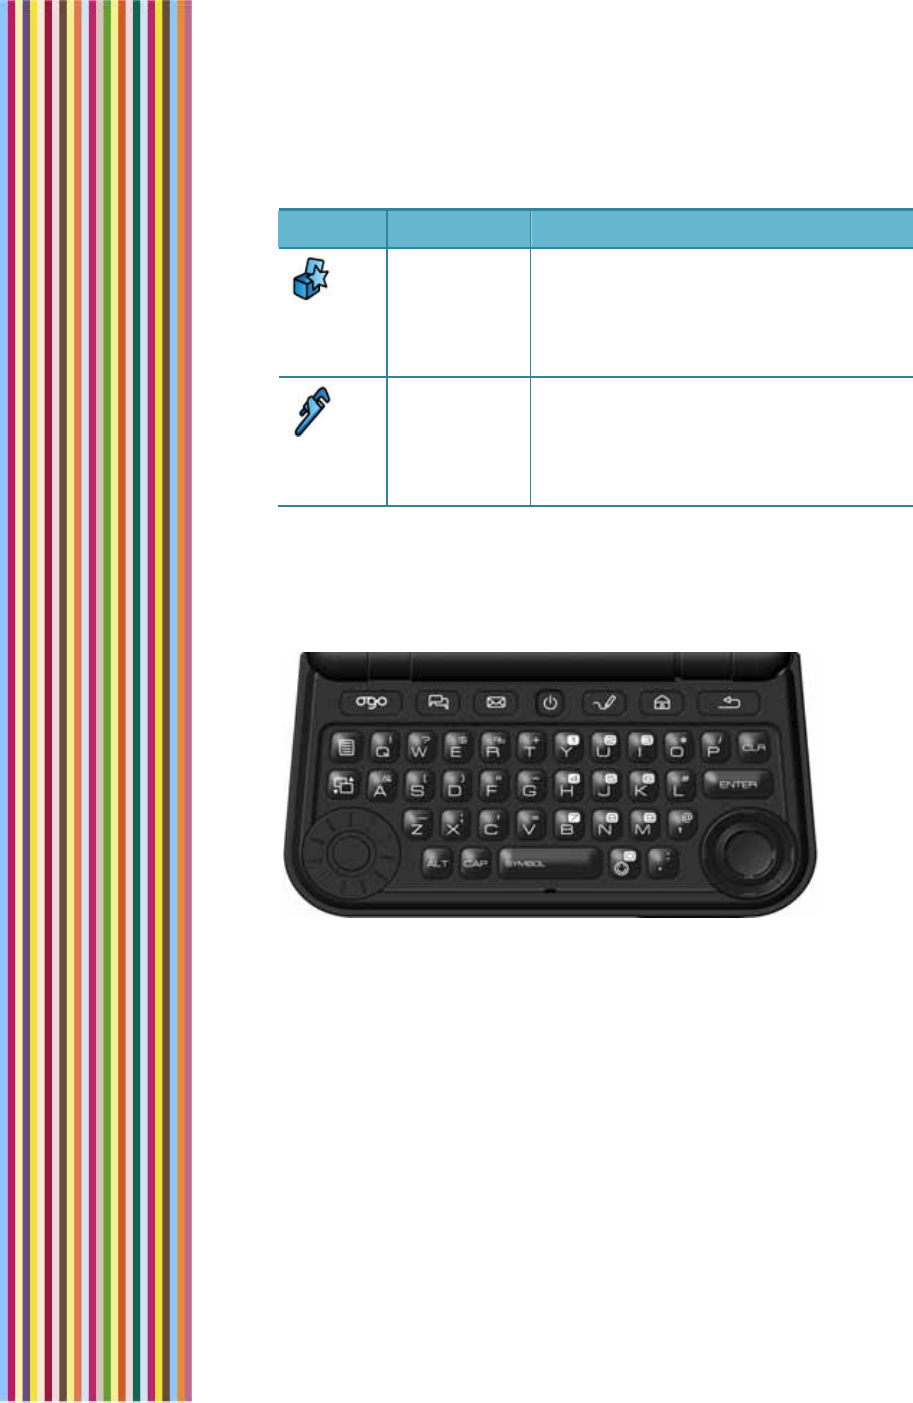
Keyboard Functionality
The convenient layout of the Ogo keyboard enables you to easily
access the various functions of your Ogo device.
Figure 10: Ogo Keyboard
The keyboard includes navigation and selection keys, shortcut keys,
and text/character insertion keys.
錯誤
!
尚未定義樣式。
錯誤! 尚未定義樣式。 15
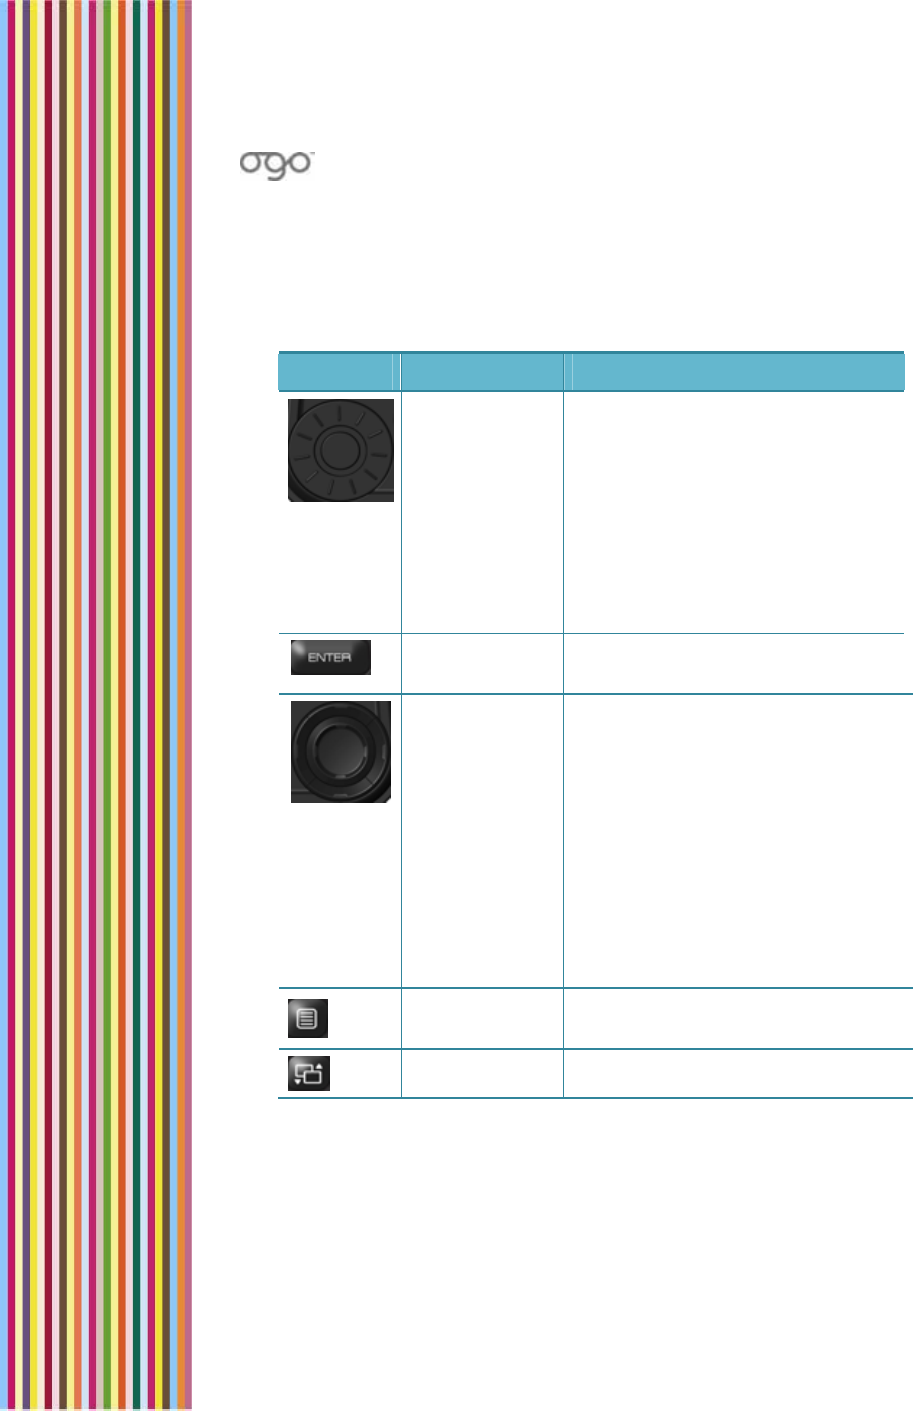
Navigation and Selection Keys
The following keys enable you to navigate within the Ogo’s screens to
select and configure the various options.
Table 4: Navigation and Selection Keys
Key Name Function
Selection
Wheel The outer ring of the selection
wheel enables you to rotate
through the various options on
the screen. Rotate the wheel in a
clockwise direction to move
forward or in a counter-clockwise
direction to move backward. To
select an option, press the button
in the center of the wheel or press
Enter on the keyboard.
Enter Activates a selected item on the
screen.
8-way
Navigation
Key
The left and right keys on the outer
ring enable you to move between
tabs or to move to the beginning
or end of a line of text. The up and
down arrows scroll one page at a
time (page up/down), or move to
the beginning and end of the
message.
The inner ring enables you to
move left and right or up and
down within a within a screen or
within lines of text.
Options Displays the Options menu for the
current screen, if available.
Main Menu Displays the main menu options.
OGO 2 User Manual
16 錯誤! 尚未定義樣式。
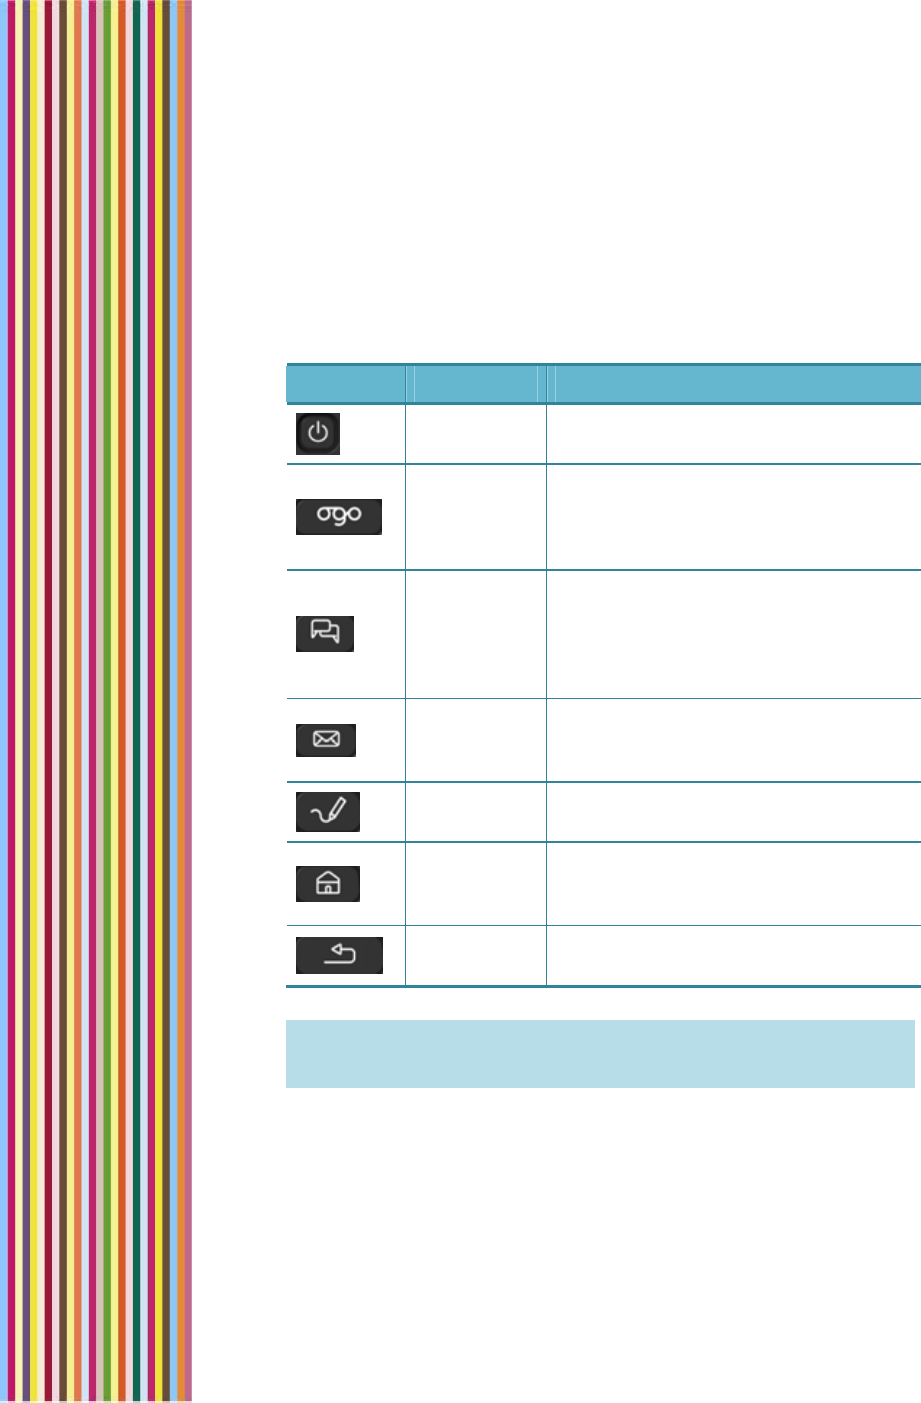
Shortcut Keys
Located above the keyboard, the following shortcut keys make it
easy to navigate between the most commonly used features on your
Ogo device.
Table 5: Shortcut Keys
Note: The precise arrangement of the keys may vary according to
device model. In addition, depending on the model, your Ogo
may have either a QWERTY or a QWERTZ keyboard.
Key Name Function
Power
On/Off Powers your Ogo on and off.
Ogo
Lists all recent unread e-mail and
SMS/text messages, open IM chat
sessions, and drafts of messages not
yet sent.
Instant
Messaging
Displays the IM screen, enabling you
to manage your ICQ and/or
Windows Live Messenger contacts,
send and receive messages, and
more.
Mailbox Displays the Mailbox screen,
enabling you to view, sort, and send
e-mail and SMS messages.
Compose Opens a screen where you can write
a new e-mail or SMS/ text message.
Home Displays a list of the main menu
options, enabling you to easily
navigate between features.
Back Displays the previously viewed
screen.
錯誤
!
尚未定義樣式。
錯誤! 尚未定義樣式。 17
Inserting Text
Using your Ogo keyboard, you insert standard text, symbols, and
emoticons in the various text fields and messages. You can also take
advantage of Ogo’s QuickText feature to insert predefined or
customized text. For details, see Working with QuickText on page 18.
Note: Depending on your region and wireless carrier, you may also
able to insert non-English characters, such as accented letters
and symbols. For details, see Using the Foreign Character
Palette on page 19.
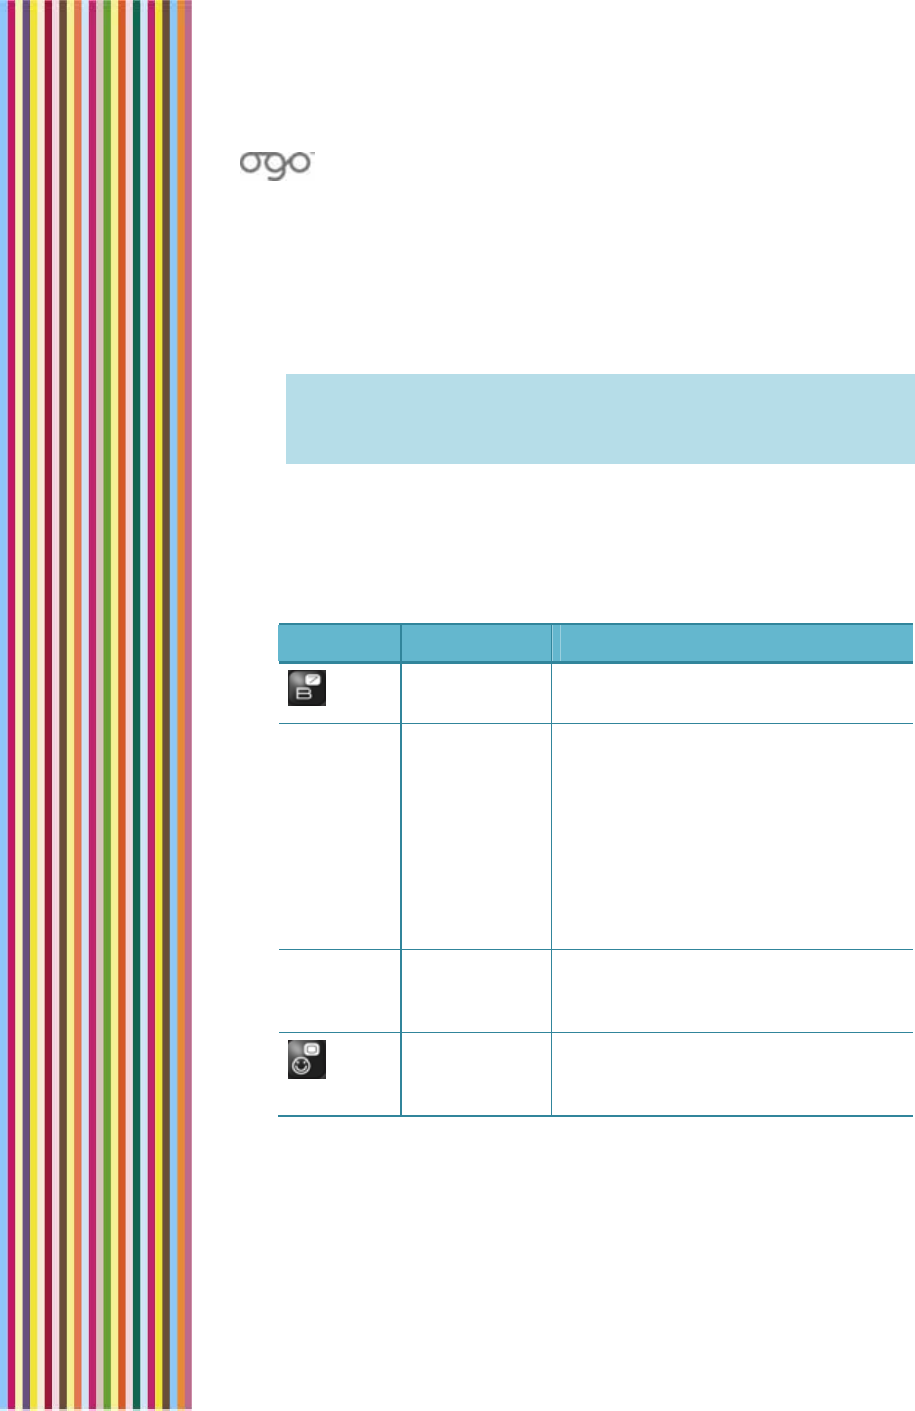
Using Text Insertion Keys
Similar to the functionality of a standard keyboard, the text insertion
keys enable you to compose IM, e-mail and SMS messages.
Table 6: Text Insertion Keys
Key Name Function
Letter keys Inserts letters, numbers and other
symbols.
ALT Alternate Inserts the symbol located above
the letter on the key. For example,
hold down the ALT key and press
the B key to insert the number 7.
Note: Holding down ALT and
pressing the spacebar displays the
symbol palette, enabling you to
include special characters when
composing outgoing messages.
CAP Capitalize Inserts a capital letter. For example,
hold down the CAP key and press
D to insert the capital letter D.
Emoticon Displays the emoticon palette,
enabling you to include emoticons
in your instant messages.
OGO 2 User Manual
18 錯誤! 尚未定義樣式。
Key Name Function
Space
bar/Symbol When pressed alone, inserts a
space in text.
When pressed in conjunction with
ALT, displays the Symbol palette,
enabling you to include special
characters when composing
outgoing messages.
Clear Enables you to delete the last
character inserted in a text field
(press once for each character), all
of the text in a field (press and
hold), or a selected message in a
list.
Note: The precise arrangement of the keys varies according to
device model.
Working with QuickText
QuickText messages are a fun and fast way to communicate at the
touch of a key. Use your Ogo’s predefined messages or customize
messages with your favorite phrases.
There are eight predefined QuickText messages available for quick
insertion into any IM, e-mail, or SMS/text message field:
3 What's your number?
4 Where should we meet?
5 When should we meet?
6 Talk to you soon
7 Where are you?
8 I'm running late
9 No problem
10 Call me when you get this
Note: QuickText messages can have a maximum of 60 characters,
including spaces.
錯誤
!
尚未定義樣式。
錯誤! 尚未定義樣式。 19
Inserting QuickText
You can insert QuickText into an instant message, e-mail message, or
SMS/text message.
► To insert QuickText:
1 While composing your message, press . The Options menu is
displayed.
2 Press 1, or select 1. Insert QuickText and press Enter. The Insert
QuickText screen is displayed, listing the available QuickText
messages.
3 Select the QuickText message you want to insert and press Enter
(or press the number of QuickText message item). The Insert
QuickText screen closes and the QuickText is inserted into the
message field.
Customizing QuickText
You can edit the QuickText options to include your favorite phrases
making them available for use in your e-mail and SMS/text messages.
► To edit QuickText:
1 While composing a message, press . The Options menu is
displayed.
2 Press 2, or select 2. Edit QuickText and press Enter. The Choose
QuickText to Edit screen is displayed, listing the available QuickText
messages.
3 Select the QuickText message you want to edit and press Enter (or
press the number of QuickText message item). The Edit QuickText
screen is displayed.
4 Edit the text.
5 Select Save and press Enter. The modified QuickText is saved and
ready for insertion into your message(s).
Using the Foreign Character Palette
Depending on your region and your wireless carrier, you may be able
to insert non-English characters, such as accented letters and symbols,
into your messages using the Extended Character palette.
If the use of foreign characters is supported, extended characters
may be used in the following fields:
OGO 2 User Manual
20 錯誤! 尚未定義樣式。
Find
Templates
Message body
Address and subject
Nickname, First, Last, Company, Postal Address, Notes in Contact
List entries
MSN display name
Instant messages
Mailbox name, Display name
► To enter an extended character in a field:
1 When the cursor is located in one of the fields listed above, access
the Extended Character palette by long-pressing one of the keys
associated with the letter you want to type: E, Y, U, I, O, A, S, D, C
and N; the Extended Character palette is displayed.
2 Scroll through and select the required character and press Enter to
close the palette and insert the selected character into your
message.
Table 7: Extended Character Options
Key English Non-English
A a ä æ å à á â ã
(A Ä Æ Å À Á Â Ã)
a ä æ å à á â ã
(A Ä Æ Å À Á Â Ã)
C c ç (C Ç) c ç (C Ç)
D d ð (D Ð) d ð (D Ð)
E e è é ê ë (E È É Ê Ë) e è é ê ë (E È É Ê Ë)
G g (G) ğ (Ğ)
I i ì í î ï (I Ì Í Î Ï) i ì í î ï ı (I Ì Í Î Ï İ)
N n ñ (N Ñ) n ñ (N Ñ)
O o ö ø ò ó ô õ
(O Ö Ø Ó Ò Ô Õ)
o ö ø ò ó ô õ
(O Ö Ø Ó Ò Ô Õ)
S s ß (S ß) s ß ş (S ß Ş)
U u ù ú û ü (U Ù Ú Û Ü) u ù ú û ü (U Ù Ú Û Ü)
Y y ý þ (Y Ý Þ) y ý þ (Y Ý Þ)

錯誤
!
尚未定義樣式。
錯誤! 尚未定義樣式。 21
Checking for Messages and Open Chats
With Ogo, you can check for new messages of all types and open
chats in one easy step – simply press on the keyboard to
display the Ogo screen.
Your Ogo screen lists all recent unread e-mail and SMS/text messages,
open IM chat sessions, and drafts of messages not yet sent.

OGO 2 User Manual
22 錯誤! 尚未定義樣式。
Instant Messaging
You can use your Ogo to chat with friends
and colleagues using the Windows Live
Messenger and/or ICQ messaging services.
Note: The availability of IM services on your
Ogo device depends on the
package offered by your wireless
carrier/operator, and may be limited
to one service or another, or neither.
You can use only one Windows Live
Messenger account and one ICQ account
at any given time.
Using the Instant Messaging Wizard to Set Up Your
Account
IM accounts are set up using the Instant Messaging Wizard.
You need to have your IM account details (username and password)
ready in order to set up an IM account on the device.
Note: If you are using your Ogo for the first time, the Instant
Messaging Wizard is displayed immediately after you select your
language.
► To access the Instant Messaging Wizard:
1 Select in the Home screen or Main Menu and press Enter. The
Settings screen is displayed.
2 Select the IM tab.
3 Scroll down to select Add and press Enter. The Instant Messaging
Wizard screen is displayed.
4 Select Next and press Enter. You are prompted to select the IM
provider.

錯誤
!
尚未定義樣式。
錯誤! 尚未定義樣式。 23
Note: You can use only one Windows Live Messenger account and
one ICQ account at any given time. If you have already set
up a Windows Live Messenger account, then you are given
the option of setting up an ICQ account only. If you have
already set up an ICQ account, then you are given the
option of setting up a Windows Live Messenger account only.
5 Select the IM Provider (Windows Live Messenger or ICQ) and press
Enter.
6 Select Next and press Enter.
7 Follow the on-screen instructions for the selected IM Provider, as
described in Setting Up Your Windows Live Messenger Account
and Setting Up Your ICQ IM Account, respectively.
Setting Up Your Windows Live Messenger Account
Although you may have more than one valid e-mail account, only
one Windows Live Messenger account can be active on the device
at any given time.
You can set up an MSN, Hotmail, Yahoo, or G-mail account for use
with Windows Live Messenger. You need to set up your e-mail
account with the relevant service prior to attempting to configure
Windows Live Messenger on your Ogo, and have your account details
(username and password) on hand in order to set up your account on
the device.
► To set up a Windows Live Messenger account:
1 If you select Windows Live Messenger as the IM Provider in the
Instant Messaging Wizard, the Windows Live Terms of Use screen is
displayed.
2 Read the terms of use. Then select Accept to indicate your
agreement and press Enter.
Note: If you do not agree to the terms, select Decline and press
Enter.
3 Select Next and press Enter. The Windows Live Messenger Setup
screen is displayed.
4 In the E-mail Address field, insert the username associated with the
e-mail address to be set up on Windows Live Messenger. If you are
using a hotmail or MSN e-mail address, do not include the domain
name. If you are using another e-mail address, such as a Yahoo e-
mail account, then you must include the domain name in the e-
mail address.
Note: For details on how to insert text, see Inserting Text on page 17.

OGO 2 User Manual
24 錯誤! 尚未定義樣式。
5 Select the required domain (@hotmail.com; @msn.com; or Other)
and press Enter.
6 In the Password field, insert your password.
Note: The letters are displayed one at a time as you insert them;
upon inserting the next letter the previously entered one turns
into an asterisk.
When you attempt to move to the next field, you are prompted to
confirm that you want to store your password on the device.
7 Select Yes to save the password on the device or select No if you
prefer to enter the password each time you sign in. Then, press
Enter.
Note: If you select Yes, a security warning is displayed advising you
to go to the .NET password website and change your
password in the event that your device is lost or stolen. Press
Enter continue.
8 To automatically sign in whenever your Ogo is turned on, select
Sign in when powered on and press Enter.
9 Select Next and press Enter. The IM account setup process is
complete.
10 To set up an IM account with the alternate service, select Set up
another account and press Enter.
11 To close the wizard, select Finish IM Wizard.
Setting Up Your ICQ IM Account
You need to set up your ICQ account in advance and have your
account details (username and password) on hand to set up your
account on the device.
► To set up your ICQ IM account:
1 If you select ICQ as the IM Provider in the Instant Messaging Wizard,
the ICQ Setup screen is displayed.
2 In the ICQ# field, insert your ICQ#.
Note: For details on how to insert text, see Inserting Text on page 17.
3 In the Password field, insert your password.
Note: The letters are displayed one at a time as you insert them;
upon inserting the next letter the previously entered one turns
into an asterisk.

錯誤
!
尚未定義樣式。
錯誤! 尚未定義樣式。 25
When you attempt to move to the next field, you are prompted to
confirm that you want to store your password on the device.
4 Select Yes to save the password on the device or select No if you
prefer to enter the password each time you sign in. Then, press
Enter.
Note: If you select Yes, a security warning is displayed advising you
to go to the change your password in the event that your
device is lost or stolen. Press Enter continue.
5 To automatically sign in whenever your Ogo is turned on, select
Connect when powered on and press Enter.
6 Select Next and press Enter. The IM account setup process is
complete.
7 If you have not set up an account with the alternate service, you
are prompted to do so.
Note: If you have already set up both services, the Account
Summary screen is displayed.
8 To set up an IM account with the alternate service (if not already
done), select Setup another account and press Enter,
OR
To close the wizard, select Finish IM Wizard.
The Account Summary screen is displayed, listing the services that
are to be accessed from your device.
Note: To remove a service, select the service and press Enter to
clear the checkbox.
9 Press Next to continue. Your device automatically signs you into
the configured service(s).
If you complete the wizard the first item you use the device, you
are prompted to set up your e-mail account(s). For details, see
Using the E-Mail Wizard to Set Up Your Account on page 34.
If you access the wizard from the Settings screen, the wizard
completes and the IM tab of the Settings screen is displayed.

OGO 2 User Manual
26 錯誤! 尚未定義樣式。
Working with the IM Screen
While viewing the IM screen, the following options are available from
the Options menu:
1 Change My Status
2 Send Message
3 Add a User/Contact
4 Delete User/Contact
5 Block User/Contact
6 User’s Details/Contact Info
7 Assign Alerticon
8 Disconnect/Sign Out
9 My Profile (Windows Live Messenger only)
► To access the Instant Messaging screen:
1 Select in the Home screen or Main Menu and press Enter. The
IM screen is displayed.
Figure 11: IM Screen
If you have set up both IM providers, then two tabs are displayed –
one tab for ICQ and a second tab for Windows Live Messenger.
Your IM status for each of the configured services is displayed in
the status bar.
錯誤
!
尚未定義樣式。
錯誤! 尚未定義樣式。 27
2 Select the tab for the IM service that you want to work with. When
a tab is selected, the username appears on the tab, and the
Contact List displays your existing contacts.
Note: If no contacts have been defined, a message is displayed
indicating that the Contact List is empty. To add a user, press Enter.
For details, see Adding an IM Contact on page 30.
Status icons are used to indicate the messaging status of your
contacts. The icons vary according to the service selected.
IM Status Icons
Status icons indicate the status of other IM users. The specific icons
vary according to the IM service in use (Windows Live Messenger or
ICQ).
Table 8: Windows Live Messenger Icons
Icon Status
Online
Busy/On the Phone
Away/Out to Lunch/Be
Right Back
Online Blocked
Offline
Offline Blocked
Table 9: ICQ Status Icons
Icon Status
Online
Busy
Away
Offline

OGO 2 User Manual
28 錯誤! 尚未定義樣式。
Changing Your Status
You can define the way in which your status is displayed to others in
their contact lists.
► To change your status:
1 Open the IM screen and select the tab for the IM service (ICQ or
Windows Live Messenger).
2 Press . The Options menu is displayed.
3 Press 1 on the keyboard or select 1. Change Status from the
dropdown menu, and press Enter. A dropdown menu of available
statuses is displayed.
4 Select the status that you want to be displayed and press Enter.
Your status is updated accordingly, and is reflected on the
corresponding icon in the status bar.
► To change the IM status that is displayed when your Ogo is closed:
1 Select in the Home screen or Main Menu and press Enter. The
Settings screen is displayed.
2 Select the IM tab.
3 Scroll down to select When closed and press Enter. A dropdown
menu is displayed.
4 Select either No change or Away and press Enter. The status
displayed to your contacts when the Ogo is closed is set
accordingly.
Sending an Instant Message
As soon as you have set up your IM account on the Ogo, you can
exchange messages with your contacts.
► To send an instant message:
1 Open the IM screen and select the tab for the IM service (ICQ or
Windows Live Messenger).
2 Select the contact to whom you want to send a message.
3 Press . The Options menu is displayed.
4 Press 2 on the keyboard or select 2. Send IM, and press Enter. The
Chat screen is displayed.

錯誤
!
尚未定義樣式。
錯誤! 尚未定義樣式。 29
5 Insert your message text and press Enter. Your message is sent to
the selected contact, and is displayed in the top half of the screen.
Adding Emoticons to Your Instant Messages
You can use a variety of emoticons to personalize your chat
messages.
► To add an emoticon to an instant message:
Press the Emoticon key on the keyboard. An emoticon palette
is displayed. Scroll through the palette to select the desired
emoticon and press Enter. The emoticon is added to your message
text.
Note: The available emoticons vary according to the IM service
provider.
Receiving an Instant Message
When an instant message arrives on your Ogo and the Chat screen is
not open, a dropdown message appears briefly at the top of the
screen. If an alerticon has been assigned to the contact, the alerticon
animation is played.
During an ongoing chat, an incoming message from the same
contact is automatically added to the dialog in the top half of the
screen.
► To view an instant message:
1 When you open the IM screen, an animation appears if you have
unread messages from a contact(s).
2 Select the contact and press Enter. The Chat screen is displayed,
with the sender’s message in the top half of the screen.
► To view an instant message upon receiving an alert:
1 While the dropdown message is displayed, press Enter. The IM
screen is displayed with the sender selected by default. In addition,
an animation indicates that you have an unread message from
this contact.
2 Press Enter. The Chat screen is displayed, with the sender’s
message in the top half of the screen.

OGO 2 User Manual
30 錯誤! 尚未定義樣式。
Closing an IM Chat Session
You can close an open IM chat session in either of the following ways:
In the Chat screen for the open session, select 8. Close Chat
Options from the Options menu.
In the Ogo screen, select the IM chat session and press CLR on the
keyboard.
Managing Your IM Contacts
You can add, delete and block specific contacts in your contact list
from your Ogo. In addition, you can assign alerticons to specific
contacts so that an animated alert pops up whenever they send you
messages.
Note: Changes made to your IM Contact List are implemented
regardless of the device used to access the IM service, and not
only when using the Ogo.
Adding an IM Contact
It’s easy to add new contacts to your IM Contact List(s) using the Ogo.
► To add an IM contact:
1 In the IM screen, press . The Options menu is displayed.
2 Press 3, or select 3. Add a User and press Enter. The Add a User
screen is displayed.
3 If you are adding an ICQ contact, insert the user’s ICQ#,
OR,
If you are adding a Windows Live Messenger contact, insert the
user’s e-mail address.
4 Select Add a User and press Enter. The contact is added to your
Contact List.
Viewing Contact Information
You can view the contact profile details of your IM contacts.
► To view contact information:
1 In the IM screen, select the contact.
2 Press . The Options menu is displayed.
錯誤
!
尚未定義樣式。
錯誤! 尚未定義樣式。 31
3 Press 6, or select 6. Contact Info and press Enter. The Contact Info
screen is displayed. The specific details displayed depend on the
selected IM service.
4 Select Yes and press Enter. The contact’s status is updated in the
IM Contact List; the contact is blocked and is unable to send you
instant messages.
Assigning an Alerticon to an IM Contact
Ogo’s animated Alerticons make it easy for you to identify when
some important to you has sent you a message. Simply assign an
Alerticon to a contact and an attractive animation pops up on your
Ogo screen whenever that contact sends you a message.
► To assign an alerticon:
1 Open the IM screen and select the tab for the IM service (ICQ or
Windows Live Messenger).
2 Select the contact.
3 Press . The Options menu is displayed.
4 Press 7, or select 7. Contact Info and press Enter. The Contact Info
screen is displayed, with the Alerticon field selected by default.
5 Press Enter. The Assign Alerticon screen is displayed.
6 Scroll and select the desired Alerticon.
Note: When an Alerticon is selected, the animation is played. You
can scroll through and view the various animations before
making your selection.
7 Press Enter.
8 Select Done and press Enter. The selected Alerticon is assigned to
the contact, and is displayed on the device each time a message
is received from the contact.
Blocking/Unblocking an IM Contact
You want to stay signed in to the IM service, but you don’t really
wanted to be bother with messages from just anyone. You can block
communications from specific contacts – and then unblock them
whenever you want.
► To block an IM contact:
1 In the IM screen, select the contact to be blocked.

OGO 2 User Manual
32 錯誤! 尚未定義樣式。
2 Press . The Options menu is displayed.
3 Press 5, or select 5. Block User and press Enter. The Block User
screen is displayed, prompting you to confirm that you want to
block the contact.
4 Select Yes and press Enter. The contact’s status is updated in the
IM Contact List; the contact is blocked and is unable to send you
instant messages.
► To unblock an IM contact:
1 In the IM screen, select the blocked contact.
2 Press . The Options menu is displayed.
3 Press 5, or select 5. Unblock User and press Enter. The Unblock User
screen is displayed, prompting you to confirm that you want to
unblock the contact.
4 Select Yes and press Enter. The contact’s status is updated in the
IM Contact List; the contact is unblocked.
Deleting an IM Contact
If you no longer interested in using the IM service to communicate
with certain contacts, you can remove them from your IM Contact
List.
► To delete an IM contact:
1 In the IM screen, select the contact to be deleted.
2 Press . The Options menu is displayed.
3 Press 4, or select 4. Delete User and press Enter. The Delete User
screen is displayed, prompting you to confirm that you want to
delete the contact.
4 Select Delete and press Enter. The contact is deleted from your IM
Contact List.
錯誤
!
尚未定義樣式。
錯誤! 尚未定義樣式。 33
Signing In
If you have not configured your Ogo to automatically sign you in
whenever it is turned on, you can manually sign in when it suits you. Or
you can sign in again, if you have signed out for any reason.
► To sign in to the IM:
1 Open the IM screen and select the tab for the IM service (ICQ or
Windows Live Messenger). You are prompted to sign in.
2 Press Enter. A Sign In screen is displayed, listing your default sign in
details.
3 To sign in using the specified details, select OK and press Enter.
Note: To sign in as a different user, insert the required details before
selecting OK and pressing Enter.
You are signed into the IM service.
Signing Out
If you do not want to be interrupted by incoming messages, you can
sign out of the IM service.
► To sign out:
1 In the IM screen, press . The Options menu is displayed.
2 Press 8, or select 8. Sign Out/Disconnect and press Enter. You are
disconnected from the IM service.

OGO 2 User Manual
34 錯誤! 尚未定義樣式。
E-Mail and SMS/Text Messaging
Ogo lets you manage messages from MS-
Exchange, POP3, IMAP4, and MSN Hotmail
accounts easily and efficiently, whether you're
sitting in a restaurant, riding the bus, or relaxing
on the beach.
And Ogo's PUSH e-mail feature means you get
e-mail as soon as it hits your inbox, so there's no
need to wait.
Note: If you have an Exchange Server (POP3 or
IMAP4) email account then you can
receive and view e-mail attachments on
your Ogo, including Word documents,
Excel spreadsheets, PDFs, graphic files,
and more.
Setting Up Your E-Mail Accounts
Your Ogo device supports the ability to send/receive e-mail from up
to five existing e-mail account(s).
If you have an Exchange Server (POP3 or IMAP4) email account then
you can receive and view e-mail attachments on your Ogo.
Note: The ability to manage multiple e-mail accounts on the Ogo
depends on your service provider.
Using the E-Mail Wizard to Set Up Your Account
E-mail accounts are set up using the Instant Messaging Wizard.
Depending on your wireless carrier/operator, you may be able to set
up multiple e-mail accounts for different e-mail providers (for example,
Hotmail, Gmail or Yahoo).
You need to have your e-mail account details (e-mail address and
password) ready in order to set up an e-mail account on the device.
► To access the E-mail Wizard:
1 Select in the Home screen or Main Menu and press Enter. The
Settings screen is displayed.

錯誤
!
尚未定義樣式。
錯誤! 尚未定義樣式。 35
2 Select the E-mail tab.
3 Scroll down to select Add and press Enter. The E-mail Wizard
screen is displayed.
4 Select Next and press Enter. You are prompted to select the e-mail
provider.
Note: If you have already set up an account on Ogo for an e-mail
provider, that provider is no longer available for selection.
5 Select the e-mail provider (Windows Live Mail, Gmail or Custom e-
mail provider) and press Enter. The Mail Setup screen is displayed.
6 Follow the on-screen instructions for the selected IM Provider, as
described in Setting Up Your Windows Live Messenger Account
and Setting Up Your Gmail or Custom Email Account, respectively.
Setting Up Your Windows Live Mail Account
If you have a Windows Live Mail account, you can configure your
Ogo to send and receive e-mail for those accounts (subject to the
conditions imposed by your wireless operator).
► To set up your Windows Live Mail account:
1 If you select Windows Live Mail as the e-mail provider in the E-mail
Wizard, the Windows Live Mail Setup screen is displayed.
If you have already configured Windows Live Messenger, your
configured user details are displayed by default.
2 In the E-mail Address field, insert the e-mail address to be set up
on Windows Live Mail. If you are using a hotmail or MSN e-mail
address, do not include the domain name. If you are using
another e-mail address, such as a Yahoo e-mail, then you must
include the domain name in the e-mail address.
Note: If you have already configured Windows Live Messenger,
your configured user details are displayed by default.
3 Select the required domain (@hotmail.com; @msn.com; or Other)
and press Enter.
4 In the Password field, insert your password.
Note: The letters are displayed one at a time as you insert them;
upon inserting the next letter the previously entered one turns
into an asterisk.
5 Select Next and press Enter. You are prompted to enter your
account information.

OGO 2 User Manual
36 錯誤! 尚未定義樣式。
6 Insert the requested information in the designated fields. Set how
often you want the Ogo to check for new mail as follows:
• Select Check interval and press Enter. A drop-down menu is
displayed.
• Scroll and select the desired time interval (OFF, 10m, 30m, 1h,
2h) and press Enter.
7 Press Enter. You are prompted to set up another account (optional)
or to finish the wizard.
8 Select Finish E-mail Wizard and press Enter.
9 Select Next and press Enter. The Account Summary screen lists the
e-mail service(s) configured on your Ogo.
Note: To remove an e-mail service, clear its checkbox.
10 Select Next and press Enter. Your e-mail account data is updated.
Setting Up Your Gmail or Custom Email Account
If you have a gmail or other e-mail account(s), you can configure
your Ogo to send and receive email for those accounts (subject to
the conditions imposed by your wireless operator).
If you are setting up a Gmail account, you will need to enable your
account’s POP Download option in order to access Gmail from the
device. To do so, select Enabled POP for all mail in your Gmail
Account Settings (in the Forwarding and POP section).
If you are setting up a custom account, you will need to have the
complete account information ready, including the username, E-mail
protocol, incoming server, outgoing server, and so on.
► To set up your gmail or custom e-mail account:
1 If you select Gmail or Custom e-mail provider as the e-mail
provider in the E-mail Wizard, you are prompted to enter your login
information.
2 In the E-mail Address field, insert your e-mail address. (If you are
setting up a custom e-mail account, include the domain name.)
3 In the Password field, insert your password.
Note: The letters are displayed one at a time as you insert them;
upon inserting the next letter the previously entered one turns
into an asterisk.
4 Select Next and press Enter. You are prompted to enter your
account information.
5 Insert the requested information in the designated fields.
錯誤
!
尚未定義樣式。
錯誤! 尚未定義樣式。 37
6 Set how often you want the Ogo to check for new mail as follows:
• Select Check interval and press Enter. A drop-down menu is
displayed.
• Scroll and select the desired time interval (OFF, 10m, 30m, 1h,
2h) and press Enter.
7 Press Enter. You are prompted to set up another account (optional)
or to finish the wizard.
8 Select Finish E-mail Wizard and press Enter.
9 Select Next and press Enter. The Account Summary screen lists the
e-mail service(s) configured on your Ogo.
Note: To remove an e-mail service, clear its checkbox.
10 Select Next and press Enter. Your e-mail account data is updated.
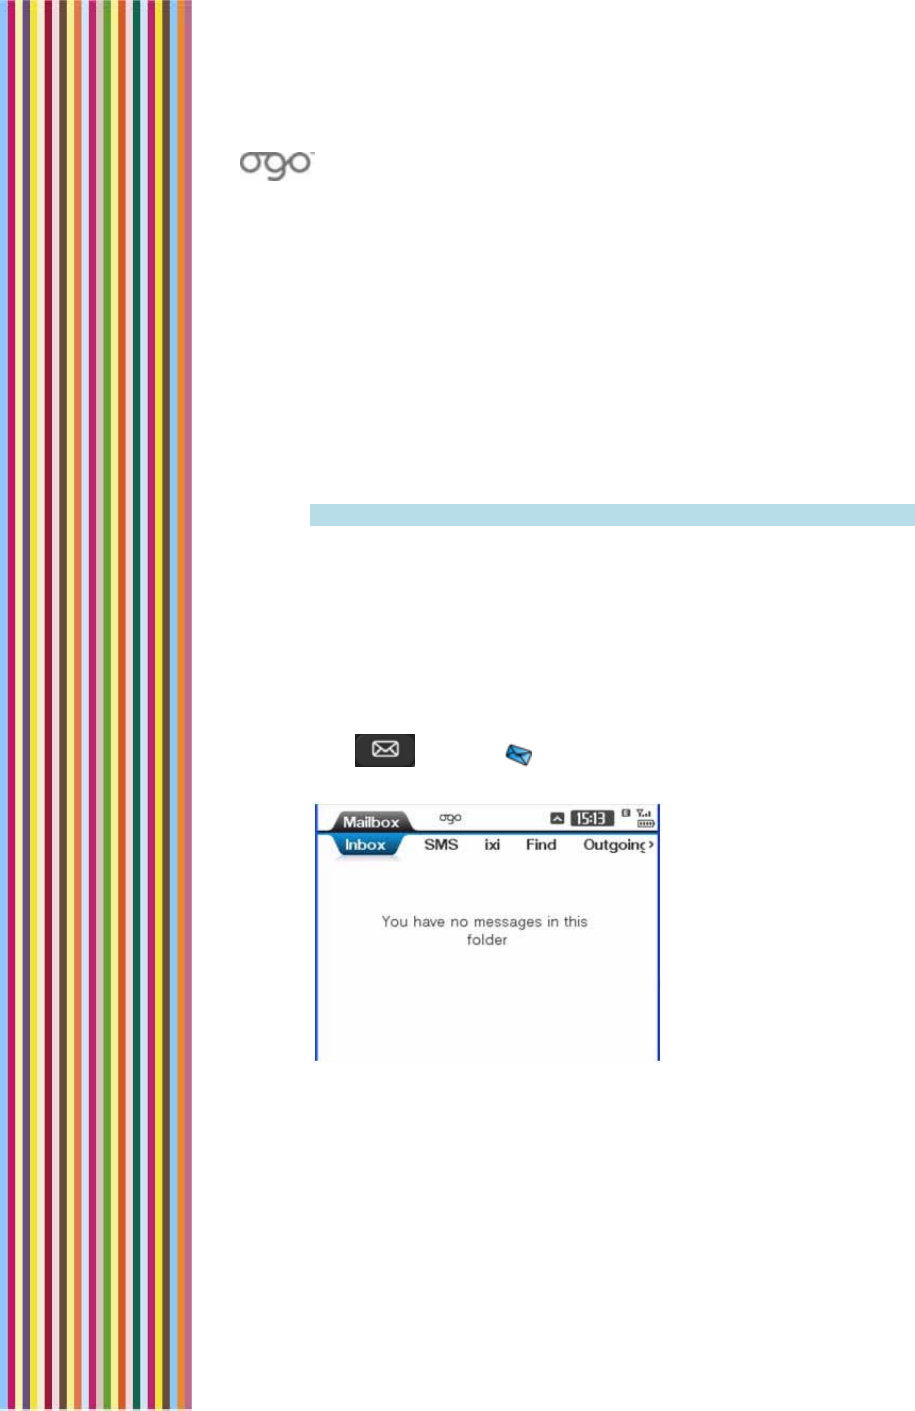
Accessing the Mailbox
The Ogo Mailbox is your window to managing your e-mail and
SMS/text messages.
► To access the Mailbox screen:
Press , or select in the Home screen or Main Menu and
press Enter. The Mailbox screen is displayed.
Figure 12: Mailbox Screen
Typically, the Mailbox screen includes the following tabs:
• Inbox
• SMS
• E-mail account(s) (if set up on the device)
• Find
OGO 2 User Manual
38 錯誤! 尚未定義樣式。
• Outgoing
Viewing Your Message Lists
The Inbox tab shows a combined list of all your e-mail and SMS/text
messages. The most recently received messages appear at the top of
the list.
Alternatively, you can view only the incoming messages of a specific
type or for a specific e-mail address in the corresponding tab. For
example, to view only SMS messages, select the SMS tab.
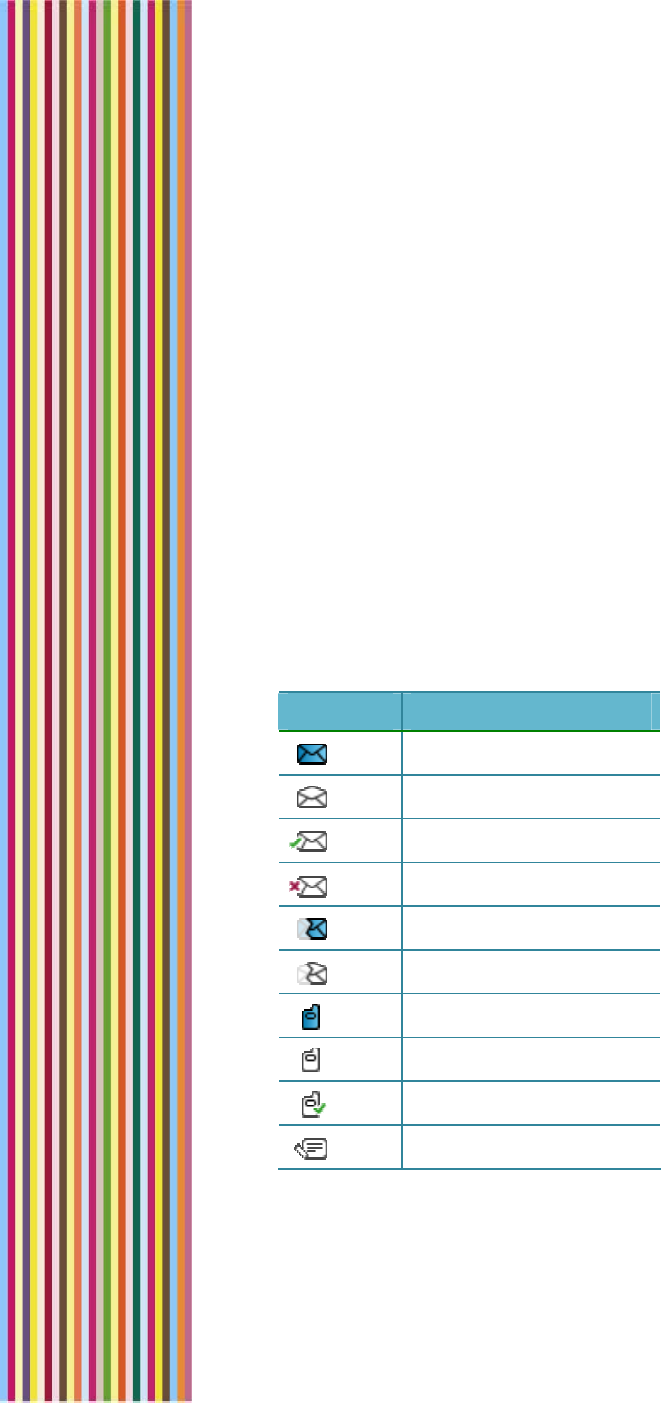
The following details appear for each message:
An icon, indicating the type and status of the message (see Table
10)
The name of the sender
The subject of the message (for e-mail messages) or the beginning
of the message, time and date (for SMS messages)
Table 10: Mailbox Icons
Icon Message Type/Status
E-mail – Unread
E-mail – Read
E-mail – Sent
E-mail – Sent (failure)
E-mail – Unread partial
E-mail – Read partial
SMS/text – Unread
SMS/text – Read
SMS/text – Sent
Draft message
While viewing a message a Mailbox tab, the following options are
available from the Options menu:
錯誤
!
尚未定義樣式。
錯誤! 尚未定義樣式。 39
Mark as Unread
Reply
Reply to All
Forward
Delete
Sort by Sender
Delete All
Send/Receive
Composing a Message
You can compose and send SMS and/or e-mail messages.
► To compose an SMS message:
1 In the SMS tab of the Compose window, press . The Options
menu is displayed.
2 Press 1, or select 1. New message and press Enter.
3 Insert the recipient’s mobile number in the To field.
4 Scroll down and insert the message text.
Note: A counter at the bottom of the screen indicates the
remaining number of characters that can be inserted into the
message. An SMS message cannot exceed 160 characters.
5 Select Send and press Enter.
► To compose an e-mail message:
1 In the E-mail tab of the Compose window, press . The Options
menu is displayed.
2 Press 1, or select 1. New message and press Enter. A message form
is displayed, with the From details automatically inserted.
3 Insert the recipient’s e-mail address, the message subject, and
message text in the designated fields.
4 Select Send and press Enter.
Note: If you attempt to leave the Compose screen without sending
the message, you are prompted to save it as a draft
message. Select Yes if you want to save the draft.

OGO 2 User Manual
40 錯誤! 尚未定義樣式。
Working with Messages
You can open messages from the Ogo List or from the various tabs of
the Mailbox screen.
While viewing an open message, the following options are available
from the Options menu:
1 Add Sender to Contacts
2 Reply
3 Reply to All
4 Forward
5 Delete
6 Delete Locally
7 Address Clipboard
Opening a Message
You can open and view your incoming messages on your Ogo.
► To open a message:
Select the message in the Ogo screen or the Mailbox screen and
press Enter.
The message opens, including details regarding the message
sender, destination e-mail address or mobile number, subject and
text, as applicable.
When applicable, attachments are listed below the message text.
Viewing an Attachment
If you have an Exchange Server (POP3 or IMAP4) email account, you
can receive and view e-mail attachments on your Ogo, including
Word documents, Excel spreadsheets, PDFs, graphic files
(.jpg, .bmp. .gif), and more.
Note: Attachments are not supported for Windows Live Mail.
► To view an attachment:
1 Select the attachment in the Attachments list and press Enter. A
pop-up menu is displayed.
2 To view a summary of the attachment properties (filename, type,
size and status), select Details.
錯誤
!
尚未定義樣式。
錯誤! 尚未定義樣式。 41
OR
To view the attachment content, select View text. A pop-up
message is displayed while the attachment is downloaded. The
attachment is displayed on screen as unformatted text.
Note: If the attachment is of a non-supported file type, an error
message is displayed.
Forwarding a Message
Got a message that you think will interest someone else? Forward it to
them.
► To forward a message:
1 In the opened message screen (or in the Mailbox screen with the
message selected), press . The Options menu is displayed.
2 Press 4, or select 4. Forward and press Enter. The Compose screen
is displayed, with the original message listed in the message area.
3 Insert the details of the intended recipient in the To field.
4 (Optional) Add to or edit the message text if desired.
5 Select Send and press Enter. The Send Message? screen is
displayed.
6 Select Yes and press Enter. A brief animation is displayed,
indicating that the message is being sent.
Note: If one or more recipient/sender is not in your Ogo Contact List,
you are prompted to save their details at this time. To do so,
select Save and press Enter to display the Address Clipboard
screen. For details on saving contacts from the Address
Clipboard, see Creating a Contact from the Clipboard on page
57.
Replying to a Message
You can reply to your incoming messages.
► To reply to a message:
1 In the opened message screen (or in the Mailbox screen with the
message selected), press . The Options menu is displayed.
2 To reply to the sender only, press 2, or select 2. Reply and press
Enter.
OR,

OGO 2 User Manual
42 錯誤! 尚未定義樣式。
To reply to the sender and all other recipients, press 3, or select 3.
Reply to All and press Enter.
The Compose screen is displayed, with the original message listed
in the message area.
3 (Optional) Add to or edit the message text if desired.
4 Select Send and press Enter. The Send Message? screen is
displayed.
5 Select Yes and press Enter. A brief animation is displayed,
indicating that the message is being sent.
Deleting a Message
Messages that are no longer needed can be deleted from your
Mailbox. You can opt to delete them locally (on the Ogo device only)
or from the mailbox maintained by the e-mail service provider.
► To delete an open message:
1 In the opened message screen, press . The Options menu is
displayed.
2 To delete the message from your Ogo device without removing it
from the mailbox maintained by the e-mail service provider, press
6, or select 6. Delete Locally and press Enter.
OR
To delete the message entirely, press 5, or select 5. Delete and
press Enter.
The message is deleted according to your selection.
► To delete a message from the Mailbox screen:
1 In the Mailbox screen, select the message and press . The
Options menu is displayed.
2 To delete the message, press 5, or select 5. Delete and press Enter.
The message is deleted.
► To delete all messages in the selected tab of the Mailbox screen:
1 In the Mailbox screen, press . The Options menu is displayed.
2 To delete the message, press 7, or select 5. Delete All and press
Enter.
All of the messages in the selected messages list are deleted.
錯誤
!
尚未定義樣式。
錯誤! 尚未定義樣式。 43
Finding a Message
The Find tab lets you search for a particular message based on a text
string contained anywhere within the message, including the address,
subject or message content fields.
► To find a message:
1 In the Mailbox screen, scroll and select the Find tab.
2 Insert the search criteria in the empty field. (The search criteria can
be a partial word, whole word, phrases, numbers, and so on.) You
can search for up to 32 characters (including symbols).
3 Select Find and press Enter. The search results are listed in the
screen.
Note: To view the content of a message that appears in the results,
select the message and press Enter.
4 To sort the search results, press and select Sort by
Recipient/Sender from the Options menu.
5 To clear the search results, press and select Clear Results from
the Options menu.
Checking for New Messages
Typically, your Ogo checks for new mail at set time intervals, which
are configured when you set up your e-mail accounts.
In addition, you can prompt your Ogo to send/receive for mail at any
time.
► To send/receive mail:
1 In the Mailbox screen, press . The Options menu is displayed.
2 To send/receive the message, press 8, or select 8. Send/Receive
and press Enter.
The messages lists in the Mailbox screen are updated accordingly.
Viewing Your Sent Messages
By default, all of the e-mail and SMS/text messages you have sent
from your Ogo are listed in the Outgoing tab of the Mailbox screen.
You can review your sent messages, forward them to additional
recipients, or delete them if they are no longer required.

OGO 2 User Manual
44 錯誤! 尚未定義樣式。
For details, see Forwarding a Message on page 41 or Deleting a
Message on page 42.

錯誤
!
尚未定義樣式。
錯誤! 尚未定義樣式。 45
Using Your Ogo Phone
As brilliant as Ogo is at text based messaging,
sometimes you just need to talk to someone.
The Phone screen enables you to make and
answer phone calls, as well as view phone
numbers previously dialed, and the calls received
and calls missed lists.
Dial/Answer and Hang Up
For added convenience, your Ogo features
Dial/Answer (green) and Hang Up (red) buttons,
which are located along the bottom edge of the
device.
Figure 13: Dial and Hang Up Buttons
So which way is up?
For best reception, hold your Ogo device with the Logo side facing
you and the Dial/Hang Up buttons near the top.
Too loud? Too quiet?
You can adjust the volume on your Ogo by simply pressing the +
and – buttons on the edge of the device. Or to mute the device, hold
down the – button for a few seconds to turn off the sound entirely.
Figure 14: Volume Control Buttons
Dialing a Call
You can place an outgoing call by manually inserting a phone
number in the Dial tab of the Phone screen or by inserting the phone
number of a contact from your Ogo Contact List.
OGO 2 User Manual
46 錯誤! 尚未定義樣式。
You can also make an outgoing call while an existing conversation is
in progress. For details, see Making another Call While Talking on the
Phone on page 48.
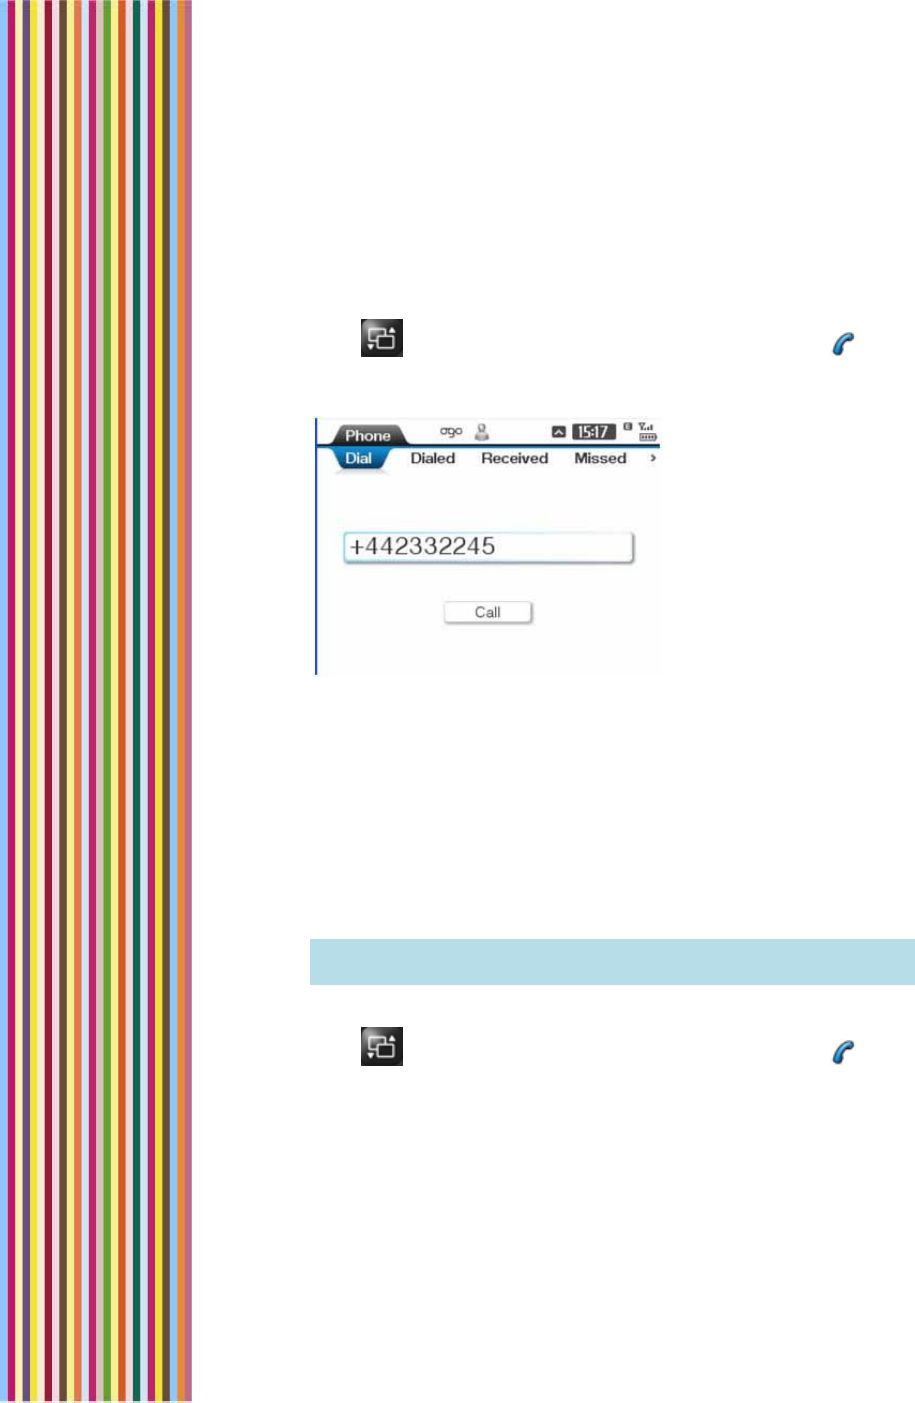
► To dial a phone number:
1 Press on the keyboard and then press Enter or select in the
Home screen and press Enter. By default, the Dial tab of the Phone
screen is displayed.
Figure 15: Phone Screen
2 Insert the phone number to be dialed.
3 Select Call and press Enter, or press the green button on the
bottom edge of your Ogo. Your call is placed. The Ongoing Call
screen is displayed.
4 When the call recipient picks up, a timer is displayed that tracks
the duration of the ongoing call.
Once you have begun the call, feel free to close the device at
any time. Your call will not be disconnected.
Note: To end the call, press the red button on the edge of your
Ogo, or scroll to Hang Up and press Enter.
► To call a contact:
1 Press on the keyboard and then press Enter or select in the
Home screen and press Enter. By default, the Dial tab of the Phone
screen is displayed.
2 Press Enter again. A pop-up list of your contacts is displayed.
3 Select the contact to be called and press Enter. Your call is placed
and the Ongoing Call screen is displayed.

錯誤
!
尚未定義樣式。
錯誤! 尚未定義樣式。 47
Note: If the selected contact has more than one phone number
stored, a symbol is included with the contact name. When
you press Enter, a list of the available phone numbers for the
contact is displayed; Select the required number and press
Enter again.
Handling Incoming Calls
Whenever your Ogo is powered on, you can receive calls on it –
whether or not the cover is open or closed.
Answering a Call – Ogo is On, Cover is Closed
► To answer the call (Ogo is on, but closed):
When you hear your Ogo ringtone, simply press the green button
on the edge of your Ogo, and start talking!
Handling an Incoming Call – Cover is Open
If you are using your Ogo and a call arrives, the Incoming Call screen
prompts you to decide whether you want to accept, reject, or silence
the call. If the call is from a number that is listed in your Ogo Contact
List, then the caller’s name is displayed. If not, the caller’s phone
number is displayed. If the caller has opted to block his caller ID,
“Private Number” is displayed.
To accept the call, press the green button on the edge or your
Ogo, or select Accept and press Enter. Start talking!
To reject the call, select Reject and press Enter. The call is
disconnected, and is listed in the Received calls tab of the Phone
screen.
To silence the call, select Silence. The playing of your ringtone stops,
without disconnecting the call. If you have voice mail, the call is
diverted to your voice mail if you do not pick up. The call is
disconnected, and is listed in the Missed calls tab of the Phone
screen.
OGO 2 User Manual
48 錯誤! 尚未定義樣式。
Handling Multiple Calls
You can juggle multiple calls on your Ogo, freely switching between
ongoing calls, or joining them into a conference call.
Making another Call While Talking on the Phone
You can take advantage of the Hold and New Call features to make
a new phone call without ending your an existing conversation.
► To make a call while talking on the phone:
1 Press . The Options menu is displayed.
2 Select Hold and press Enter. The existing conversation is put on
hold.
3 Press again and select New Call from the Options menu. A Dial
screen is displayed.
4 Insert the phone number for the new call and press Enter. The call
is dialed. When the call is answered, you can talk while keeping
the previous call on hold.
Note: Optionally, you can swap between the open calls or combine
them into a conference call.
Receiving another Call While Talking on the Phone
If another party calls you while you are talking on the phone, an
Incoming Call screen is displayed.
You can choose one of the following options:
To accept the new call and immediately place it on hold, select
Hold and press Enter. The new call is listed as on Hold in the Call
screen.
To end the existing call and accept the new call in its place, select
Drop and press Enter.
To reject the new call, select Reject and press Enter. The call is
disconnected, and is listed in the Received calls tab of the Phone
screen.
錯誤
!
尚未定義樣式。
錯誤! 尚未定義樣式。 49
Swapping Calls
If you are engaged in two calls simultaneously, talking to one person
while the other is on hold, Ogo allows you to "swap" between the
calls – placing the active call on hold so that you can talk to the other
person.
► To swap calls:
1 Press . The Options menu is displayed.
2 Select Swap and press Enter. The calls are swapped.
Joining Calls (Conferencing)
If you are engaged in a number of simultaneous calls (two or more),
Ogo allows you to join the calls into a conference.
► To join the calls:
1 Press . The Options menu is displayed.
2 Select Join and press Enter. The calls are joined. The number of
participants in the conference call is displayed in the Call screen.
► To unjoin the calls:
1 Press . The Options menu is displayed.
2 Select Split and press Enter. The calls are joined. The calls are split.
Each call returns to its previous state (active or on hold).
Ending a Call
It is easy to end a call, simply press the red button on the edge of your
Ogo. The call is disconnected.
Note: Alternatively, you can select Hang Up in the Call tab and press
Enter.
Muting/Unmuting a Call
Ever need to say something that you don’t want the person on the
line to hear, but you aren’t ready to hang up yet? Then, muting the
call is the solution for you. Muting a call temporarily disables Ogo’s
microphone so that the other party cannot hear you.

OGO 2 User Manual
50 錯誤! 尚未定義樣式。
► To mute/unmute a call:
In the Call tab of the ongoing call, select Mute and press Enter.
The icon is displayed.
► To mute/unmute a call:
To re-enable the microphone, select Unmute and press Enter.
The icon disappears.
Viewing Your Call Lists
The Ogo stores lists of dialed, received and missed calls.
Each call list entry includes the following:
• The phone number called or the name of the contact if it appears
in your Contacts list.
• A time stamp of when the call was dialed, or received, or missed.
• A call icon, indicating the type of call
► To view a history of recent calls:
Select the tab for the type of call list (Dialed, Received, or Missed)
in the Phone screen. The corresponding call list is displayed.
While viewing a call list, the following options are available from the
Options menu for a selected entry:
1 View Details: Displays the Call Details screen, including the phone
number and any available caller details.
2 Call This Number: Displays the Call screen, and automatically
places a call to the selected number.
3 Use Number: Displays the Call screen, with the number inserted by
default. The call is not automatically dialed; press Enter to dial.
4 Compose SMS: Displays the Compose screen, with the number
inserted in the To field by default.
5 Add to Contact: Enables you to add the selected number to an
existing contact.
6 Create Contact: Enables you to create a new contact with the
selected number.
7 Delete Item: Removes a selected entry from the call list.
8 Clear List: Removes all entries from the currently displayed call list.

錯誤
!
尚未定義樣式。
錯誤! 尚未定義樣式。 51
Call Timers
The Timers tab displays the following timers:
Last call duration: The duration of the last call, either dialed out or
received.
Received calls duration: The accumulated duration of all incoming
calls listed in the Received calls history.
Dialed calls duration: The accumulated duration of all outgoing
calls listed in the Dialed calls history.
All calls duration: The accumulated duration of all calls, both
incoming and outgoing, listed in the Dialed calls and Received
calls histories. (This timer cannot be cleared).
► To reset the timers:
1 In the Timers tab, select Clear and press Enter. The Reset Timers
screen is displayed.
2 Select Yes and press Enter to confirm that you want to reset the
call timers. The Last call duration, Received calls duration and
Dialed calls duration timers are reset.
Note: The All calls duration timer is not reset.
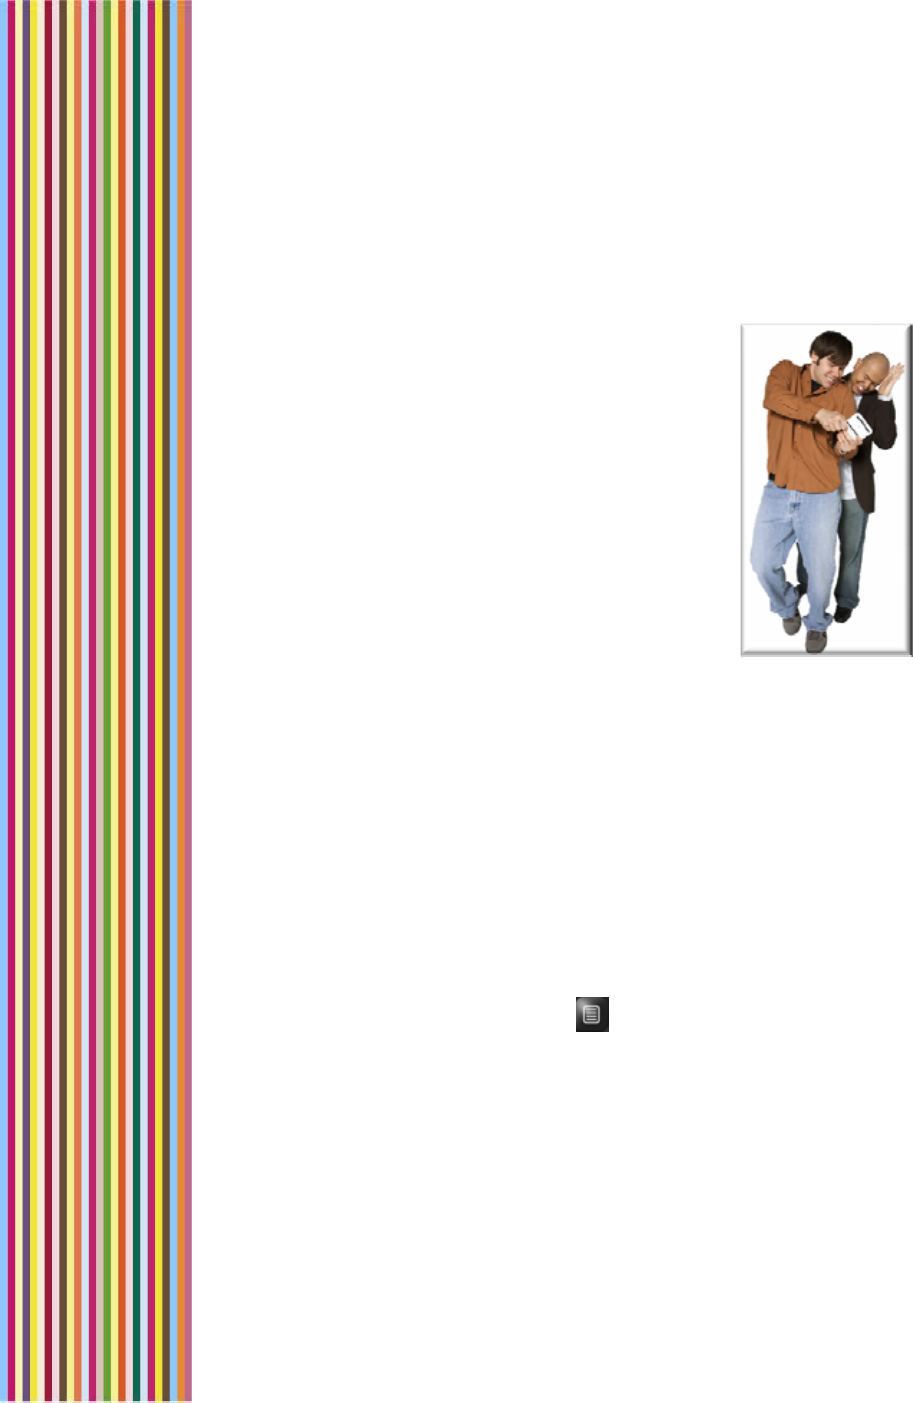
OGO 2 User Manual
52 錯誤! 尚未定義樣式。
Managing Your Ogo Contact List
Your Ogo Contact Lists lets you set up, find and
manage contact information for people with
whom you exchange e-mail and SMS/text
messages.
While viewing the Contact List, the following
options are available from the Options menu for
a selected entry:
1 Dial: Displays the Call screen, and
automatically places a call to the selected
number.
2 Edit Contact Profile: Displays the Contact
Profile screen, enabling you to add to or edit
the existing contact details.
3 Compose Message: Displays the Compose screen, with the
contact’s number inserted in the To field and your number inserted
in the From field.
4 New Contact: Enables you to create a new contact in the
Contact Profile screen. For details, see Adding Contacts on page
53.
5 Delete Contact: Removes the selected contact from the Contact
List.
6 Delete All Contacts: Removes all contacts from the Contact List.
► New Group: Enables you to create a group within your Contact List.
For details, see To delete all your contacts:
1 In the Contacts screen, press . The Options menu is displayed.
2 Press 6, or select 6. Delete All Contacts and press Enter. The Delete
All Contacts screen is displayed.
3 Select Yes to confirm the deletion and press Enter. The contact is
deleted from your Ogo Contact List.
4 Working with Contact Groups on page 54.
5 Export to SIM: Enables you to export your Contact List from the
Ogo device memory to the SIM card memory.
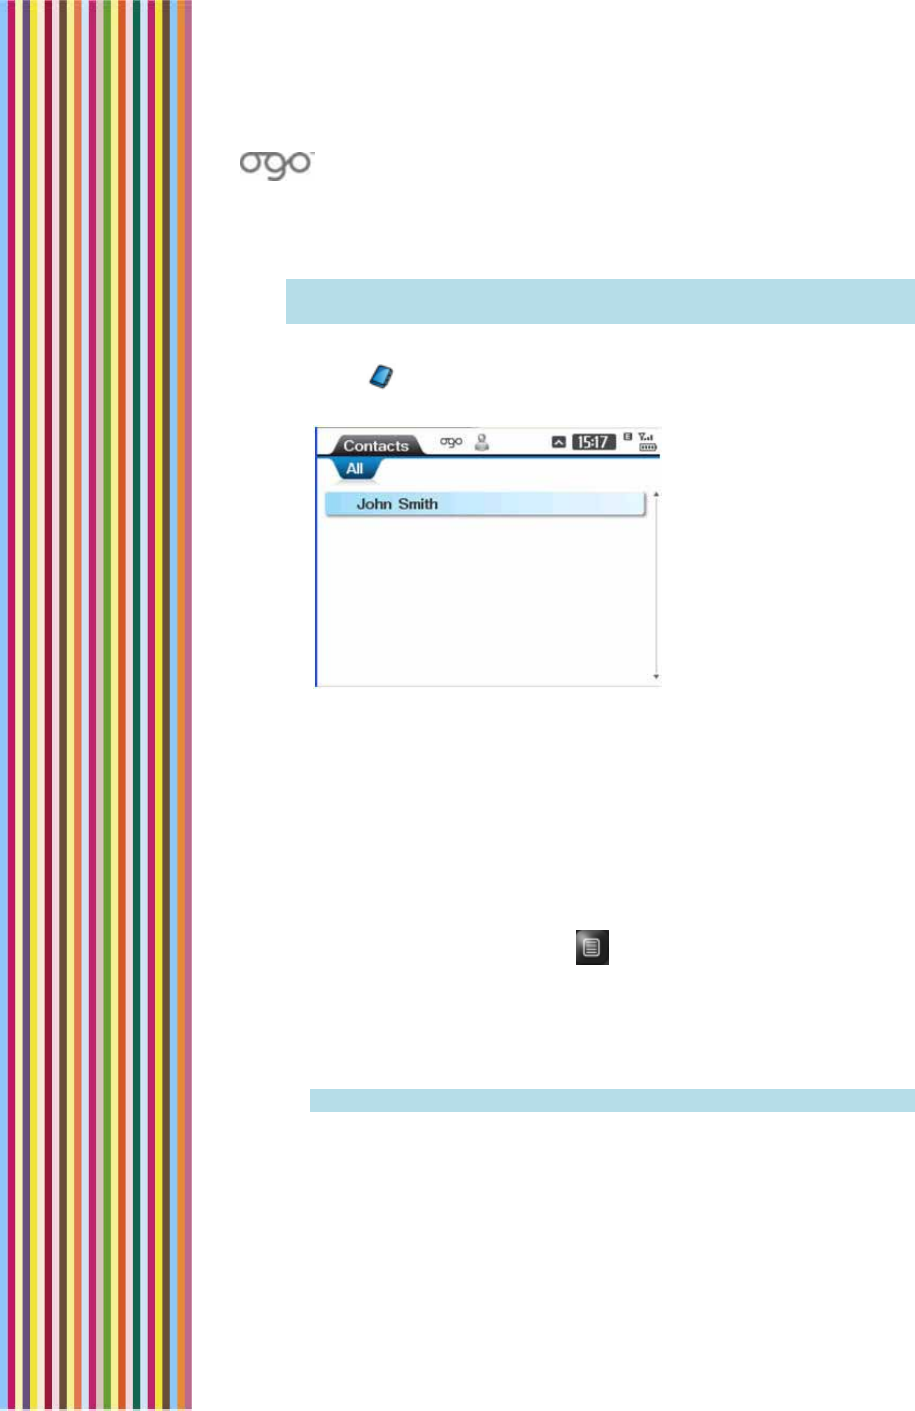
錯誤
!
尚未定義樣式。
錯誤! 尚未定義樣式。 53
6 Import from SIM: Enables you to import your Contact List from the
SIM card memory into the Ogo device memory.
Note: Your IM Contact Lists are managed separately. For details, see
Managing Your IM Contacts on page 30.
► To access the Contact List:
Select in the Home screen or Main Menu and press Enter. The
Contacts screen is displayed.
Figure 16: Contacts Screen
The All tab lists all of your contacts. An additional tab is displayed
for each Contact Group (if defined).
Adding Contacts
You can add contacts to your Ogo Contact List at any time.
► To add a contact:
1 In the Contacts screen, press . The Options menu is displayed.
2 Select New Contact and press Enter. The Contact Profile screen is
displayed.
3 Insert the displayed contact details (First Name, Last Name, Mobile
Phone, and E-mail Address) as required.
Note: You must provide either the first or last name.
4 (Optional) Select Alerticon and press Enter to select an alerticon
for the contact.
OGO 2 User Manual
54 錯誤! 尚未定義樣式。
5 (Optional) To add an additional data field:
• Select Add Field and press Enter. A menu of optional fields is
displayed. Select the desired field name and press Enter to add
it to the form.
• Insert the relevant information in the new field.
• Repeat for additional data fields if required.
6 Select Save & Close and press Enter. The new contact is saved.
Deleting Contacts
You can remove contacts from your Ogo Contact List.
► To delete a contact:
1 In the Contacts screen, select the contact and press . The
Options menu is displayed.
2 Press 5, or select 5. Delete Contact and press Enter. The Delete
Contact screen is displayed.
3 Select Yes to confirm the deletion and press Enter. The contact is
deleted from your Ogo Contact List.
► To delete all your contacts:
4 In the Contacts screen, press . The Options menu is displayed.
5 Press 6, or select 6. Delete All Contacts and press Enter. The Delete
All Contacts screen is displayed.
6 Select Yes to confirm the deletion and press Enter. The contact is
deleted from your Ogo Contact List.
Working with Contact Groups
Organizing your contacts into Contact Groups makes it easy for you
to locate that special person’s details when you need them. Similar to
a mailing list, it also enables you to send e-mail and SMS/text
messages to the entire group at once.
Creating a Group
You can create contact groups and then add multiple contacts to
the groups.
Note: The same contact can be added to more than one group.
錯誤
!
尚未定義樣式。
錯誤! 尚未定義樣式。 55
► To create a group:
1 In the Contacts screen, press . The Options menu is displayed.
2 Select New Group. The New Group screen is displayed.
3 Insert name for the group, for example, family.
4 Select OK and press Enter. A tab is added to the Contacts screen
for the new group.
Adding Contacts to Groups
You can assign a contact to one or more Contact groups. The
contact will continue to appear in the All tab as well as in the tab(s)
for the group(s) to which it has been added.
► To add a contact to a group:
1 In the group’s tab, press . The Options menu is displayed.
2 Press 5, or select 5. Add Contact to Group and press Enter. Your
existing contacts are listed in a pop-up menu.
3 Select the contact to be added to the group, and press Enter. The
contact is listed in the group’s tab.
Sending a Message to a Group
You can send a message to an entire group of contacts at the same
time, without having to insert the individual address one at a time.
► To send a message to a group:
1 In the group’s tab, press . The Options menu is displayed.
2 Press 4, or select 4. Compose Message to Group and press Enter.
The Compose screen is displayed with your details in the From field
and the group name in the To field.
3 Insert the subject and message text.
4 Select Send and press Enter. The message is sent to all contacts in
the group.
Viewing/Editing Contact Profiles
You can view existing contact profiles and edit the information they
contain.

OGO 2 User Manual
56 錯誤! 尚未定義樣式。
► To view a contact profile:
In the Contact screen, select the contact and press Enter. The
Contact Profile screen is displayed.
Note: For details on defining a contact profile, see Adding Contacts
on page 53.
Assigning an Alerticon to a Contact
Ogo’s animated Alerticons make it easy for you to identify when
someone important to you has sent you a message. Simply assign an
Alerticon to a contact and an attractive animation pops up on your
Ogo screen whenever that contact sends you a message.
► To assign an alerticon:
1 In the Contact Profile screen, select the Alerticon field and press
Enter. The Assign Alerticon screen is displayed.
2 Scroll and select the desired Alerticon.
Note: When an Alerticon is selected, the animation is played. You
can scroll through and view the various animations before
making your selection.
3 Press Enter.
4 Select Done and press Enter. The selected Alerticon is assigned to
the contact, and is displayed on the device each time a message
is received from the contact.
Working with the Address Clipboard
The Address Clipboard makes it easy to add new contacts to your
Ogo Contact list based on the contact data available from the
messages in your mailbox. You can also send a message or place a
call directly from the clipboard, without adding a new contact.
Menu options vary according to type of entry selected in clipboard
and may include a combination of the following:
• Add to Contact
• Create New Contact
• Compose
• Call (SMS only)
• Open (URL only)

錯誤
!
尚未定義樣式。
錯誤! 尚未定義樣式。 57
Creating a Contact from the Clipboard
You can create a contact directly from within a message using the
Address Clipboard.
► To create a new contact from the clipboard:
1 In an open message screen, press . The Options menu is
displayed.
2 Press 7, or select 7. Address Clipboard and press Enter. The Address
Clipboard is displayed.
3 Select the entry in the displayed list and press Enter. A pop-up
menu is displayed.
4 Press 2, or select 2. Create New Contact and press Enter. The
Contact Profile screen is displayed.
Note: If you select an e-mail address it is inserted automatically. If
you select a phone number, you are prompted to select the
type of number (Mobile Phone, Main Phone, Home Phone,
Work Phone, Fax, or Pager).
5 Add to or edit the displayed contact details (First Name, Last
Name, Mobile Phone, and E-mail Address) as required.
6 (Optional) Select Alerticon and press Enter to select an alerticon
for the contact.
7 (Optional) To add an additional data field:
• Select Add Field and press Enter. A menu of optional fields is
displayed. Select the desired field name and press Enter to add
it to the form.
• Insert the relevant information in the new field.
8 Select Save & Close and press Enter. The new contact is saved.

OGO 2 User Manual
58 錯誤! 尚未定義樣式。
Exporting Contacts
You can export specific contacts or your entire Ogo Contacts List
from the device memory to your SIM card, for example, to make the
contact information available on another device.
► To export contacts:
1 In the Contacts screen, press . The Options menu is displayed.
2 Press 8 or select 8. Export to SIM and press Enter. A pop-up menu is
displayed.
3 To export the entire Contact List, select 1. All Records and press
Enter.
OR
To export only the selected contact, select 2. This Record and
press Enter.
The Export Record(s) screen is displayed.
4 Select the checkboxes for the types of phone numbers to be
exported.
Note: There may be a limit to the number of characters/fields that
may be exported.
5 Select Export and press Enter to export the contact data. A pop-
up message indicates the progress of the export process.
Importing Contacts
You can import contacts from your SIM card to your Ogo Contact List.
► To import contacts:
1 In the Contacts screen, press . The Options menu is displayed.
2 Press 9 or select 9. Import from SIM and press Enter. The Import
Record(s) screen is displayed, advising you that both the device
card and the SIM card may contain different numbers for the
same contact fields.
3 To override the local entries, select Yes and press Enter.
Or
To manually resolve any potential conflicts, select No and press
Enter.
4 The Copying Screen is displayed while the records are copied.

錯誤
!
尚未定義樣式。
錯誤! 尚未定義樣式。 59
Note: If you opt to manually resolve conflicts and conflicts are
detected you are prompted to override the local entry. (Select
Yes or No, as required, and press Enter.)
Synchronizing Your Contact List
If Ogo Sync is installed on your personal computer (desktop or laptop),
you can connect your Ogo and manually synchronize your Contact
Lists using a USB cable. For details, see your Ogo Sync documentation.
Note: The availability of this option, including specific synchronization
methods, is subject to the conditions imposed by your cellular
operator.
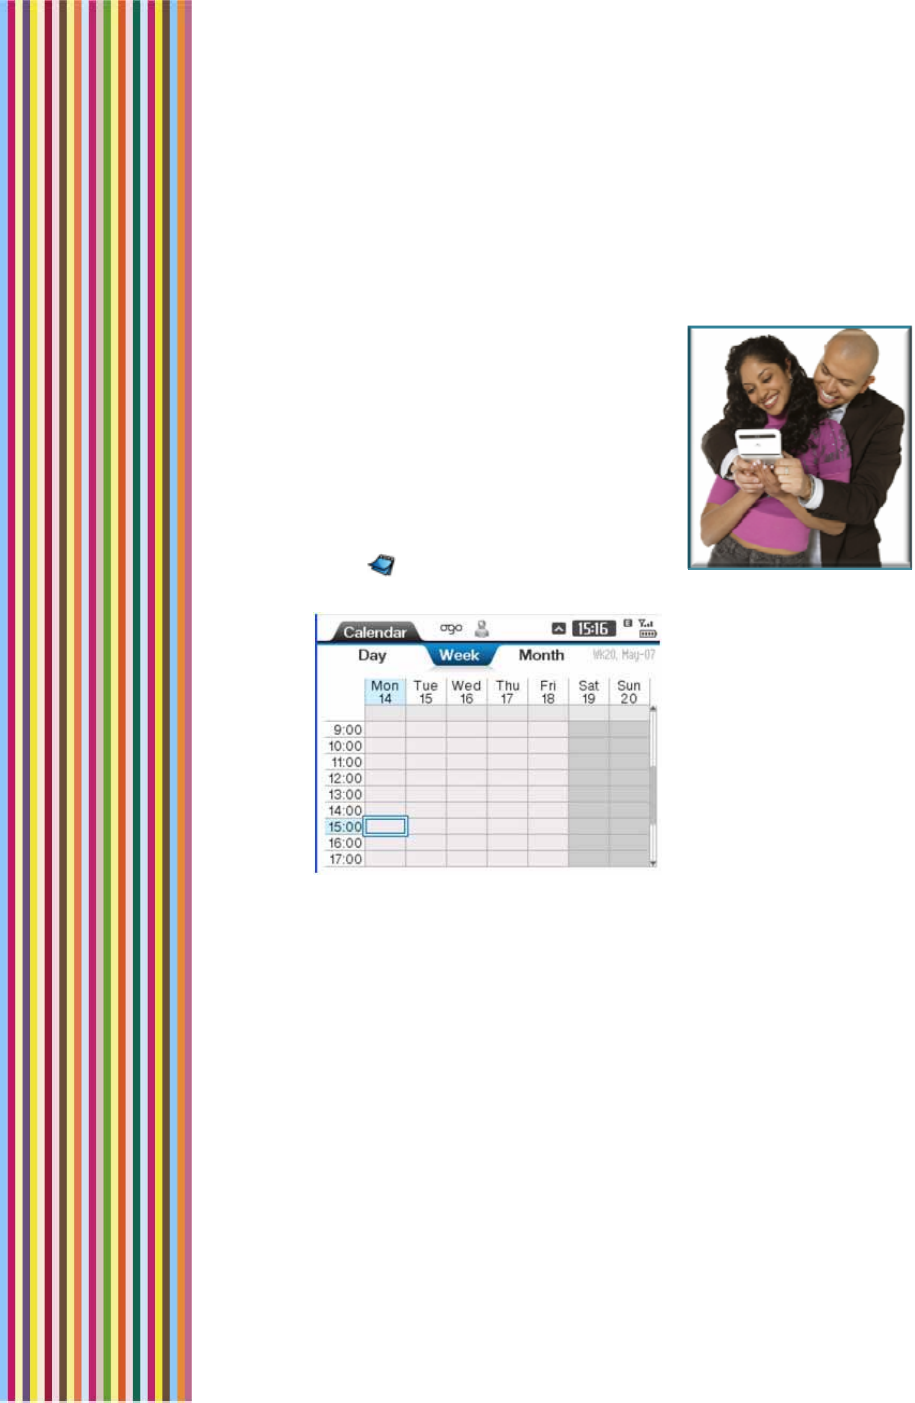
OGO 2 User Manual
60 錯誤! 尚未定義樣式。
Working with the Calendar
Ogo’s built-in calendar enables you to
manage your schedule on the go. And
depending on the package offered by
your cellular operator, you may be able
synchronize your schedule with your
calendar on your home PC using a USB
cable, Bluetooth connection, or over the
air.
► To access the Calendar screen:
Select in the Home screen or Main
Menu and press Enter. The Calendar screen is displayed.
Figure 17: Calendar Screen
The Calendar screen includes three tabs:
Day: Displays your schedule for a single day.
Week: Displays your schedule for a week, with a column for each
day of the week.
Month: Displays your schedule for a month, with a row for each
week in the month.
On all three tabs, time blocks for which appointments exist are
marked in blue.
Depending on your cellular operator, the following options may be
available from the Options menu in the Calendar screen:
New Appointment: Enables you to add a new appointment

錯誤
!
尚未定義樣式。
錯誤! 尚未定義樣式。 61
Open Appointment: Opens the Appointment screen, enabling you
to view and edit the appointment details.
Delete Appointment: Removes the appointment from your
schedule.
Summary Mode: Displays a list of the appointments in your
calendar.
Day View: Changes the view from Summary Mode to Day View.
Today: Highlights the current day’s schedule on the screen.
Clean-Up: Enables you to delete appointments from your calendar.
Synchronize: Enables you to synchronize your calendar with your
schedule on your personal computer. The availability of this option,
including the specific synchronization methods, is subject to the
conditions imposed by your cellular operator.
Adding an Appointment
Adding appointments to your Ogo calendar makes it easier for you to
keep track of your schedule.
► To add an appointment:
1 In the Calendar screen, press . The Options menu is displayed.
2 Press 1, or select 1. New Appointment and press Enter. The
Appointment screen is displayed.
3 Insert the subject and location in the designated fields.
4 If you are scheduling an all day appointment, select All-day event
and press Enter. Then insert the dates in the Start and End fields.
5 If you are setting an appointment for part of a day, insert the times
and dates in the Start and End fields. (Do not select Add-day
event.)
6 Select Show as and press Enter. A pop-up menu of available
statuses is displayed. Select the status to be shown on your
calendar and press Enter.
7 If you want to be reminded about this appointment, select
Reminder and press Enter. A pop-up menu is displayed. Select the
how far in advance to be reminded from the list of available
values, or select none if you do not want to be reminded about
this appointed.

OGO 2 User Manual
62 錯誤! 尚未定義樣式。
8 (Optional) To set the priority of the appointment, select
Importance and press Enter. Select the desired priority (Low,
Normal or High) from the pop-up menu. The default priority is
Normal.
9 (Optional) Insert a note in the Note field.
10 Select Save and press Enter to add the appointment to your
calendar.
Opening/Editing an Appointment
You can view and update the appointment details, for example, if
the location or time has been changed.
► To open/edit an appointment:
1 In the Day tab of Calendar screen, select the appointment and
press . The Options menu is displayed.
2 Press 2, or select 2. Open Appointment and press Enter. The
Appointment screen is displayed.
3 Change the appointment details, as required. For details, see
Adding an Appointment on page 61.
4 Select Save and press Enter. The appointment details are updated
accordingly.
Deleting an Appointment
The meeting was cancelled. No problem. You can delete the
appointment from your calendar.
► To delete an appointment:
1 In the Day tab of Calendar screen, select the appointment and
press . The Options menu is displayed.
2 Press 3, or select 3. Delete Appointment and press Enter. The Delete
Appointment screen is displayed.
3 Select Yes to confirm the deletion and press Enter. The
appointment is deleted from your schedule.

錯誤
!
尚未定義樣式。
錯誤! 尚未定義樣式。 63
Deleting Old Appointments
You can delete outdated appointments from your calendar.
► To delete old appointments:
1 In the Calendar screen, press . The Options menu is displayed.
2 Select Cleanup and press Enter. A pop-up menu is displayed.
3 Select 2. Delete Old Appointments to delete appointments
according to scheduled dates. The Delete Old Appointments
screen is displayed.
4 Press Enter and select the time frame to serve as the basis for
deleting old appointments (older than 1 week, 2 weeks, and so
on).
5 Select OK and press Enter. Appointments that predated the set
time frame are deleted from the calendar.
Deleting All Appointments
You can delete all of your appointments from your calendar.
► To delete all appointments:
1 In the Calendar screen, press . The Options menu is displayed.
2 Select Cleanup and press Enter. A pop-up menu is displayed.
3 Select 1. Delete All Appointments to delete appointments
according to their scheduled dates. The Delete Appointments
screen is displayed.
4 Select Yes to confirm the deletion and press Enter. All
appointments are deleted from your schedule.
Receiving Appointment Reminders
Appointment reminders are displayed automatically on your screen
according to the reminder settings defined when you added the
appointment.
The Reminder screen includes the information included in the
appointment entry (subject, location, and so on). You are prompted
to take one of the following actions:

OGO 2 User Manual
64 錯誤! 尚未定義樣式。
Remind me in: Enables you to set a time interval after which the
Reminder will pop-up again.
Dismiss: Closes the Reminder screen for once and for all.
Snooze: Enables you to temporarily close the Reminder. It will pop-
up again after a configured time interval.
Open: Opens the Appointment screen.
Select the desired option and press Enter to continue.
Synchronizing Your Calendar
If Ogo Sync is installed on your personal computer (desktop or laptop),
you can connect your Ogo and manually synchronize your Calendars
using a USB cable. For details, see your Ogo Sync documentation.
Note: The availability of this option, including specific synchronization
methods, is subject to the conditions imposed by your cellular
operator.

錯誤
!
尚未定義樣式。
錯誤! 尚未定義樣式。 65
Viewing the News
To stay in touch with your world, Ogo enables you
to download RSS news feeds for up to the moment
news, information and alerts about the subjects
you care about most.
The Ogo News screen provides a simple and
intuitive interface for receiving updates from web
sites featuring standard RSS feed. You can monitor
several feeds concurrently.
► To access the News screen:
Select in the Home screen or Main Menu
and press Enter. The News screen is displayed.
Figure 18: News Screen
Accessing News Feeds
The News screen may contain several tabs, depending on the
number of news feeds you have configured.
The All tab lists all of the available new items. Each of the additional
tabs display a single source or category of news. The number of news
items on each tab appears in parenthesis after the tab name.
In each news items list, the color of the icon indicates the status of the
item: a blue icon indicates an unread news item. A white icon
indicates that the item has been read.
OGO 2 User Manual
66 錯誤! 尚未定義樣式。
► To open a news item:
1 Select the news item and press Enter. The item is displayed,
including the time, date and supplying feed.
2 To open the news item in a browser, press . The Options menu is
displayed.
3 Press 1, or select 1. Open in Browser and press Enter. A connection
is established with the site, and the news item is opened in the
Browser screen. Scroll down to read the news item in its entirety.
► To view the news item details:
1 Select the news item and press Enter. The item is displayed,
including the time, date and supplying feed.
2 To view the news item details, press . The Options menu is
displayed.
3 Press 3, or select 3. View Details and press Enter. The URL of the
news item is displayed in the News Message Details screen.
► To mark an item as read/unread:
1 Select the news in the news item and press . The Options menu
is displayed.
2 Press 2, or select 2. Mark as Unread/Mark as Read and press Enter.
The status of the news item changes accordingly.
Adding a News Feed
Depending on your cellular carrier, you can add news feeds from a
preconfigured set of available feeds.
► To add a news feed:
1 In the News Screen, press . The Options menu is displayed.
2 Press 5, or select 5. Add New Feed and press Enter. The Feed
Selection screen is displayed.
3 Press Enter. A list of available feeds is displayed.
4 Select the desired feed and press Enter.
5 Select Done and press Enter. A tab is added for the new feed and
relevant news items are retrieved automatically.
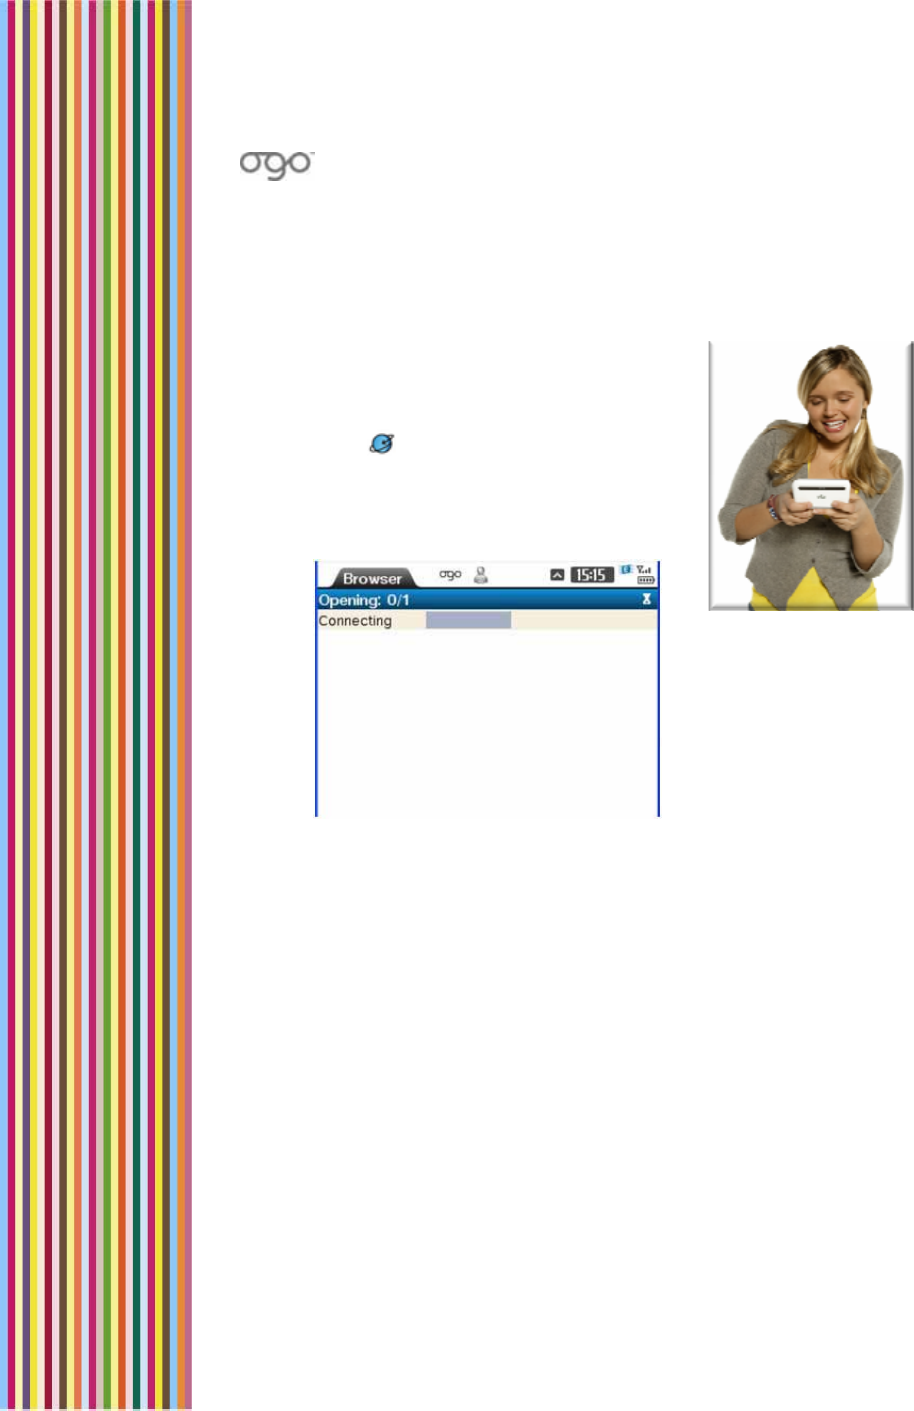
錯誤
!
尚未定義樣式。
錯誤! 尚未定義樣式。 67
Surfing the Internet
With Ogo, you can browse the web from
practically anywhere.
► To open the Web browser:
Select in the Home screen or Main
Menu and press Enter. The Browser screen
is displayed. When the connection is
established, a Google search page
appears.
Figure 19: Browser Screen
While browsing the Internet, the following options are available from
the Options menu:
1. Go to URL: Enables you to open a specific web page. For
details, see .
2. Navigate: Displays a submenu of standard navigation options,
including Refresh, Forward, Backward, Stop, and Home page.
3. View: Displays a submenu of standard viewing options,
including Zoom in, Zoom out, Reset zoom, and Thumbnail
On/Off.
4. Add to Bookmarks: Enables you to create bookmarks to
selected web pages.
5. Open: Enables you to view your bookmarks and browsing
history.
6. Security: Displays active session and session certificate
information, when applicable.

OGO 2 User Manual
68 錯誤! 尚未定義樣式。
7. Properties: Displays your default browsing properties, including
page title, address and page size. Typically, these are
preconfigured by your cellular carrier and cannot be edited.
Searching the Internet
Using the Google website, you can use your Ogo to search for
information on the Internet.
► To search the Internet:
1 In the Browser screen, insert search criteria in the Google search
field.
2 Select Find and press Enter. The first set of search results is
displayed.
3 (Optional) Select an entry in the results and press Enter to connect
to the corresponding website.
Requesting a Specific URL
If you know the URL of the webpage you would like to view, you can
insert the URL and view it on your Ogo.
► To go to a specific URL:
1 In the Browser screen, press . The Options menu is displayed.
2 Press 1, or select 1. Go to URL and press Enter. The Open new page
screen is displayed. A history of previously viewed URLs is displayed.
3 In the http:// field, insert the URL of the page that you want to
open and press Enter.
OR
If you have recently viewed the URL, select it in the history list and
press Enter.
Your Ogo browser connects to and displays the requested URL.
Working with Bookmarks
Creating bookmarks makes it easier to return to the webpages that
you need the most. And you can make it easier to find your
bookmarks by organizing them into personal folders.
錯誤
!
尚未定義樣式。
錯誤! 尚未定義樣式。 69
Adding a Bookmark
You can create a bookmark to any web page that you expect to visit
frequently.
► To add a bookmark:
1 While viewing a page in the Browser screen, press . The Options
menu is displayed.
2 Press 4, or select 4. Add to Bookmarks and press Enter. The Add to
Bookmarks screen is displayed.
The screen name and URL of the currently displayed page are
inserted automatically.
3 (Optional) Insert/edit the screen name.
4 Select OK and press Enter. The Bookmarks screen is displayed.
To save the bookmark in main directory, press Enter,
OR
To save the bookmark in an existing folder, select the folder and
press Enter. The Add Here prompt is displayed. Press Enter to add
the bookmark.
Removing a Bookmark
You can remove bookmarks to web pages that are no longer of
interest to you.
► To remove a bookmark:
1 In the Bookmarks screen, select the bookmark and press . A
pop-up menu is displayed.
2 Select Delete from the pop-up menu. The bookmark is deleted
from your Bookmarks list.
Adding a Folder
For easier navigation, you can create folders for your bookmarks.
► To add a folder:
1 In the Bookmarks screen, press . A pop-up menu is displayed.
2 Select Create new folder from the pop-up menu. The Enter folder
name screen is displayed.
3 Insert the folder name.

OGO 2 User Manual
70 錯誤! 尚未定義樣式。
4 Select OK and press Enter. The folder is added in the Bookmarks
screen.
Opening a Bookmark
Selecting a bookmark is a fast and easy way of opening a webpage.
► To open a page using a bookmark:
1 In the Browser screen, press . The Options menu is displayed.
2 Press 5, or select 5. Open > 1. Bookmarks and press Enter. The
Bookmarks screen is displayed.
3 Select a bookmark and press Enter to display the corresponding
webpage.
Viewing Your Browsing History
You can view a list of the URLs recently opened on your Ogo.
► To view the history:
1 In the Browser screen, press . The Options menu is displayed.
2 Press 5, or select 5. Open > 2. History and press Enter. The History
screen is displayed.
3 The sites accessed are sorted according to day, from the current
day backward.
You can take the following actions from within the History screen:
• To view the sites accessed a specific day, select the day and
press Enter.
• To sort the sites (by date, by site, by last visited, or by most
visited), press Enter and select Sort from the pop-up menu.
• To view a list of pages accessed on a specific site, select the
URL and press Enter.
• To display a specific page, select the page in the list and press
Enter.
• To delete a selected site/page, press Enter and select Delete
from the pop-up menu.
• To clear the entire history, press Enter and select Delete all from
the pop-up menu.
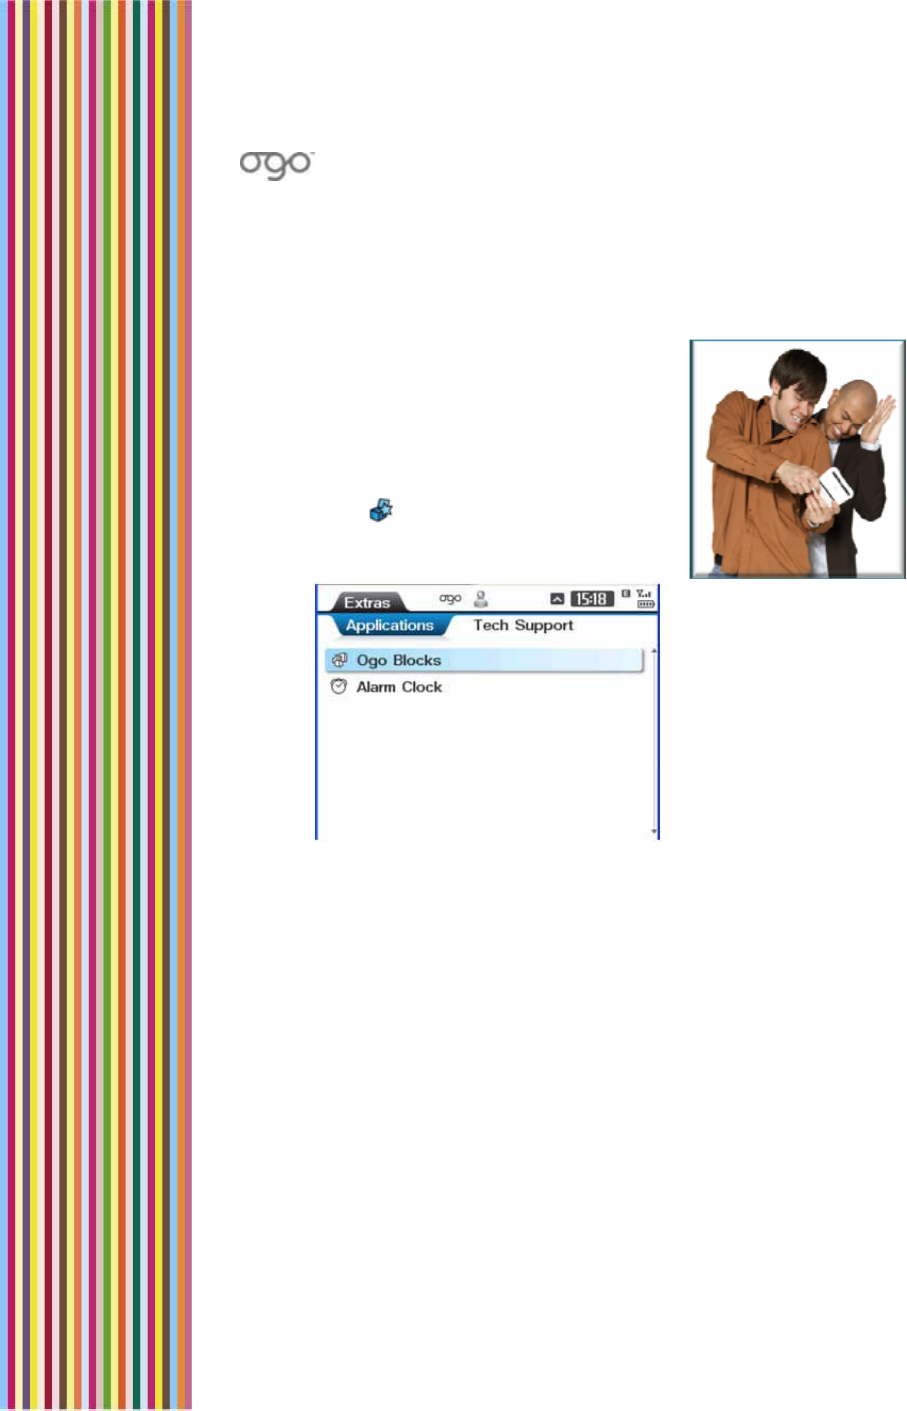
錯誤
!
尚未定義樣式。
錯誤! 尚未定義樣式。 71
Ogo Extras
The Extras screen provides access to any
additional applications available on the
device, such as Ogo Blocks, as well as to
the contact details for technical support
purposes.
► To access the Extras screen:
Select in the Home screen or Main
Menu and press Enter. The Extras screen
is displayed.
Figure 20: Extras Screen
The Extras screen includes two tabs:
Applications: Lists any pre-installed applications available on the
device. The range of available applications depends on your
cellular operator.
Tech Support Info: Lists the contact details for technical support
purposes.
Playing Ogo Blocks
The Blocks game comes pre-installed on your Ogo. In this game, you
rotate shapes as they fall so that they fit together with as few spaces
between them as possible.
OGO 2 User Manual
72 錯誤! 尚未定義樣式。
► To play Ogo Blocks:
1 In the Application tab of the Extras screen, select Ogo Blocks and
press Enter.
2 Use the game control keys to control the movement of the falling
blocks.
Table 11: Blocks Game Controls
Control Key Functionality
A, Z, Left (inner ring) Moves a piece to the left
L "," Right (inner ring) Moves a piece to the right
S, X, K, M, Up (inner ring),
Page Up (outer ring)
Rotates a piece
Space, Down (inner
ring), Page Down (outer
ring)
Drops the piece, or resumes a
paused game
P Pauses or resumes an active game
Viewing Technical Support Information
The phone number and e-mail address technical support are listed in
the Tech Support Info tab of the Extras screen.

錯誤
!
尚未定義樣式。
錯誤! 尚未定義樣式。 73
Setting Your Preferences
You can configure various settings for your Ogo, including the default
methods for handling calls, IM, and e-mail messages on the device.
Your preferences are defined in the following tabs of the Settings
screen:
Phone: Enables you to configure settings related to your Ogo
phone functionality. For details, see Setting Your Phone Preferences
on page 74.
IM: Enables you to configure your IM accounts settings. For details,
see Setting Your IM Preferences on page 77.
E-mail: Enables you to configure your e-mail account and mailbox
settings. For details, see Setting Your E-mail Preferences on page 78.
Browser: Enables you to configure the display of Internet content
on your Ogo. For details, see Setting Your Browser Preferences on
page 80.
Sync: Enables you to configure the ways in which data on your
Ogo can be synchronized with other devices. For details, see
Setting Synchronization Preferences on page 82.
Device: Enables you to customize the look of your Ogo screen and
configure the way in which alerts are displayed. For details, see
Setting Device Preferences on page 82.
Calendar: Enables you to configure the display and handling your
Calendar. For details, see Setting Your Calendar Preferences on
page 85.
Sounds: Enables you to configure the sounds made by your Ogo in
various situations. For details, see Setting Your Sounds Preferences
on page 86
Time & Date: Enables you to configure the time and date settings
on your Ogo. For details, see Setting the Time and Date on page 88.
Network: Enables you to view your network settings. For details, see
Setting Your Network Preferences on page 89.
System: Enables you to view your Ogo’s system capacities and
identifying characteristics. For details, see Viewing Your System on
page 90.
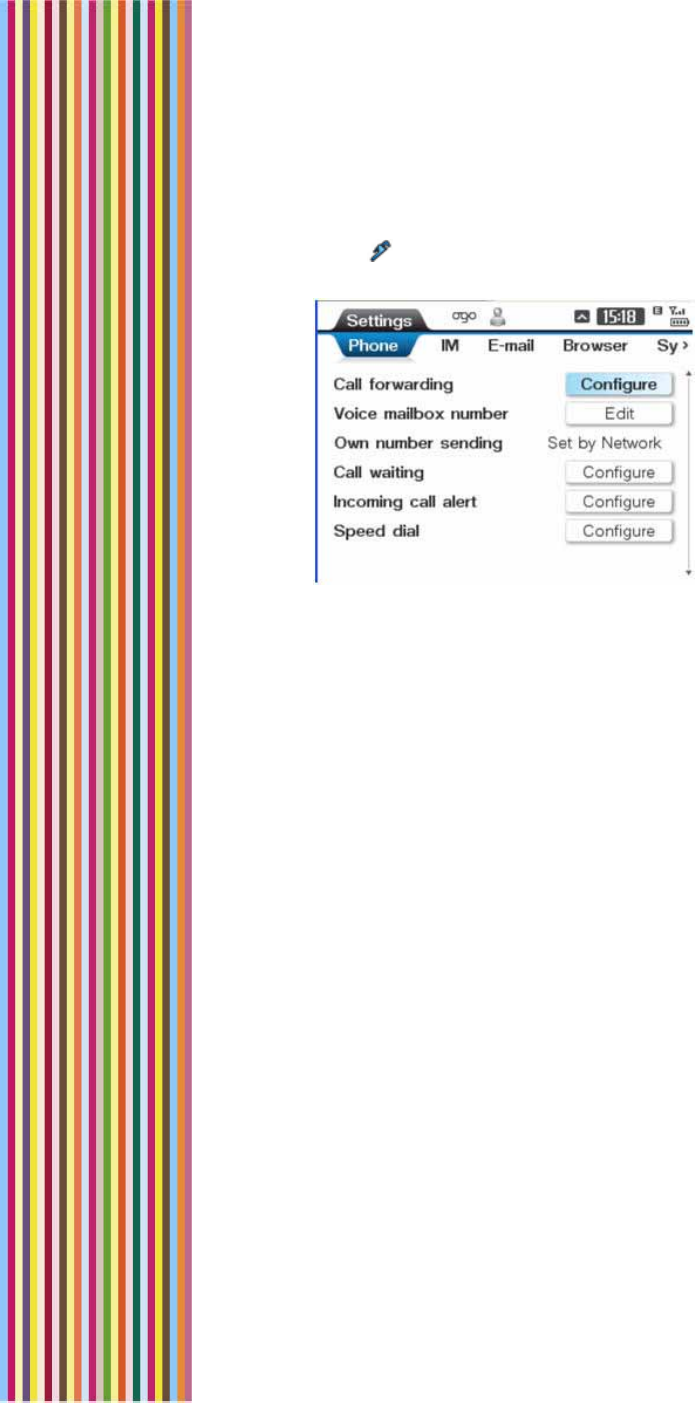
OGO 2 User Manual
74 錯誤! 尚未定義樣式。
► To access the Settings screen:
Select in the Home screen or Main Menu and press Enter. The
Settings screen is displayed.
Figure 21: Settings Screen
Setting Your Phone Preferences
The settings configured in the Phone tab determine how your Ogo
responds to various calling conditions.
► To set your phone preferences:
1 In the Settings screen, select the Phone tab.
2 Select and edit one or more of the Phone settings, as required. The
Phone settings are described in Table 12.

錯誤
!
尚未定義樣式。
錯誤! 尚未定義樣式。 75
Table 12: Phone Settings
Option Description
Call
forwarding The following call forwarding options may be
configured to Enable or Disable:
• Forward all calls: Ogo re-routes all incoming
calls to another pre-determined number.
• Forward if busy: Ogo re-routes incoming calls
to another pre-determined number if you are
engaged in an active phone call.
• Forward if not answered: Ogo re-routes an
incoming call to another pre-determined
number if you do not answer the call.
• Forward if not reachable: Ogo re-routes an
incoming call to another pre-determined
number if the network cannot locate your Ogo
to deliver the call.
• Cancel all: Activate this option to disable all of
the Forward options that have been enabled.
To access the settings, select Configure and
press Enter to display the Call Forwarding
screen. Select Configure for each of the Call
forwarding options and set the options to
Enable or Disable. (Press Query if you want to
view the current setting). Select Done and press
Enter.
Voice
mailbox
number
The phone number used to retrieve your
voicemail. (This number is assigned by your
cellular operator.)
Select Edit and press Enter to display the Voice
mail number screen. Insert the number, select
Done and press Enter.

OGO 2 User Manual
76 錯誤! 尚未定義樣式。
Option Description
Own number
setting This setting defines whether the person you are
calling can view your phone number on caller
ID-equipped telephones:
• On: Your number is displayed.
• Off: Your number is not displayed.
• Set by Network: The option is set at the
discretion of your cellular service carrier
(usually On).
Press Enter and select your preference from the
pop-up menu.
Call waiting When enabled, Ogo notifies you of an incoming
call while a call is in progress, rather than
delivering a busy signal to the new caller.
To access the settings, select Configure and
press Enter to display the Call waiting screen.
Select Enable or Disable, and press Enter.
Incoming call
alert The ways in which you are alerted to an
incoming call, including the type of ringtone, its
volume, and/or vibration.
To access the settings, select Configure and
press Enter to display the Incoming call alert
screen.
To set the ringtone, select Ringing tone and
press enter. Then select the desired ringtone
from the pop-up menu.
To set the volume, select Ringing volume and
adjust the volume by moving the indicator on
the slider using the left and right button on the
8-way selection key.
To enable the vibrating alert, select Vibrating
alert and press Enter.
Select Done and press Enter.
錯誤
!
尚未定義樣式。
錯誤! 尚未定義樣式。 77
Option Description
Speed dial You can create shortcuts for dialing your most
commonly needed numbers.
To access these settings, select Configure and
press Enter to display the Speed dial screen.
Insert the number(s) for which you want to use
the speed dial option.
Select Close and press Enter.
Setting Your IM Preferences
Your IM account settings are configured in the IM tab.
► To set your IM preferences:
1 In the Settings screen, select the IM tab.
2 Select and edit one or more of the IM settings, as required. The IM
settings are described in Table 13.
Table 13: IM Settings
Option Description
ICQ The sign in options for the ICQ service, such as
ICQ number, password and default presence.
Select Open and press Enter to view/edit these
settings.
Windows Live
Messenger The sign in options for the Windows Live
Messenger service, such as e-mail address,
password and default presence.
Select Open and press Enter to view/edit these
settings.
When closed The action to be taken regarding your IM
presence when you close the device (but leave
it powered on).
Select When close and press Enter. Select the
desired action (No change or Away) from the
pop-up menu and press Enter.
OGO 2 User Manual
78 錯誤! 尚未定義樣式。
Option Description
Add IM
account Enables you to add an IM account. If you have
already set up your IM account(s), this option is
disabled.
Select Add and press Enter. The Instant
Messaging Wizard is displayed. For details, see
Using the Instant Messaging Wizard to Set Up
Your Account on page 22.
Remove IM
account Removes an existing IM account.
Select Remove and press Enter. The Account
Summary screen is displayed. Clear the
checkbox for the service to be removed and
press Next.
Setting Your E-mail Preferences
Your e-mail account settings are configured in the E-mail tab.
► To set your e-mail preferences:
1 In the Settings screen, select the E-mail tab.
2 Select and edit one or more of the IM settings, as required. The E-
mail settings are described in Table 14.
Table 14: E-mail Settings
Option Description
Mailbox
name The options for the displayed mailbox (for each
configured e-mail address).
Select Open and press Enter to display the
Mailbox Settings screen. For details, see Table
15.
Add e-mail
account Enables you to add an e-mail account.
Select Add and press Enter. The E-mail Wizard is
displayed. For details, see Using the E-Mail
Wizard to Set Up Your Account on page 34.
錯誤
!
尚未定義樣式。
錯誤! 尚未定義樣式。 79
Option Description
Remove e-
mail account Removes an existing e-mail account.
Select Remove and press Enter. The Account
Summary screen is displayed. Clear the
checkbox for the e-mail account to be
removed and press Next.
Personal
signature You can insert a personal signature at the end
of your
e-mail messages.
Select Open and press Enter to display the
Personal Signature screen.
Select Edit and press Enter to insert/edit your
personal signature. Select Save and press Enter.
Select the New messages and/or Replied and
forwarded checkboxes to determine to which
messages your signature is attached.
Reply with
original Includes the original message when you reply to
a message.
Brand auto
signature Inserts the following message at the end of your
e-mail message: These words brought to you by
Ogo. Find out more at www.ogo.com.
Sent items to
keep The number of sent items to be kept in the
Outgoing tab.
Select Sent items to keep and press Enter. Select
the desired number from the pop-up menu and
press Enter.
Table 15: Mailbox Settings
Option Description
E-mail
address Your e-mail address for the selected Mailbox.
Password Your password for the e-mail account.

OGO 2 User Manual
80 錯誤! 尚未定義樣式。
Option Description
Default
account When you compose an e-mail message, it is
sent from your default e-mail account. (If you
have set up only one e-mail account, this option
is selected by default.)
Press Enter to select/clear the checkbox as
required.
Display name The name that appears in the From field of an
e-mail account that you send from this account.
Server name If you have a custom e-mail account set up, this
is the server name for that account. (This field
cannot be edited).
Configure
server Enables you to configure the server for a custom
e-mail account.
Select Open and press Enter to configure the
server settings.
Sync back The time period for which to perform
synchronization (if synchronization is available).
Press Enter and select the time period from the
pop-up menu.
Check
interval The frequency at which Ogo checks for new e-
mail messages.
Press Enter and select the time interval from the
pop-up menu.
Setting Your Browser Preferences
The settings configured in the Browser tab determine how Internet
content is displayed on your Ogo.
► To set your browser preferences:
1 In the Settings screen, select the Browser tab.
2 Edit one or more of the browser settings, as required. The Browser
settings are described in Table 16.
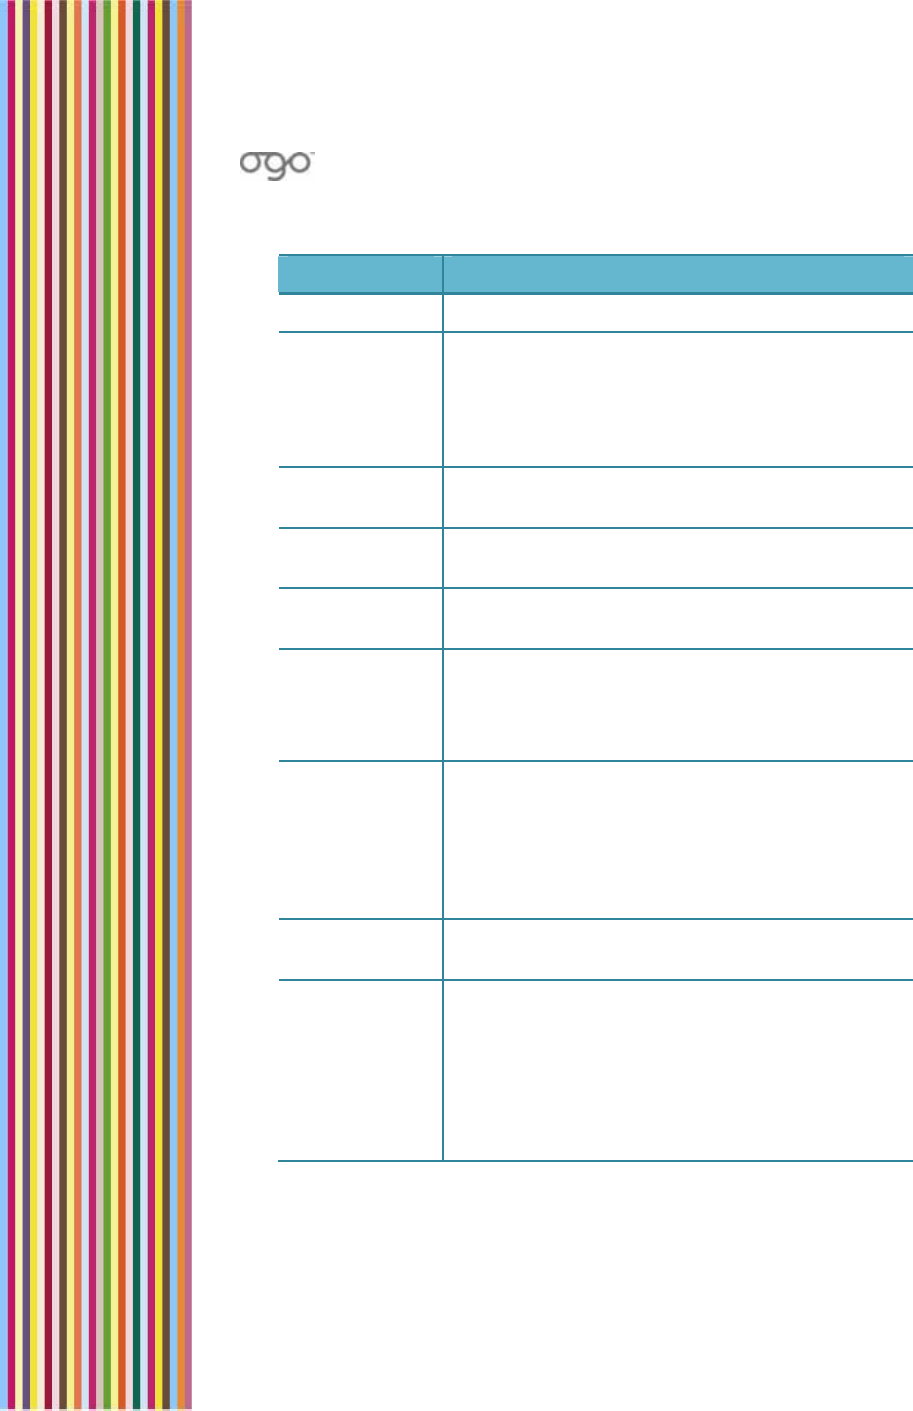
錯誤
!
尚未定義樣式。
錯誤! 尚未定義樣式。 81
Table 16: Browser Settings
Option Description
Full screen Displays the browser in full screen mode.
Rendering
mode Displays the mode for presenting content on the
Ogo screen.
Press Enter and select the rendering mode
(Standard, Text wrap, Screen optimized, or Text
only) from the pop-up menu.
Enable scripts Enables the use of scripts when browsing the
Internet.
Show images Enables the display of images when browsing
the Internet.
Enable
cookies Enables the use of cookies when browsing the
Internet.
Encoding Determines the type of encoding used.
Press Enter and select the encoding type (Auto-
Select, Latin-1; UTF-16, UCS-2, UTF-8, or Latin-2)
from the pop-up menu.
Private data Enables you to clear the private data stored on
the device (cache, cookies, and history).
Select Configure and press Enter to display the
Private data screen. For each of the options,
you can select Clear and press Enter to clear
the saved data.
Security
warning Displays a security warning when you request a
potentially unsafe site or action.
Connection
settings Enables you to configure the Ogo’s connection
settings, including the connection type, timeout
interval, and proxy properties.
Select Configure and press Enter to display the
Connection settings screen. Configure the
parameters, as required. Then select Done and
press Enter.

OGO 2 User Manual
82 錯誤! 尚未定義樣式。
Setting Synchronization Preferences
The settings configured in the Sync tab determine how the data on
your Ogo can be synchronized with your personal computer. It also
enables you to see when synchronization was last performed.
Note: The availability of this option depends on your cellular operator.
If synchronization is not supported, the Sync tab is not displayed.
► To set your synchronization preferences:
1 In the Settings screen, select the Sync tab.
2 Edit one or more of the synchronization settings, as required. The
Synchronization settings are described in Table 17.
Table 17: Synchronization Settings
Option Description
Server
settings The settings used to enable synchronization of
your Contacts List and Calendar.
Select Edit and press Enter to display the Server
Settings screen. Configure the parameters, as
required. Then select Done and press Enter.
Synchronizati
on status Indicates the last time the Calendar and/or
Contacts were successfully synchronized.
Select View and press Enter to display the details.
Setting Device Preferences
The settings configured in the Device tab determine the look of your
Ogo screen and how alerts are displayed when messages are
received, sent or deleted.
► To set your device preferences:
1 In the Settings screen, select the Device tab.
2 Edit one or more of the device settings, as required. The Device
settings are described in Table 18.
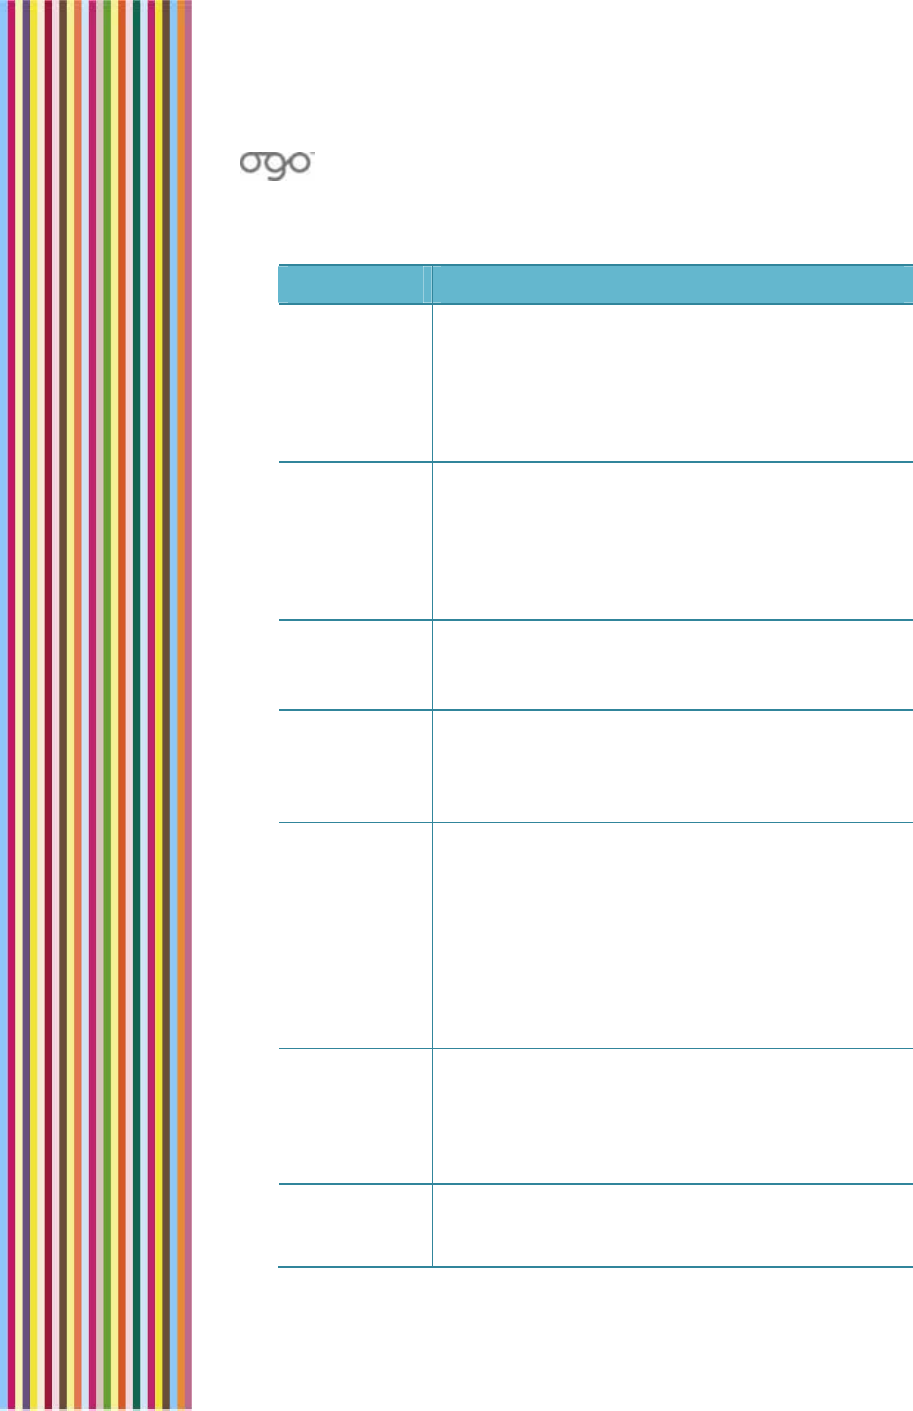
錯誤
!
尚未定義樣式。
錯誤! 尚未定義樣式。 83
Table 18: Device Settings
Option Description
Screen
brightness The level of brightness of the Ogo screen display.
Adjust the brightness by moving the indicator on
the slider using the inside buttons on the 8-way
selection key. The screen brightness changes
immediately as you move from one level to the
next.
Brightness
period The time interval for which the screen brightness is
maintained when no keys are pressed. The longer
the brightness period, the more battery power
consumed.
Press Enter and select the desired period from the
pop-up menu.
Language The language of the Ogo system interface.
Press Enter and select the preferred language
from the pop-up menu.
Home
wallpaper The background theme displayed on your Ogo
screen.
Press Enter and select a wallpaper from the pop-
up menu.
SIM PIN
required For security purposes, enabling this option
prompts you to enter a PIN when the device is
powered on.
WARNING! If you forget your SIM PIN, you have
only three opportunities to correctly enter it. After
three failed attempts, you are asked to enter
your PUK code in order to reactivate your SIM.
You must contact your carrier if you do not have
the PUK code.
Change PIN
code Changes your PIN code. Be sure to keep a
record of your new code in a safe place.
Select Change and press Enter to display the
Change PIN code screen. Set your new PIN code
and select Done.
Banner
settings Enables you to control whether or not banners
appear when new messages are received
and/or when IM contacts come online.

OGO 2 User Manual
84 錯誤! 尚未定義樣式。
Option Description
Select Open and press Enter to display the
Banner Settings screen. Select when you want to
allow the display of banners (new IM or SMS, new
e-mail, and/or IM contact comes online), and
select Done.
Reset device Resets your Ogo device to its original factory
settings, permanently removing all personal and
account information (for example, if you are
preparing to give the device to someone else).
Select Reset and press Enter. A warning is
displayed. Select OK and press Enter to reset the
device. The device restarts after resetting.
Confirm
msg. delete Prompts you for confirmation before deleting a
message.
Prompt to
add
contacts
Prompts you to add a contact when you send an
e-mail or SMS/text message to an
address/number that is not already in your Ogo
Contact List.
Restore
canceled
pop-ups
Restores canceled pop-up windows. This option is
not currently available.
Check for
software
updates
Automatically checks for software updates.
Bluetooth
settings Enables you to configure the use of Bluetooth
with your Ogo.
Note: The availability of this option depends on
your Ogo model and cellular operator.
Select Open and press Enter to display the
Bluetooth settings screen.
Configure the following parameters:
• Local device name: The designated Bluetooth
name of the Ogo device. Other Bluetooth
devices searching for this Ogo recognize it by
this designation.
• Change name: The setting used to change the
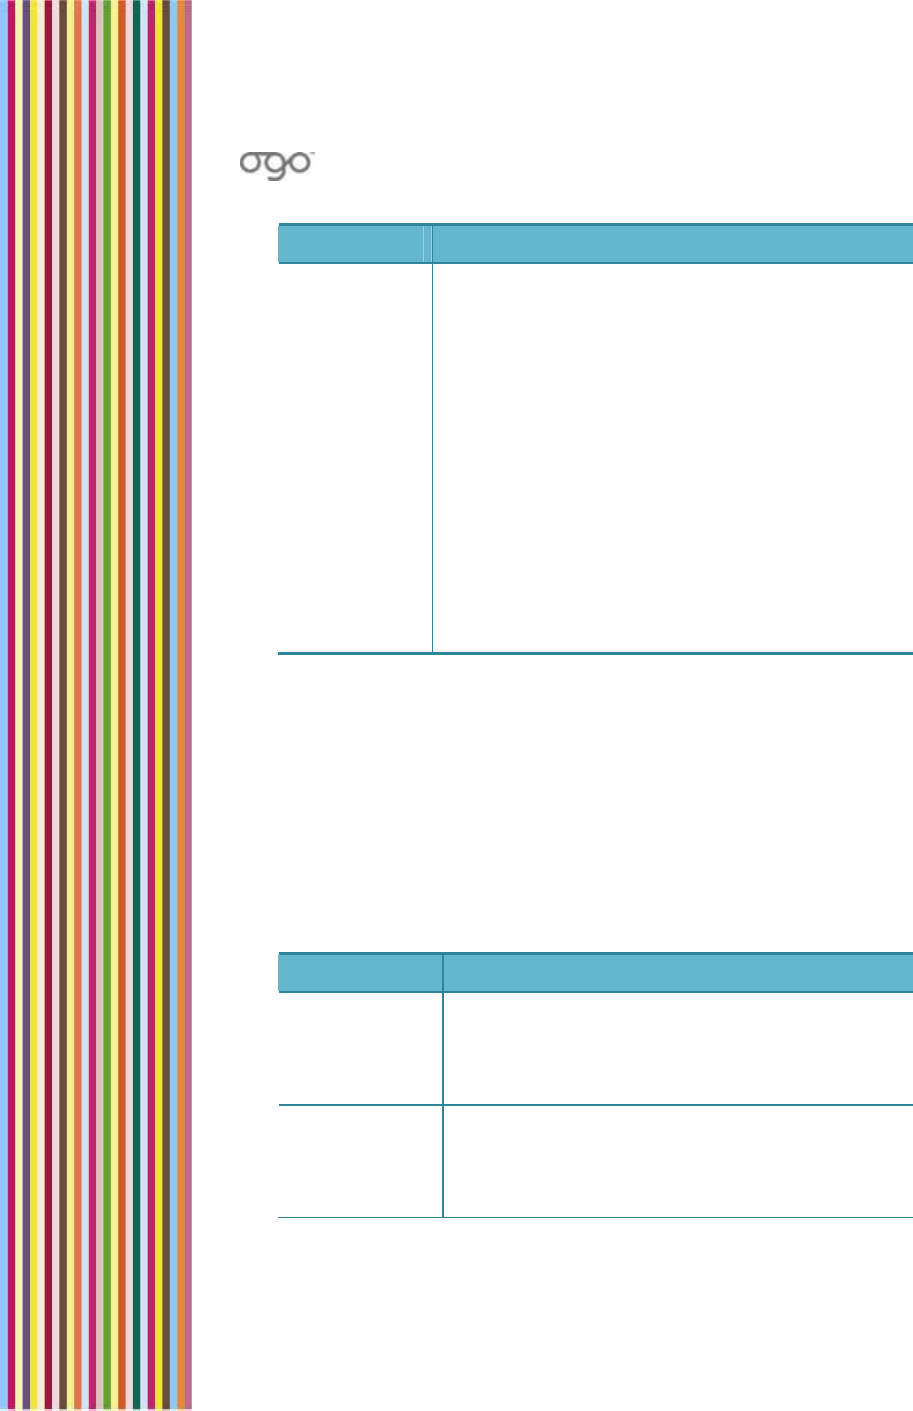
錯誤
!
尚未定義樣式。
錯誤! 尚未定義樣式。 85
Option Description
Local device name.
• My devices: The names of all of the Bluetooth
devices that are paired with the Ogo device.
• Search for devices: An option scans the
airwaves for available Bluetooth devices to
connect to. Select Scan and press Enter; a pop-
up window appears showing that a search is in
progress.
• Temporary visibility: To protect itself from
undesired contacts, the Ogo is normally
"invisible" to random searches. When you wish to
be found, the Ogo must be made "visible" to
the airwaves. Select Enable and press Enter; a
pop-up window appears informing you that
your Ogo will be temporarily visible for 1 minute.
Setting Your Calendar Preferences
The settings configured in the Calendar tab determine how your
calendar is displayed and managed on your Ogo device.
► To set your calendar preferences:
1 In the Settings screen, select the Calendar tab.
2 Edit one or more of the calendar settings, as required. The
calendar settings are described in Table 19.
Table 19: Calendar Settings
Option Description
Default view The default time resolution for viewing your
calendar (Day, Week, or Month).
Press Enter and select the desired period from
the pop-up menu.
Default day
view The default view for viewing a day in the
calendar (Detailed, Summary, or Last viewed).
Press Enter and select the desired period from
the pop-up menu.
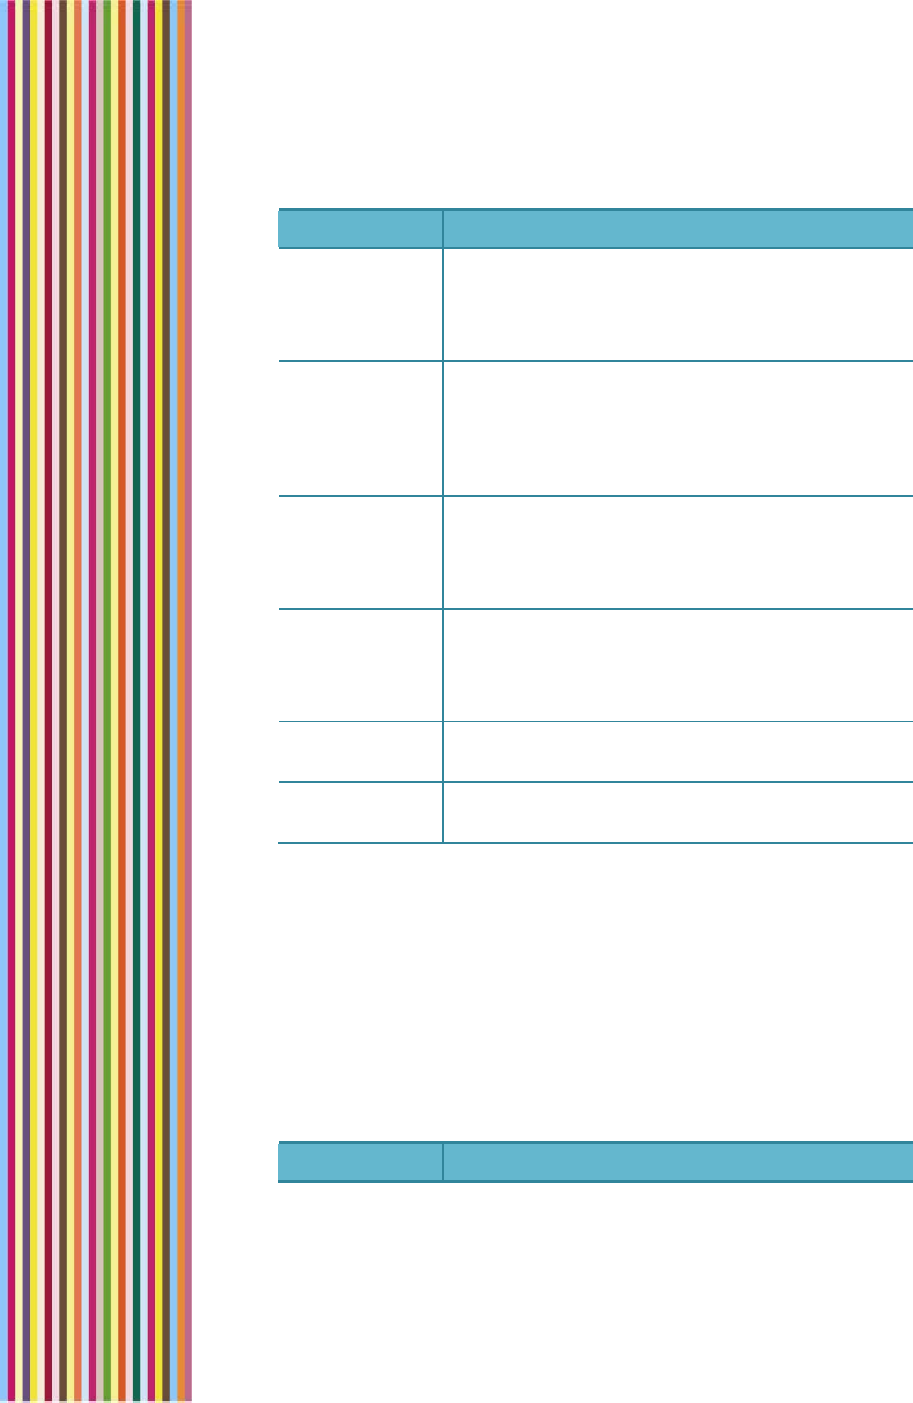
OGO 2 User Manual
86 錯誤! 尚未定義樣式。
Option Description
Default
reminder The default time (in minutes) in advance to be
reminded of an upcoming appointment.
Press Enter and select the desired time interval
from the pop-up menu.
Work week The standard work week settings, including the
starting and ending hours and the first day of
the week.
Select Open and press Enter to display the Work
week screen.
Default
snooze period The default time (in minutes) after which a
repeat reminder is displayed.
Press Enter and select the desired time interval
from the pop-up menu.
Delete items
older than The time interval after which items are to be
removed from the calendar.
Press Enter and select the desired time interval
from the pop-up menu.
Delete
confirmation Displays a confirmation message before
deleting an appointment from the calendar.
Tooltips in
week view Displays tooltips when an appointment is
selected in week view.
Setting Your Sounds Preferences
The settings configured in the Sound tab enable you to determine the
sounds made by your Ogo in various situations.
► To set your sounds preferences:
1 In the Settings screen, select the Sounds tab.
2 Edit one or more of the sound settings, as required. The Sounds
settings are described in Table 20.
Table 20: Sounds Settings
Option Description
錯誤
!
尚未定義樣式。
錯誤! 尚未定義樣式。 87
Option Description
Ringtones Enables you to set the volume of the ringtone
played to indicate an incoming call.
Adjust the volume by moving the indicator on
the slider using the left and right button on the
8-way selection key.
System
sounds Enables you to set the volume of the sounds
played to indicate various system events.
Adjust the volume by moving the indicator on
the slider using the left and right button on the
8-way selection key.
Alerts Enables you to set the volume of the sounds
played to indicate an alert.
Adjust the volume by moving the indicator on
the slider using the left and right button on the
8-way selection key.
Silent Mutes all of the device sounds (ringtones,
system sounds and alert).
Vibration Activates vibration to alert you to when a
contact comes online or a new message is
received.
Key tones Turns on/off the sound made when Ogo keys
are pressed.
Alerticon
sounds Turns on/off the sounds associated with
alerticons.
Message
events Turns on/off the sounds made when messages
are received.
Presence
events Turns on/off the sounds made when IM contacts
sign on.
System
sounds Turns on/off the sounds made when you power
on/off, or open/close the device.
OGO 2 User Manual
88 錯誤! 尚未定義樣式。
Setting the Time and Date
When your Ogo is powered on, it automatically synchronizes with the
current time from your carrier’s network. If for some reason the
network is not available, you can set the time and date manually
using the settings on the Time & Date tab.
Note: If your network does not provide the time and date, these
settings are lost if you remove the battery.
► To set your time and date preferences:
1 In the Settings screen, select the Time and Date tab.
2 Edit one or more of the time and date settings, as required. The
time and date settings are described in Table 21.
Table 21: Time and Date Settings
Option Description
Device time The time as it is currently set on your Ogo.
Network time The current time and date on the network
Use network
time Displays the network time as the default time
on your Ogo.
Set Time & Date Enables you to manually set the time and date.
Select Open and press Enter to display the Set
Time & Date screen. Insert the date and time,
and select Done.
Note: Manually setting the time and date stops
automatic updates.
Time format Determines the format for displaying time on
your Ogo (24H or AM/PM).
Press Enter and select the desired time format
from the pop-up menu.
Date format Determines the format for displaying dates on
your Ogo (DD/MM/YY or MM/DD/YY).
Press Enter and select the desired date format
from the pop-up menu.
錯誤
!
尚未定義樣式。
錯誤! 尚未定義樣式。 89
Setting Your Network Preferences
The settings configured in the Network tab are typically used by your
cellular operator for troubleshooting.
► To set your network preferences:
1 In the Settings screen, select the Network tab.
2 Edit one or more of the network settings, as required. The network
settings are described in Table 22.
Table 22: Network Settings
Option Description
Active
network The name of the active network.
Network
selection The mode for selecting the active network (Auto
or Manual).
Scan for
networks Scans for available networks. This option is
enabled manual selection only.
Messaging
center The phone number of the messaging center to
be called to retrieve your voice mail (if
supported by your cellular carrier).
Edit SMSC
number The number of the messaging center for SMS
services.
Select Edit and press Enter to display the Edit
SMSC number screen. Insert/edit the number
and select Done.
GPRS
configuration The GPRS settings, including APN,
authentication, user and password.
Select Edit and press Enter to display the GPRS
configuration screen. Configure the settings and
select Done.
GPRS status The status of your GPRS connection
(Connected, Not connected, Connection
denied, Paused, or Not available).
OGO 2 User Manual
90 錯誤! 尚未定義樣式。
Option Description
Data counters Enables you to view the cumulative volume of
incoming and outgoing bytes. You can
manually reset these counters.
Select Open and press Enter to display the Data
counters screen. To reset the counters, select
Reset and press Enter.
Viewing Your System Settings
The System tab displays the current capacities and identifying
characteristics of your Ogo.
► To view your system preferences:
In the Settings screen, select the System tab. The system settings
are described in Table 23.
Table 23: System Settings
Option Description
Contacts The number of existing contact records; the
number of contact records available for future
use.
Software The version number of the software on your Ogo
(for example, v3.0_PRO (20121).
IMSI The unique identifier of the SIM card.
IMEI The unique identifier of the device.
Battery The battery level, as a percentage of total
battery capacity.
Check for
updates Enables you to manually check for available
software updates for your Ogo.
Select Check and press Enter.

錯誤
!
尚未定義樣式。
錯誤! 尚未定義樣式。 91
Important Safety Information
Radio Frequency (RF) Energy
When your device is powered on, it receives and transmits RF energy.
While this device complies with U.S. regulatory requirements
concerning exposure of human beings to RF energy, you always want
to minimize exposure. To minimize your exposure to this RF energy,
follow these procedures:
Use only the antenna supplied with the device or an approved
replacement.
For body-worn operation, place the device in a supplied or
approved clip, holder, holster, case, etc.
Use AT&T Wireless-approved accessories.
For more information on RF, see www.fda.gov/cellphones.
RF Interference/Compatibility
In some instances, your device will cause interference with other
electronic devices. Here are a few rules to follow:
Power off your device in any facility or area, such as hospitals or in
blasting areas, where posted notices instruct you to do so. This
includes notices saying, “Turn off two-way radio.”
Follow instructions from airline crew for use of this device on an
airplane.
If you use a pacemaker, hearing aid or other medical device that
may be affected by RF, consult your health care provider or the
manufacturer’s recommendations before using this device.
Generally, they recommend that you hold a device that is ON
more than six inches from the pacemaker and do not carry it in
your breast pocket.
Check your vehicle owner’s manual or your dealer to be sure that
you can use this device in your vehicle and it will not interfere with
any of your vehicle’s electronic systems. For any equipment added
to your vehicle, check with the equipment manufacturer or where
you purchased it.

OGO 2 User Manual
92 錯誤! 尚未定義樣式。
Potentially Explosive Atmospheres
In rare cases, your device can emit a spark that could cause an
explosion or fire. To minimize this risk, do the following:
Do not use your device and do not remove, replace, or charge
batteries when you are in an area with a potentially explosive
atmosphere. Such areas are not always marked and include
fueling areas like gas stations, below deck on boats, fuel or
chemical transfer or storage facilities, vehicles using LP gas, or
areas where the air contains chemicals or particles such as grain,
dust, or metal powders.
Do not transport or store flammable gas, liquids, or explosives in
your vehicle, especially if you plan to use your device.
Using Device Safely While Driving
Note to Parents: Review this section with your child and establish
guidelines for their use of this device when they are driving.
Using your device while driving can distract you and could result in an
accident.
Consider your alternatives:
Let the device receive your messages and then respond to them
at your convenience.
Ask a passenger to view your messages.
Pull off road and park in a safe location before using device.
Accessories
Only use AT&T Wireless-approved accessories. Using unapproved
accessories may cause the device to malfunction, resulting in
property damage or injury.
Batteries and Battery Chargers
Lithium ion batteries can become very hot and cause serious injury or
property damage if the battery terminals touch metal objects, such
as jewelry, keys, coins, or chains.

錯誤
!
尚未定義樣式。
錯誤! 尚未定義樣式。 93
Be careful when putting a charged battery that is separated from the
device inside a pocket, purse, or other container that may have
metal objects.
Follow all safety information on the battery. Do not puncture battery
or place battery or device in a fire. Dispose of the battery and device
in accordance with local regulations.
Keep battery away from children.
Only use Ogo-certified batteries and battery chargers. Use of
unapproved batteries and chargers could result in damage to the
battery or charger, and, in extreme circumstances, to a battery
explosion.
Only use the charger indoors and with an acceptable power source.
See Charging the Battery on page 17 for more information on using
the battery charger.
Repetitive Motion Injuries
Your fingers, thumbs, hands, arms, shoulders or neck may start to hurt
if you use this device for messaging for a long time.
To minimize this discomfort, take a 15-minute break for each hour of
device use, and stop for several hours if any part of your body starts to
hurt. If you still have discomfort after stopping for a few hours, see your
doctor.
Caring for Your Device and Charger
Do not allow foreign objects or liquids to get in your device. These
can cause a short and result in fire, electrical shock, or damage to
your device or its battery.
Unplug the charger before cleaning the device or charger. Do not
use liquid or aerosol cleaners or solvents to clean. Use only a dry
cloth.
Place the device and the charger on a stable, level surface so it
doesn’t fall, possibly causing damage or injury. Do not place on or
near a heat source or on an electrical product that produces heat.

OGO 2 User Manual
94 錯誤! 尚未定義樣式。
Device Service
Bring your device, charger, or accessories to the place of purchase or
to an authorized service facility if any of these items have been
dropped or damaged or have been exposed to liquid/water or
extreme heat.
Also, bring it in for service if any of these items become very hot to
the touch or do not operate normally after following the
instructions.
Do not disassemble the device, charger, or any accessories. Doing
so could cause further damage and could void the warranty.
Radio Frequency Signals
A wireless phone operates by sending and receiving Radio Frequency
(RF) signals, and therefore emits low levels of RF energy when the
phone is on. Many studies have been conducted concerning RF
exposure.
Based on these studies, the U.S. Food and Drug Administration (FDA)
has concluded that the available scientific evidence doesn’t show
that any health problems are associated with using wireless devices,
although there is no proof that they’re absolutely safe. Further
scientific research is ongoing, and AT&T Wireless supports this research.
For more information, you can review the FDA’s Consumer Update on
Wireless Phones, which is available from the FDA at 1 888 463-6332.
Additional consumer information on wireless phones and RF safety is
available online at the joint FDA FCC Web site, Cell Phone Facts, at
www.fda.gov/cellphones.
The Federal Communications Commission (FCC) has established
guidelines setting limits for RF exposure from wireless phones (these
limits are called the Specific Absorption Rate or SAR). AT&T Wireless
sells only those phones and devices that have been certified by the
manufacturers as complying with FCC guidelines. For more
information about FCC guidelines and SAR limits, you can visit the
FCC’s Web site at www.fcc.gov/cellphones or contact the FCC at 1
202 418-2464.

錯誤
!
尚未定義樣式。
錯誤! 尚未定義樣式。 95
FCC Compliance Statement
This device complies with Part 15 of the FCC Rules. Operation is
subject to the following two conditions: (1) this device may not cause
harmful interference, and (2) this device must accept any
interference received, including interference that may cause
undesired operation.
FCC ID: SOW-OGOCT25E
Statement according to FCC part 15.21.
Modifications not expressly approved by CMCS could void the user’s
authority to operate the equipment.
Statement according to FCC part 15.105.
This equipment has been tested and found to comply with the limits
for a Class B digital device, pursuant to Part 15 of the FCC Rules. These
limits are designed to provide reasonable protection against harmful
interference in a residential installation. This equipment generates,
uses and can radiate radio frequency energy and, if not installed and
used in accordance with the instructions, may cause harmful
interference to radio communications. However, there is no
guarantee that interference will not occur in a particular installation. If
this equipment does cause harmful interference to radio or television
reception, which can be determined by turning the equipment off
and on, the user is encouraged to correct the interference by one or
more of the following measures:
Reorient or relocate the receiving antenna.
Increase the separation between the equipment and the receiver.
Connect the equipment into an outlet that is on a circuit different
from the receiver.
Consult the dealer or an experienced radio/TV technician for help.
Battery Safety Precautions
For the safe use of lithium ion batteries always follow the instructions
provided below. Improper handling of lithium ion batteries may result
in injury or damage from electrolyte leakage, heating, ignition, or
explosion.

OGO 2 User Manual
96 錯誤! 尚未定義樣式。
Danger!
Never use the batteries with anything other than the specifically
designed equipment.
Always use the battery charger provided with the device.
Never impact, pierce or crush the battery.
Handle a damaged or leaking battery with extreme care. If you
come in contact with the electrolyte, wash the exposed area with
soap and water. If it contacts the eye, flush the eye with water for
15 minutes and seek medical attention.
When discarding a battery, contact your local waste disposal
provider regarding local restrictions on the disposal or recycling of
batteries.
Never disassemble or modify the battery. The battery contains a
circuit designed to enhance safety. Damaging this circuit may
cause overheating, fire, or bursting.
Never expose or charge a battery under high temperature
conditions, such as near a fire or in the direct sunlight. If the
ambient temperature is too high, the protection circuit may be
actuated, preventing further charging, or damaged.
Never short-circuit the battery by connecting the positive and
negative terminals with a metal material. Do not store or carry the
battery where it could come into contact with metal objects, such
as a key chain or necklace.
Never allow the battery to get wet or to be immersed in water.
Do not place the battery in a microwave oven or high-pressure
container.
Stop charging if the battery is not charged after the prescribed
charge time.
If leakage of the electrolyte occurs, or if there is an offensive odor,
immediately remove the battery from any source of fire or spark.
If you become aware of any abnormal phenomena, such as odor,
discoloration, or deformation, during use, while charging, or when
storing the battery, remove the battery from the device or charger
and stop using it.
In the event the electrolyte comes into contact with the eyes, flush
thoroughly with clean water, without rubbing. Consult with a
physician immediately.

錯誤
!
尚未定義樣式。
錯誤! 尚未定義樣式。 97
RF Exposure
Tests for Specific Absorption Rate (SAR) are conducted using standard
operating positions specified by the FCC with the device transmitting
at its highest certified power level in all tested frequency bands.
Although the SAR is determined at the highest certified power level,
the actual SAR level of the device while operation can be well below
the maximum value. This is because the device is designed to
operate at multiple power levels so as to use only the power required
to reach the network. In general, the closer you are to a wireless base
station antenna, the lower the power output. Before a device model
is available for sale to the public, it must be tested and certified to the
FCC that it does not exceed the limit established by the government-
adopted requirement for safe exposure. The tests are performed in
positions and locations (e.g., at the ear and worn on the body) as
required by the FCC for each model. (Body-worn measurements may
differ among device models, depending upon available accessories
and FCC requirements). While there may be differences between the
SAR levels of various devices and at various positions, they all meet
the government requirement for safe exposure. For body worn
operation, to maintain compliance with FCC RF exposure guidelines,
use only accessories that contain no metallic components and
provide a separation distance of 1.5cm (0.6 inches) to the body. Use
of other accessories may violate FCC RF exposure guidelines and
should be avoided.
Health and Safety Information
Exposure to Radio Frequency (RF) Signals
Your wireless device is a radio transmitter and receiver. It is designed
and manufactured not to exceed the emission limits for exposure to
radio frequency (RF) energy set by the Federal Communications
Commission of the U.S. Government. These limits are part of
comprehensive guidelines and establish permitted levels of RF energy
for the general population. The guidelines are based on the safety
standards previously set by both U.S. and international standards
bodies:
American National Standards Institute (ANSI) IEEE. C95.1-1992
National Council on Radiation Protection and Measurement
(NCRP). Report 86.1986.

OGO 2 User Manual
98 錯誤! 尚未定義樣式。
International Commission on Non-Ionizing Radiation Protection
(ICNIRP) 1996.
Ministry of Health (Canada), Safety Code 6. The standards include
a substantial safety margin designed to assure the safety of all
persons, regardless of age and health.
The exposure standard for wireless mobile devices employs a unit of
measurement known as the Specific Absorption Rate, or SAR. The SAR
limit set by the FCC is 1.6W/kg*.
*In the U.S. and Canada, the SAR limit for mobile devices used by the
public is 1.6 watts/kg (W/kg) averaged over one gram of tissue. The
standard incorporates a substantial margin of safety to give
additional protection for the public and to account for any variations.
SAR Information
THIS MODEL DEVICE MEETS THE GOVERNMENT’S REQUIREMENTS FOR
EXPOSURE TO RADIO WAVES.
Your wireless mobile GSM device is a radio transmitter and receiver. It
is designed and manufactured not to exceed the emission limits for
exposure to radio frequency (RF) energy set by the Federal
Communications Commission of the U.S. Government. These limits are
part of comprehensive guidelines and establish permitted levels of RF
energy for the general population. The guidelines are based on the
safety standards previously set by both U.S. and international
standards bodies:
American National Standards Institute (ANSI) IEEE. C95.1-1992.
National Council on Radiation Protection and Measurement
(NCRP). Report 86.1986.
International Commission on Non-Ionizing Radiation Protection
(ICNIRP) 1996.
Ministry of Health (Canada), Safety Code 6. The standards include
a substantial safety margin designed to assure the safety of all
persons, regardless of age and health.
The exposure standard for wireless mobile GSM device employs a unit
of measurement known as the Specific Absorption Rate, or SAR. The
SAR limit set by the FCC is 1.6W/kg*.

錯誤
!
尚未定義樣式。
錯誤! 尚未定義樣式。 99
This device was tested for typical body-worn operations. To comply
with FCC RF exposure requirements, a minimum separation distance
of 1.5 cm must be maintained between the user’s body and the
terminal, including the antenna. Third-party belt-clips, holsters, and
similar accessories used by this device should not contain any metallic
components. Body-worn accessories that do not meet these
requirements may not comply with FCC RF exposure requirements
and should be avoided.
The FCC has granted an Equipment Authorization for this model
device with all reported SAR levels evaluated as in compliance with
the FCC RF exposure guidelines. SAR information on this model device
is on file with the FCC and can be found under the Display Grant
section of http://www.fcc.gov/oet/fccid after searching on FCC ID
SOW-OGOCT25E.
Additional information on Specific Absorption Rates (SAR) can be
found on the Cellular Telecommunications and Internet Association
(CTIA) Web site at http://www.devicefacts.net.
*In the U.S. and Canada, the SAR limit for mobile GSM device used by
the public is 1.6 watts/kg (W/kg) averaged over one gram of tissue.
The standard incorporates a substantial margin of safety to give
additional protection for the public and to account for any variations.
Warrantee and Conditions
Please see www.ogo.com for the warranty and conditions for your
Ogo device.