Iconnect 572 802.11a/b/g/n Long-Range USB Adapter Dual-Band 2.4/5 GHz User Manual
Iconnect 802.11a/b/g/n Long-Range USB Adapter Dual-Band 2.4/5 GHz
UserManual.wiki
>
Iconnect
>
572 User Manual
>
User Manual
Contents
1.
User Manual
2.
Users Manual
User Manual
Navigation menu
Upload a User Manual
Namespaces
Wiki Guide
HTML
PDF
Info
Views
User Manual
Discussion / Help
Navigation
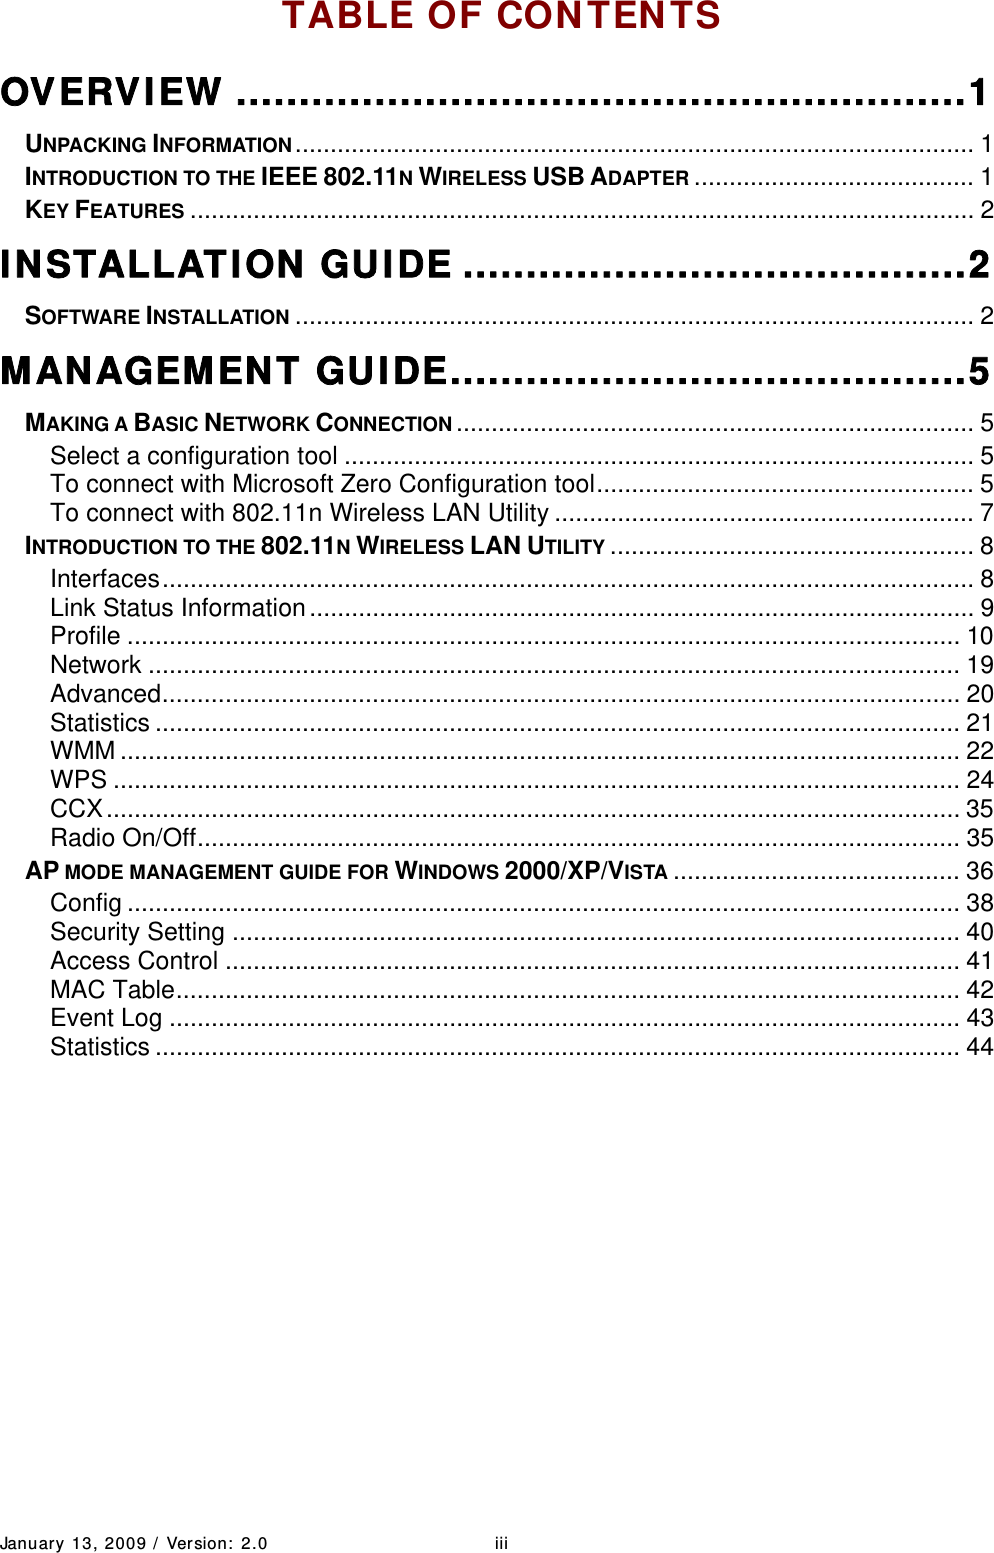
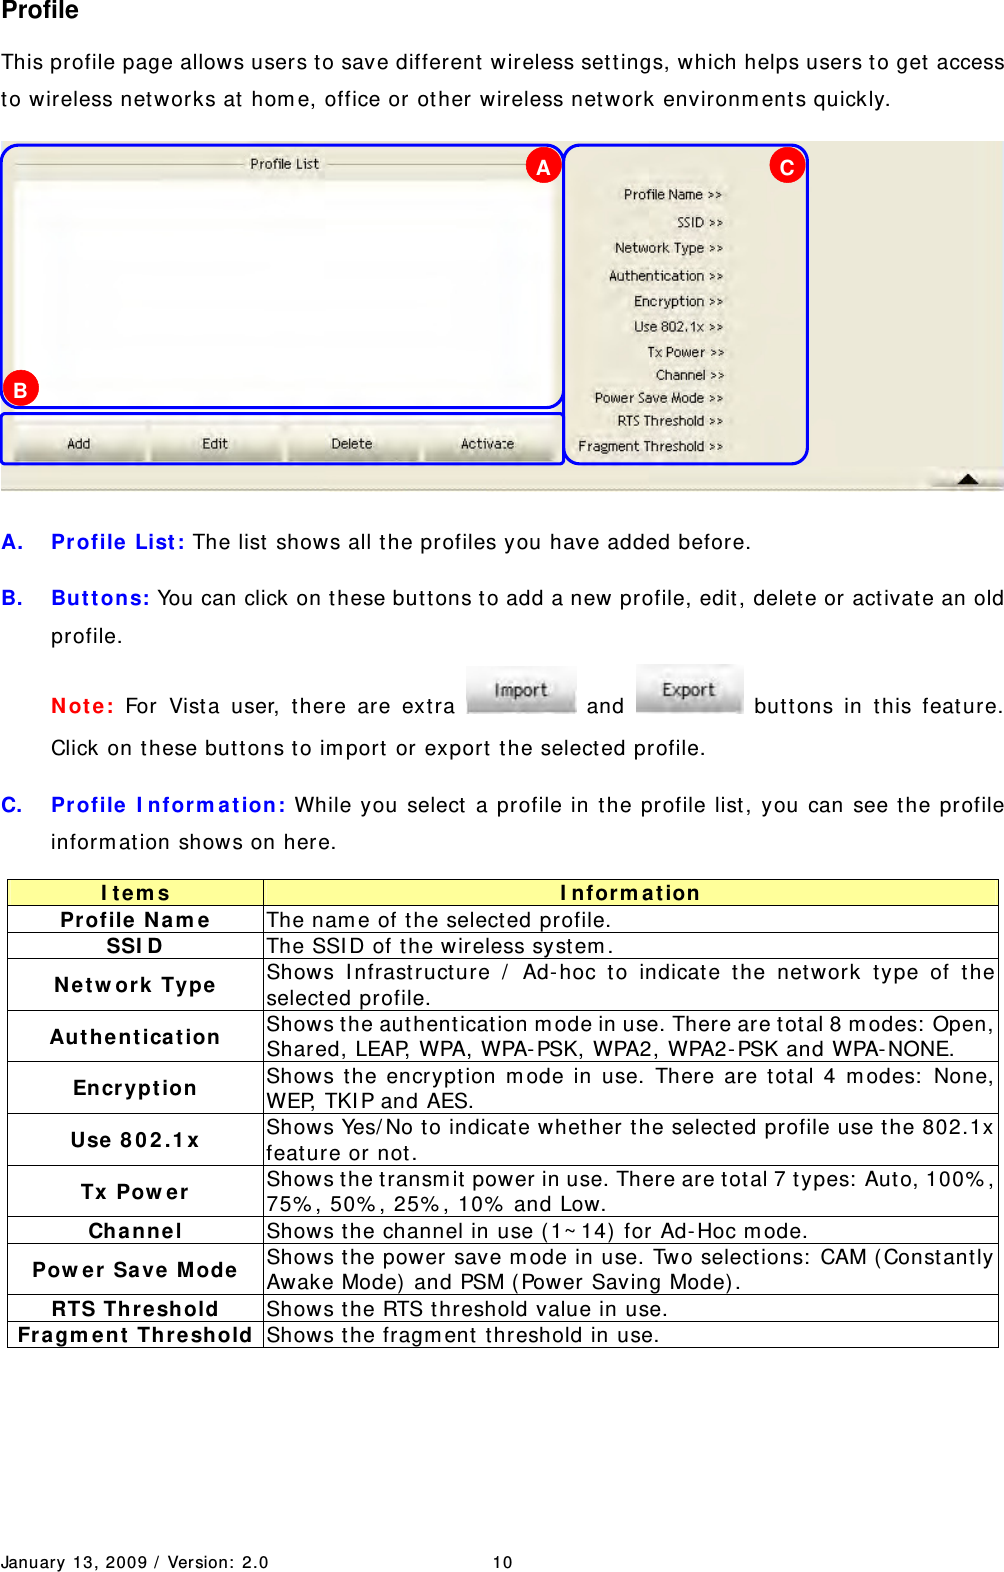

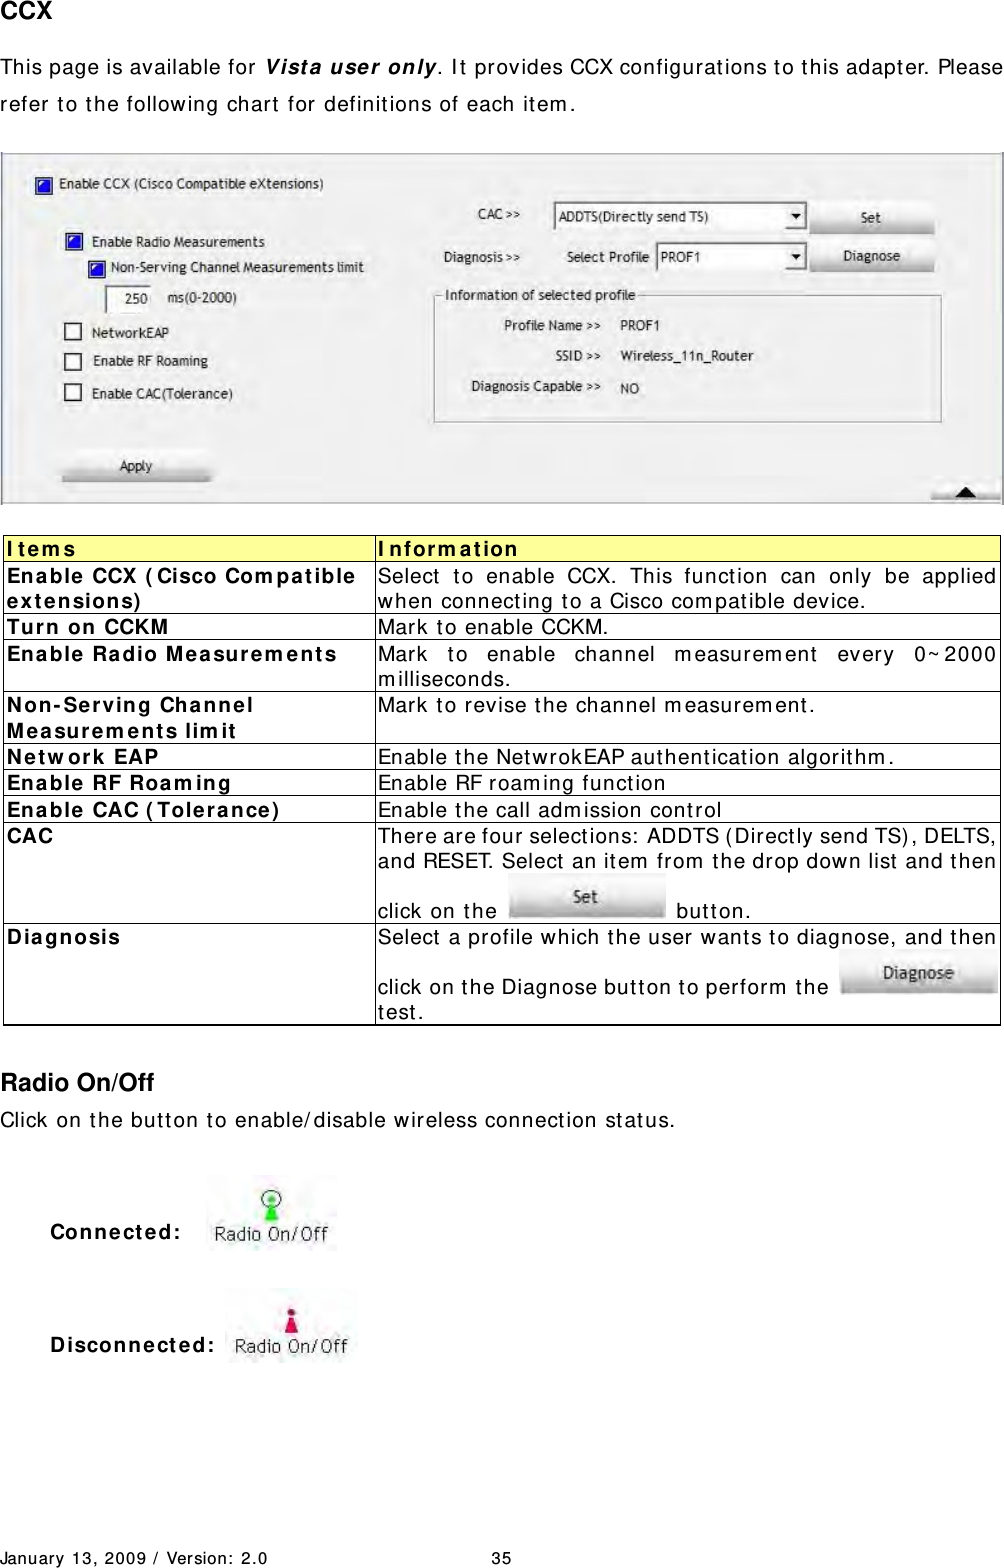
![January 13, 2009 / Ver sion: 2.0 38 Config This page provides overall configurat ion to t his adapt er. Please find t he following item s for ident ification t o each field. 1 . SSI D: AP nam e of user t ype. User also can select [ Use Mac Address] t o display it . 2 . W ire le ss M ode: Select wireless m ode. Only 2.4G is support ed. 1 2 3 4 5 6 789 10 11 12 13 15 14](https://usermanual.wiki/Iconnect/572.User-Manual/User-Guide-2645012-Page-42.png)
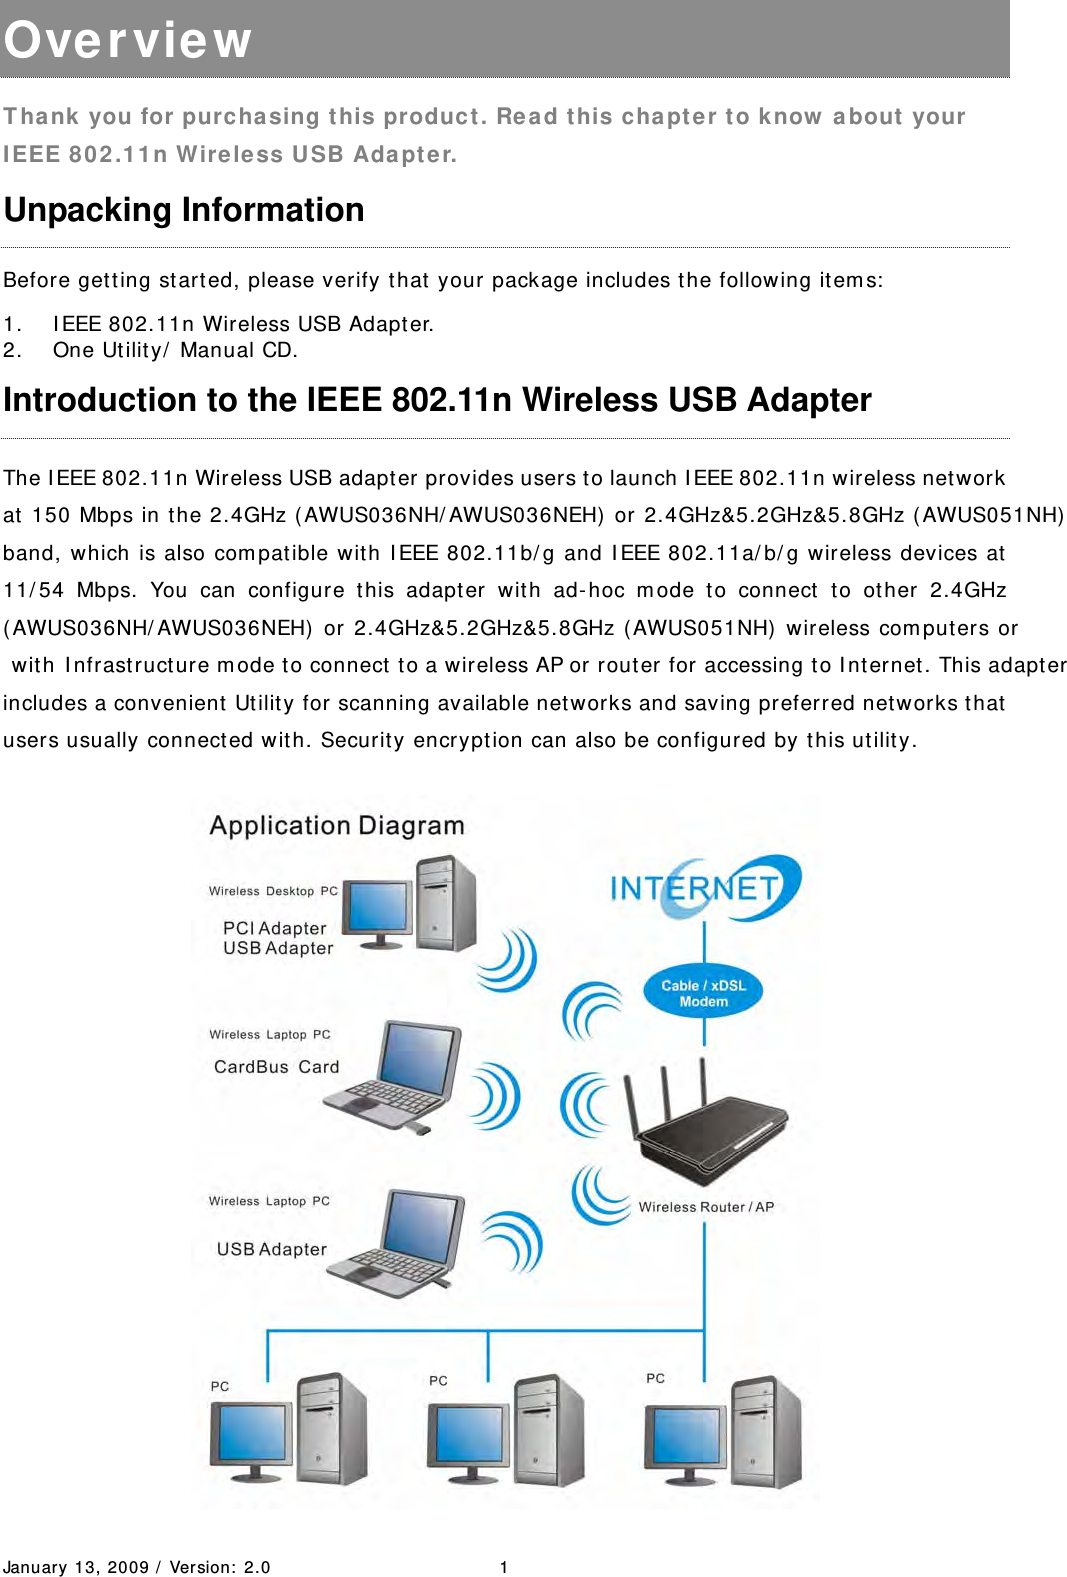
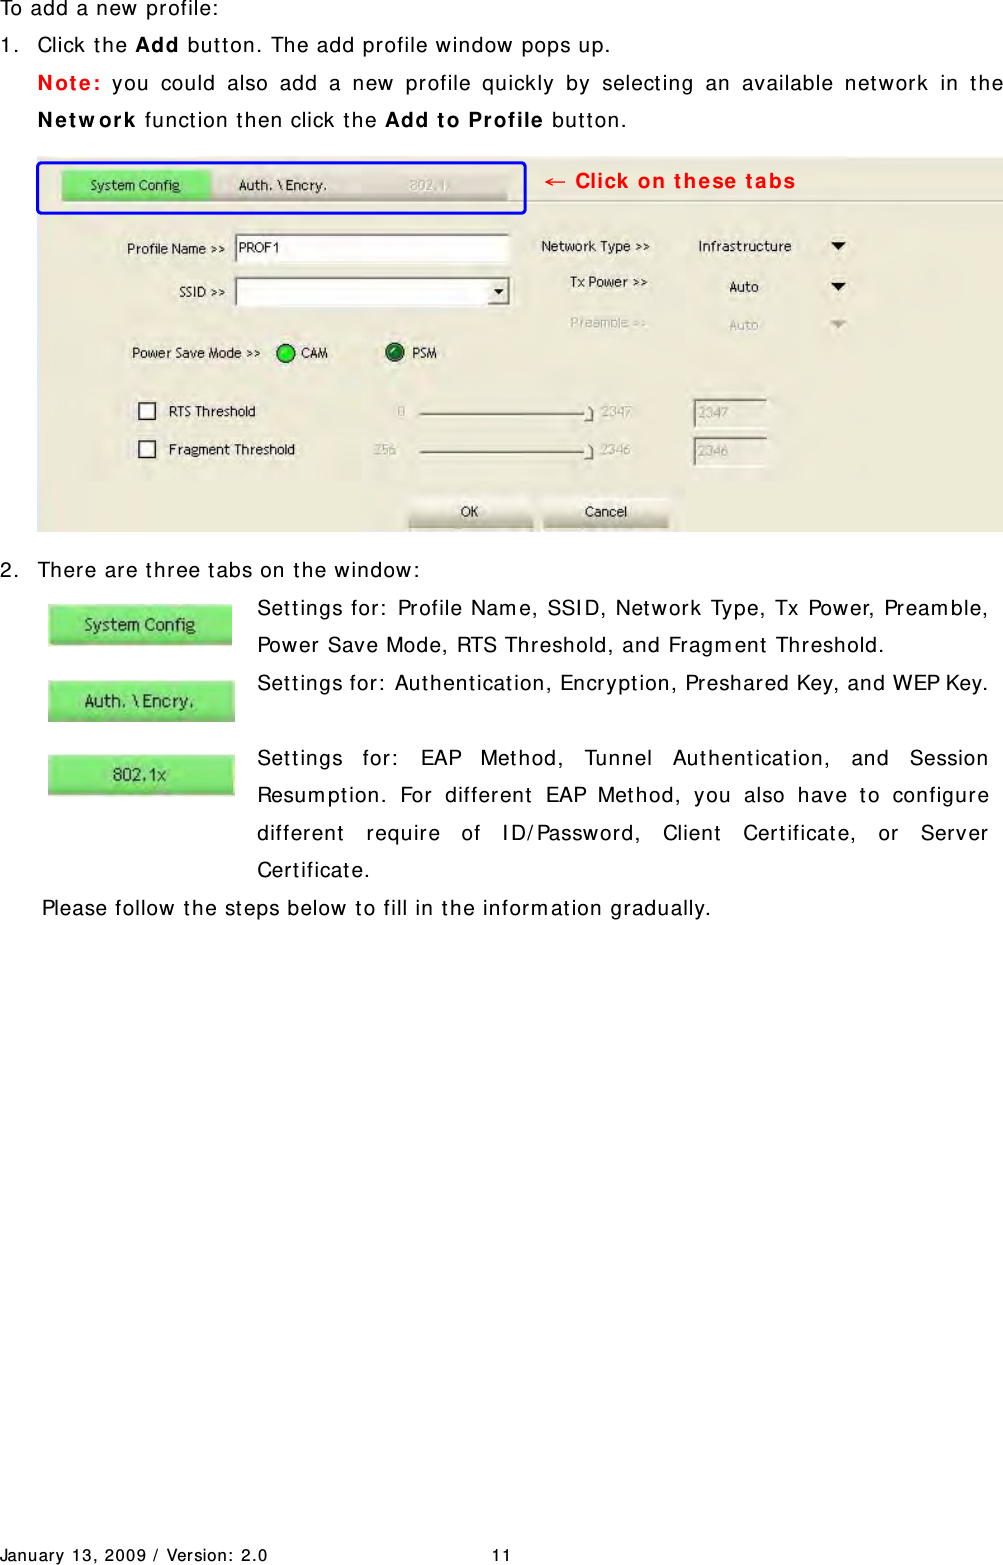
![January 13, 2009 / Ver sion: 2.0 41 Access Control This function filters users t o use this device by designat ing MAC address. Please refer t o the following chart for int roduct ion. 1 . Access Policy: Choose a m et hod to process access cont rol from t he drop list to det erm ine the MAC addresses that you designat ed are allowed to access t he AP or not . 2 . M AC Addr ess: Add allowed ( or denied) MAC addresses t o the MAC address list. 3 . Access List : Display all Mac Addresses t hat you designated. 4 . De le t e: Delet e Mac addresses t hat you selected. 5 . Rem ove All: Rem ove all Mac address in [ Access List] . 6 . Apply: Apply changes. 1 2 34 5 6](https://usermanual.wiki/Iconnect/572.User-Manual/User-Guide-2645012-Page-45.png)