Ingenico I7770BASE Point of sale, base station User Manual users manual
Ingenico Point of sale, base station users manual
Ingenico >
Contents
users manual
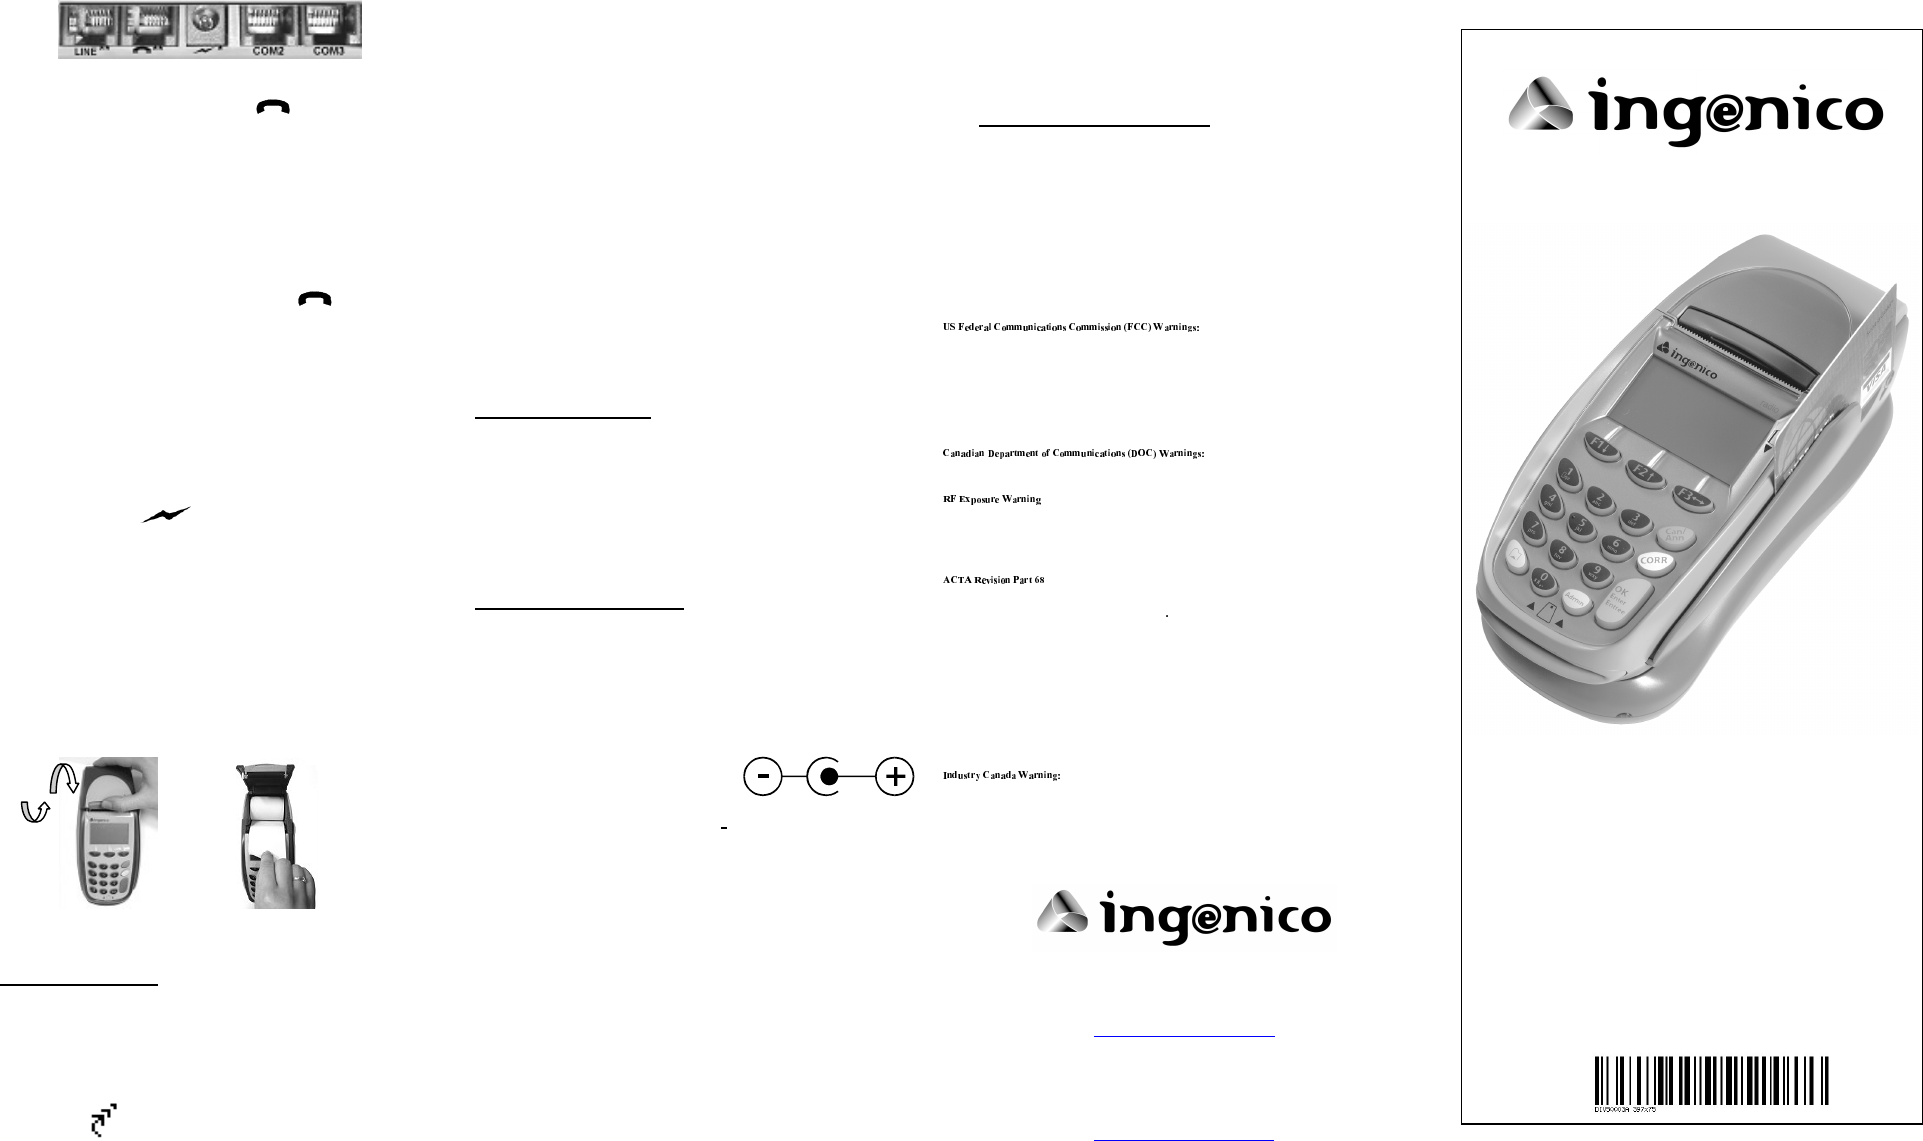
• ',$//,1(DQG3+21(&211(&7,216
The I7770 ports marked /,1( and are identical.
Use either one of these ports to connect the Ingenico
7770 modem to the telephone line: plug the one end of a
telephone cable into the port, and connect the other end
of a cable to a wall telephone jack.
Use remaining port to connect the phone, fax or other
device that will share the same phone line with Ingenico
7770: plug the one end of a telephone cable in the
available Ingenico 7770 port (/,1( or ), and plug
the other end of the cable in a device.
• 3(5,3+(5$/+267&211(&7,21
Turn off the Ingenico 7770 base. Connect the serial cable
to the base port marked &20 or &20. Plug the other
end of the serial cable to the device (PC, check reader
etc.). For detailed instructions, ask the equipment
supplier.
• 32:(5&211(&7,21
Plug the power adapter radial jack into the Ingenico 7770
base port marked . The green light on the front
right hand side of the base indicates the power is on.
Attach the cable securing plate and fix it with a screw.
&KDQJLQJWKHSULQWHUSDSHU
When the red stripe on a paper appears, replace the paper:
Remove the Ingenico 7770 from the base and wait till it
turns off, do not touch the printer parts. Be aware of the
sharp paper cutter.
1. Push the button on the paper compartment cover
toward the back and lift the cover.
2. Remove the empty paper roll and insert the new roll,
the paper protruding from UNDERNEATH the roll.
3. To close the cover, press it until it snaps. Press the
“Paper feed” key to verify that paper feeds properly.
1RUPDO2SHUDWLRQ
To extend the battery life, the Ingenico 7770hand held
terminal goes into a stand-by mode when it is not on its
base. To quickly power on the hand held terminal:
• Press the green <ENTER> key, or
• Place the hand held briefly on the base.
The symbol in the upper left hand corner of the
screen indicates that the hand held terminal is assigned to
its base and it is in the range (the search phase typically lasts
less than 10s).
The message -5$1*(- appears when the radio link
is not available:
• The hand held terminal is out of range.
• The terminal is scanning for the base while initiating
communication.
• The hand held terminal is configured with the wrong
base s/n. Go to the SYSTEM MENU, select the
“RADIO CONFIG” and run “MOD RADIO PARA”.
• The radio base is not powered up.
The message -%86<- appears when the hand held
terminal tries to connect to a base while it communicates
with another terminal. Wait until the base becomes available.
The message )8// appears when the maximum number
of terminals configured for a base is exceeded.
Remove the extra terminals from the network, power off the
radio base and turn it back on to reinitialize.
&OHDQLQJSURFHGXUH
The Ingenico 7770 must be off for all cleaning operations.
Do not clean the I7770 with water but with a dry or only
slightly damp cloth. Do not use solvent, detergent or abrasive
products. If the terminal has the battery recharging or
communication problems (the message “No tone” is printed
out), clean the golden contact under the terminal with a damp
cloth. Do not scratch or scrape the surface of the contacts.
7HFKQLFDOVSHFLILFDWLRQV
The Ingenico 7770 uses a low power (20dB, ≤100mW) radio
technology with frequency hopping in the 2.45Ghz ISM
band. Ingenico 7770 range is around 100m (open field).
3RZHUVXSSO\
The power adapter is mainly used for charging the internal
battery.
•
INPUT ......................AC 120V 60Hz
• OUTPUT........ DC 18V 0.9A 16.2VA
7KHUPDO3DSHU6SHFLILFDWLRQ
• Single ply thermal sensitive – POS or facsimile grade.
• Basis Weight:
(lb/rm 17 ins. X 22 ins. - 500) --- 14.5 ± 5%
(GSM) --- 55 ± 5%
• Caliper.....................................2.4 ± 0.2 Mils or 60 ± 5 Microns
• Brightness................................................................... Min. 85%
• Smoothness (Bekk Minimum)............................................ 300 s
• Roll Width........................... 2.25 ± 0.020 in (58 mm ± 0.5 mm)
• Roll Diameter ..................................... 2.0 in (51 mm) maximum
• Roll Core ID......................................0.500 in (13 mm) nominal
• Roll Core OD.....................................0.625 in (16 mm) nominal
For the best performance, Ingenico recommends the following
sources/brands:
KANZAKI.............................P300
APPLETON .....................T1012A
KOEHLER..............................K55
Thermal paper should NOT be exposed to vinyl, plastics, adhesives,
shrink-wraps, wet-toner copies or certain carbon papers, office light
UV light, high humidity and temperature (above 65%, 25C) for long
periods of time.
,I\RXH[SHULHQFHSUREOHPV
Call one of the customer service centers listed below:
,Q&DQDGD ,QWKH86$
RBA Inc. Ingenico Inc.
3190 Orlando Drive TotalCARE
Mississauga, Ontario 1101 Mansell Road
L4V 1R5 Atlanta, GA 30076
1-800-387-3938 1–800–435–3014
or (905) 672–1048
This equipment has been tested and found to comply with the limits for a Class A digital device, pursuant to Part 15 of
the FCC Rules. These limits are designed to provide reasonable protection against harmful interference when this
equipment is operated in a commercial environment. This equipment generates, uses, and can radiate radio frequency
energy and, if not installed and used in accordance with the installation guide, may cause harmful interference to radio
communications. Operation of this equipment in a residential area is likely to cause harmful interference in which case
the user will be required to correct the interference at his own expense.
Warning: Changes or modifications not expressly approved by Ingenico could void the user’s authority to operate the
equipment.
This digital apparatus does not exceed the Class A limits for radio noise emissions from the digital apparatus as set out
in the radio interference regulations of the Canadian Department of Communications.
:
To comply with RF exposure requirements the base unit must be installed and operated with a separation distance of 20
cm or more between the device and all person's body (excluding extremities of hands, wrist and feet). The terminal unit
has been tested and meets RF exposure guidelines for hand held operation pursuant to FCC OET Bulletin 65
Supplement C ed. 01-01, IEEE 1528/D1.2 (2003) and Industry Canada RSS-102 (1999). The base and terminal units
must not be co-located or operated in conjunction with any other antenna or transmitter.
This equipment complies with Part 68 of the FCC rules and the requirements adopted by the Administrative Council for
Terminal Attachments (ACTA). On the bottom of this equipment is a label that contains, among other information, a
product identifier in the format US: IN2DT00BI7770 If requested, this number must be provided to the telephone
company.
A plug and jack used to connect this equipment to the premises wiring and telephone network must comply with the
applicable FCC Part 68 rules and requirements adopted by the ACTA.
The Ringer Equivalence Number (REN) is used to determine the number of devices that may be connected to a
telephone line. Excessive RENs on a telephone line may result in the devices not ringing in response to an incoming
call. In most but not all areas, the sum of RENs should not exceed five (5). To be certain of the number of devices that
may be connected to a line, as determined by the total RENs, contact the local telephone company.
If the equipment is causing harm to the telephone network, the telephone company may request that you disconnect the
equipment until the problem is resolved.
If your home has specially wired alarm equipment connected to the telephone line, ensure the installation of this
INGENICO 7770 does not disable your alarm equipment. If you have questions about what will disable alarm
equipment, consult your telephone company or a qualified installer.
NOTICE: This equipment meets the applicable Industry Canada Terminal Equipment Technical Specifications. This is
confirmed by the registration number. The abbreviation, IC, before the registration number signifies that registration
was performed based on a Declaration of Conformity indicating that Industry Canada technical specifications were met.
It does not imply that Industry Canada approved the equipment.
NOTICE: The Ringer Equivalence Number (REN) for this terminal equipment is <0.0>. The REN assigned to each
terminal equipment provides an indication of the maximum number of terminals allowed to be connected to a telephone
interface. The termination on an interface may consist of any combination of devices subject only to the requirement
that the sum of the Ringer Equivalence Numbers of all the devices does not exceed five.
,QJHQLFR,QF
1003 Mansell Road, Atlanta, GA 30076
Tel: (770) 594 – 6000 Fax: (770) 594 – 6003
www.ingenico-us.com
,QJHQLFR&DQDGD/WG
79 Torbarrie Road, Toronto, Ontario, Canada, M3L 1G5
Tel: (416) 245 – 6700 Fax: (416) 245 – 6701
www.ingenico-ca.com
,QJHQLFR
,QVWDOODWLRQ*XLGH
DIV50003A
,QJHQLFRGHVFULSWLRQ
The Ingenico 7770 is a fully self-contained, portable
point of sales electronic payment terminal designed to
process the debit, credit and smart card purchases.
Ingenico 7770 features a new ergonomic design with a
friendly interface: an easy loading high-speed printer, a
graphic display, back lit keyboard and easily accessible
battery (for a fast installation and replacement) with an
intelligent battery charging management. The Ingenico
7770 is environment friendly with a light packaging,
recyclable plastic and non-polluting batteries.
The Ingenico 7770 communicates with the bank through
its base via the telephone network. The hand held
terminal and the base communicate through the 2.45 GHz
radio link, or via direct contact. A network can be set up,
with one base managing up to 7 terminals at the same
time. The base allows connection to various peripherals
through its RS-232 ports.
The I7770 features a secure, multi-application operating
system (UNICAPTTM technology) permitting several
applications to run independently on the same terminal.
The Ingenico 7770 has the following features:
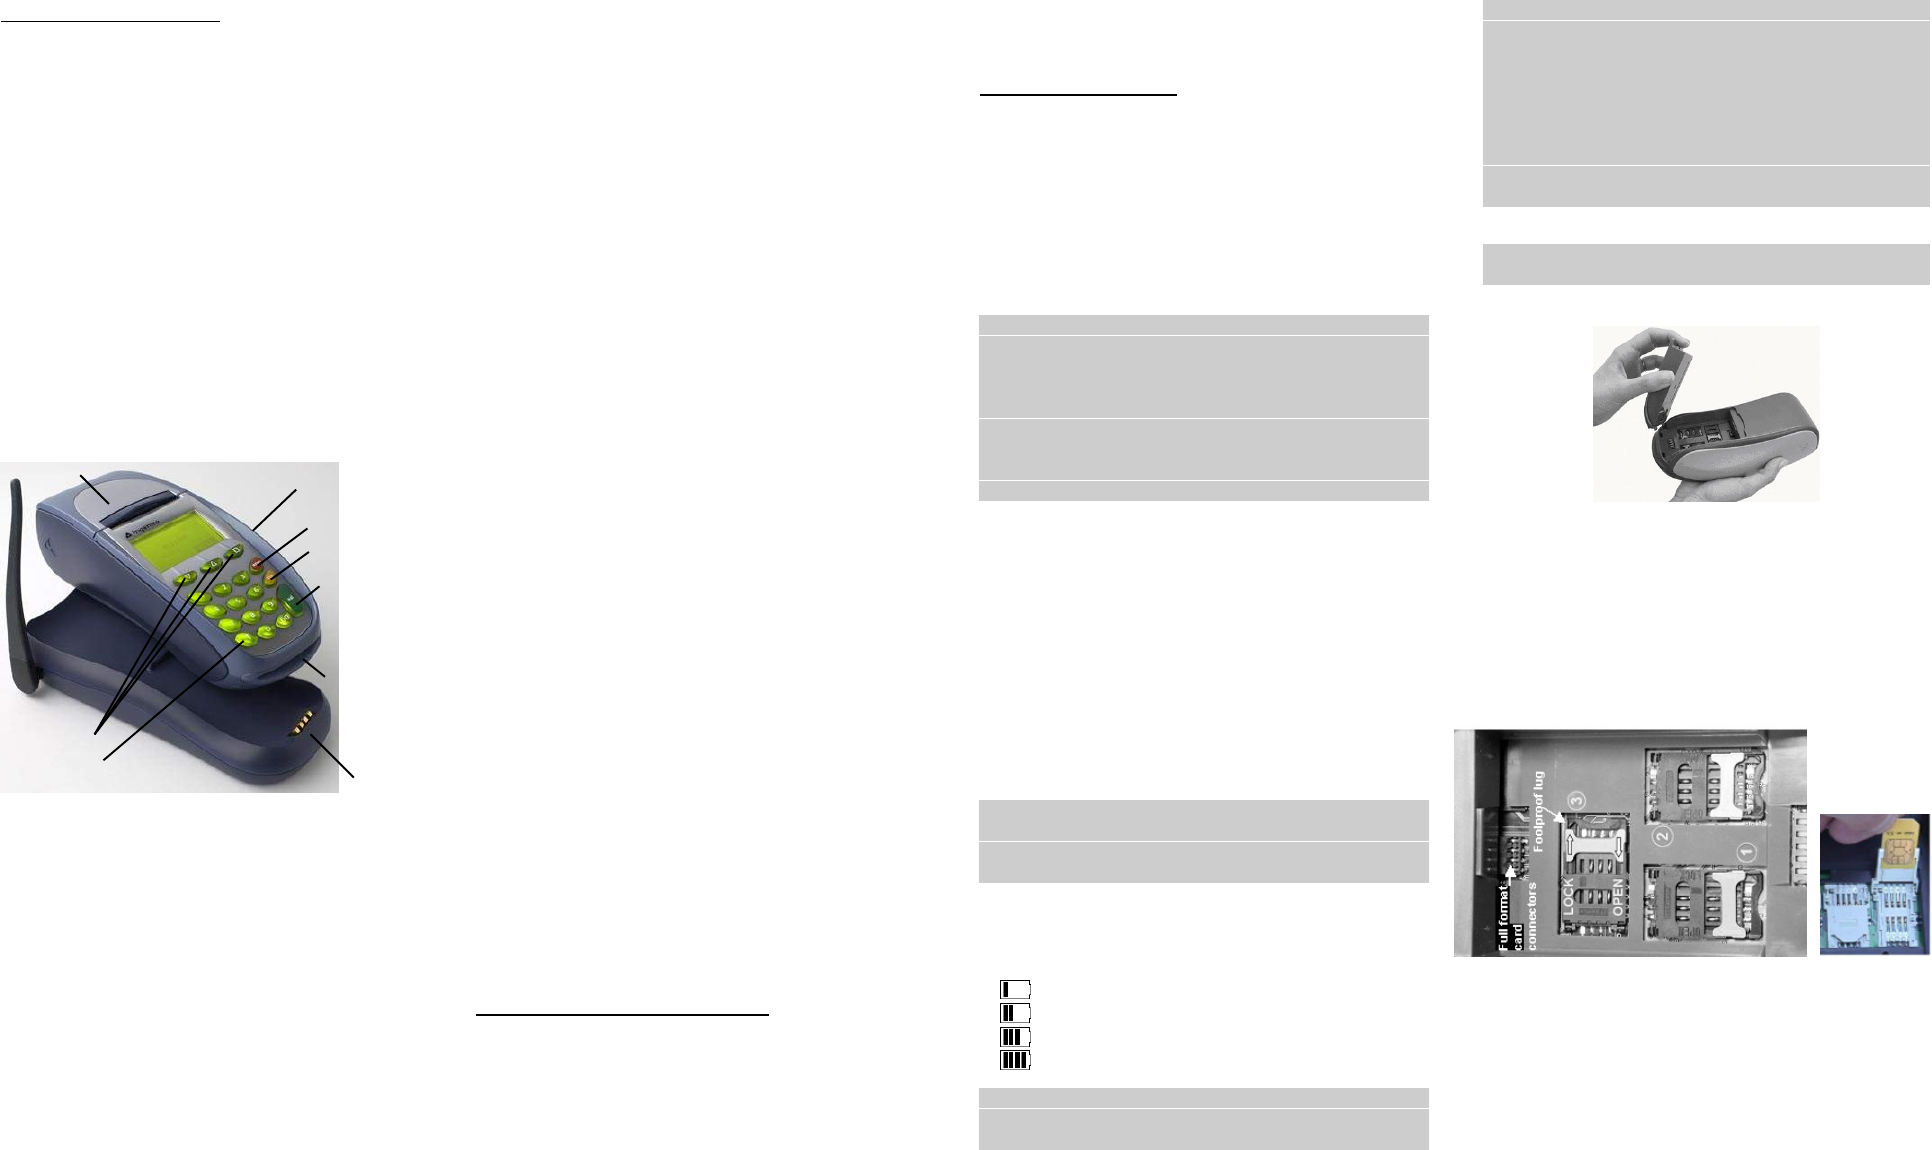
'LVSOD\
A 4 line x 16 character LCD graphic display, with a
back light.
.H\SDG
18 keys, with a back light. The special function keys are:
• Programmable function keys <F1>, <F2> and <F3>
for navigation and access to various Ingenico 7770
functions and the system and application menus.
• Paper Feed key is used for a printer paper feed (20mm)
The green <ENTER> key confirms the data entered or
displayed. It also powers on the Ingenico 7770.
• The red <CAN> key cancels the current function and
returns the terminal to the idle state.
• The yellow <CORR> key corrects invalid data entry.
• Blue <ADMIN> key is used to access the terminal
administration function menu.
0DJQHWLF6WULSH&DUG5HDGHU
I7770 features a bi-directional reader capable of reading
tracks 1 and 2 simultaneously. The reader is located on the
right-hand side of the Ingenico 7770. The card can be swiped
from the bottom to the top, or from the top to the bottom. The
magnetic stripe on the card has to face down and toward the
Ingenico 7770. The card has to be swiped at uniform speed
and pressure, ensuring that the card remains in contact with
the bottom of the track throughout the entire swipe action.
6PDUW&DUG5HDGHU
The smart card reader complies with the ISO 7816,
Sync and Async T=1 & T=0 and is EMV approved.
Insert the smart card horizontally into the slot on the front of
the Ingenico 7770, the microchip facing up, and leave it in
the reader throughout the transaction.
3ULQWHU
The Ingenico 7770 integrates a quiet, high speed, “ easy-load”
style thermal printer with graphics capability.
%DWWHU\
Rechargeable and easily replaceable intelligent Ni-MH
battery pack (optional Lithium-Ion battery available).
6$0&RQQHFWRUV
Three SAM card connectors are located on the bottom of the
Ingenico 7770. The SAM (Secure Access Module)
supports smart card chips necessary for applications
such as loyalty.
)XOO,62)RUPDW&DUG&RQQHFWRU
The full format card is used to identify a merchant. The card
is required for certain applications.
7KH%DVH
The Ingenico 7770 communicates with its base via radio link,
or through the contacts (connect mode) which is useful when
loading large amount of data, or when a radio link is
unavailable.
The base provides recharging system for the intelligent
battery pack, and includes the communication ports:
&20DQG&20
Two RS-232 serial communication links for the customer
applications download and for the communication with the
external peripherals (speed 300 to 115200 bps).
',$//,1(DQG7(/(3+21(3RUWV
The V34 / 33600 bps (asynch. and synchr.) modem that
supports fast connect and busy line detection.
The ports allow sharing of the telephone line with other
devices such as a fax machine or telephone.
,QJHQLFR3DFNDJLQJ&RQWHQW
1. The Ingenico 7770 hand held terminal.
2. The Ingenico 7770 battery pack.
3. Thermal printer paper, one roll.
4. The Ingenico 7770 base (optional, radio or charging).
5. The power supply (optional, with the base only).
6. The phone cable (optional, with the radio base only).
7. The cable securing plate and a screw (optional, with the
base only).
8. This installation guide.
,QVWDOODWLRQSURFHGXUH
Place the Ingenico 7770 base on a clear, flat surface near the
electrical and telephone sockets. The ideal location is in the
center of the zone to be covered with a large open area
around. The antenna is inside, on the left side of the base.
The Ingenico 7770 hand held and the base must be protected
against high temperature, vibrations, dust, damp and
electromagnetic radiation (computer screen, microwave
oven, anti-theft barrier etc.). Equipment such as cordless and
cellular phones can emit harmonics that could disturb the
terminal at 2.45 GHz.
Do not place the base near a great vertical metal plane (doors
of refrigerator, large home appliances, vending machines).
Do not place the base or the terminal closer than 3 m from
any microwave oven in use.
Do not dock the hand held terminal on a metal surface.
Do not put the hand under the printer during communication,
the range is strongly reduced.
If there are several radio bases installed, position them at
least 2 meters from each other.
2SHUDWLQJWHPSHUDWXUH ............................... +5°C to +40°C
+XPLGLW\ ........................20% to 90% without condensation
6WRUDJHWHPSHUDWXUH.................................... -10°C to +60°C
%DWWHU\6HWXSDQG&KDUJLQJ
The Ingenico 7770 is supplied with a removable
rechargeable NiMH (or optional lithium-ion) battery. Only
use the battery pack supplied with your terminal.
Ingenico 7770 battery is built with a circuitry for a battery
charging management. To charge the battery, place it (alone,
or with the terminal) on the Ingenico 7770 base. Ensure the
base is powered up. Note that the battery will recharge only
if necessary. Furthermore, the battery has internal
temperature control so it never exceeds 50°C.
Use the power adapter supplied with the Ingenico 7770.
Many adapters can appear similar and will plug into the
Ingenico 7770 base but will not work properly causing erratic
behavior, poor charging or even damage to the unit.
The Ingenico 7770 with a fully charged battery can execute
up to 200 transactions (depending on the ticket size and
transaction duration).
The Ingenico 7770 displays the battery status:
1 bar represents 25 % of full capacity,
2 bars represent 50 % of full capacity,
3 bars represent 75 % of full capacity,
4 bars represent 100 % of full capacity.
Charge the battery for 3 hours when it is used the first time.
Full charging time after the first time is 2 hours. A new
battery will benefit from an initial "conditioning": for the
first 3 charge cycles, allow the battery to fully discharge and
then charge it to its full capacity.
Do not place the Ingenico 7770 terminal back on its base
after each transaction. Frequent and short battery charging
may damage the battery and reduce its lifetime.
Every one to two months allow the Ingenico 7770 to show
the low battery warning and shuts down. Then charge the
battery to its full capacity. This will prolong the battery life.
Batteries that sit idle for extended periods of time without
charging, will gradually self-discharge.
,QVWDOOLQJWKH%DWWHU\
Leave the Ingenico 7770 handheld terminal off its base and
wait to turn itself off before handling the battery pack.
Hold the battery with the connectors facing downwards, do
not touch the contacts on the battery or Ingenico 7770.
Insert two plastic teeth in the gaps on the Ingenico 7770
case, place the battery in a cavity and press the handle until a
click is heard.
6$0,QVWDOODWLRQ
Wait till the Ingenico 7770 turns off and remove its battery.
Unlock the SAM connector by sliding the metallic latch in
the direction of the OPEN arrow. Lift the SAM cover
upward and insert the chip as shown on the picture below.
Swing the cover down and slide the latch in a lock position
(the LOCK arrow). Put the battery in the Ingenico 7770.
0HUFKDQW&DUG,QVWDOODWLRQ
Remove the battery and slide the card into the housing. Put
the battery pack back in the place.
&RQQHFWLRQV
Turn the Ingenico 7770 base off when connecting
peripherals. The power supply must be connected last, only
after all the other connections are made.
1DYLJDWLRQNH\V
3DSHU&RPSDUWPHQW
&$1&(/.H\
&255.H\
(17(5.H\
%DVHFRQWDFWV
3DSHU)HHG.H\
0655HDGHU
6PDUW&DUG
5HDGHU