Inovonics Wireless 3B6ECNCA Portable Alarm System User Manual 623754 00 DS100
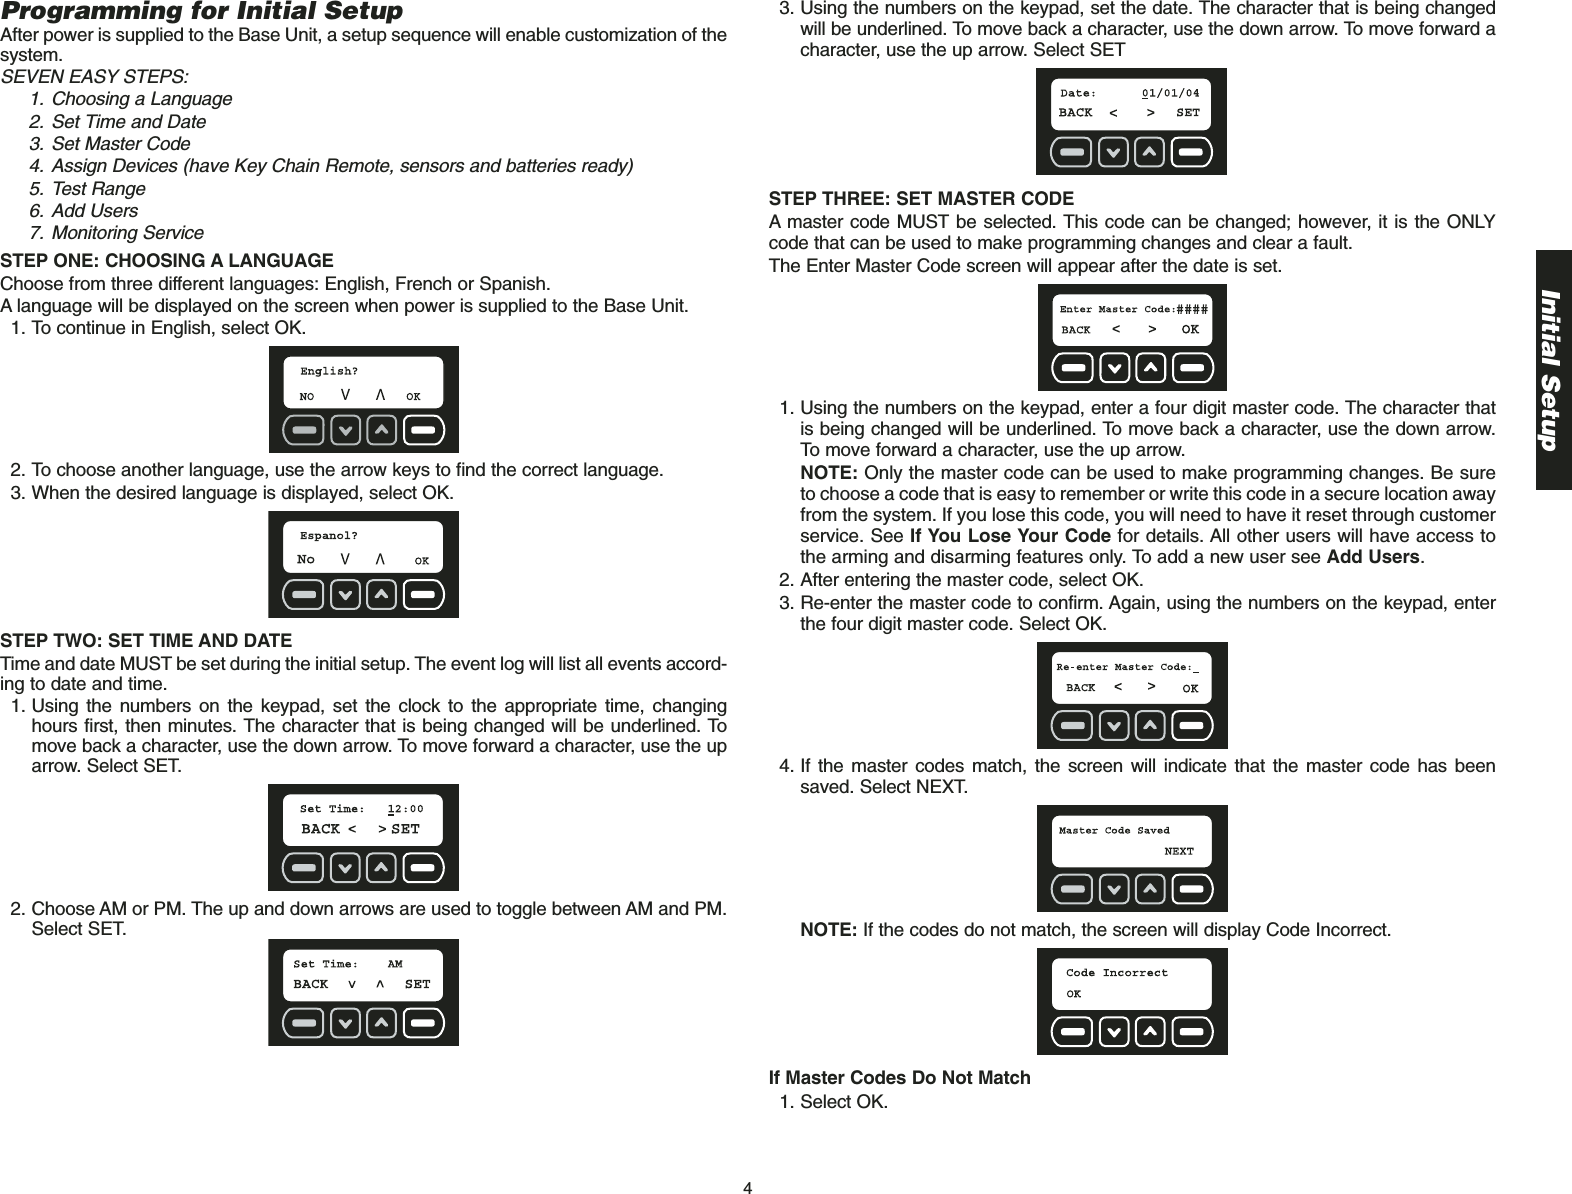
Inovonics Wireless Corporation Portable Alarm System 623754 00 DS100
Contents
- 1. Users Manual Part 1
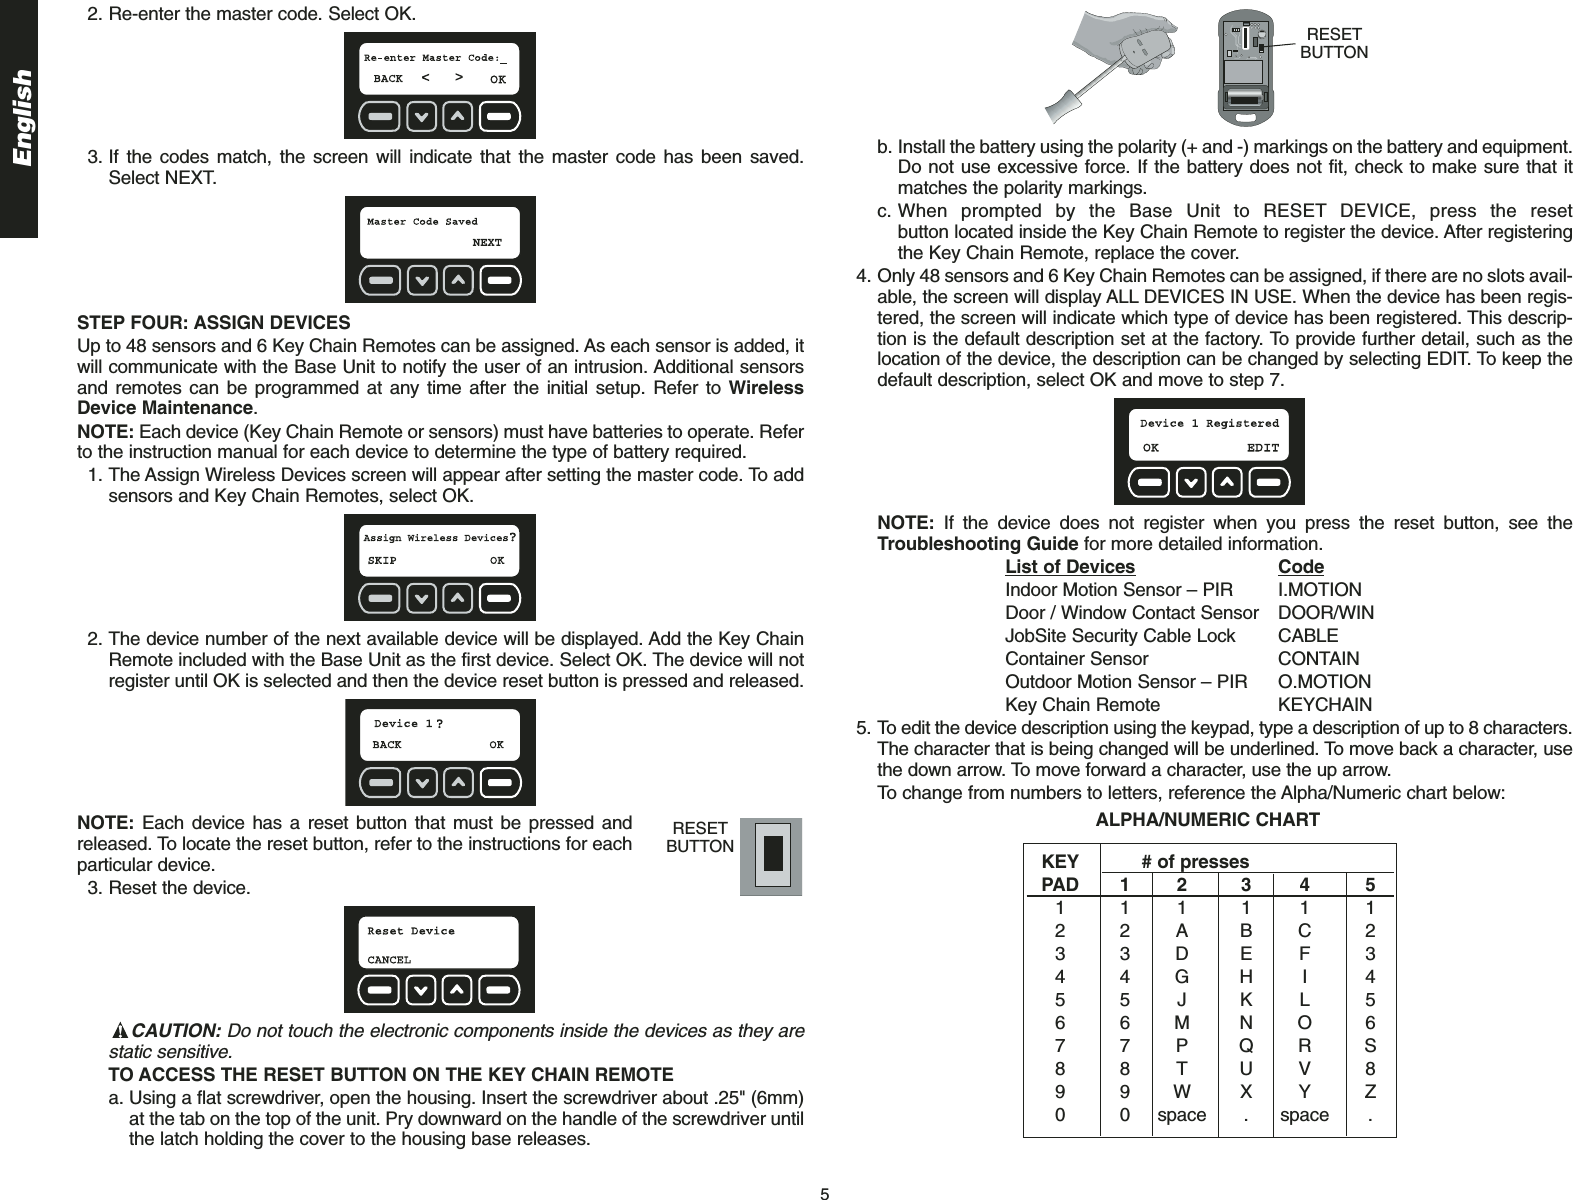
- 2. Users Manual Part 2
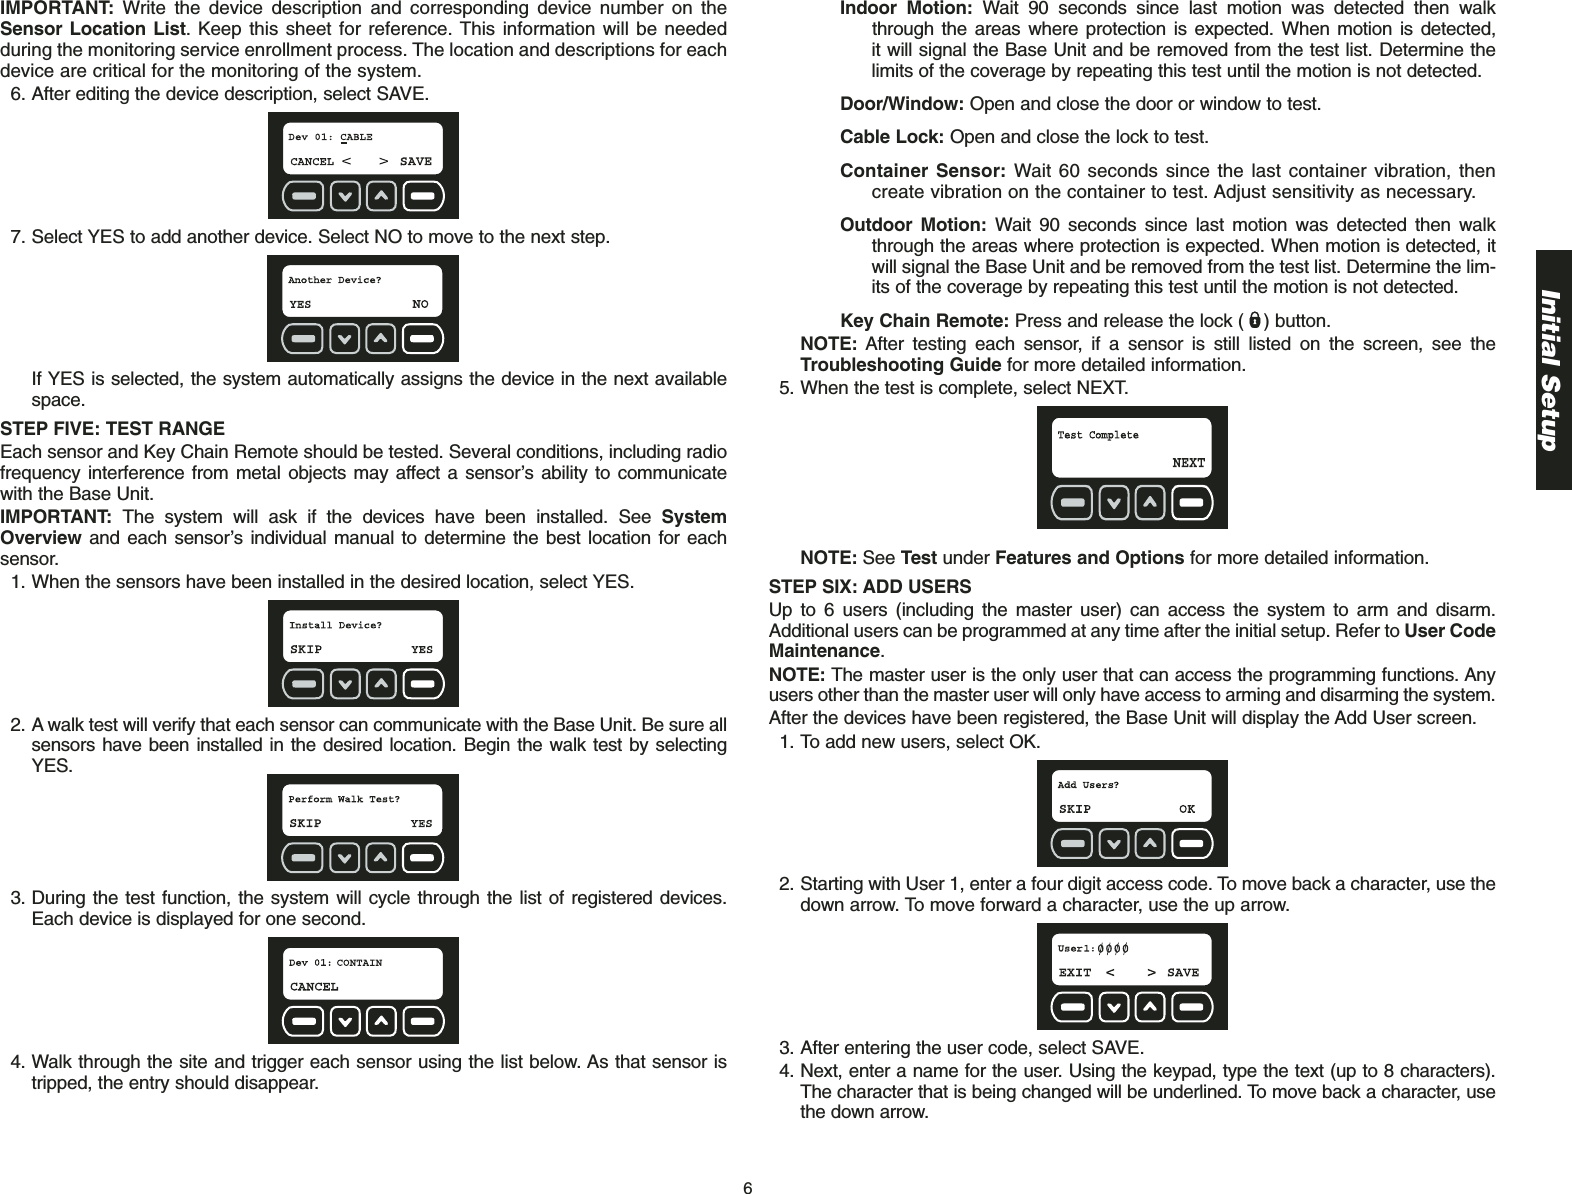
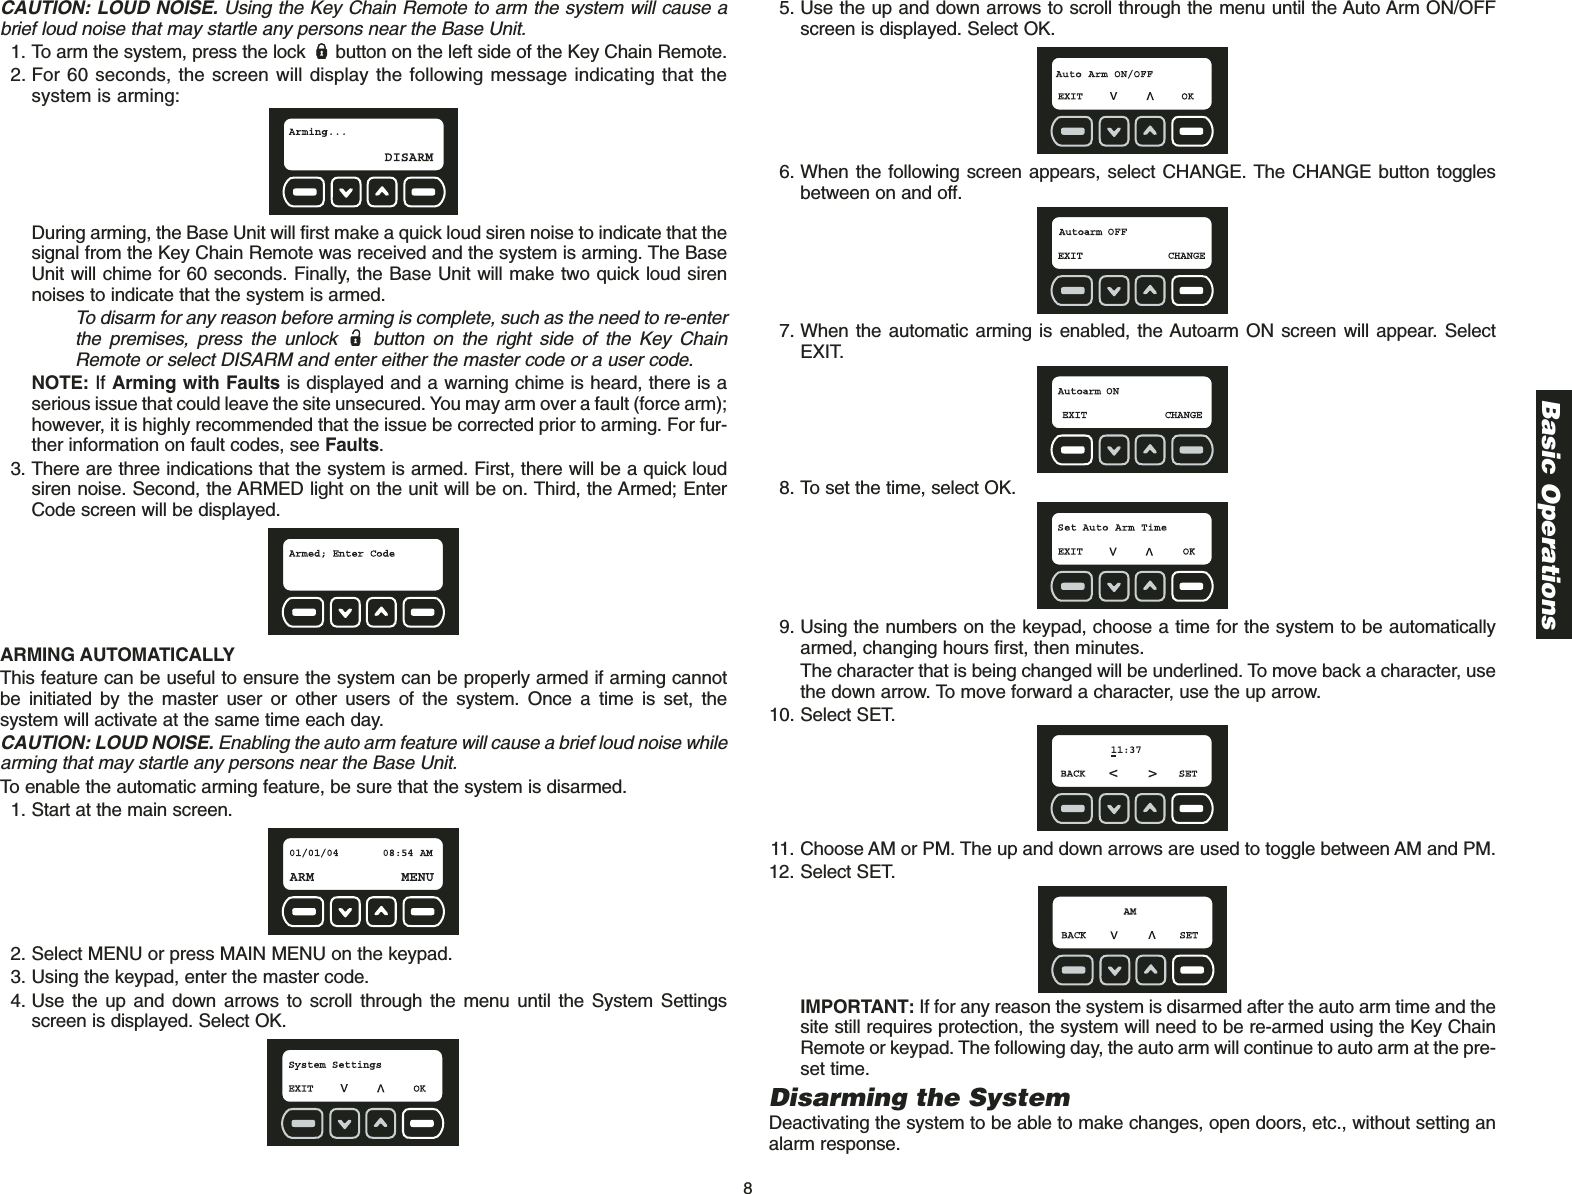
- 3. Users Manual Part 3
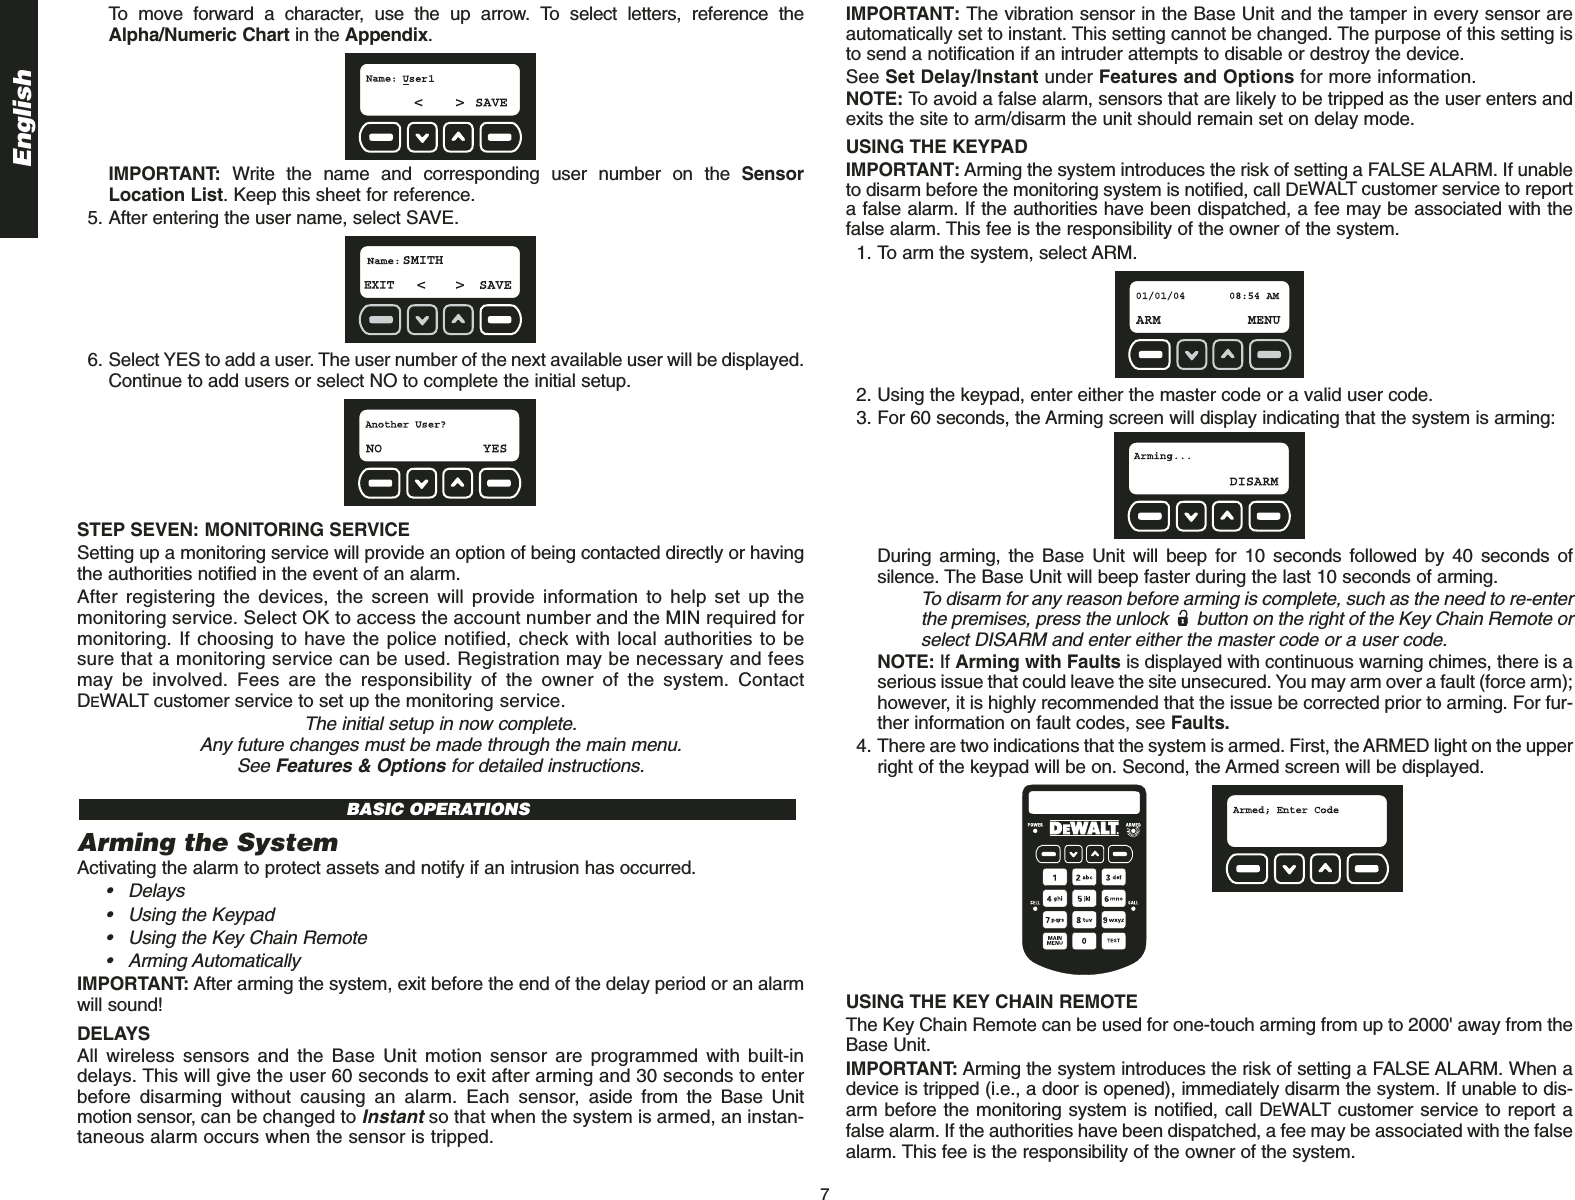
- 4. Users Manual Part 4
- 5. Users Manual Part 5
Users Manual Part 1