IntelliDOT IDOT-001 802.11b radio User Manual
IntelliDOT 802.11b radio
Contents
- 1. Users manual part 1 of 4
- 2. Users manual part 2 of 4
- 3. Users manual part 3 of 4
- 4. Users manual part 4 of 4
Users manual part 3 of 4

P/N TP0001-01 Rev. B Medication Administration DOT Sheet
intelliDOT iConnect System User Guide Confidential 4-37
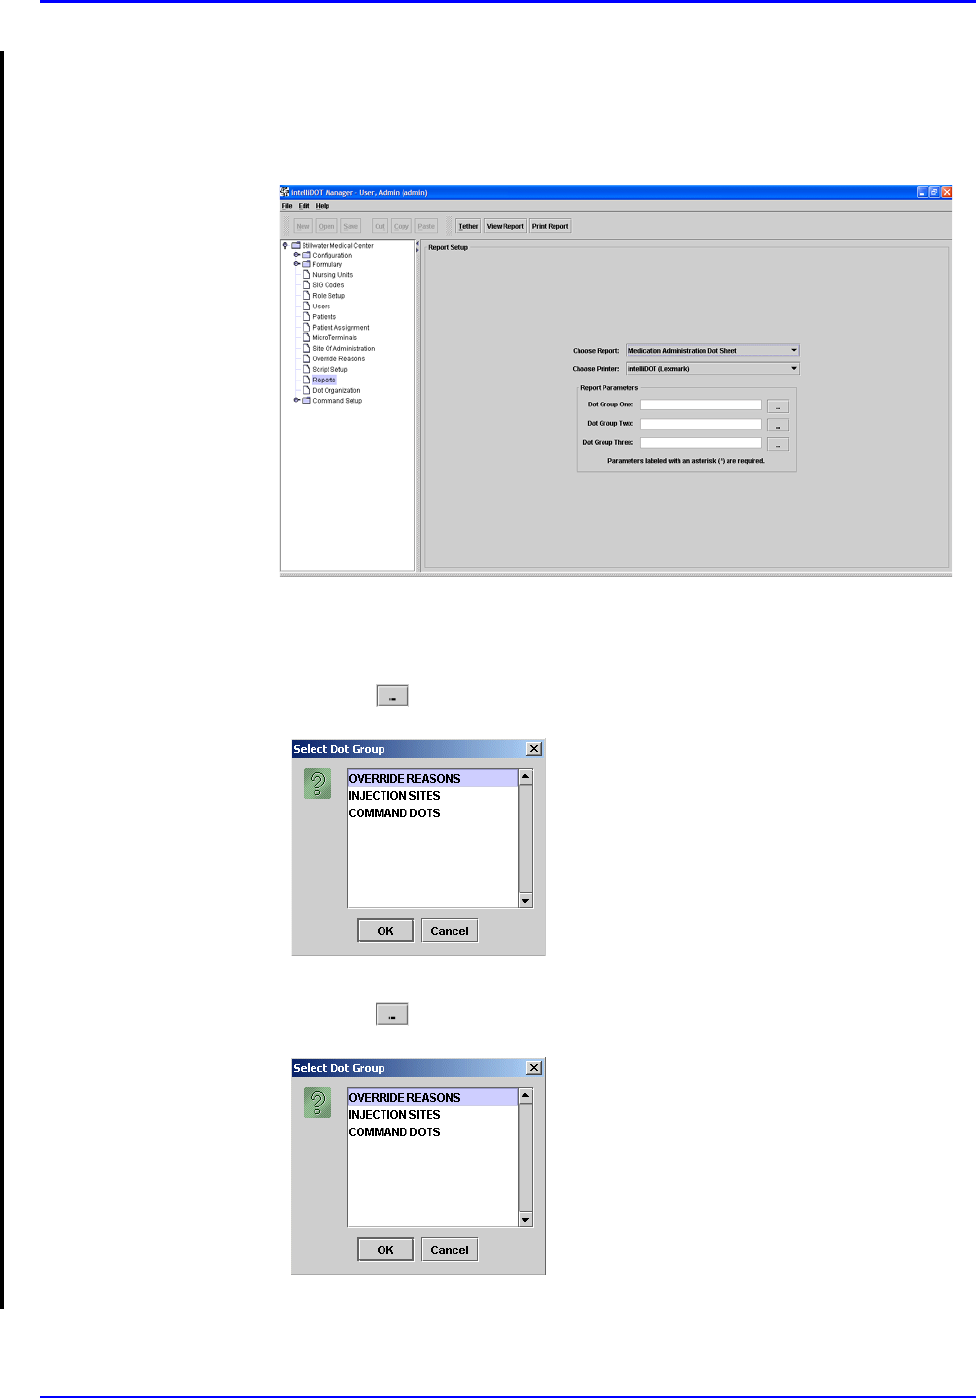
6. Click the button to select Dot Group Two. The Select Dot Group window
appears.
7. Click the Dot Group and click OK.
8. Click the button to select Dot Group Three. The Select Dot Group
window appears.
9. Click the Dot Group and click OK.
10. Click on the View Report button located at the top of the screen. The
following report will appear.
Note: Refer to DOT Organization Setup on page 3-42. The MAR may be printed
with or without DOT groups. DOT groups provides a way to create groups of
DOTs for Override Reasons, Administration Sites, and Command DOTs. If for
example, you need to print a new MAR, select a DOT group from the list. This
will print on your MAR and you can use the iConnect Handheld to scan the
iDOT.

Medication Administration DOT Sheet P/N TP0001-01 Rev. B
4-38 Confidential intelliDOT iConnect System User Guide
Example of a Medication Administration DOT Sheet
Sites
L. UPPER ARM R. LOWER ABD. L. ANTERIOLATERAL
THIGH L. DELTIOD MUSCLE L. VENTRO-GLUTEAL
MUSCLE
L. GLUTEAL-MEDIAL
MUSCLE R. ANTERIOLATERAL
THIGH R. UPPER ARM L. LOWER ABD. R. DELTOID MUSCLE
R. VENTRO-GLUTEAL
MUSCLE L. UPPER ABD. R. GLUTEAL-MEDIAL
MUSCLE INTRAVENOUS
Override Reasons
Patient Preference Pt. Declined Pt. Sleeping Pt. Off Unit Pt. Transferred
Pt. Discharged IV Discontinued IV Infiltrated IV Patency C/O Pain
Increased Pain C/O Nausea Increased Nausea Within Normal Limits VS Warranted
Med. Missing Tx. In Progress Hold Medication NPO Per Protocol
New Order New Schedule New Route Standing Order Stat Order
RX Change Discontinued Abnormal Limits Contraindicated Incompatability
Dialysis In Progress Pending Lab Specimen Collection
Needed S/W Bug
keypad
1 2 3 4 5
6 7 8 9 /
0 # Cancel decimal back
Extra Dots
Cancel All Continue Omit Logout New Order Prep
Cover Patients Previous Next Enter Later Extra Dose
Delay Dose
Medication Administration Dot Sheet
Printed By: User, Admin Page 1 of 1 Printed At: 04/08/2004 13:42
P/N TP0001-01 Rev. B Medication Administration DOT Sheet
intelliDOT iConnect System User Guide Confidential 4-39
Printing your Medication Administration DOT Sheet
To print your Medication Administration DOT sheet, perform the following:
1. After logging into the iConnect DOT Manager, select Reports. The default
report screen will appear.
2. From the Choose Report drop down menu, select Medication
Administration DOT sheet.
3. From the Choose Printer drop down menu, select your applicable Printer.
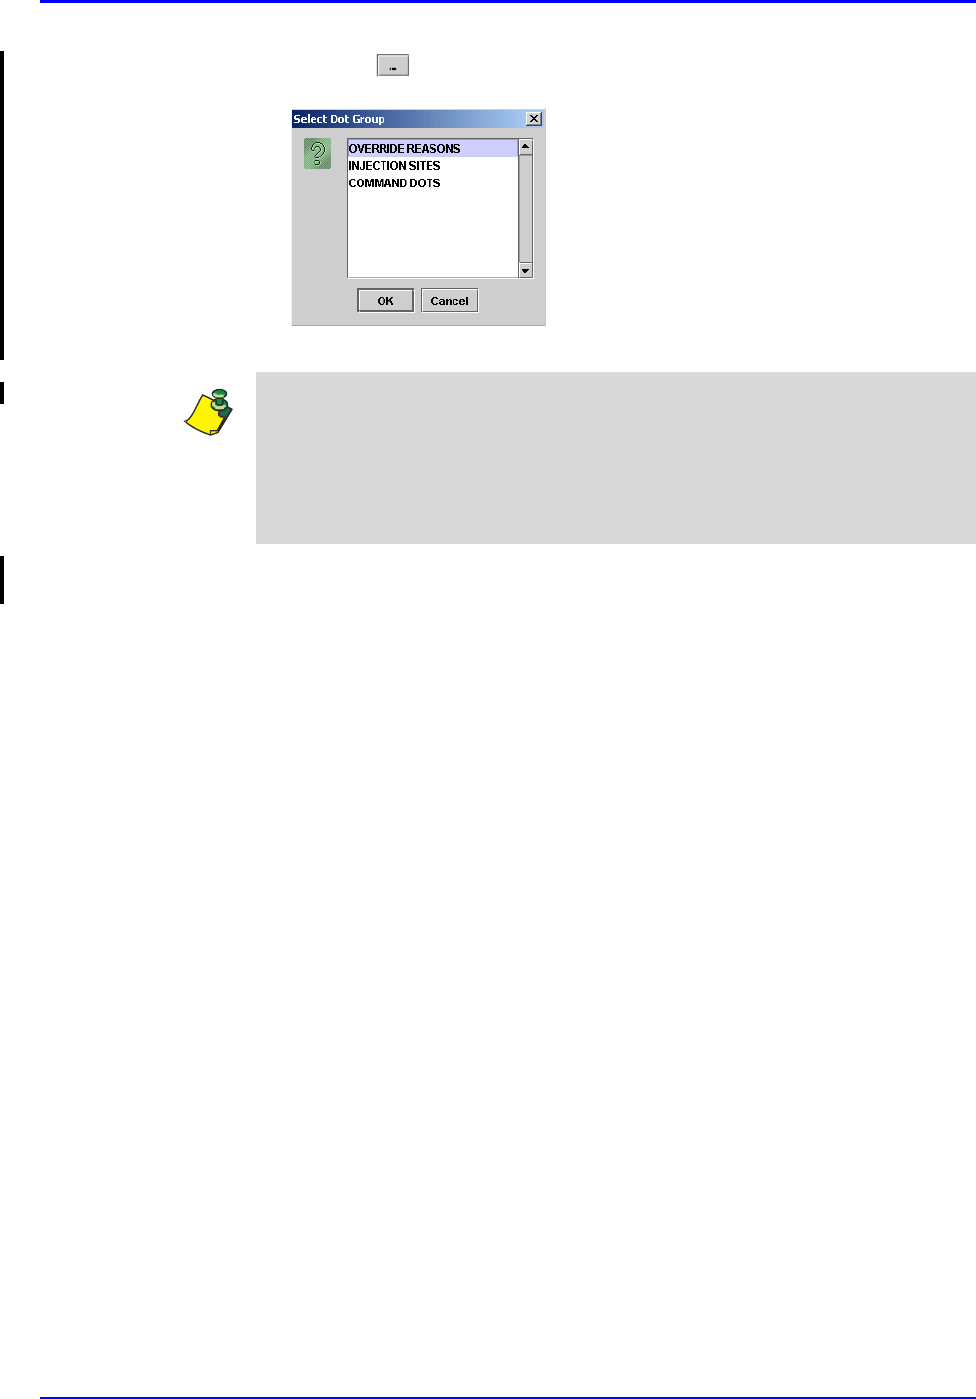
4. Click the button to select Dot Group One. The Select Dot Group window
appears.
5. Click the Dot Group and click OK.
6. Click the button to select Dot Group Two. The Select Dot Group window
appears.
7. Click the Dot Group and click OK.
Medication Administration DOT Sheet P/N TP0001-01 Rev. B
4-40 Confidential intelliDOT iConnect System User Guide
8. Click the button to select Dot Group Three. The Select Dot Group
window appears.
9. Click the Dot Group and click OK.
10. Press the Print Report button located at the top of the screen. The Report will
be printed on the applicable printer you selected.
Note: Refer to DOT Organization Setup on page 3-42. The MAR may be printed
with or without DOT groups. DOT groups provides a way to create groups of
DOTs for Override Reasons, Administration Sites, and Command DOTs. If for
example, you need to print a new MAR, select a DOT group from the list. This
will print on your MAR and you can use the iConnect Handheld to scan the
iDOT.
P/N TP0001-01 Rev. B Administration History and Audit Report
intelliDOT iConnect System User Guide Confidential 4-41
Administration History and Audit Report
This Administration History and Audit report provides a detailed record of all
medication activity during the patient’s stay. The administration history and audit
report allows a detailed overview of med admin organized by med and time.
Viewing the Administration History and Audit Report
To view your Administration History and Audit Report, perform the following:
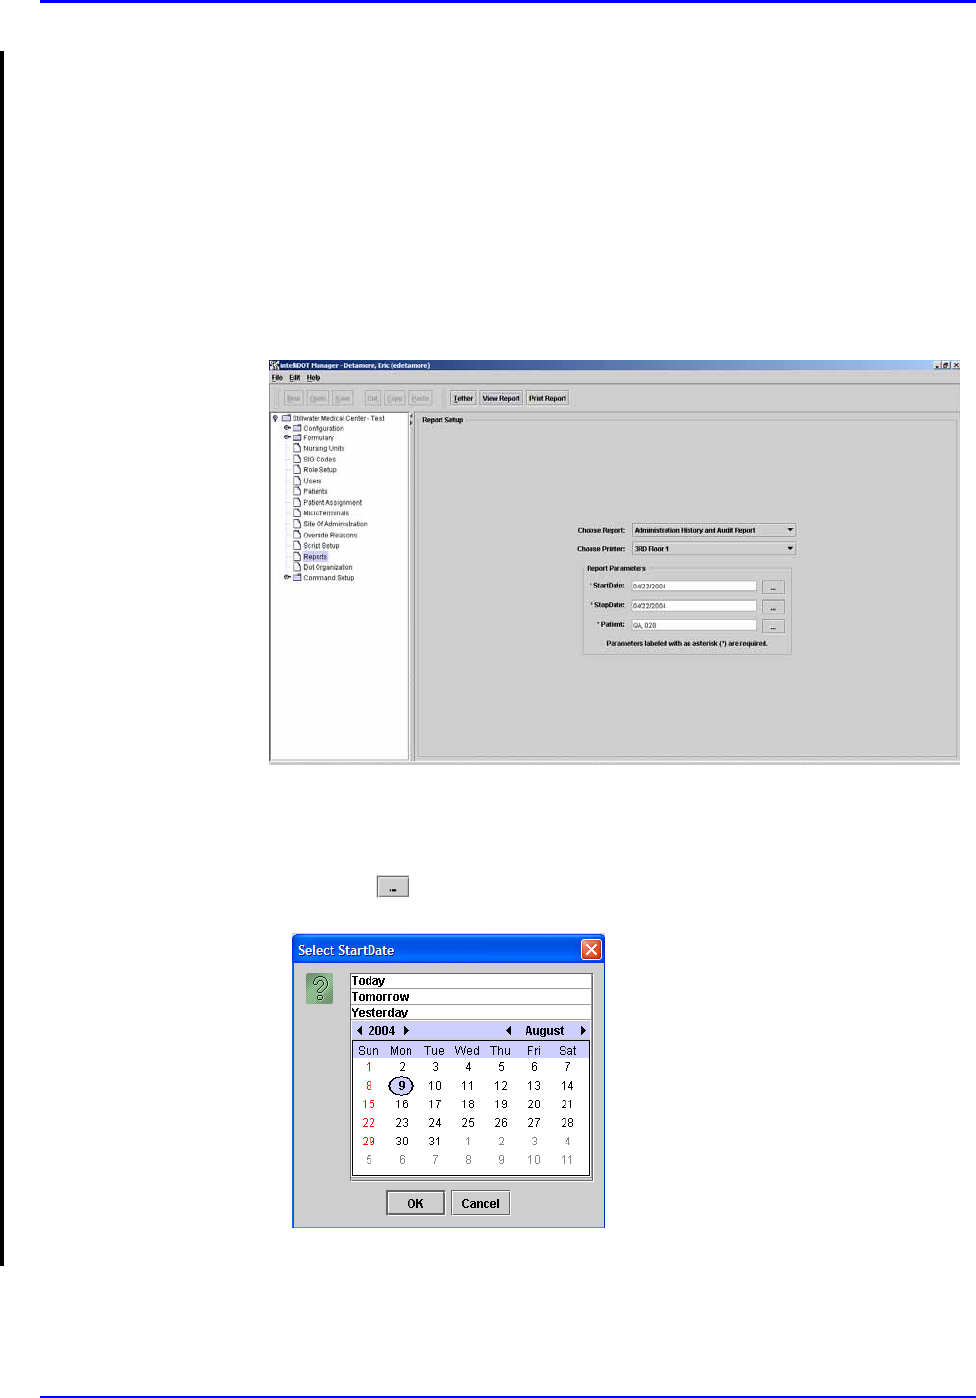
1. After logging into the iConnect DOT Manager, select Reports. The default
report screen will appear..
2. From the Choose Report drop down menu, select Administration History
and Audit Report.
3. From the Choose Printer drop down menu, select your applicable Printer.
4. Click the button to select a StartDate. The Select StartDate window
appears.
5. Select Today, Tomorrow, or Yesterday, Year, Month, Day and click OK.

Administration History and Audit Report P/N TP0001-01 Rev. B
4-42 Confidential intelliDOT iConnect System User Guide
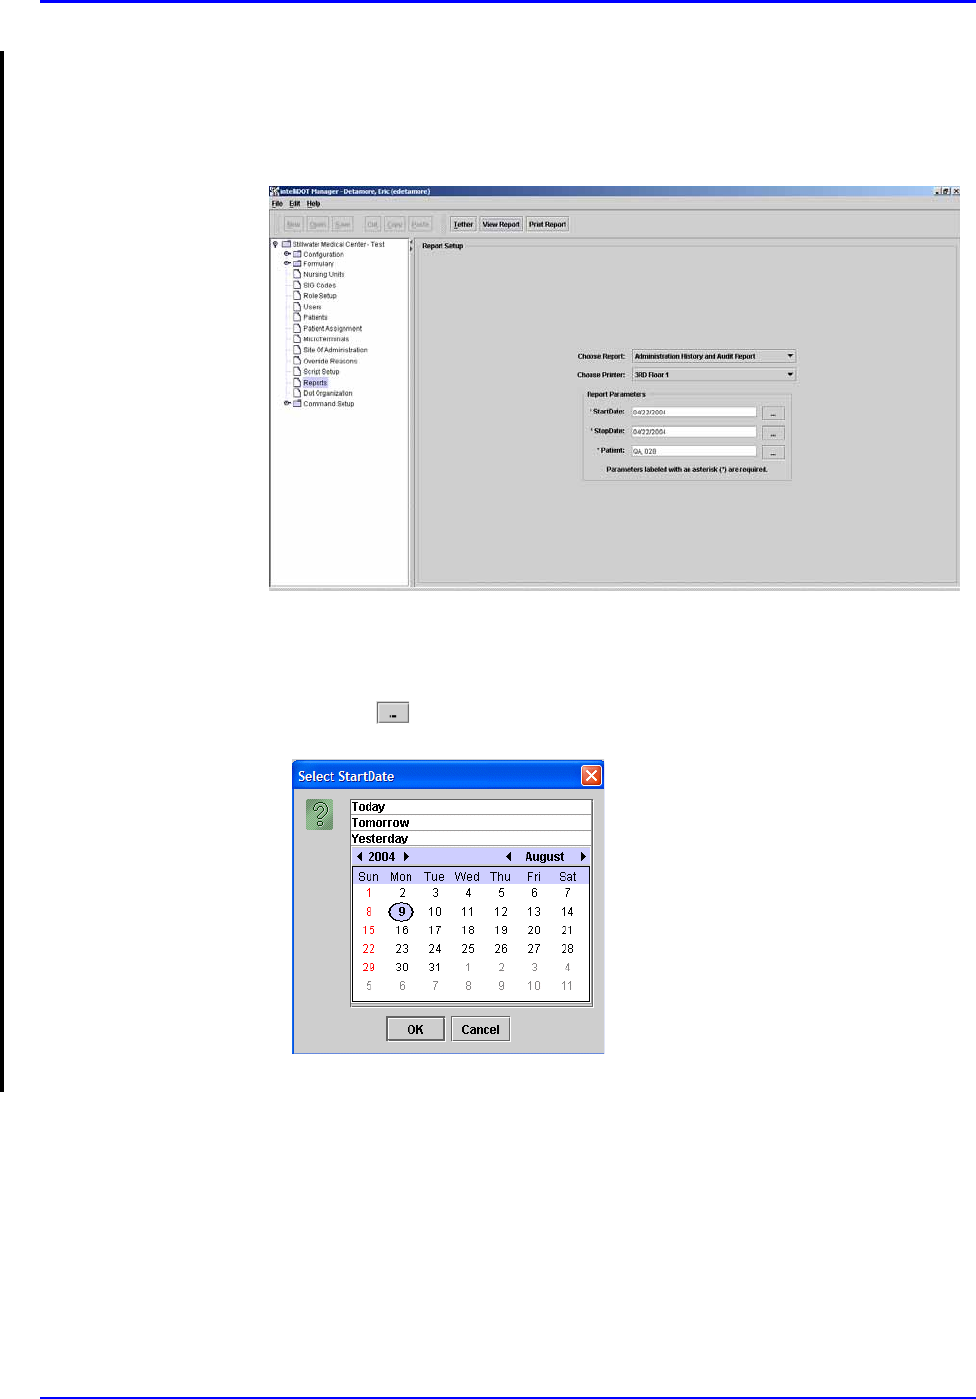
6. Click the button to select a StopDate. The Select StopDate window
appears.
7. Select Today, Tomorrow, or Yesterday, Year, Month, Day and click OK.
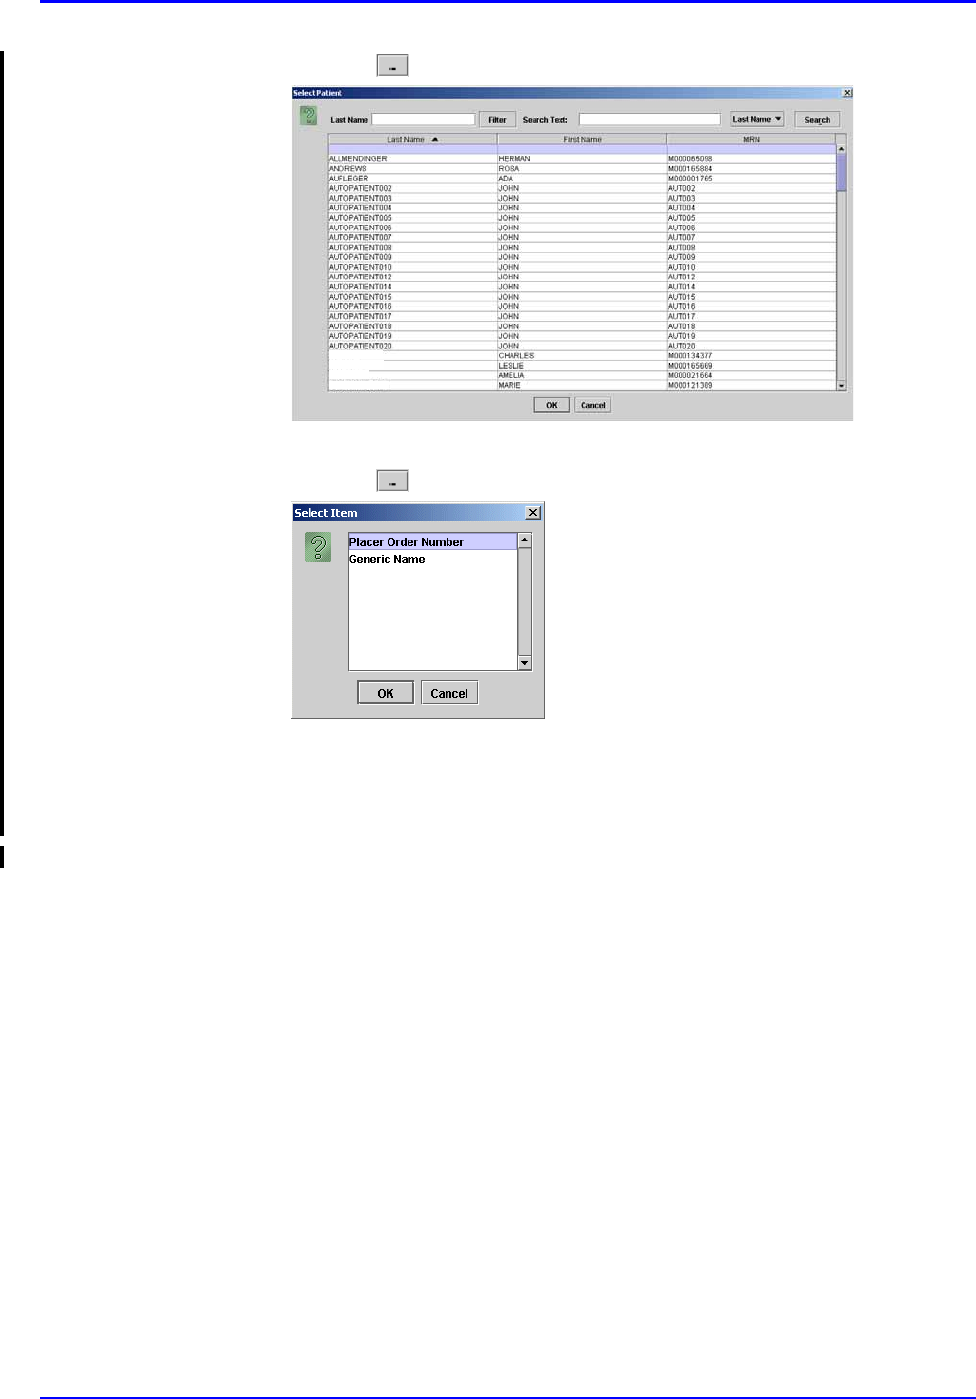
8. Click the button to select a Patient. The Select Patient window appears.
9. Select an applicable patient and click OK.
10. Click on the View Report button located at the top of the screen. The
following report will appear.
Williams
Brunson
Thompson
McMahon

P/N TP0001-01 Rev. B Administration History and Audit Report
intelliDOT iConnect System User Guide Confidential 4-43
Example of a Administration History and Audit Report
DIPHENHYDRAMINE 12.5 MG/5 ML ELIX (30)
(BENADRYL)
IN: LIDOCAINE HCL 2% VISC SOLN 5 ML SOLN (20)
(XYLOCAINE VISC.)
4/22/04
#0001354 New Order Started at 04/22/2004 13:00
DOSE: 5 ML PO FOUR TIMES DAILY
13:46 Prepared Mistretta2, Michael2
14:03 Prepared Mistretta2, Michael2
14:04 Given Mistretta2, Michael2 Gave 10ML
Edited: 14:09 Mistretta2, Michael2
14:14 Mistretta2, Michael2 Gave 0ML
IN: SODIUM CL 0.9% INJ 1000 ML BAG (1000)
(SODIUM CHLORIDE 0.9%)
4/22/04
#000355 New Order Started at 04/22/2004 13:00
DOSE: 1000 IV PRN
14:20 Mistretta2, Michael2 Gave 0
14:18 Prepared Mistretta2, Michael2
INSULIN HUMAN REGULAR 100 UNITS/100 UNITS INJ (1UNIT)
(HUMAN INSULIN-R U-100)
4/22/04
#000360 New Order Started at 04/22/2004 13:00
DOSE: 1 UNIT SC EVERY 6 HOURS
14:38 Mistretta2, Michael2
SODIUM CL 0.9% INJ 1000 ML BAG (1000ML)
(SODIUM CHLORIDE 0.9%)
4/22/04
14:48 Prepared Mistretta2, Michael2
IN: SODIUM CL 0.9% INJ 1000 ML BAG (1000)
(SODIUM CHLORIDE 0.9%)
4/22/04
#000355 New Order Started at 04/22/2004 13:00
DOSE: 1000 IV PRN
14:23 Given Mistretta2, Michael2
14:27 Prepared Mistretta2, Michael2
SODIUM CL 0.9% INJ 1000 ML BAG (1000ML)
(SODIUM CHLORIDE 0.9%)
4/22/04
14:46 Given Mistretta2, Michael2 Gave 1000ML
Administration History and Audit Report
4/22/04 - 4/22/04 NAME: QA, 028
TIME PRINTED: 04/22/2004 15:05 Admit: 4/22/04
DIAGNOSIS: Multi-Lateral tear on left anterio thigh
NOTES:
ALLERGIES: CODEINE, LATEX, FISH
Printed By: Detamore, Eric Page 1 of 1 Printed At: 04/22/2004 15:05
Administration History and Audit Report P/N TP0001-01 Rev. B
4-44 Confidential intelliDOT iConnect System User Guide
Printing the Administration and Audit Report
To print your Administration and Audit Report, perform the following:
1. After logging into the iConnect DOT Manager, select Reports. The default
report screen will appear.
2. From the Choose Report drop down menu, select Administration History
and Audit Report.
3. From the Choose Printer drop down menu, select your applicable Printer.
4. Click the button to select a StartDate. The Select StartDate window
appears.
5. Select Today, Tomorrow, or Yesterday, Year, Month, Day and click OK.
P/N TP0001-01 Rev. B Administration History and Audit Report
intelliDOT iConnect System User Guide Confidential 4-45
6. Click the button to select a StopDate. The Select StopDate window
appears.
7. Select Today, Tomorrow, or Yesterday, Year, Month, Day and click OK.
8. Click the button to select a Patient. The Select Patient window appears.
9. Select an applicable patient and click OK.
10. Press the Print Report button located at the top of the screen. The Report will
be printed on the applicable printer you selected.
Williams
Brunson
Thompson
McMahon
Seven (7) Day Medication Summary Report P/N TP0001-01 Rev. B
4-46 Confidential intelliDOT iConnect System User Guide
Seven (7) Day Medication Summary Report
The 7-Day Medication Summary is a convenient method to view med
administrations over a longer period, and may be of use by physicians and others
interested in a longer term view of med administration. If used as a routine tool,
this report will often be generated for all patients on a unit at the same time. This
report will not be used as a permanent chart document or as a means of auditing
for med errors because it will not contain enough detail on medication activities.
Viewing your 7 Day Medication Summary Report
To view your 7 Day Medication Summary Report, perform the following:
1. After logging into the iConnect DOT Manager, select Reports. The default
report screen will appear.
2. From the Choose Report drop down menu, select 7 Day Medication
Summary.
3. From the Choose Printer drop down menu, select your applicable Printer.
4. Click the button to select a Date. The Select Date window appears.
5. Select Today, Tomorrow, or Yesterday, Year, Month, Day and click OK.
P/N TP0001-01 Rev. B Seven (7) Day Medication Summary Report
intelliDOT iConnect System User Guide Confidential 4-47
6. Click the button to select a Patient. The Select StopDate window appears.
7. Select an applicable patient and click OK.
8. Click the button to select a Sort Order. The Select Item window appears.
9. Select Placer Order Number or Generic Name to sort by and click OK. The
MAR will sort by either the order number or by generic name.
10. Click on the View Report button located at the top of the screen. The
following report will appear.
Note: In the 7 Day Medication Summary Report, ordered meds are
shown in the first (left) column like they are on the daily MAR. This
report also provides allergy information. The next 7 columns have
headers that show the full name of the day of the week with date in
MM/DD/YY format below each. Unlike other reports, this report
rounds times to the nearest hour to save space and to make it easy for
you to see when the doses were given.
Williams
Brunson
Thompson
McMahon

Seven (7) Day Medication Summary Report P/N TP0001-01 Rev. B
4-48 Confidential intelliDOT iConnect System User Guide
Example of a 7 Day Medication Summary
000829:
FERROUS SULFATE 324 MG TAB
(324MG)
(FEOSOL)
Start
07/29
14:00
Stop
DOSE: 324 MG PO TWICE A DAY
14 OMITTED
Reason
Omitted :
Within Normal
Limits
000830:
POTASSIUM CL 20 MEQ TABCR
(20MEQ)
(K-DUR)
Start
07/29
12:00
Stop
DOSE: 20 MEQ PO FOUR TIMES DAILY
14 OMITTED
Reason
Omitted :
Within Normal
Limits
000831:
LEVOFLOXACIN 500 MG TAB (500MG)
(LEVAQUIN)
Start
07/29
14:00
Stop
DOSE: 500 MG PO EVERY MORNING
14 OMITTED
Reason
Omitted :
Within Normal
Limits
000833:
CALCIUM/VITAMIN D 250 MG TAB
(500MG)
(OS-CAL D)
Start
07/29
14:00
Stop
DOSE: 500 MG PO TWICE A DAY
14 OMITTED
Reason
Omitted :
Within Normal
Limits
000835:
PANTOPRAZOLE SOD 40 MG TABCR
(40MG)
(PROTONIX)
Start
07/29
14:00
Stop
DOSE: 40 MG PO TWICE A DAY
14 OMITTED
Reason
Omitted :
Within Normal
Limits
000837:
PROMETHAZINE HCL INJ 25 MG/1 ML
INJ (25MG)
(PROMETHAZINE)
Start
07/29
14:00
Stop
DOSE: 25 MG IV Q 3 HOURS
14 OMITTED
Reason
Omitted :
Within Normal
Limits
000827:
INSULIN HUMAN REGULAR 100
UNITS/100 UNITS INJ (1U)
(HUMAN INSULIN-R U-100)
Start
07/28
09:00
Stop
DOSE:1USCEVERY 6 HOURS
000828:
SODIUM CL 0.9% INJ 1 ML INJ (30ML)
(SODIUM CHLORIDE FLUSH)
Start
07/29
14:00
Stop
DOSE: 30 ML IV PRN
000832:
DIPHENOXYLATE/ATROPINE 1 TAB TAB
(2EA)
(LOMOTIL)
Start
07/29
14:00
Stop
DOSE: 2 EA PO PRN
7 Day Medication Summary
8/3/04 NAME: QA, 028
TIME PRINTED: 08/09/2004 16:11 Admit: 7/29/04
DIAGNOSIS: Multi-Lateral tear on left anterio thigh
NOTES:
ALLERGIES: CODEINE, LATEX, FISH
8/3/04 8/4/04 8/5/04 8/6/04 8/7/04 8/8/04 8/9/04
QA, 028
Gender: F
DOB: 12/14/20 MRN: M90000028
Visit: V0000028
Acct: DR: SMALLEY, MY NAME IS TO LONG
M.D.
Room: 311 1
Stillwater Medical Center
1323 West 6th Box 2408
Stillwater, OK 74074
Printed By: User, Admin Page 1 of 1 Printed At: 08/09/2004 16:11
P/N TP0001-01 Rev. B Seven (7) Day Medication Summary Report
intelliDOT iConnect System User Guide Confidential 4-49
Printing your 7 Day Medication Summary Report
To print your 7 Day Medication Summary Report, perform the following:
1. After logging into the iConnect DOT Manager, select Reports. The default
report screen will appear.
2. From the Choose Report drop down menu, select 7 day Medication
Summary.
3. From the Choose Printer drop down menu, select your applicable Printer.
4. Click the button to select a Date. The Select Date window appears.
5. Select Today, Tomorrow, or Yesterday, Year, Month, Day and click OK.
Seven (7) Day Medication Summary Report P/N TP0001-01 Rev. B
4-50 Confidential intelliDOT iConnect System User Guide
6. Click the button to select a Patient. The Select StopDate window appears.
7. Select an applicable patient and click OK.
8. Click the button to select a Sort Order. The Select Item window appears.
9. Select Placer Order Number or Generic Name to sort by and click OK. The
MAR will sort by either the order number or by generic name.
10. Press the Print Report button located at the top of the screen. The Report will
be printed on the applicable printer you selected.
Williams
Brunson
Thompson
McMahon
P/N TP0001-01 Rev. B MicroTerminal Configuration Report
intelliDOT iConnect System User Guide Confidential 4-51
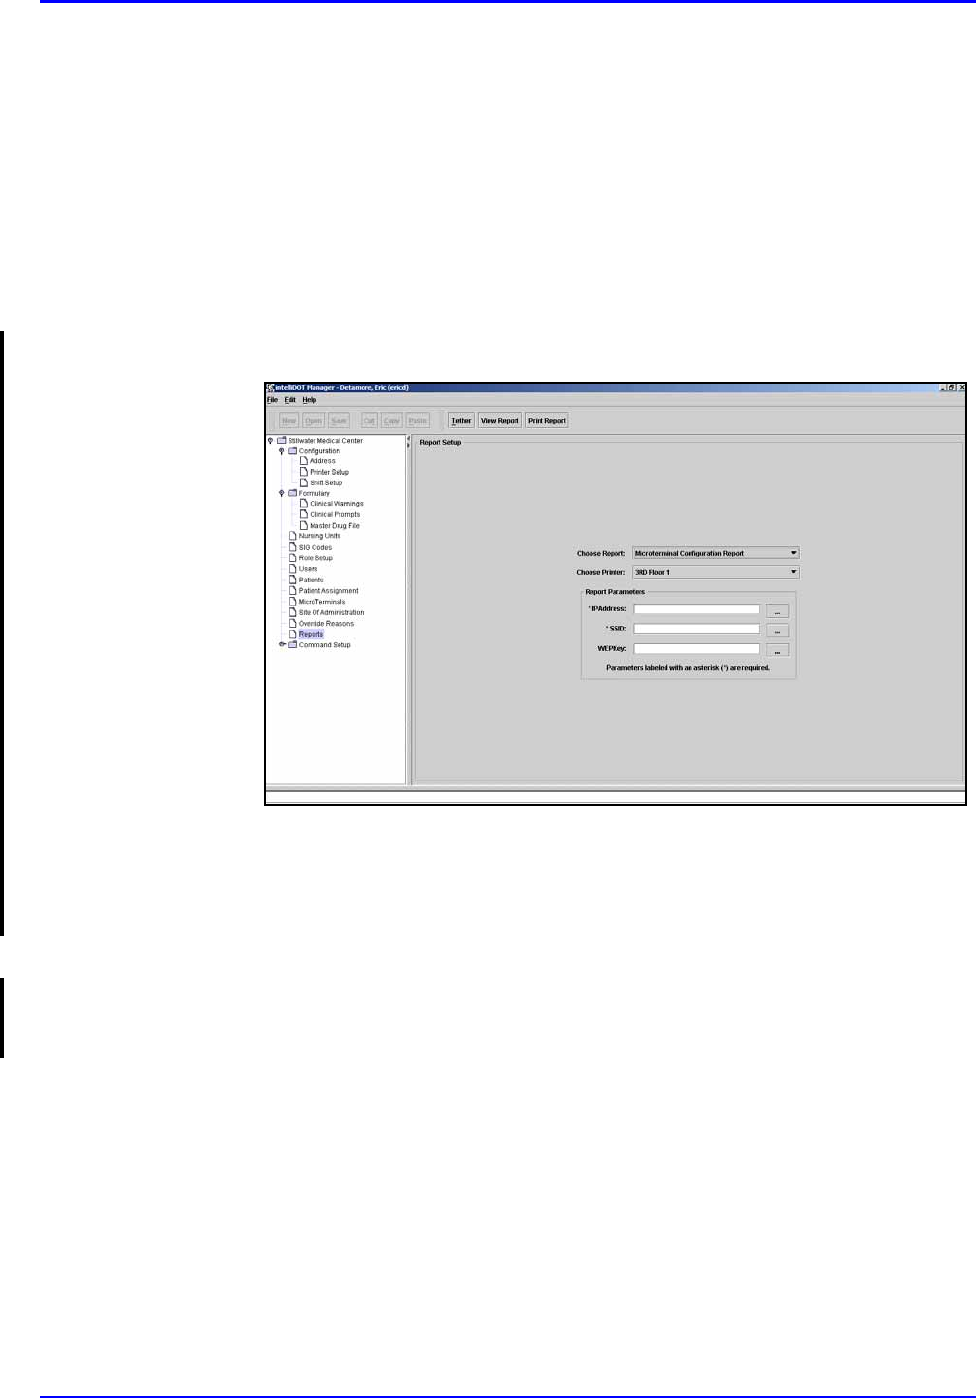
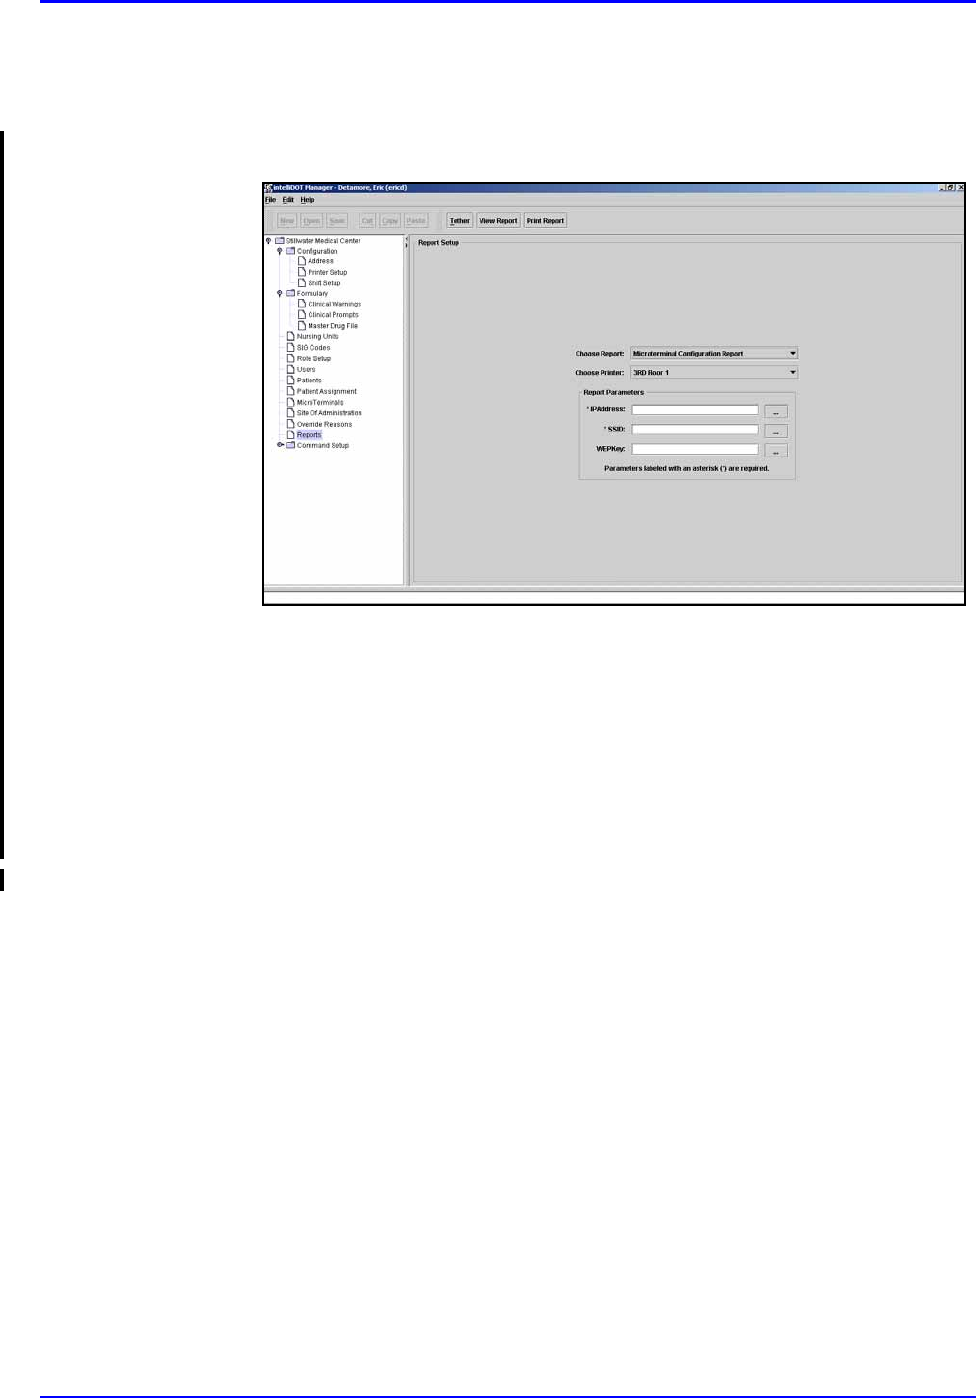
MicroTerminal Configuration Report
This document allows the iConnect Handheld to be configured by scanning
iDOTs, and is primarily used by the IntelliDOT service technicians. This report
provides a configuration allowing the iConnect Handheld to connect to the
hospital wireless access point.
Viewing your MicroTerminal Configuration Report
To view your MicroTerminal Configuration Report, perform the following:
1. After logging into the iConnect DOT Manager, select Reports. The default
report screen will appear.
2. From the Choose Report drop down menu, select MicroTerminal
Configuration Report.
3. From the Choose Printer drop down menu, select your applicable Printer.
4. Enter the IP address.
5. Enter the Hospital SSID.
6. Enter the Wep Key.
7. Click on the View Report button located at the top of the screen. The
following report will appear.
MicroTerminal Configuration Report P/N TP0001-01 Rev. B
4-52 Confidential intelliDOT iConnect System User Guide
Example of a MicroTerminal Configuration Report
This report will configure your MicroTerminal for the server at 172.167.55.13
using the wireless network 'General Hospital'.
Scan this dot to begin
Scan these dots when prompted
1
2
3
4
5
6
7
Microterminal Configuration Report
Printed By: User, Admin Page 1 of 1 Printed At: 08/09/2004 16:23
P/N TP0001-01 Rev. B MicroTerminal Configuration Report
intelliDOT iConnect System User Guide Confidential 4-53
Printing your MicroTerminal Configuration Report
To print your MicroTerminal Configuration Report, perform the following:
1. After logging into the iConnect DOT Manager, select Reports. The default
report screen will appear.
2. From the Choose Report drop down menu, select MicroTerminal
Configuration Report.
3. From the Choose Printer drop down menu, select your applicable Printer.
4. Enter the IP address.
5. Enter the Hospital SSID.
6. Enter the Wep Key.
7. Press the Print Report button located at the top of the screen. The Report will
be printed on the applicable printer you selected.
Patient Assignment Worksheet P/N TP0001-01 Rev. B
4-54 Confidential intelliDOT iConnect System User Guide
Patient Assignment Worksheet
For the IntelliDOT system to operate, nurses must tell the iConnect System which
patients they are taking care of during their shift. To do this, a “Patient
Assignment” worksheet can be printed. The patient assignment worksheet
provides you with a quick and easy way to scan the patient iDOT’s and assign
patients to the nurse.
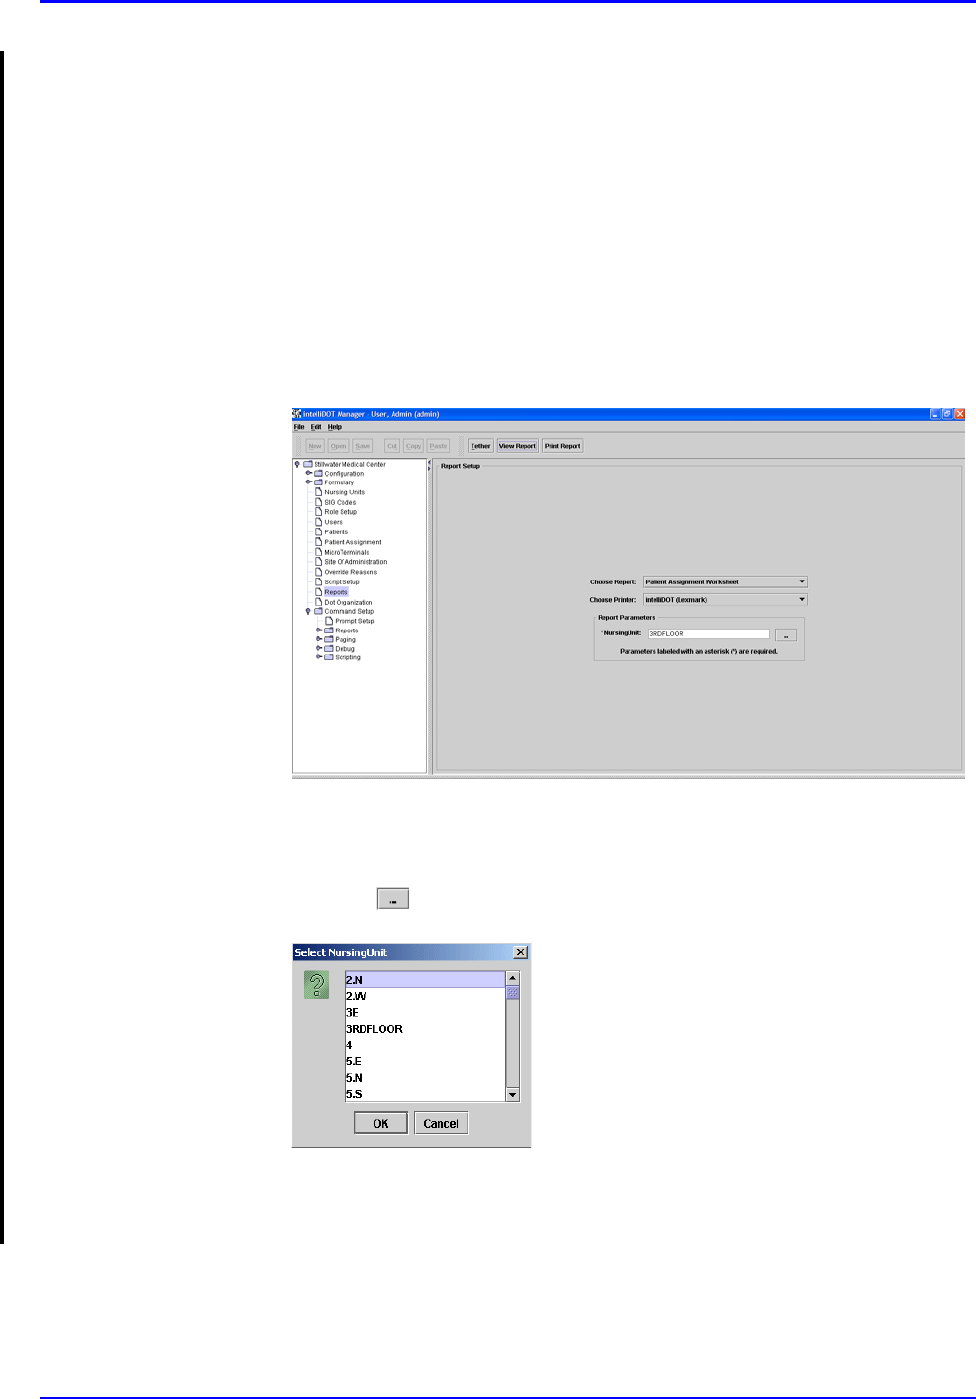
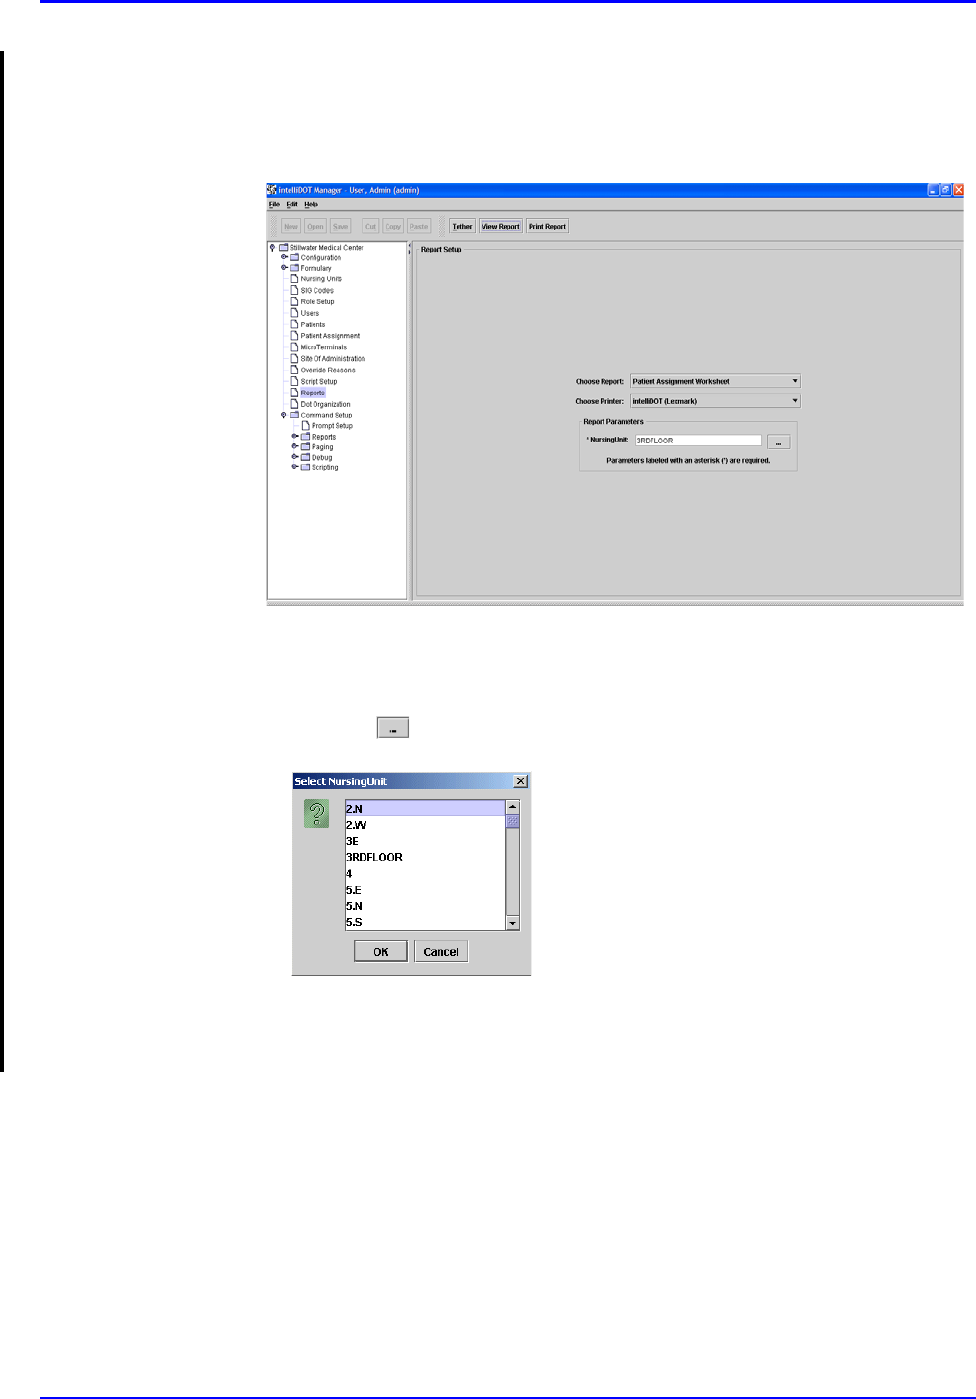
Viewing your Patient Assignment Worksheet
To view your Patient Assignment Worksheet, perform the following:
1. After logging into the iConnect DOT Manager, select Reports. The default
report screen will appear.
2. From the Choose Report drop down menu, select MicroTerminal
Configuration Report.
3. From the Choose Printer drop down menu, select your applicable Printer.
4. Click the button to select a Nursing Unit. The Select Nursing Unit
window appears.
5. Select an applicable nursing unit and click OK.
6. Click on the View Report button located at the top of the screen. The
following report will appear.
P/N TP0001-01 Rev. B Patient Assignment Worksheet
intelliDOT iConnect System User Guide Confidential 4-55
Example of a Patient Assignment Worksheet
This assignment sheet was printed for the nursing unit 3RDFLOOR
Begin Patient Assignment Session End Patient Assignment Session
Rooms
300 1 320 1
301 1 321 1
302 1 322 1
303 1 323 1
304 1 324 1
305 1 325 1
306 1 326 1
307 1 327 1
308 1 328 1
309 1 329 1
310 1 330 1
311 1 331 1
312 1 332 1
313 1 333 2
314 1 334 1
315 1 335 1
316 1 336 1
317 1 337 1
318 1 338 1
319 1 339 1
Patient Assignment Worksheet
Printed By: User, Admin Page 1 of 1 Printed At: 08/09/2004 17:20
Patient Assignment Worksheet P/N TP0001-01 Rev. B
4-56 Confidential intelliDOT iConnect System User Guide
Printing your Patient Assignment Worksheet
To print your Patient Assignment Worksheet, perform the following:
1. After logging into the iConnect DOT Manager, select Reports. The default
report screen will appear.
2. From the Choose Report drop down menu, select MicroTerminal
Configuration Report.
3. From the Choose Printer drop down menu, select your applicable Printer.
4. Click the button to select a Nursing Unit. The Select Nursing Unit
window appears.
5. Select an applicable nursing unit and click OK.
6. Press the Print Report button located at the top of the screen. The Report will
be printed on the applicable printer you selected.
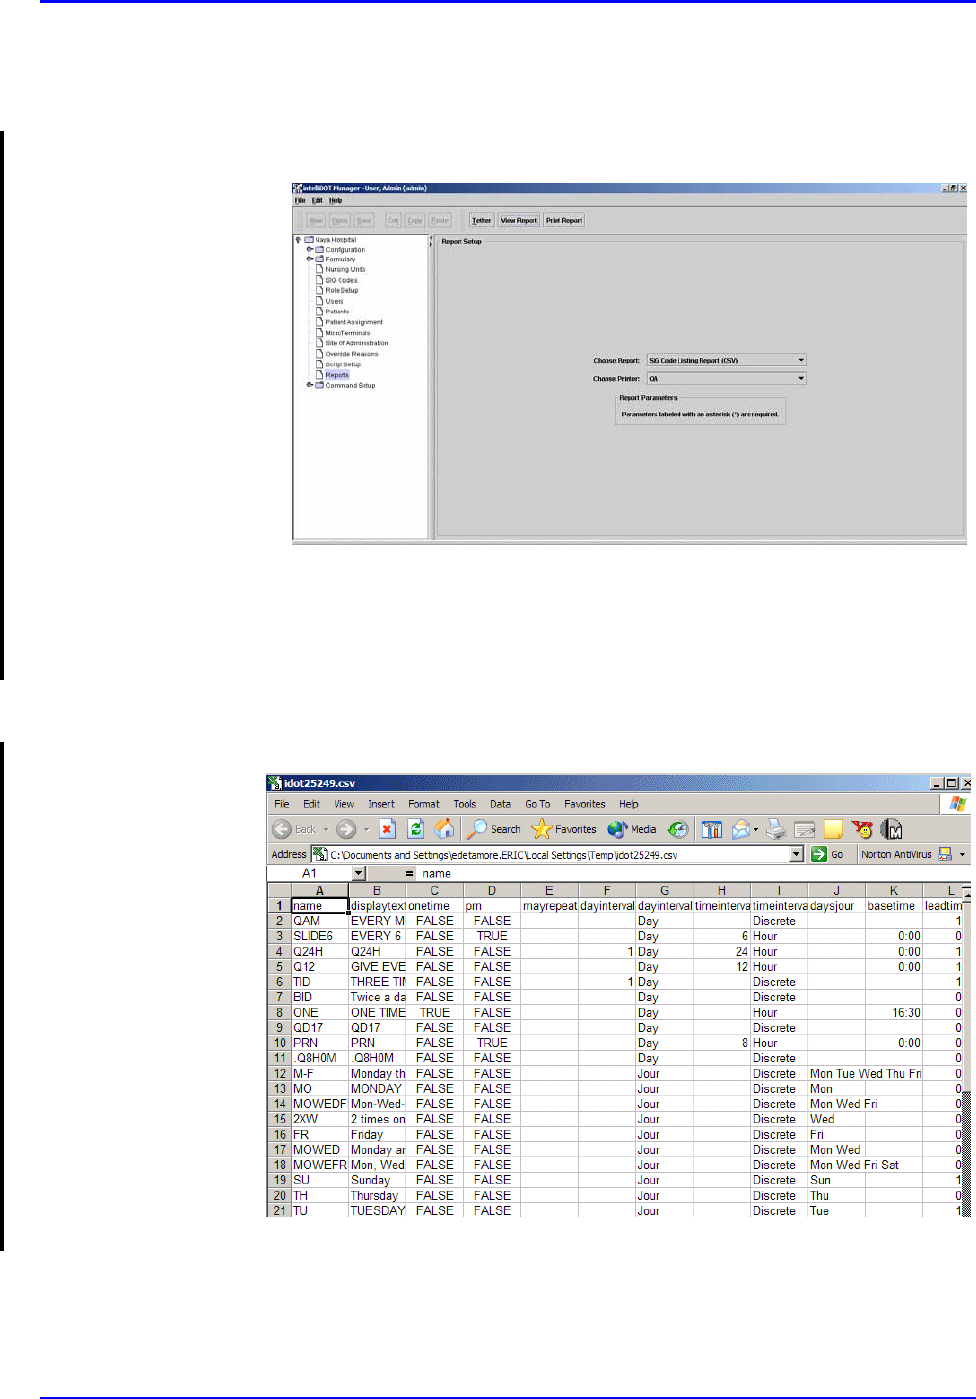
P/N TP0001-01 Rev. B Sig Code Listing Report (CSV)
intelliDOT iConnect System User Guide Confidential 4-57
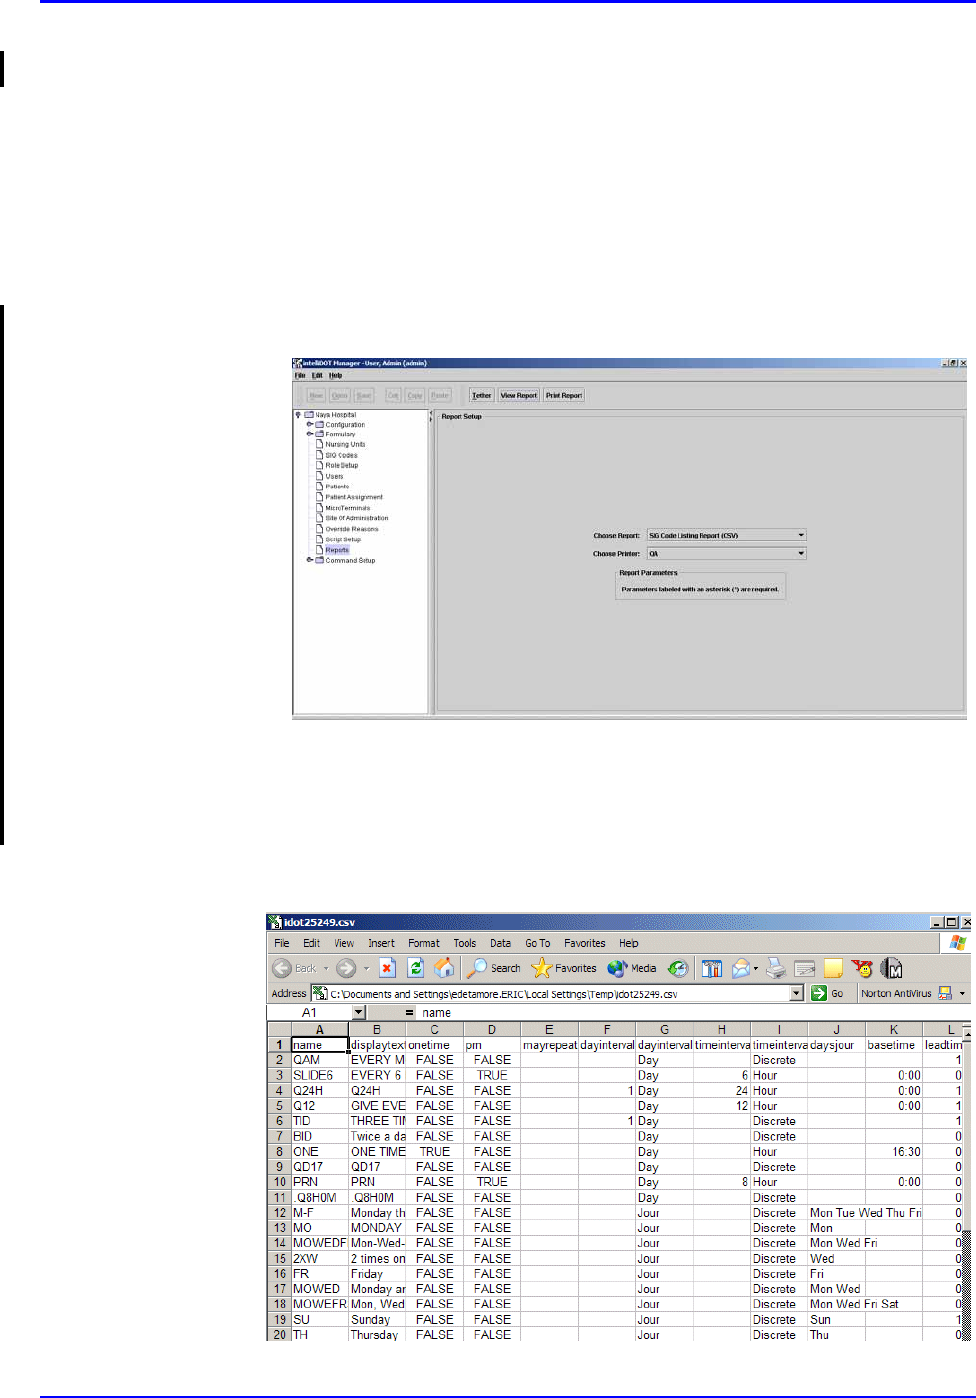
Sig Code Listing Report (CSV)
The sig code listing report provides a list of all sig codes used in the hospital
formulary (master drug file). The Report will appear in a .CSV file which can be
read through the Internet file or EXCEL.
Viewing your Sig Code Listing Report (CSV)
To view your Sig Code Listing Report (CSV), perform the following:
1. After logging into the iConnect DOT Manager, select Reports. The default
report screen will appear.
2. From the Choose Report drop down menu, select SIG Code Listing Report
(CSV).
3. From the Choose Printer drop down menu, select your applicable Printer.
4. Click on the View Report button.
The Report will appear in a .CSV file which can be read through the Internet
file or EXCEL. See the following illustration for an example.
Sig Code Listing Report (CSV) P/N TP0001-01 Rev. B
4-58 Confidential intelliDOT iConnect System User Guide
Printing your Sig Code Listing Report (CSV)
To print your Sig Code Listing Report (CSV), perform the following:
1. Click Reports on your iConnect DOT Manager. The default report screen
will appear.
2. From the Choose Report drop down menu, select SIG Code Listing Report
(CSV).
3. From the Choose Printer drop down menu, select your applicable Printer.
4. Click on the Print Report button.
The Report will be printed on the applicable printer you selected. The Report
prints from the Internet file or EXCEL. See the following illustration for an
example.
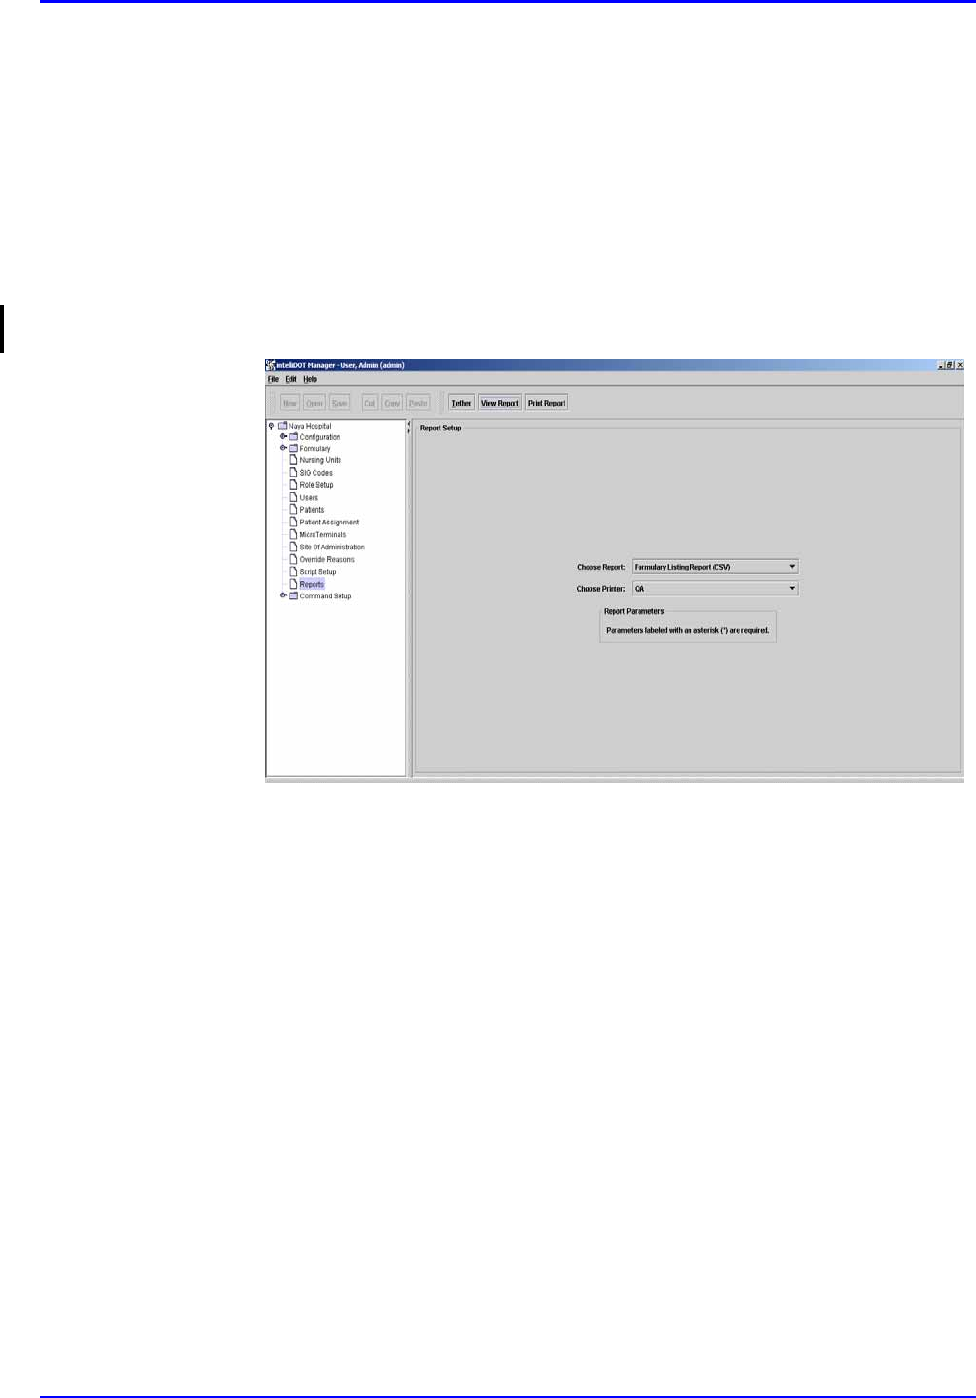
P/N TP0001-01 Rev. B Formulary Listing Report (CSV)
intelliDOT iConnect System User Guide Confidential 4-59
Formulary Listing Report (CSV)
The sig code listing report provides a list of the hospital formulary (master drug
file). The Report will appear in a .CSV file which can be read through the Internet
file or EXCEL.
Viewing your Formulary Listing Report (CSV)
To view your Formulary Listing Report (CSV), perform the following:
1. After logging into the iConnect DOT Manager, select Reports. The default
report screen will appear.
2. Select the Formulary Listing Report (CSV) from the Choose Report drop
down menu.
3. Choose your applicable Printer.
Formulary Listing Report (CSV) P/N TP0001-01 Rev. B
4-60 Confidential intelliDOT iConnect System User Guide
4. Click on the View Report button.
The Report will appear in a .CSV file which can be read through the Internet
file or EXCEL. See the following illustration for an example.
Printing your Formulary Listing Report (CSV)
To print your Formulary Listing Report (CSV), perform the following:
1. After logging into the iConnect DOT Manager, select Reports. The default
report screen will appear.
2. Select the Formulary Listing Report (CSV) from the Choose Report drop
down menu.
3. Choose your applicable Printer.

P/N TP0001-01 Rev. B Formulary Listing Report (CSV)
intelliDOT iConnect System User Guide Confidential 4-61
4. Click on the Print Report button.
The Report will be printed on the applicable printer you selected. The Report
prints from the Internet file or EXCEL. See the following illustration for an
example.
Administration Sites Listing P/N TP0001-01 Rev. B
4-62 Confidential intelliDOT iConnect System User Guide
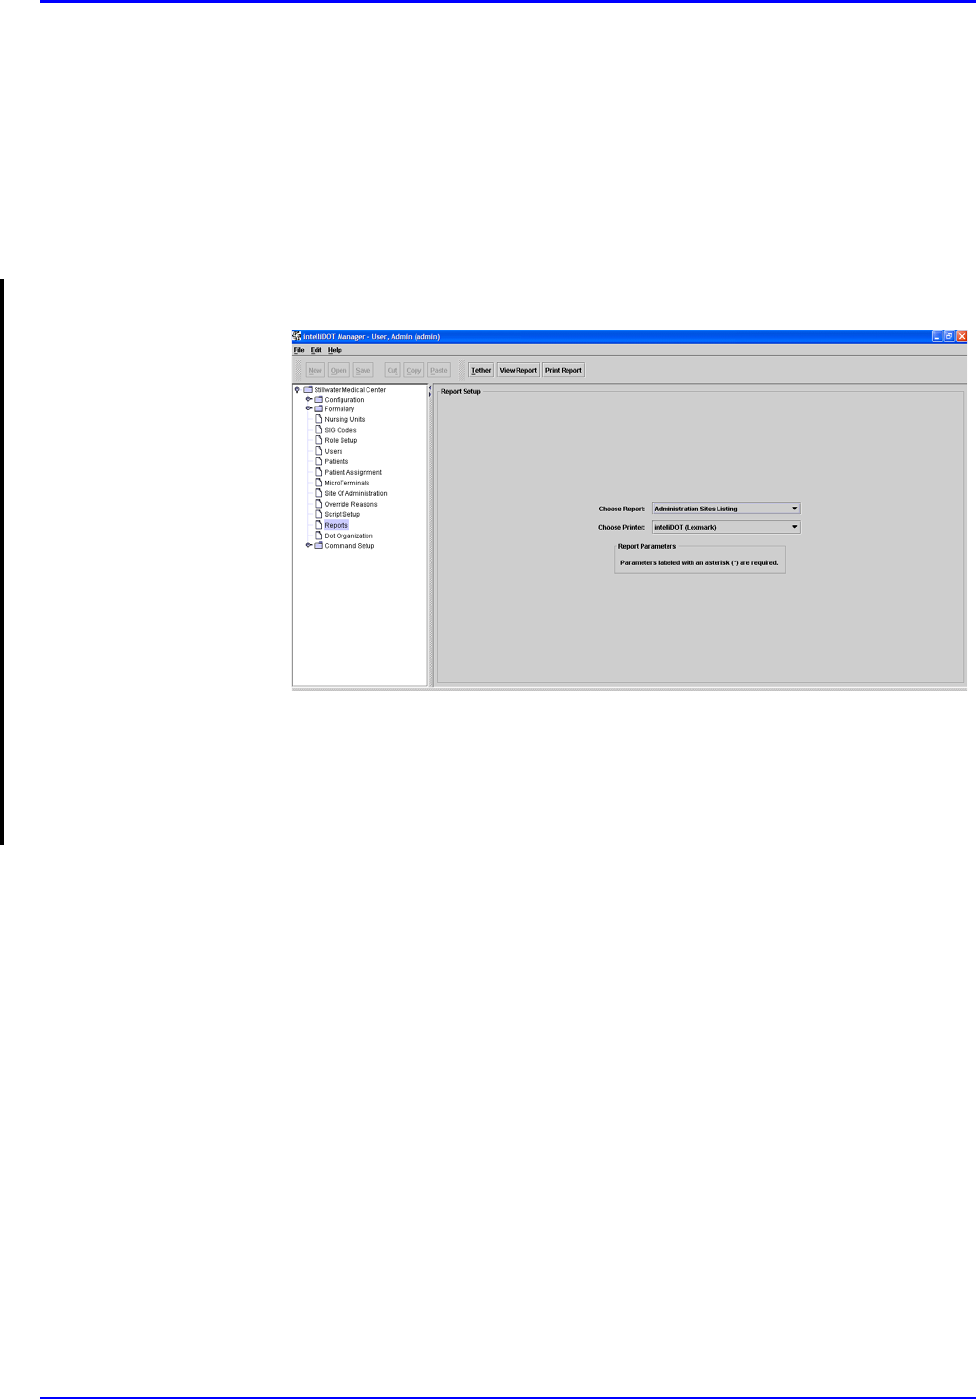
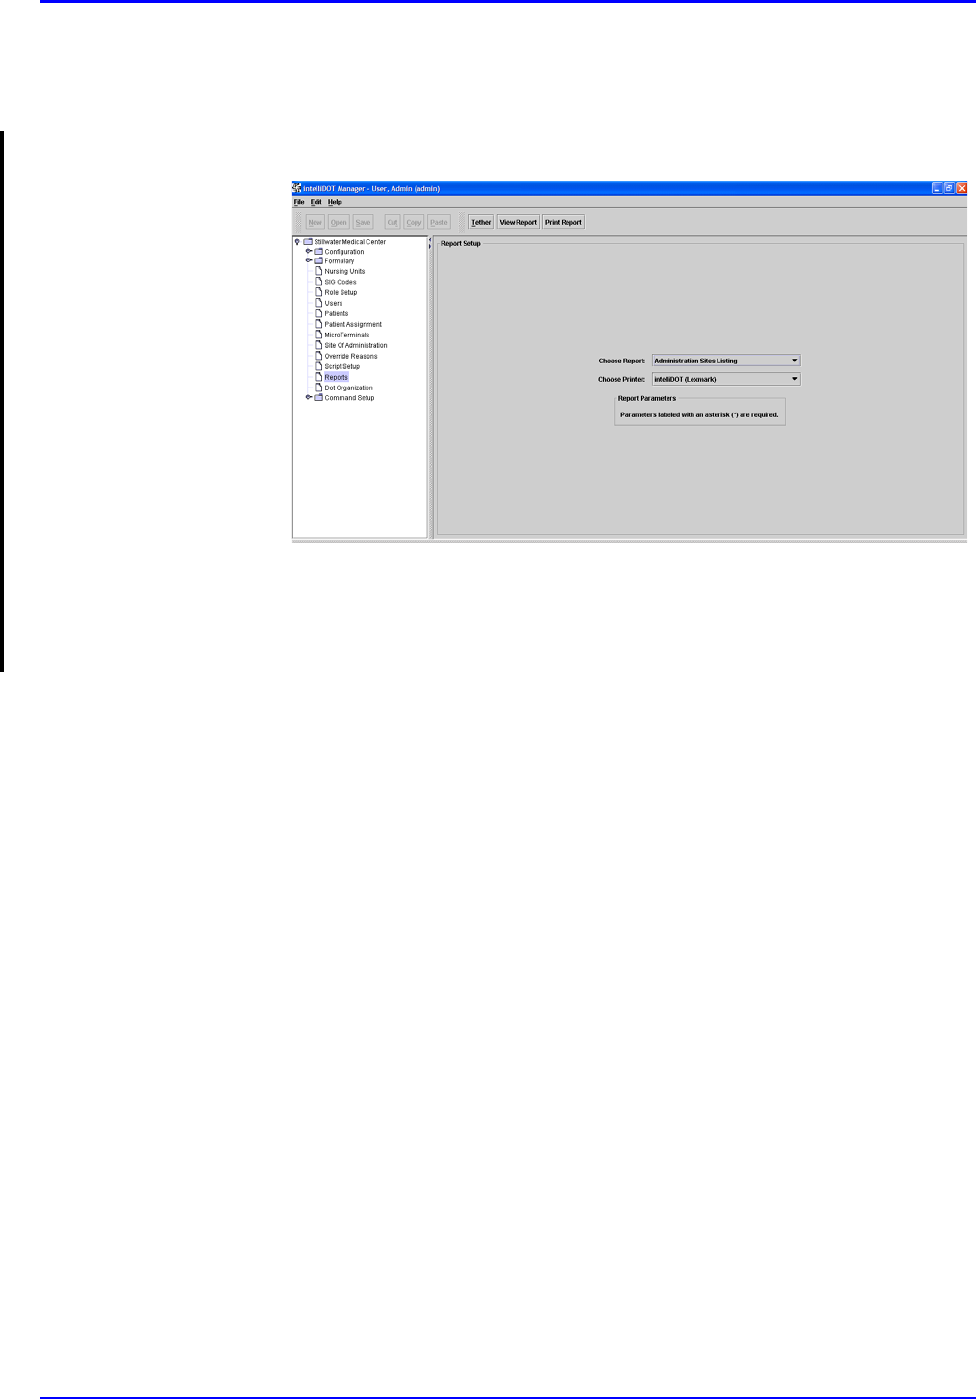
Administration Sites Listing
The Administration Sites Listing provides a list of sites of administration when
administering the medications to a patient.
Viewing your Administration Sites Listing
To view your Administration Sites Listing, perform the following:
1. After logging into the iConnect DOT Manager, select Reports. The default
report screen will appear..
2. From the Choose Report drop down menu, select Administration Sites
Listing.
3. From the Choose Printer drop down menu, select your applicable Printer.
4. Click on the View Report button located at the top of the screen. The
following report will appear.

P/N TP0001-01 Rev. B Administration Sites Listing
intelliDOT iConnect System User Guide Confidential 4-63
Example of a Administration Sites Listing
Administration Sites Listing
L. Anteriolateral Thigh L.Deltoid Muscle L.Gluteal-Medial Muscle L.Lower Abd. L. Upper Abd.
L. Upper Arm L. Ventro-Gluteal Muscle R. Deltoid Muscle R. Gluteal-Medial Muscle R. Lower Abd.
R. Upper Abd. R. Upper Arm R. Ventro-Gluteal Muscle L.Forearm R.Forearm
L. Hip/Subcutaneous R.Hip/Subcutaneous R. Anteriolateral Thigh
Administration Sites Listing
Printed By: User, Admin Page 1 of 1 Printed At: 08/10/2004 10:50
Administration Sites Listing P/N TP0001-01 Rev. B
4-64 Confidential intelliDOT iConnect System User Guide
Printing your Administration Sites Listing
To print your Administration Sites Listing, perform the following:
1. After logging into the iConnect DOT Manager, select Reports. The default
report screen will appear.
2. From the Choose Report drop down menu, select Administration Sites
Listing.
3. From the Choose Printer drop down menu, select your applicable Printer.
4. Click on the Print Report button.
The Report will be printed on the applicable printer you selected.
P/N TP0001-01 Rev. B Command DOT Listing
intelliDOT iConnect System User Guide Confidential 4-65
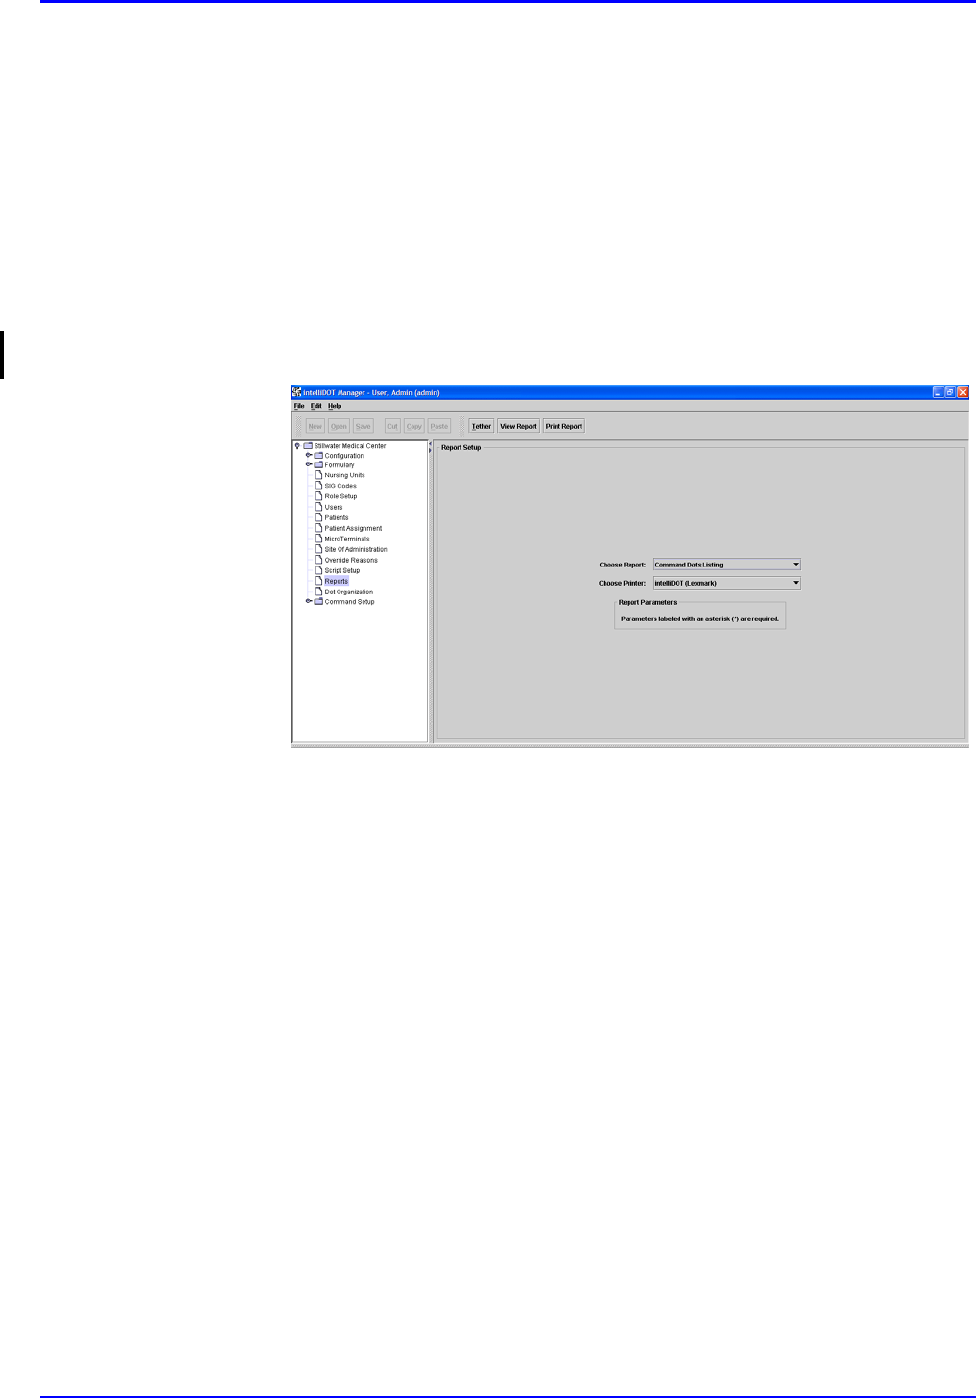
Command DOT Listing
The command iDOTs listing provides a way to create individual command iDOTs
to perform a particular action. For example, if you create a iDOT to “Print a
Current Mar”. This report provides you with a list of all command iDOTs printed
on an individual report.
Viewing your Command DOT Listing
To view your Command DOTs Listing, perform the following:
1. After logging into the iConnect DOT Manager, select Reports. The default
report screen will appear.
2. Select Command DOTs Listing from the Choose Report drop down menu.
3. Choose your applicable Printer.
4. Click on the View Report button.
The Report will appear. See the following illustration.

Command DOT Listing P/N TP0001-01 Rev. B
4-66 Confidential intelliDOT iConnect System User Guide
Example of a Command DOTs Listing
Override Reasons Listing
Within Normal Limits Pt. Cond. Warrants Pt. Declined Med. Missing Pt. Sleeping
Tx. In Progress Standing Order Dialysis In Progress Pt. Off Unit Increased Pain
Stat Order Pending Lab Pt. Transferred NPO Pt. Discharged
Increased Nausea D/C'd Family/S.O. Refused Pt. Expired Pt. Preference
Blood Transfusion Rx Change
Override Reasons Listing
Printed By: User, Admin Page 1 of 1 Printed At: 08/10/2004 14:16
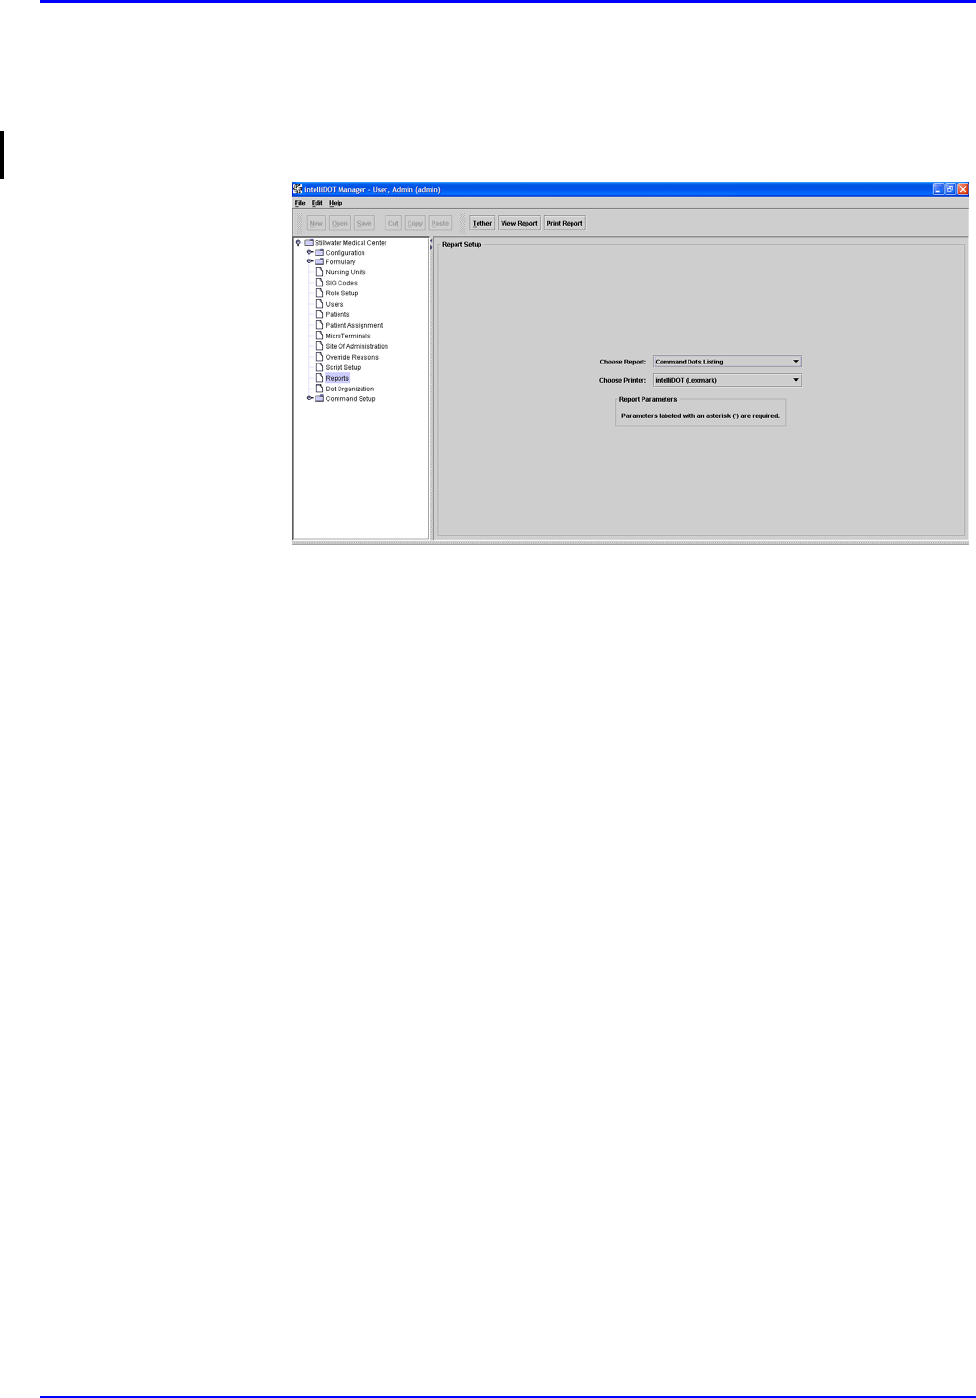
P/N TP0001-01 Rev. B Command DOT Listing
intelliDOT iConnect System User Guide Confidential 4-67
Printing your Command DOTs Listing
To print your Command DOTs Listing, perform the following:
1. After logging into the iConnect DOT Manager, select Reports. The default
report screen will appear.
2. Select Command DOTs Listing from the Choose Report drop down menu.
3. Choose your applicable Printer.
4. Click on the Print Report button.
The Report will be printed on the applicable printer you selected.
Override Reasons Listing P/N TP0001-01 Rev. B
4-68 Confidential intelliDOT iConnect System User Guide
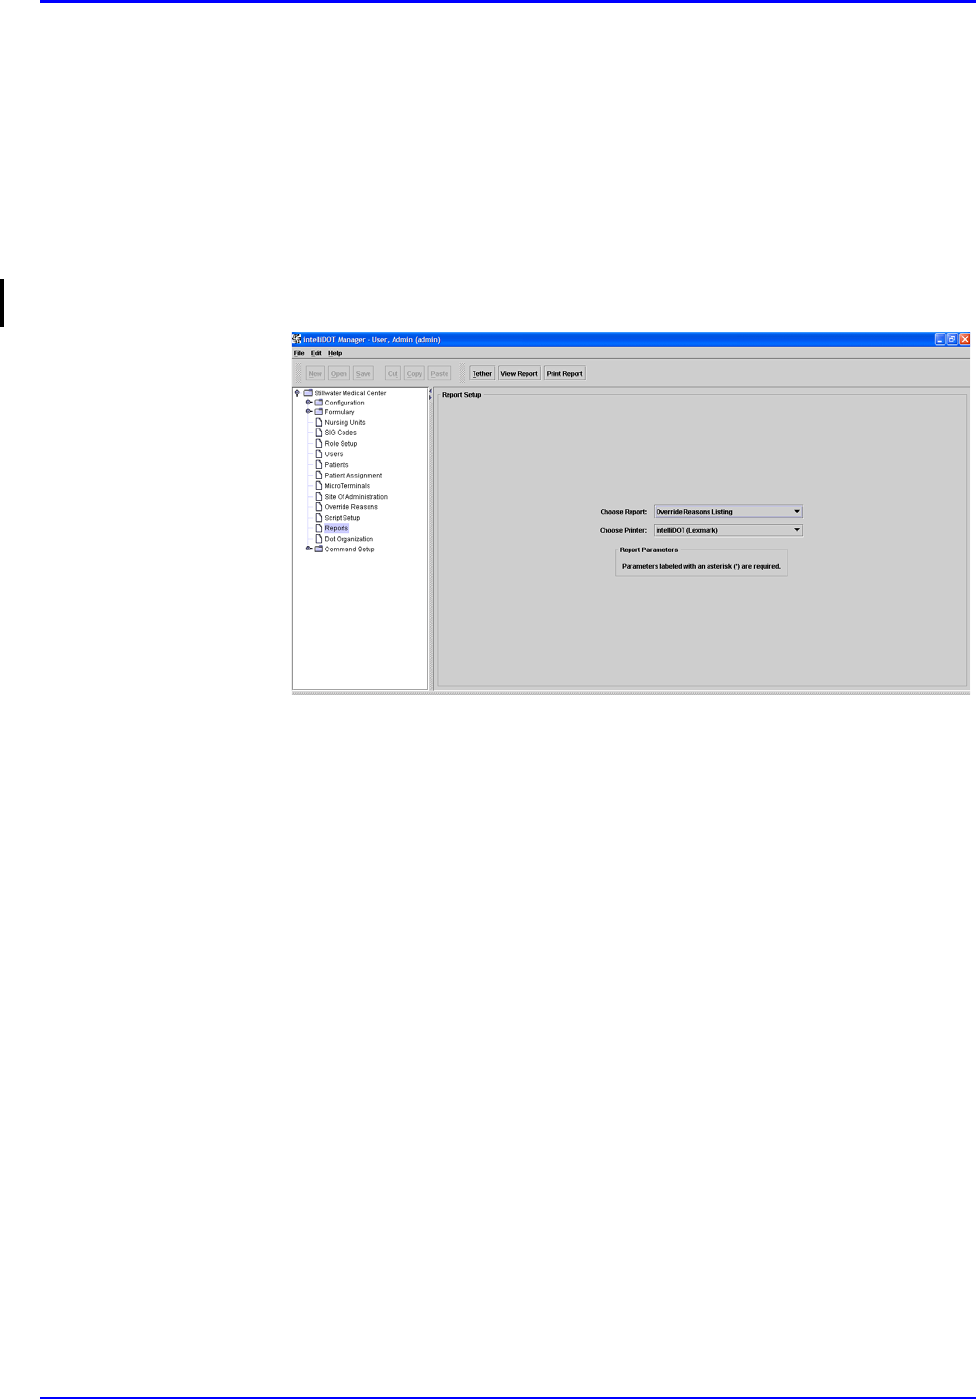
Override Reasons Listing
The override reasons listing provides DOTs used by the nurse during an
administration of medications.
Viewing your Override Reasons Listing
To view your Override Reasons Listing, perform the following:
1. After logging into the iConnect DOT Manager, select Reports. The default
report screen will appear.
2. Select Override Reasons Listing from the Choose Report drop down menu.
3. Choose your applicable Printer.
4. Click on the View Report button.
The Report will appear. See the following illustration.

P/N TP0001-01 Rev. B Override Reasons Listing
intelliDOT iConnect System User Guide Confidential 4-69
Example of Override Reasons Listing
Override Reasons Listing
Within Normal Limits Pt. Cond. Warrants Pt. Declined Med. Missing Pt. Sleeping
Tx. In Progress Standing Order Dialysis In Progress Pt. Off Unit Increased Pain
Stat Order Pending Lab Pt. Transferred NPO Pt. Discharged
Increased Nausea D/C'd Family/S.O. Refused Pt. Expired Pt. Preference
Blood Transfusion Rx Change
Override Reasons Listing
Printed By: User, Admin Page 1 of 1 Printed At: 08/10/2004 14:16
Override Reasons Listing P/N TP0001-01 Rev. B
4-70 Confidential intelliDOT iConnect System User Guide
Printing your Override Reasons Listing
To print your Override Reasons Listing, perform the following:
1. After logging into the iConnect DOT Manager, select Reports. The default
report screen will appear.
2. Select Override Reasons Listing from the Choose Report drop down menu.
3. Choose your applicable Printer.
4. Click on the Print Report button.
The Report will be printed on the applicable printer you selected.
P/N TP0001-01 Rev. B DOT Keyboard
intelliDOT iConnect System User Guide Confidential 4-71
DOT Keyboard
The DOT keyboard provides a listing of alphanumeric characters, numeric
characters, basic commands (cancel all, cancel, etc.), order information, and
diagnostic information.
Viewing your DOTs Keyboard
To view your DOTs Keyboard, perform the following:
1. After logging into the iConnect DOT Manager, select Reports. The default
report screen will appear.
2. Select DOTs Keyboard from the Choose Report drop down menu.
3. Choose your applicable Printer.
4. Click on the View Report button.
The Report will appear. See the following illustration.
DOT Keyboard P/N TP0001-01 Rev. B
4-72 Confidential intelliDOT iConnect System User Guide
Example of a DOT Keyboard
Keyboard
A B C D E
F G H I J
K L M N O
P Q R S T
U V W X Y
Z
Keypad
01234
56789
.
Basic Commands
Cancel All Cancel Last Continue Logout Omit
Verify Item
Order Information
Show Order Info - Order
Details Show Order Info - Patient
Name Show Order Info -
Medication
Diagnostic Information
Dump Patients and Orders Dump Users Dump Formulary Dump Commands Dump Dots
Show MT Version. Test RF Tether
Dot Keyboard
Printed By: User, Admin Page 1 of 1 Printed At: 04/02/2004 17:41
P/N TP0001-01 Rev. B DOT Keyboard
intelliDOT iConnect System User Guide Confidential 4-73
Printing your DOT Keyboard
To print your DOTs Keyboard, perform the following:
1. After logging into the iConnect DOT Manager, select Reports. The default
report screen will appear.
2. Select DOTs Keyboard from the Choose Report drop down menu.
3. Choose your applicable Printer.
4. Click on the Print Report button.
The Report will be printed on the applicable printer you selected.

DOT Keyboard P/N TP0001-01 Rev. B
4-74 Confidential intelliDOT iConnect System User Guide
- Notes -

intelliDOT iConnect System User Guide Confidential 5-1
Creating Command iDOTs P/N TP0001-01 Rev. B
Chapter 5
Creating Command iDOTs
Command iDOTs allow nurses to page someone, send an e-mail, print a
document, and other tasks by simply scanning a iDOT.
In order to place command iDOTs on reports, they must first be created. This
chapter reviews the process for creating command iDOTs.
For reporting-printing commands, if you always want the report to print on a
specific printer when the iDOT is scanned, set up the printer in the command (the
Order Change request for example). Once you have the commands setup, you put
them on the Worksheet by adding the commands to the Worksheet's Command
parameter.
Command iDOT Prompt Setup P/N TP0001-01 Rev. B
5-2 Confidential intelliDOT iConnect System User Guide
Command iDOT Prompt Setup
The prompt setup is used to enter information that appears on your iConnect
Handheld. The information you enter in the fields appear to the left in the blue
box. This box illustrates what will appear on your iConnect Handheld. The
instruction field will tell the iConnect Handheld what to do. For example, Scan
DOT or Press OK tells you to scan your command iDOT and press OK.
The reports allow you to create instructions appearing on your iConnect
Handheld. To create a command iDOT prompt, perform the following:
1. Select Command Setup, Prompt Setup. For example, the following screen
will appear.
2. Click New and new fields appear on the screen.
3. Enter the information to appear in Line 1 and Line 1b. This information
displays in the blue box to the right. This box displays an example of what
you will see on your iConnect Handheld.
4. Enter the instructions you want the user to perform. For example, if you want
the user to press ok, enter “Press OK”.
5. Select the Response Category from the drop down list. For example, select
patient if you printing a MAR for a current patient.
Remember that leaving the Printer parameter blank will cause the report to be
printed to the user's default printer when they scan the command iDOT for the
report.

P/N TP0001-01 Rev. B Worksheet Reports
intelliDOT iConnect System User Guide Confidential 5-3
Worksheet Reports
The reports allow you to create and save a iDOT to print a specific report. This
iDOT can then placed on the worksheet.
1. Select Command Setup, Reports and applicable report.
For example: The Nurse Medication Worksheet screen will appear.
2. Click New and new fields appear on the screen.
3. Enter the name of the report in the Name field.
4. Enter the Nurse (current user recommended), the date (today), the shift the
nurse is working,
Remember that leaving the Printer parameter blank will cause the report to be
printed to the user's default printer when they scan the command iDOT for the
report. Each report will be specific to the command needed. Be sure to enter all
information in the required fields.

Worksheet Reports P/N TP0001-01 Rev. B
5-4 Confidential intelliDOT iConnect System User Guide
- Notes -

intelliDOT iConnect System User Guide Confidential 6-1
Diagnostics, Troubleshooting, and Safety P/N TP0001-01 Rev. B
Chapter 6
Diagnostics, Troubleshooting, and
Safety
This section is about diagnostics for your iConnect Handheld and troubleshooting
any problems that arise, including the following:
• Tether the iConnect Handheld
• Testing RF
• Rebooting the iConnect Handheld
• Troubleshooting
Tethering the iConnect Handheld P/N TP0001-01 Rev. B
6-2 Confidential intelliDOT iConnect System User Guide
Tethering the iConnect Handheld
Tethering is a way for the iConnect Handheld to directly interface with the
iConnect System Manager. It is a fast efficient way of accurately entering bar
code information into the iConnect System Manager without typing. Once
tethered, you can scan a medication bar code and it appears in the formulary brand
setup window of the Master Drug file. Tethering can be performed for the
iConnect System Manager using the iConnect Handheld. To tether to the iConnect
System Manager, perform the following:
1. Print out the latest DOT Keyboard.
This keyboard will have a Tether iDOT on the report.
2. Login to the iConnect System Manager.
3. Logon the iConnect Handheld.
4. On the iConnect System Manager, select the tether button from anywhere on
the screen.
The User Badnge Asssigmnet window appears asking you to scan the tether
iDOT.
Be sure to use the same login ID and password for the iConnect System Manager
and the iConnect Handheld. To tether they must be the same.
P/N TP0001-01 Rev. B Tethering the iConnect Handheld
intelliDOT iConnect System User Guide Confidential 6-3
5. Scan the tether DOT. The following screen will appear.
6. Click the Tether button on the iConnect System Manager.
7. To untether, just press OK on the iConnect Handheld.
The “User, Scan Patient or Command iDOT reappears
Waiting for Connection
ED
iConnect Handheld screen
Tethered
OK to Quit
ED
iConnect Handheld screen
Refer to Formulary Configuration on page 3-10. The formulary configuration
section provides the steps how to enter your information.
Testing RF with the iConnect Handheld P/N TP0001-01 Rev. B
6-4 Confidential intelliDOT iConnect System User Guide
Testing RF with the iConnect Handheld
1. Scan the RF Test iDOT on your DOT Keyboard Report. The following screen
will appear.
2. Press OK and you will be in RF Test mode.
This will be the signal to noise ratio for the wireless signal.
Rebooting the iConnect Handheld
Rebooting the device is needed when an iConnect Handheld does not connect to
the server or may the device may need to be refreshed. To reboot the iConnect
Handheld, perform the following:
1. Gently insert a paper clip into the small hole on the underside of the iConnect
Handheld.
or
Place the iConnect Handheld in the charging cradle.
Press OK
ED
iConnect Handheld screen
SNR
38%
ED
iConnect Handheld screen

P/N TP0001-01 Rev. B Safety and Maintenance
intelliDOT iConnect System User Guide Confidential 6-5
System Timeout and What to Do
System timeout occurs when the iConnect Handheld cannot connect to the
IntelliDOT server. This can occur with different scenarios which include power
outage, wireless connectivity interruption, or a server reboot.
• Press the OK button to return to the previous screen.
All data entered on the scanner before the system timeout remains in the
system and does not need to be re-entered. The iConnect Handheld displays a
screen informing you to Press OK.
If you press OK, the iConnect Handheld will reconnect to the server and bring
you back to your last med needed to be given.
Safety and Maintenance
iConnect Handheld User Safety Information
IMPORTANT: READ this before operating your iConnect Handheld
For safe use of the iConnect Handheld always observe the following guidelines.
• This device complies with part 15 of the FCC rules. Operation is subject to
the following two conditions: (1) This device may not cause harmful
interference, and (2) this device must accept any interference received,
including interference that may cause undesired operation.
• There are no user serviceable parts of the iConnect Handheld. Do not
attempt to open the housing as this may damage the unit. Any changes or
modifications to the product not expressly approved by the party
responsible for FCC compliance could void the user’s authority to operate
the equipment. Refer any unit needing maintenance or service to qualified
service personnel.
• This equipment has been tested and found to comply with the limits for a
Class A digital device, pursuant to part 15 of the FCC Rules. These limits
are designed to provide reasonable protection against harmful interference
in a residential installation. The equipment generates uses and can radiate
radio frequency energy and, if not installed and used in accordance with the
instructions, may cause harmful interference to radio communications.
However there is no guarantee that interference will not occur in a particular
installation. If this equipment does cause harmful interference to radio or
television reception, which can be determined by turning the equipment off
and on, the user is encouraged to try to correct the interference by one or
more of the following measures:
-Reorient or relocate the receiving antenna.
Do Not Reboot the iConnect Handheld after a System Timeout. Contact your
System Administrator.

Safety and Maintenance P/N TP0001-01 Rev. B
6-6 Confidential intelliDOT iConnect System User Guide
-Increase the separation between the equipment and the receiver.
-Connect the equipment into an outlet on a circuit different from that to
which the receiver is connected.
-Consult the dealer or an experienced radio/TV technician for help.
• This unit incorporates a Class II laser in its bar code scanner. Laser light
will be emitted for up to several seconds after the button labeled
“BAR CODE” or “III I II” is pressed. The laser light is emitted from the
side of the unit opposite the LCD and function buttons. Never direct the
laser emitting side of the unit toward your own or anyone else’s eyes.
General Tips
• This device complies with part 15 of the FCC rules. Operation is subject to
the following two conditions: (1) This device may not cause harmful
interference, and (2) this device must accept any interference received,
including interference that may cause undesired operation.
• Although the iConnect Handheld is water and dust resistant, do not expose
it to rain or moisture for an extended period of time. In general, treat the
device as you would a pocket calculator or other small electronic
instrument.
• The touch-sensitive screen of the iConnect Handheld contains glass.
Although the device is rugged, be careful not to drop the device or subject it
to repetitive strong impact.
• Protect the iConnect Handheld from temperature extremes. Keep it away
from heaters and other heat sources.
• Do not store the iConnect Handheld in a dusty, damp, or wet location.
Cleaning the Device
Use a soft lens cloth to clean the iConnect Handheld. If the surface of the screen
becomes soiled, clean it with a soft cloth moistened with a diluted antibacterial
soap solution.
Batteries
The iConnect Handheld uses one main battery. As long as the device is returned to
the charger when not in use, the battery will stay operative and not need to be
replaced. Contact IntelliDOT if you need a new battery.

P/N TP0001-01 Rev. B Safety and Maintenance
intelliDOT iConnect System User Guide Confidential 6-7
Battery Charging
The iConnect Handheldcontains a rechargeable Li-ion battery with a charging
safety circuit. When you first unpack the unit, the battery will likely be fully
discharged. Place the unit into the iConnect charging station plugged into standard
120VAC power. It takes approximately 4 hours to fully charge the battery of the
iConnect Handheld. Depending on usage, the battery should provide full function
for about 12 hours.
Wireless Networking
The iConnect Handheld operates using 802.11b wireless networking capability.
Your nursing unit must be equipped with wireless access points which allow the
iConnect Handheld to communicate with the IntelliDOT Server computer and
other iConnect Handheld. If you leave your nursing unit, the iConnect Handheld
may loose its connection to the network and the IntelliDOT Server. Don’t be
alarmed, but know that your iConnect Handheld is “off-line” in these
circumstances.
iConnect Handheld Radiation Specifications
The iConnect Handheld contains a laser device to implement linear bar code
scanning.
• Laser source: Diode
• Laser Class: FDA CDRH Class II
• Laser light wavelength: 650nm
• Laser power: 0.8mW nominal – Aim Mode
• 1.2mW nominal – Scanning Mode
• Scan rate: 39 (+/- 3) per second (bi-directional)
Troubleshooting P/N TP0001-01 Rev. B
6-8 Confidential intelliDOT iConnect System User Guide
Troubleshooting
Unknown Patient
Medication Can Not Be Found
Time Error
Device Does Not Turn On
Scanner Does Not Function
Description Remedy
When scanning the patient bar code, a
match can not be made in the patient
database “Unknown Patient”.
Add the patient at the iConnect System Manager or
check the interface or wait for the interface.
Description Remedy
When scanning the medication, the med
ID is not found in the formulary
database “Unknown Med”.
Contact the pharmacy or the IntelliDOT System
Administrator.
Description Remedy
If a time error is received and the
user knows that the order time is
correct, the system time on the
device may not be correct.
Contact the IntelliDOT System Administrator.
Description Remedy
The login screen does not appear
when the device is turned on. Insert a paper clip into the small hole on the backside of
the iConnect Handheld.
If the iConnect Handheld still does not operate, report
the problem to the IntelliDOT System Administrator.
Description Remedy
The iConnect Handheld does not
scan a bar code when you press the
Bar Code
button.
Check to be sure the bar code is not defaced.
Hold the scanner at a 30
o
-45
o
angle. Be sure the
iConnect Handheld is within proper scanning range.
If the iConnect Handheld stops emitting a laser beam
while the
Bar Code
button is pressed, check the battery
level. When the battery is low, the scanner shuts off
before the low battery warning appears. Recharge the
scanner and select another iConnect Handheld device.
If the iConnect Handheld still does not operate and the
battery is not low, report the problem to the IntelliDOT
System Administrator.
P/N TP0001-01 Rev. B Troubleshooting
intelliDOT iConnect System User Guide Confidential 6-9
Troubleshooting Quick Reference Chart
Problem Remedy/How To:
DOT Reader Light Stays ON
1. Reboot iConnect Handheld via paper clip.
2. Press OK to connect to server. Relogin.
3. If light does not go OFF, replace with new iConnect Handheld and
contact IntelliDOT Customer Support for new iConnect Handheld
and record iConnect Handheld ID.
Unknown Med
1. User on wrong screen.
2. Med is incorrectly entered in iConnect System Manager
Formulary.
3. Check with Pharmacy to ensure med is entered correctly.
Unknown Patient
1. User on wrong screen. Scanned an unexpected bar code, expecting
a patient.
2. Patient not in the system. Verify on iConnect System Manager that
the patient is in the system.
Unknown User
1. User is incorrectly entered into the iConnect System Manager.
2. Check iConnect System Manager for user. Verify Bar Code is in
the system.
3. Rescan badge.
Wireless Signal Missing from iConnect Handheld
(Icon Missing)
1. Reboot iConnect Handheld by inserting into charging unit. (Do
not use paper clip)
2. Check Access point is not working. Walk down nursing unit
3. Check with IS about access point not working.
Battery Symbol at Minimum
1. Recharge iConnect Handheld. (Yellow LED flashes when in
charger, Green LED flashes when fully charged)
2. Wait until iConnect Handheld is at 90% or better to use.
Note: Battery is life is around 6 hours.(Can be less)
iConnect Handheld Displaying Not Able to Connect
on Screen
1. Server is being rebooted. (Not Likely)
2. Reboot iConnect Handheld. Use Paper Clip.
3. Ask Patti to reconfigure iConnect Handheld. Reconfigure
iConnect Handheld using Configuration Report DOTs.
Meds showing up late on iConnect Handheld for
previous days
1. When were you assigned to Patient?
2. If assigned yesterday, remove assignment and reassign patient to
nurse.
Unable to Login
1. Wireless signal missing from iConnect Handheld. See above
2. Check RF symbol on iConnect Handheld.
3. Server maybe down. Login again
Troubleshooting P/N TP0001-01 Rev. B
6-10 Confidential intelliDOT iConnect System User Guide
iDOTs Not Scanning - Negative Tone
1. Bad Printer. Reprint reports.
2. Bad camera on iConnect Handheld. Have the nurse tether the
iConnect Handheld to see a iDOT being read. Be sure to turn on
image to view bad iDOTs.
3. iConnect Handheld may need to be charged. If at 18% or
below...charge iConnect Handheld and get new iConnect
Handheld.
Time-out Warning on iConnect Handheld Press OK to
Continue
1. Server not communicating. Wait for 30 seconds and try to login
again.
2. Timeout goes back to login state.
3. Connect to iConnect System Manager. If you cant connect, server
is down.
Unable to Connect to iConnect System Manager
1. Server not communicating. Wait for 30 seconds and try to login
again.
2. Connect to iConnect System Manager. If you cant connect, server
is down.
3. Reboot server. To Reboot Server......Ask Mike, Phil, Eric.
Problem Remedy/How To:

intelliDOT iConnect System User Guide Confidential Index-1
Index P/N TP0001-01 Rev. B
Index
A
Adding a New Administration event on the On-Line
MAR 3-32
Administration History and Audit Report
Printing 4-44
Viewing 4-41
Administration Sites Listing 4-62
Printing 4-64
Viewing 4-62
Advance Prepared Items 2-25
Administering Meds for Cases 1-3 2-33
Meds already computer entered by pharmacy
requiring a witness 2-28
Meds not yet computer entered by pharmacy 2-35
Meds not yet computer entered by pharmacy with
more than one component 2-40
Assigning Patients 3-38
B
Bar Coding 1-7
Medication Packages 1-7
Nurse Badges 1-7
Patient Wristbands 1-7
Battery Charging 6-7
C
Command Dots Listing 4-65
Printing 4-67
Viewing 4-65
Command iDOT Prompt Setup 5-2
Configuration Setup 3-3
Hospital Address Setup 3-3
Printer Setup 3-4
Shift Setup 3-5
Configuring iConnect Handheld 3-39
Correcting or Cancelling Medication Transactions 2-47
Creating Command iDOTs 5-1
D
Diagnostics, Troubleshooting, and Safety 6-1
Dose Out of Range 2-23
Dose-Due Reminder and Over-Due Alerts 2-17
Dose-Due Reminders 2-17
Lunch and Break Coverage DOTs 2-21
Omitting Medications Due Times 2-18
Over-Due Med Alerts 2-18
Snooze Feature 2-20
Using Delay Dose 2-20
DOT Keyboard 4-71

Index P/N TP0001-01 Rev. B
Index-2 Confidential intelliDOT iConnect System User Guide
Printing 4-73
Viewing 4-71
Dot Keyboard 4-71
DOT Organization Setup 3-42
F
Formulary Listing Report 4-59
Printing 4-60
Viewing 4-59
Formulary Setup 3-6
Adding and Editing Clinical Warnings 3-6
Adding, Editing, and Deleting Clinical Prompts 3-4,
3-8, 3-13, 3-15, 3-17, 3-19
Clinical Prompts 3-8
Clinical Warnings 3-6
Formulary Configuration 3-10
Formulary Download 3-10
Master Drug Formulary 3-10
G
Generating Reports 4-1
I
iConnect Handheld
Basic Medication Administration 2-10
Basic Medication Administration of a PRN
Medication 2-13
Charging 2-3
Conventions 2-4
Features 2-2
Login/Logout 2-5
Medication Administration 2-9
Patient Assignment 2-8
Responding to Prompts for Data During
Administration 2-15
Scanning 2-4
Scanning Bar Codes 2-4
Scanning iDOTs 2-5
Using 2-1
Using the Patient Assignment DOT 2-8
iConnect Handheld Configuration Report
Printing 4-53
iConnect Server 1-5
Physical Description 1-5
Purpose 1-5
iConnect System Components 1-2
Charging the Device 1-3
Durability 1-4
iConnect Handheld 1-2
Operating the iConnect Handheld 1-3
Physical Description 1-3
Using the iConnect Handheld 1-4
iConnect System Installation 1-6
Definition 1-6
Development and Testing 1-7
Function, Location, and Definition 1-6
Information Components 1-6
Installation Responsibility 1-6, 1-7
Interface Installation 1-6
Purpose 1-6
Wireless Access Point Installation 1-6
iConnect System Manager 1-5
Access / Operation 1-5
Adding Patient Specific Notes 3-34
Administration Specific Notes 3-37
Editing an Administration on the On-Line MAR 3-31
Editing Patient Specific Notes 3-35
Functions 1-5
MAR Notes 3-34
Medication Order Specific Notes 3-36
Patient Specific Notes 3-34
Physical Description 1-5
Using 3-1
iConnect System Manager MAR 3-30
Viewing the MAR 3-30
L
Logging into the iConnect DOT Manager 3-2
M
Medication Administration DOT Sheet 4-30
Viewing 4-36
Medication Administration Record
Printing 4-5, 4-10, 4-16
Viewing 4-2, 4-7, 4-12
Medication Administration Warnings 2-22
Battery Low Warning 2-24
Early or Late Warnings 2-22
Timeout Warnings 2-22
Meds already computer entered by pharmacy 2-26
MicroTerminal Configuration Report 4-51
Multi-Component Items Dispensed by Pharmacy 2-46
N
Nurse Medication Worksheet 4-2, 4-18, 4-24, 4-30
Printing 4-22, 4-28, 4-34
Viewing 4-18, 4-24, 4-30
Nursing Unit Setup 3-13
Nursing Workflow Setup 1-9
O
Override Reason Listing 4-68
Printing 4-70
Viewing 4-68
Override Reasons Setup 3-41
P
Patient Assignment Worksheet 4-58

Index P/N TP0001-01 Rev. B
intelliDOT iConnect System User Guide Confidential Index-3
Printing 4-56
Viewing 4-54
Patient Medication Worksheet 4-46
Viewing 4-46
Patient Setup 3-29
Reviewing Meds on the iConnect System Manager 3-
29
Pharmacy System Setup 1-8
Clinical Settings 1-8
Formulary 1-8
Hospital-Specific Policies and Procedures 1-9
System Configuration Process 1-8
Workflow Assessment by IntelliDOT 1-9
Pharmacy Use of the iConnect Handheld 2-49
Drug Item Verification 2-49
Printing your Sig Code Listing Report (CSV) 4-58
R
Rebooting the iConnect Handheld 6-4
Reports 3-41
Requesting a Scheduled Med Time Change 2-48
Role Setup 3-21
Suggested Privileges for Charge Nurses Roles 3-24
Suggested Privileges for Director and Nurse Manager
Roles 3-23
Suggested Privileges for Pharmacist Roles 3-26
Suggested Privileges for Pharmacy Technician Roles
3-27
Suggested Privileges for Ward Clerk/Unit Secretary
Roles 3-25
User Roles and Privileges 3-22
S
Safety and Maintenance 6-5
iConnect Handheld User Safety Information 6-5
Script Setup 3-41
Seven (7) Day Medication Summary Report 4-46
Printing 4-49
Viewing 4-46
Sig Code Listing Report 4-54
Viewing 4-57
Sig Code Setup 3-15
Site of Administration Setup 3-40
System Overview 1-1
Introduction 1-1
Outline 1-2
T
Testing RF with the iConnect Handheld Devices 6-4
Tethering the iConnect Handheld Device 6-2
Troubleshooting 6-8
Troubleshooting Quick Reference Chart 6-9
U
Unknown Item 2-23
User Setup (Adding and Editing) 3-28
V
Viewing your Medication Worksheet Report 4-18, 4-24,
4-30
W
Wireless Networking 6-7
Worksheet Reports 5-3

Index P/N TP0001-01 Rev. B
Index-4 Confidential intelliDOT iConnect System User Guide
- Notes -