Interactive Technologies IQ69 Marine Device Remote Control Transmitter User Manual
Interactive Technologies, Inc. Marine Device Remote Control Transmitter
UserManual.wiki
>
Interactive Technologies
>
IQ69 User Manual
user manual
Navigation menu
Upload a User Manual
Namespaces
Wiki Guide
HTML
PDF
Info
Views
User Manual
Discussion / Help
Navigation
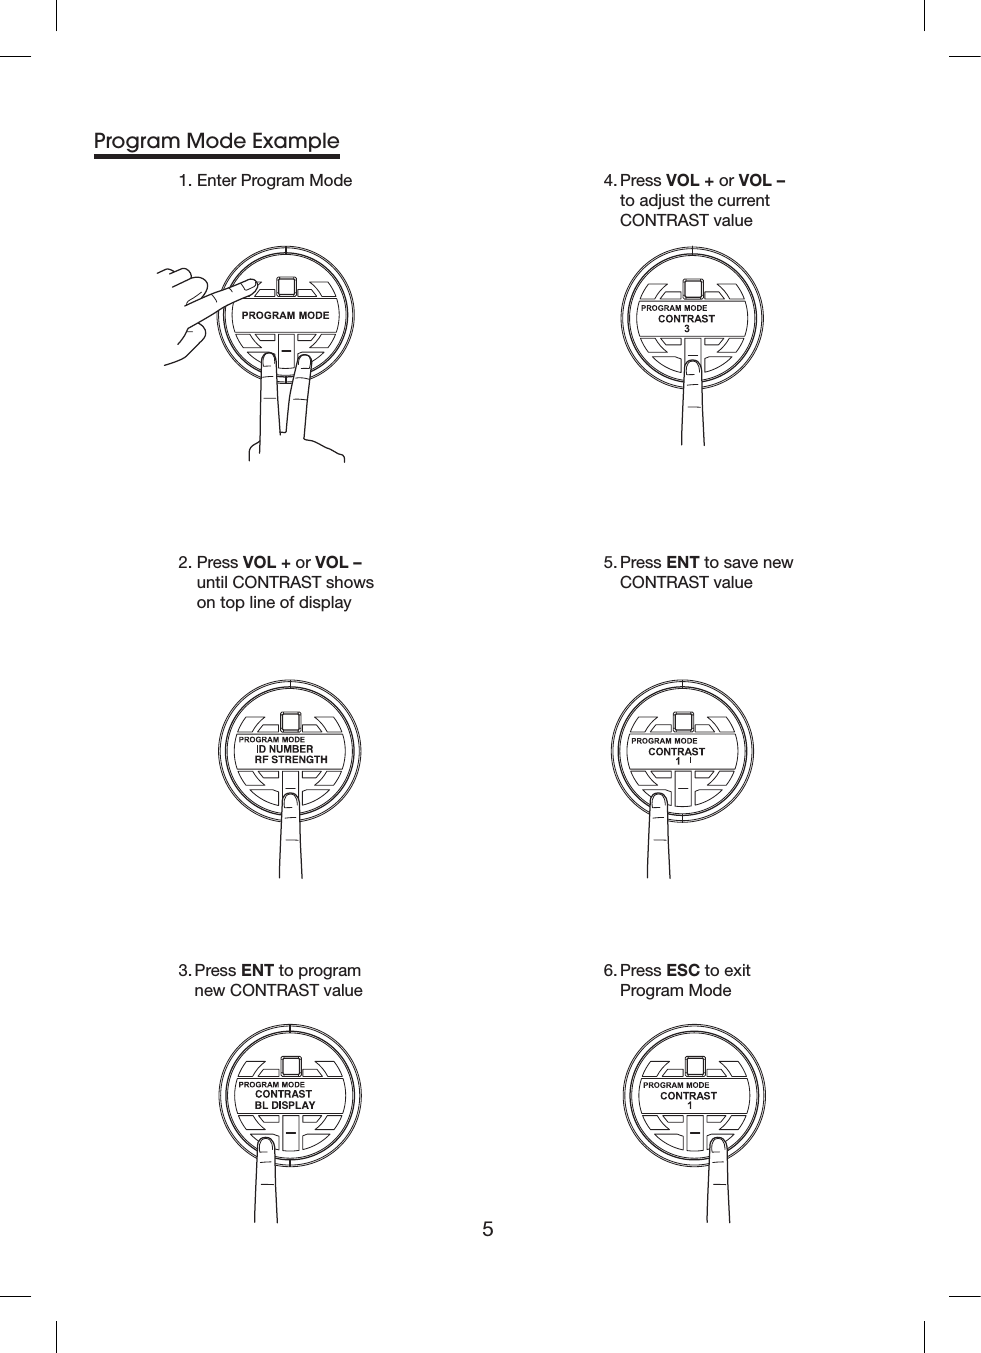
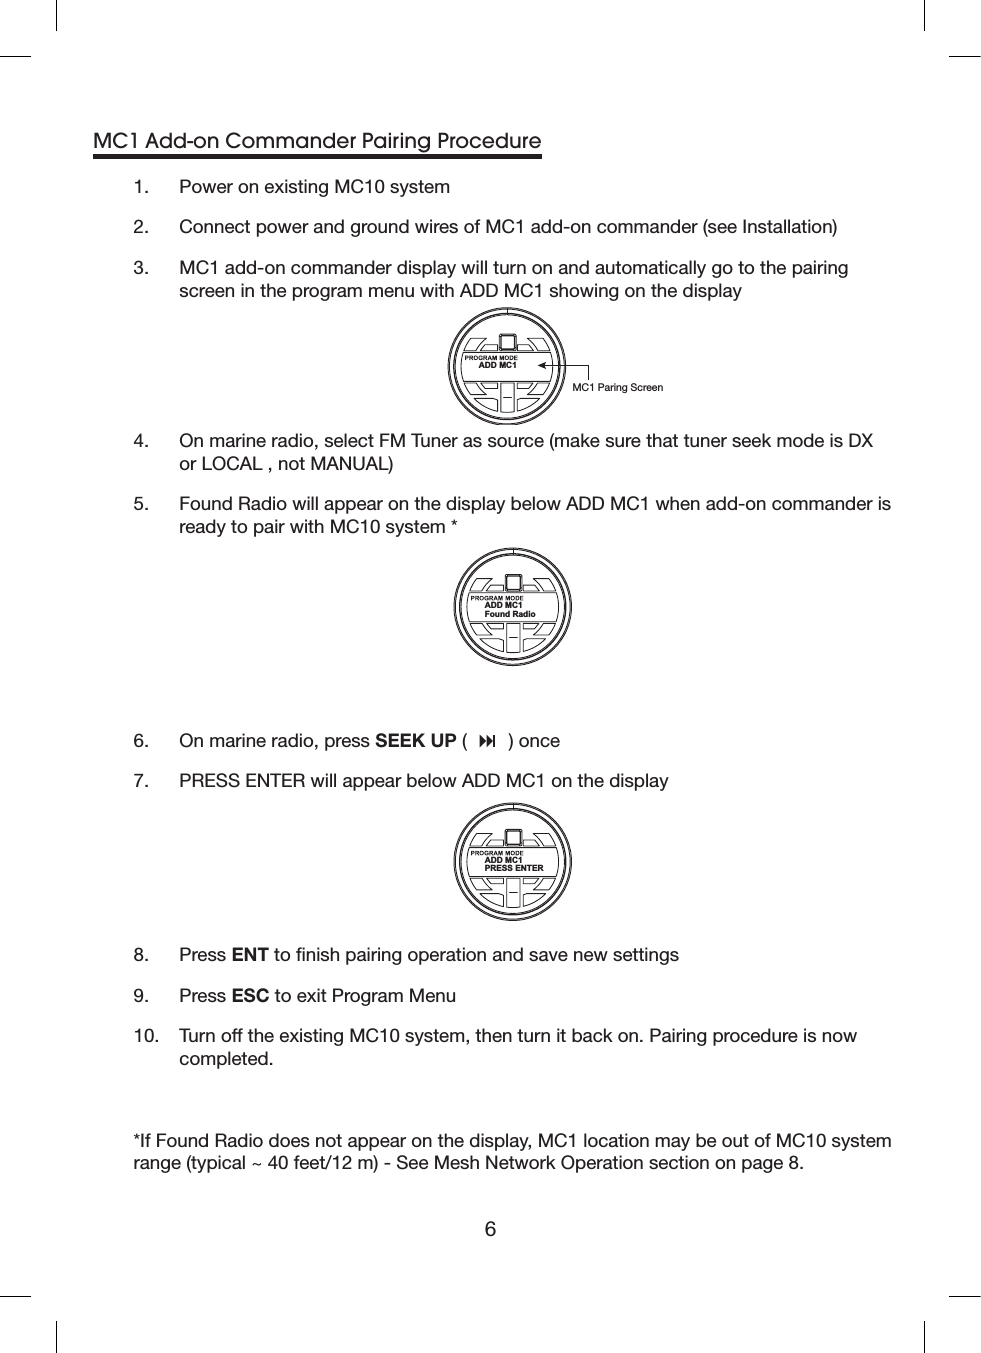
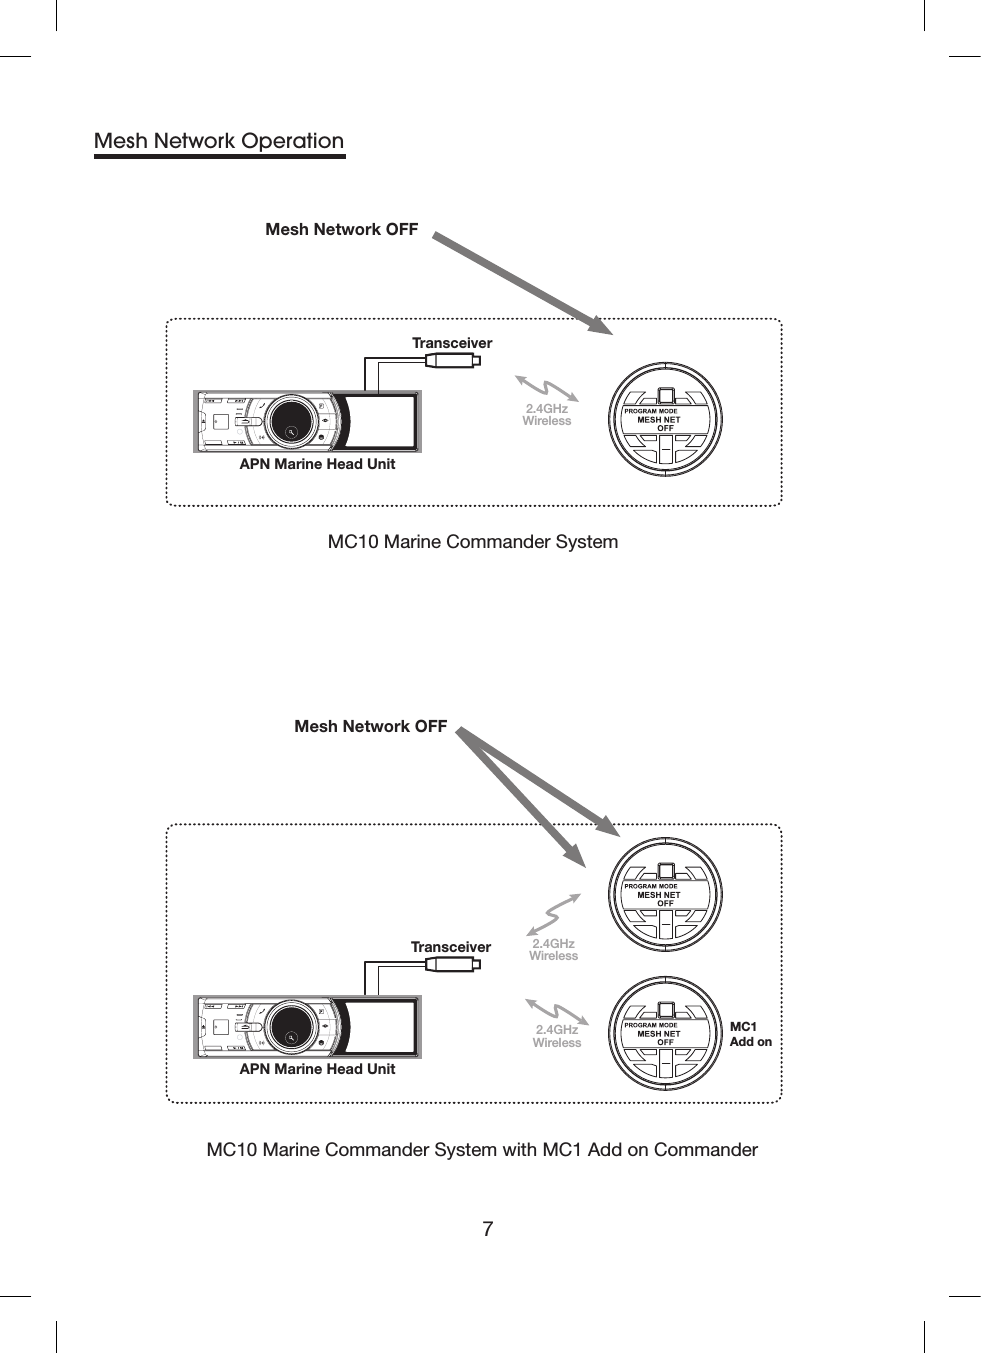
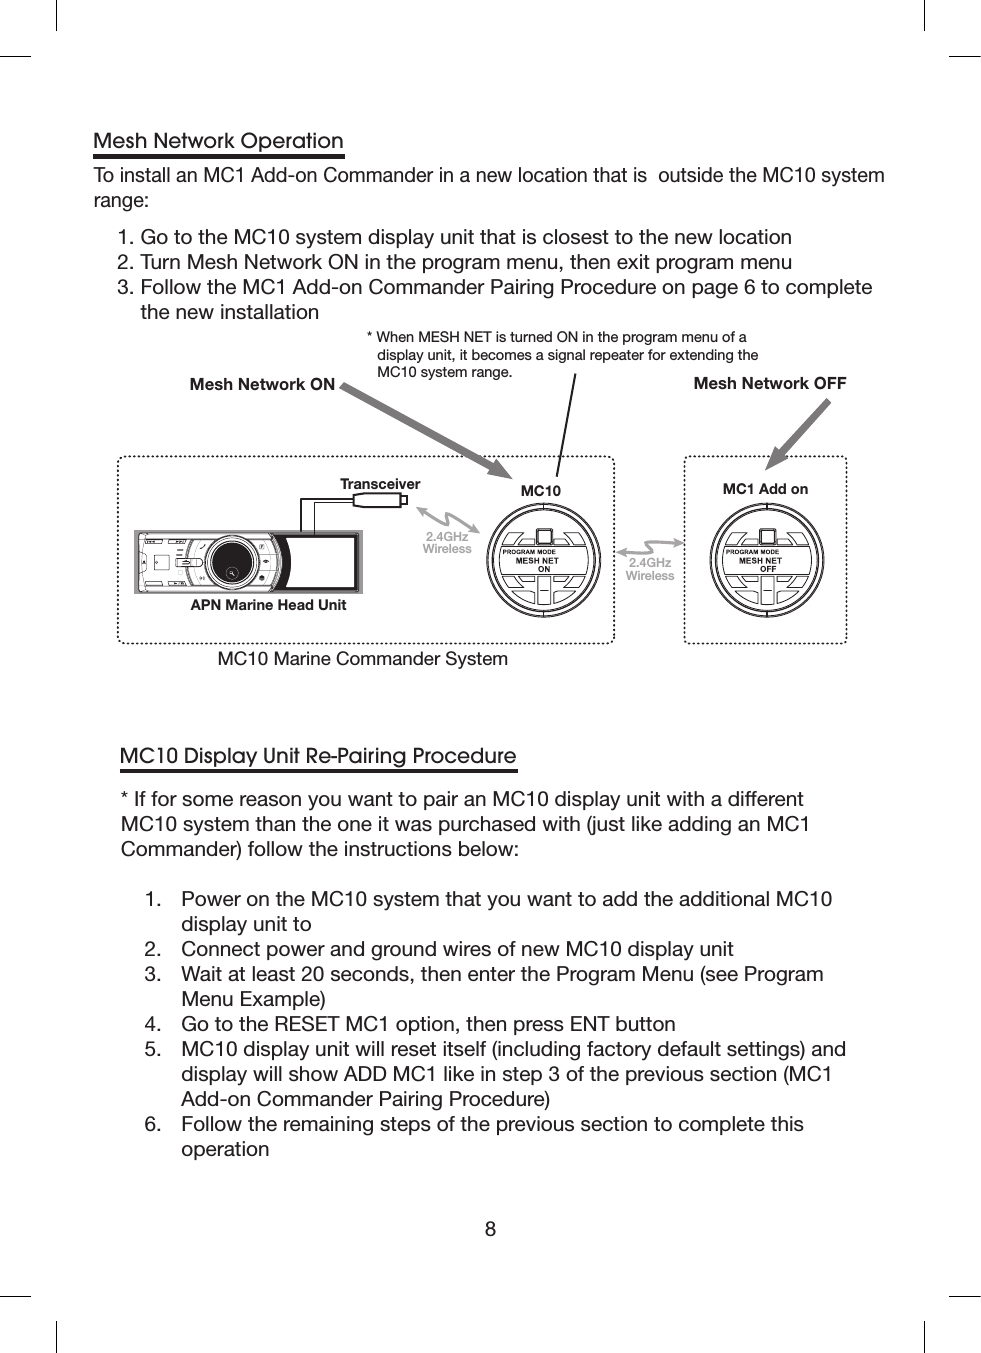
![4Enter Program ModeMC10Display unitProgram Menu1. ID NUMBER This is the serial number of the display unit. * Range of serial numbers: 00001 to 999992. RF STRENGTH Signal strength between a display unit and the closest display or transceiver unit in the MC10 wireless system * Range of strength: [ to ]3. SIGNAL STATUS Wireless signal connection status between a display unit and the transceiver unit * Values: [CONNECTED, NO CONNECT] 4. MESH NET When set to ON, turns a display unit into a signal repeater for communicating with MC1 add-on commander units that are installed outside the MC10 system communication range * Values: [OFF, ON]5. CONTRAST Sets brightness or dimness of LCD display characters * Values: [5, 4, 3, 2, 1, 0]6. BL DISPLAY Turns LCD backlighting ON or OFF 7. BL KEYPAD Turns keypad button backlighting ON or OFF 8. TEMPERATURE Sets temperature scale to degrees F or degrees C 9. RESET MC1 Menu selection for pairing or re-pairing any MC1 or MC10 display units with any existing MC10 system. RESET MC1 also restores factory default setting* Note: Bold indicates default menu selection for this program menu optionProgram Menu Options](https://usermanual.wiki/Interactive-Technologies/IQ69/User-Guide-1116982-Page-4.png)