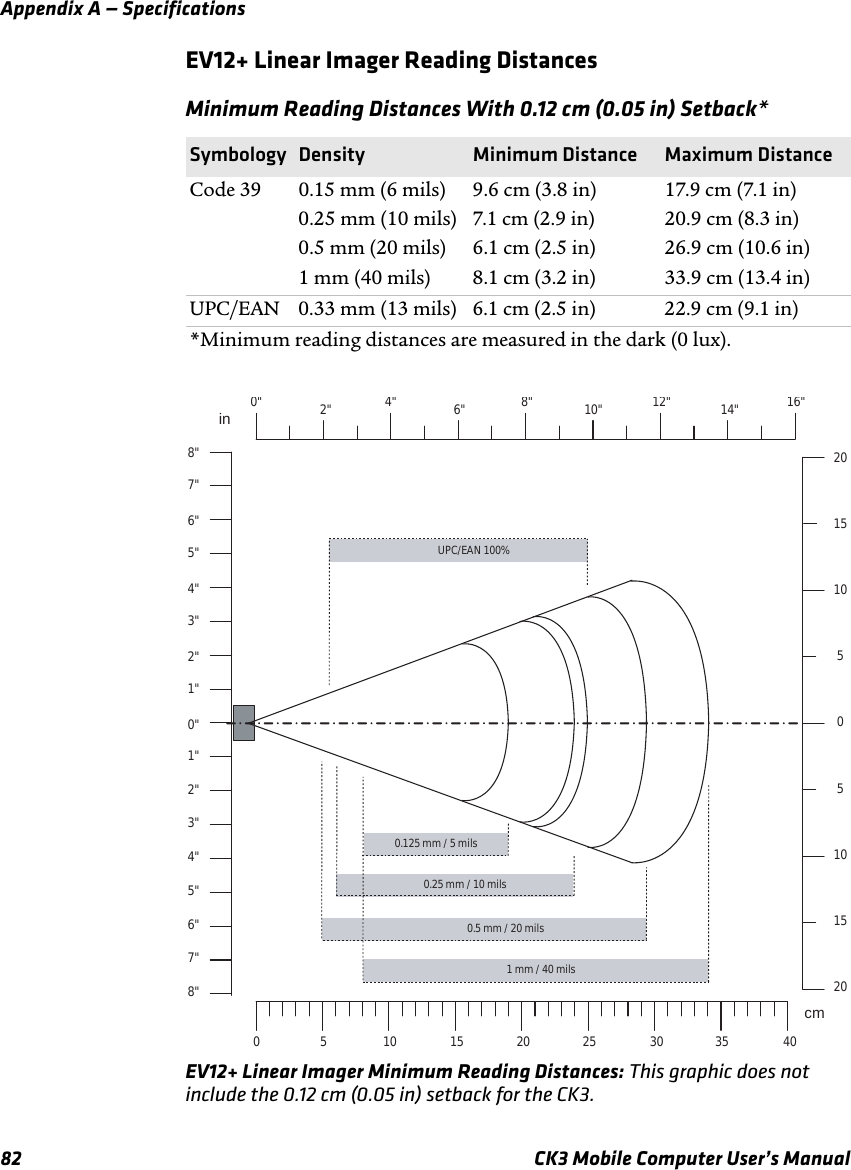
Intermec Technologies CK3DHIB CK3 Series Handheld Computer User Manual CK3UM
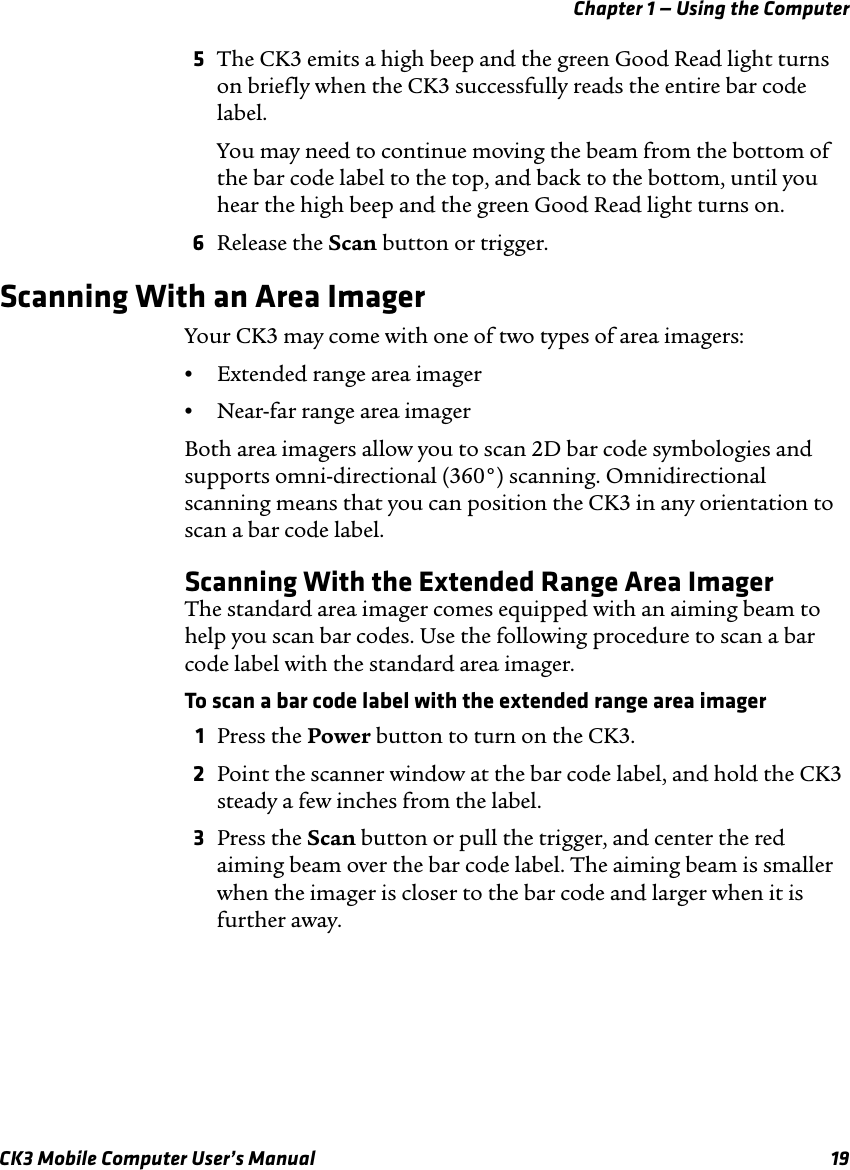
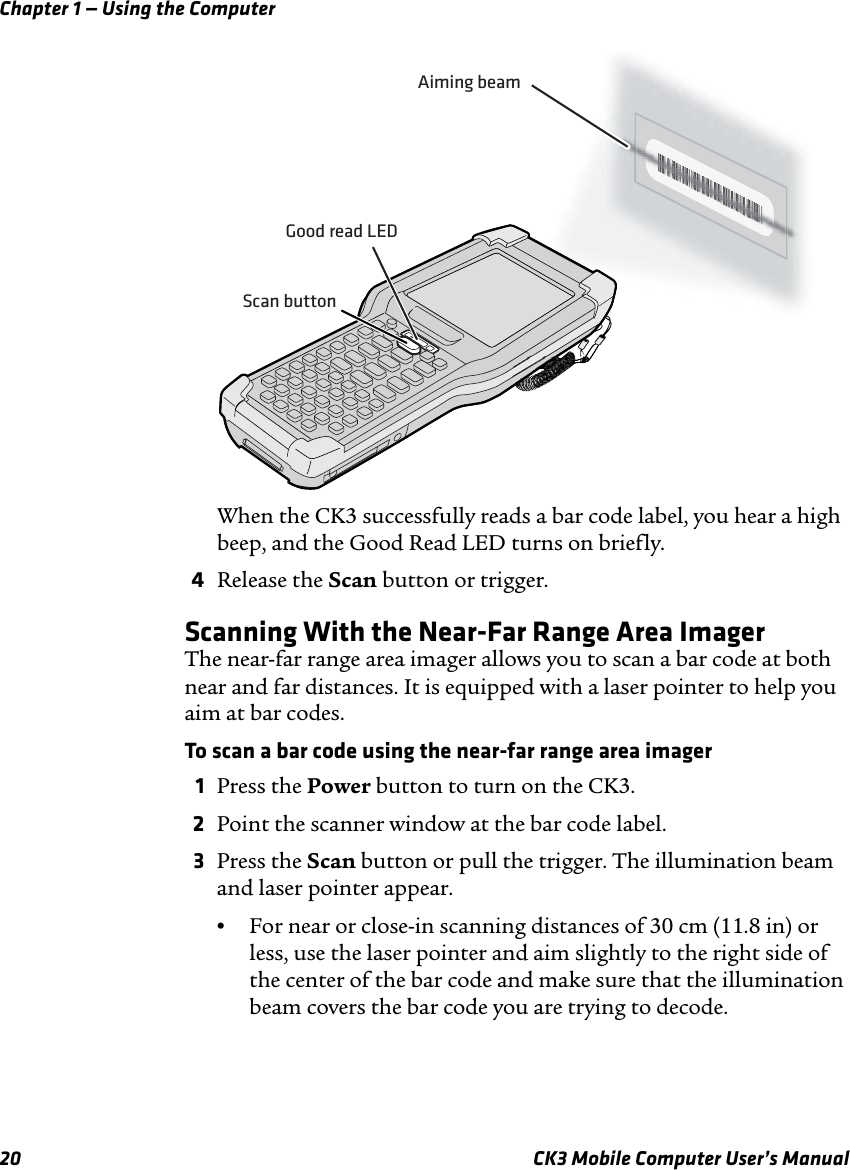
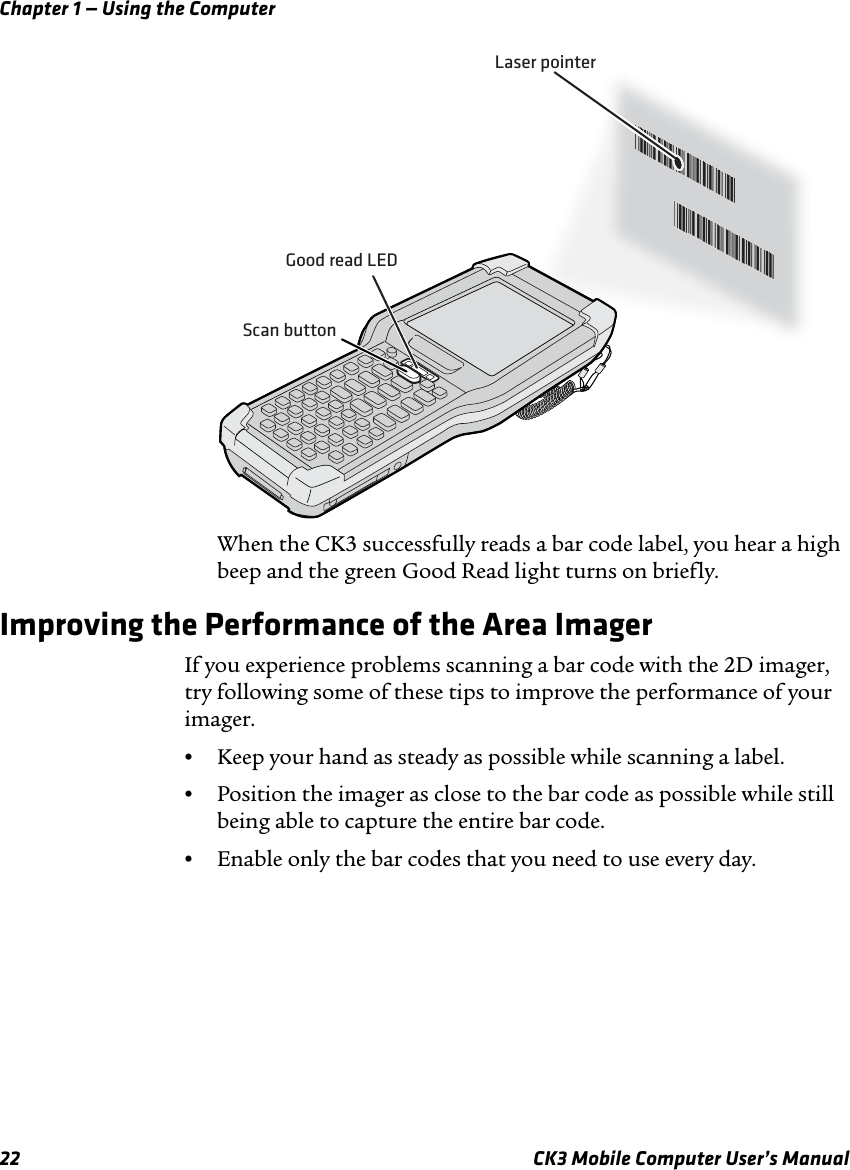
Intermec Technologies Corporation CK3 Series Handheld Computer CK3UM
UserManual.wiki
>
Intermec Technologies
>
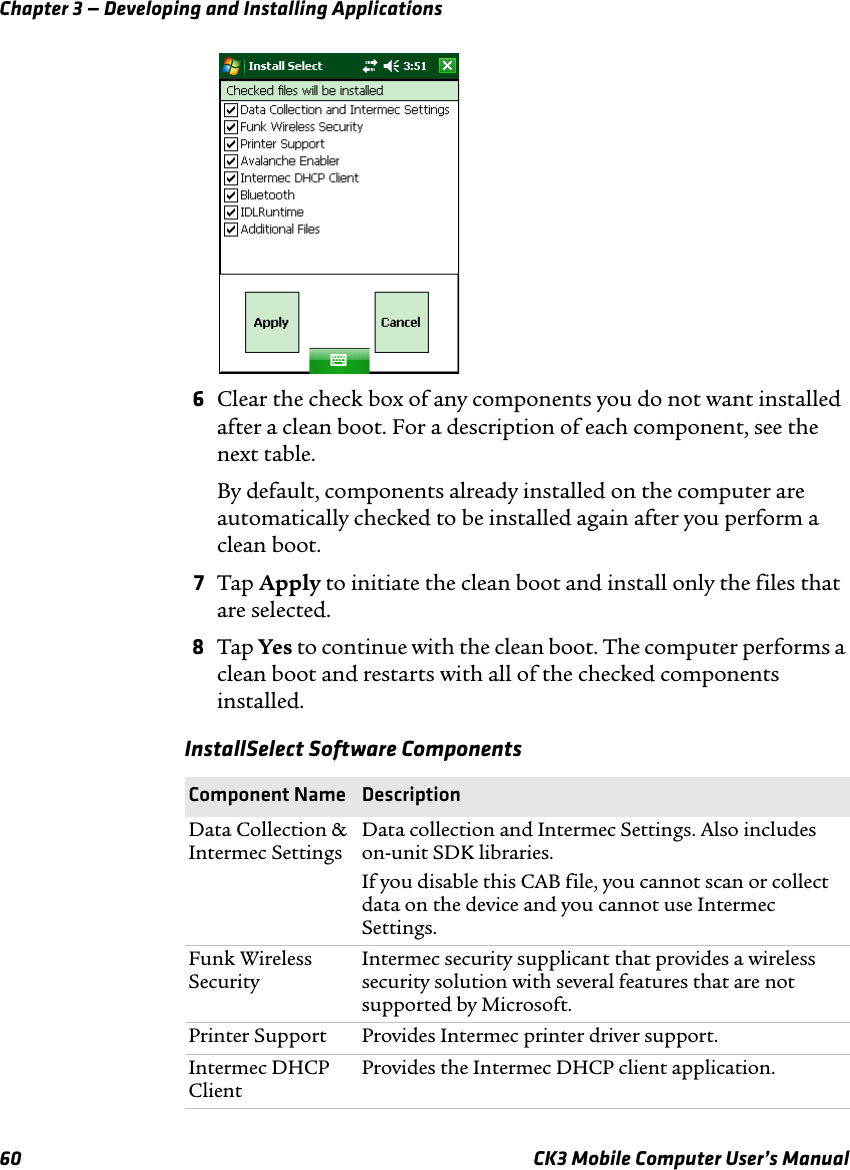
CK3DHIB User Manual
>
User Manual
Contents
1.
Compliance Info 1
2.
Compliance Insert
3.
User Manual
4.
Final User Manual
User Manual
Navigation menu
Upload a User Manual
Namespaces
Wiki Guide
HTML
PDF
Info
Views
User Manual
Discussion / Help
Navigation


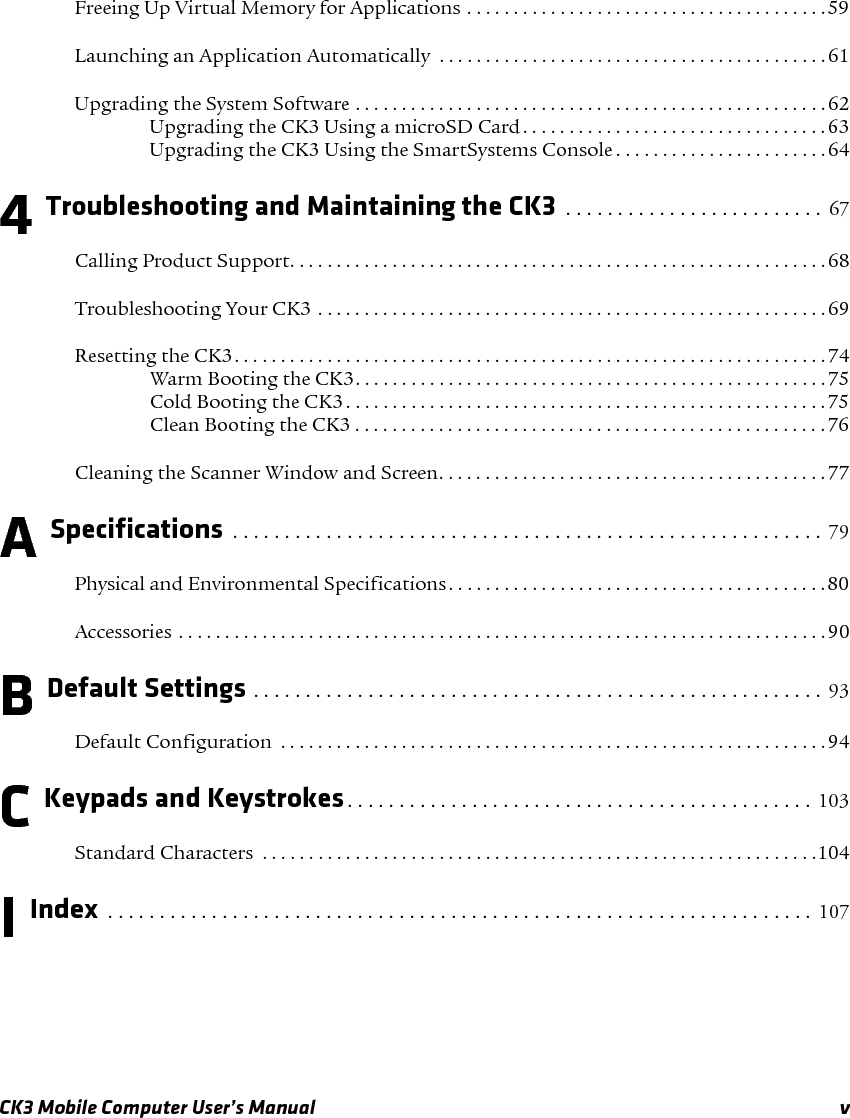


![Chapter 2 — Connecting and Configuring the CK3CK3 Mobile Computer User’s Manual 31Configuring the CK3 for Your NetworkThe CK3 is a versatile mobile computer that you can easily add to your wireless or wired data collection network. You can connect your CK3 using:•802.11b/g radio communications.•Bluetooth communications.•Ethernet communications•USB and serial communications.Configuring 802.11b/g Radio CommunicationsYour CK3 has an 802.11b/g radio to transfer data using wireless communications. This section assumes that your wireless network is set up, including your access points. To configure 802.11b/g radio parameters1Tap Start > Settings > the Systems tab >Intermec Settings.2Tap Communications > 802.11 Radio > Funk Security > [Profile #] > SSID.3Enter your SSID (network name).4If you are not using DHCP, tap IP Settings and configure your network settings.5Make sure that your CK3 is talking to the network and that the network can see your CK3.6Configure security. For help, see “Configuring Wireless Security” on page 40.Make sure all components with antennas are at least 30 cm (1 ft) apart when power is applied. Failure to comply could result in equipment damage.](https://usermanual.wiki/Intermec-Technologies/CK3DHIB.User-Manual/User-Guide-1014656-Page-41.png)


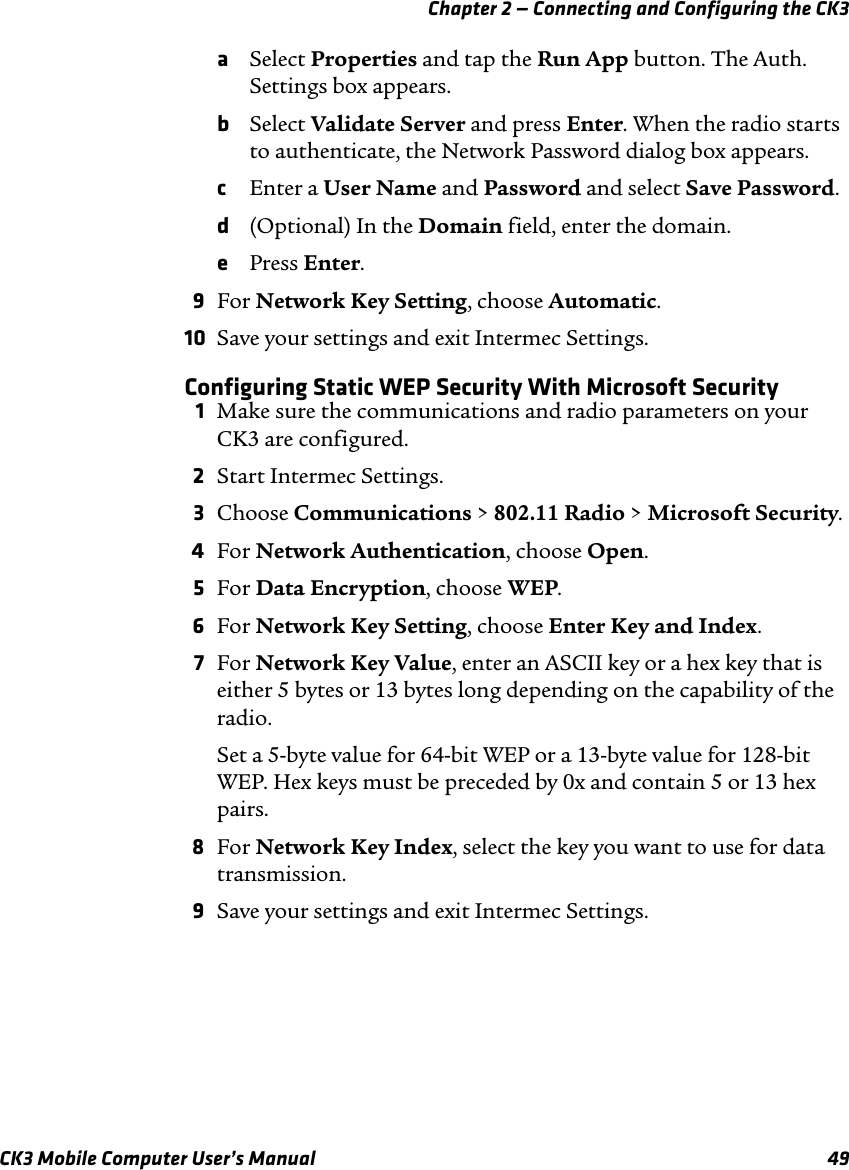


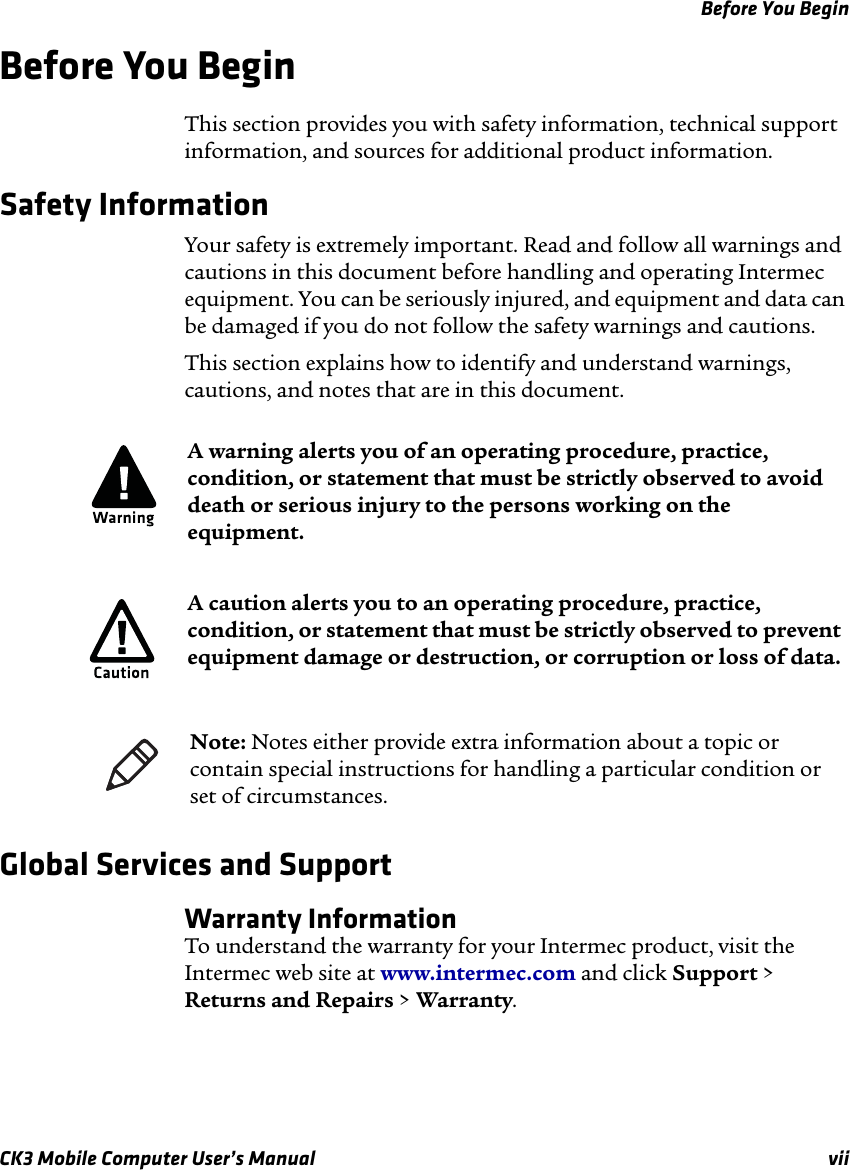
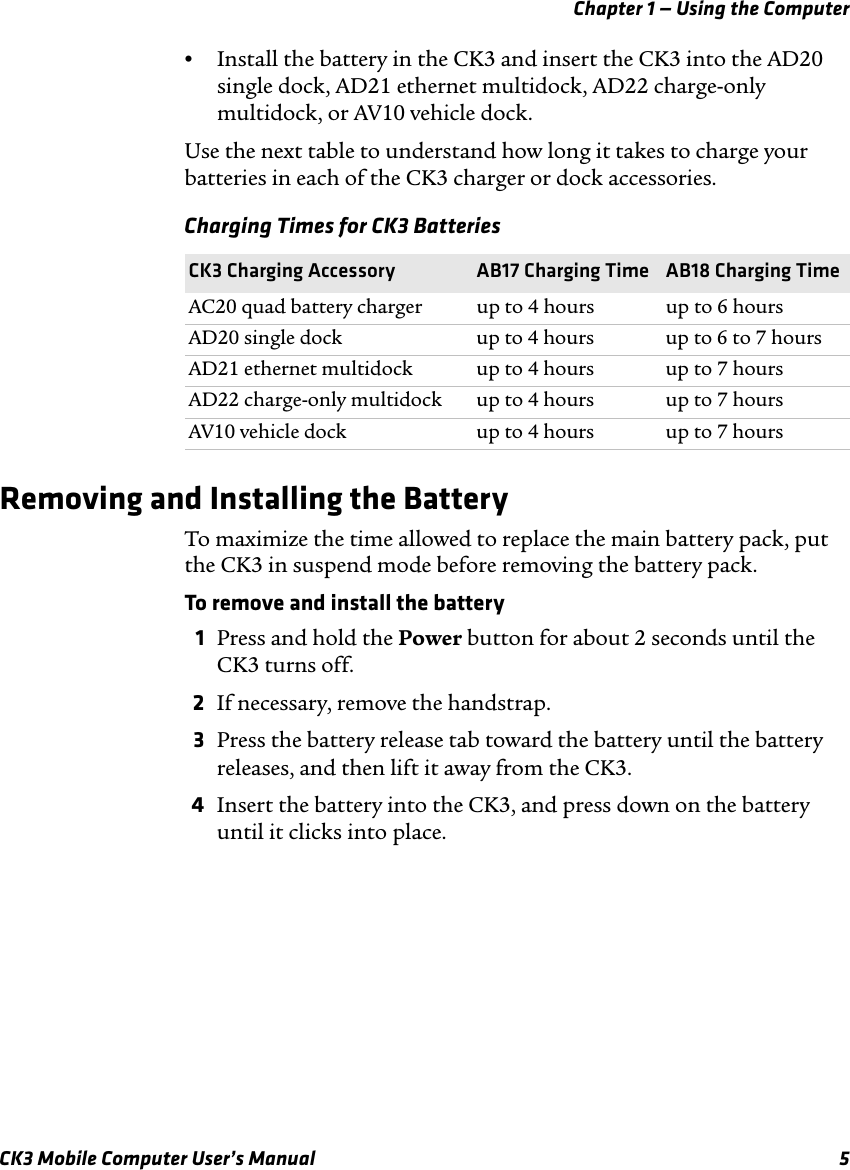
![Appendix C — Keypads and Keystrokes104 CK3 Mobile Computer User’s ManualStandard CharactersUse the following tables to learn how to enter standard characters with the keypad.Alphanumeric CharactersCharacter Alphanumeric Keypad Numeric Keypada[A]B [ESC]b[B]B [7]c[C]B [8]d[D]B [9]e[E]B Ef[F]B [4]g[G]B [5]h[H]B [6]i[I]B [1j[J]B [2]k[K]B [3]l[L]B [FldExit]m[M]B [0]n[N]B [.]o[O]B [F1]p[P]B [F2]q[Q]B [F3]r[R]B [F4]s[S]B [F5]t[T]B [F6]u[U]B [F7]v[V]B [F8]w[W]B [F9]x[X]B [F10]y [Y] B [F11]z[Z]B [F12]AB [A] B [A] B [<] [Esc]](https://usermanual.wiki/Intermec-Technologies/CK3DHIB.User-Manual/User-Guide-1014656-Page-114.png)
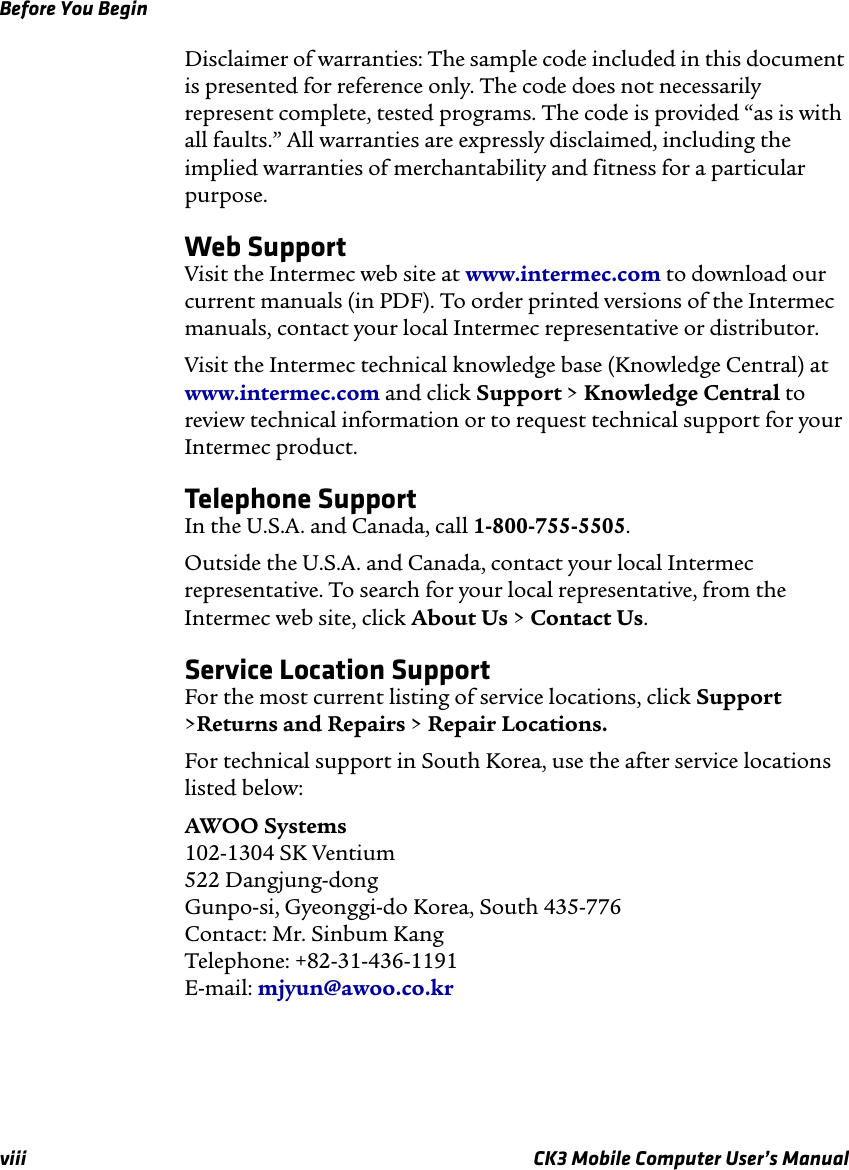
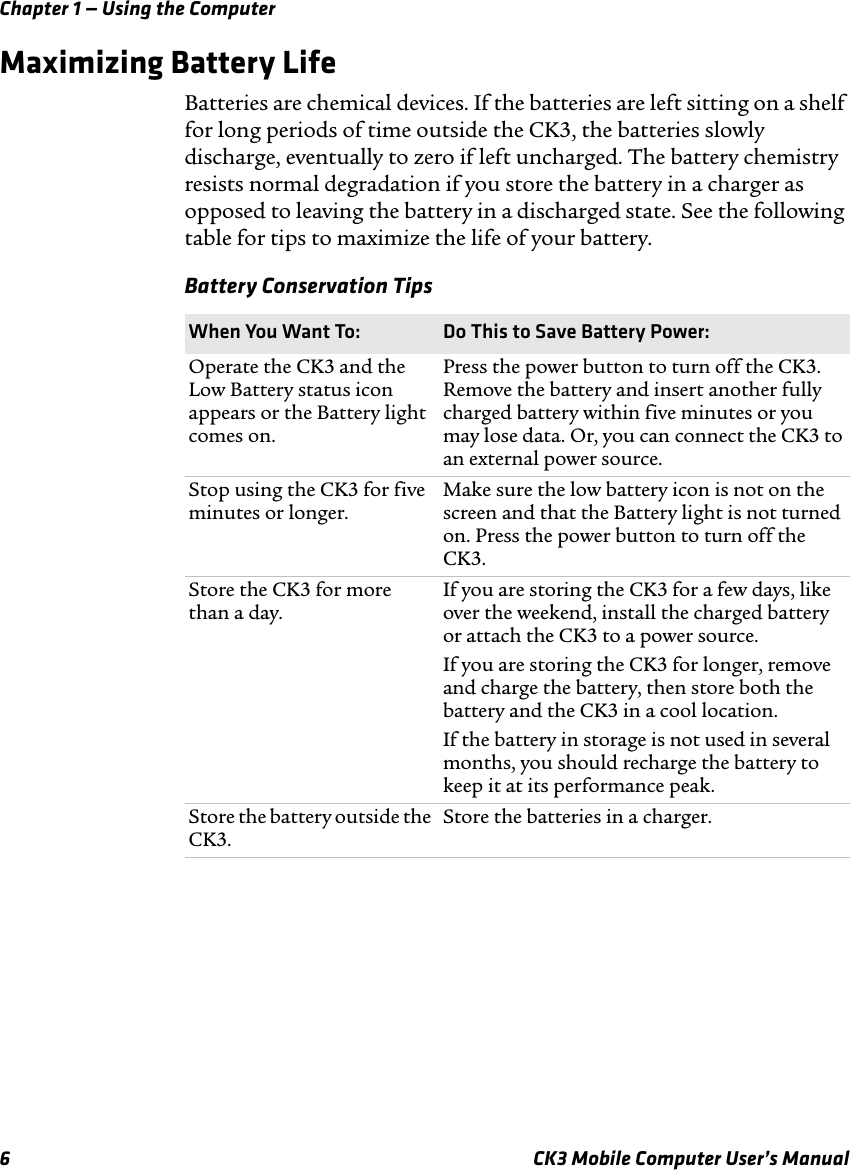
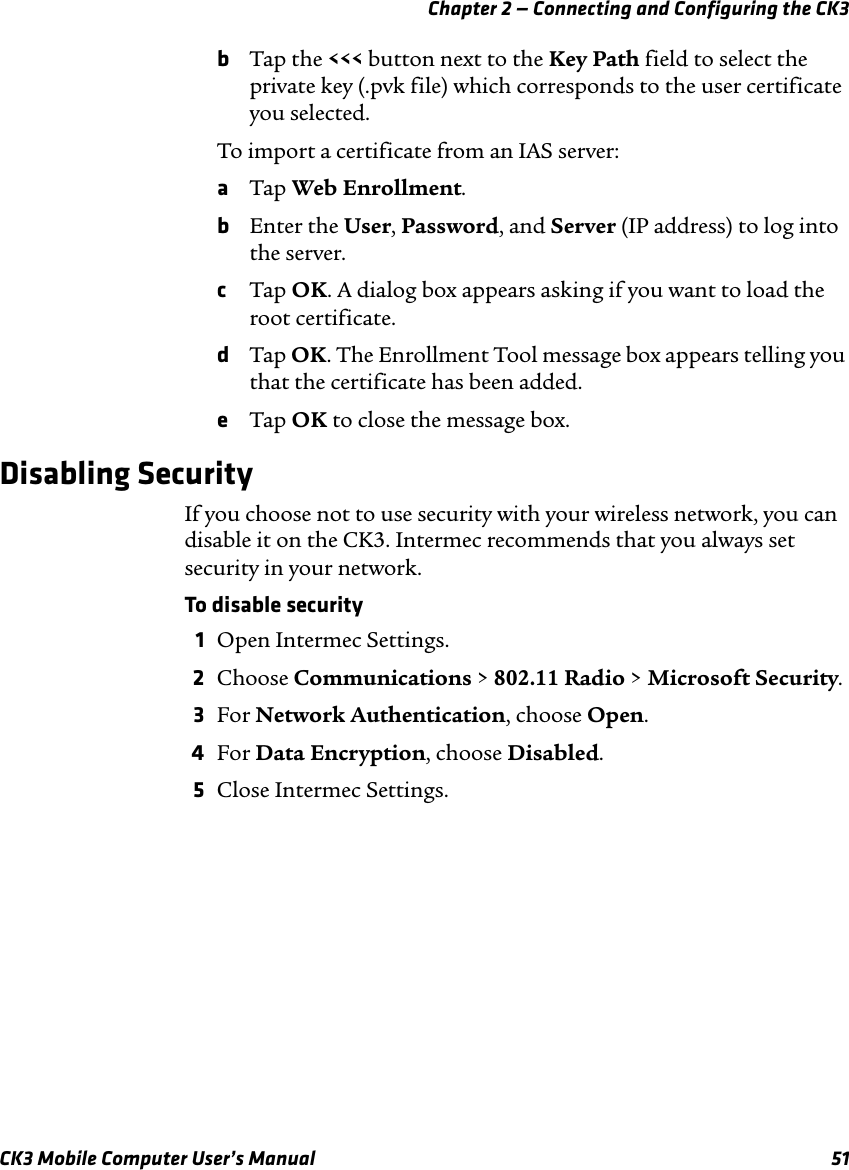
![Appendix C — Keypads and KeystrokesCK3 Mobile Computer User’s Manual 105BB [B] B [B] B [<] [7]CB [C] B [C] B [<] [8]DB [D] B [D] B [<] [9]EB [E] B [E] B [<] EFB [F] B [F] B [<] [4]GB [G] B [G] B [<] [5]HB [H] B [H] B [<] [6]IB [I] B [I] B [<] [1]JB [J] B [J] B [<] [2]KB [K] B [K] B [<] [3]LB [L] B [L] B [<] [FldExit]MB [M] B [M] B [<] [0]NB [N] B [N] B [<] [.]OB [O] B [O] B [<] [F1]PB [P] B [P] B [<] [F2]QB [Q] B [Q] B [<] [F3]RB [R] B [R] B [<] [F4]SB [S] B [S] B [<] [F5]TB [T] B [T] B [<] [F6]UB [U] B [U] B [<] [F7]VB [V] B [V] B [<] [F8]WB [W] B [W] B [<] [F9]XB [X] B [X] B [<] [F10]YB [Y] B [Y] B [<] [F11]ZB [Z] B [Z] B [<] [F12]0[0][0]1[1][1]2[2][2]3[3][3]4[4][4]5[5][5]6[6][6]Alphanumeric Characters (continued)Character Alphanumeric Keypad Numeric Keypad](https://usermanual.wiki/Intermec-Technologies/CK3DHIB.User-Manual/User-Guide-1014656-Page-115.png)
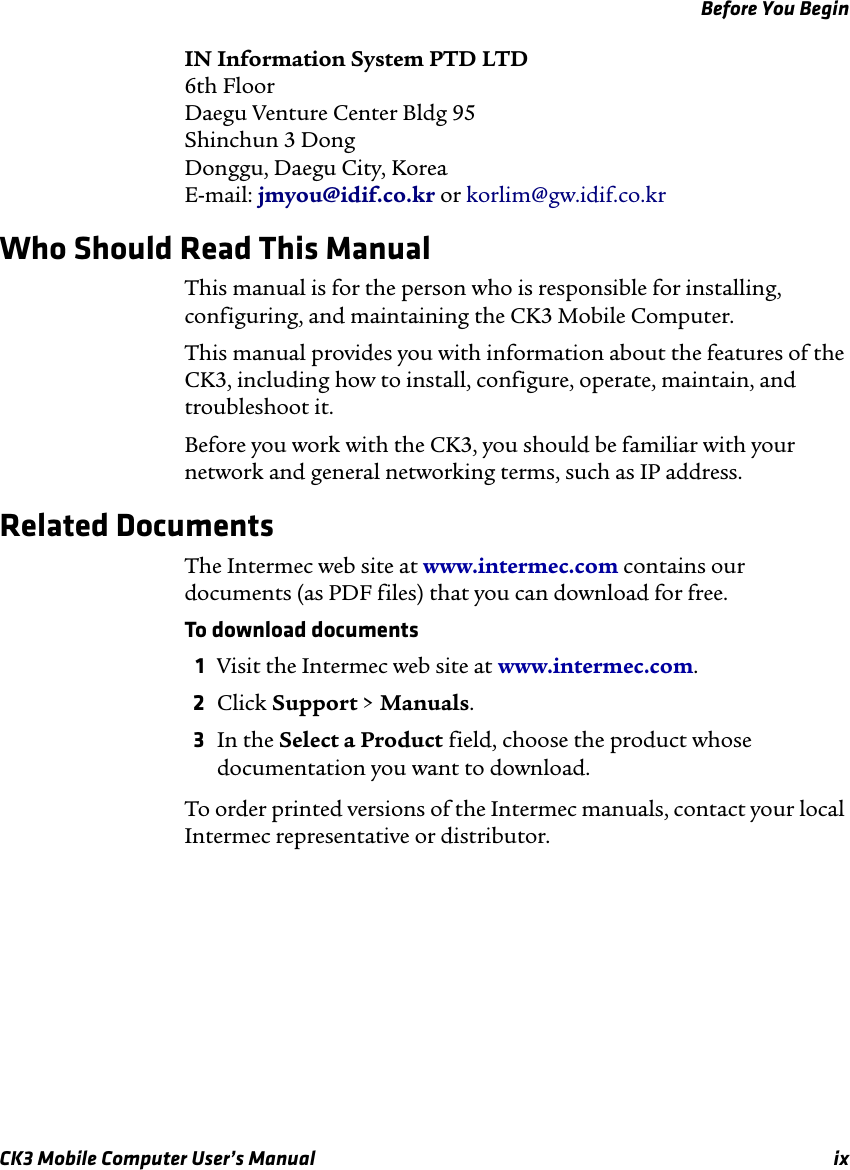
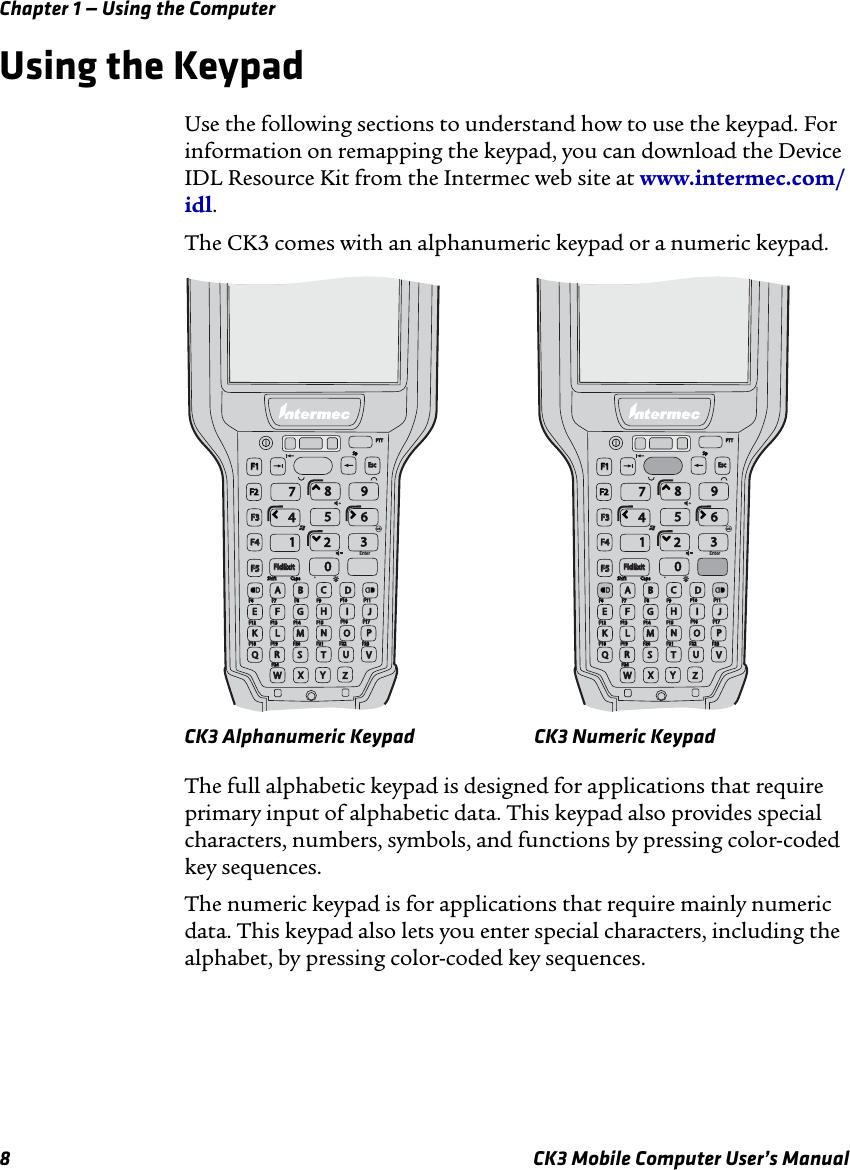
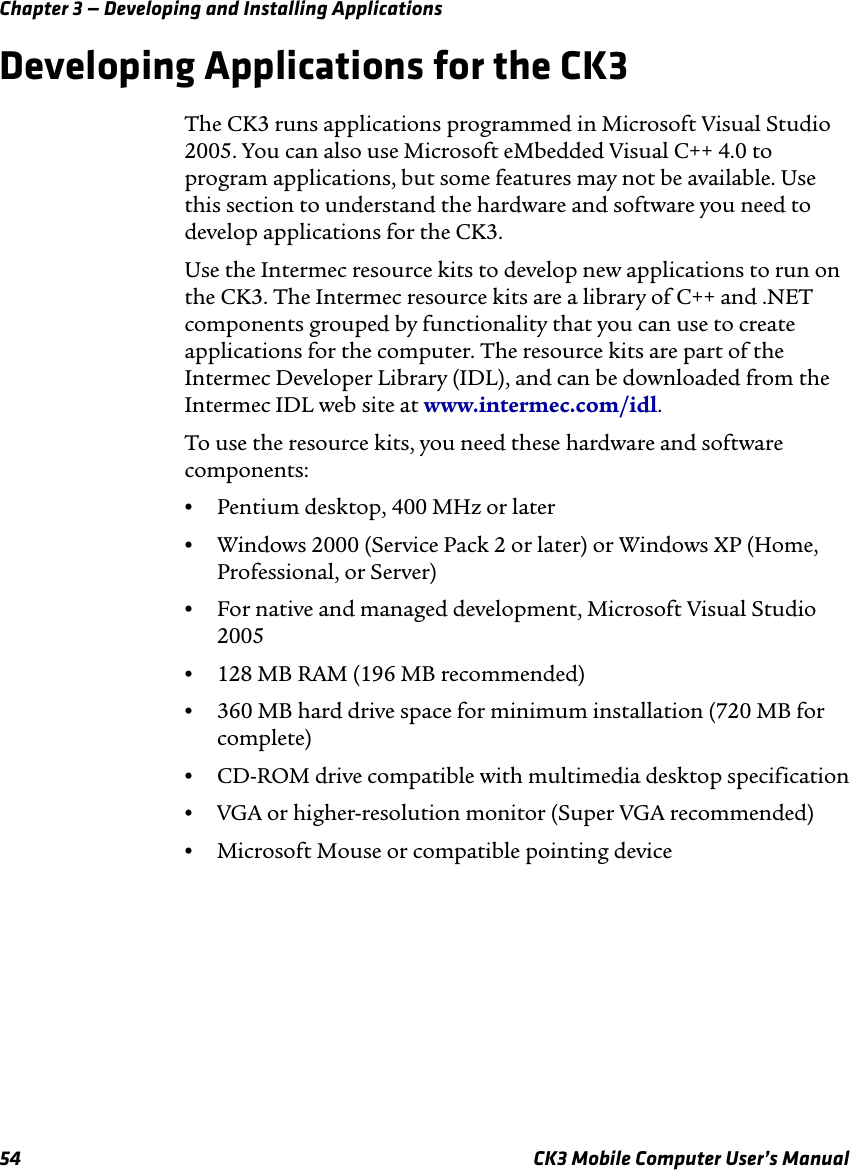
![Appendix C — Keypads and Keystrokes106 CK3 Mobile Computer User’s Manual7[7]8[8]9[9]Function KeysFunction Alphanumeric Keypad Numeric KeypadBack Tab C [->|] C [->|]Backspace [<-] [<-]Caps Lock B [B] B [>] Forward Tab [->|] [->|]ReturnShift B [A] B [<] Space C [<-] C [<-]Special CharactersCharacter Alphanumeric Keypad Numeric KeypadAlphanumeric Characters (continued)Character Alphanumeric Keypad Numeric Keypad](https://usermanual.wiki/Intermec-Technologies/CK3DHIB.User-Manual/User-Guide-1014656-Page-116.png)