Intermec Technologies CK3DHIB CK3 Series Handheld Computer User Manual 935 016 001
Intermec Technologies Corporation CK3 Series Handheld Computer 935 016 001
Contents
- 1. Compliance Info 1
- 2. Compliance Insert
- 3. User Manual
- 4. Final User Manual
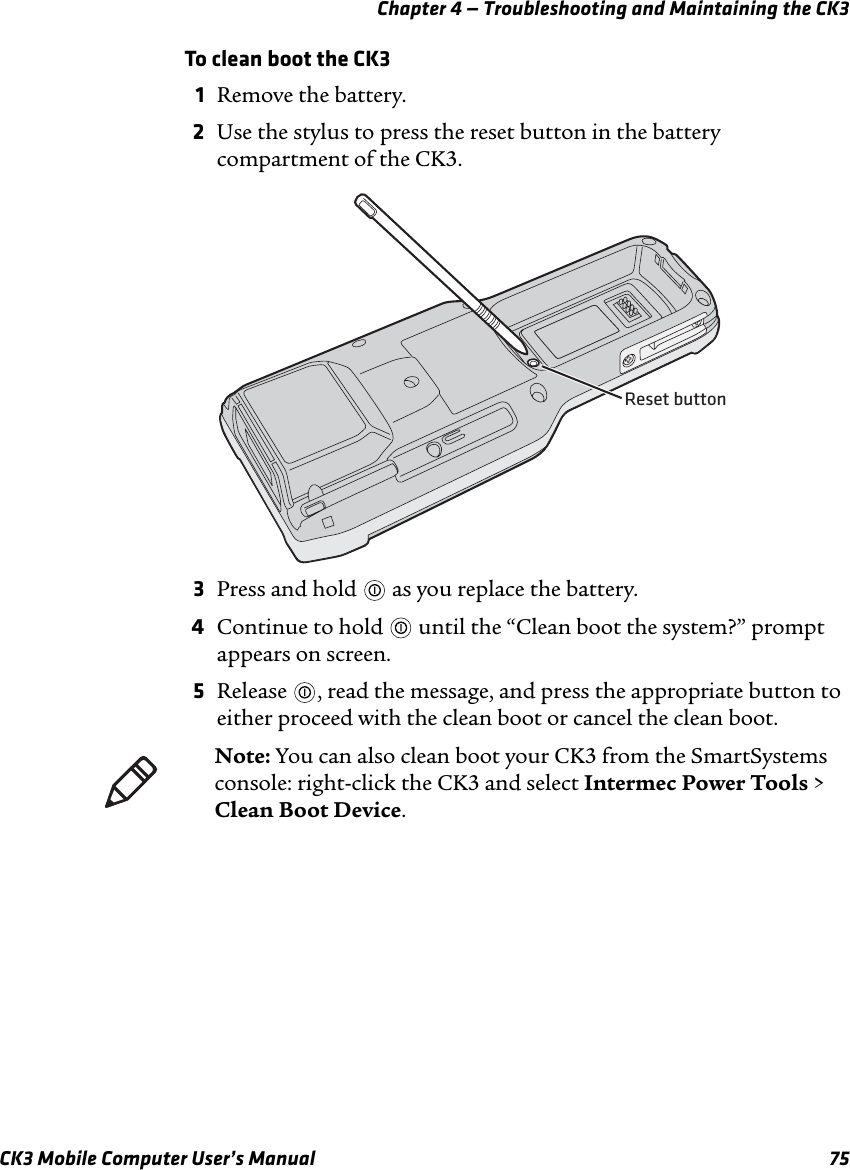
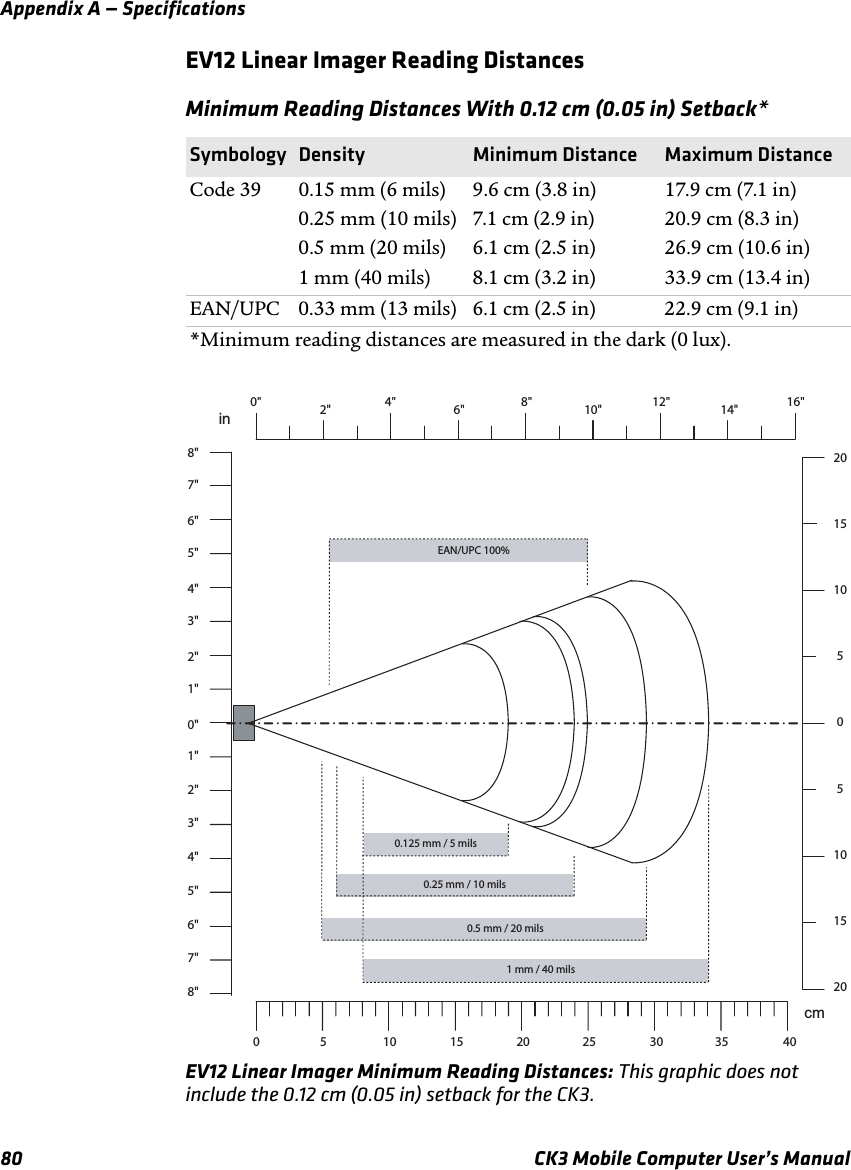
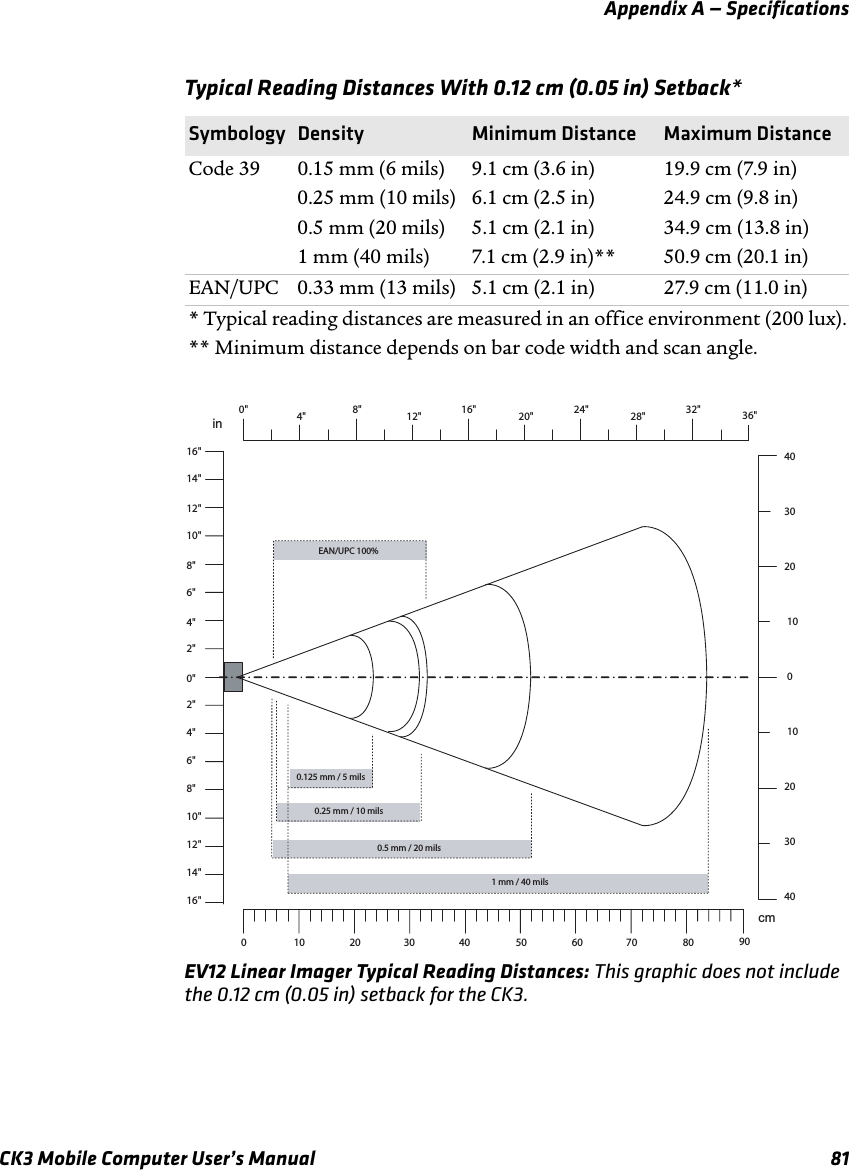
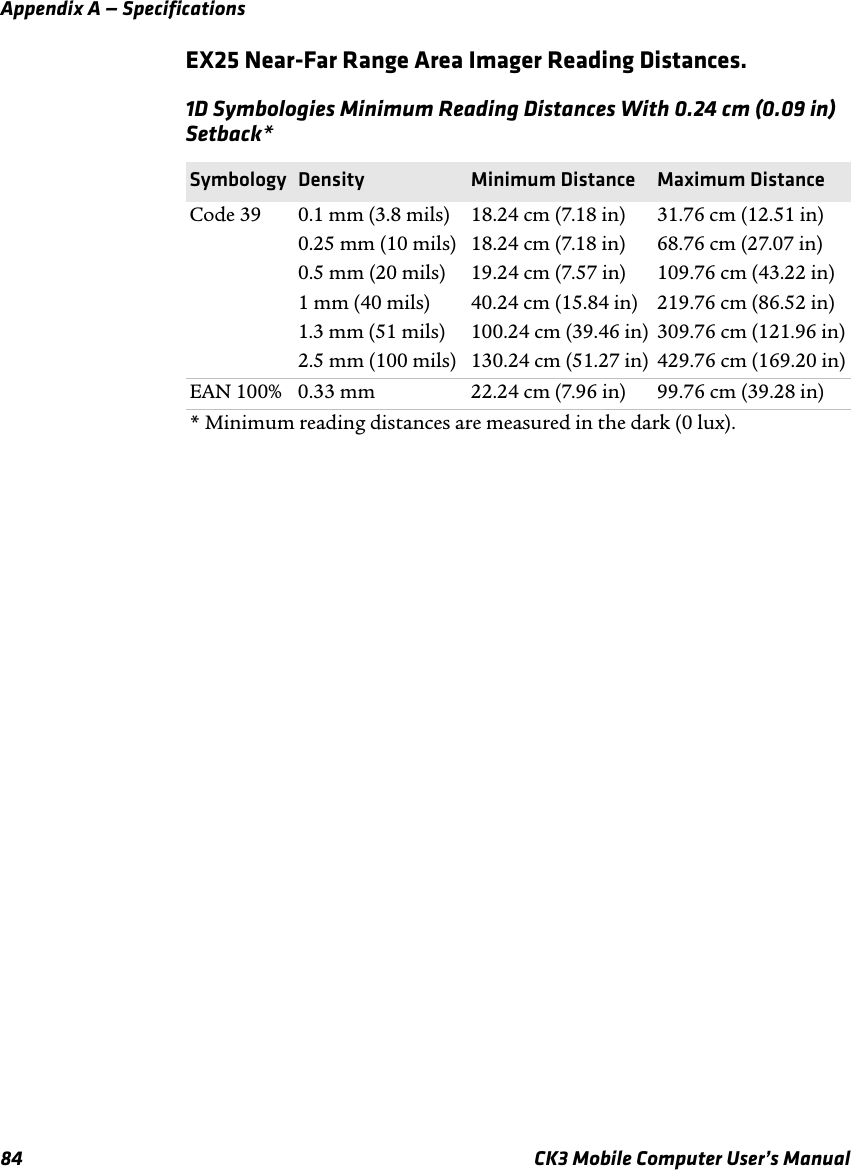
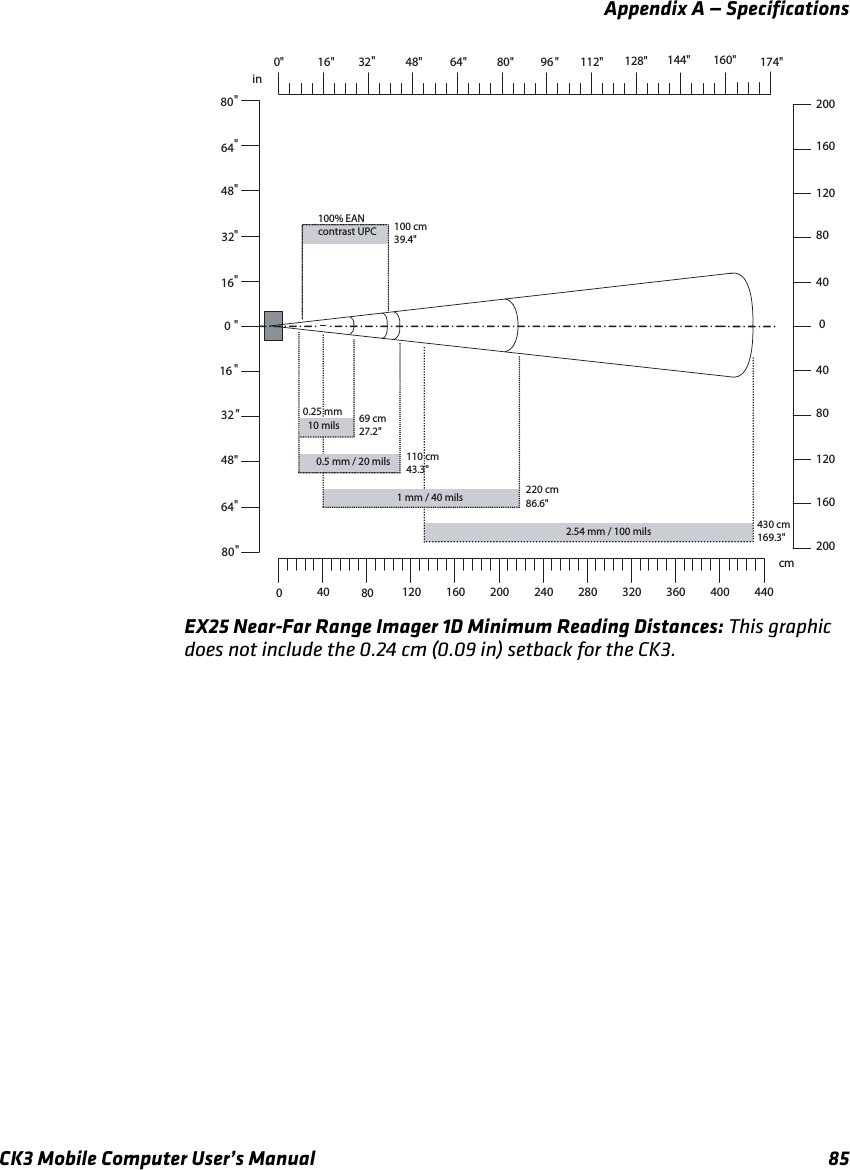
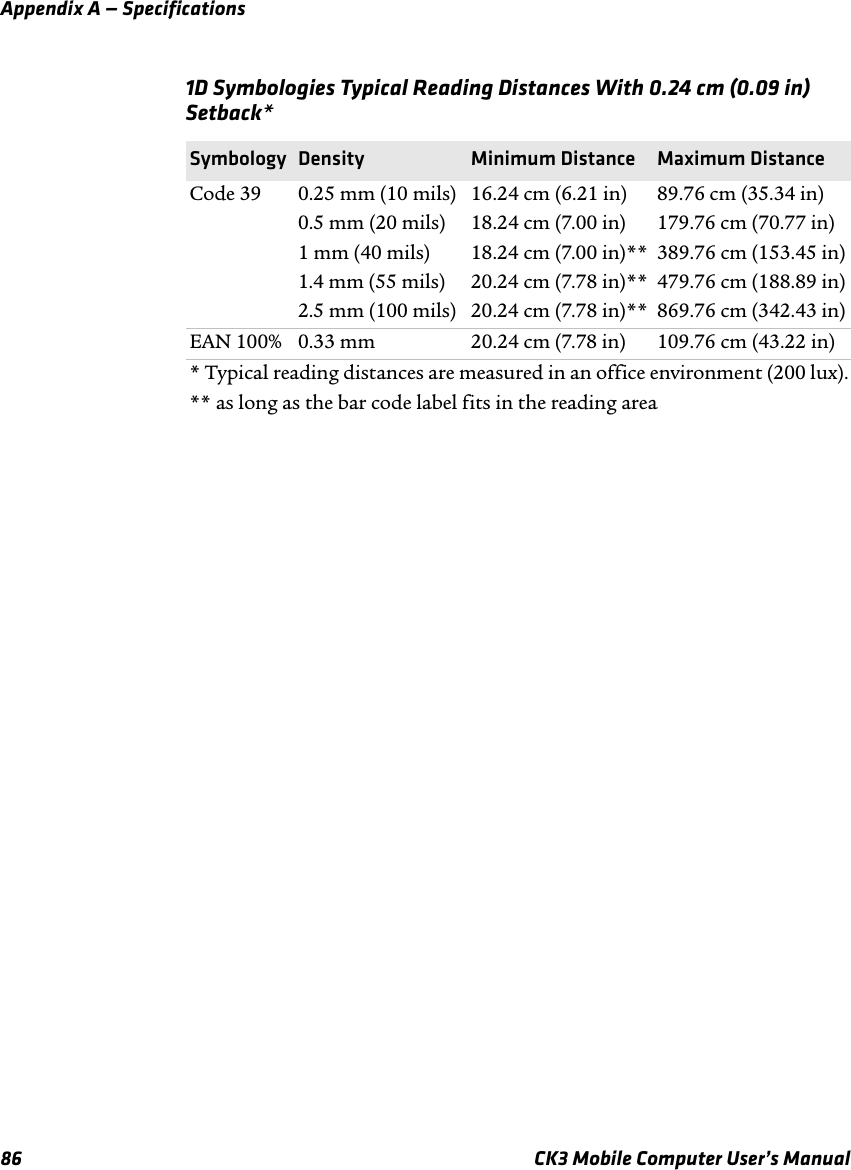
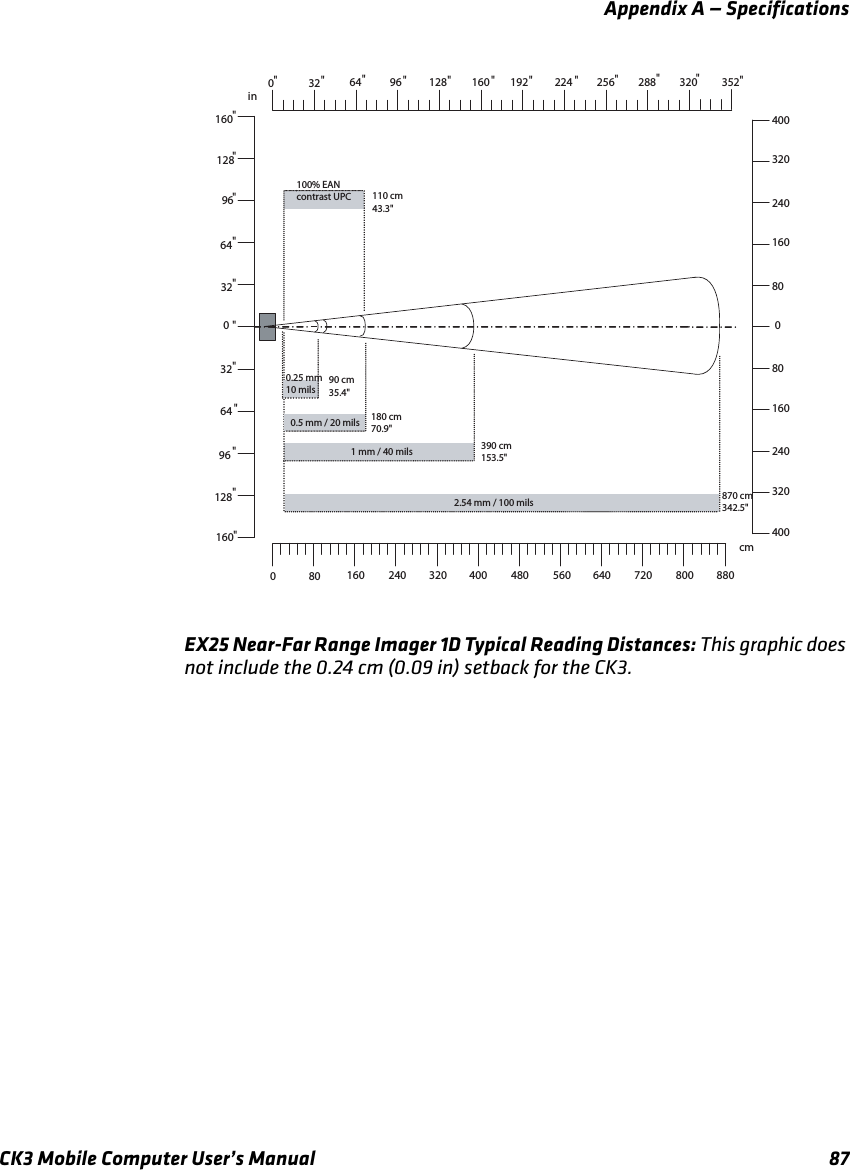
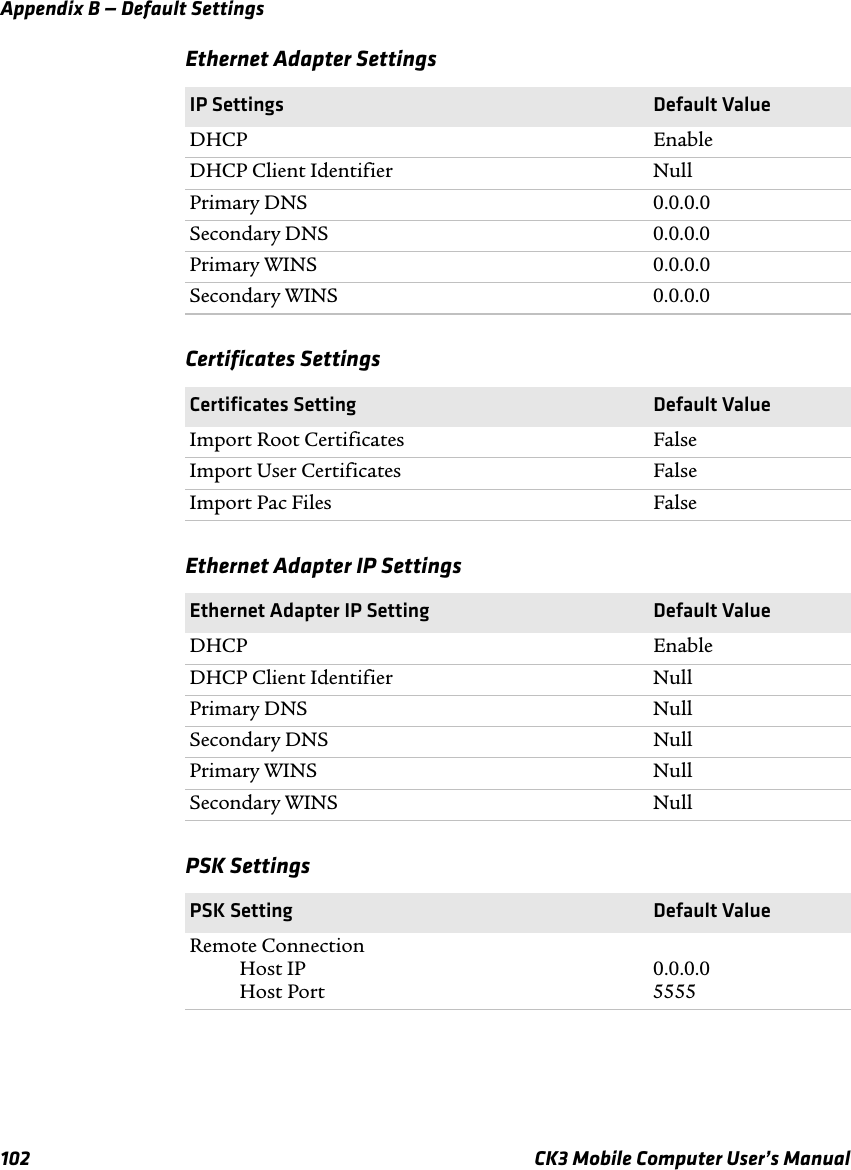
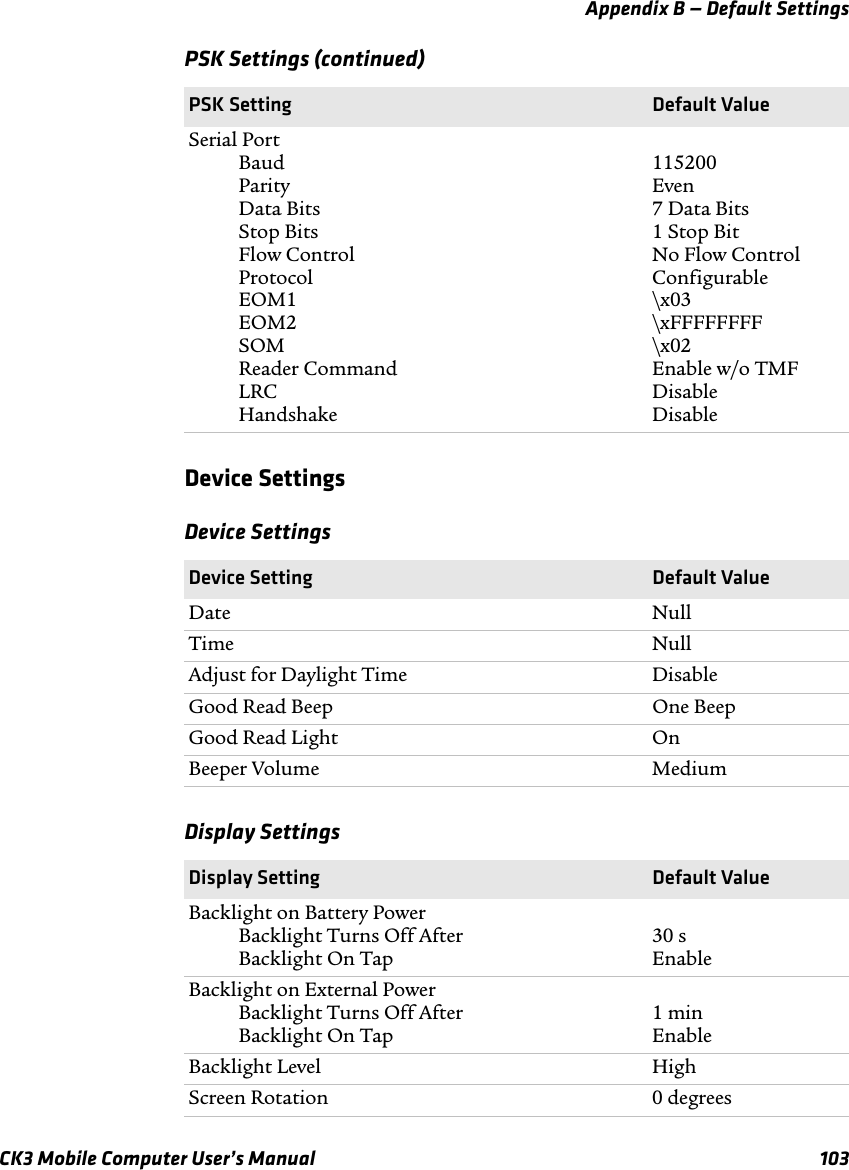
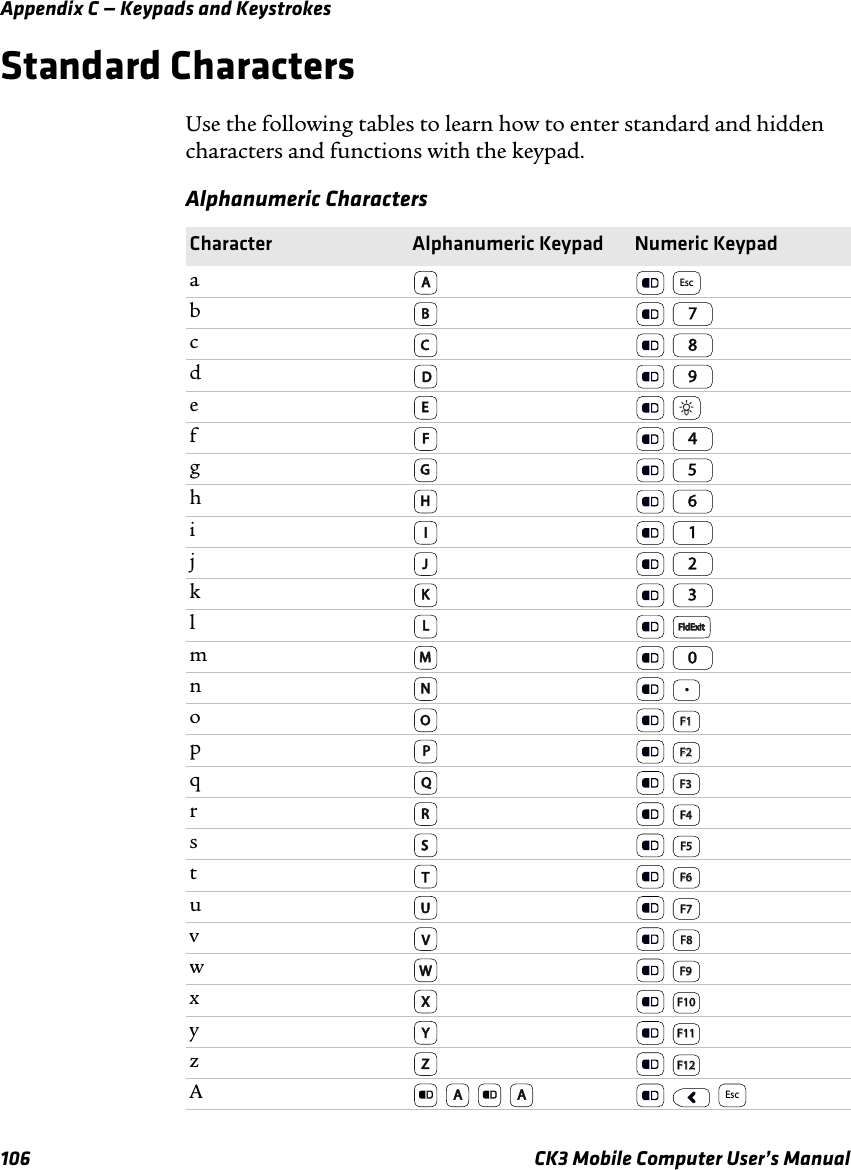
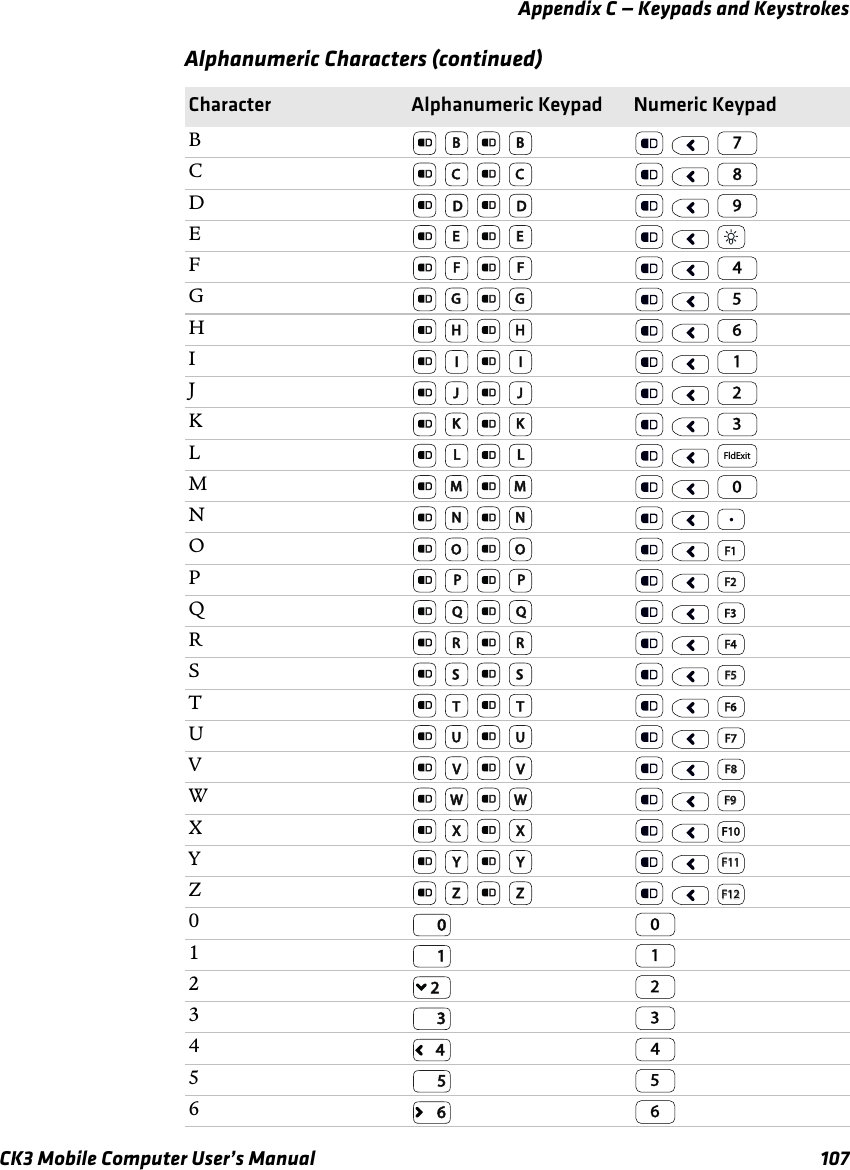
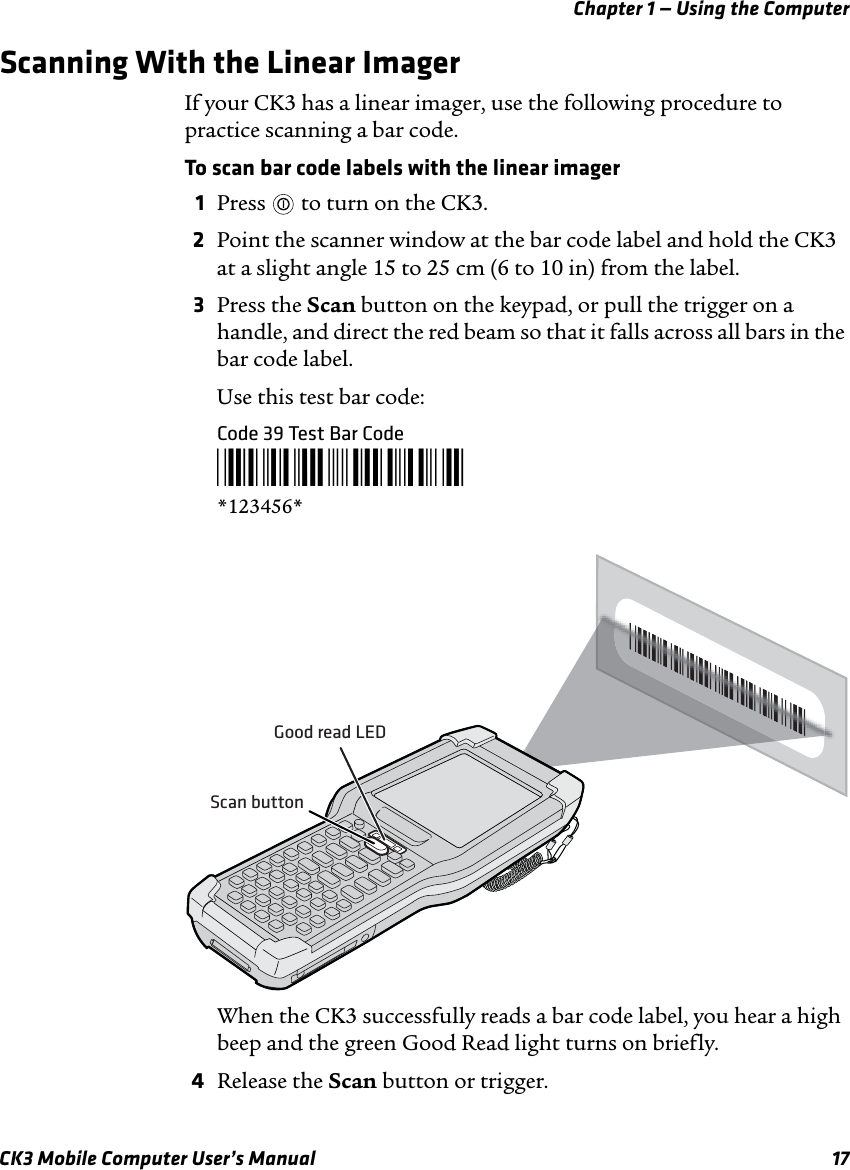
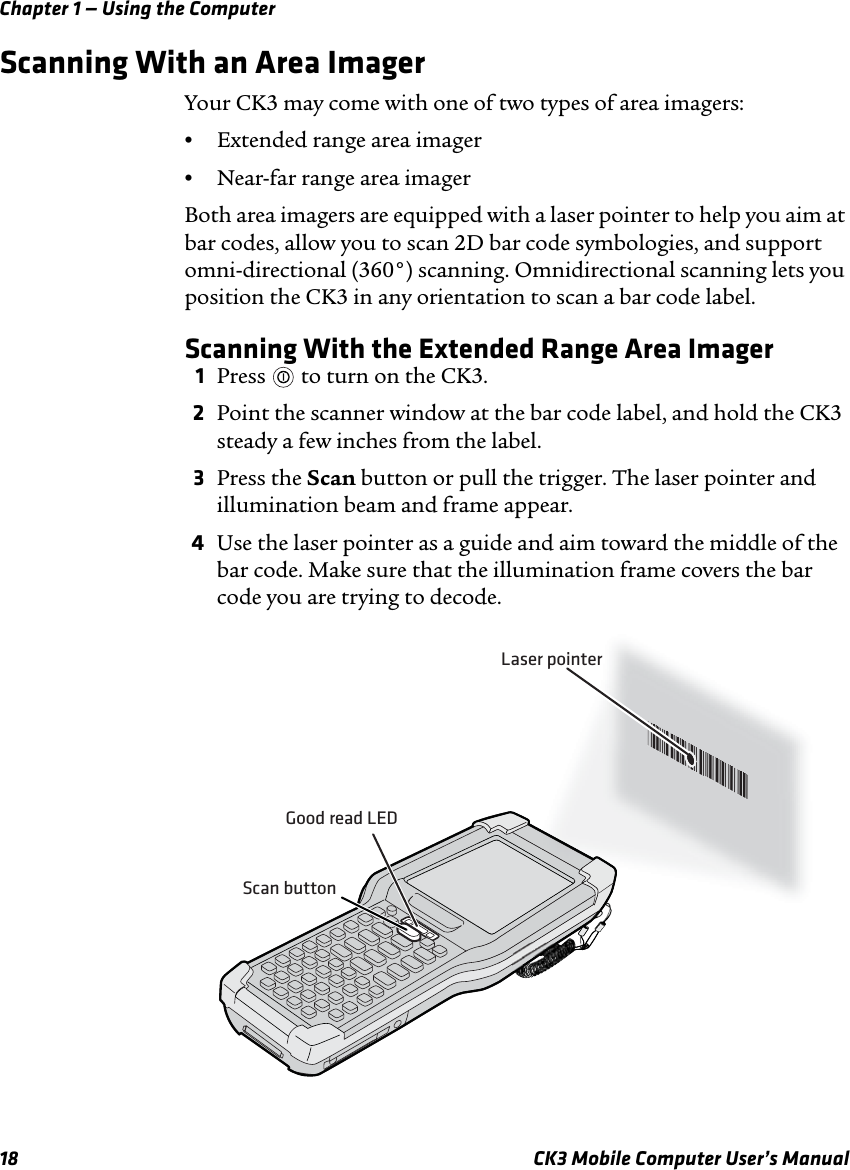
Final User Manual


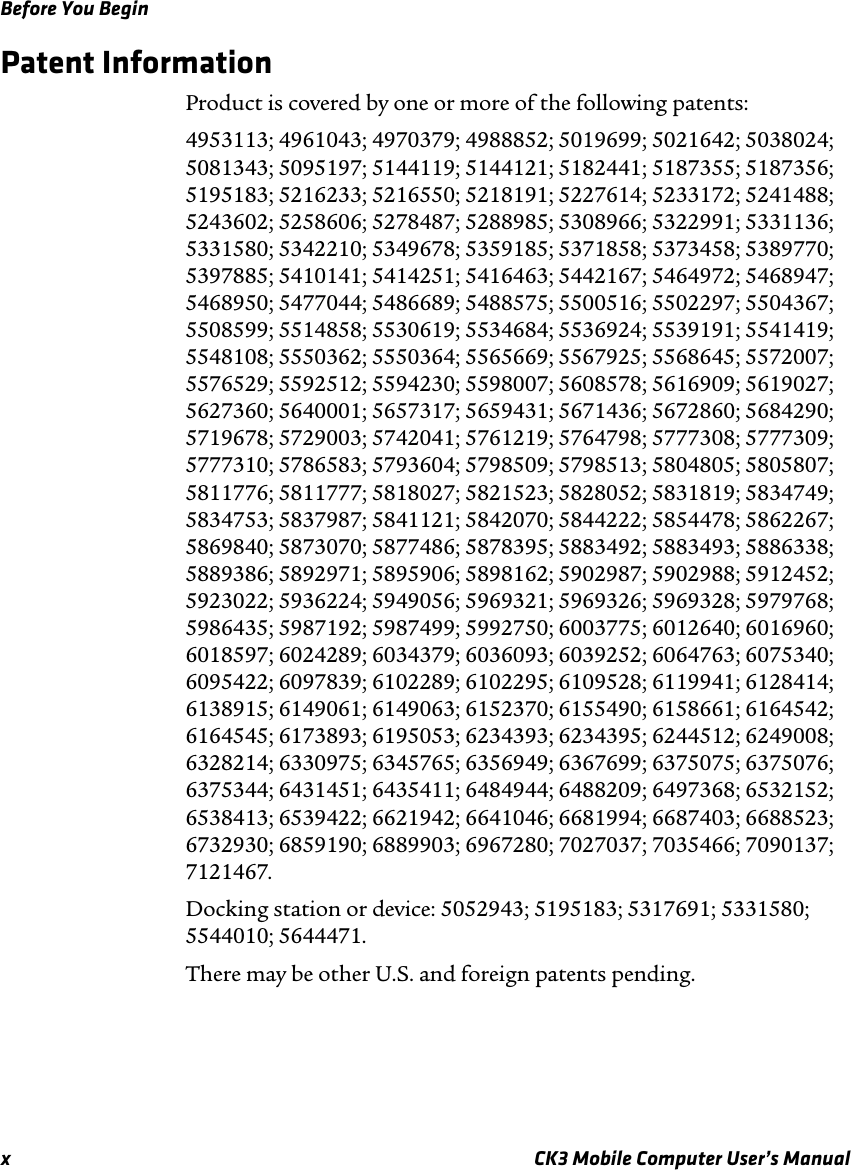


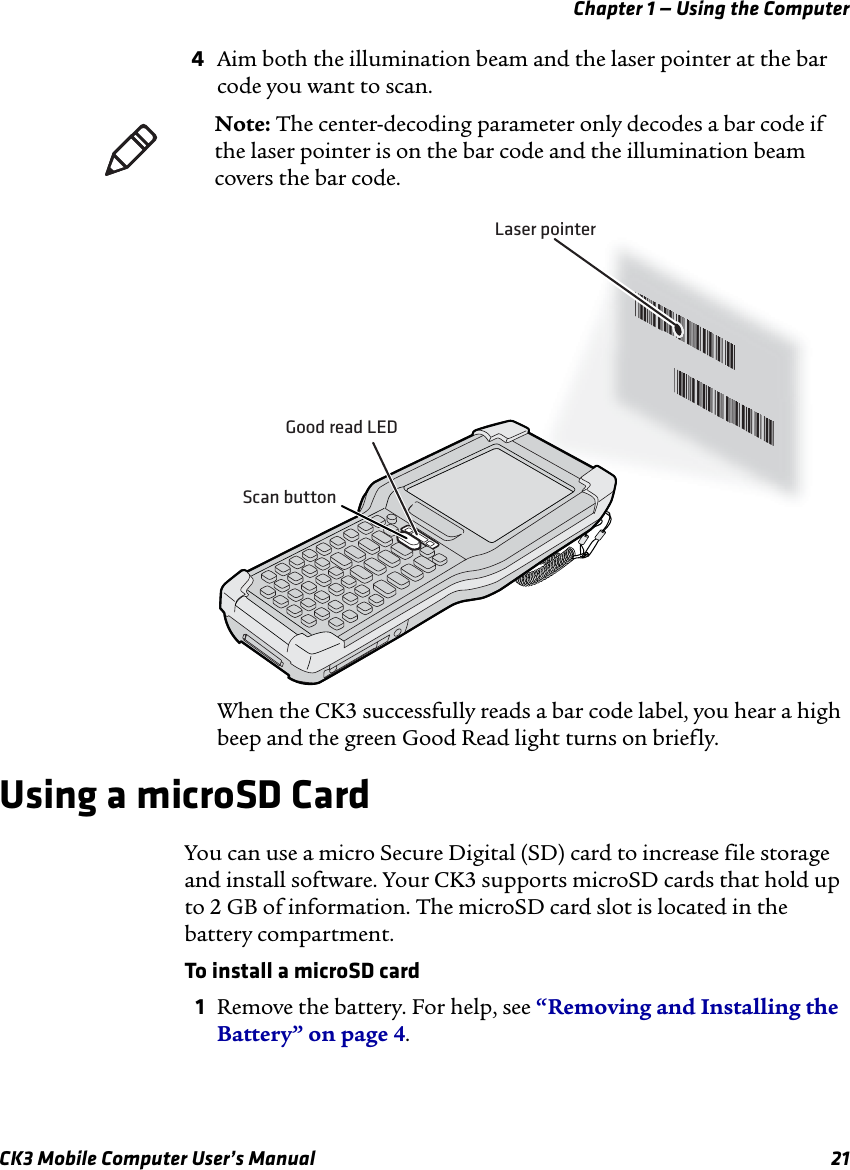
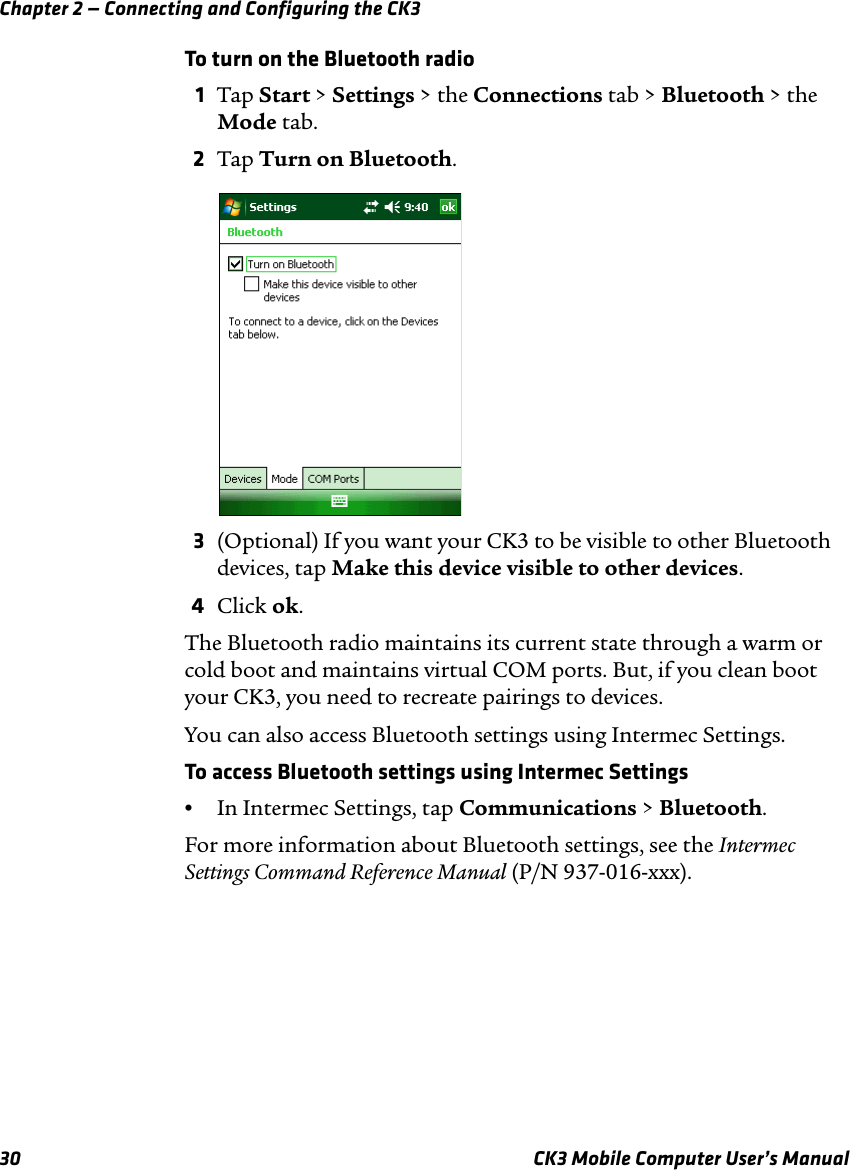
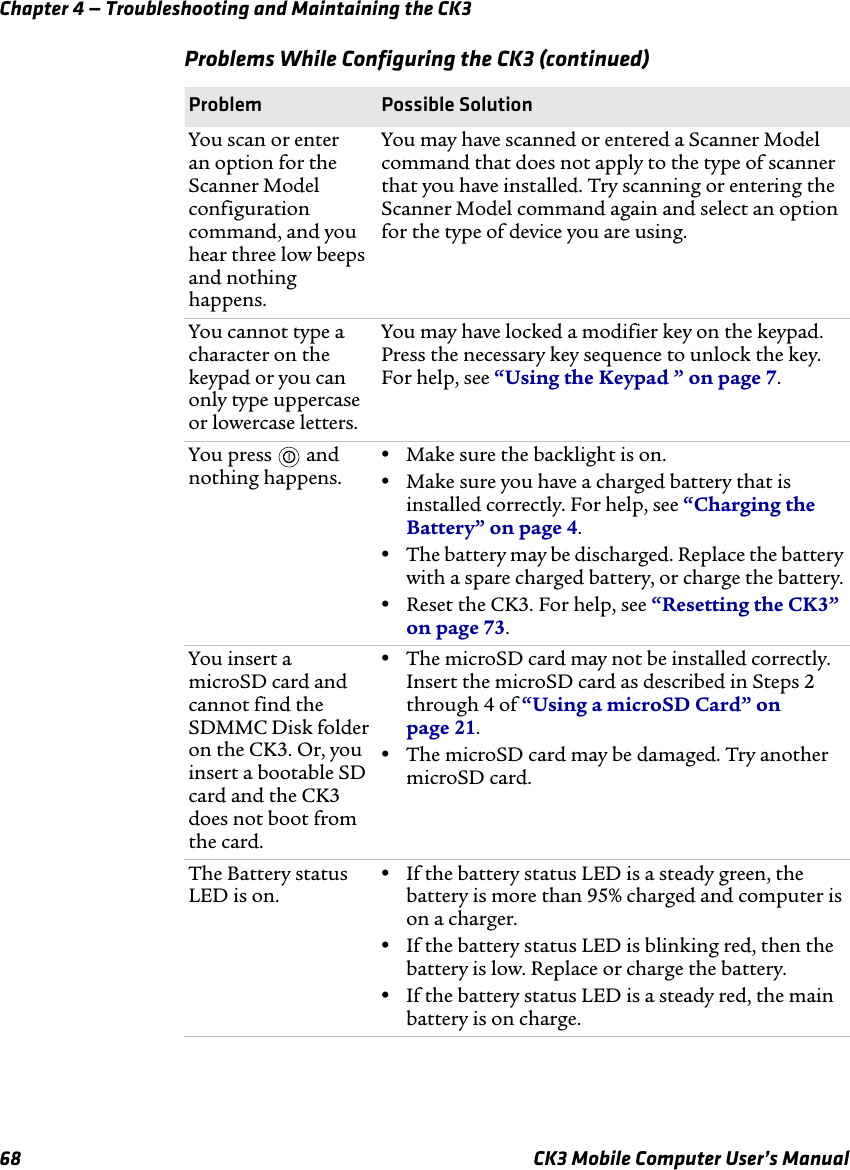
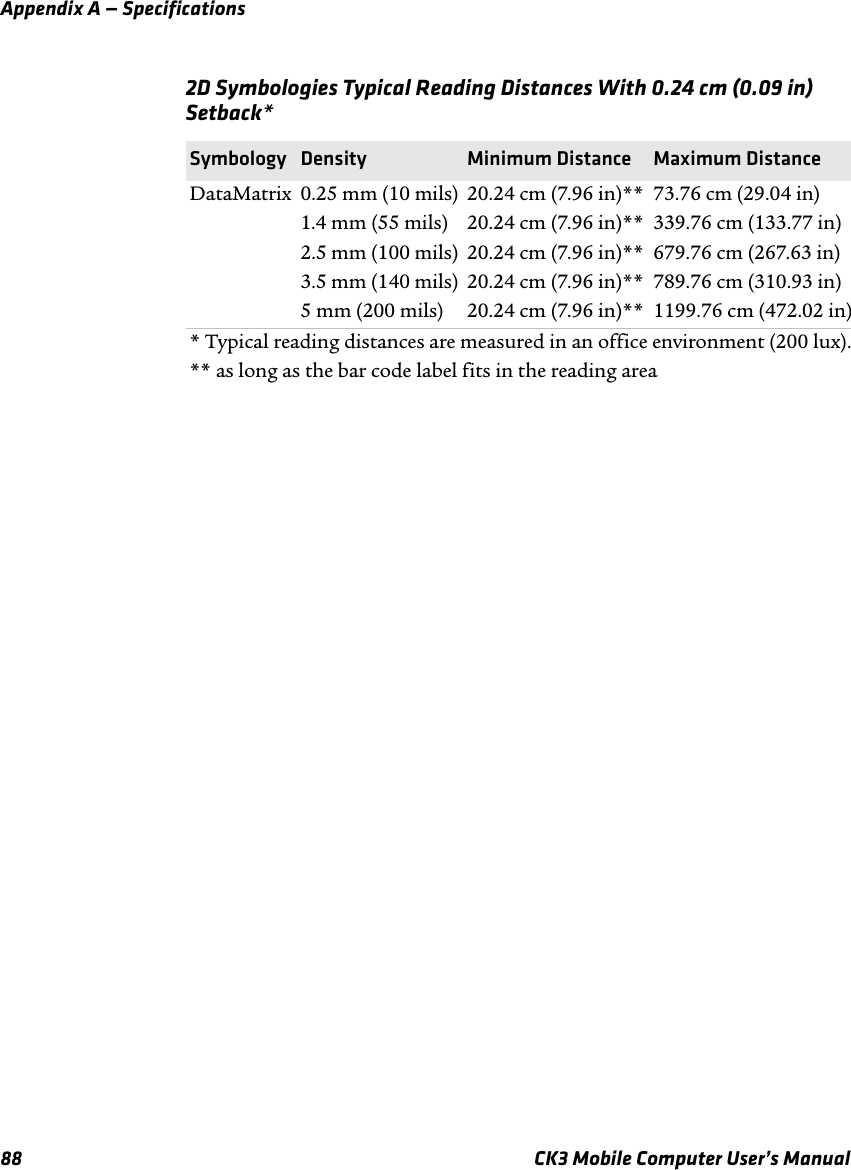
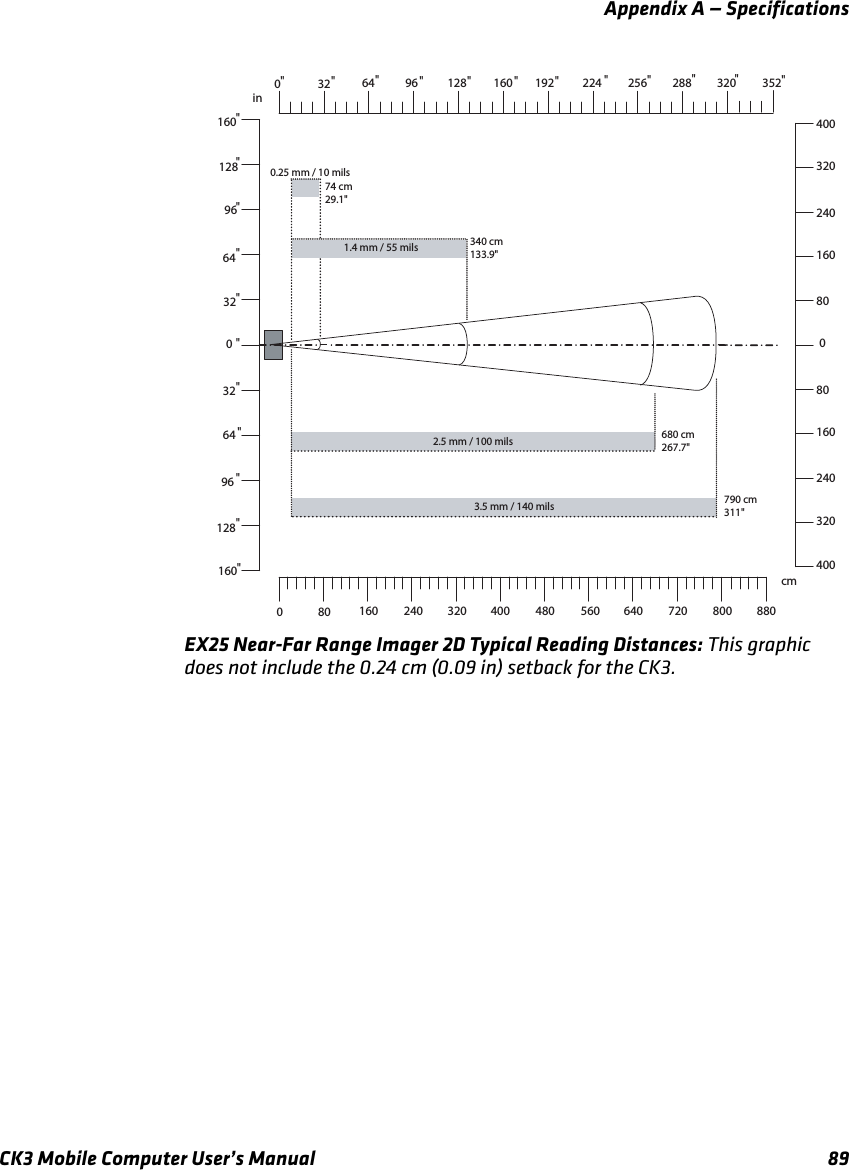
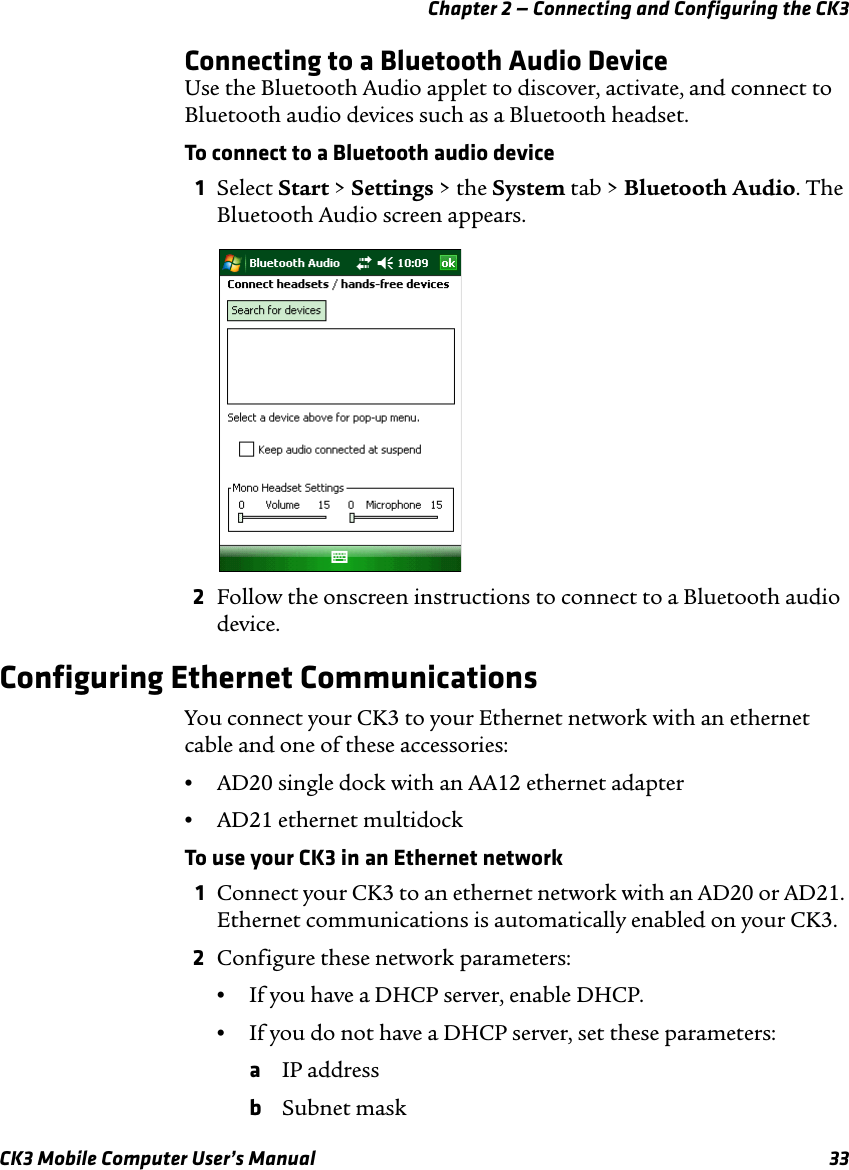
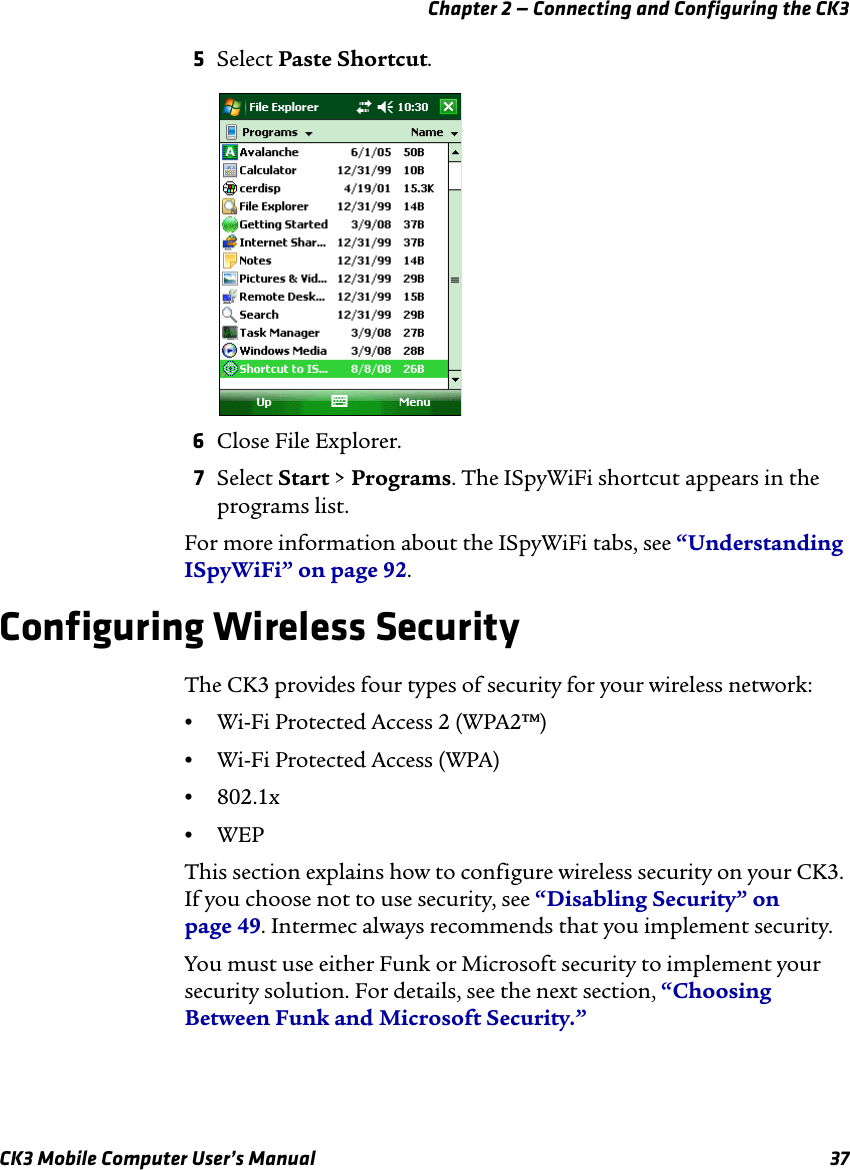
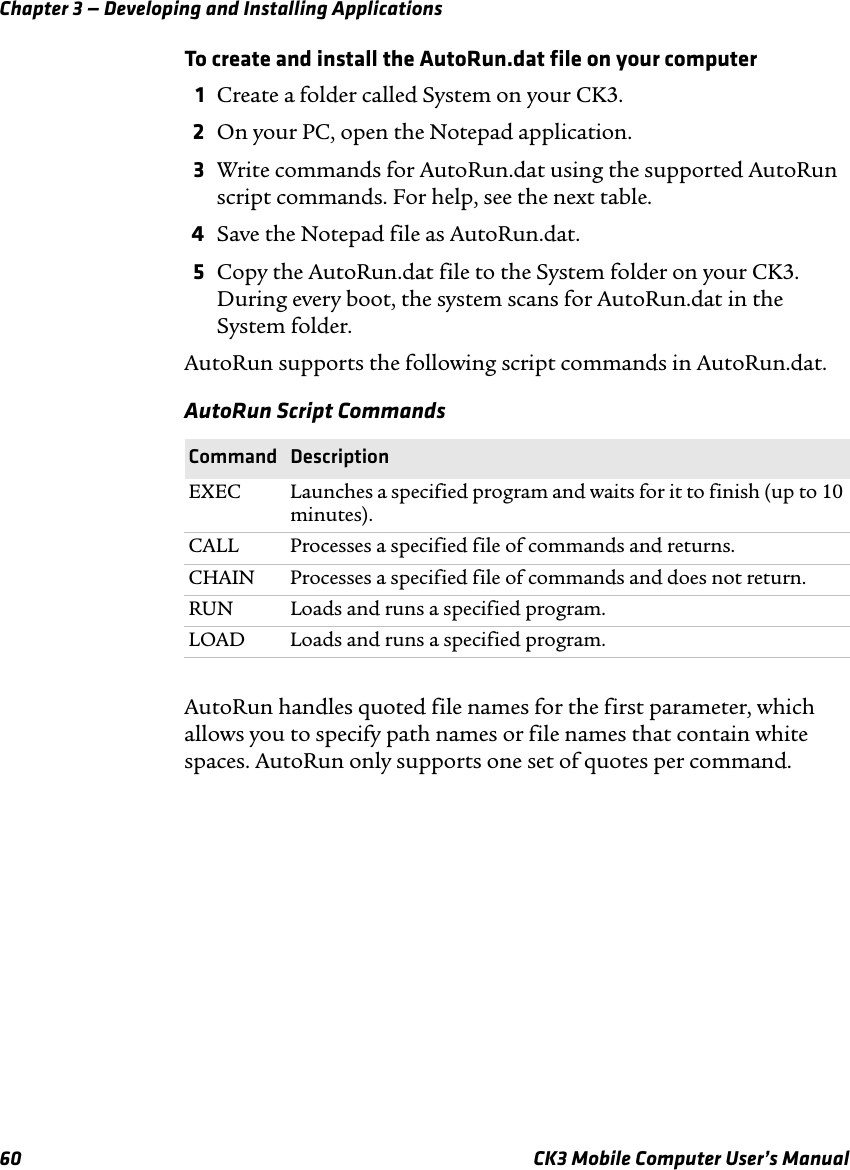
![Chapter 2 — Connecting and Configuring the CK3CK3 Mobile Computer User’s Manual 29•Ethernet communications•USB and serial communications.Configuring 802.11b/g Radio CommunicationsYour CK3 has an 802.11b/g radio to transfer data using wireless communications. This section assumes that your wireless network is set up, including your access points. To configure 802.11b/g radio parameters1Tap Start > Settings > the Systems tab >Intermec Settings.2Tap Communications > 802.11 Radio > Funk Security > [Profile #] > SSID.3Enter your SSID (network name).4If you are not using DHCP, tap IP Settings and configure your network settings.5Make sure that your CK3 is talking to the network and that the network can see your CK3.6Configure security. For help, see “Configuring Wireless Security” on page 37.Configuring Bluetooth CommunicationsYou CK3 is Bluetooth™-enabled, which lets you connect to other Bluetooth devices, such as: •scanners.•printers.•audio devices.You need to turn on the Bluetooth radio before you can discover and connect to other Bluetooth devices. By default, the radio is turned off.Make sure all components with antennas are at least 30 cm (1 ft) apart when power is applied. Failure to comply could result in equipment damage.](https://usermanual.wiki/Intermec-Technologies/CK3DHIB.Final-User-Manual/User-Guide-1017279-Page-41.png)