Intermec Technologies MC75 MC75 User Manual legal
Intermec Technologies Corporation MC75 legal
UserManual.wiki
>
Intermec Technologies
>
MC75 User Manual
>
Final Users Manual part 1 of 2
Contents
1.
Users Manual
2.
Compliance Insert
3.
Final Users Manual part 1 of 2
4.
Final Users Manual part 2 of 2
Final Users Manual part 1 of 2
Navigation menu
Upload a User Manual
Namespaces
Wiki Guide
HTML
PDF
Info
Views
User Manual
Discussion / Help
Navigation
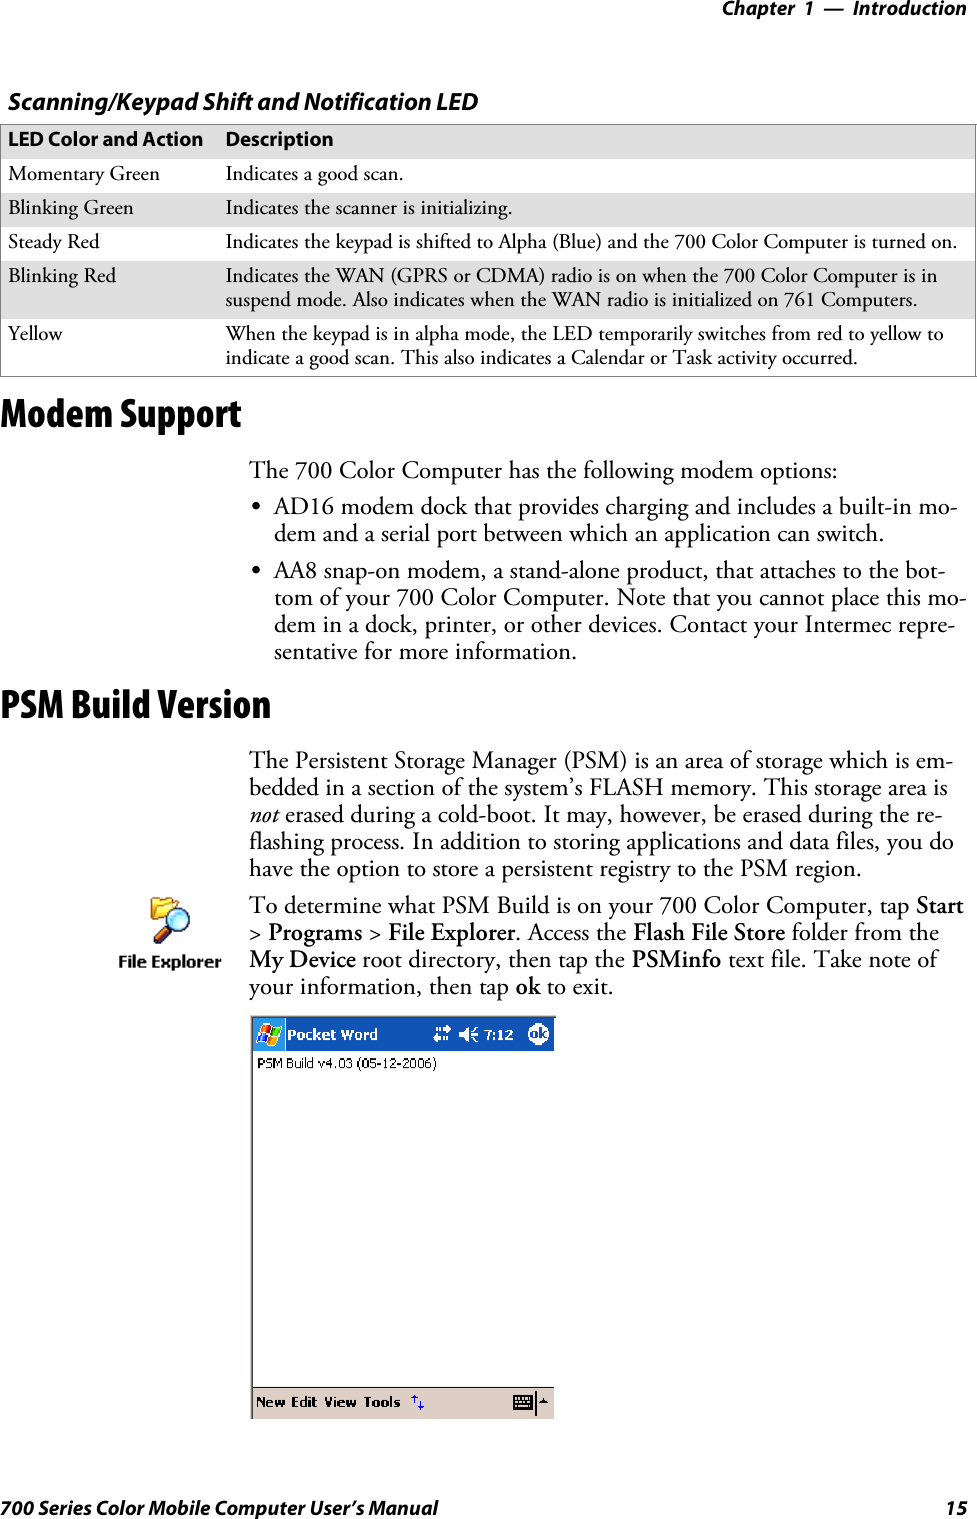
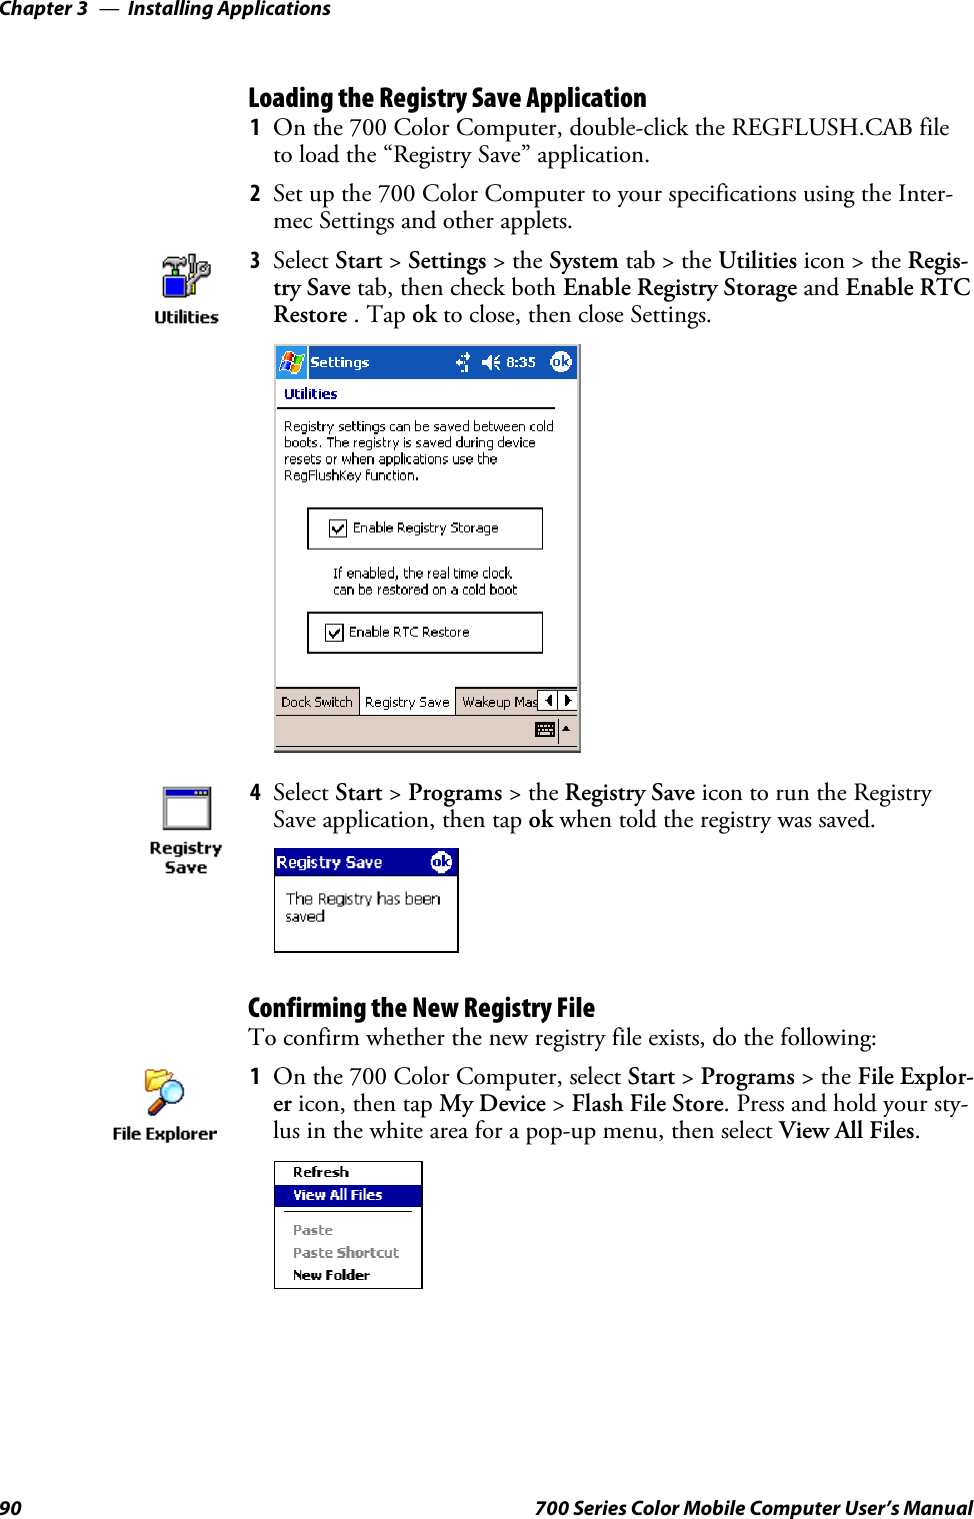
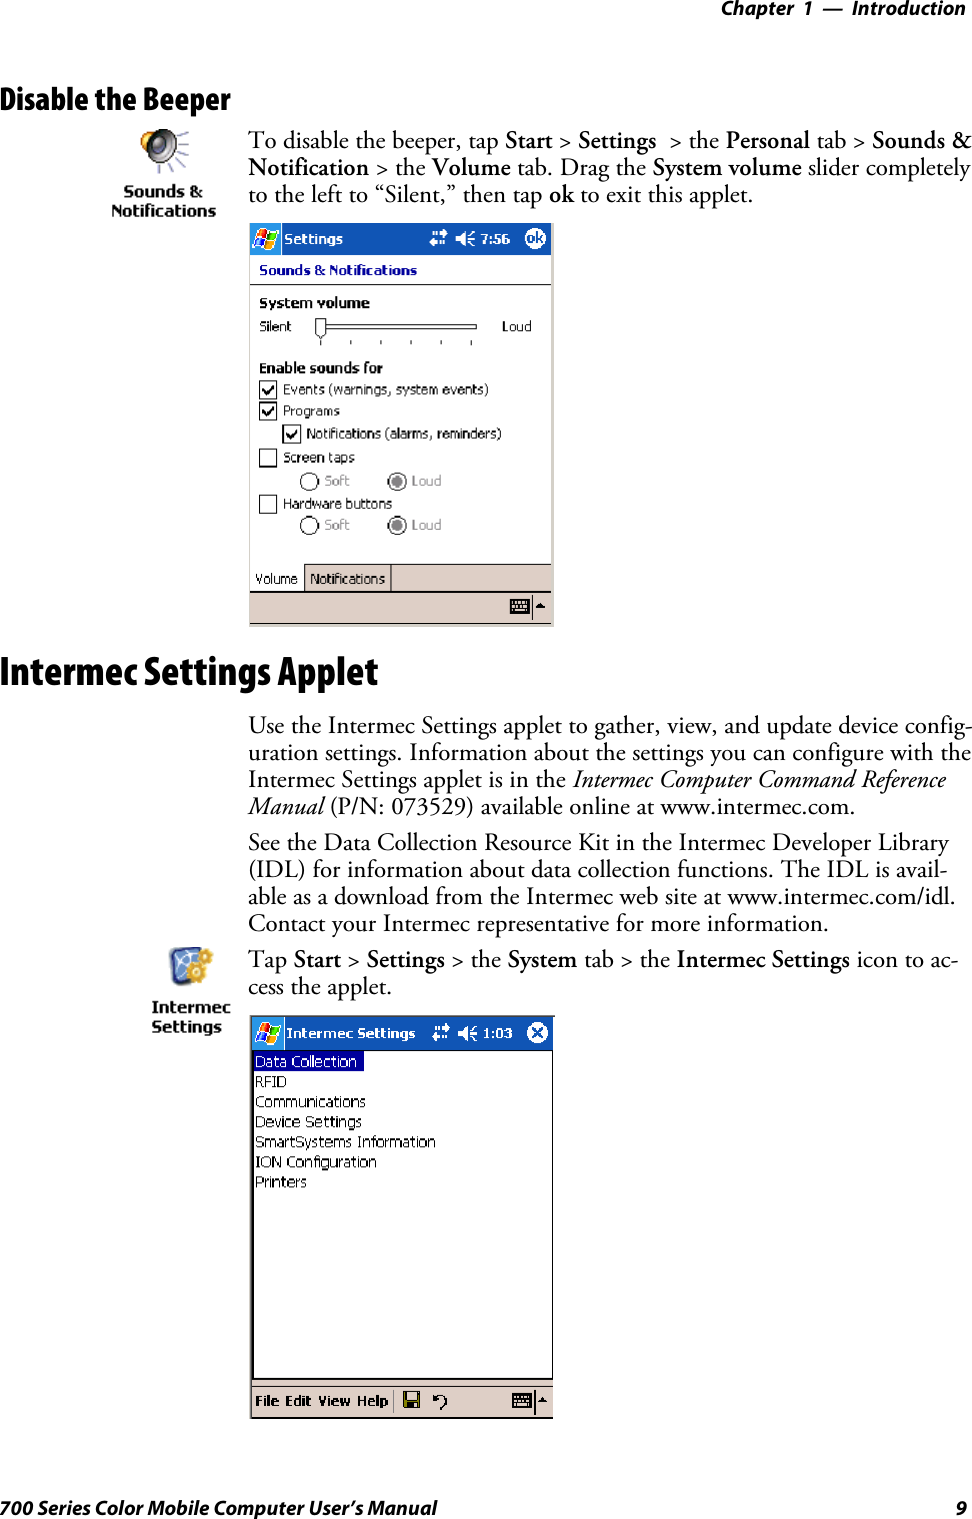
![Contentsv700 Series Color Mobile Computer User’s ManualContentsBefore You Begin xv.............................................................Safety Information xv.....................................................Global Services and Support xv..............................................Warranty Information xv............................................Web Support xv...................................................Telephone Support xvi...............................................WhoShouldReadThisManual xvi...........................................Related Documents xvi.....................................................Patent Information xvii....................................................Introduction 1...............................................................AB10 Battery 2.................................................................Ambient Light Sensor 4..........................................................Audio System 4.................................................................Speaker 5...............................................................Microphone 5...........................................................External Headset Jack 6....................................................Beeper 7......................................................................Enable the Beeper 7.......................................................Disable the Scanner Mute 7.................................................Select a Beeper Volume 8...................................................Disable the Beeper 9......................................................Intermec Settings Applet 9........................................................Keypads 10....................................................................700 Color Keypads 10.....................................................Backlight for Keypad 10....................................................Key Sequences 11.........................................................[Gold] or [Gold/White] Plane Keys 11..................................Alpha (Blue) Plane Keys 12...........................................LEDs 14......................................................................Modem Support 15..............................................................PSM Build Version 15...........................................................1](https://usermanual.wiki/Intermec-Technologies/MC75.Final-Users-Manual-part-1-of-2/User-Guide-730132-Page-5.png)
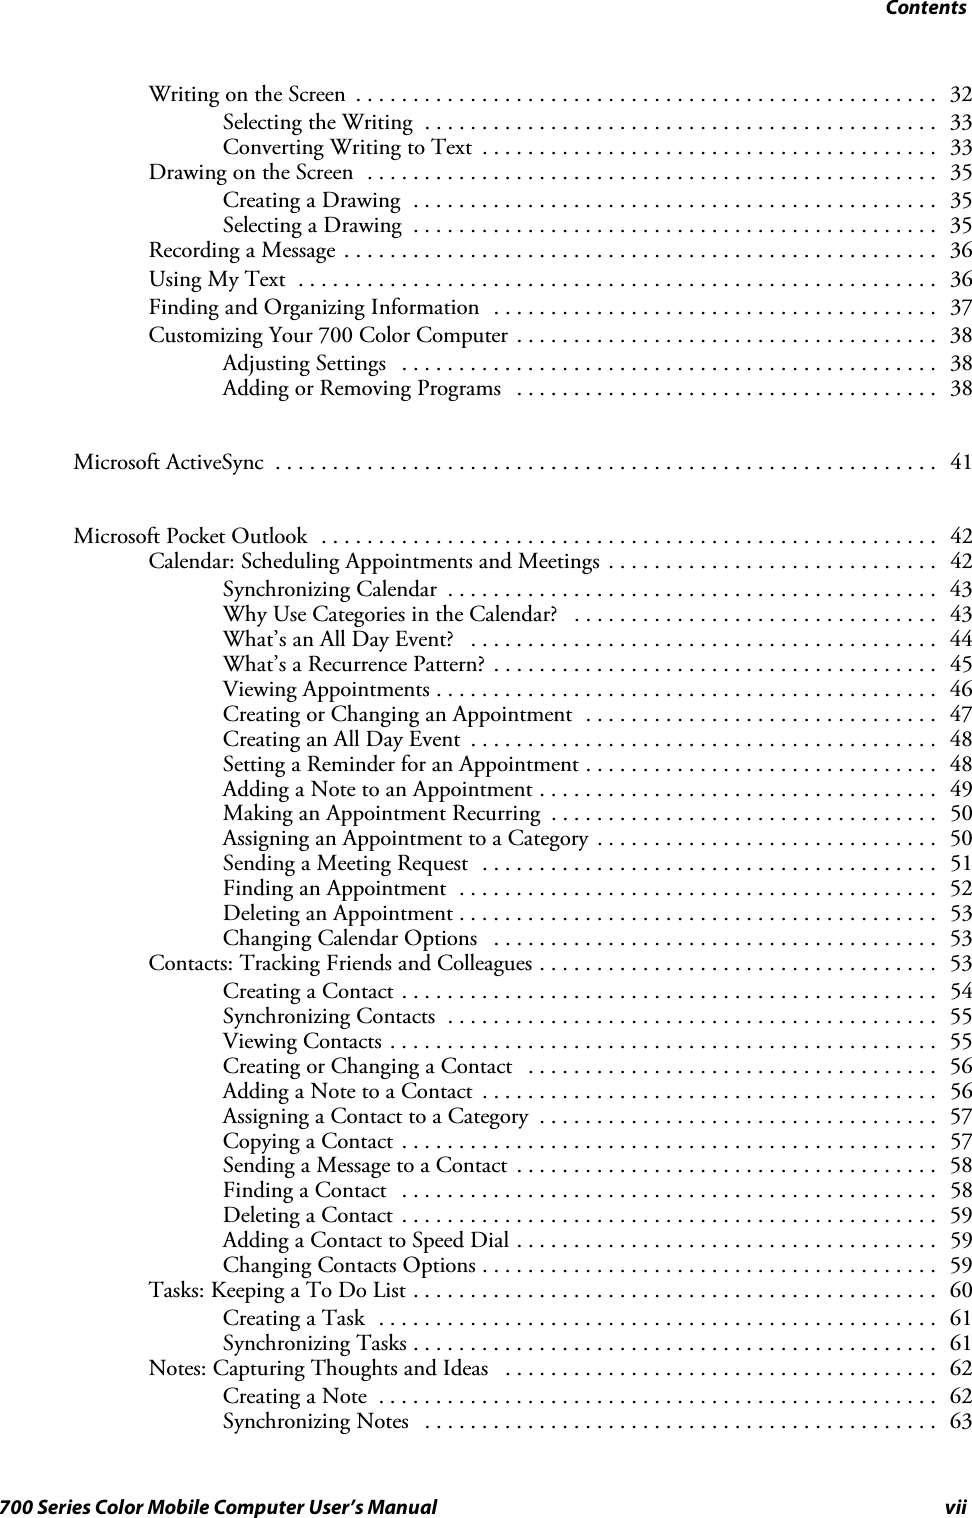
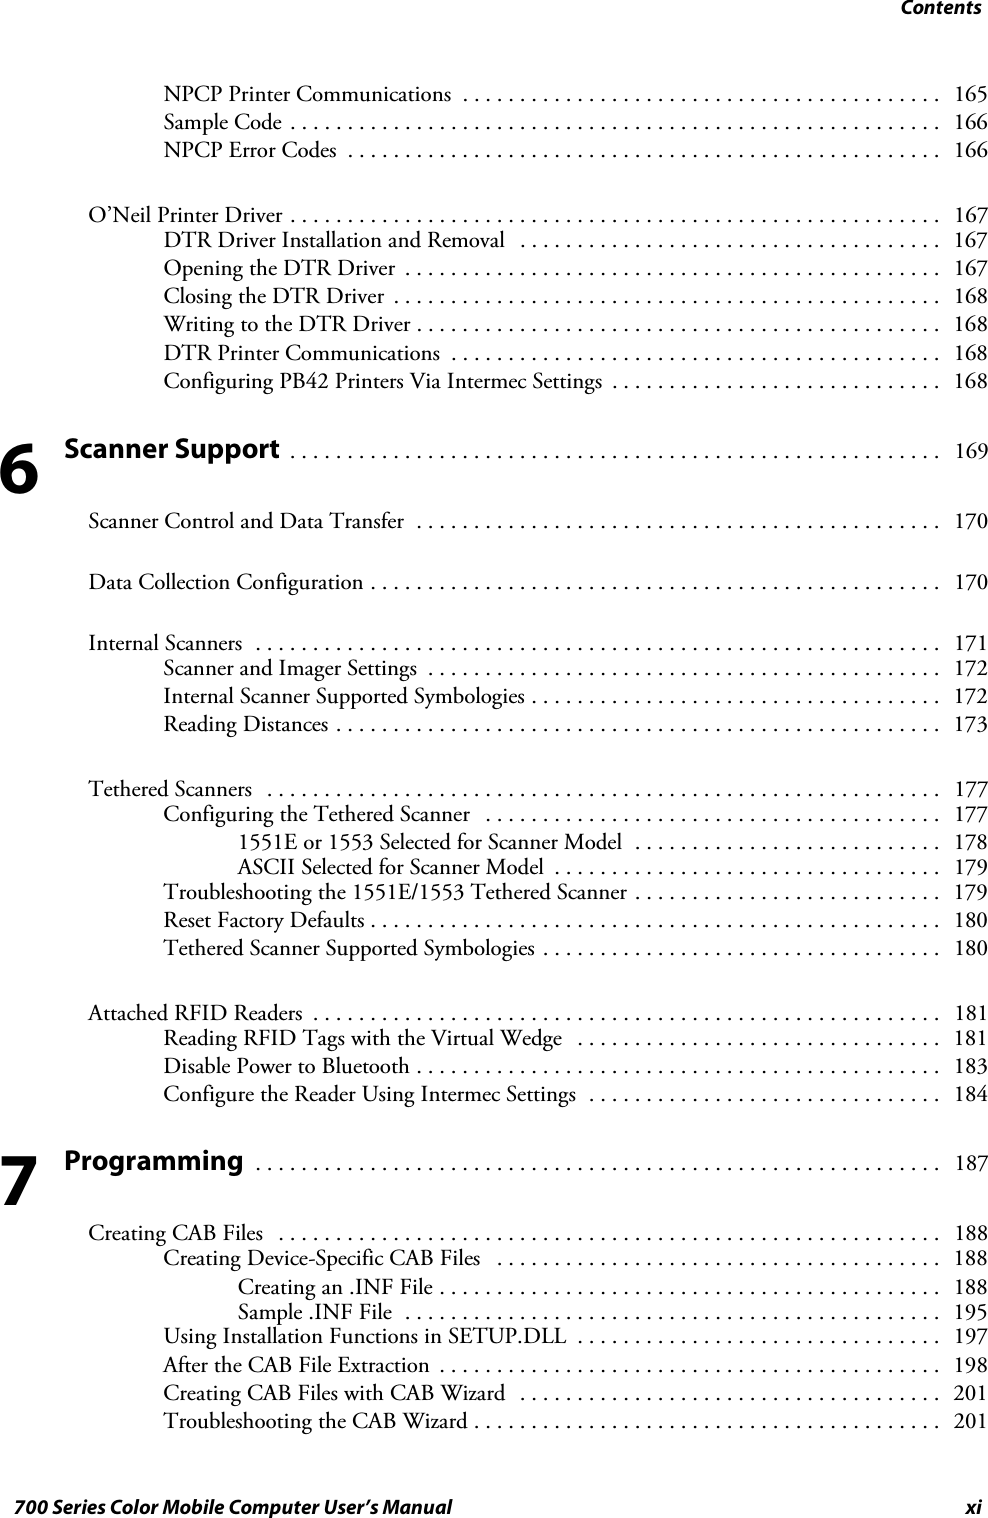
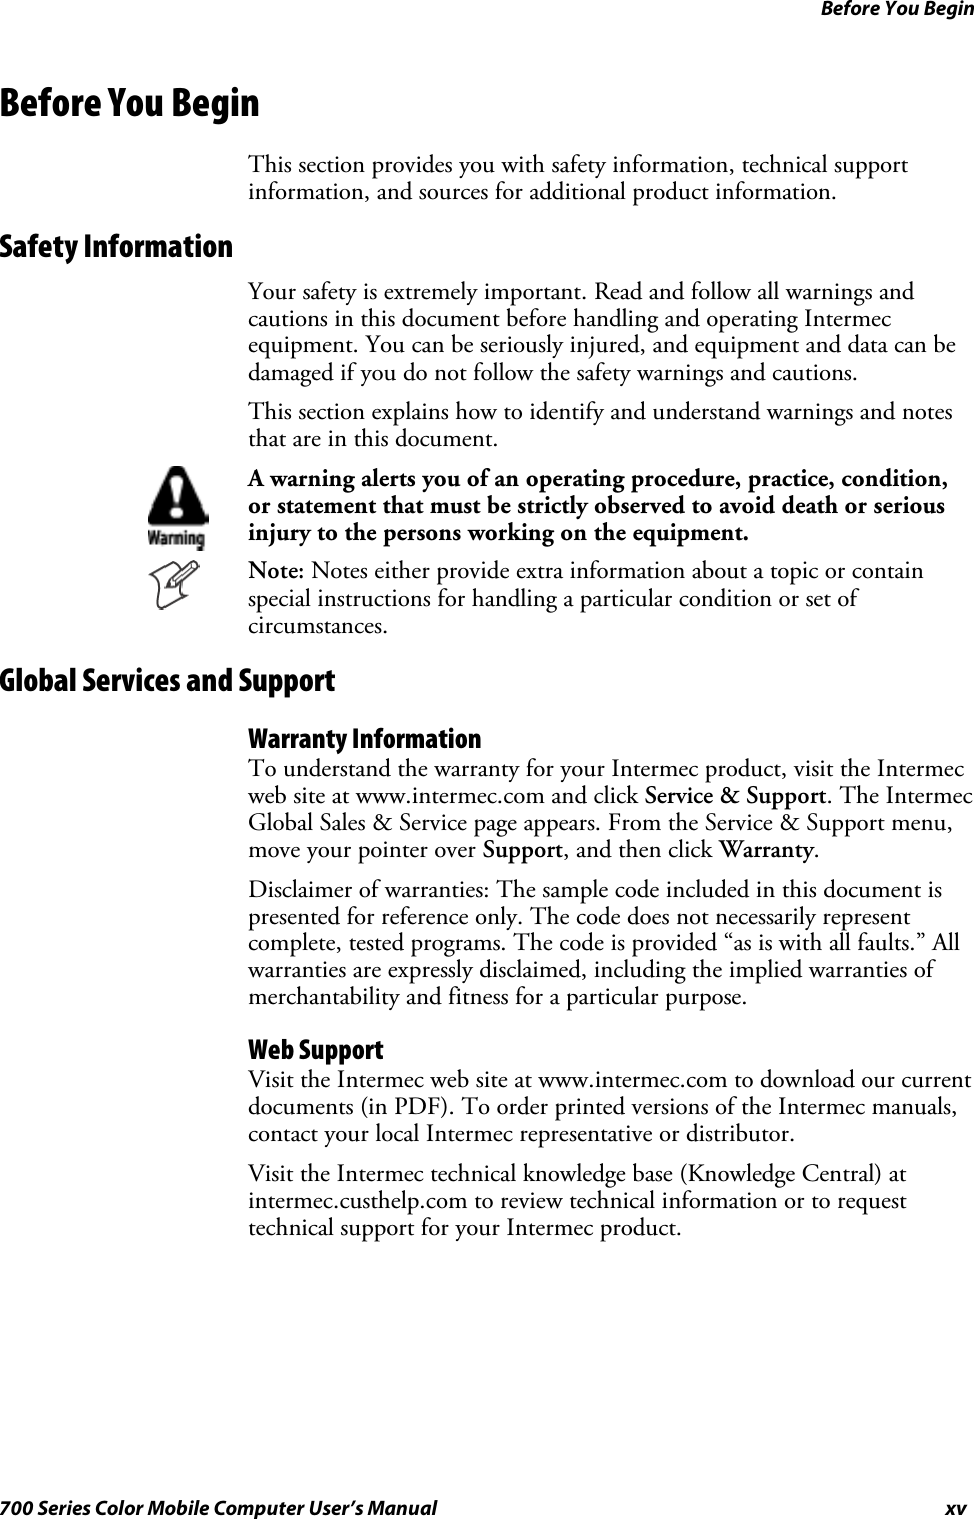

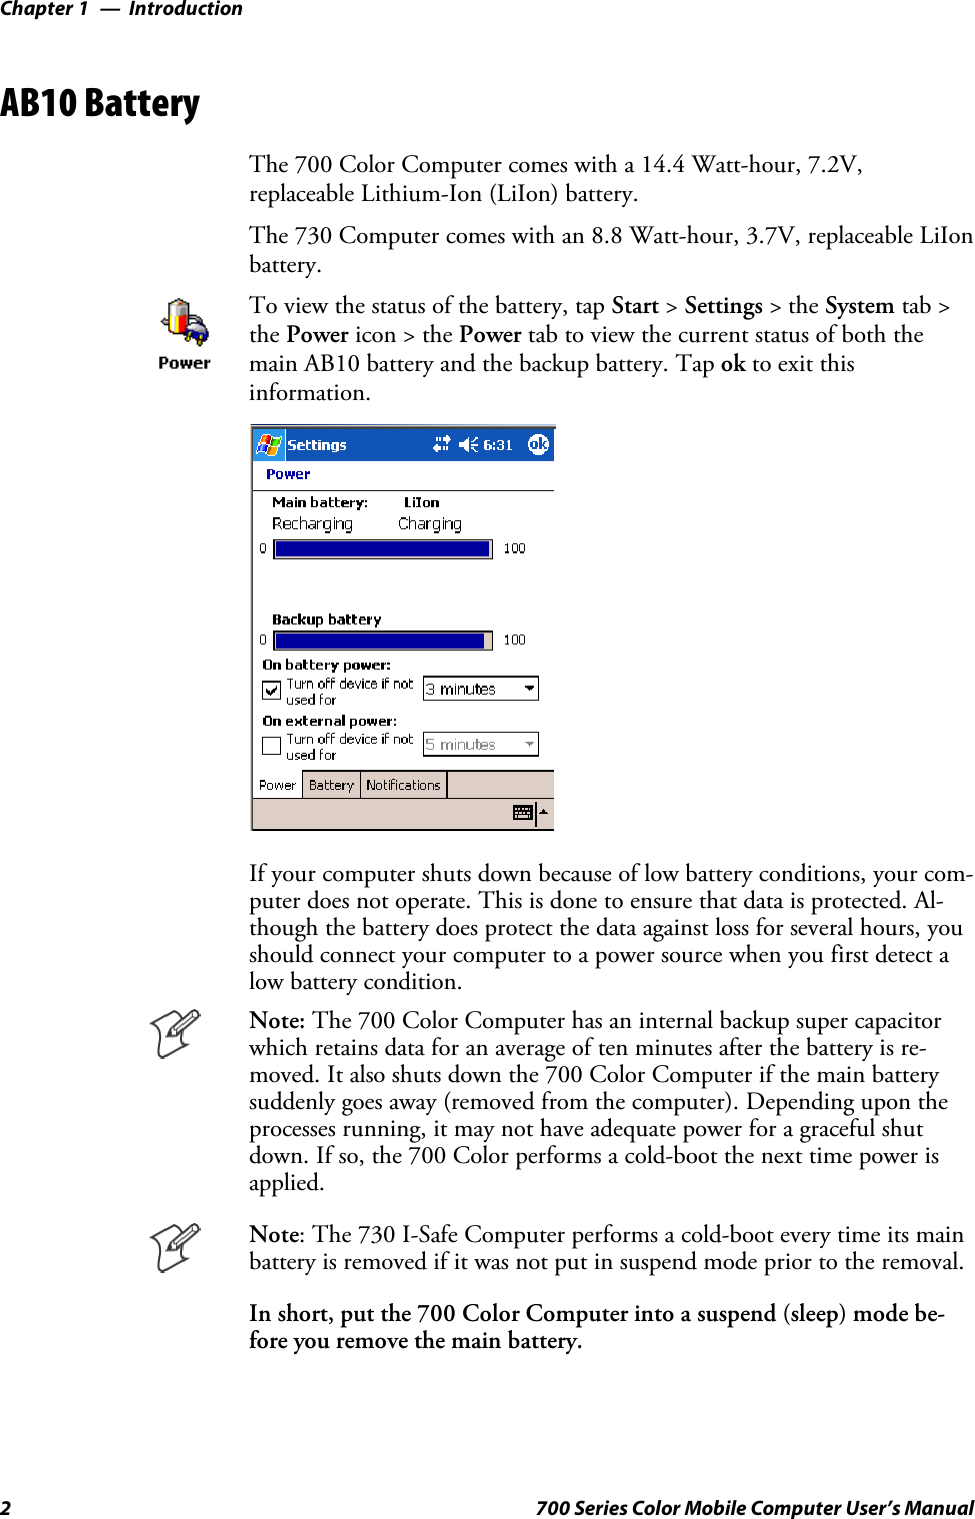
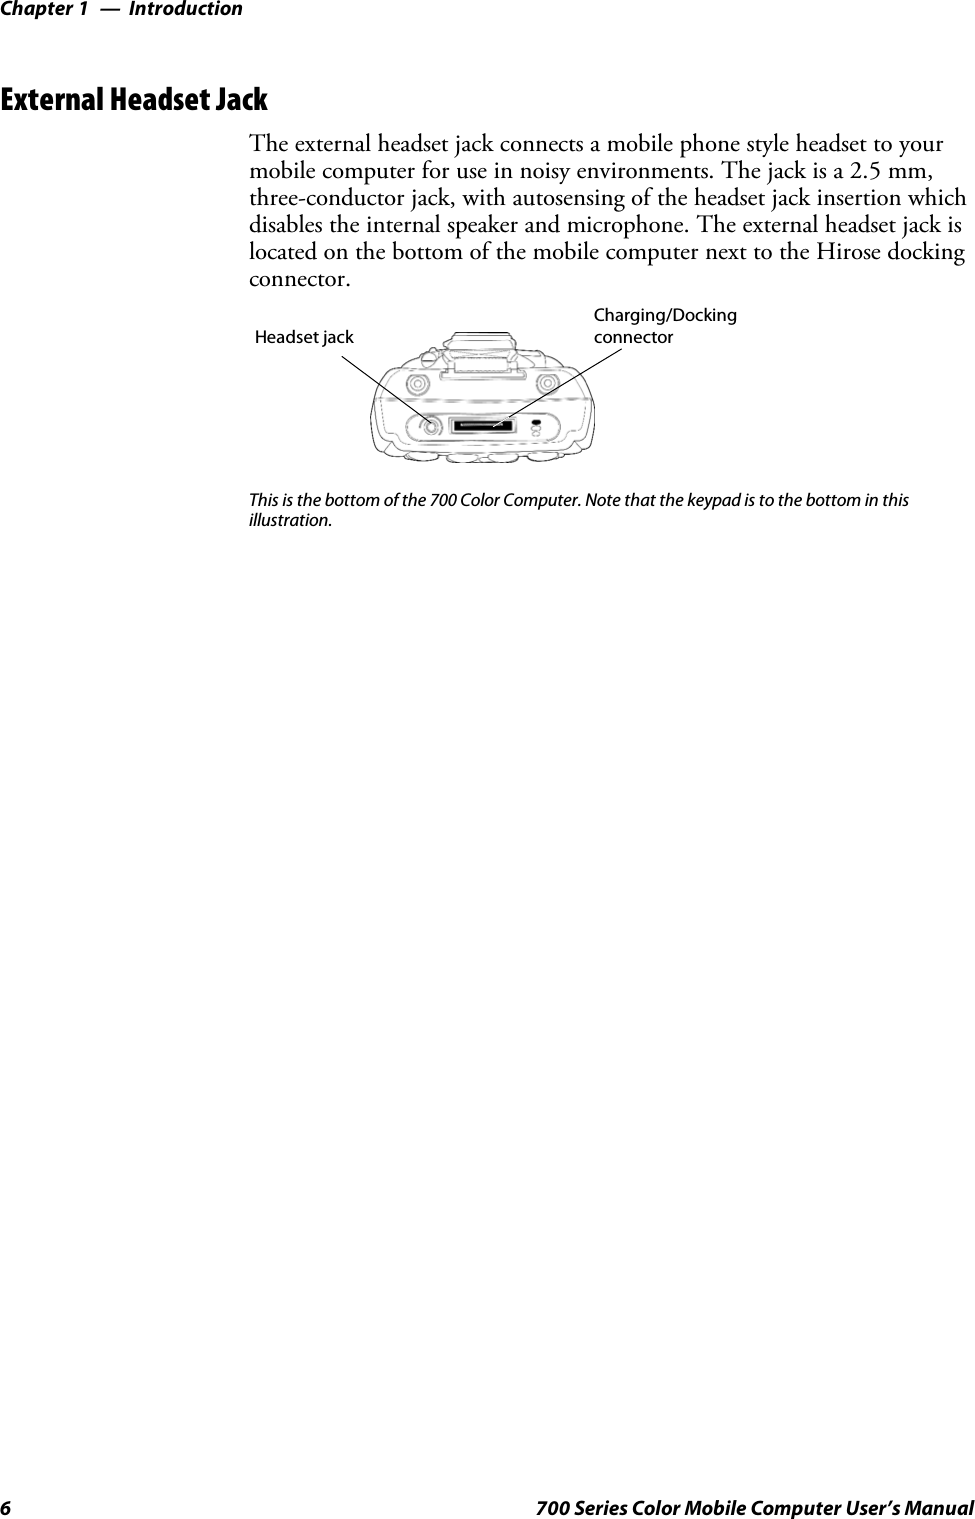
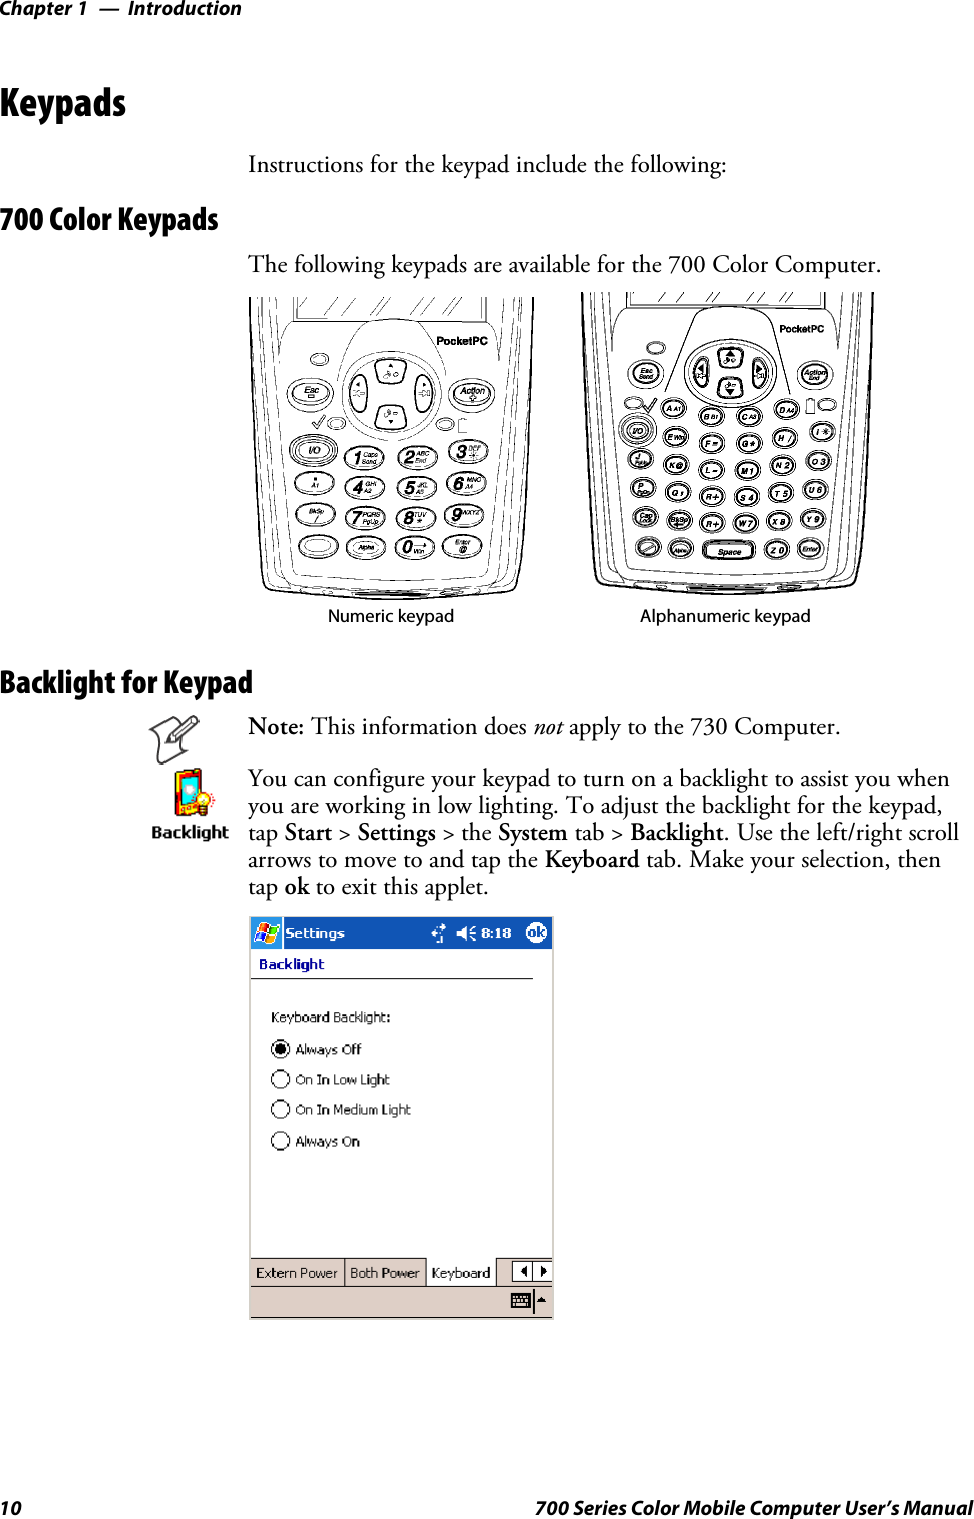
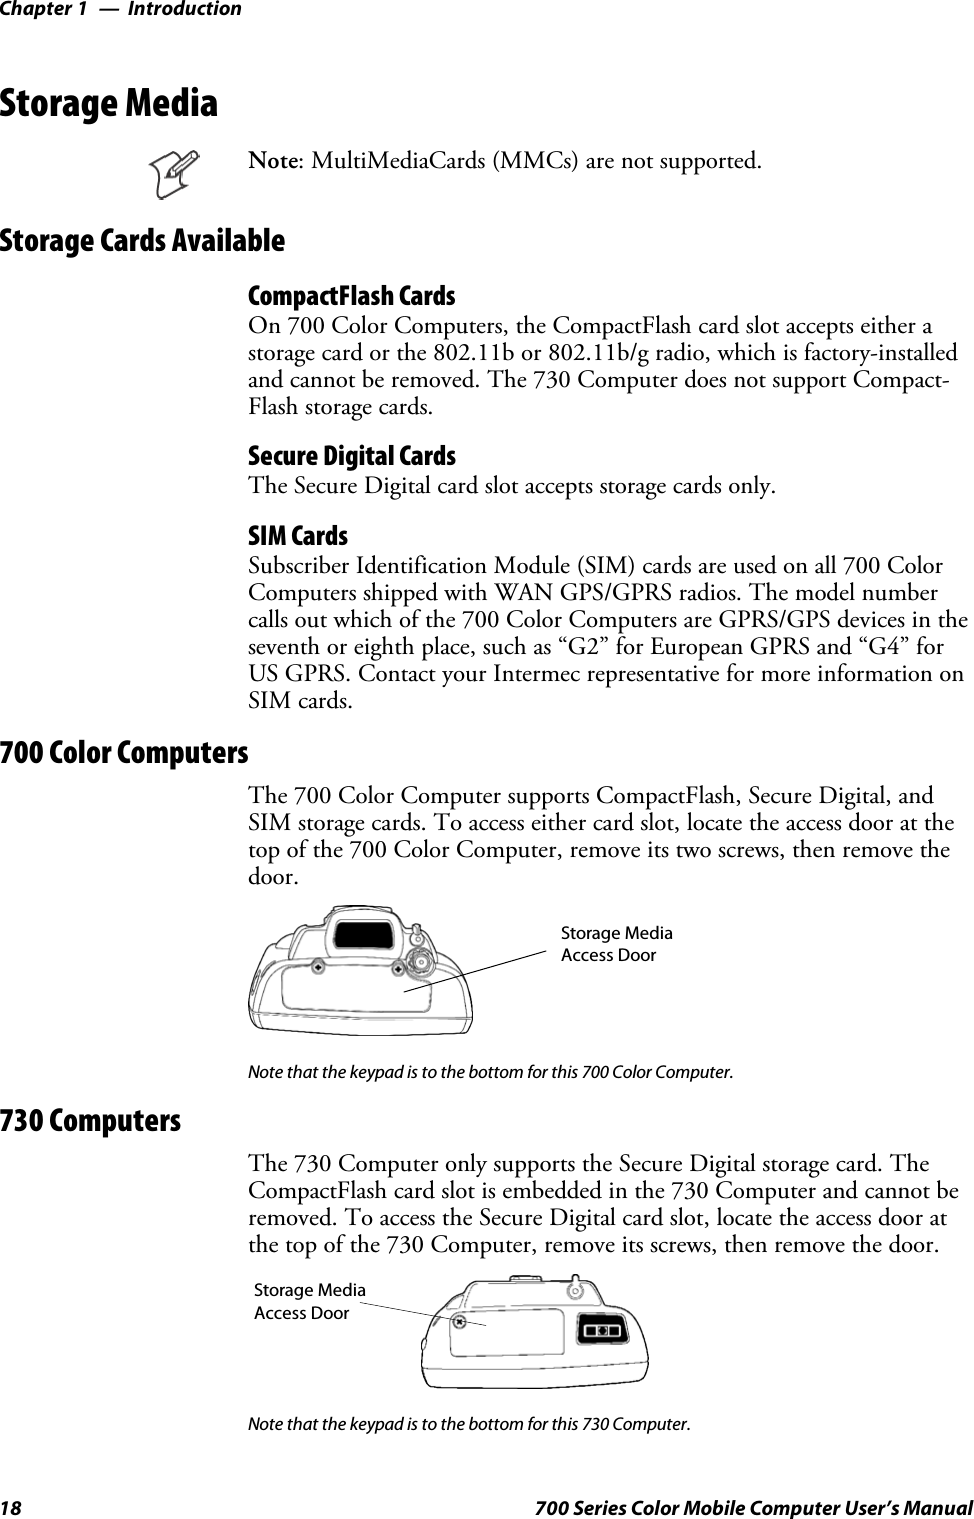
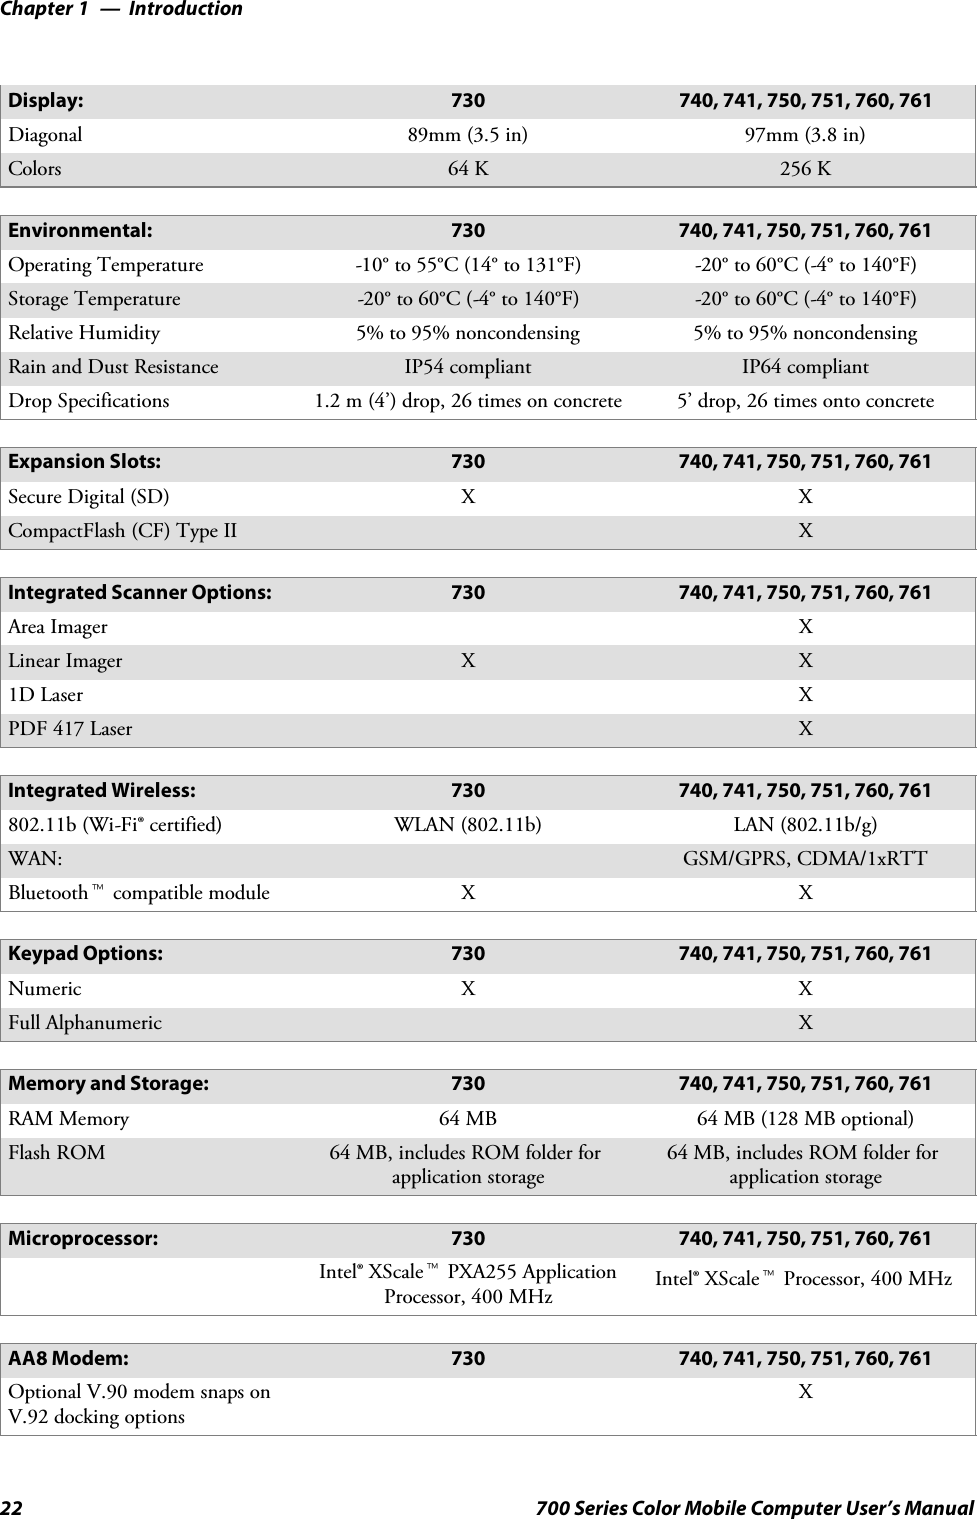
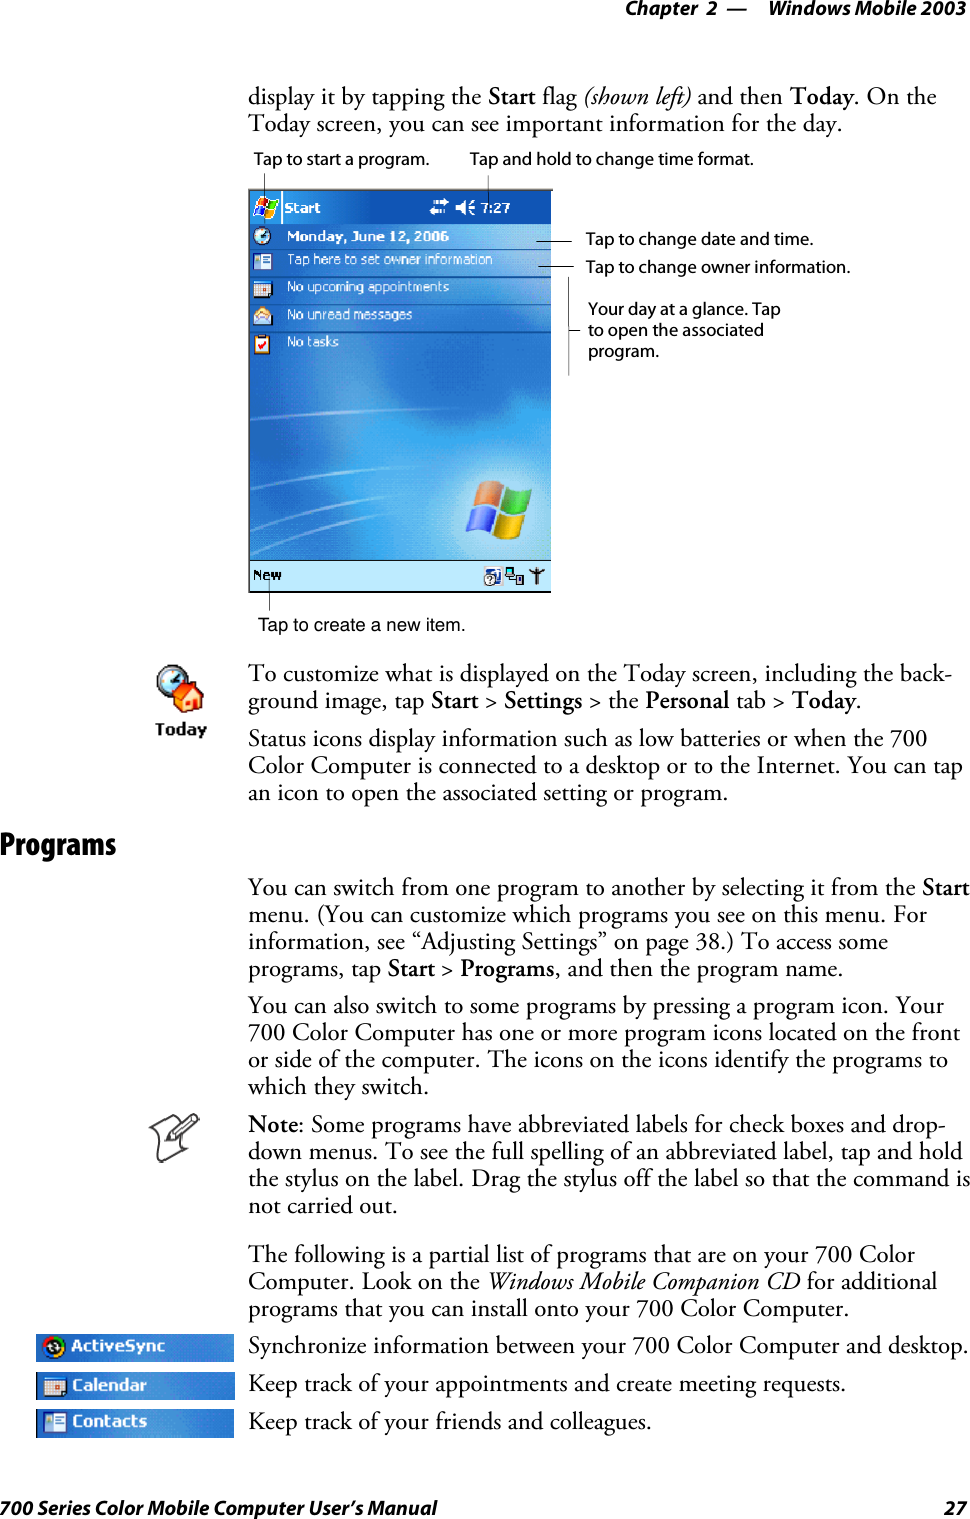
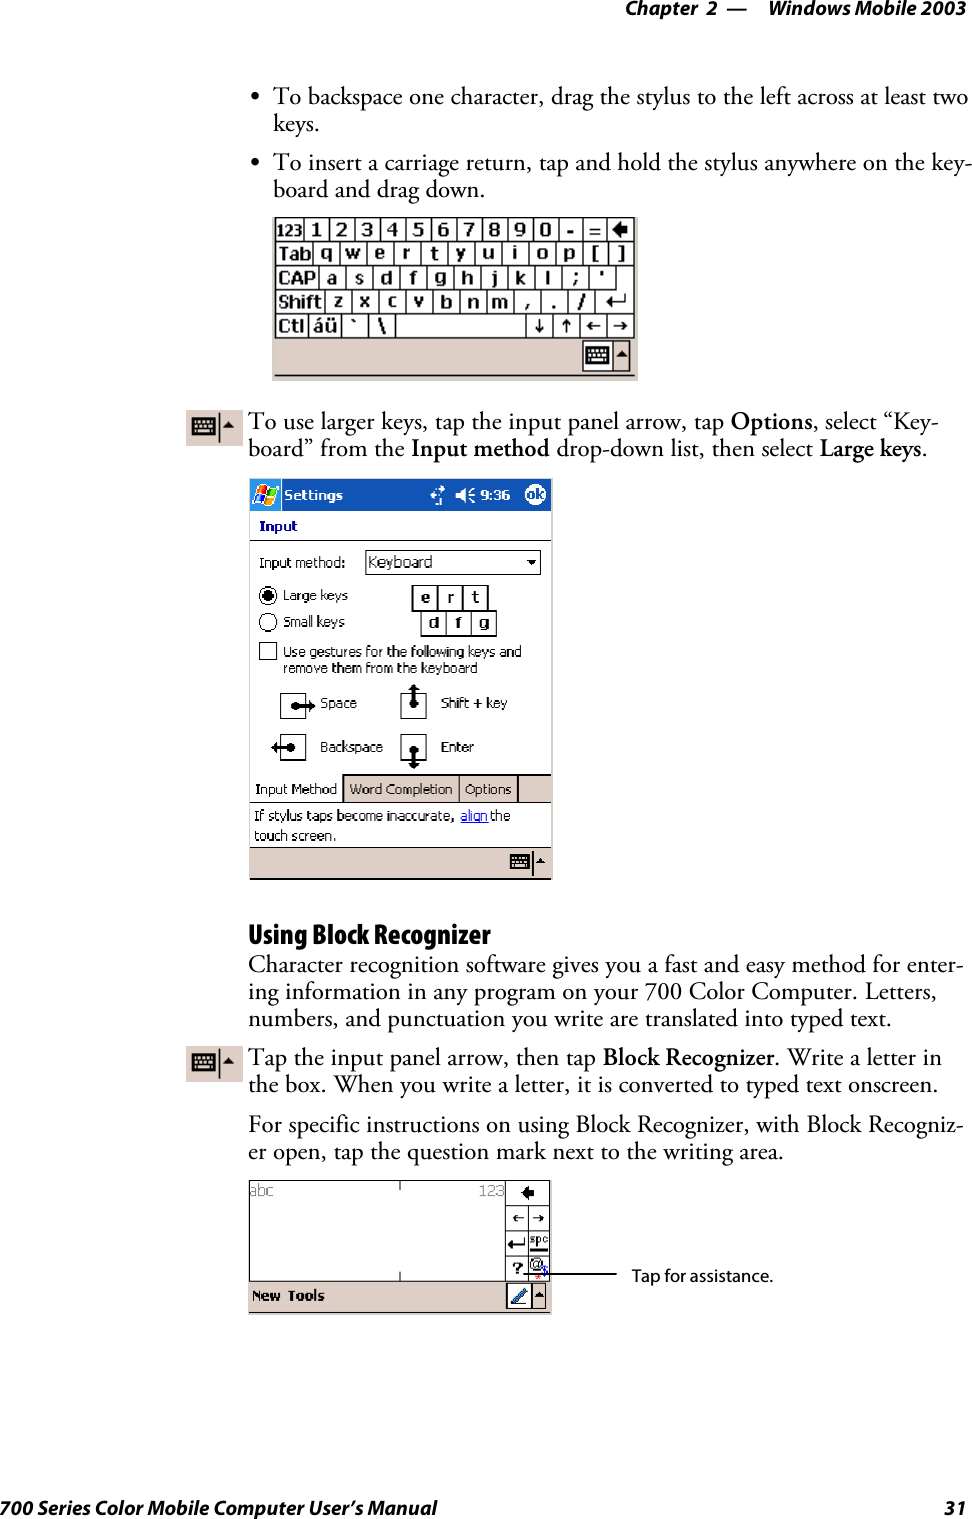
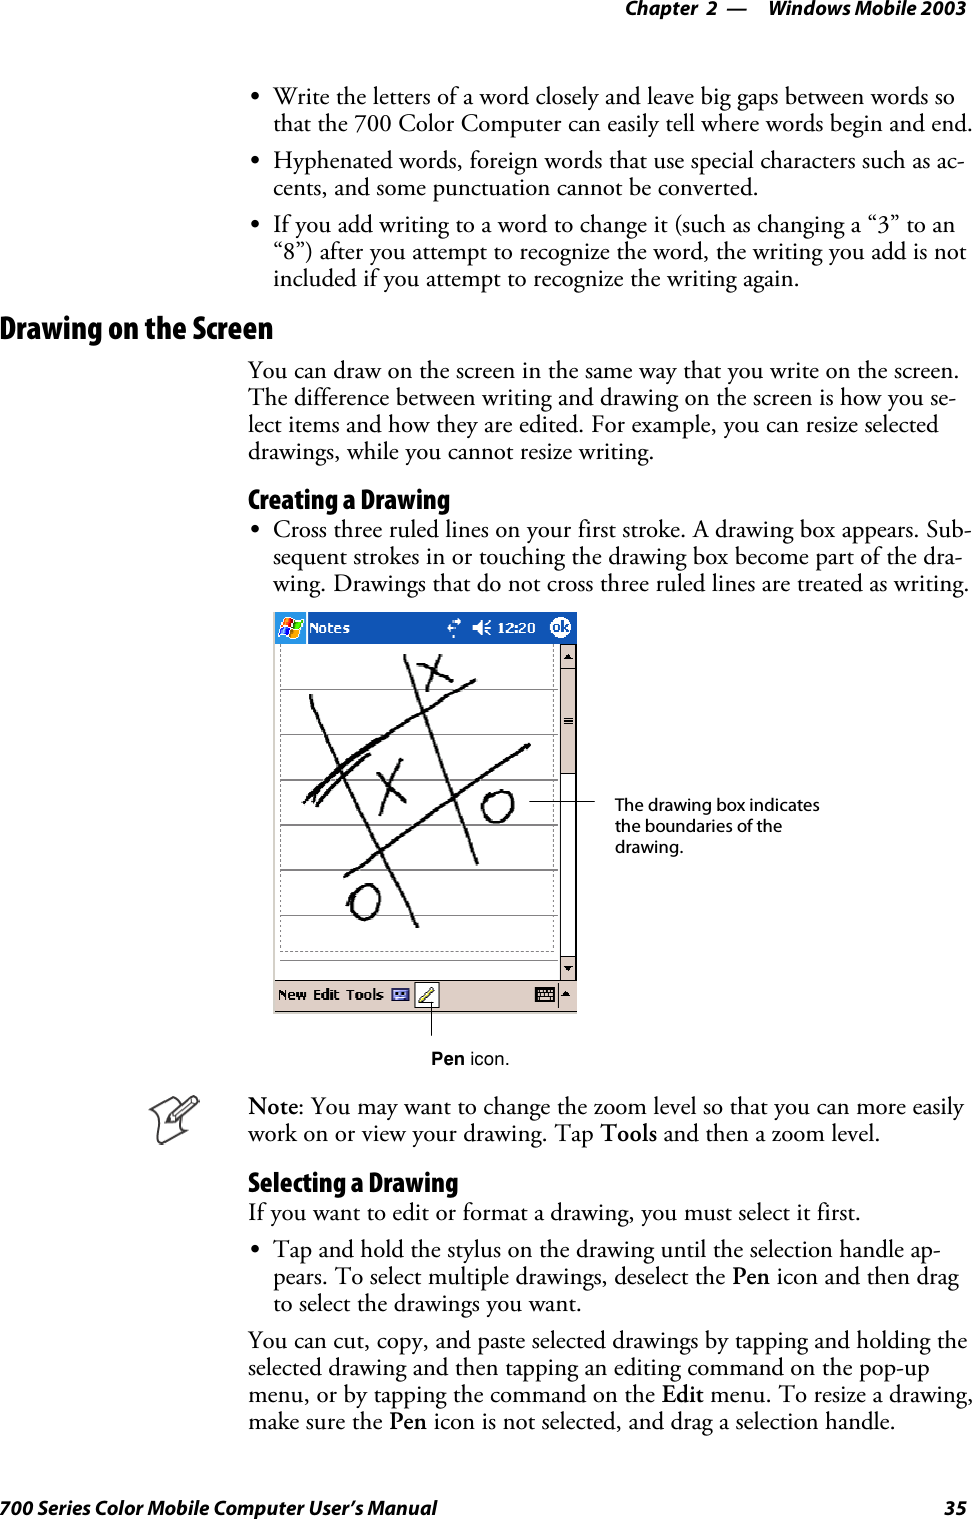
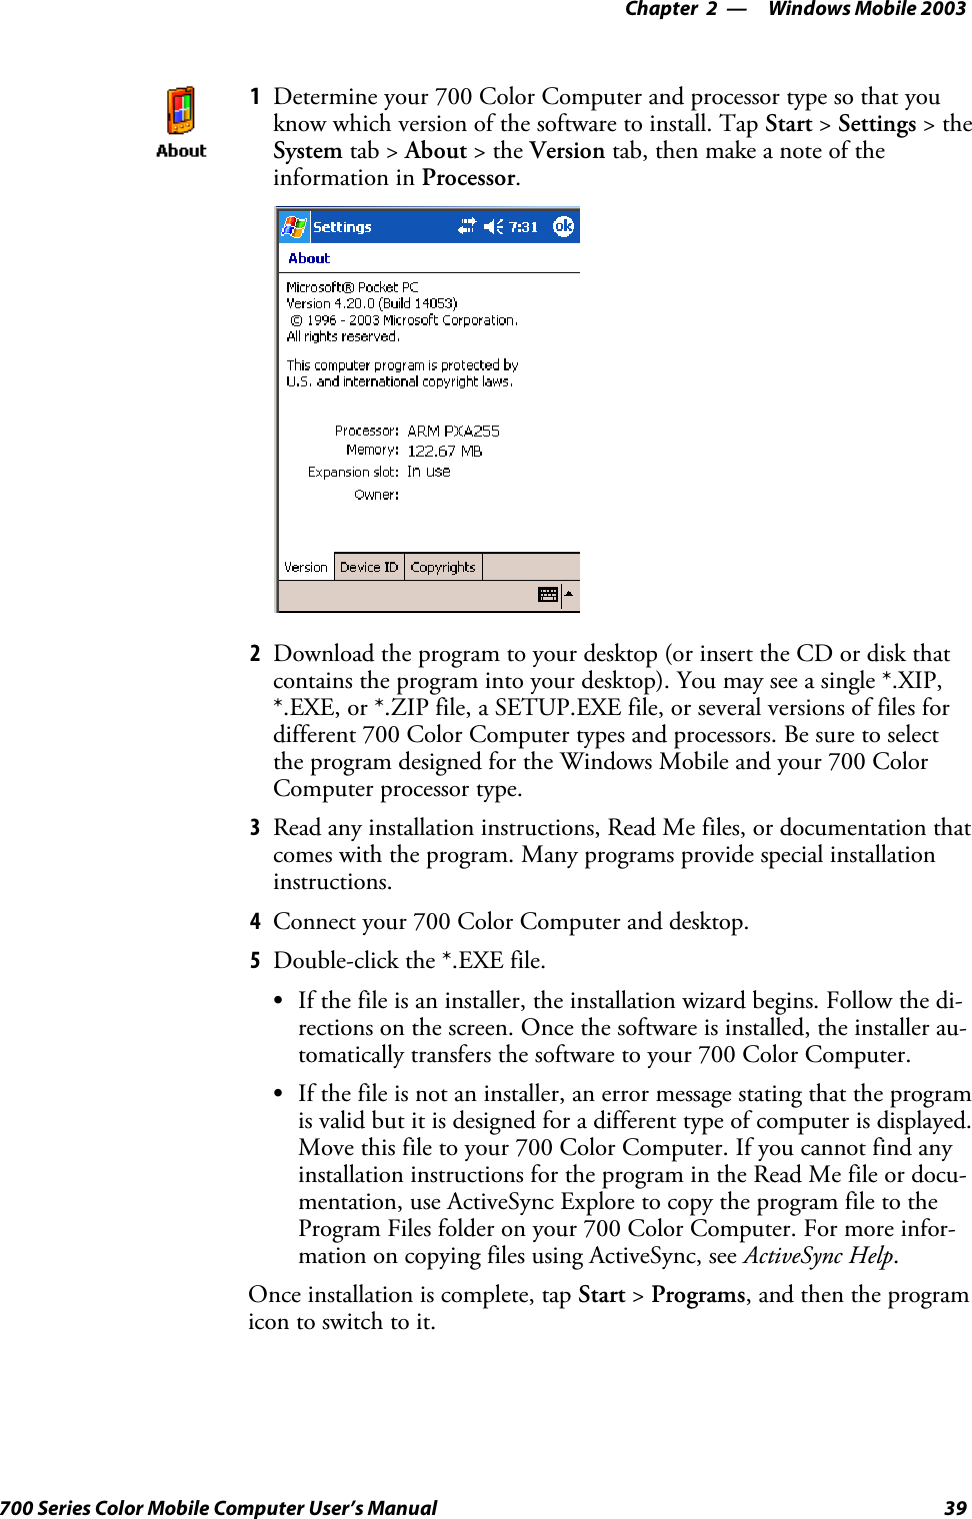
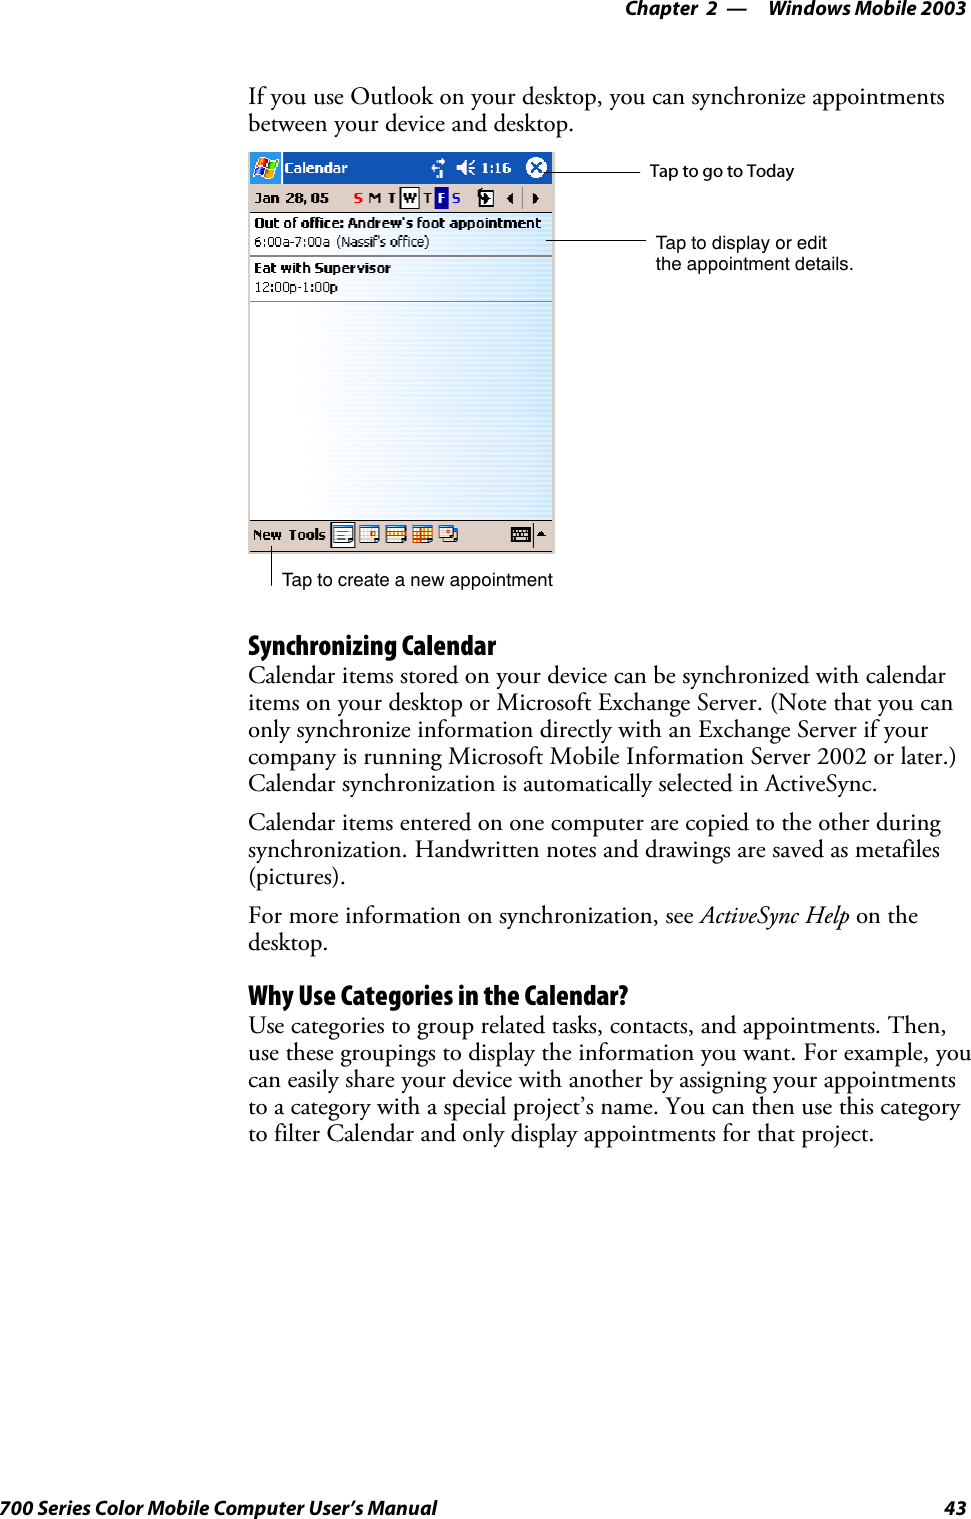
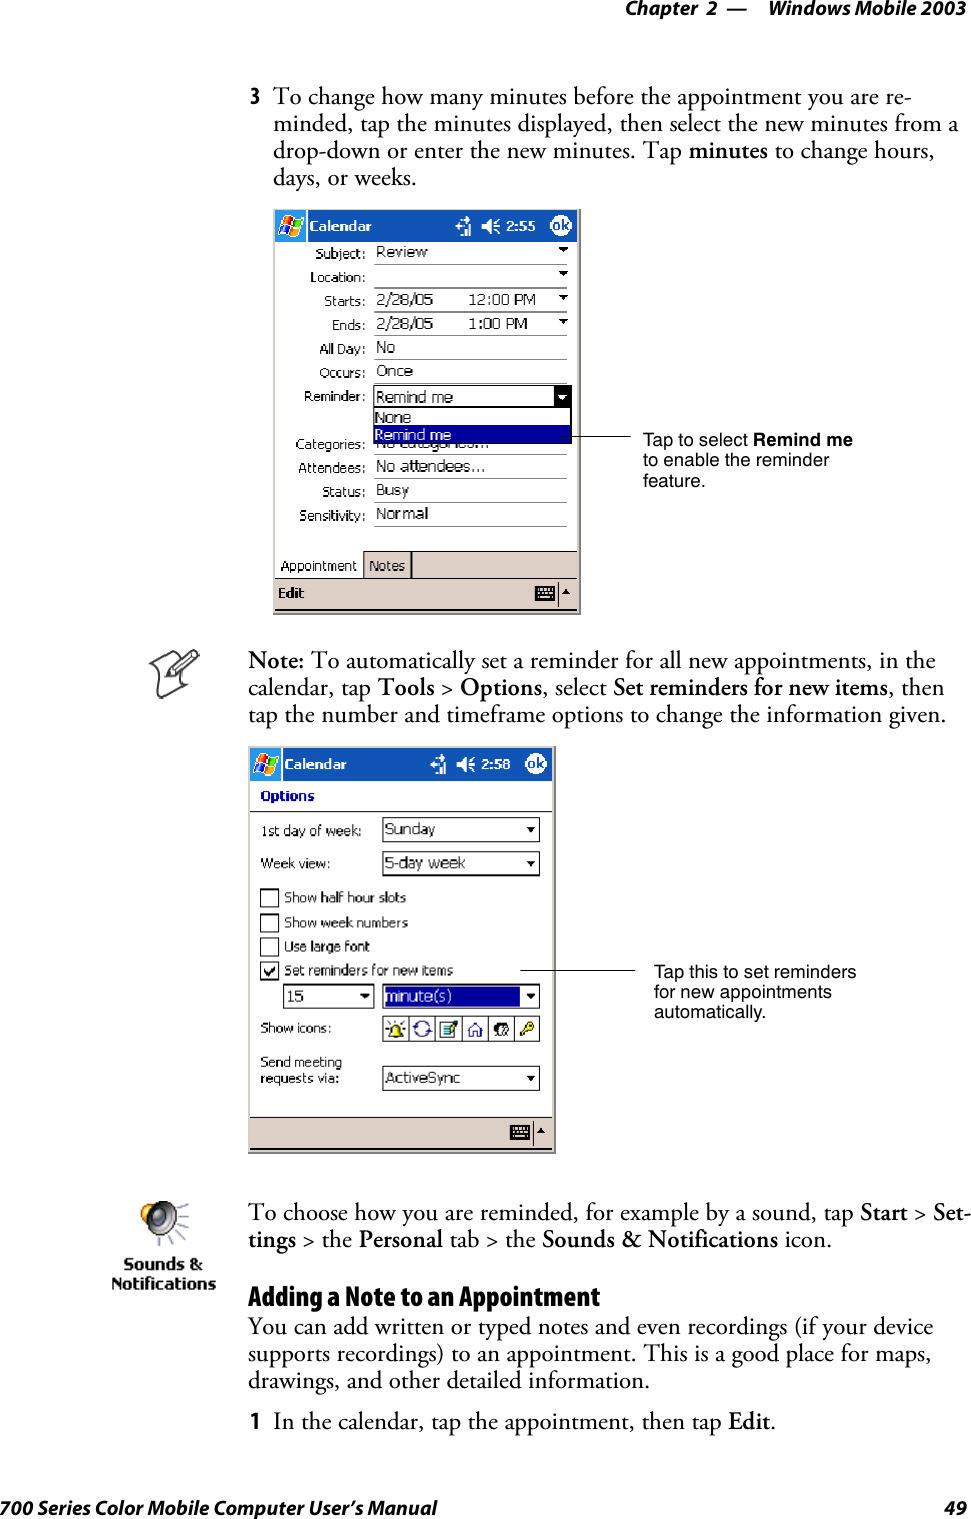
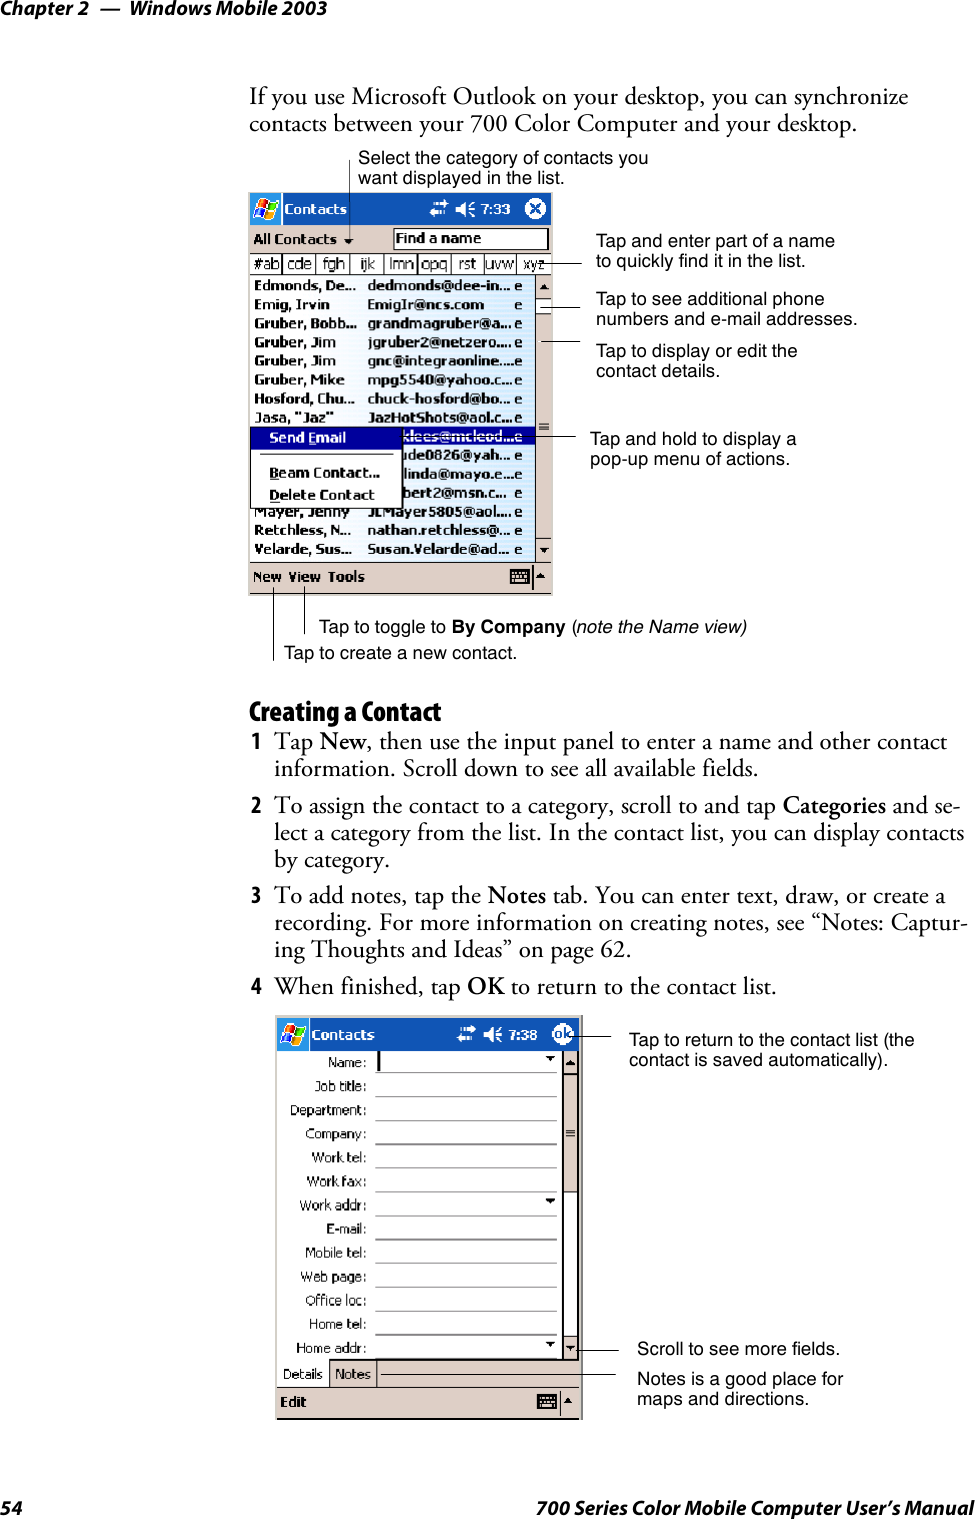
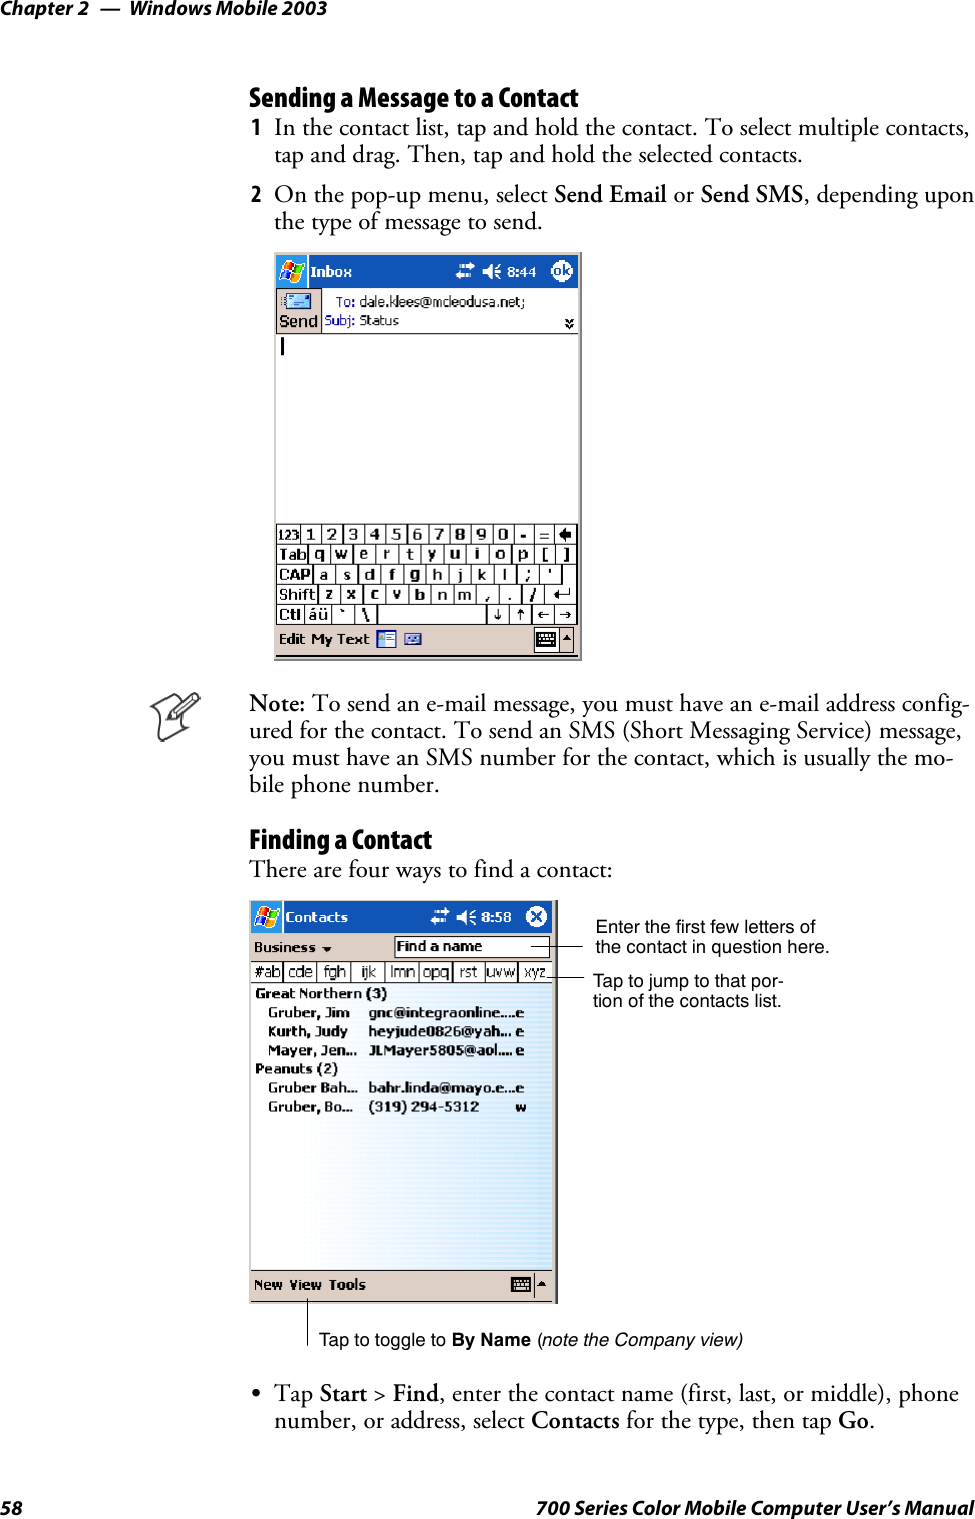
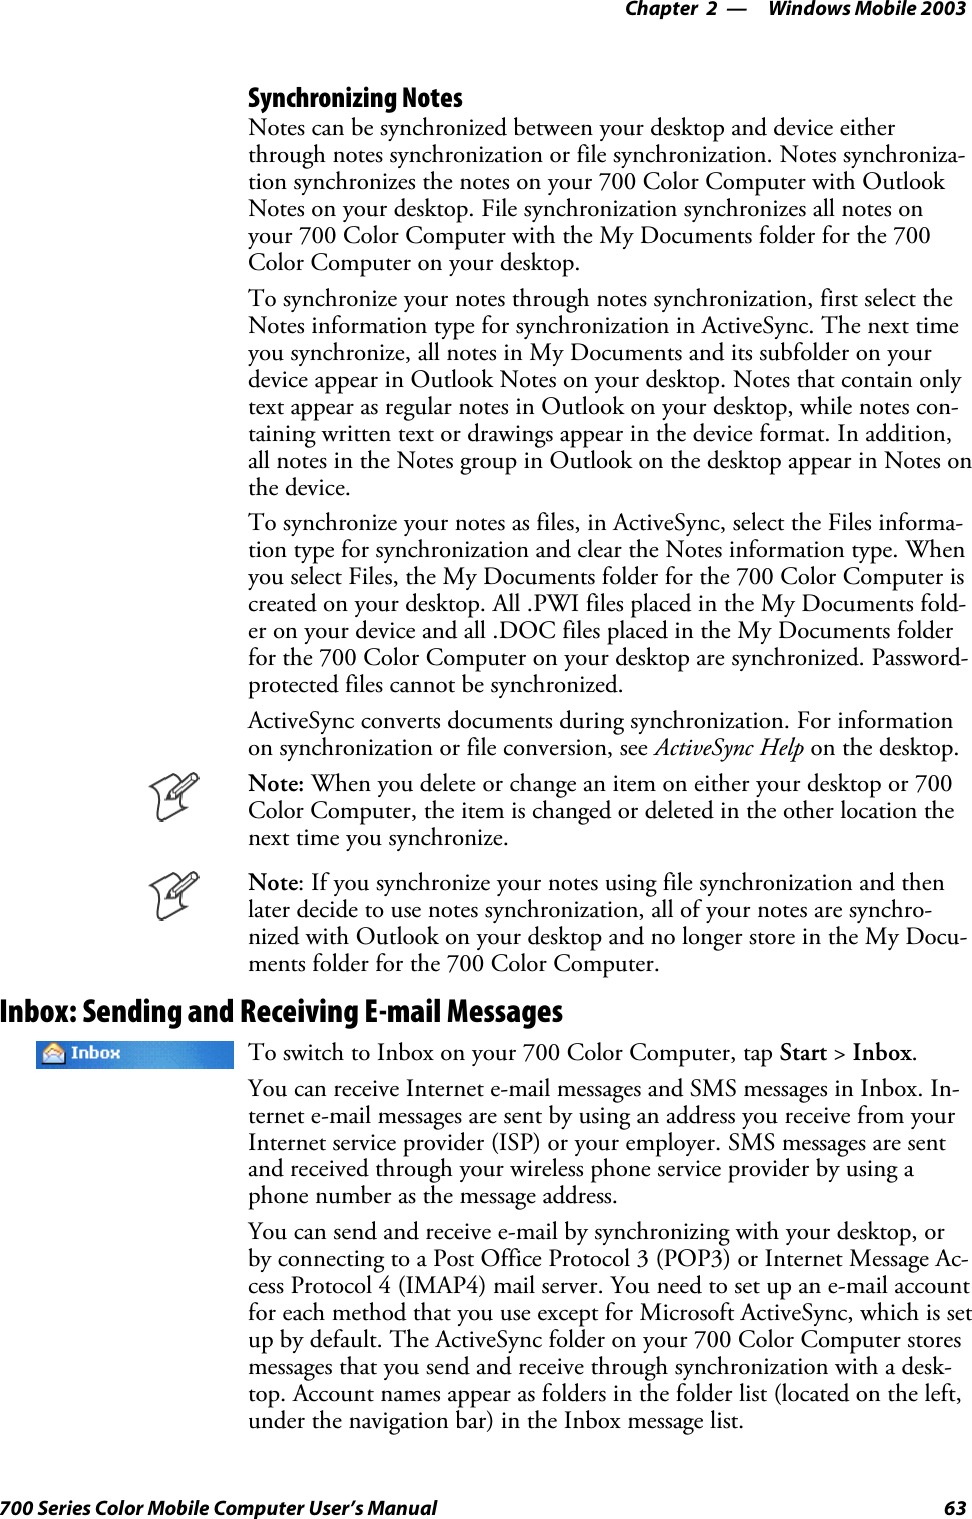
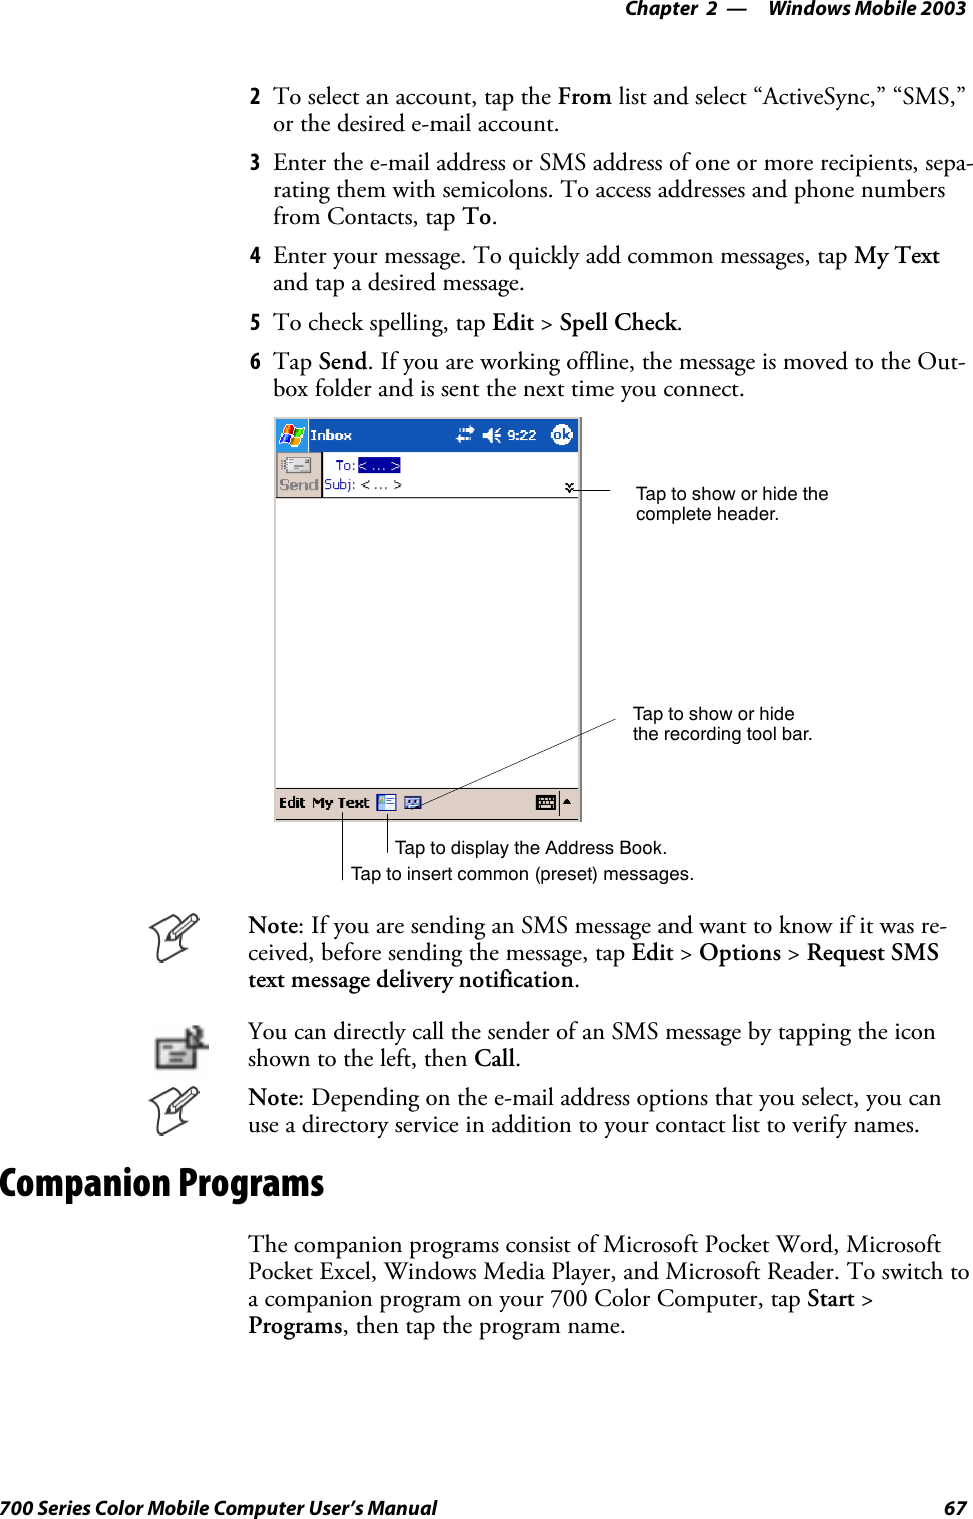
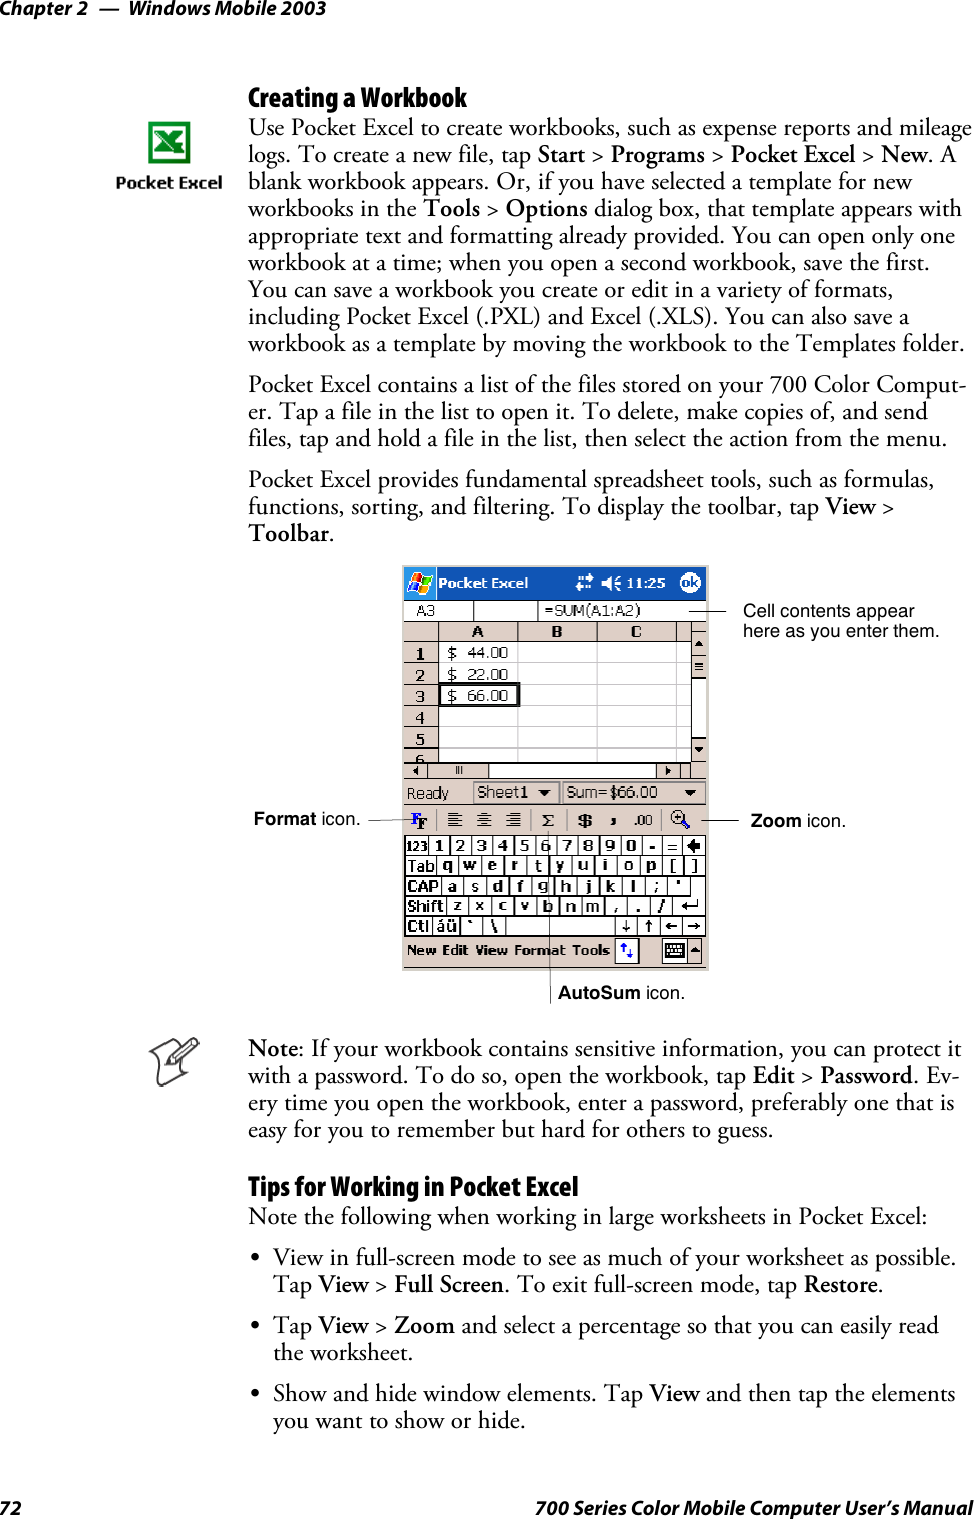
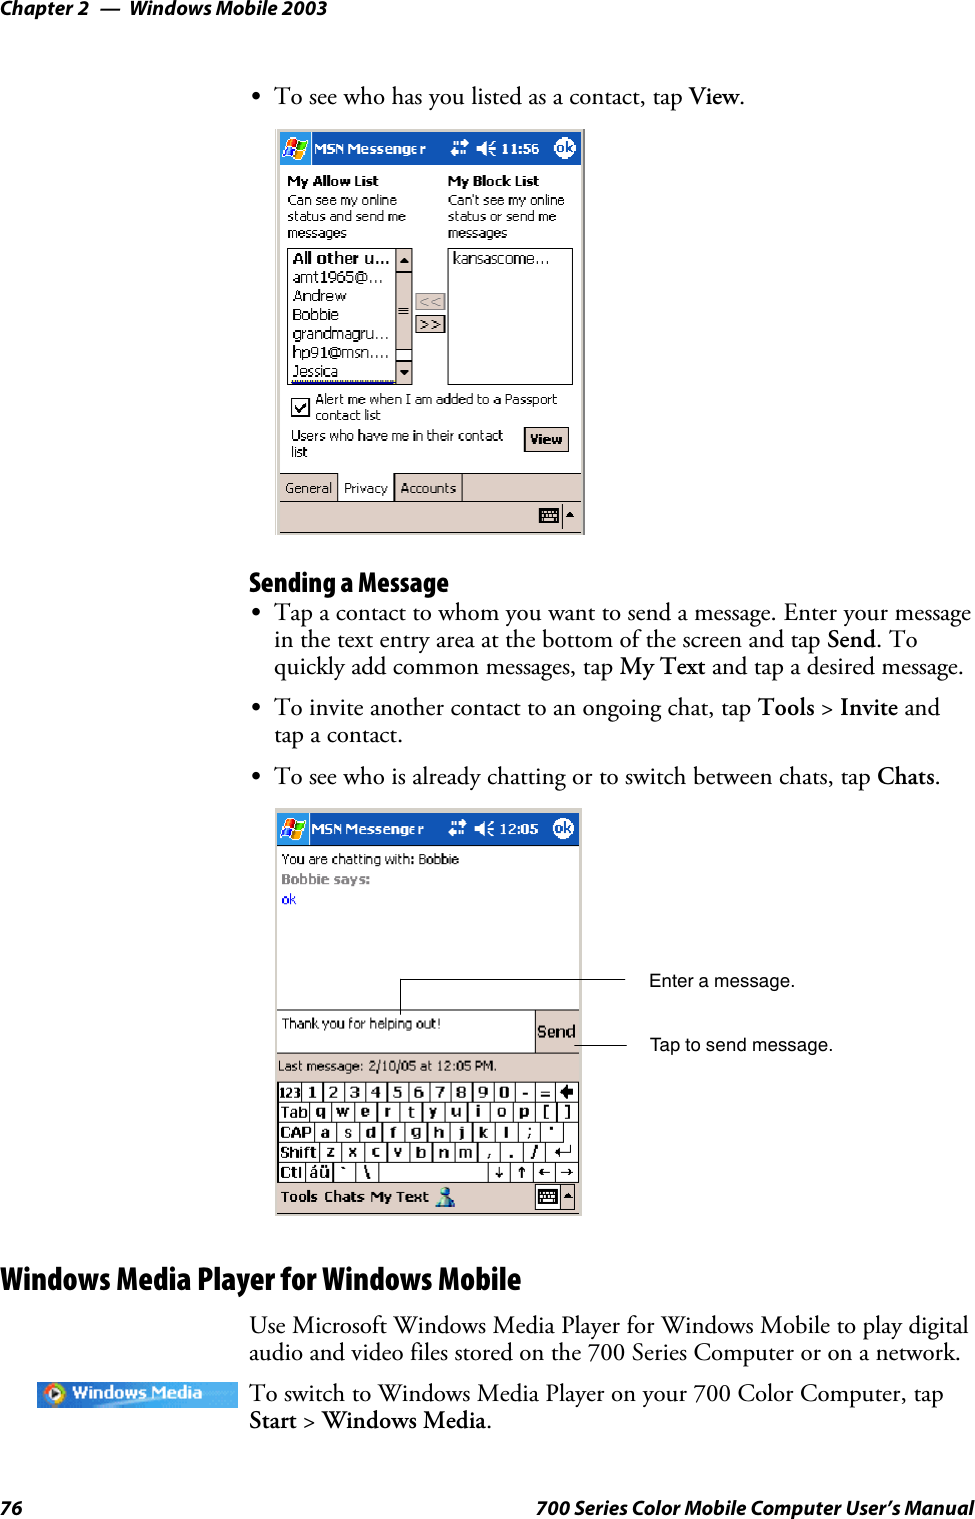
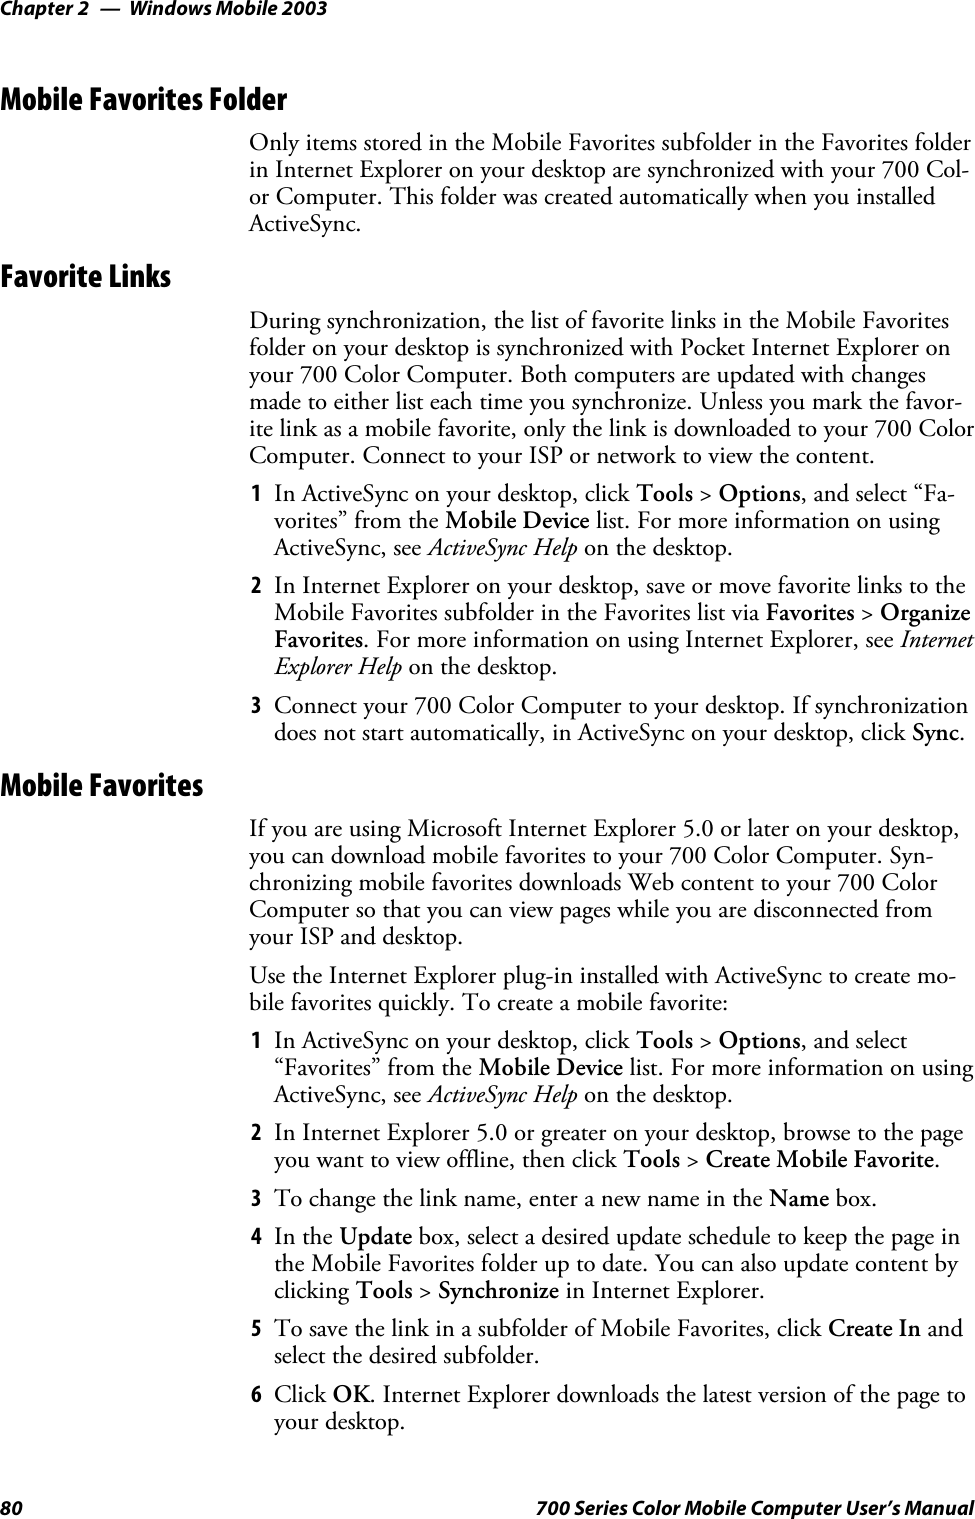
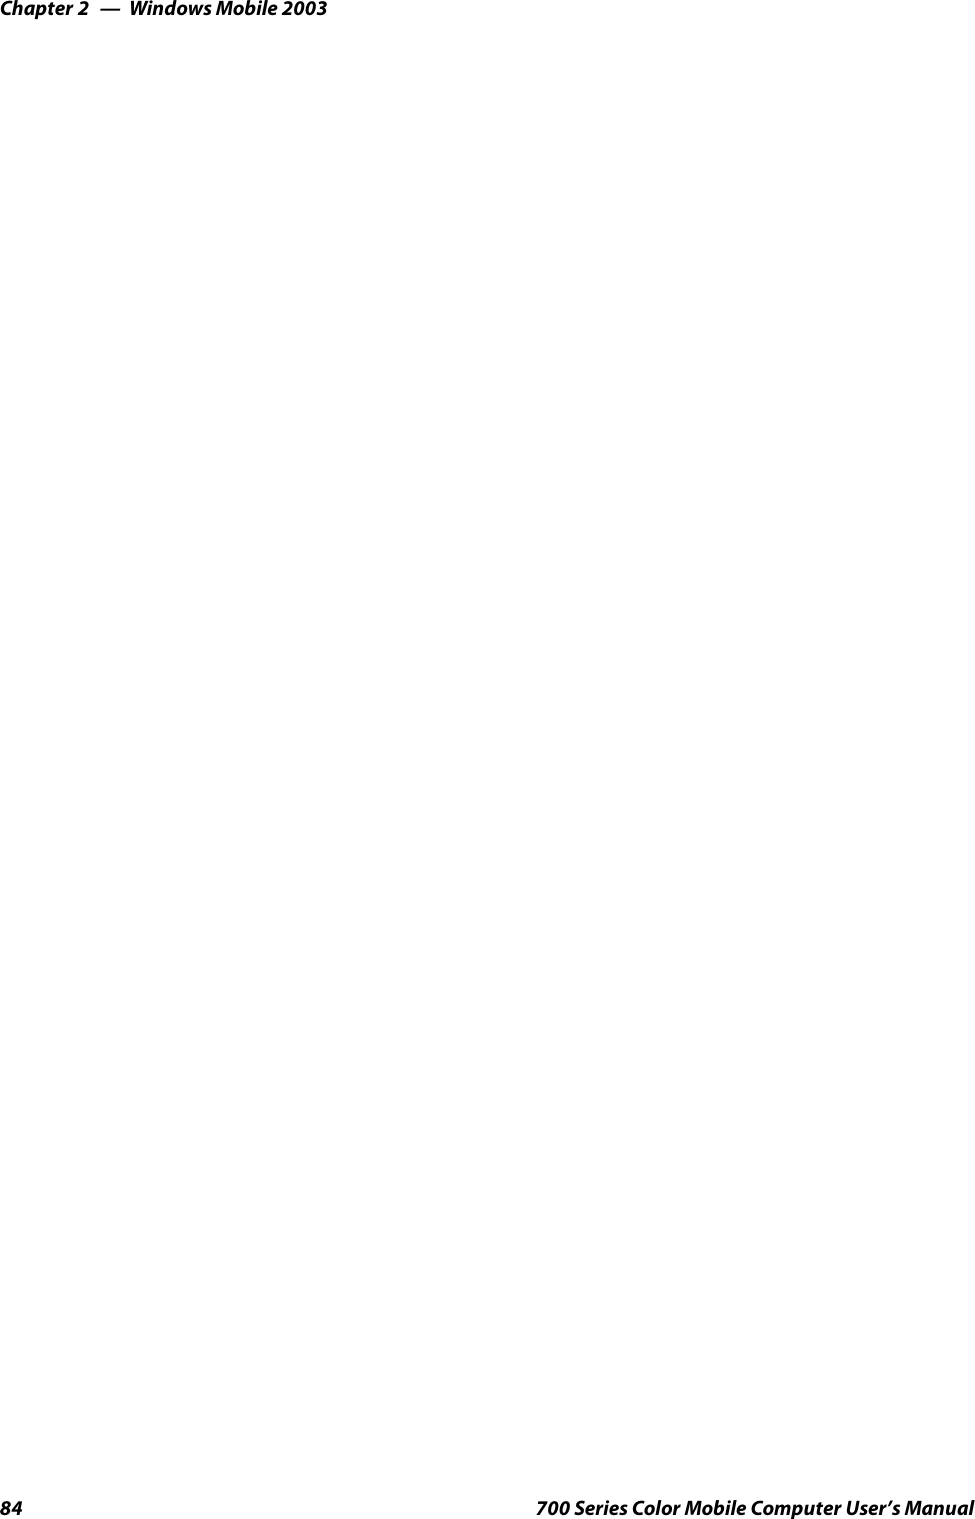
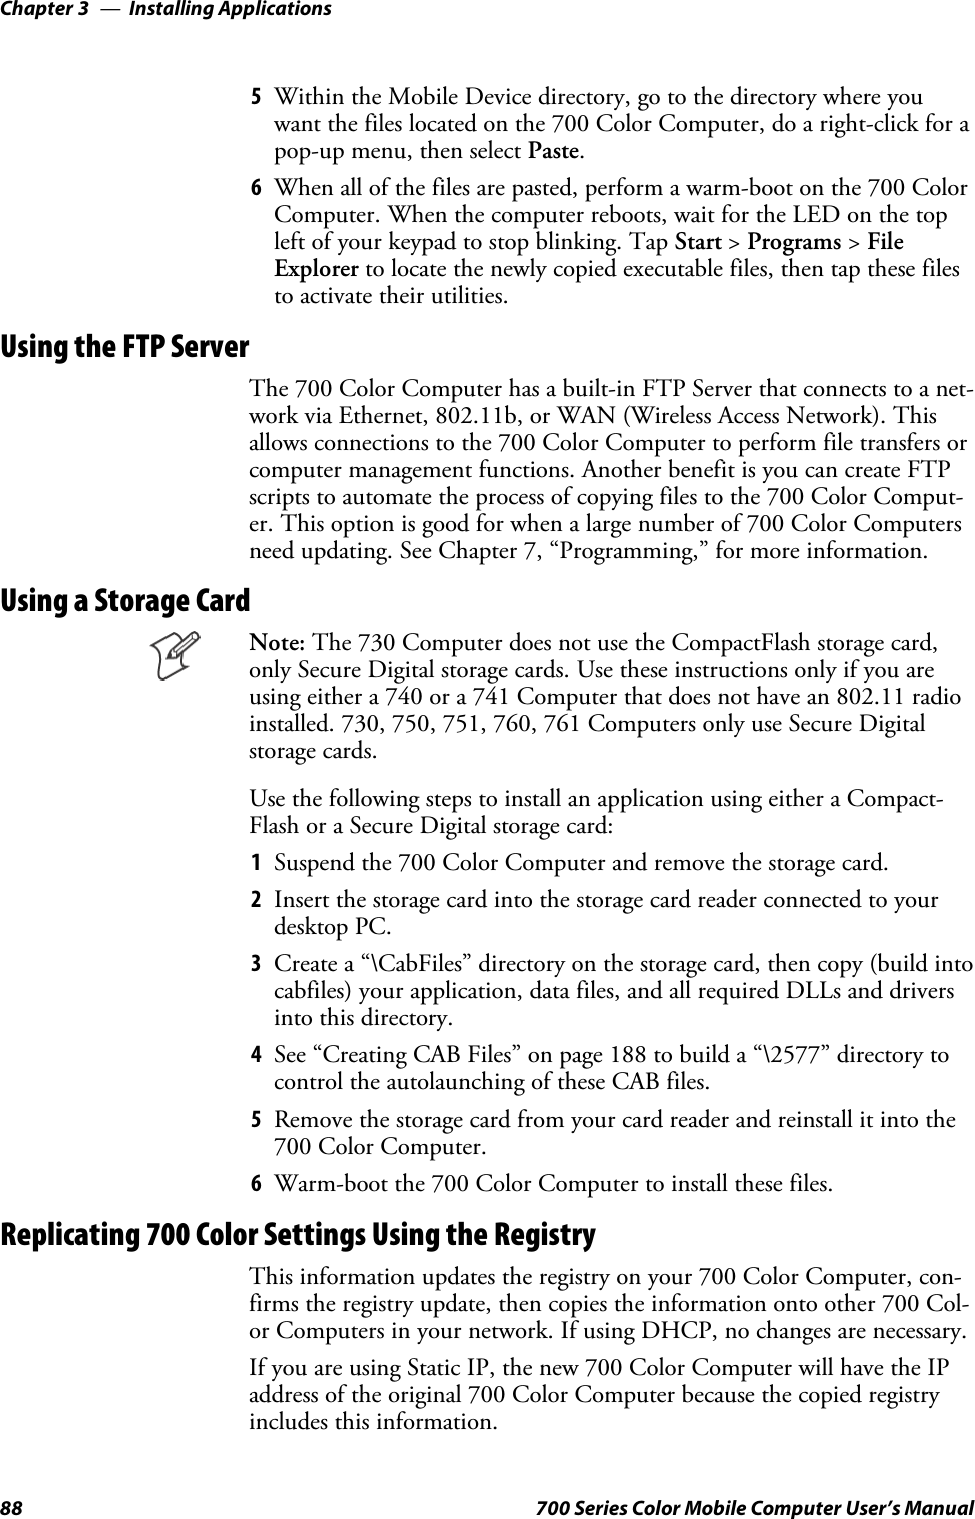
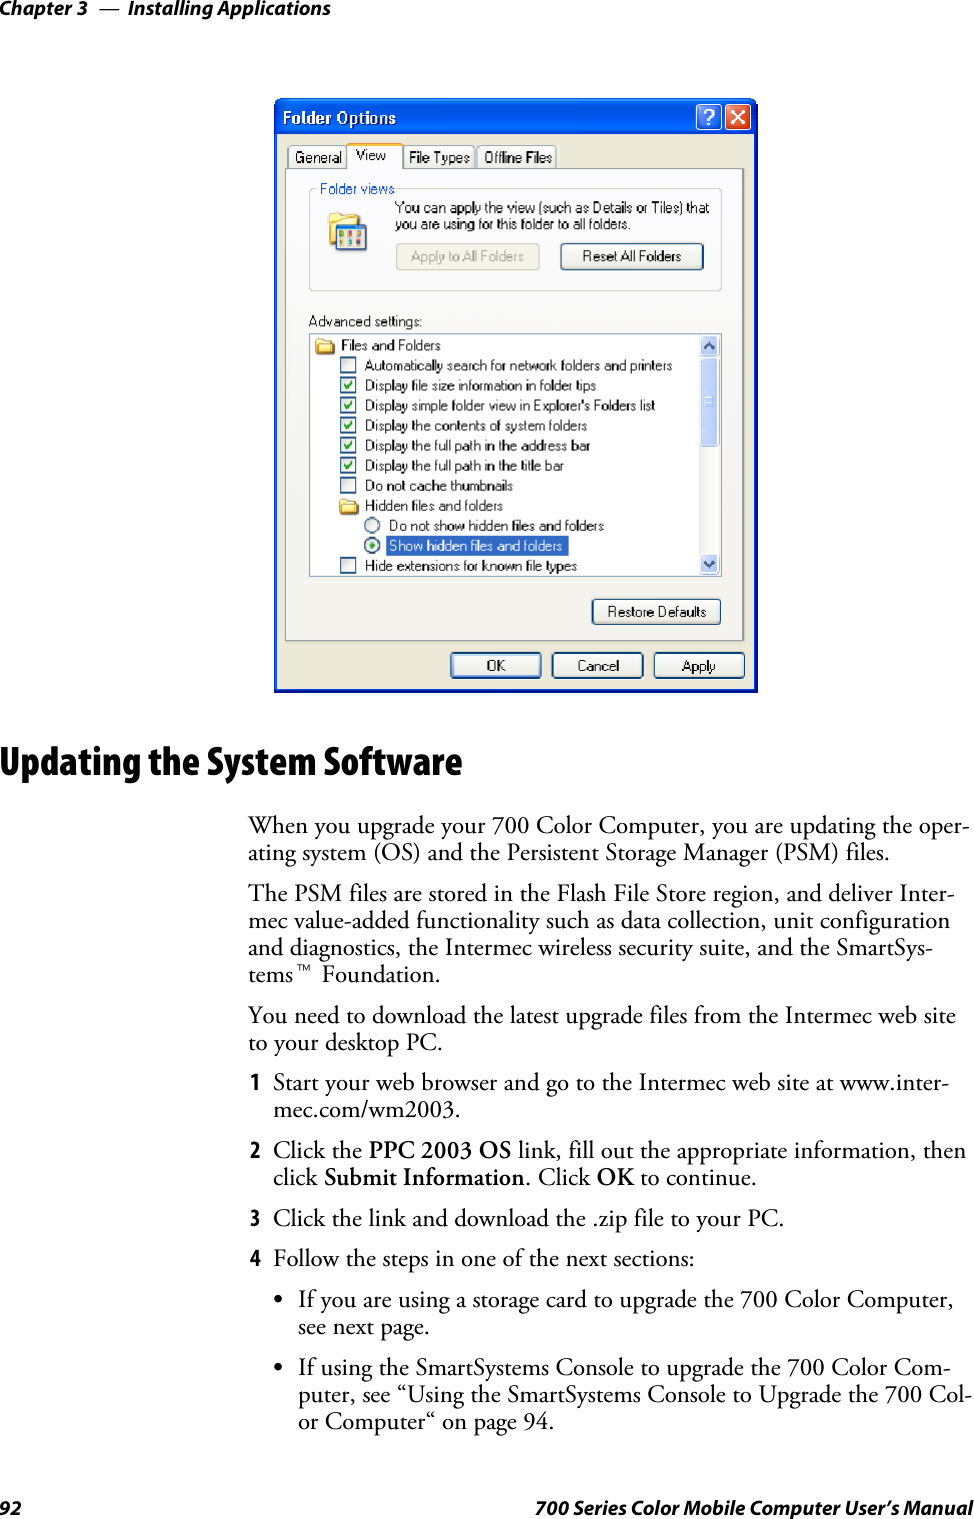
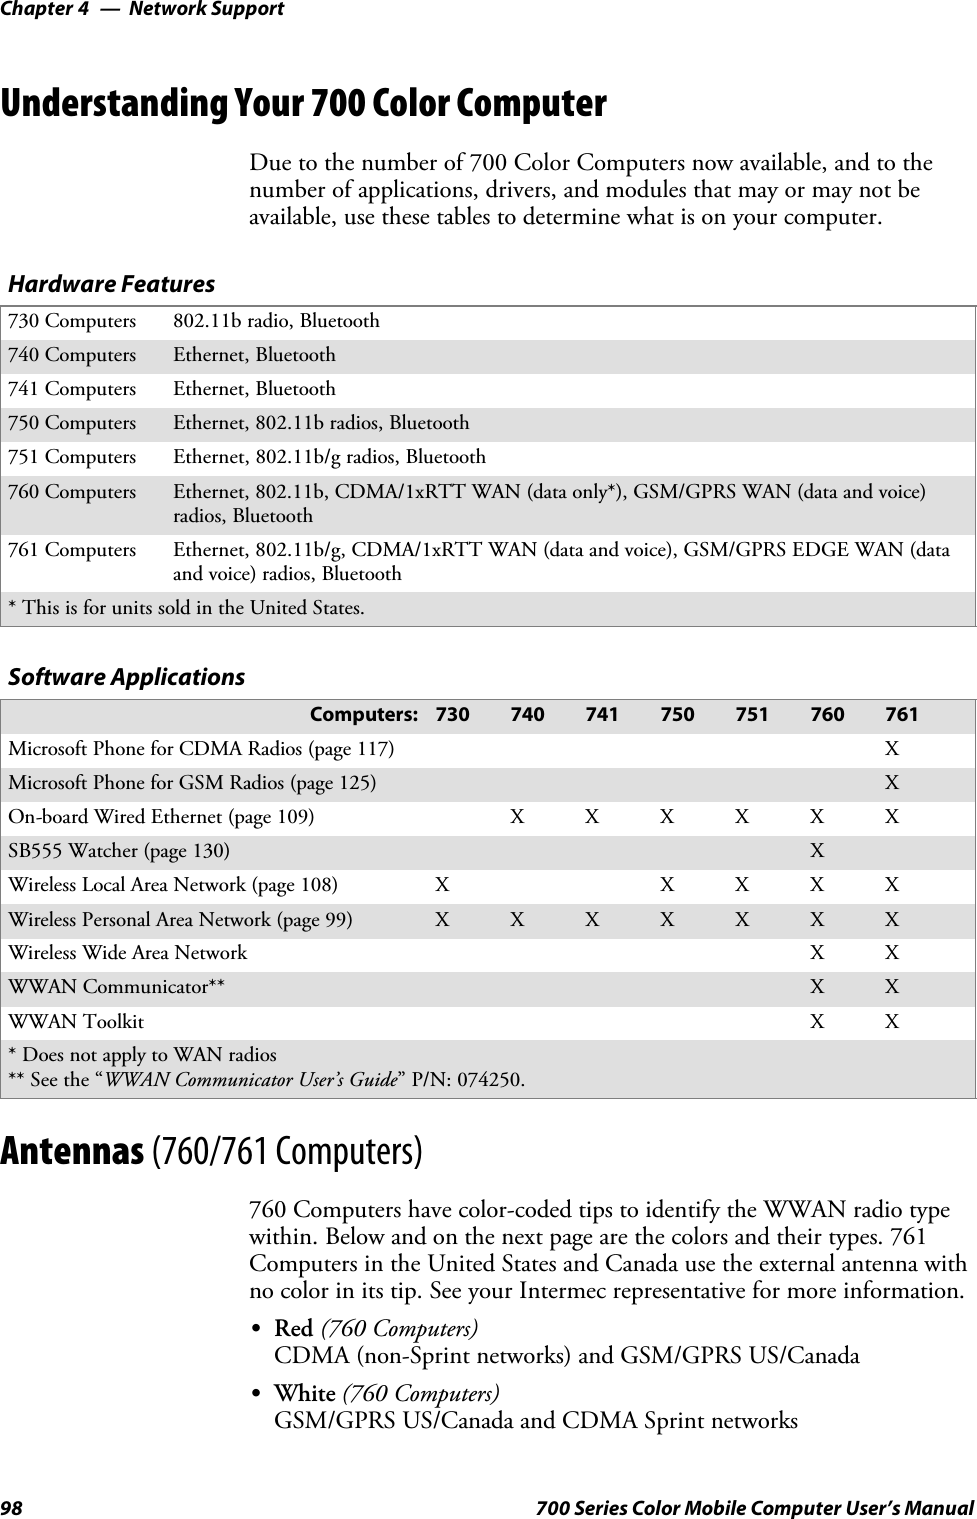
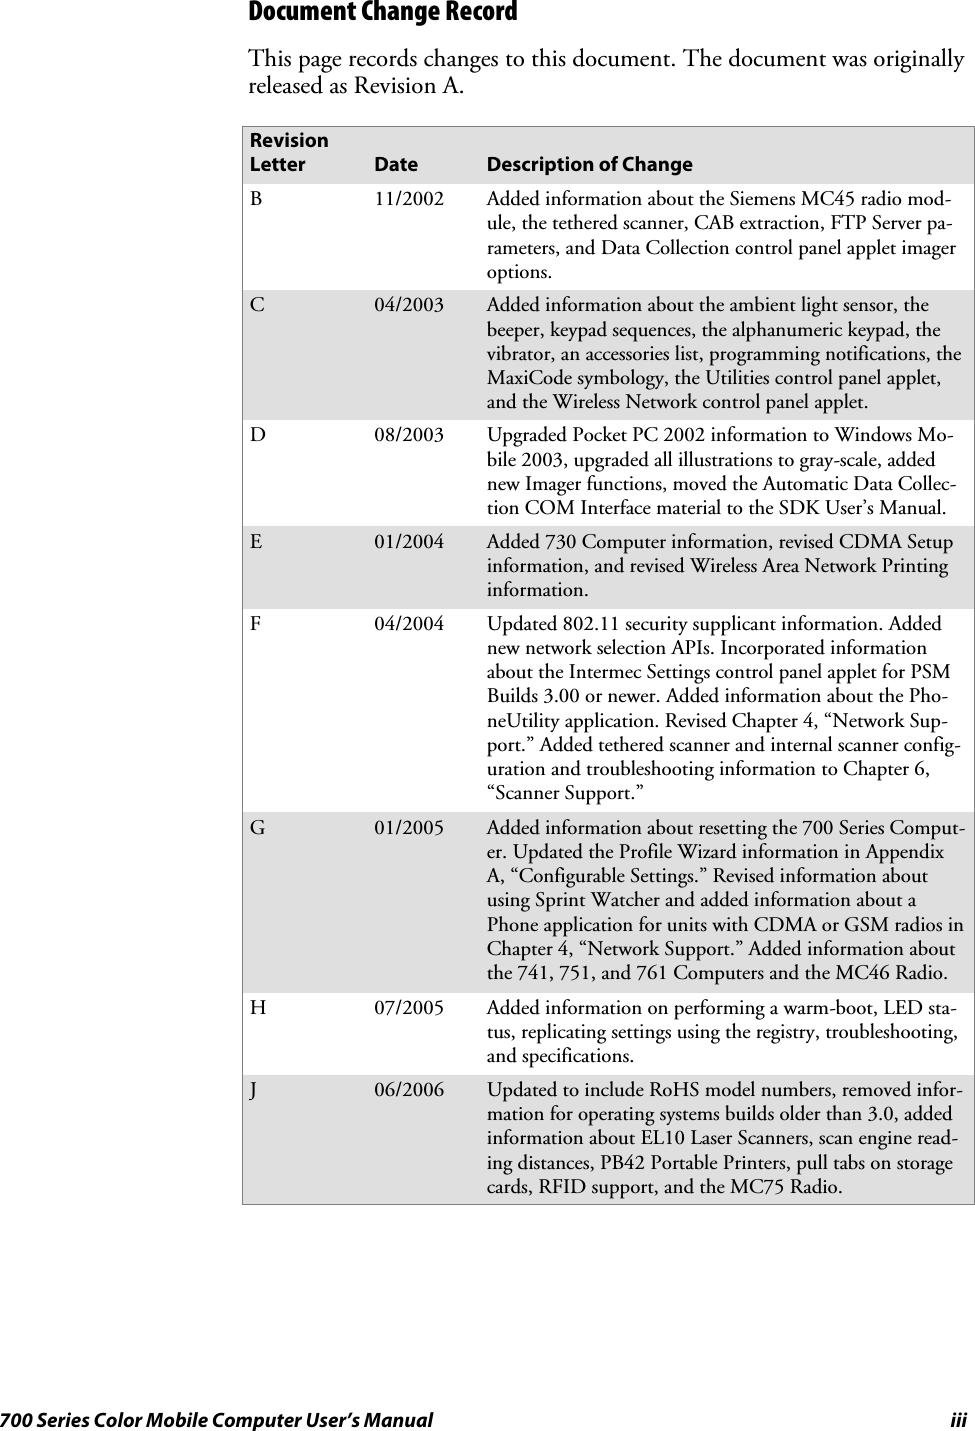
![Introduction—Chapter 111700 Series Color Mobile Computer User’s ManualKey SequencesUse the following key sequences to enter characters into your 700 ColorComputer using either a numeric keypad or an alphanumeric keypad.[Gold] or [Gold/White] Plane KeysThe [Gold] bplane key (numeric keypad) or the [Gold/White] cplanekey (alphanumeric keypad) provides you access to display controls, specialcharacters, and Pocket PC options.Press the [Gold] bkey or the [Gold/White] ckey for each gold planekey stroke you wish to make. For example to turn on the front light, pressandholdthe[Gold] bkey plus the 3key on the numeric keypad orpress and hold the [Gold/White] ckey plus the Ikey on the alphanu-meric keypad. To turn the front light off, press the appropriate keys again.On the next few pages are the key sequences.Numeric KeypadThe following table lists sequences that use the [Gold] bplane key. SeeChapter 2, “Windows Mobile 2003,” for information about the Pocket PCapplications.Press the Keys To Do This[Gold] b3 Toggle the backlight on or off (also goes through backlight powerlevels if held down)[Gold] ba Access the Pocket PC Record application (see Note).[Gold] b4 Access the Pocket PC Calendar application (see Note).[Gold] b5 Access the Pocket PC Contacts application (see Note).[Gold] b6 Access the Pocket PC Tasks application (see Note).[Gold] b7 Move up one page.[Gold] b8 Enter an asterisk (*).[Gold] b9 Move down one page.[Gold] b0 Access the Pocket PC Start menu.[Gold] be Enter an at symbol (@).[Gold] bK Enter a backslash (/).[Gold] bE Enter a minus sign (–).[Gold] bA Enter a plus sign (+).[Gold] b→Tab to the right.[Gold] b←Tab to the left.[Gold] bU Increase volume[Gold] bD Decrease volumeNote: Pocket PC applications are accessible only if configured to do so in the App Launchportion of the Utilities applet. See page 231 for more information.](https://usermanual.wiki/Intermec-Technologies/MC75.Final-Users-Manual-part-1-of-2/User-Guide-730132-Page-29.png)
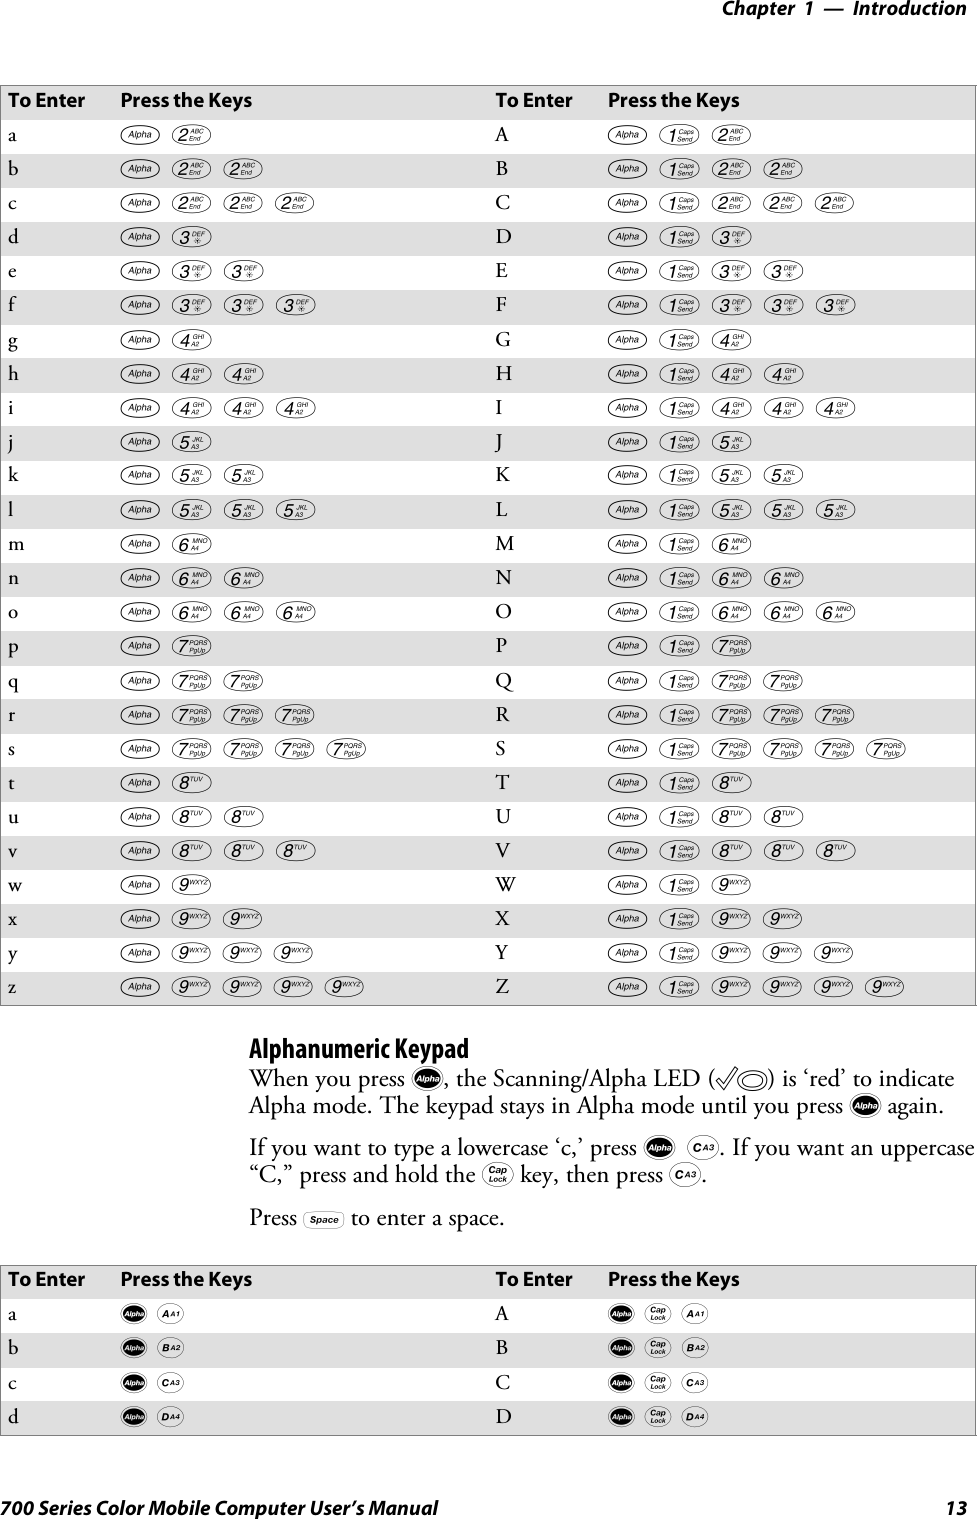
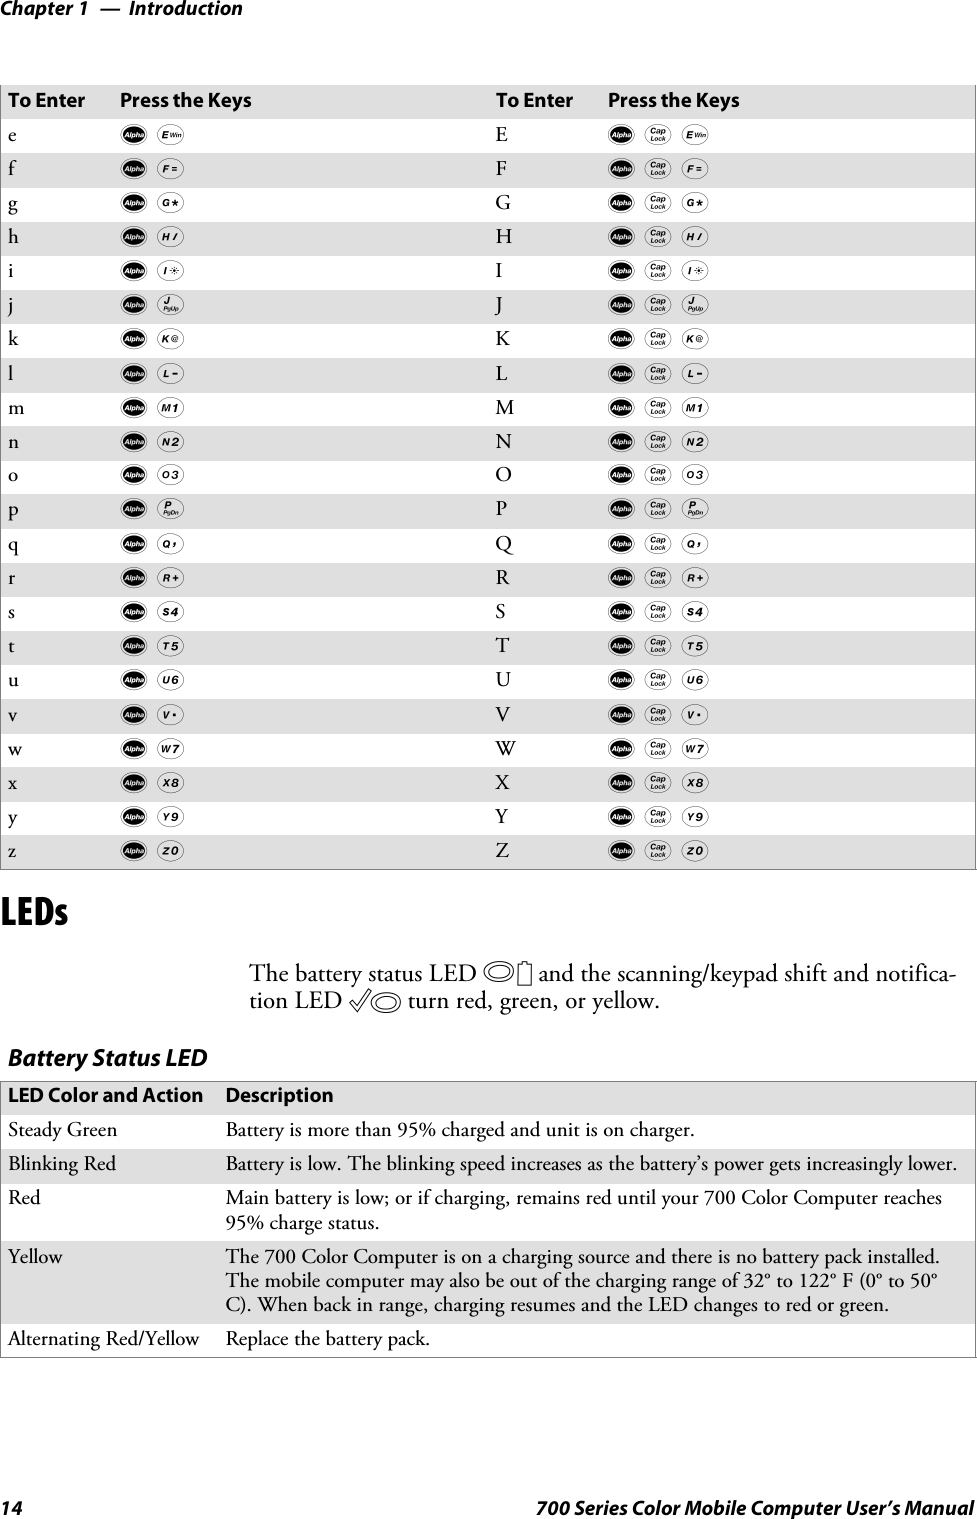
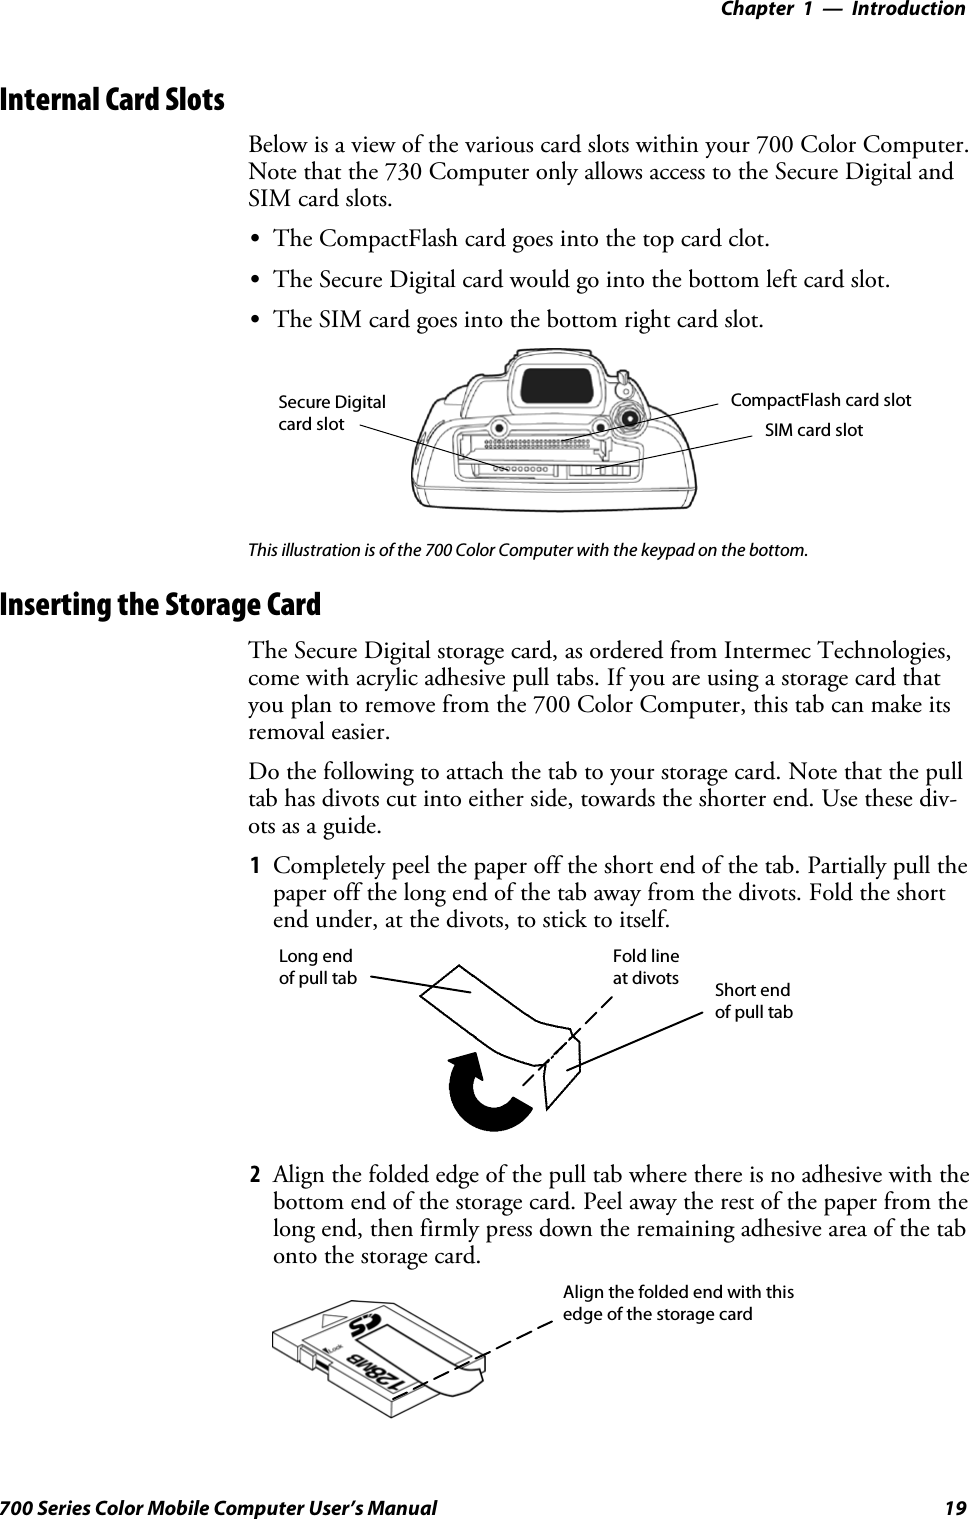
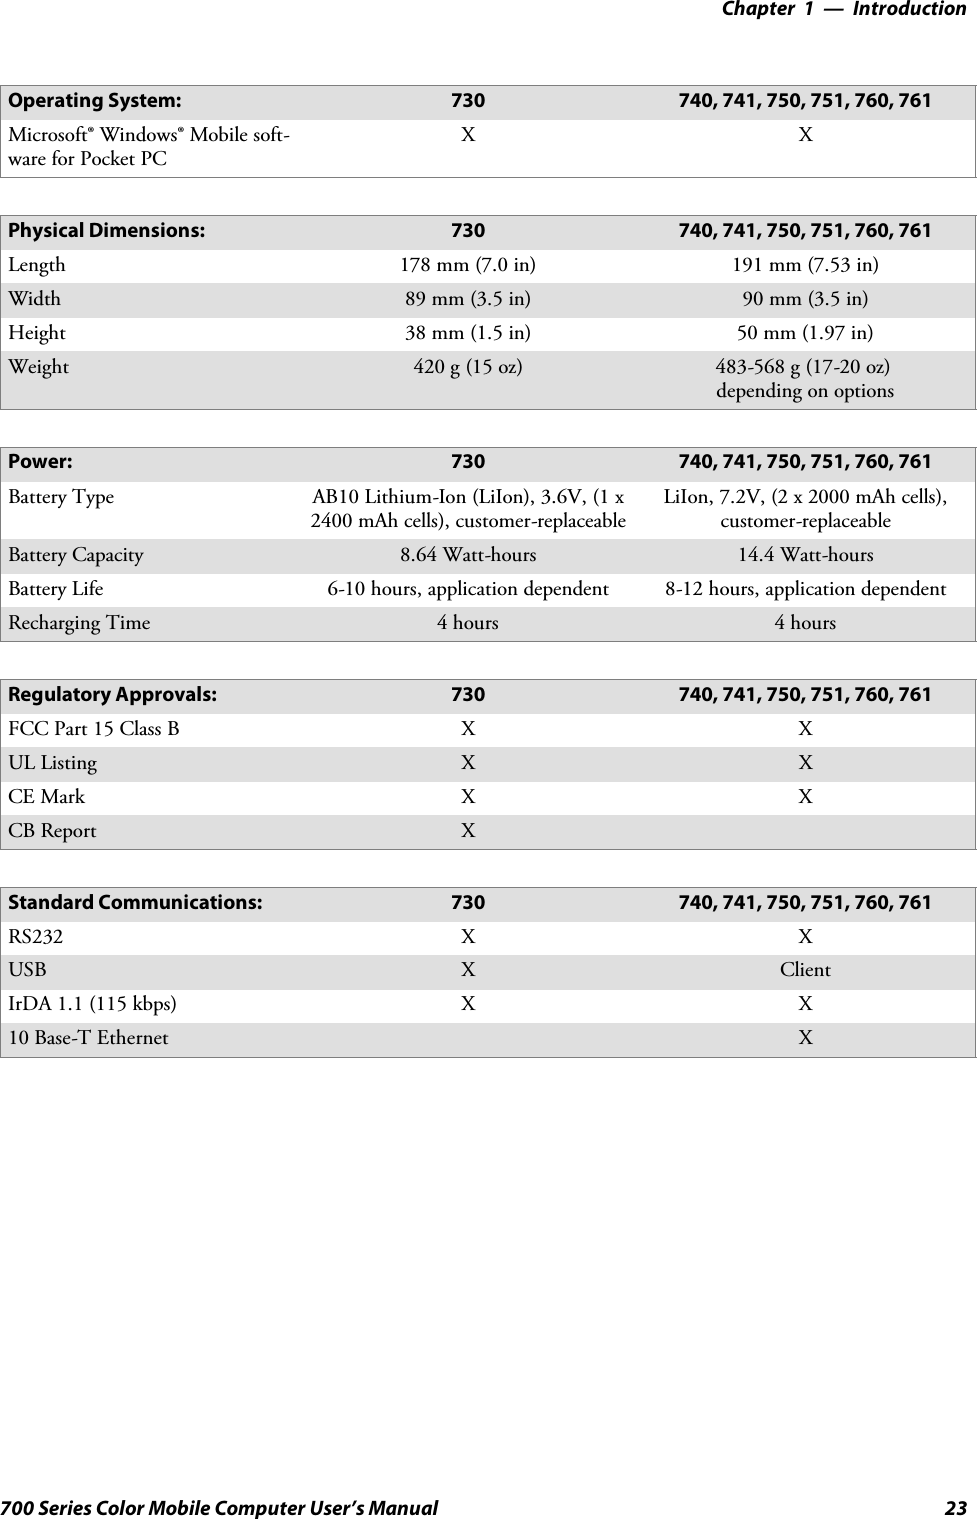
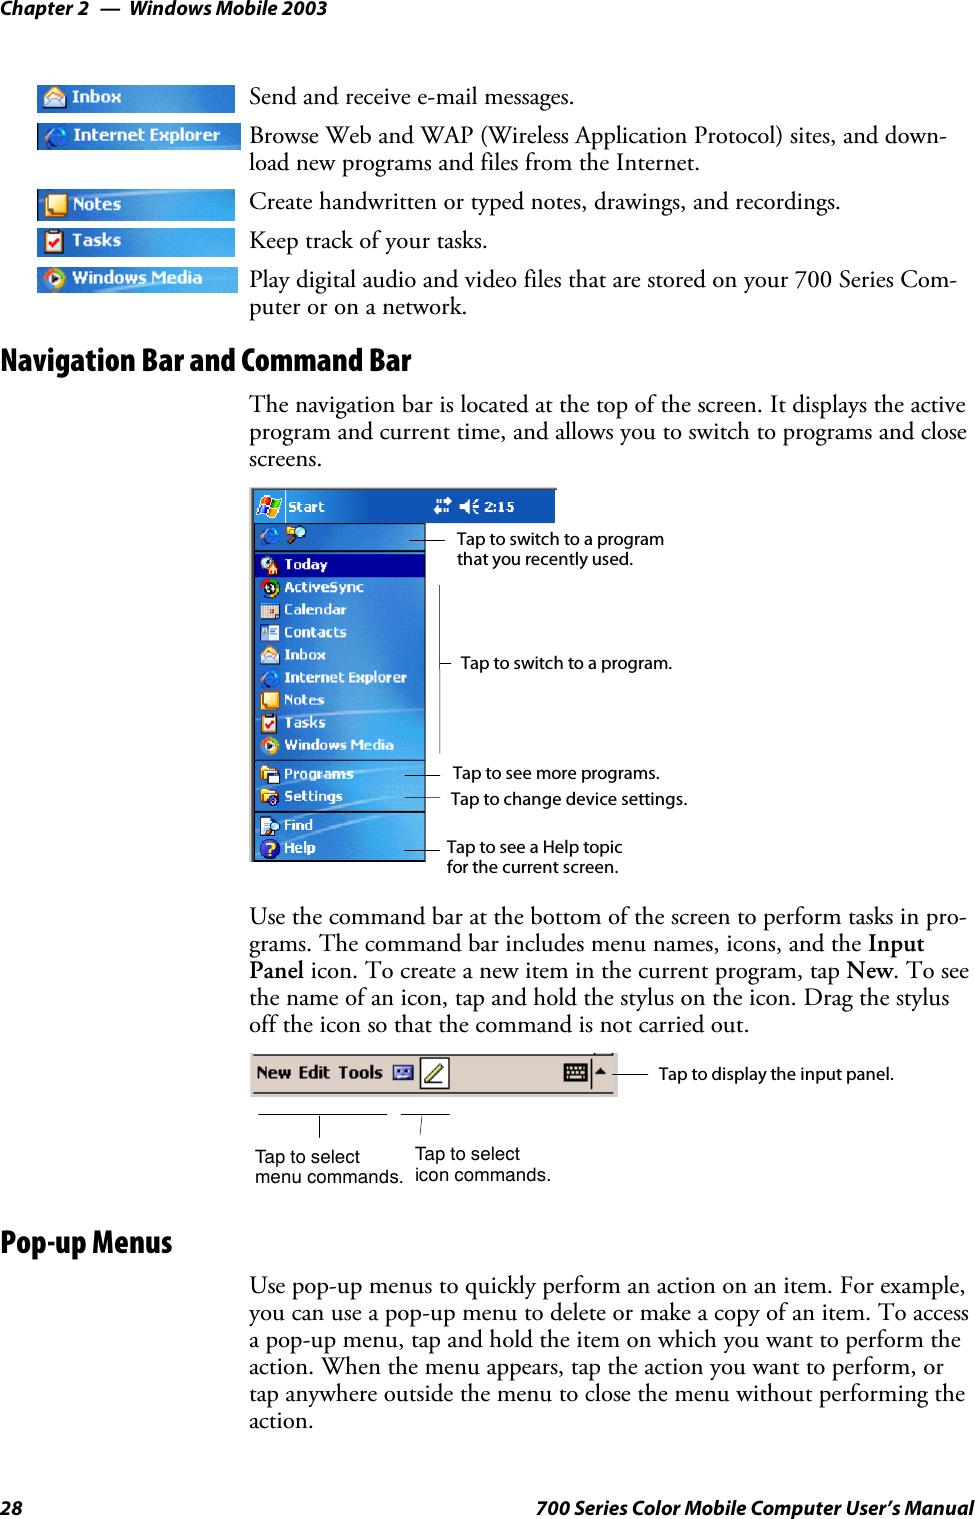
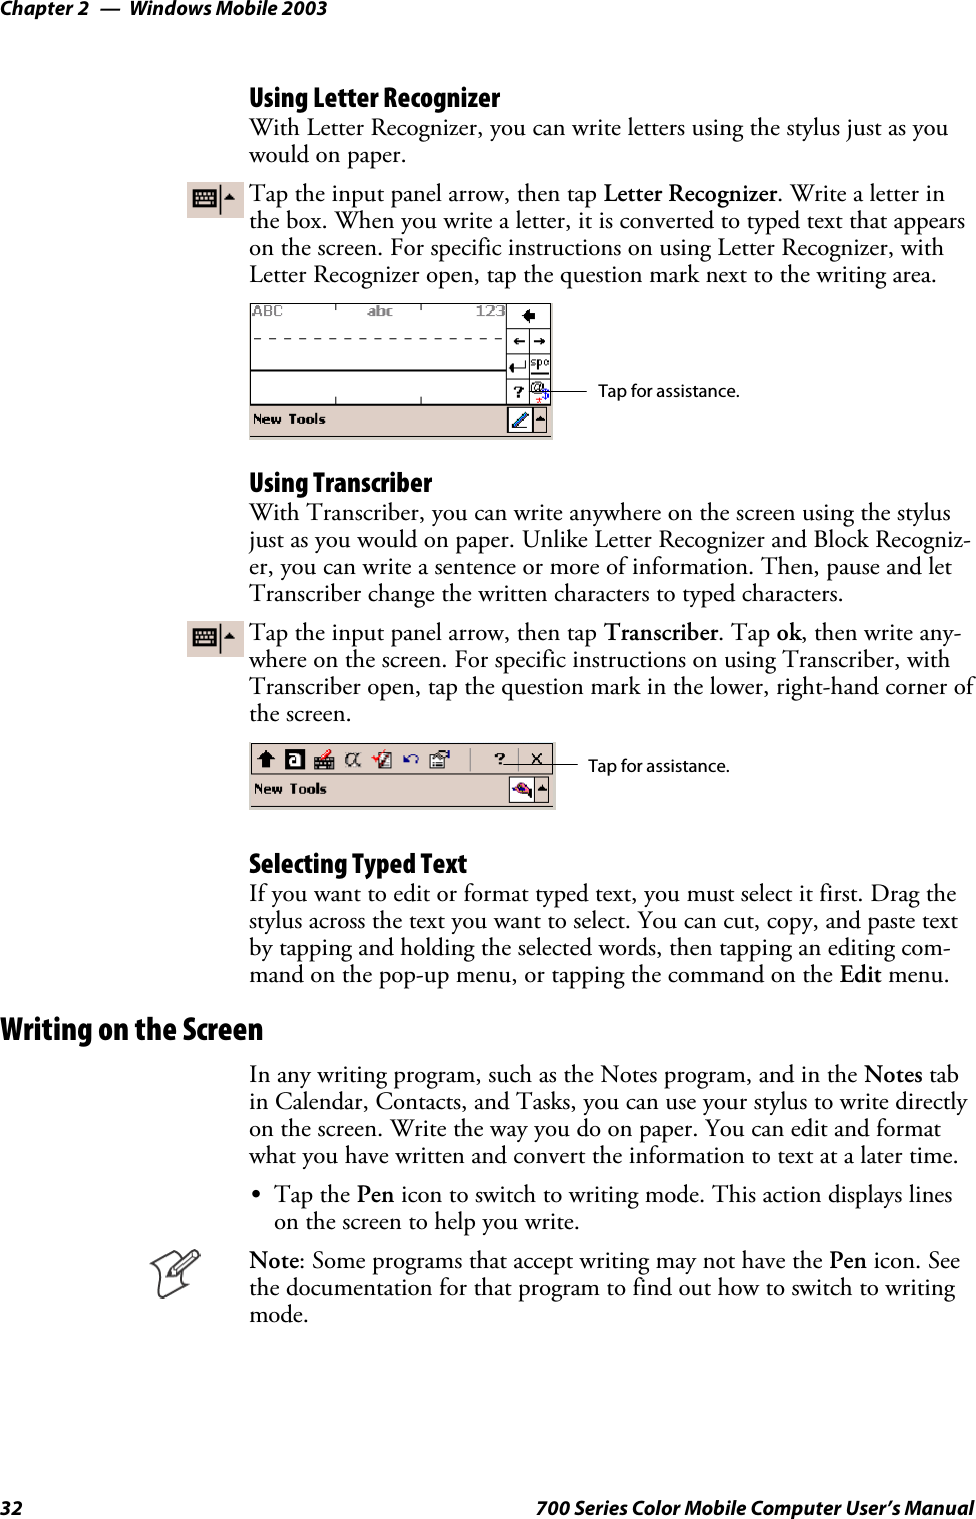
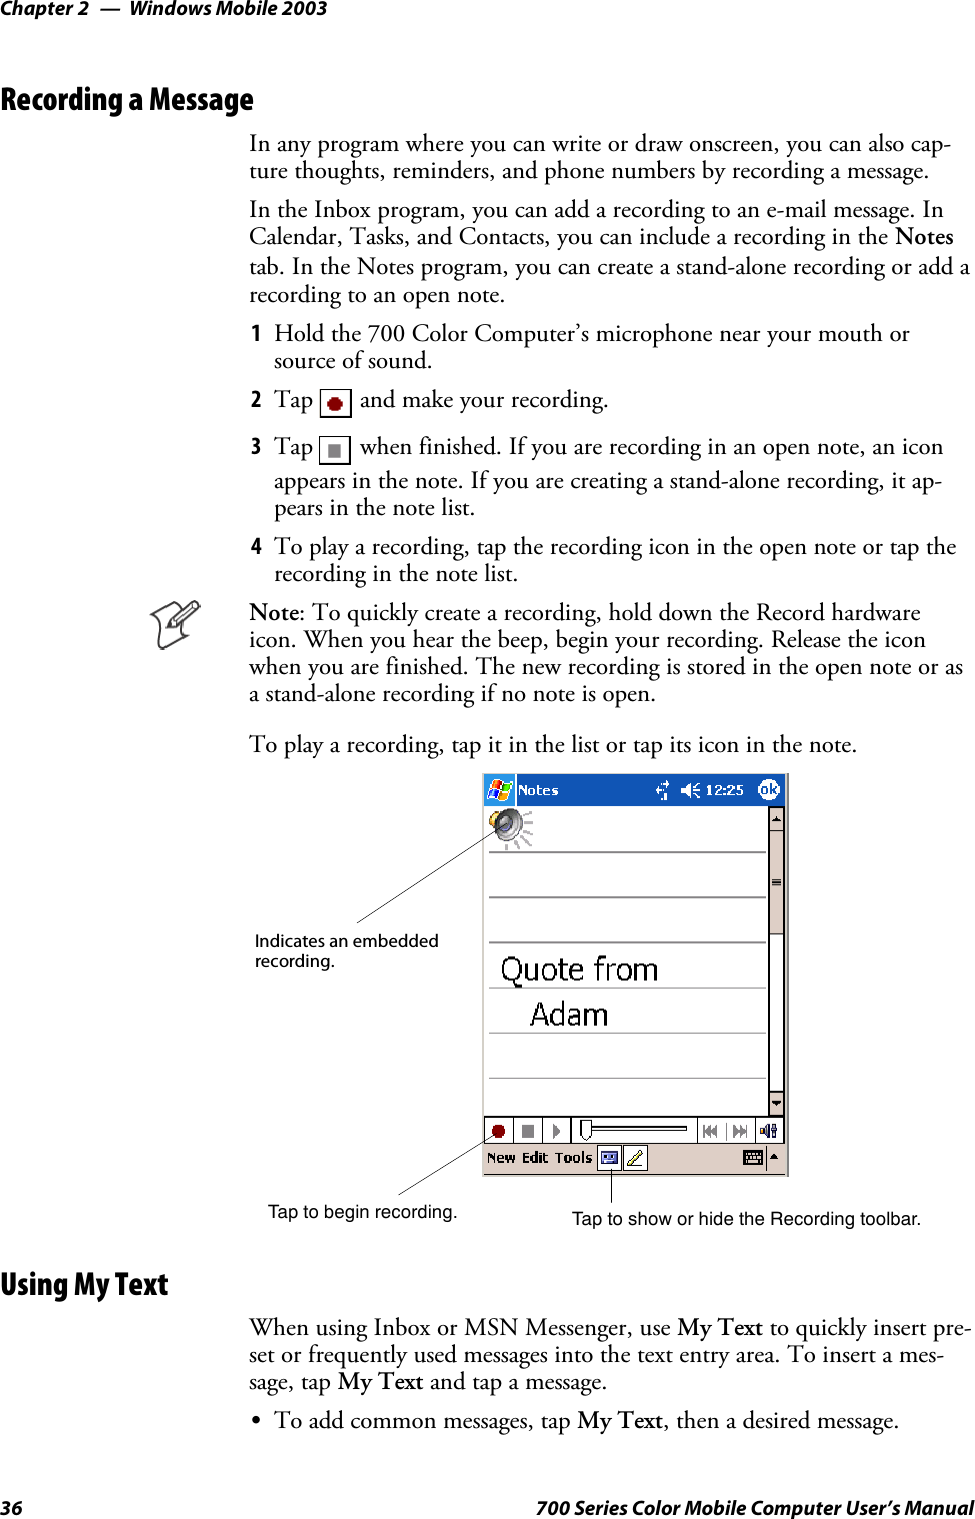
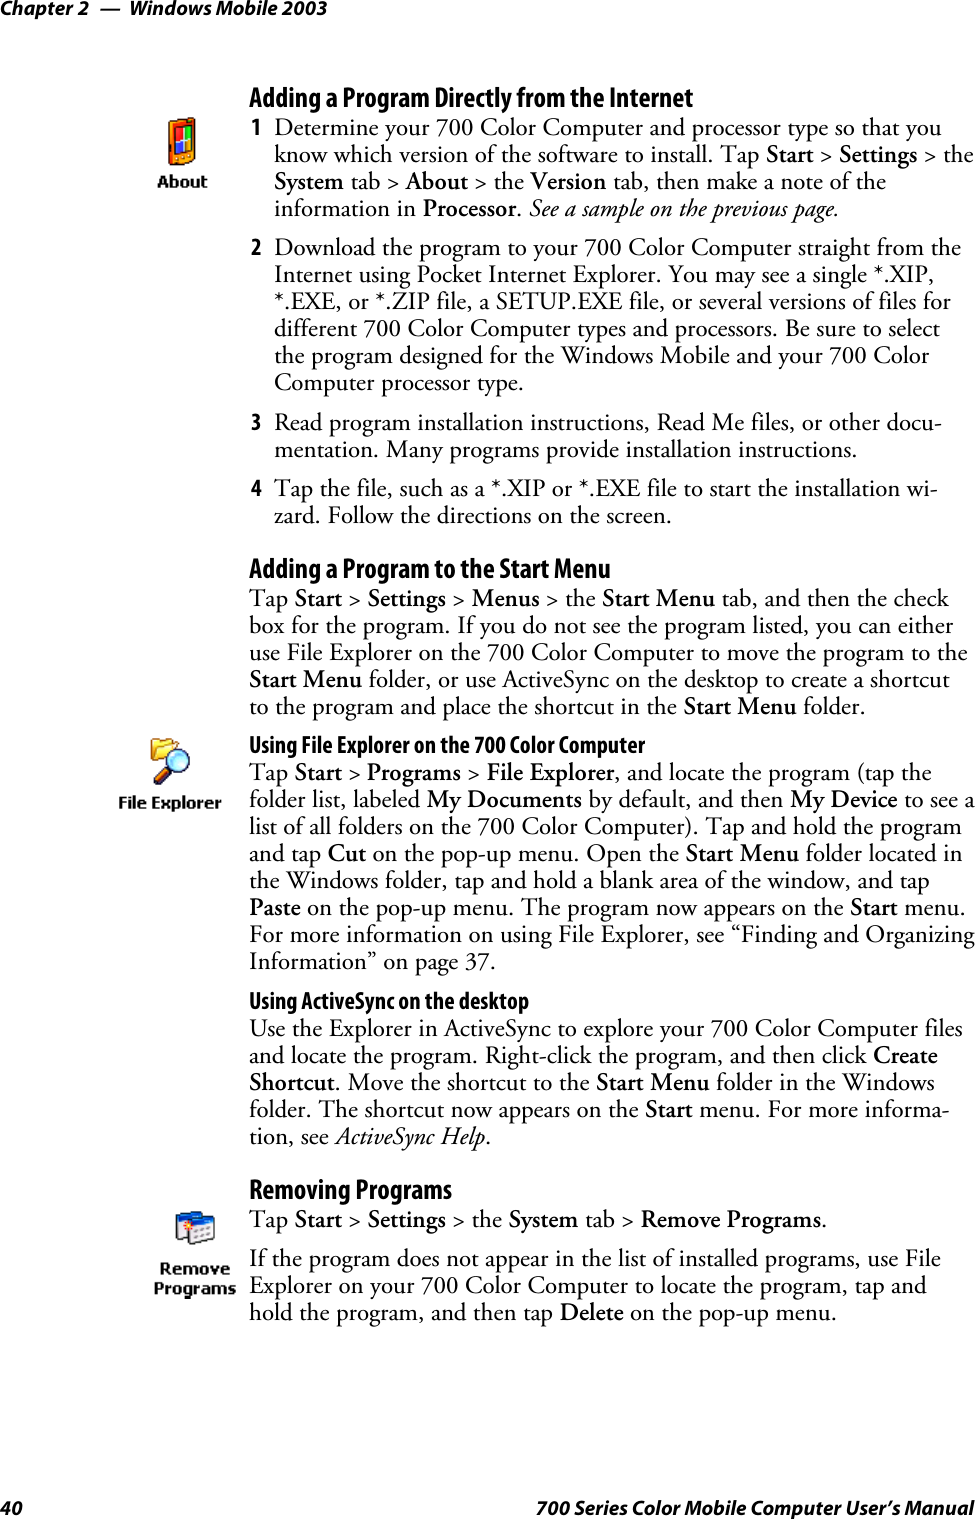
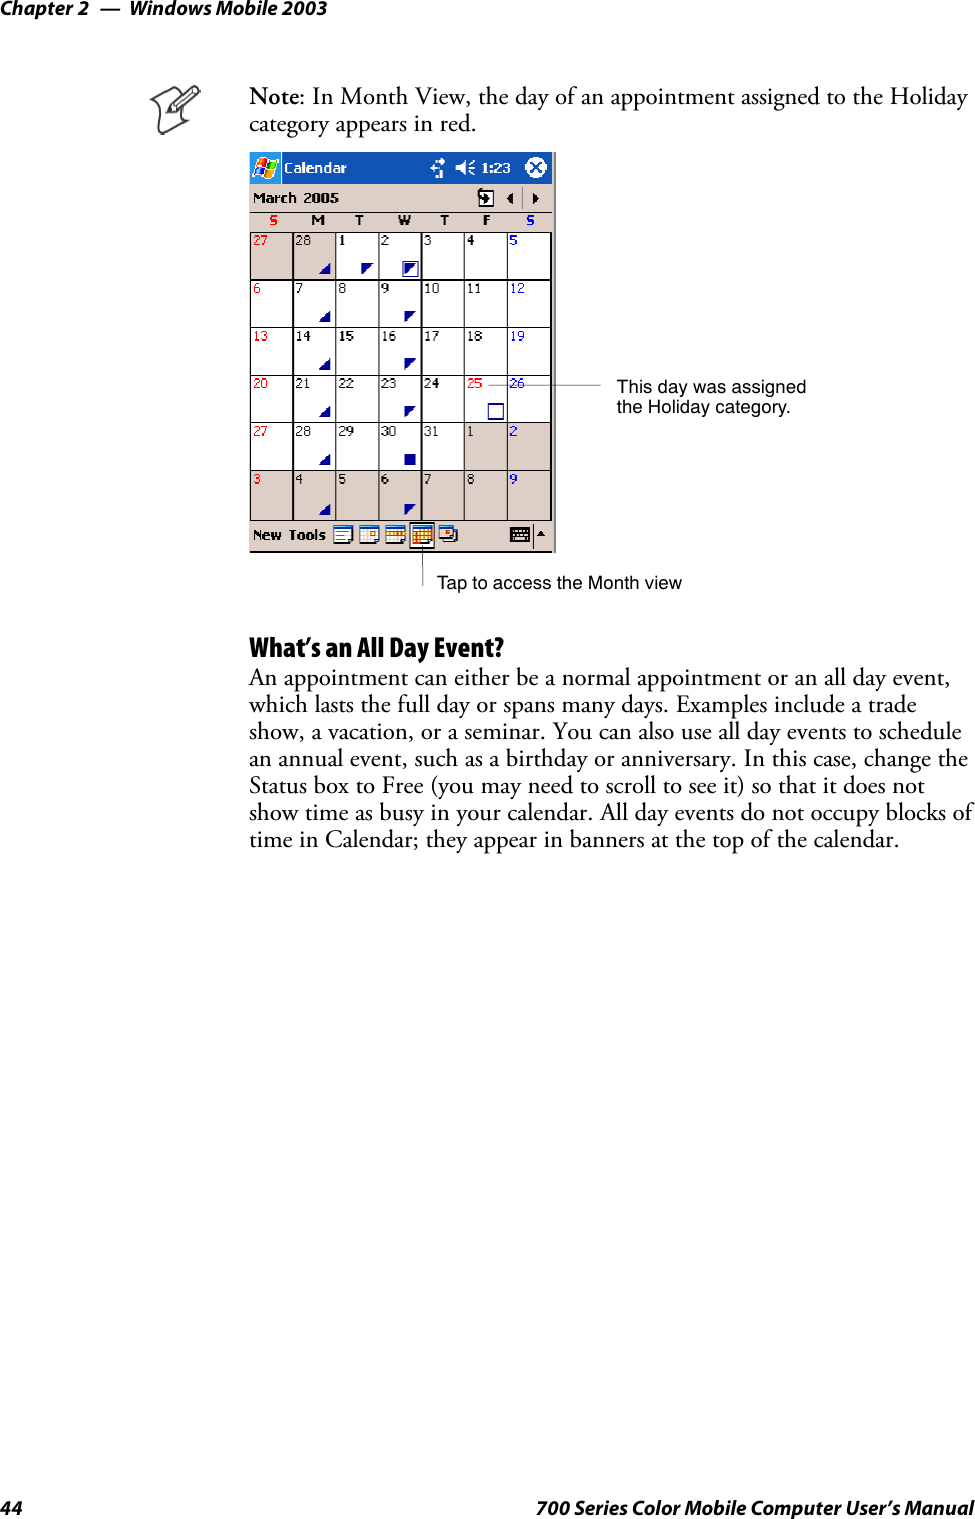
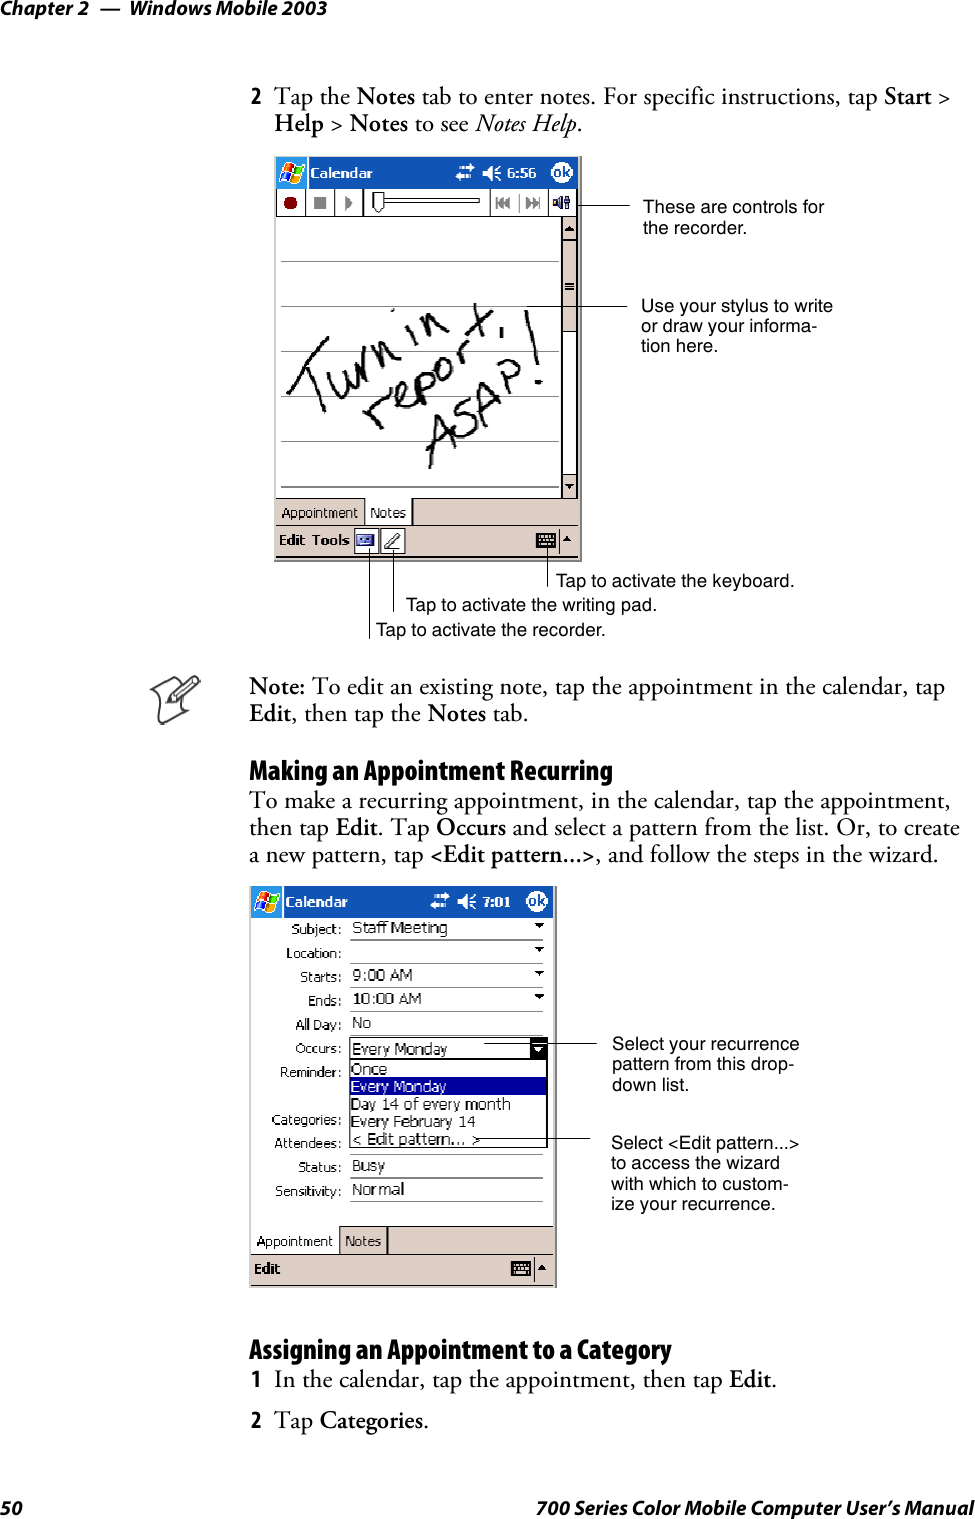
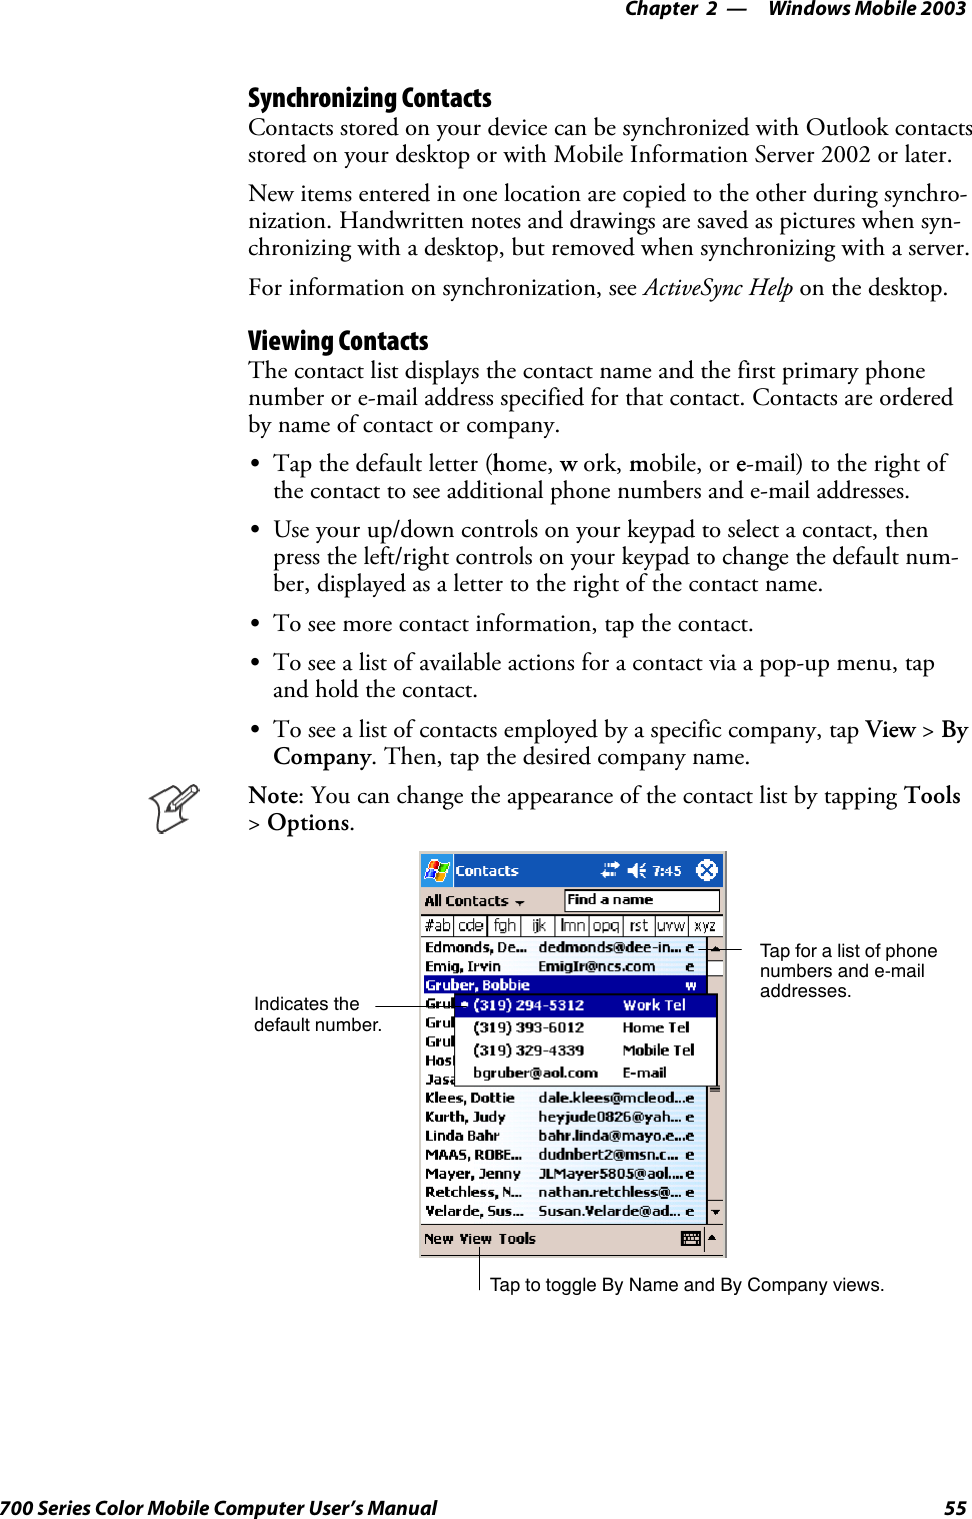
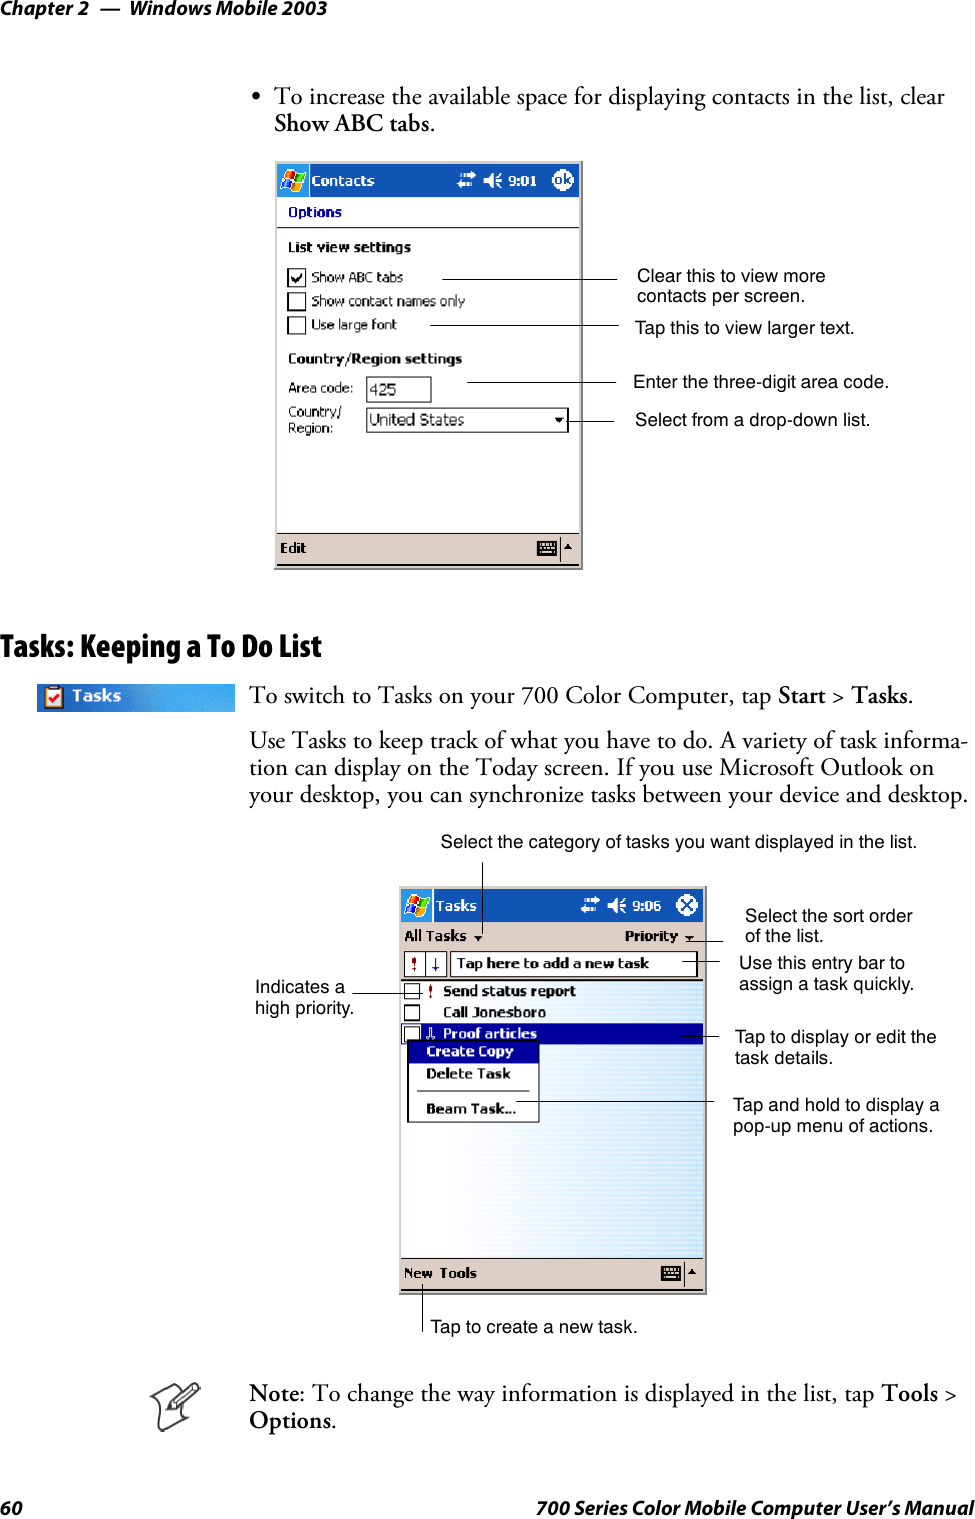
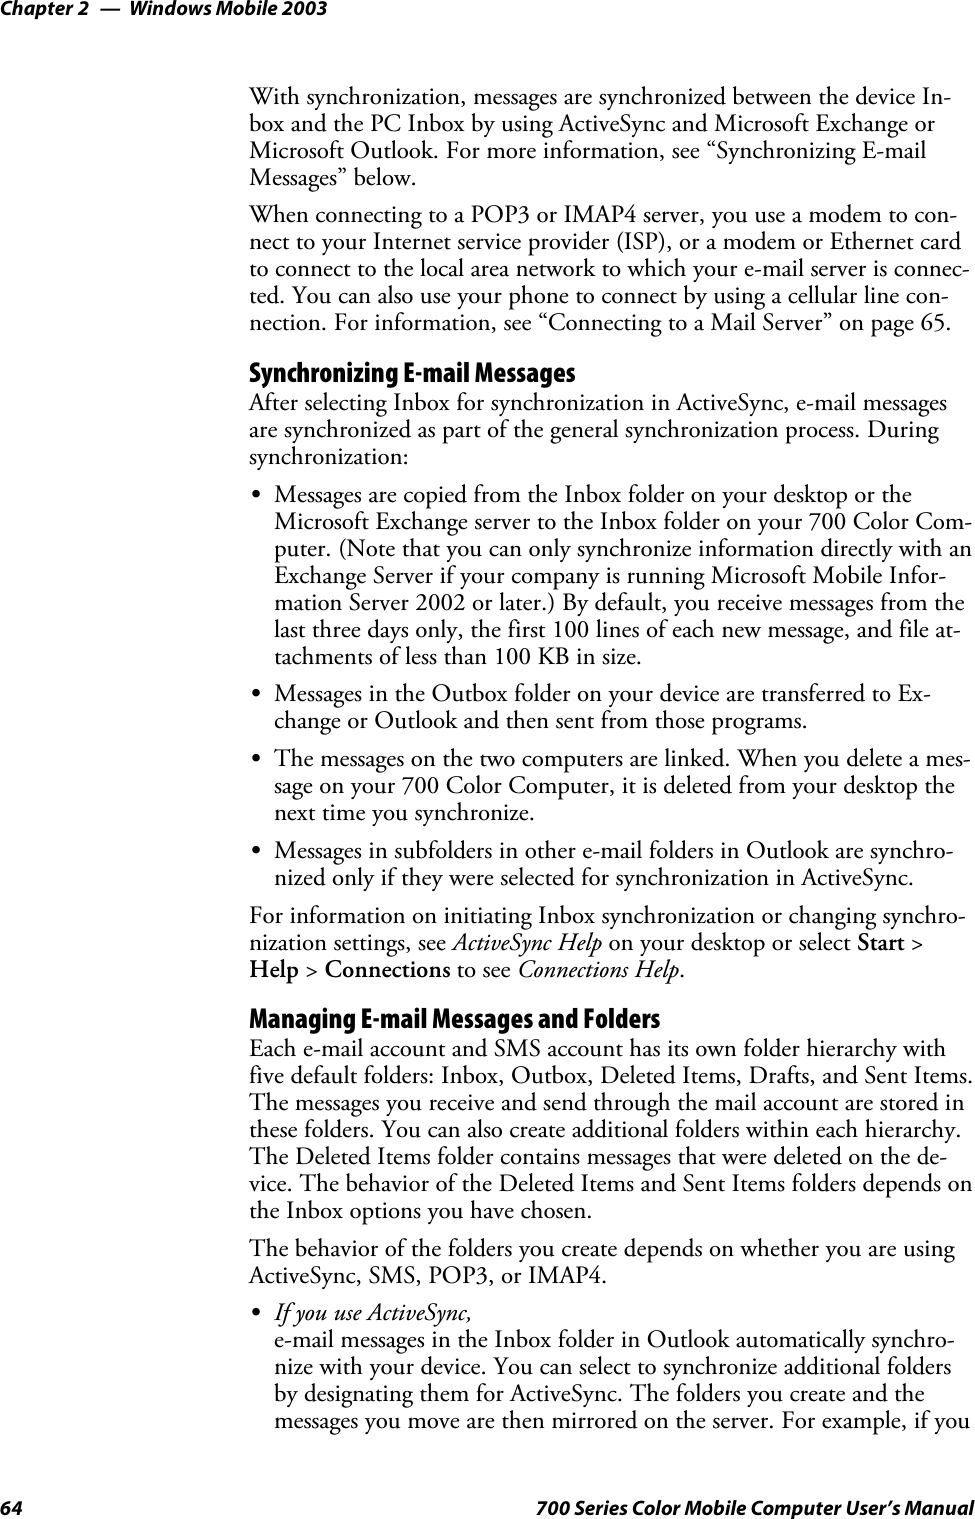
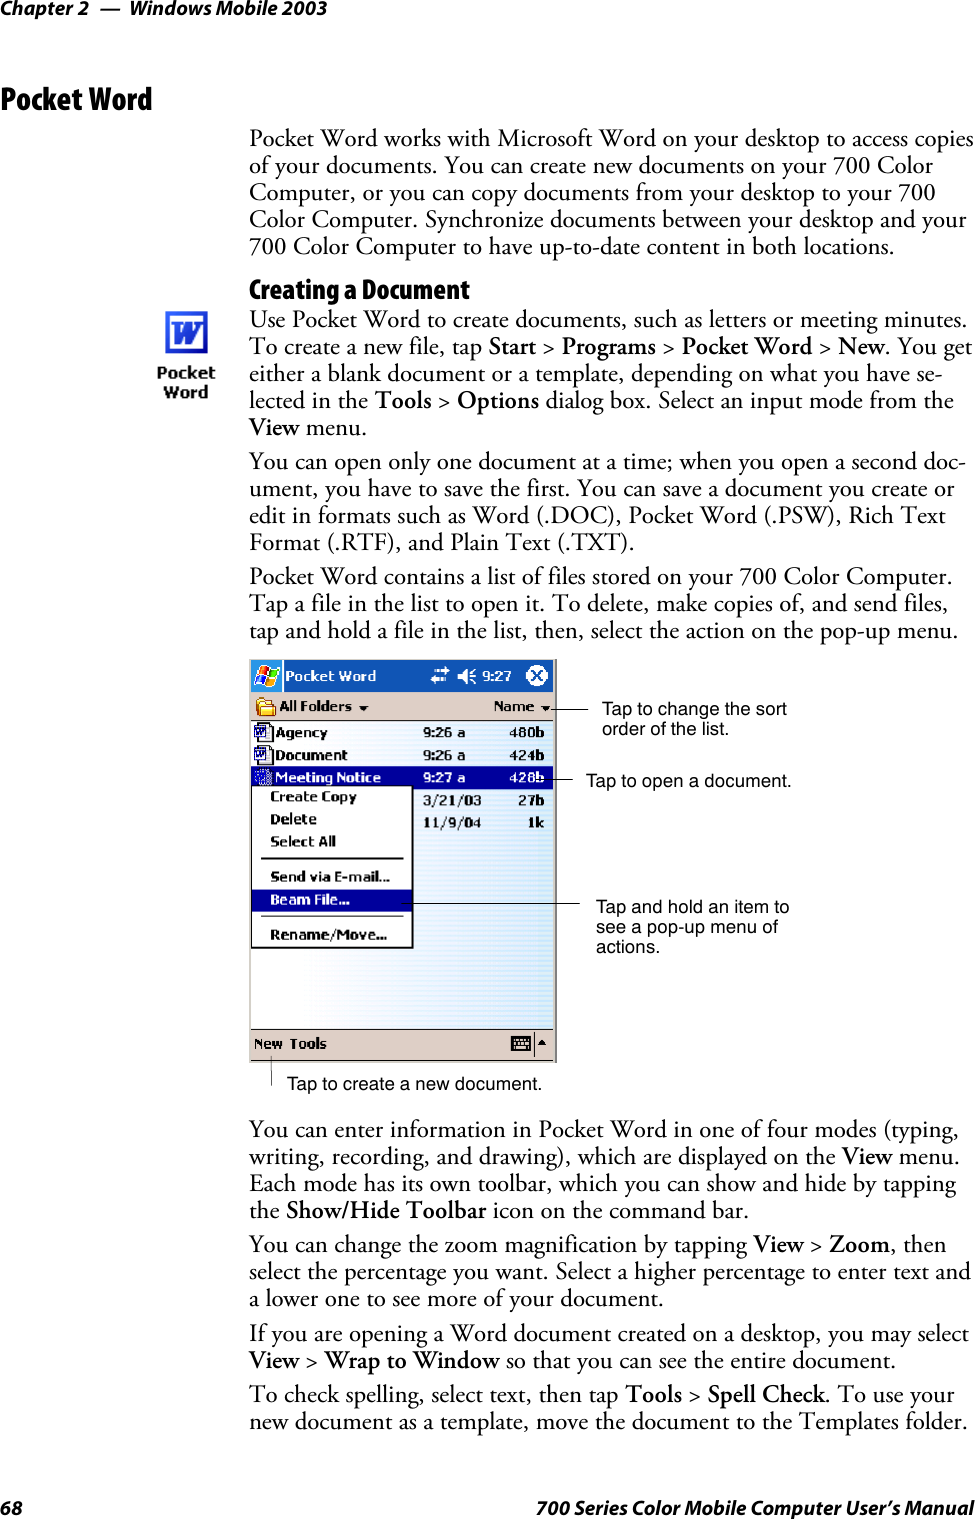
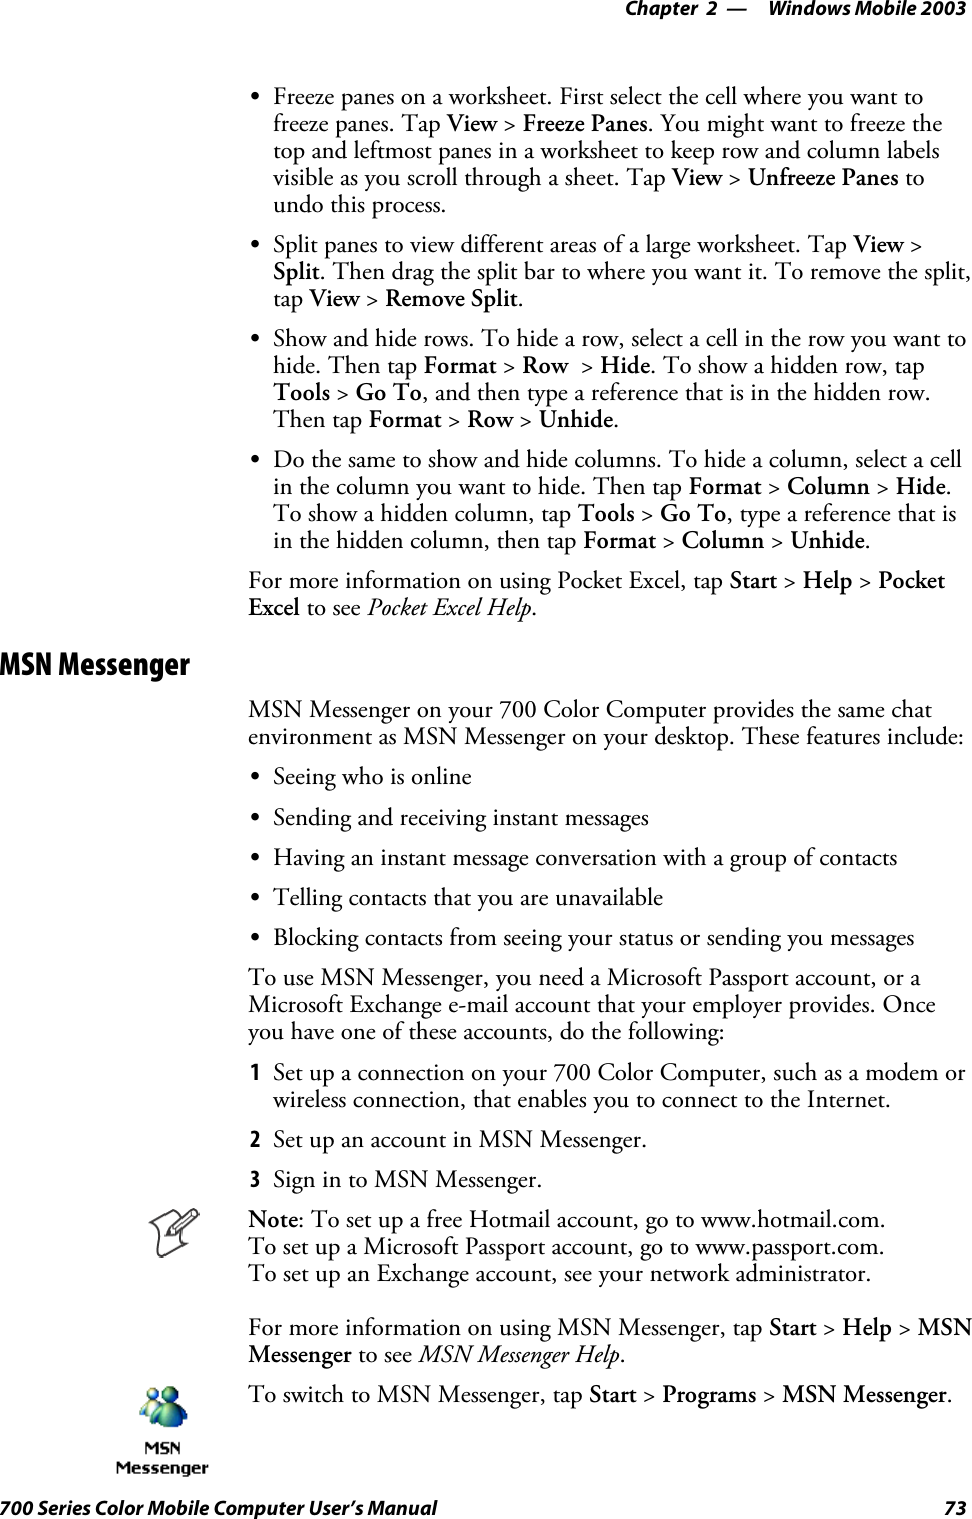
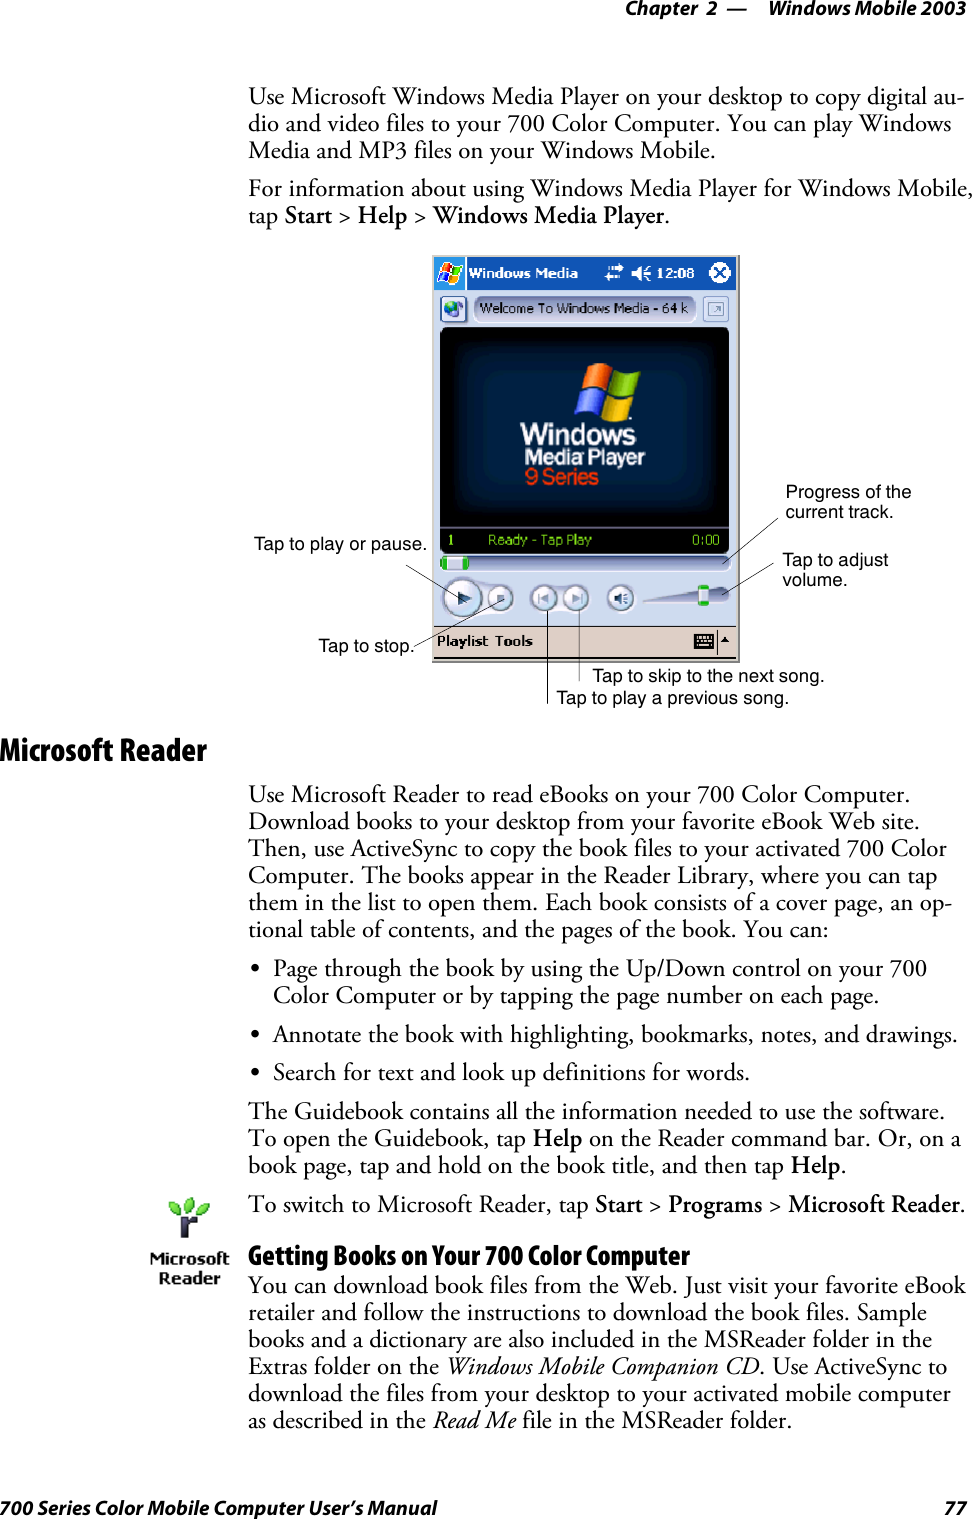
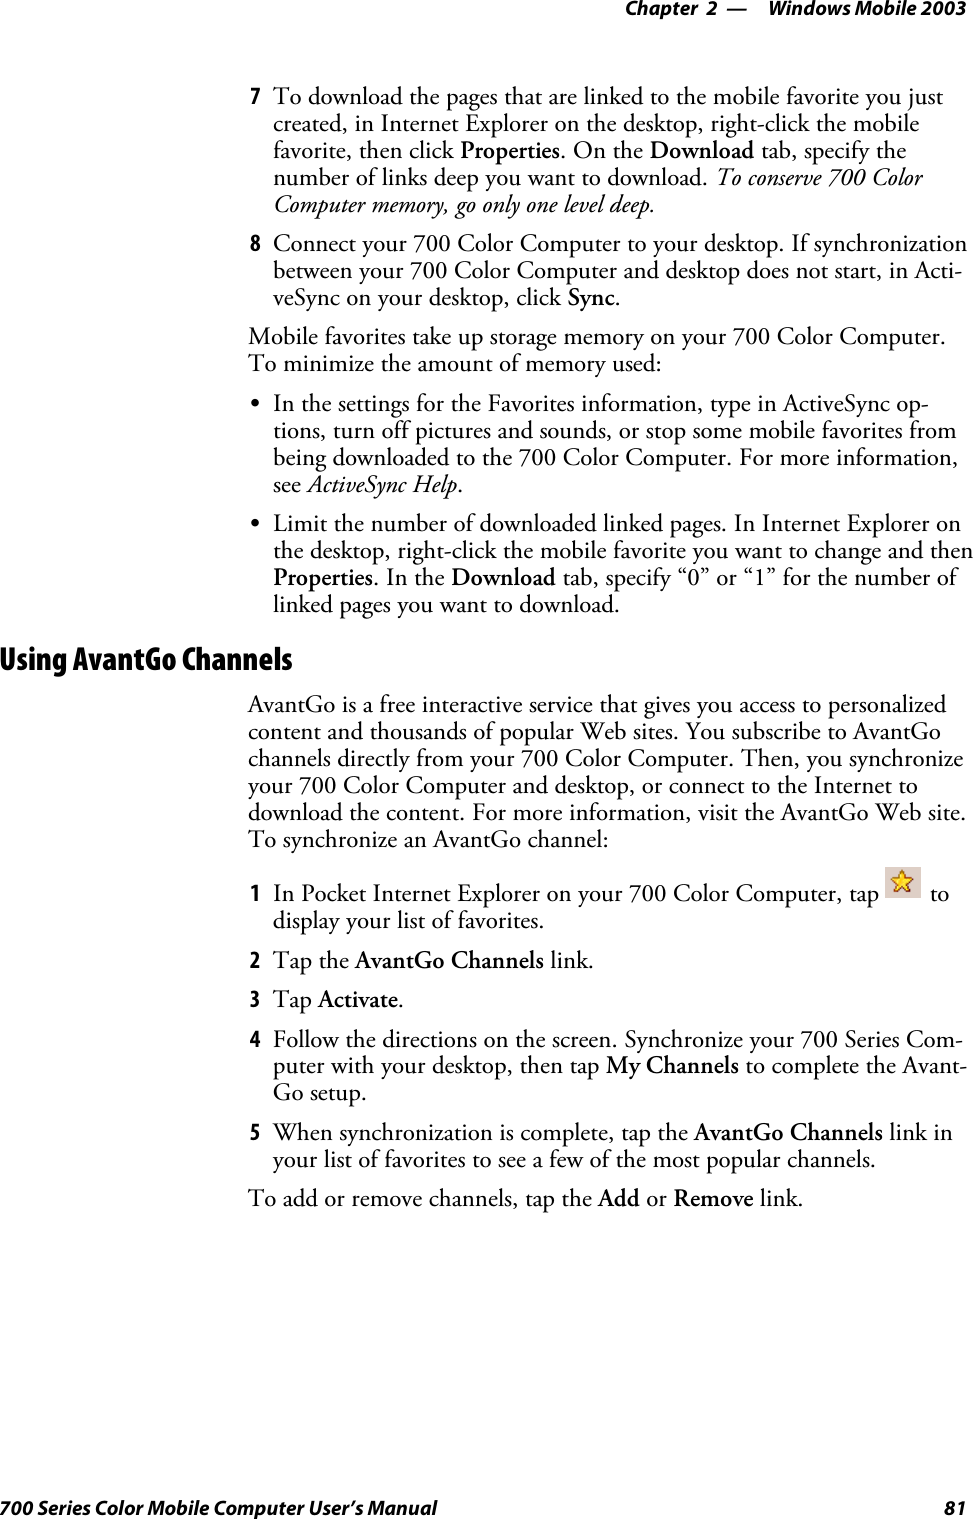
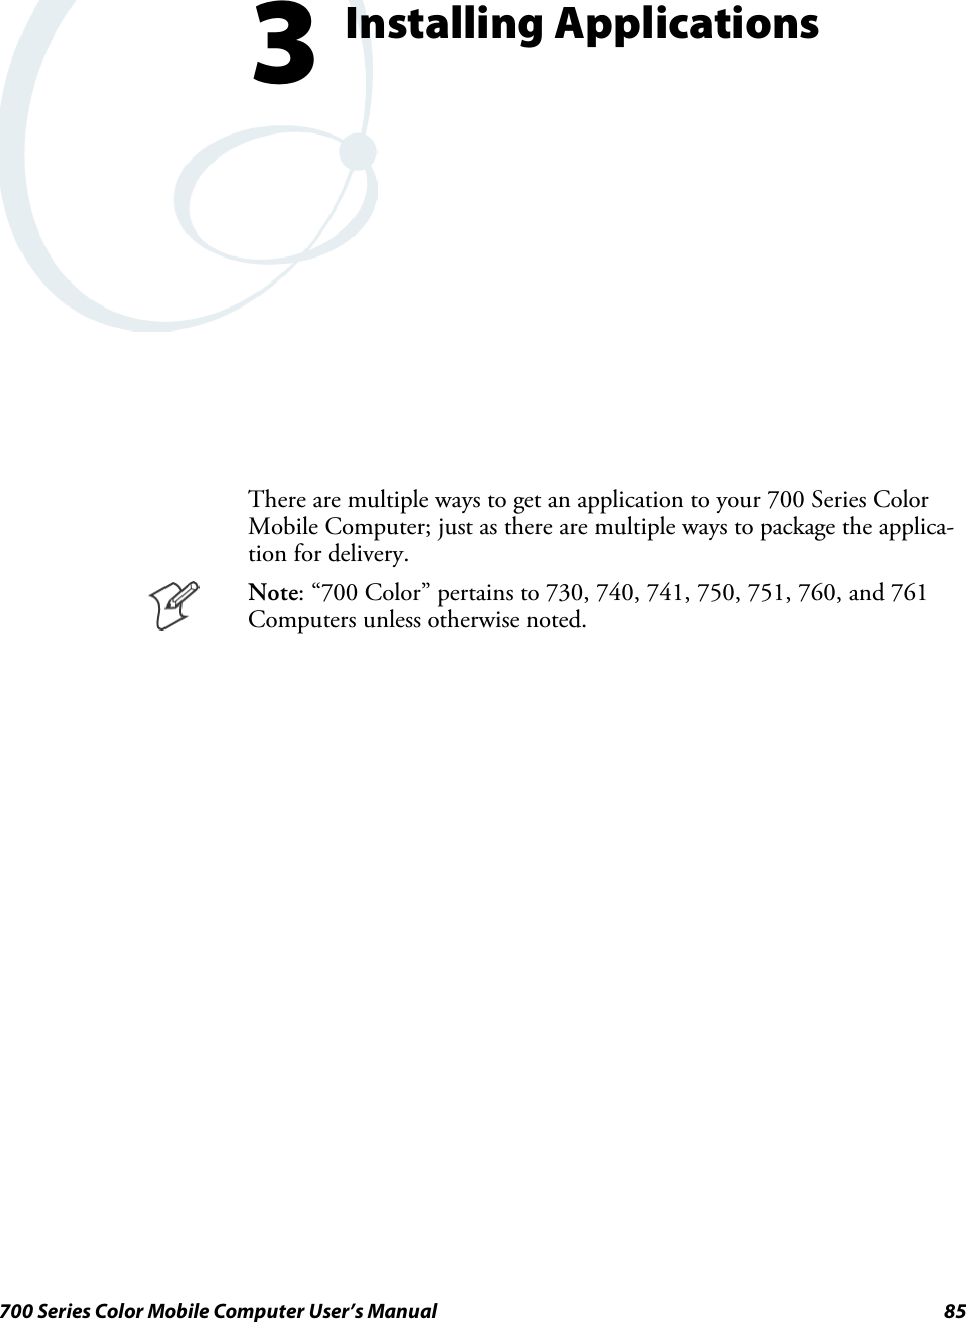
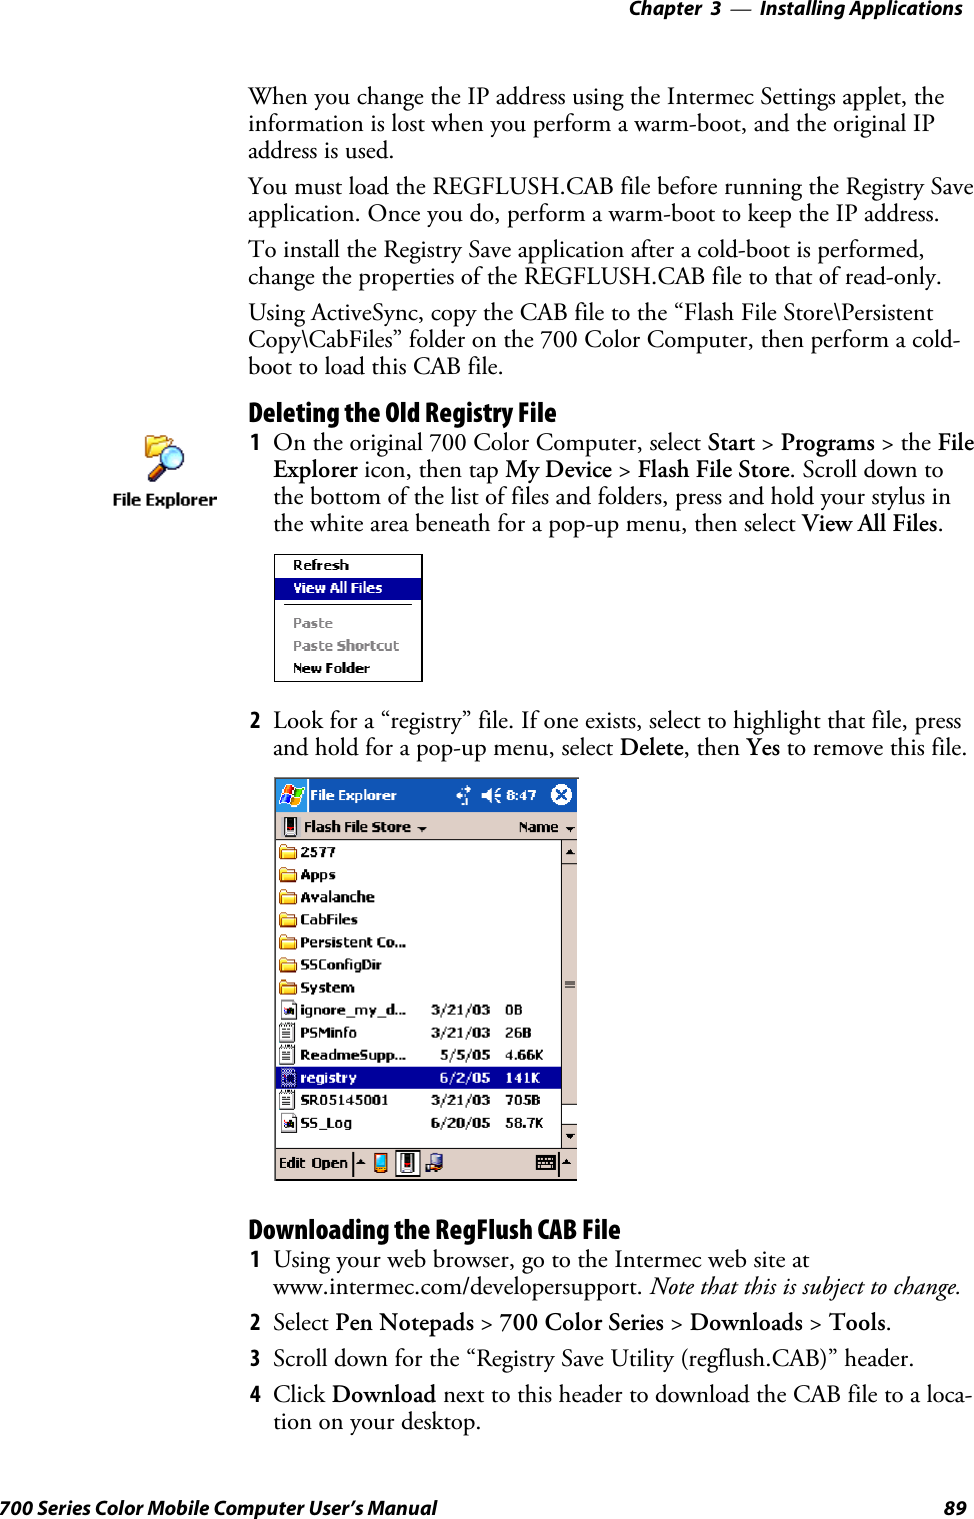
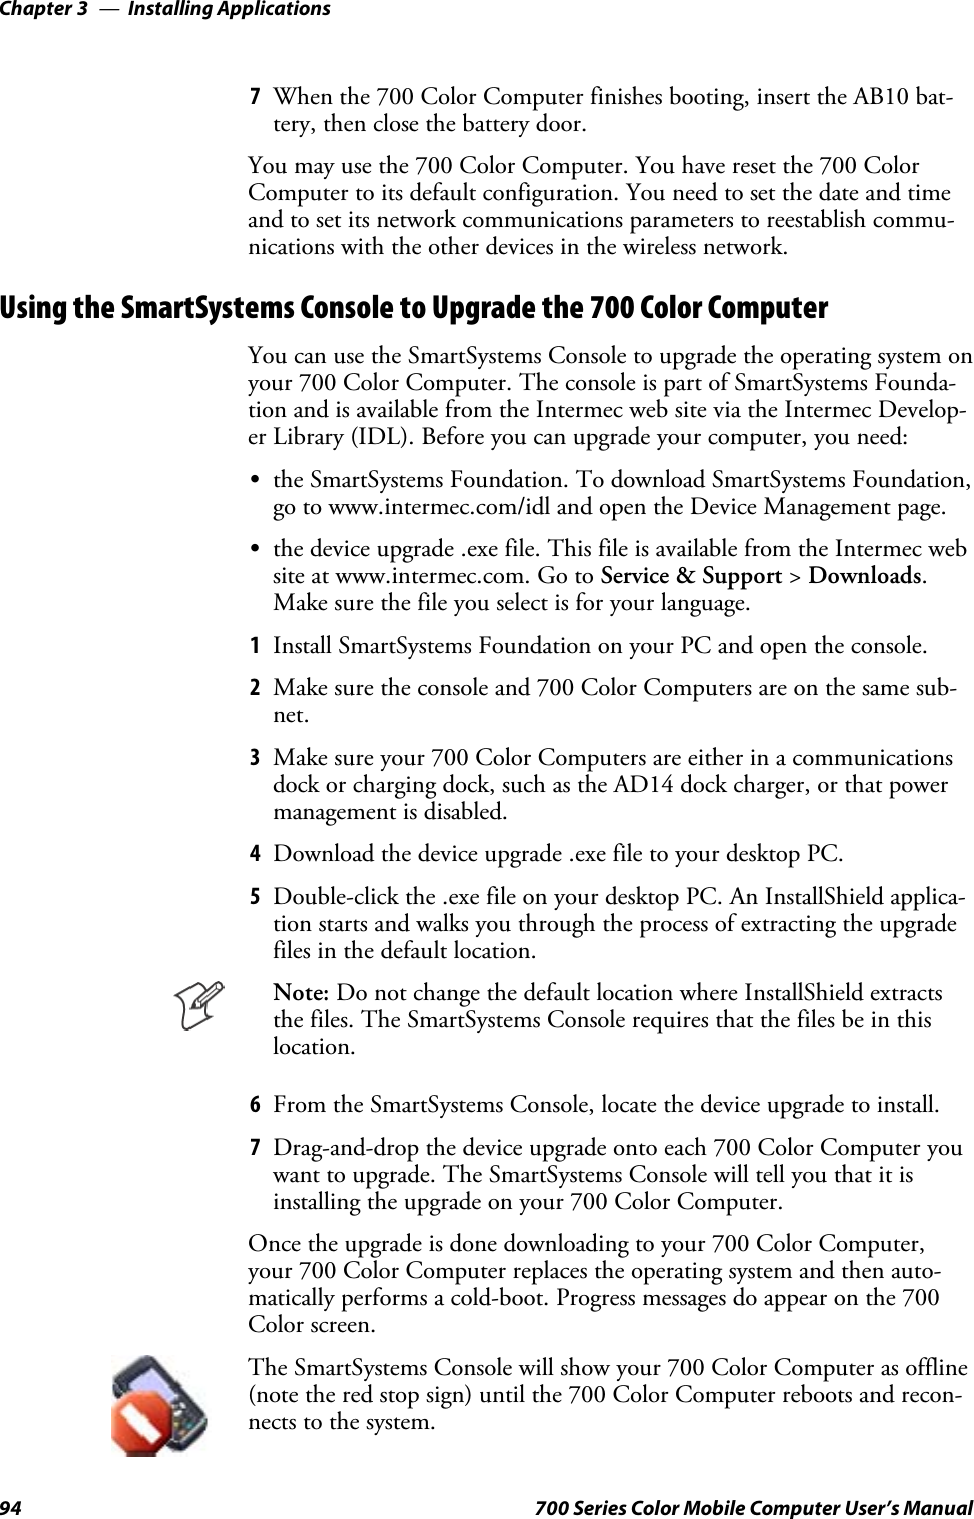
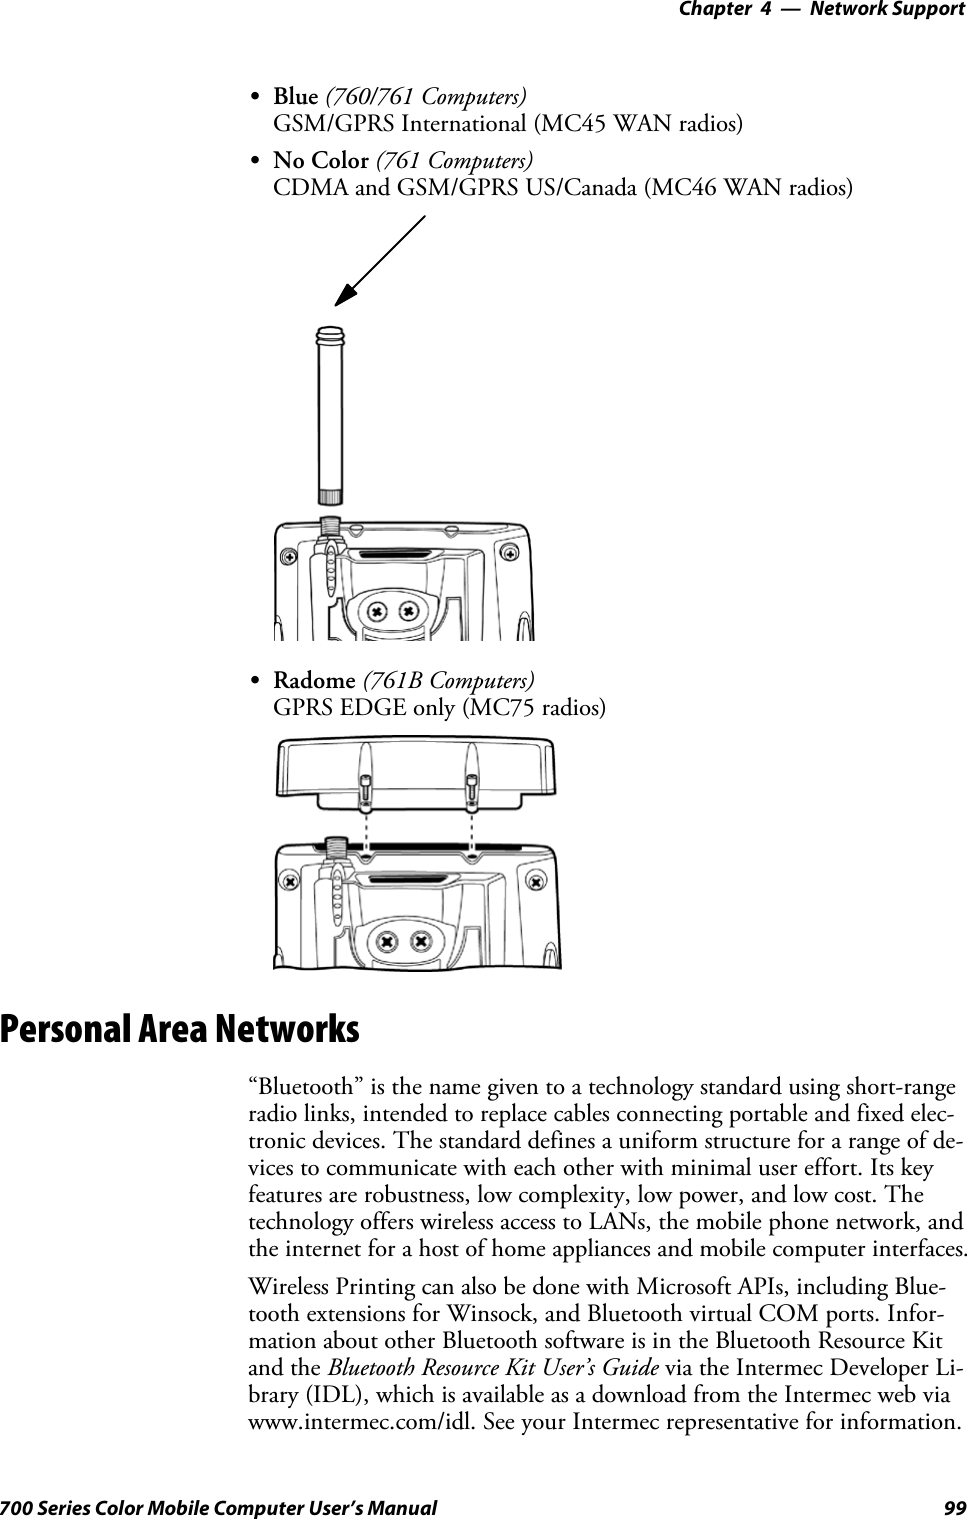
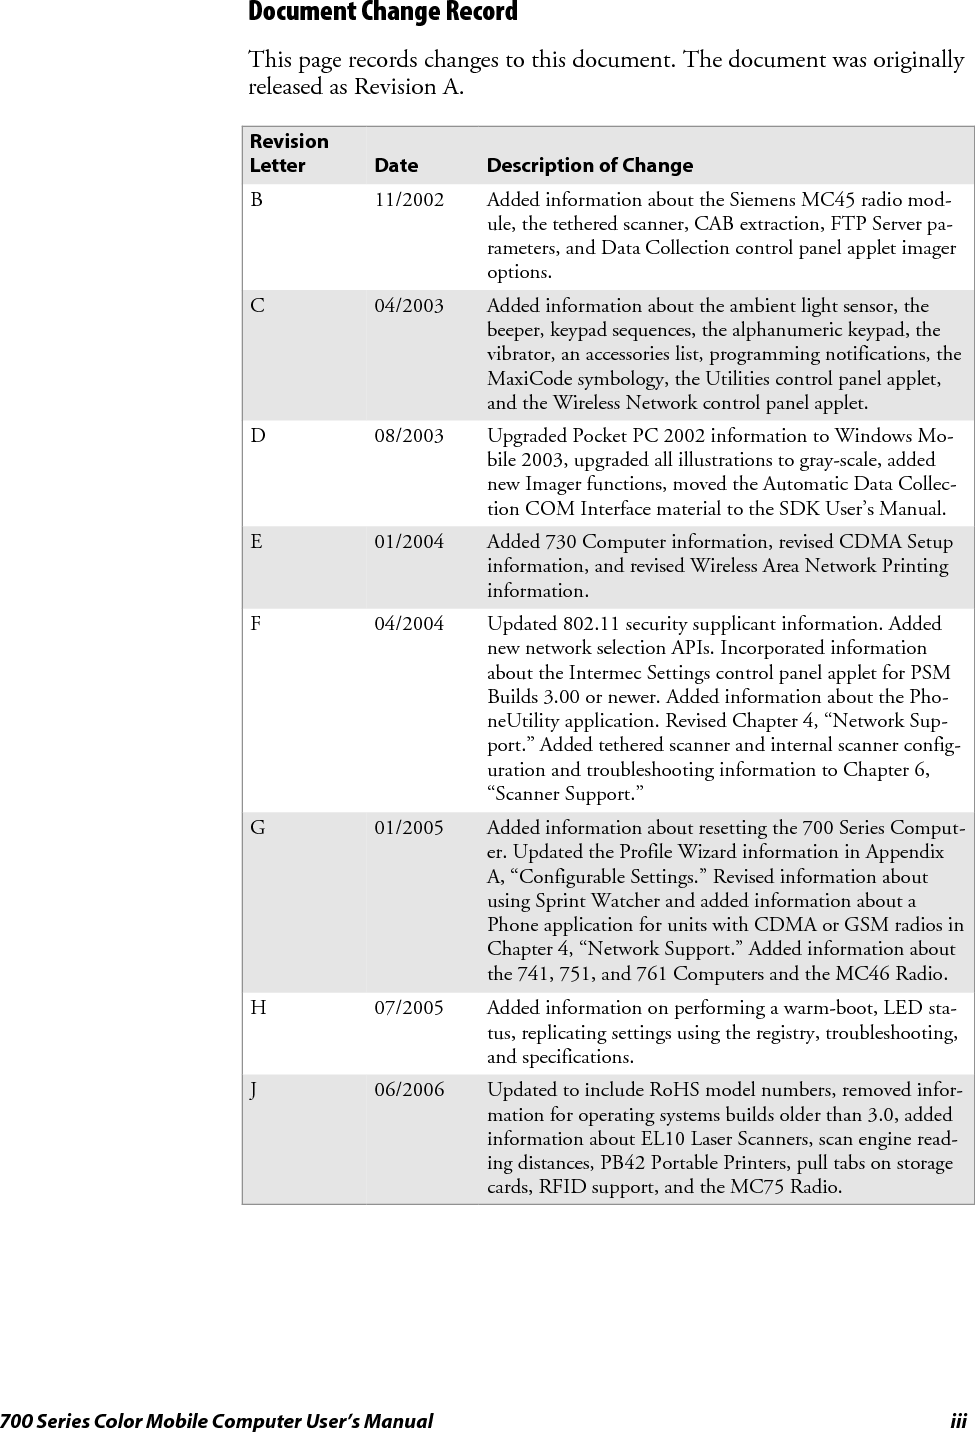
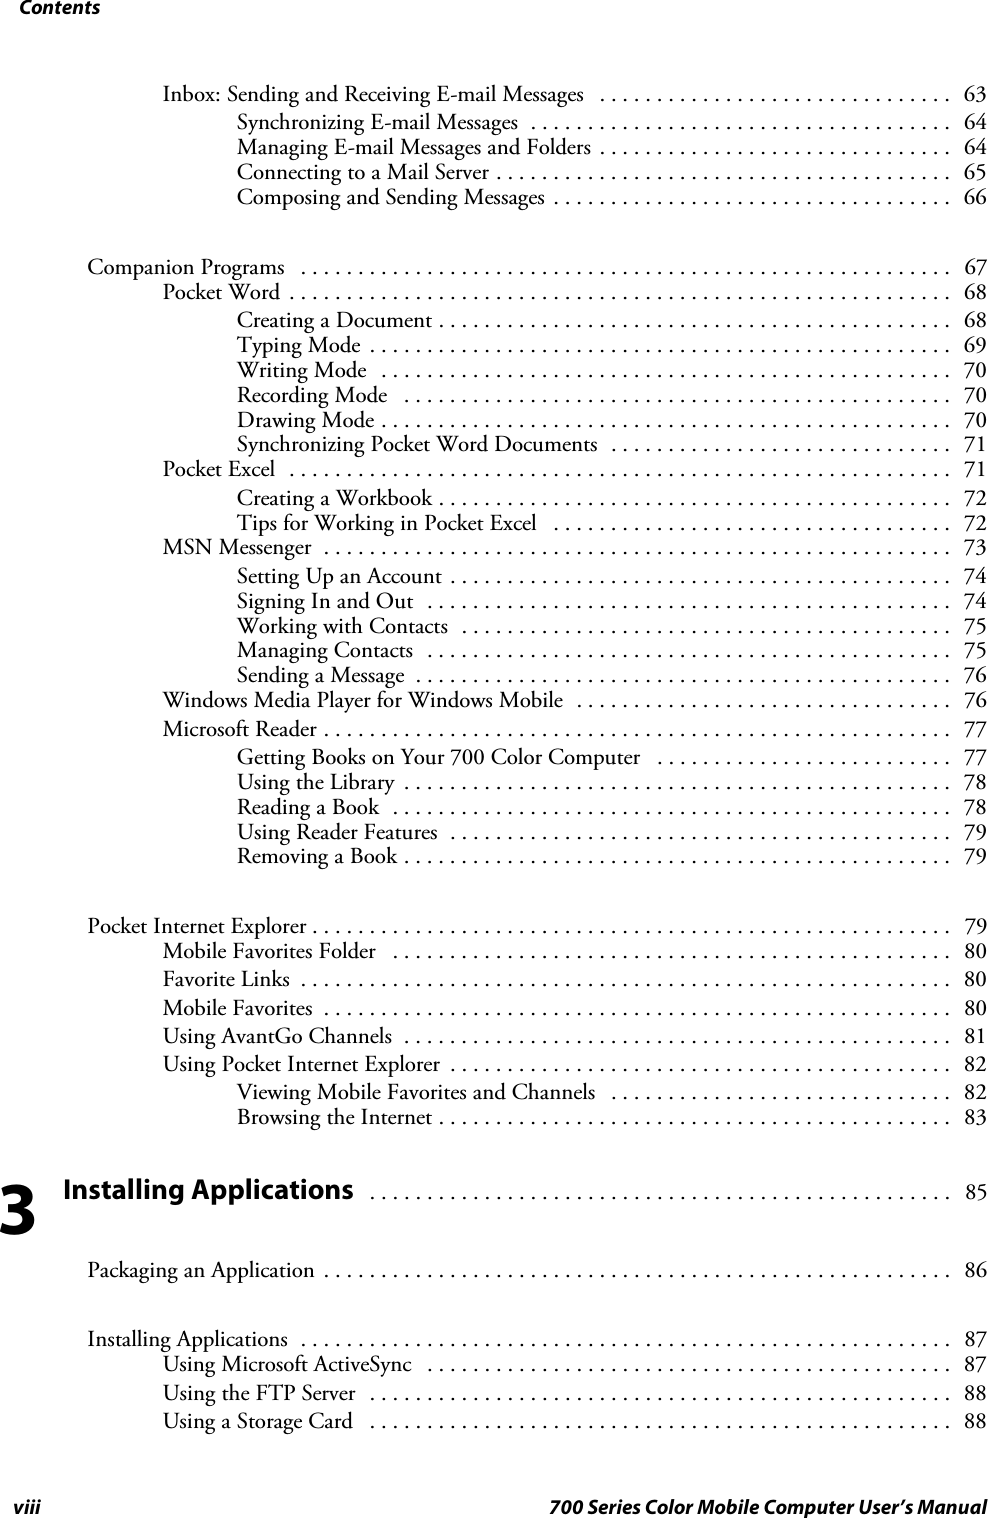
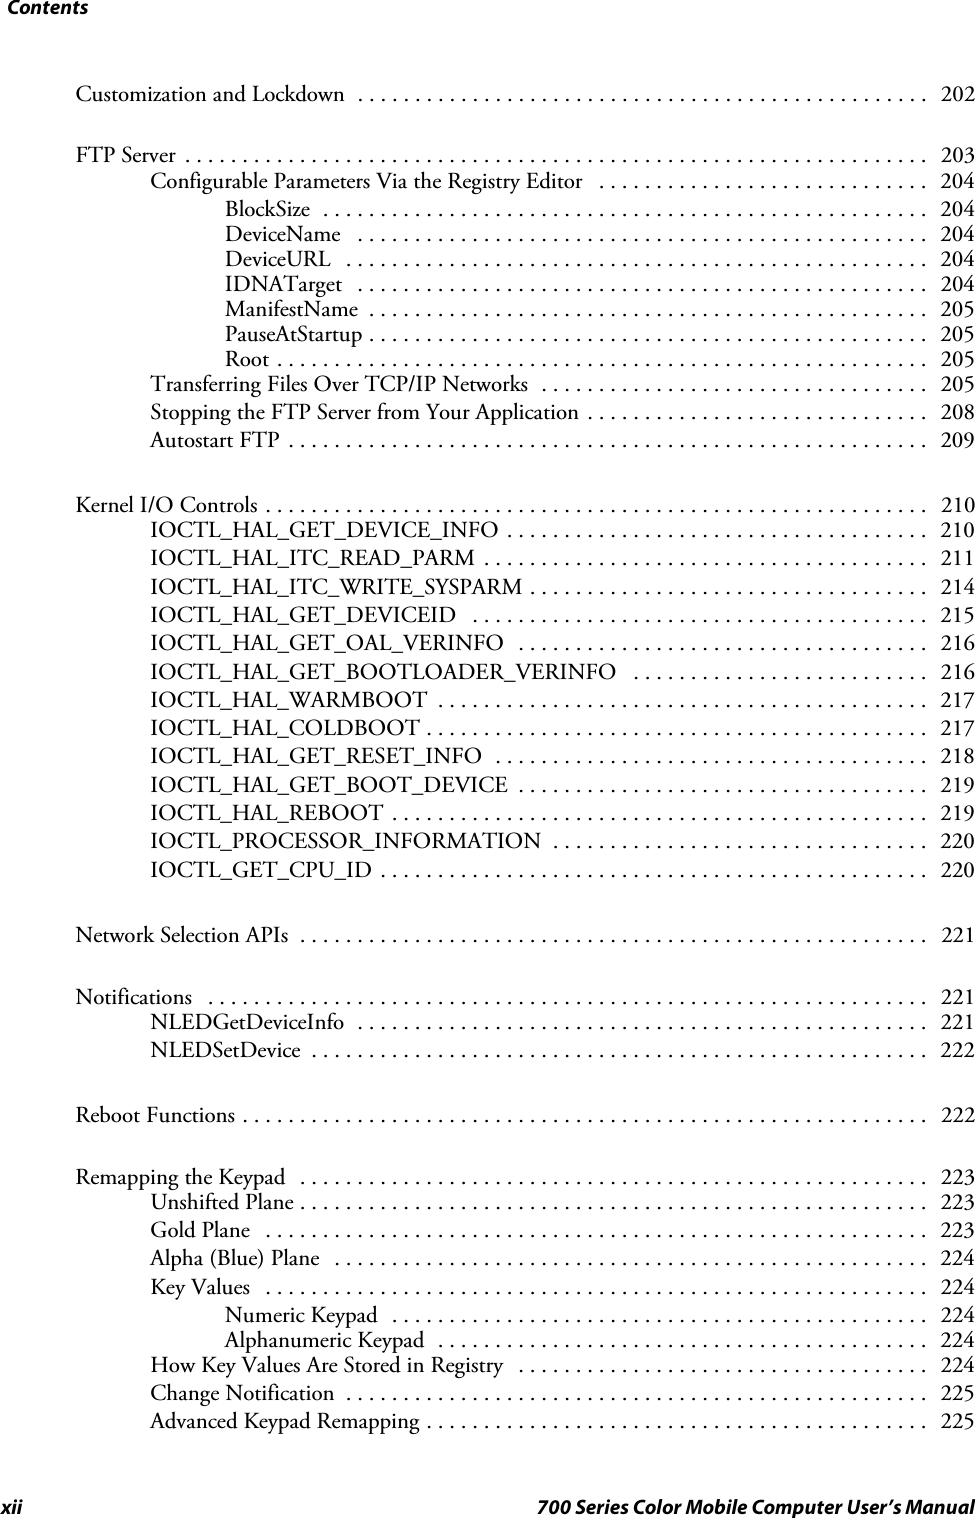
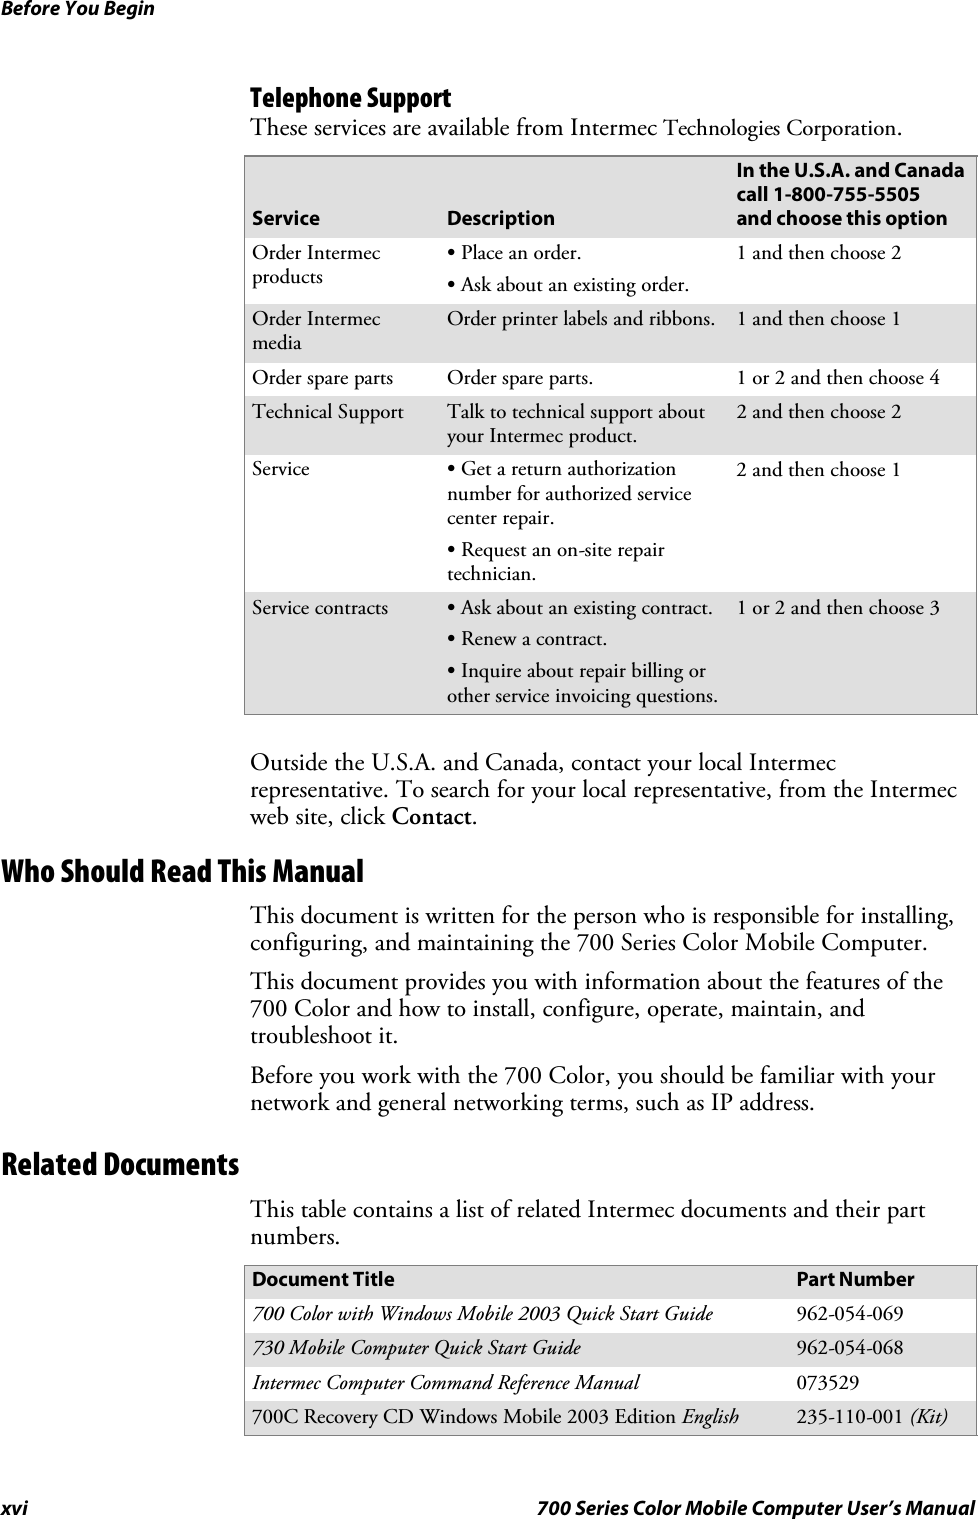
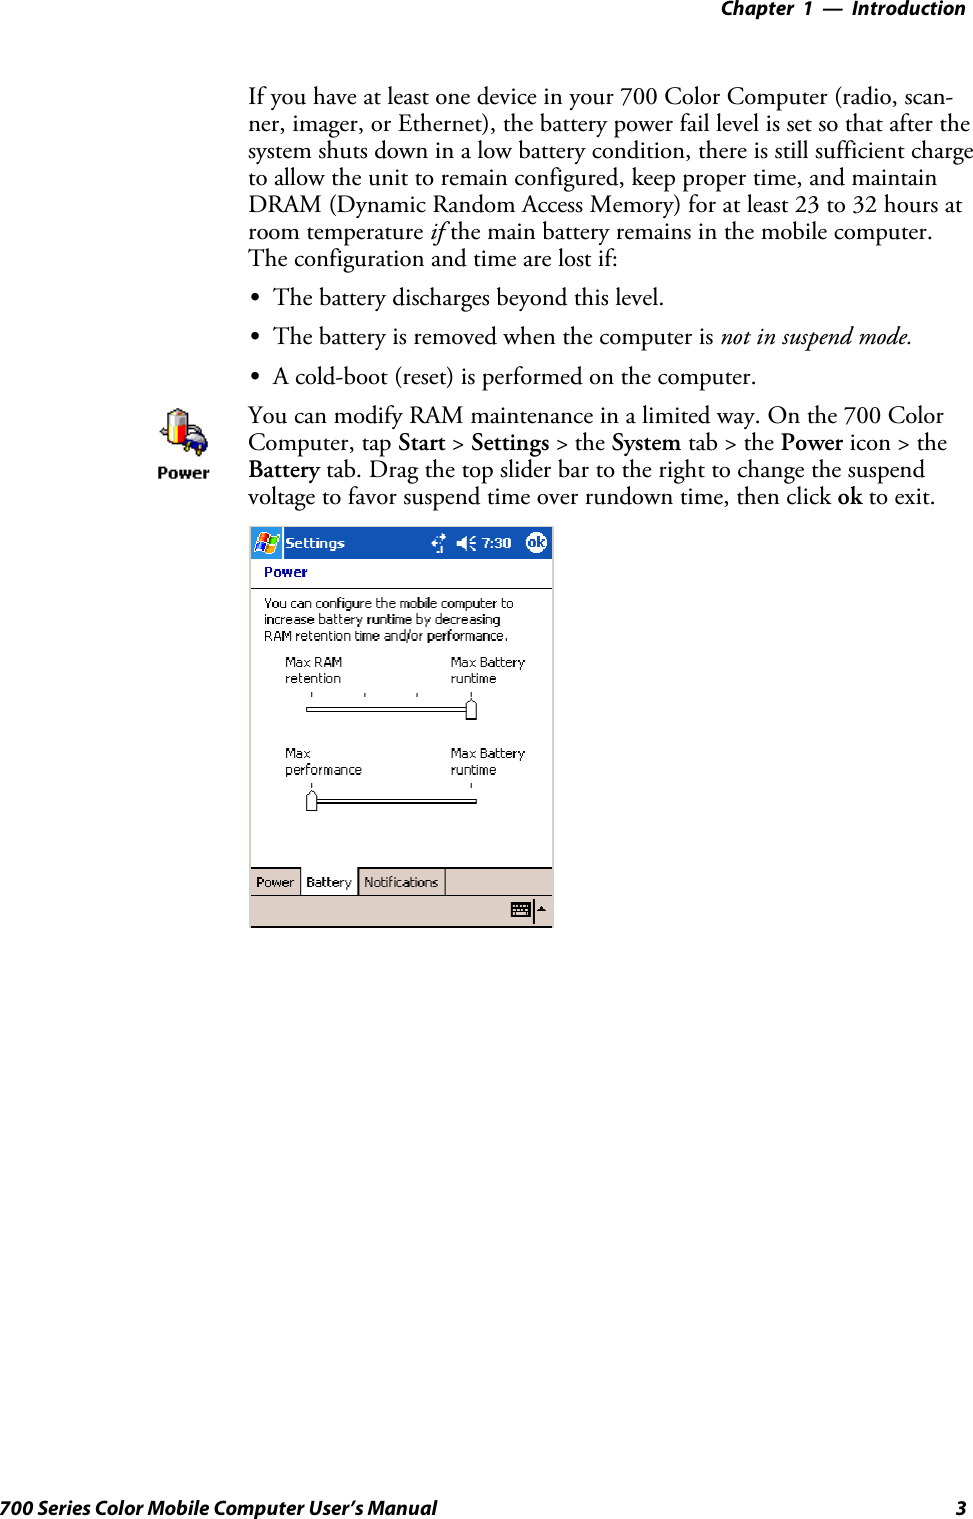
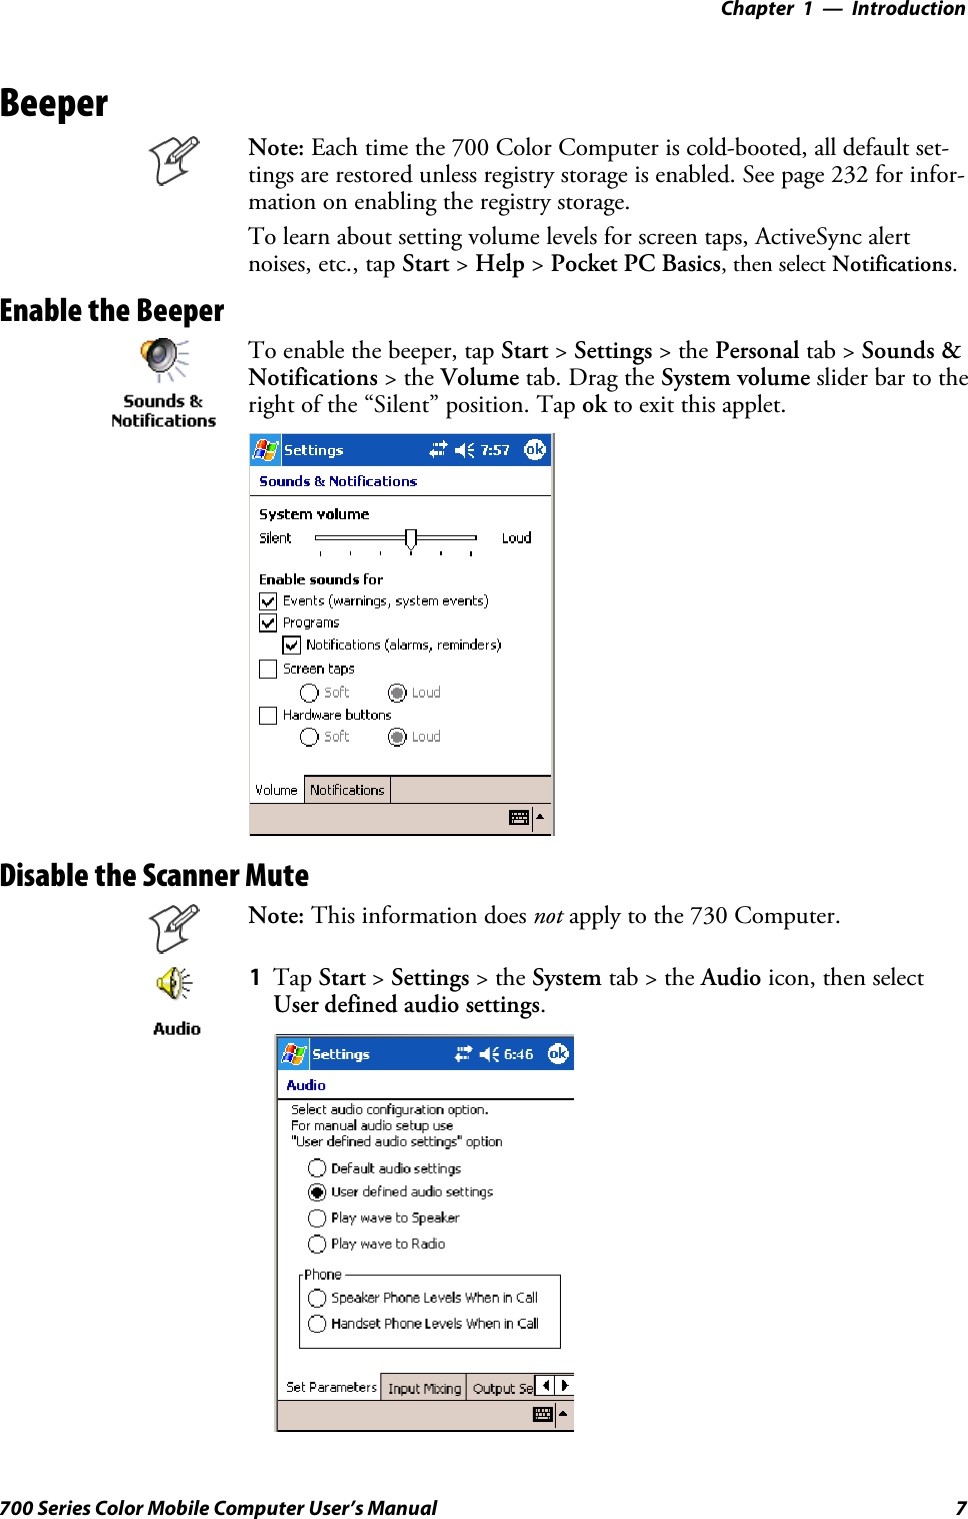
![IntroductionChapter —112 700 Series Color Mobile Computer User’s ManualAlphanumeric KeypadNote: This information does not apply to the 730 Computer.The following table lists sequences that use the [Gold/White] cplanekey. See Chapter 2, “Windows Mobile 2003,” for information about thePocket PC applications.Press the Keys To Do This[Gold/White] cI Toggle the backlight on or off (also goes through backlightpower levels if held down)[Gold/White] cA Access the Pocket PC Record application (see Note).[Gold/White] cB Access the Pocket PC Calendar application (see Note).[Gold/White] cC Access the Pocket PC Contacts application (see Note).[Gold/White] cD Access the Pocket PC Tasks application (see Note).[Gold/White] cJ Move up one page.[Gold/White] cG Enter an asterisk (*).[Gold/White] cP Move down one page.[Gold/White] cE Access the Pocket PC Start menu.[Gold/White] cK Enter an at symbol (@).[Gold/White] cH Enter a backslash (/).[Gold/White] cL Enter a minus sign (–).[Gold/White] cR Enter a plus sign (+).[Gold/White] cl Tab to the right.[Gold/White] cj Tab to the left.[Gold/White] ck Increase volume[Gold/White] cm Decrease volumeNote: Pocket PC applications are accessible only if configured to do so in the App Launchportion of the Utilities applet. See page 231 for more information.Alpha (Blue) Plane KeysThe alphabet can be entered with either the numeric keypad or the alpha-numeric keypad. Below and on the next page are the key sequences.Numeric KeypadWhen you press F, the Scanning/Alpha LED (C) shows ‘red’ forthe Alpha mode. The keypad stays in Alpha mode until you press F.To type a lowercase ‘c,’ press F222(the [2] key threetimes). To type a letter on the same key as the last letter entered, wait twoseconds, then enter the correct series of keystrokes to create the next letter.WhileyouareintheAlphamodeandyoupress1to initiate the CAPSmode, you will render a CAPS LOCK until you press 1again. Onceyou are in CAPS mode, you stay in CAPS until it is pressed again.Press 0to enter a space.](https://usermanual.wiki/Intermec-Technologies/MC75.Final-Users-Manual-part-1-of-2/User-Guide-730132-Page-30.png)