Itron 24GZR AMR Transceiver Device For Utility Meters User Manual Users Manuel Chp One and Two
Itron, Inc. AMR Transceiver Device For Utility Meters Users Manuel Chp One and Two
Itron >
Contents
- 1. Users Manuel Chp One and Two
- 2. Users Manuel Chp Three
- 3. Users Manuel Chp Five Through Seven
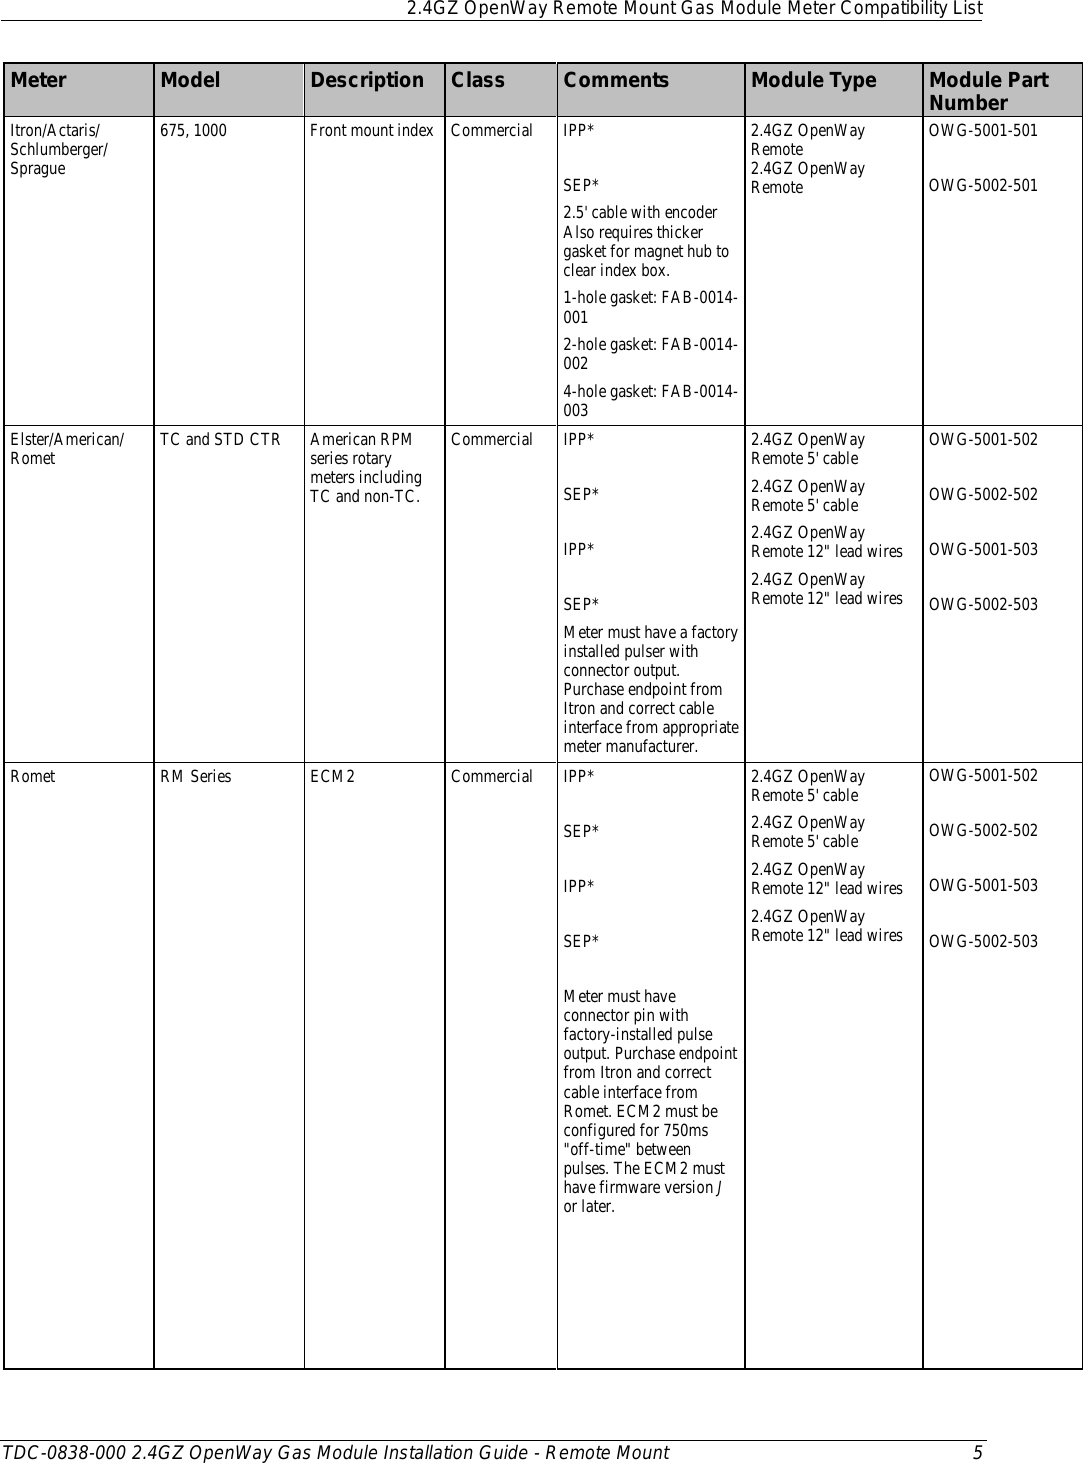
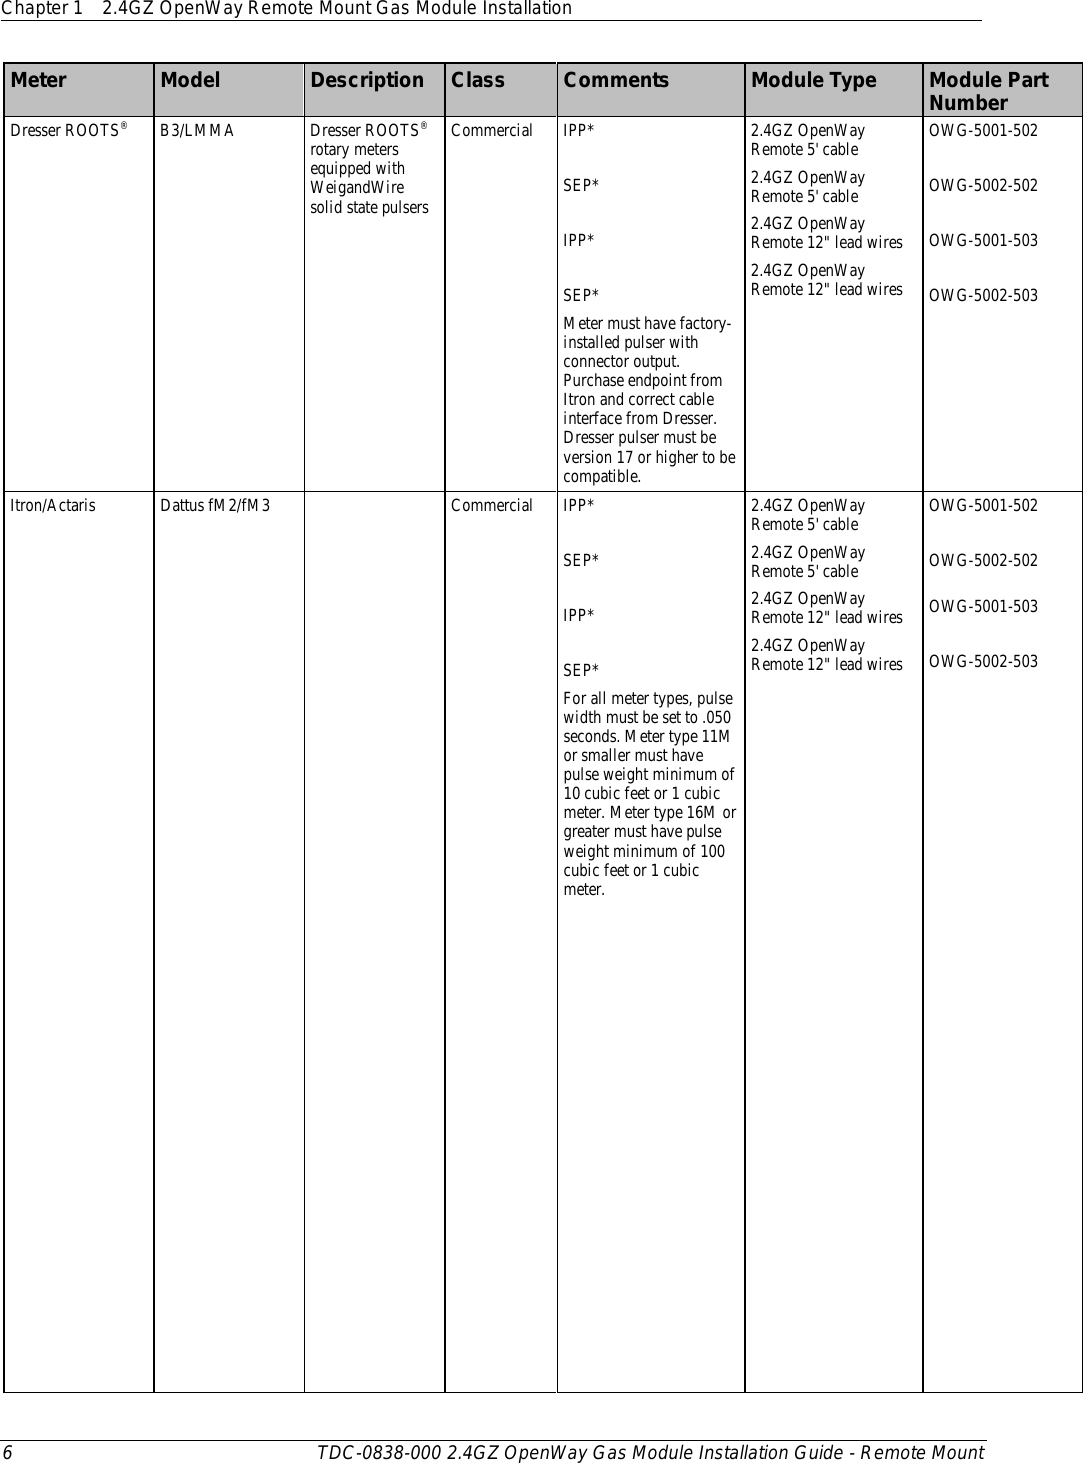
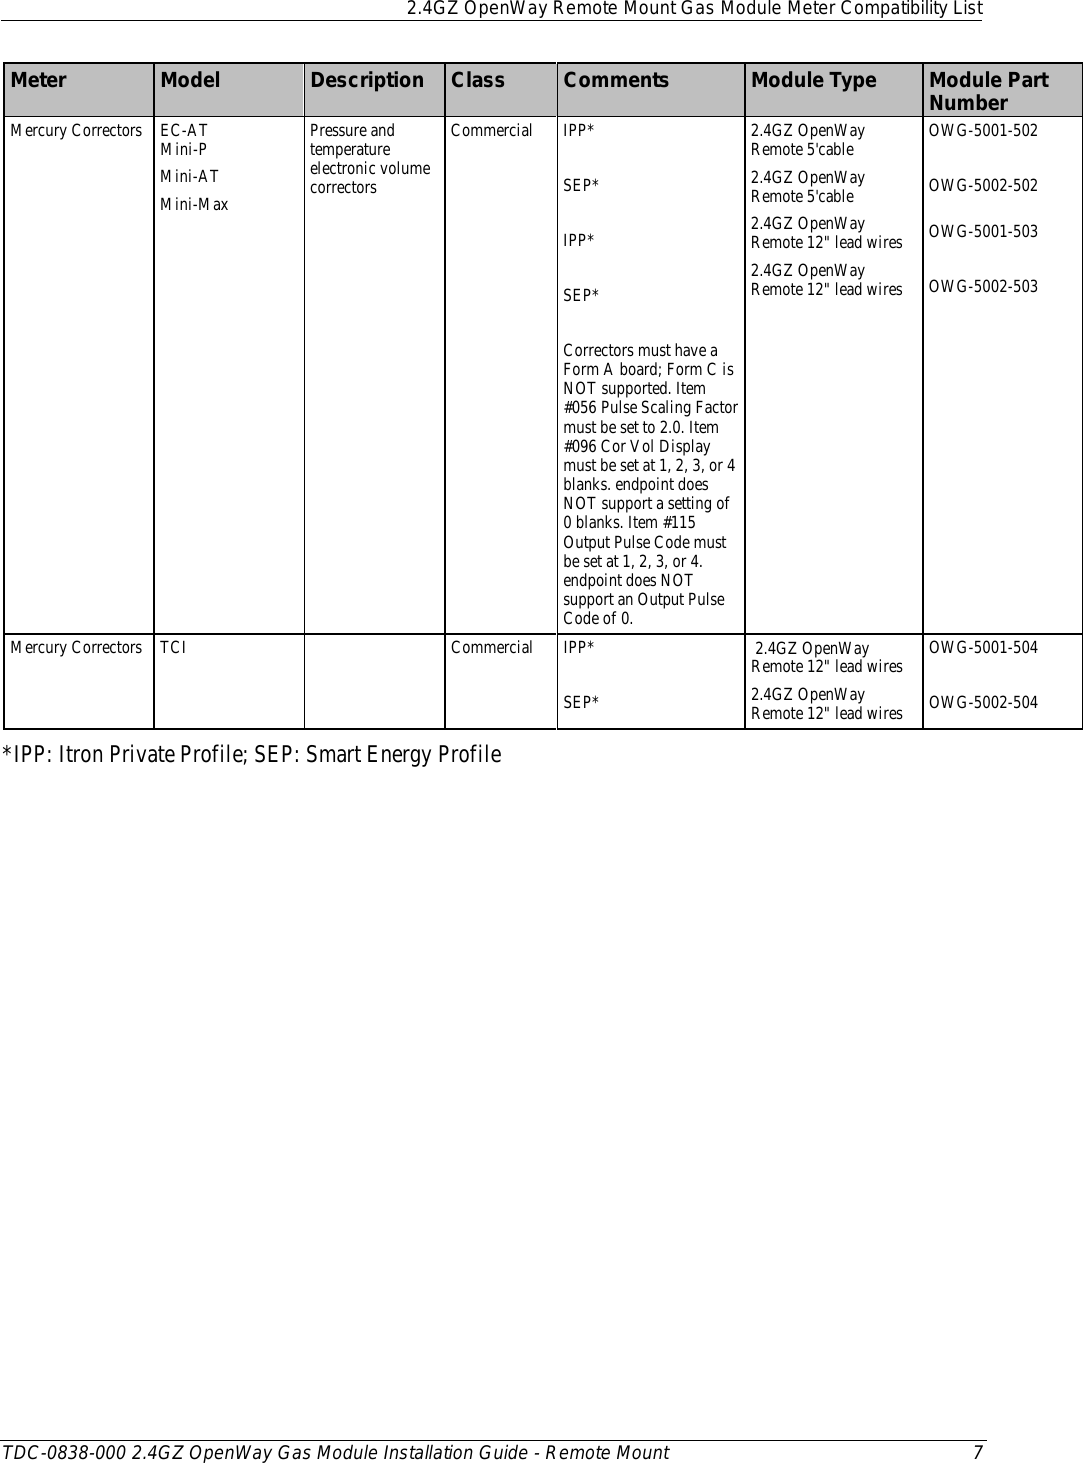
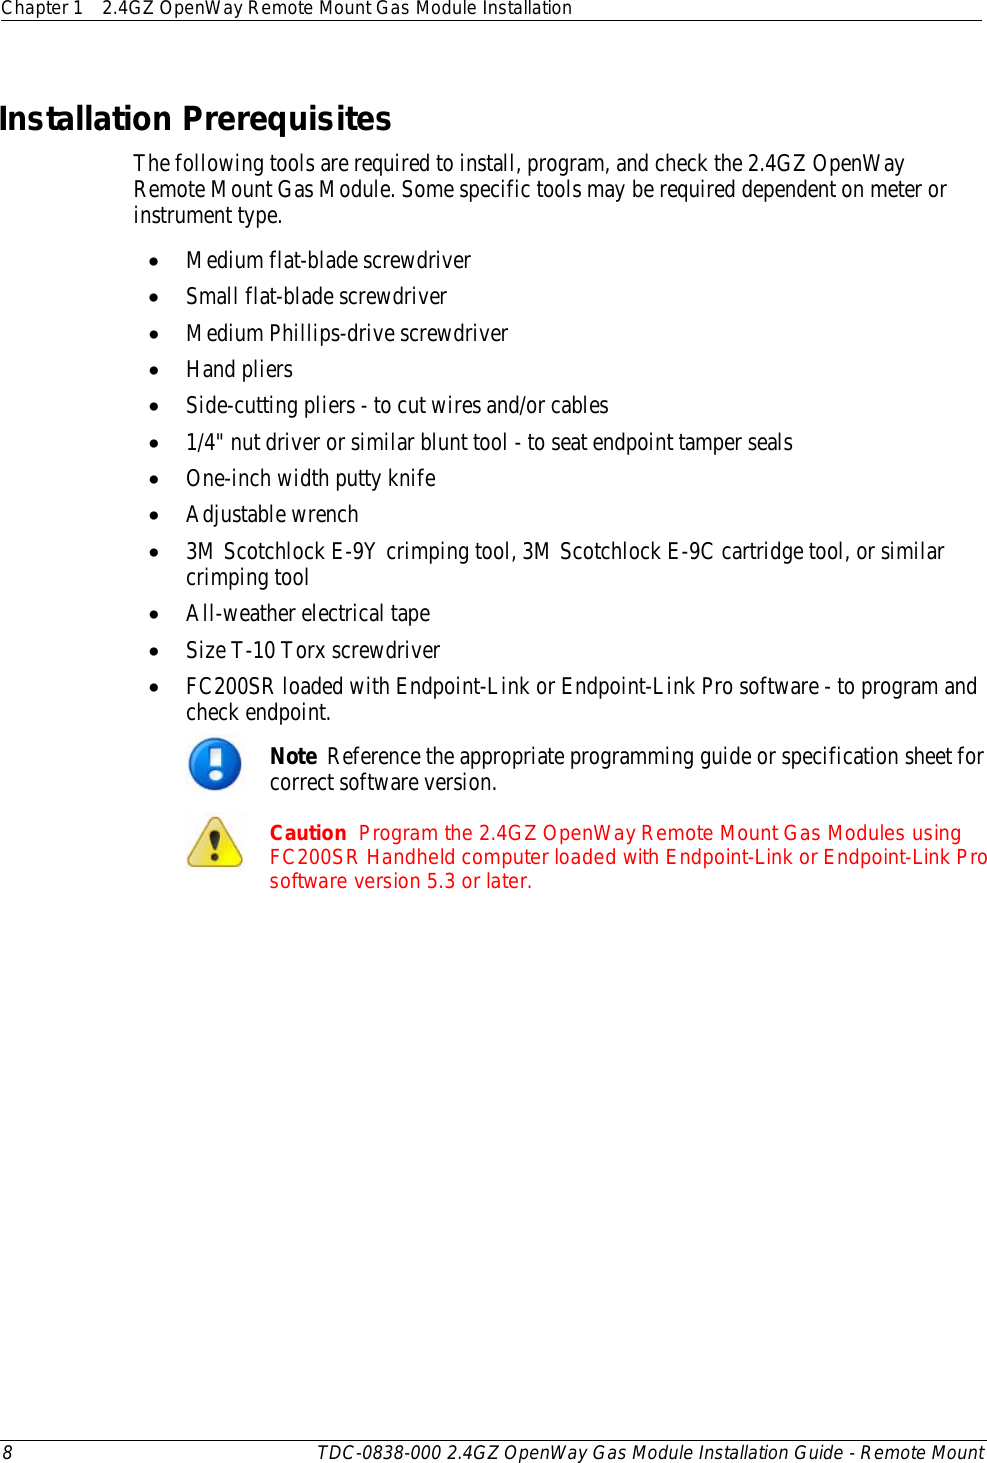
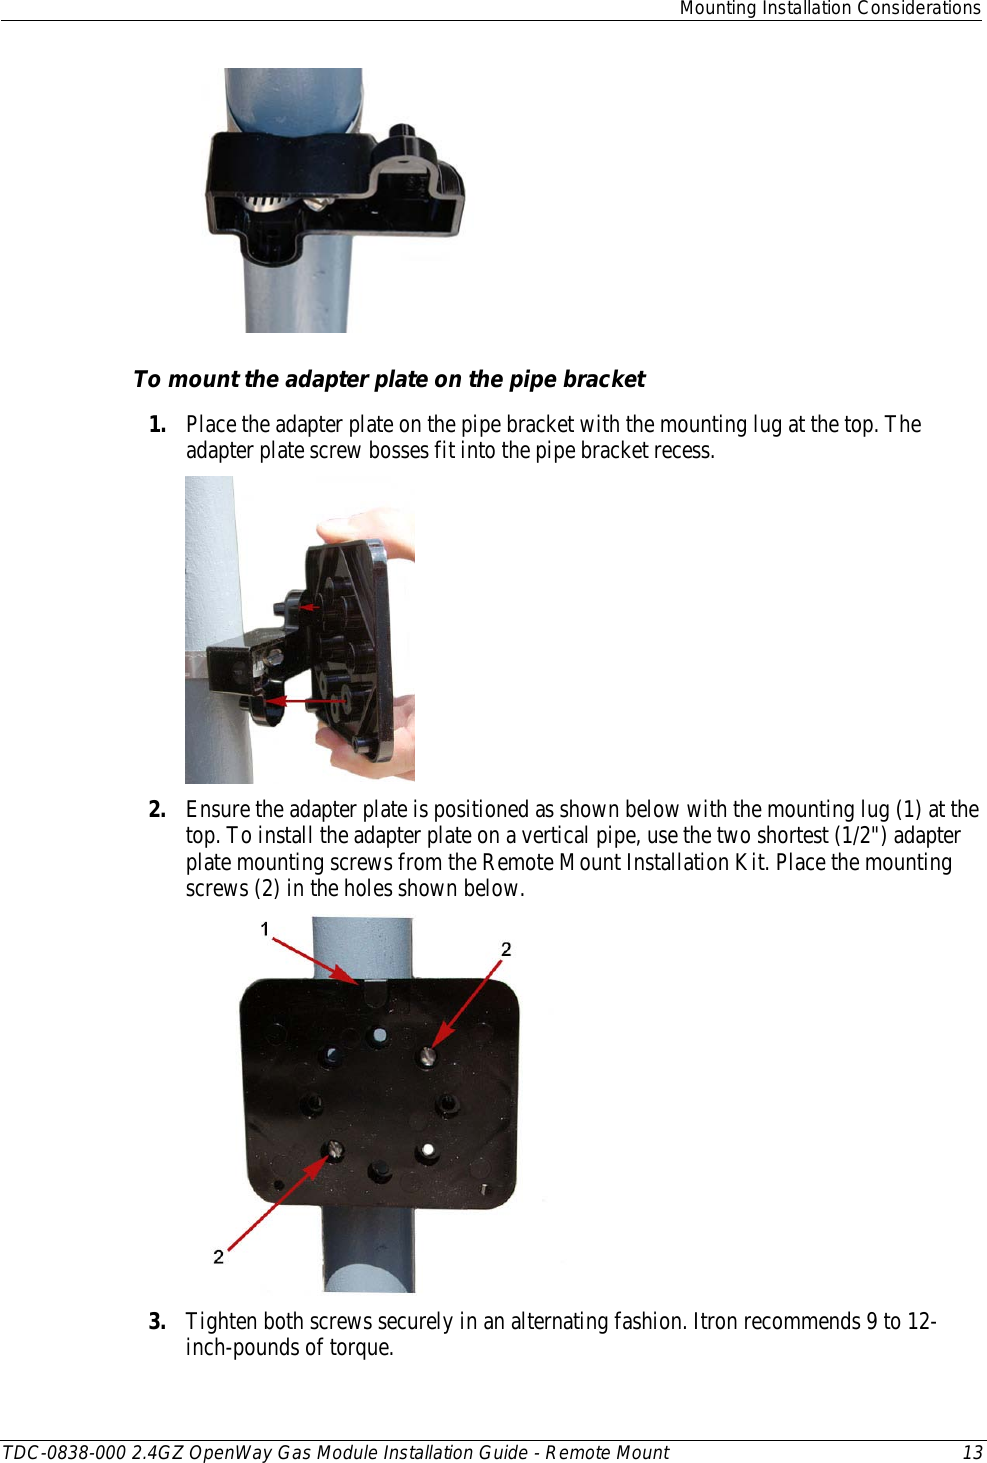
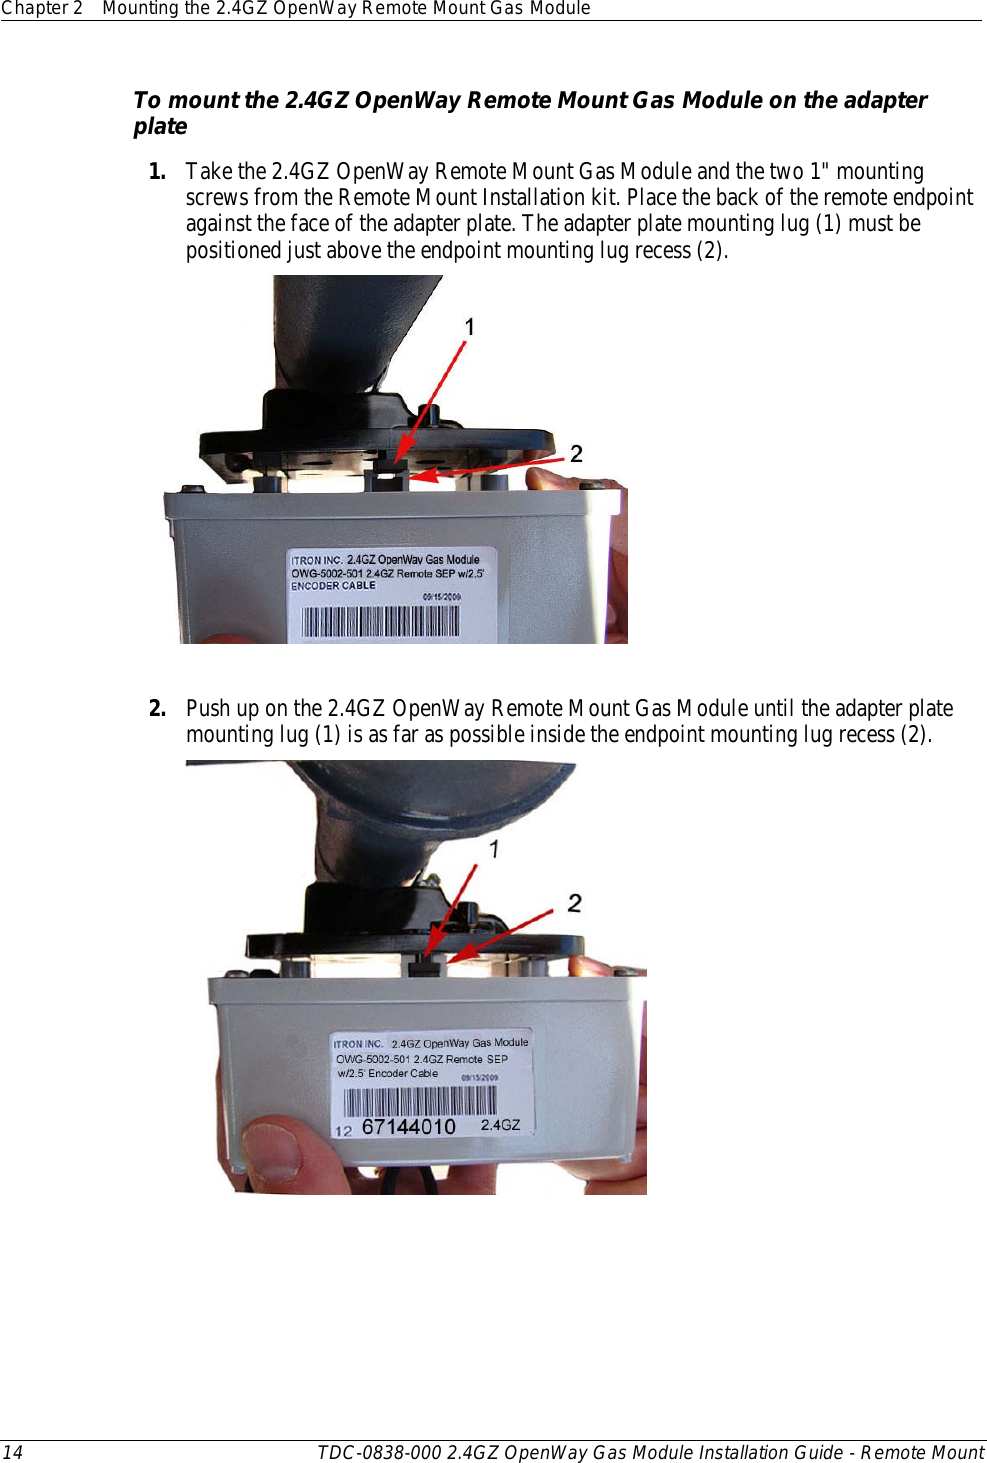
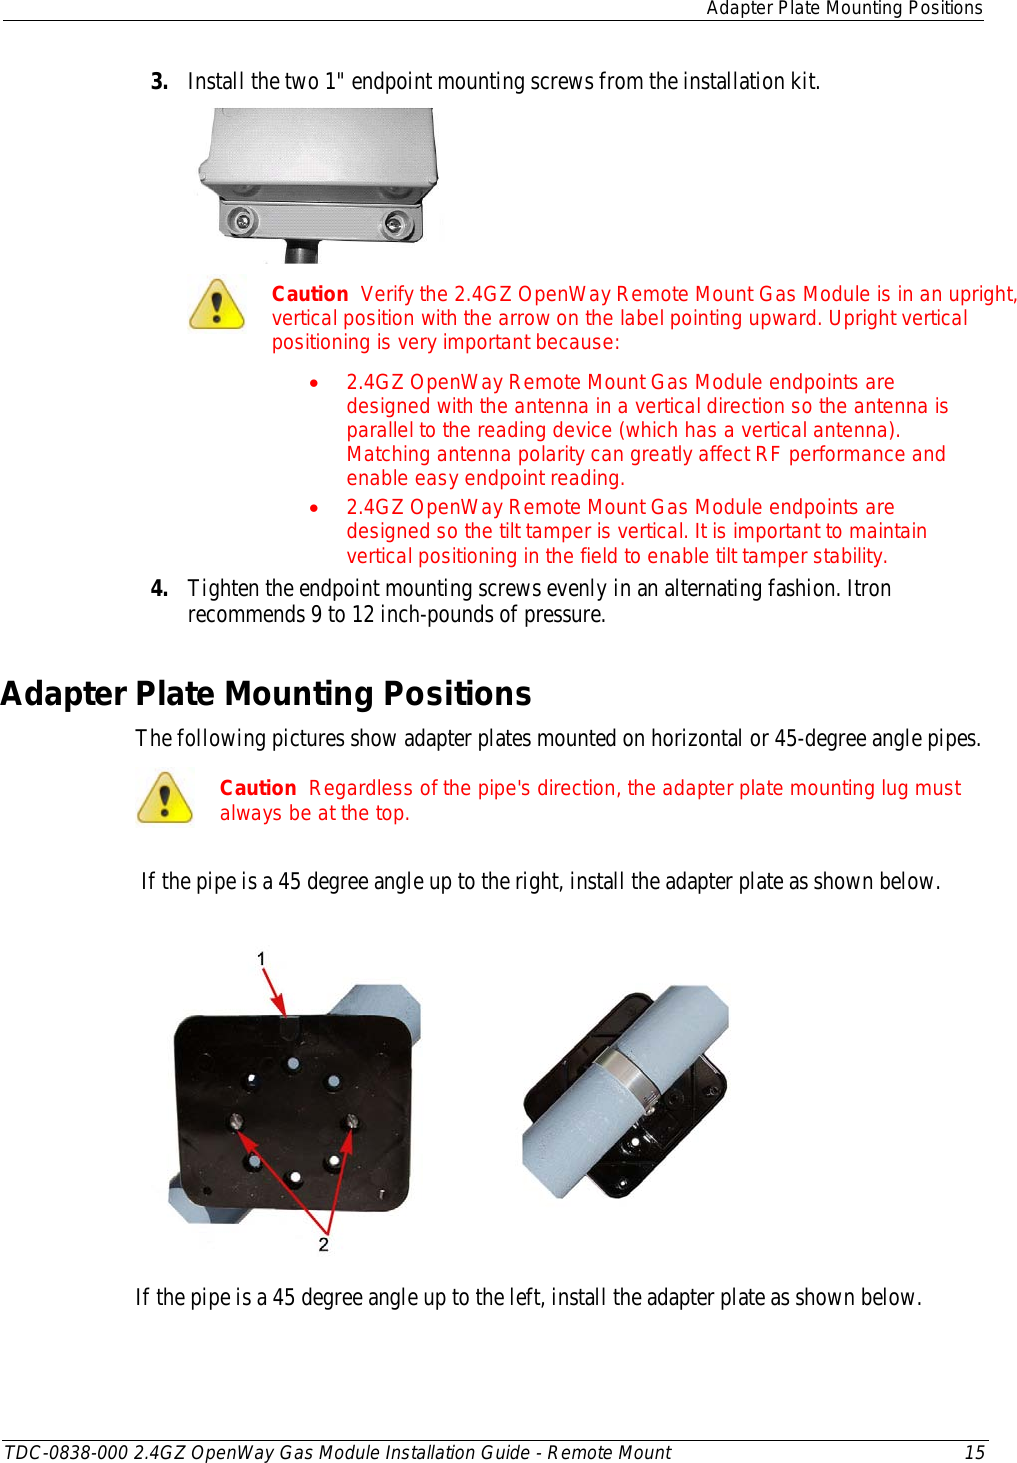
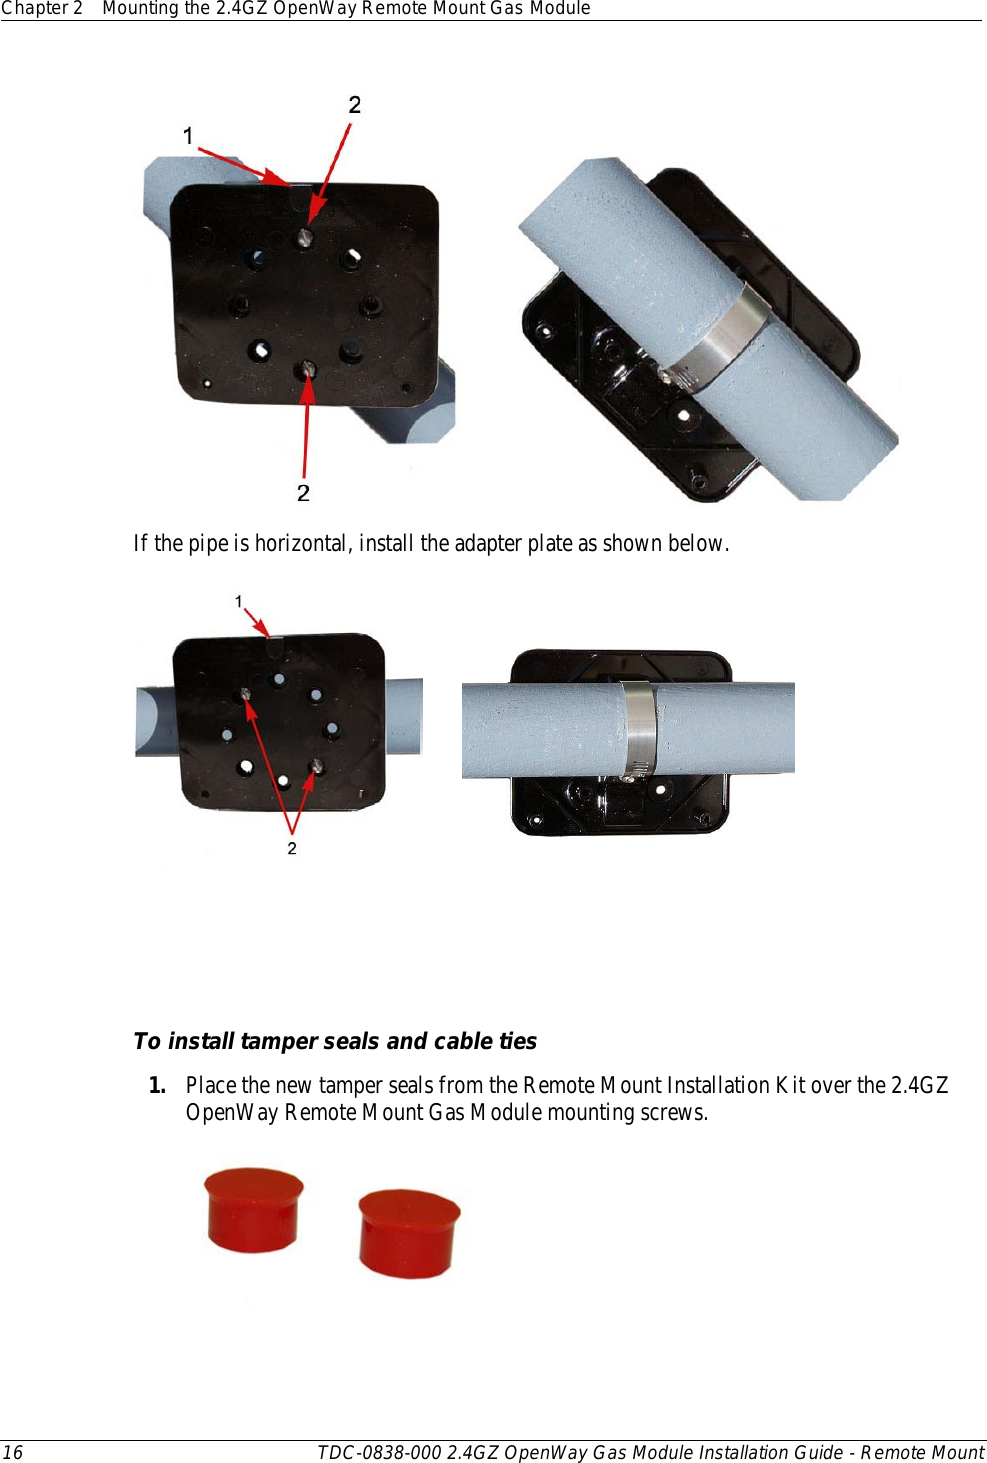
Users Manuel Chp One and Two