Janam Technologies XM20 MOBILE BARCODE TERMINAL User Manual PowerPoint Presentation
Janam Technologies LLC MOBILE BARCODE TERMINAL PowerPoint Presentation
Users Manual
Quick Start Guide
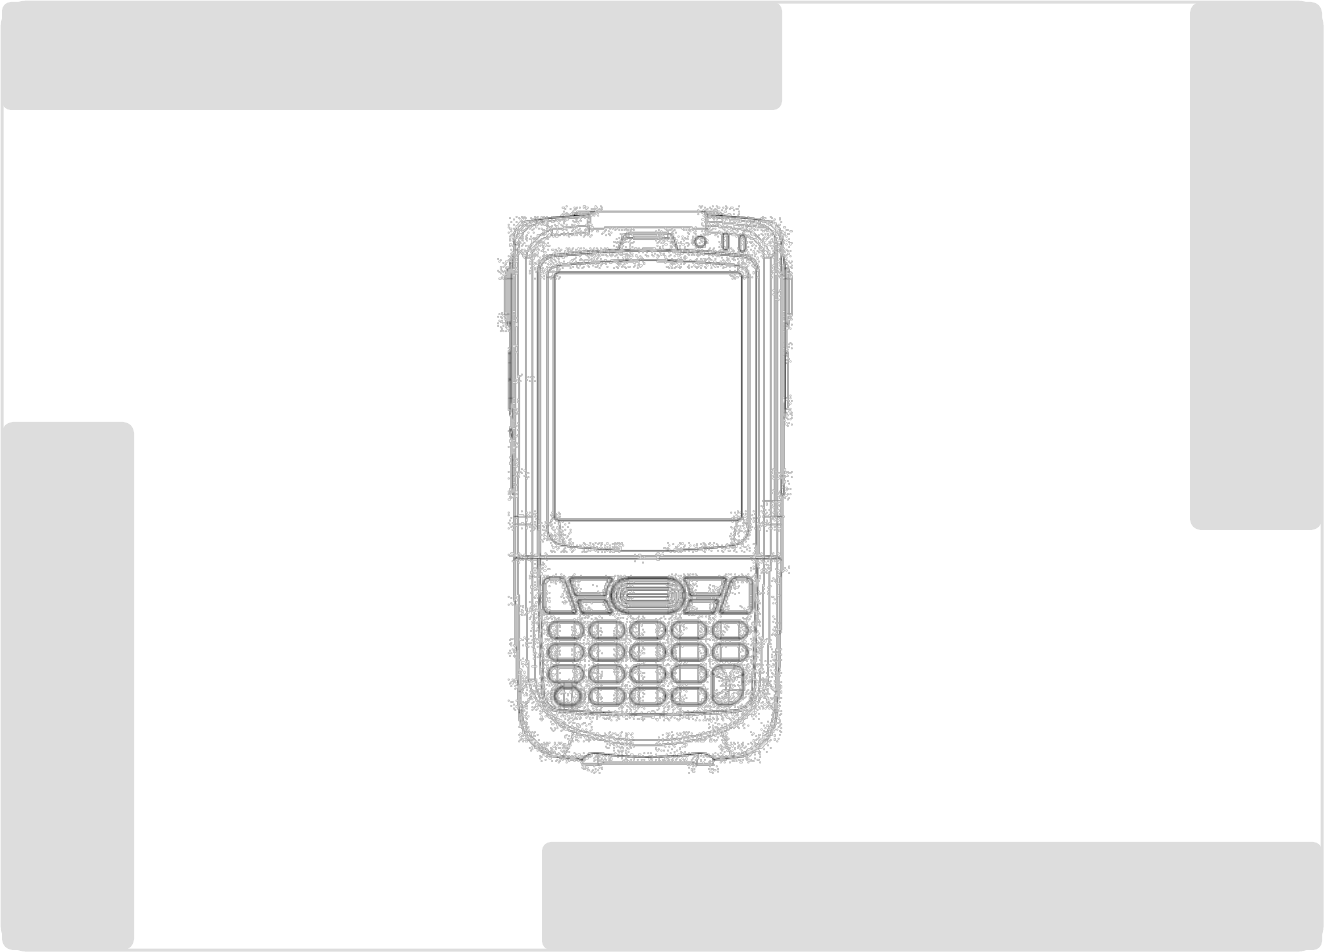
LPT20 Series mobile computer
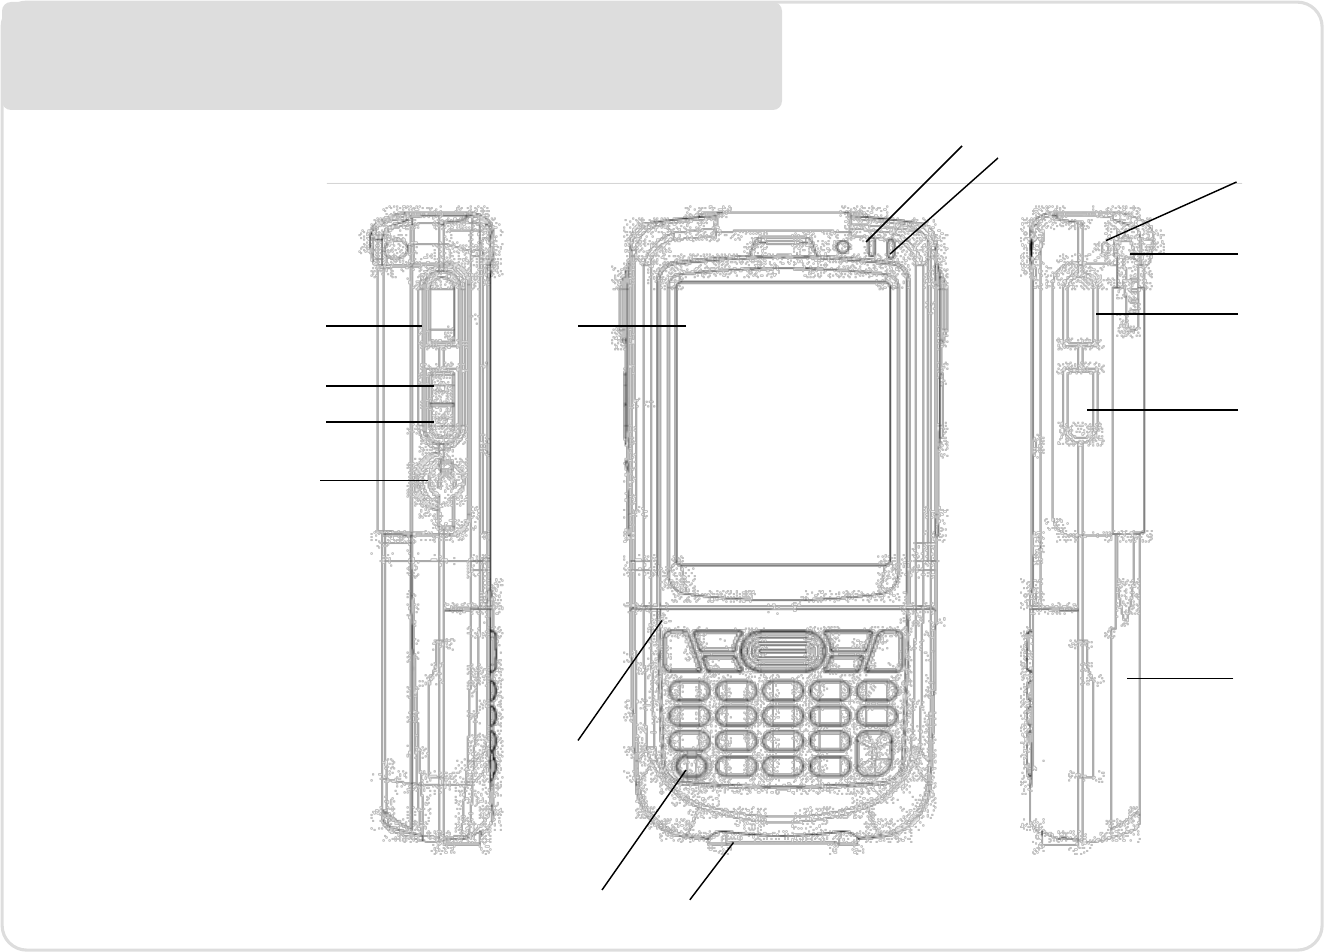
Features front and side views
1
2
3
4
5
6
7
8
9
10
11
12
13
14
15
1. Power button
2. Keypad
3. LCD display
4. Charging LED
5. Status LED
6. USB connector
7. Lanyard hole
8. Stylus
9. Scan / action
button
10. Action button
11. Battery cover
12. Scan / action
button
13. Up button
14. Down button
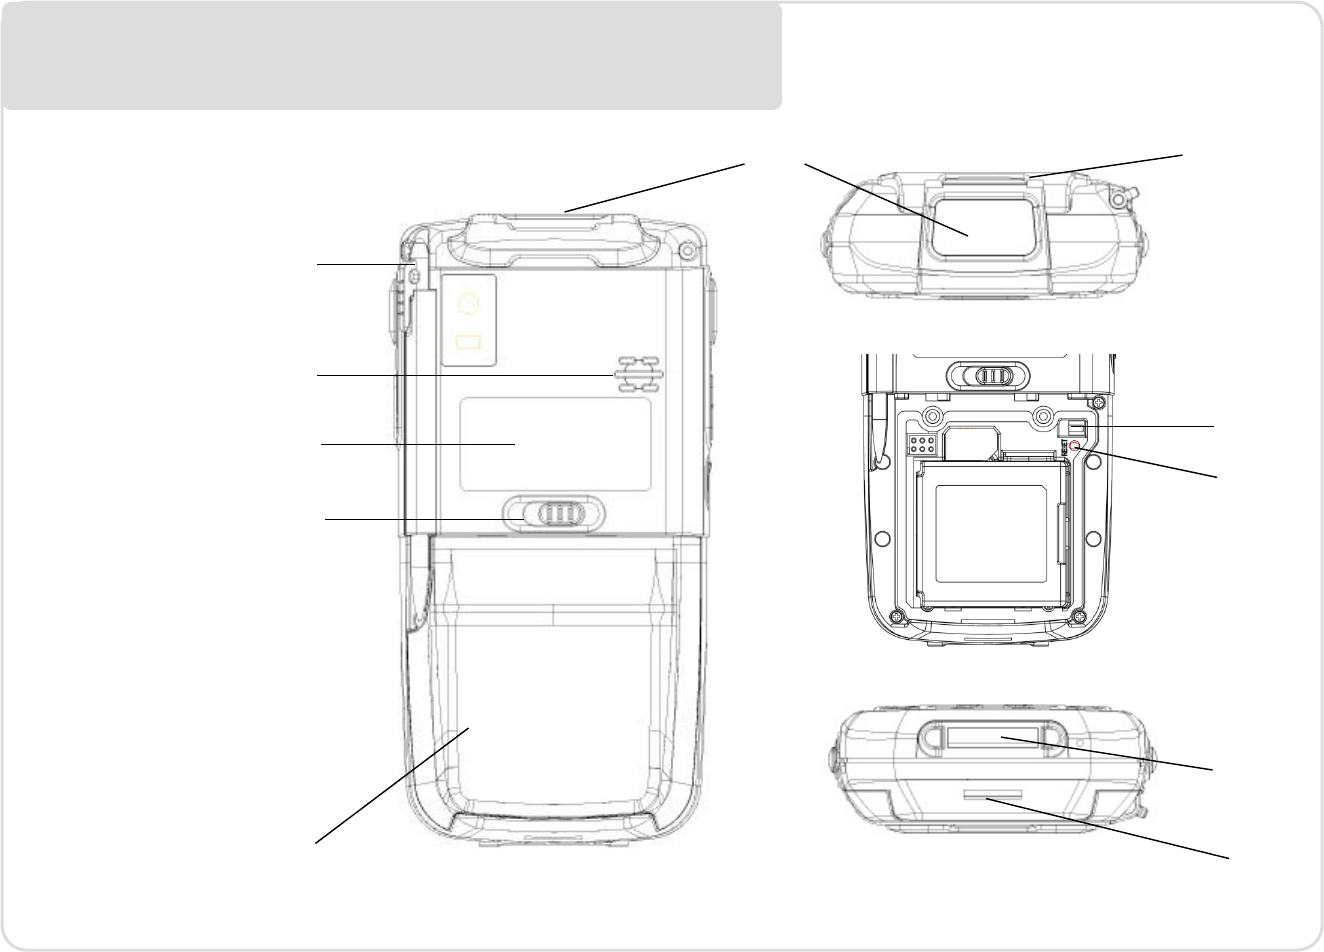
Features rear, top and bottom views
1. Data capture
window
2. Stylus
3. Speaker
4. Label recess
5. Battery cover latch
6. Battery cover
7. Handstrap clip
8. USB Connector
9. Handstrap bar
10. Reset Key
11. Battery cover
switch
6
5
4
3
2
17
8
9
10
11
Getting started installing card and battery
Installing MicroSD card
1. Remove battery if necessary
2. Insert MicroSD card into the card slot
3. Make sure the card connector (the golden contacts) should be at the front of
insert
34
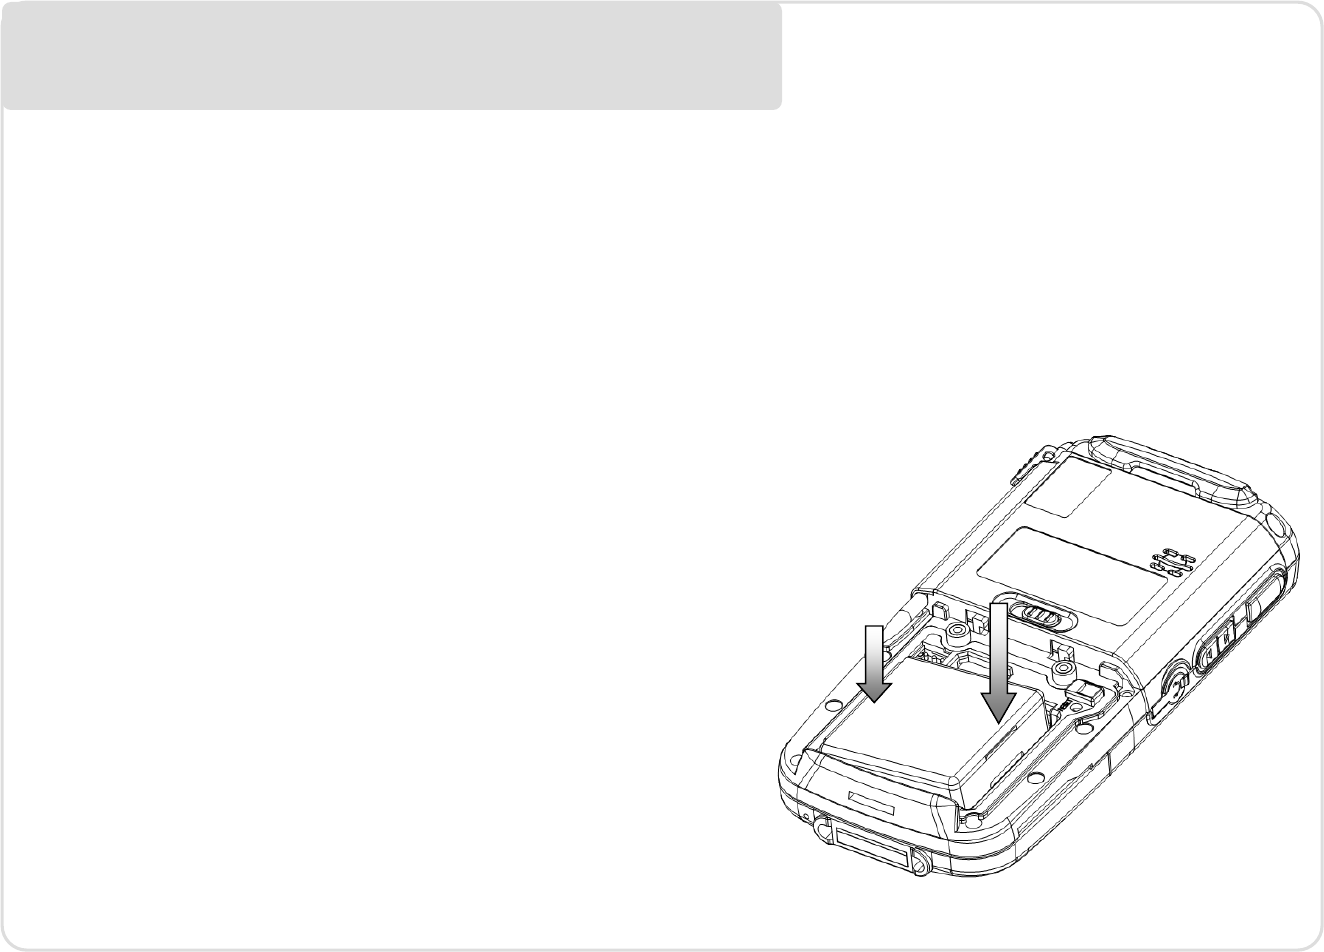
Installing battery
–If battery cover is installed on the device,
slide the battery latch to the left.
–The battery cover will lift up slightly, grasp
the battery cover and remove it
–Insert the battery, left side (with golden
contacts) first, into the battery compartment
–Press the battery down until the battery
fully rests on the bottom of battery
compartment
–Put the battery cover back, tab first, and
press down until the latch secure the
battery cover
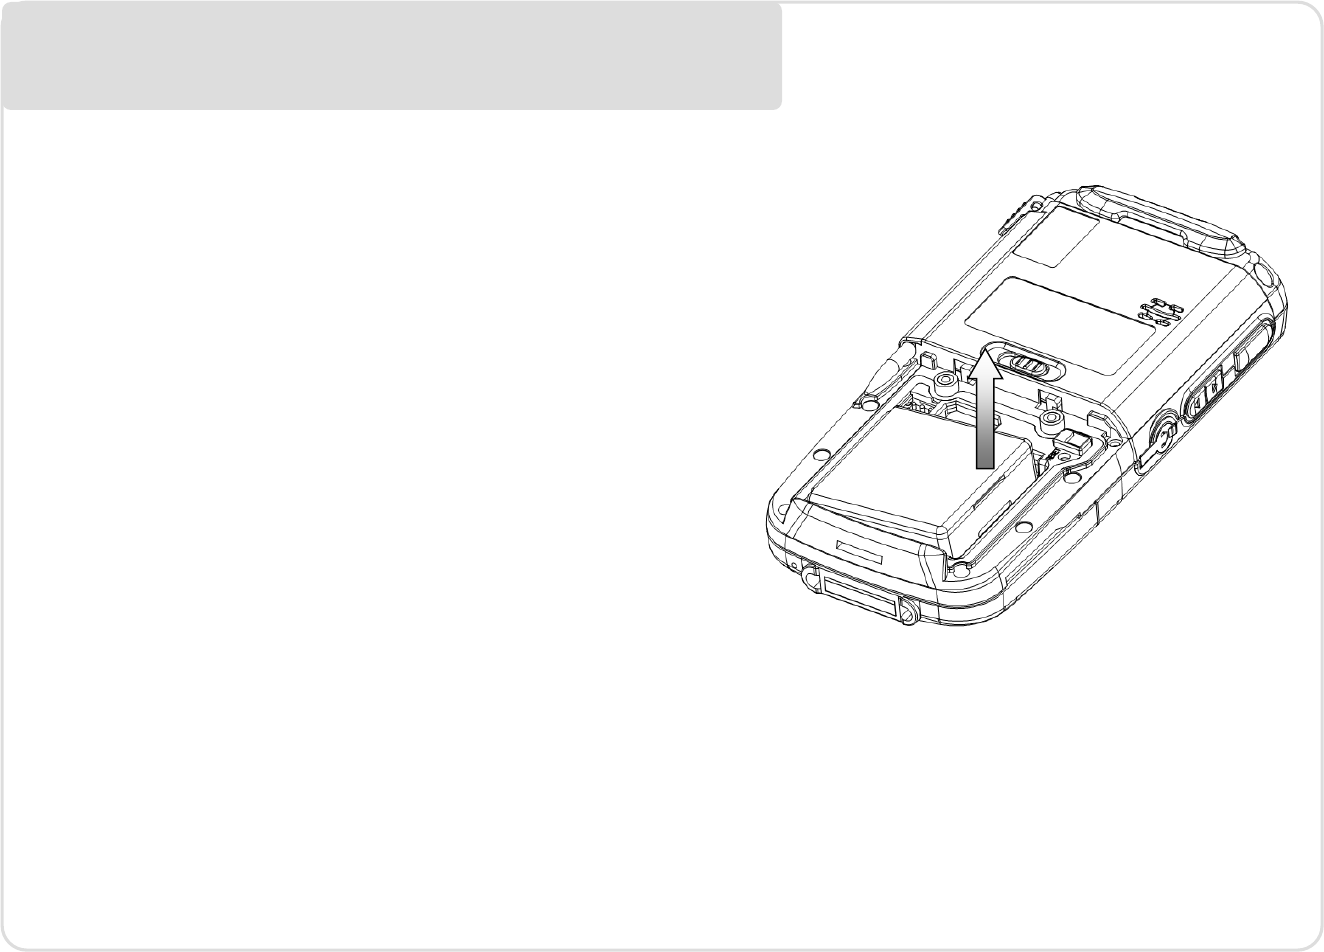
Removing battery
1. Slide the battery latch to the left.
2. The battery cover will lift up
slightly, grasp the battery cover
and remove it
3. Remove the battery, right side first,
from the battery compartmen
Getting started installing card and battery
3

Installing handstrap
1. Separate the velcro of the handstrap.
2. Feed the loose end of the extended handstrap through the handstrap clip
3. Wrap the handstrap around the clip and fasten together to close the strap
Calibrating screen
1. For turn on the device 1st time
2. Follow the instructions on the welcome utility screen
3. Tap 5 crosses as appeared on the screen to calibrate the touch screen
Getting started

Enabling WiFi
1. Tap Start Menu, then tap and hold the Settings
2. Select Network Connections
3. Tap and hold AR6K_SD1 icon, make sure it is Enable
4. Double click the Network icon on the status bar, pick the desired AP and
setup as the wireless AP properties as usual
Disabling WiFi
1. Tap Start Menu, then tap and hold the Settings
2. Select Network Connections
3. Tap and hold AR6K_SD1 icon, make sure it is Disable
Getting started Enabling & disabling WiFi

Enabling Bluetooth
1. Tap Start Menu, then tap and hold the Settings
2. Select Control Panel
3. Double click Bluetooth Device Properties icon
4. Pick the Tools menu and then select Turn on Bluetooth item
5. Select Search Device and carry out bluetooth device operations as usual
Disabling Bluetooth
1. Tap Start Menu, then tap and hold the Settings
2. Select Control Panel
3. Double click Bluetooth Device Properties icon
4. Pick the Tools menu and then select Turn off Bluetooth item
Getting started Enabling & disabling BT

Performing soft reset
1. Slide the battery latch to the left and grasp
the battery cover and remove it
2. Use a stylus to press the reset key and release
3. The device is reset
Performing hard reset
1. Slide the battery latch to the left and grasp
the battery cover and remove it
2. Press “2” (or “8” if you want to format the
NAND flash as well) on the numeric keypad
3. Keep pressing the key, use a stylus to press
the reset key and release
4. When the green LED is flashing, release key “2”
or “8”
5. Put back the battery cover and calibrate the
screen
Getting started Soft and hard reset
Reset key
Getting started Refreshing ROM
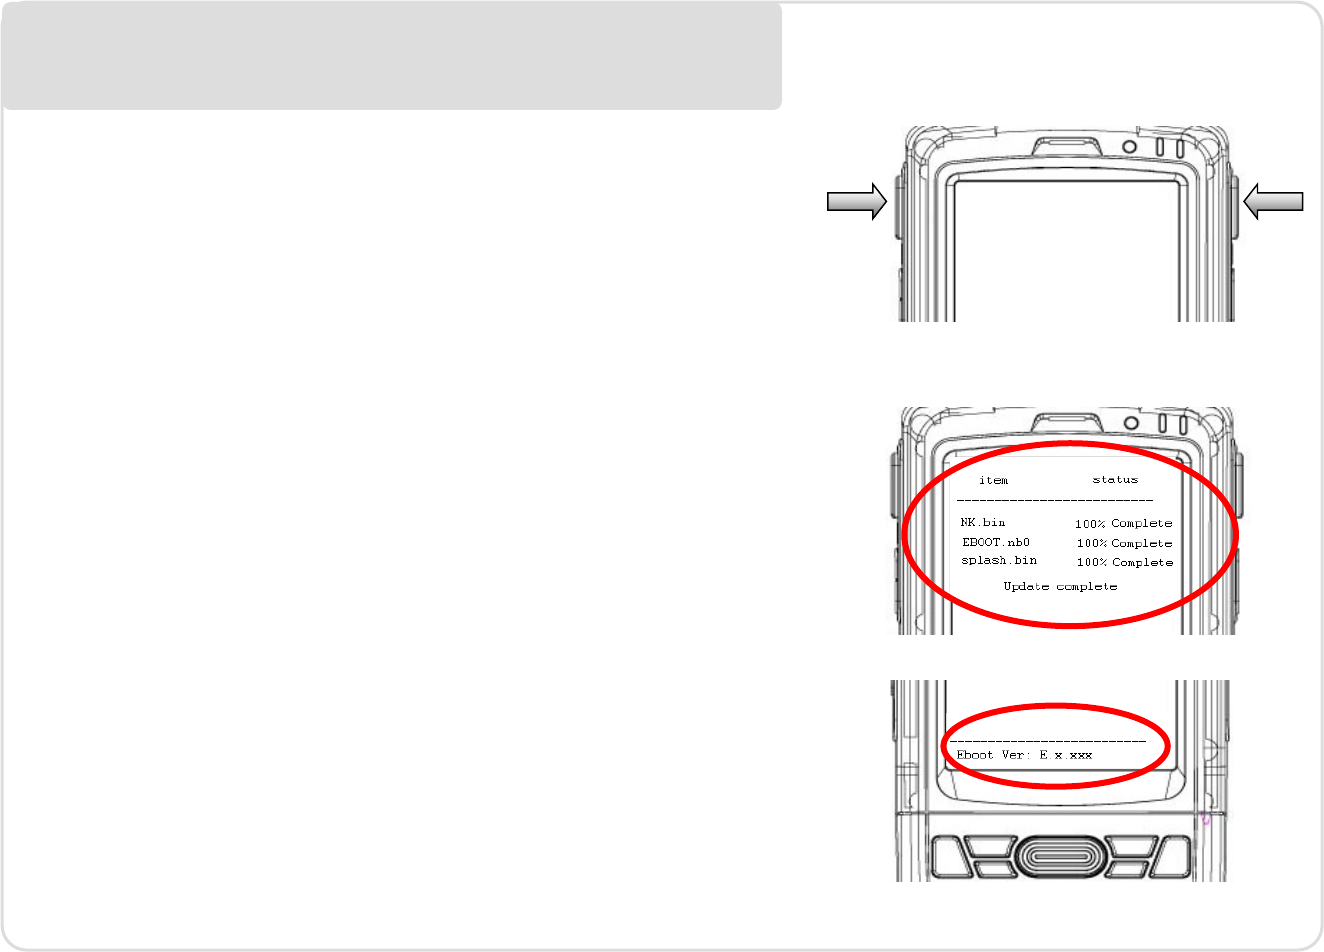
Refreshing LPT20 ROM
1. Copy NK.bin, EBOOT.nb0 and splash.bin
(optional) to the root directory of the microSD
card
2. Open the battery cover, remove the battery
3. Insert the microSD card
4. Press and hold the left and right side Scan /
Action button
5. Install the battery to the battery compartment
6. Continue to press and hold the left and right
side Scan / Action button until the Update
Screen appears
7. Once NK.bin, EBOOT.nb0 and splash.bin
(optional ) have 100% complete updated.
Remove the battery and microSD card from
the device.
8. Insert the battery to the battery compartment
again
9. Performing the hard reset with NFLASH
format
4 4
7
8
65o
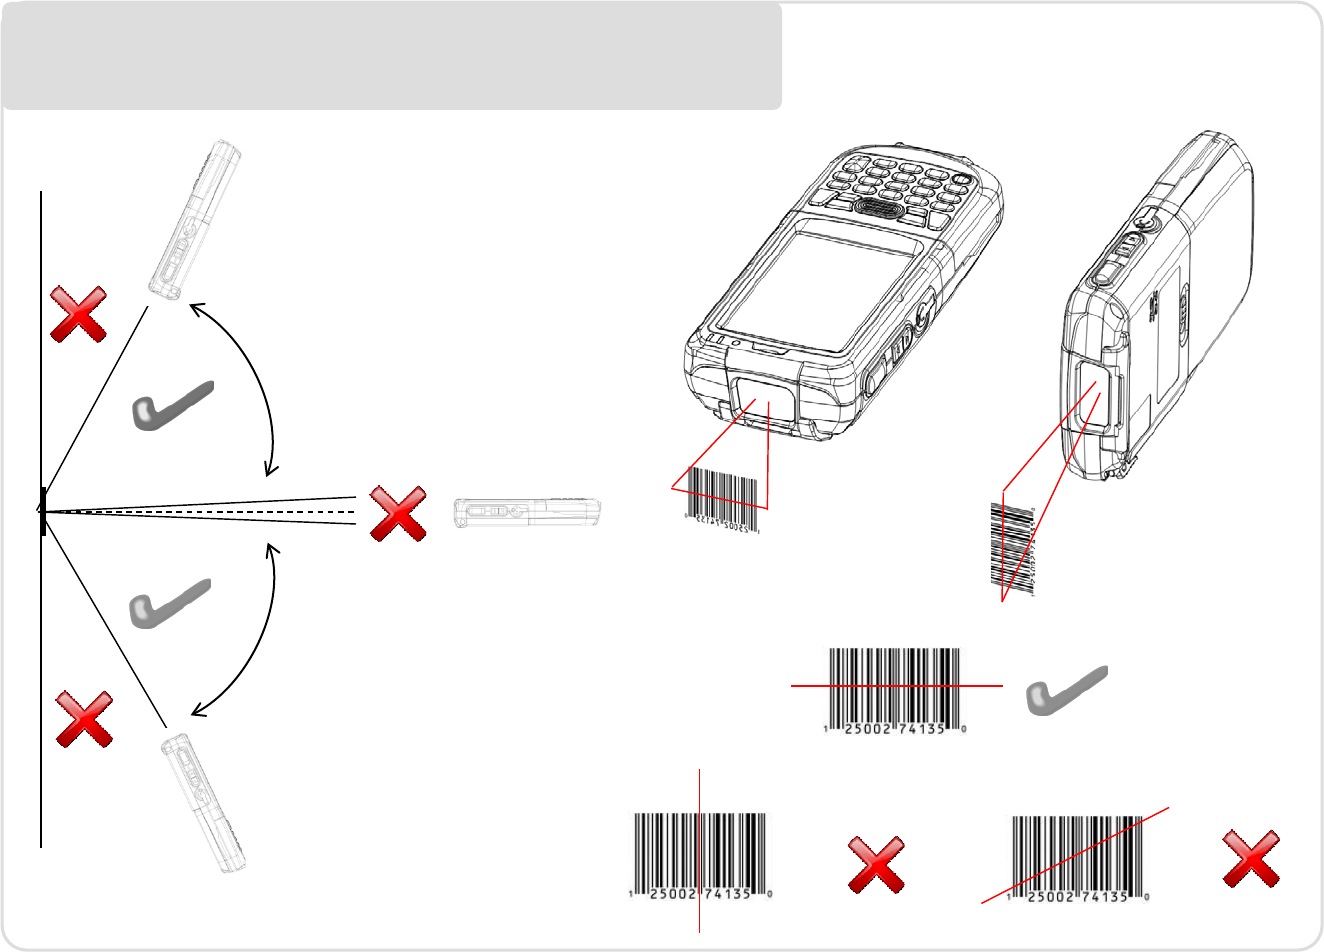
Getting started Capturing data
65o

Battery safety guidelines
1. Use manufacturer’s original battery and charger only. Any incompatible
battery or charger may result in in a fire, explosion, or other hazard.
2. Do not disassemble or open, crush, bend or deform, puncture, or shred the
battery
3. Do not short circuit a battery by allowing conductive materials to contact the
battery terminals.
4. Charge the mobile device, the battery and charger temperatures must be
between 0 ºC and +40 ºC
5. Do not immerse or expose the battery to water or other liquids.
6. Do not dispose of batteries in fire or place the battery into a microwave oven
or dryer.
7. If battery leakage is found, avoid the liquid to come in contact with the skin or
eyes. If contact has been made, rinse the affected area with water and seek
medical advice.
8. If you suspect damage to your equipment or battery, contact the
manufacturer for inspection.
9. Follow the local regulations to dispose or recycle the used re-chargeable
batteries.
Getting started Battery warning

CE Marking and European Economic Area (EEA)
Hereby, Portable Innovation Technology Ltd. declares that this product is in compliance with the
essential requirements and other relevant provisions of Directive, 1999/5/EC.
Radio Frequency Interference Requirements-FCC
Note: This equipment has been tested and found to comply with the limits for a Class B digital
device, pursuant to Part 15 of the FCC rules. These limits are designed to provide
reasonable protection against harmful interference in a residential installation. This
equipment generates, uses and can radiate radio frequency energy and, if not installed
and used in accordance with the instructions, may cause harmful interference to radio
communications. However there is no guarantee that interference will not occur in a
particular installation. If this equipment does cause harmful interference to radio or
television reception, which can be determined by turning the equipment off and on, the
user is encouraged to try to correct the interference by one or more of the following
measures:
• Reorient or relocate the receiving antenna
• Increase the separation between the equipment and receiver
• Connect the equipment into an outlet on a circuit different from that to which the
receiver is connected
• Consult the dealer or an experienced radio/TV technician for help.
Statement of Compliance

Changes or modifications to this unit not expressly approved by the party
responsible for compliance could void the user authority to operate the
equipment.
This device complies with Part 15 of the FCC Rules. Operation is subject to the
following two conditions: (1) this device may not cause harmful interference,
and (2) this device must accept any interference received, including
interference that may cause undesired operation.
The Equipment should be operated with minimum distance 1cm between the
radiator and user body.
Warning