Japan Radio JHS-180 AIS User Manual Operations Manual
Japan Radio Co Ltd. AIS Operations Manual
UserManual.wiki
>
Japan Radio
>
JHS 180 User Manual
Operations Manual
Navigation menu
Upload a User Manual
Namespaces
Wiki Guide
HTML
PDF
Info
Views
User Manual
Discussion / Help
Navigation
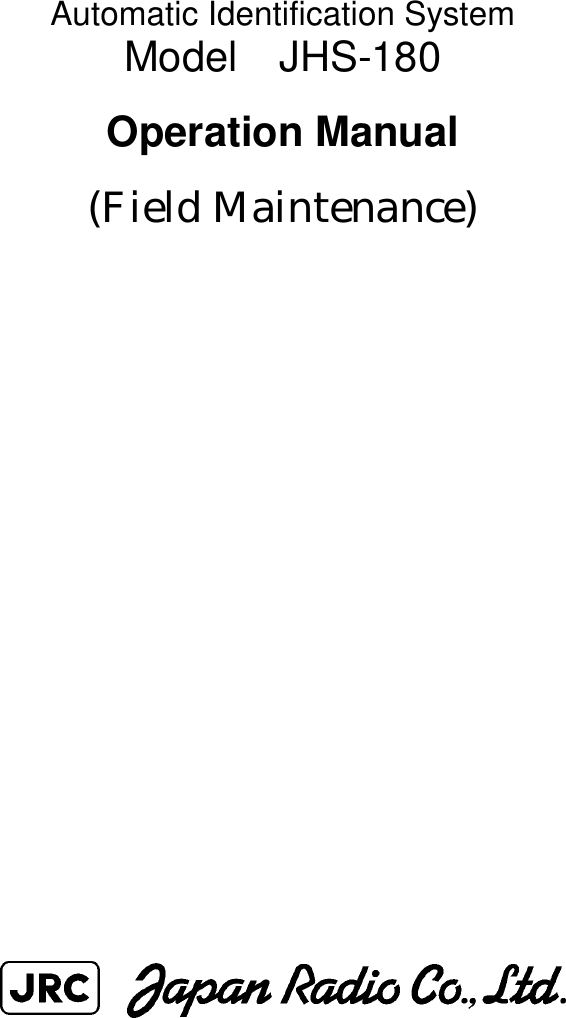
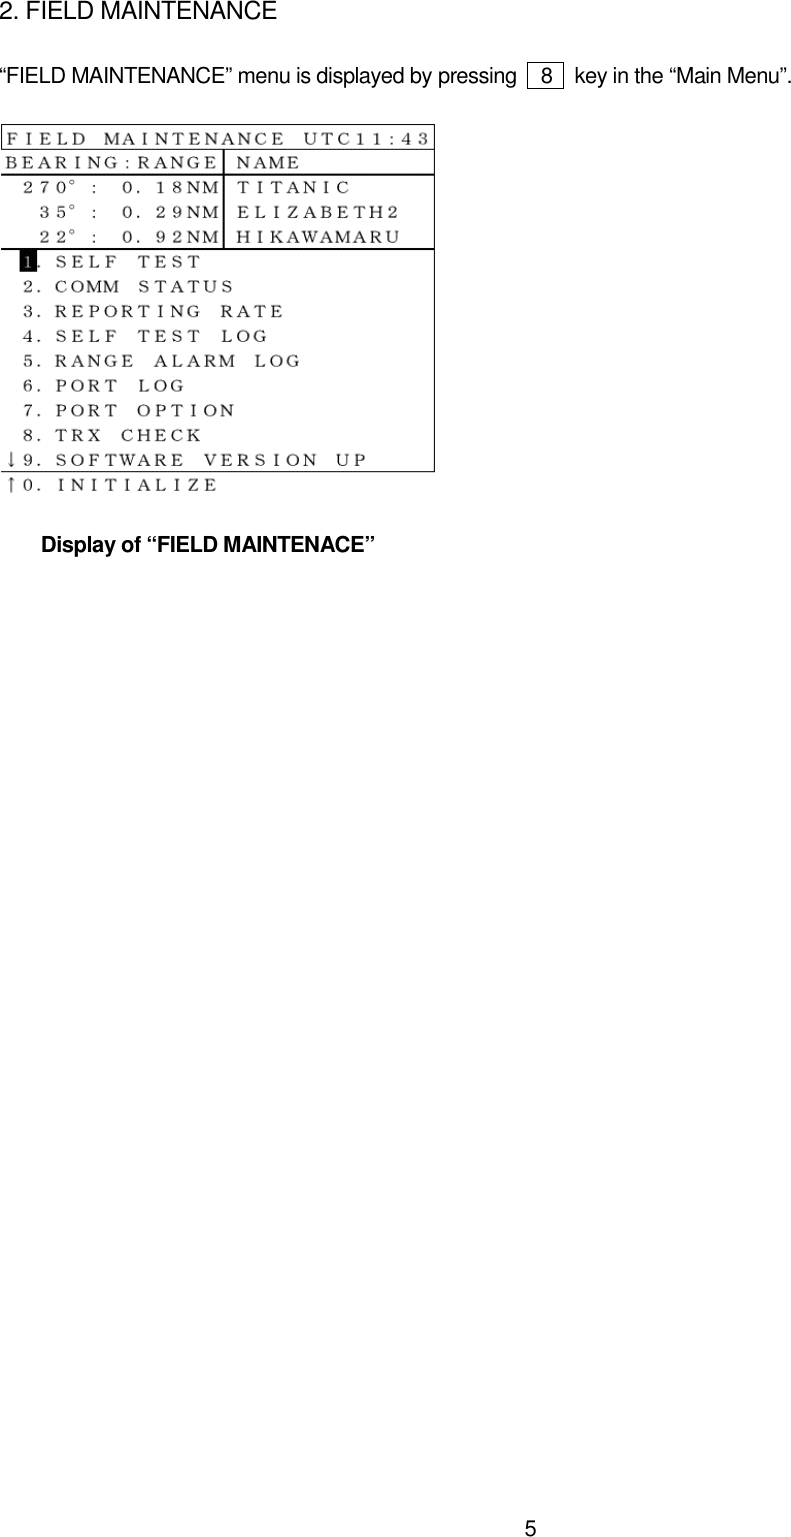
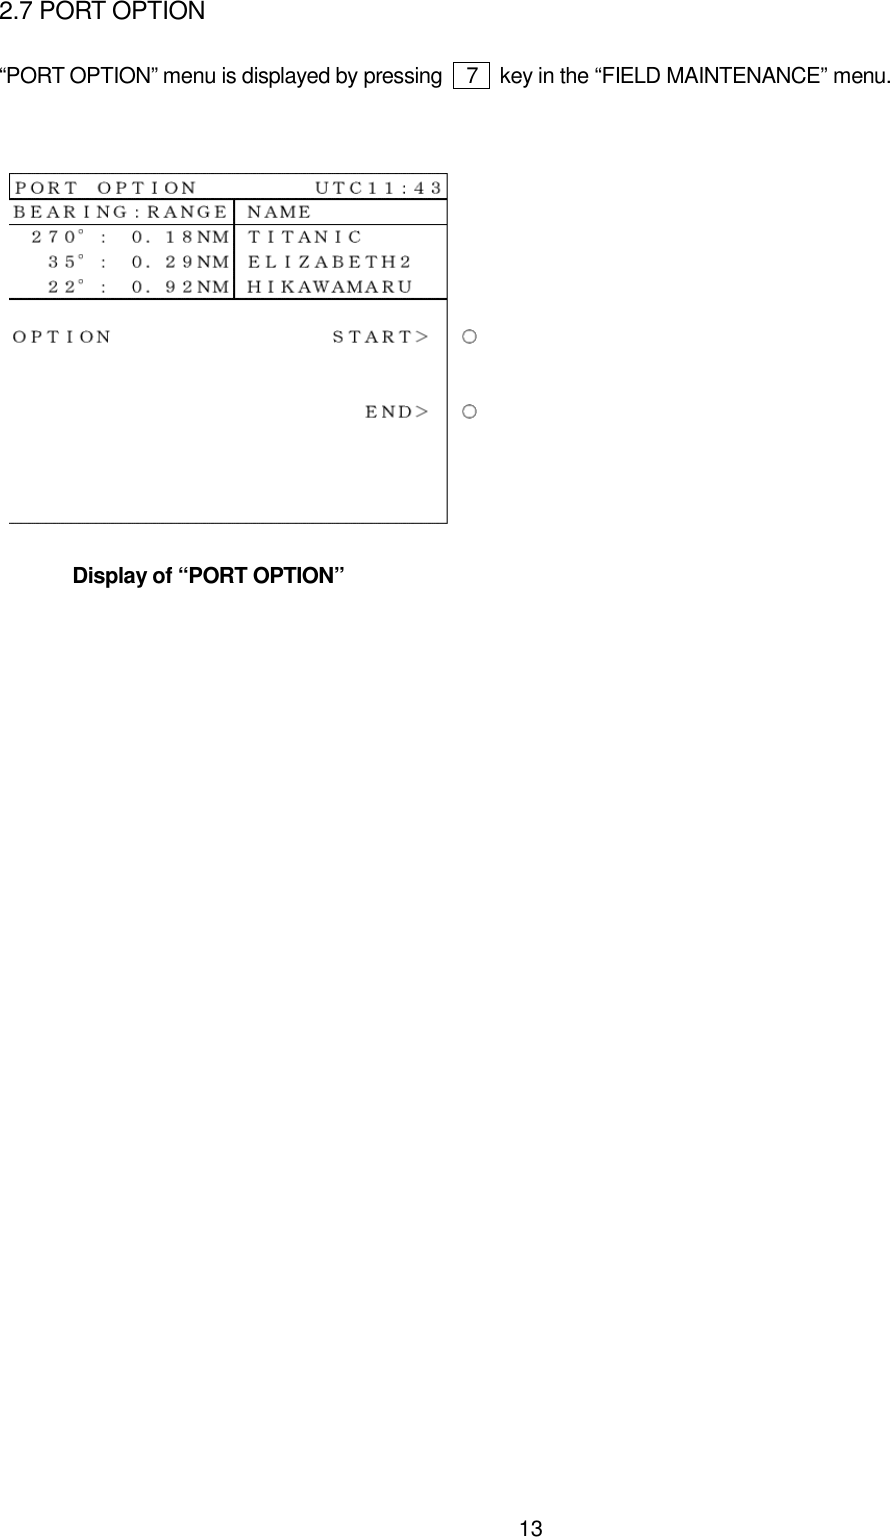
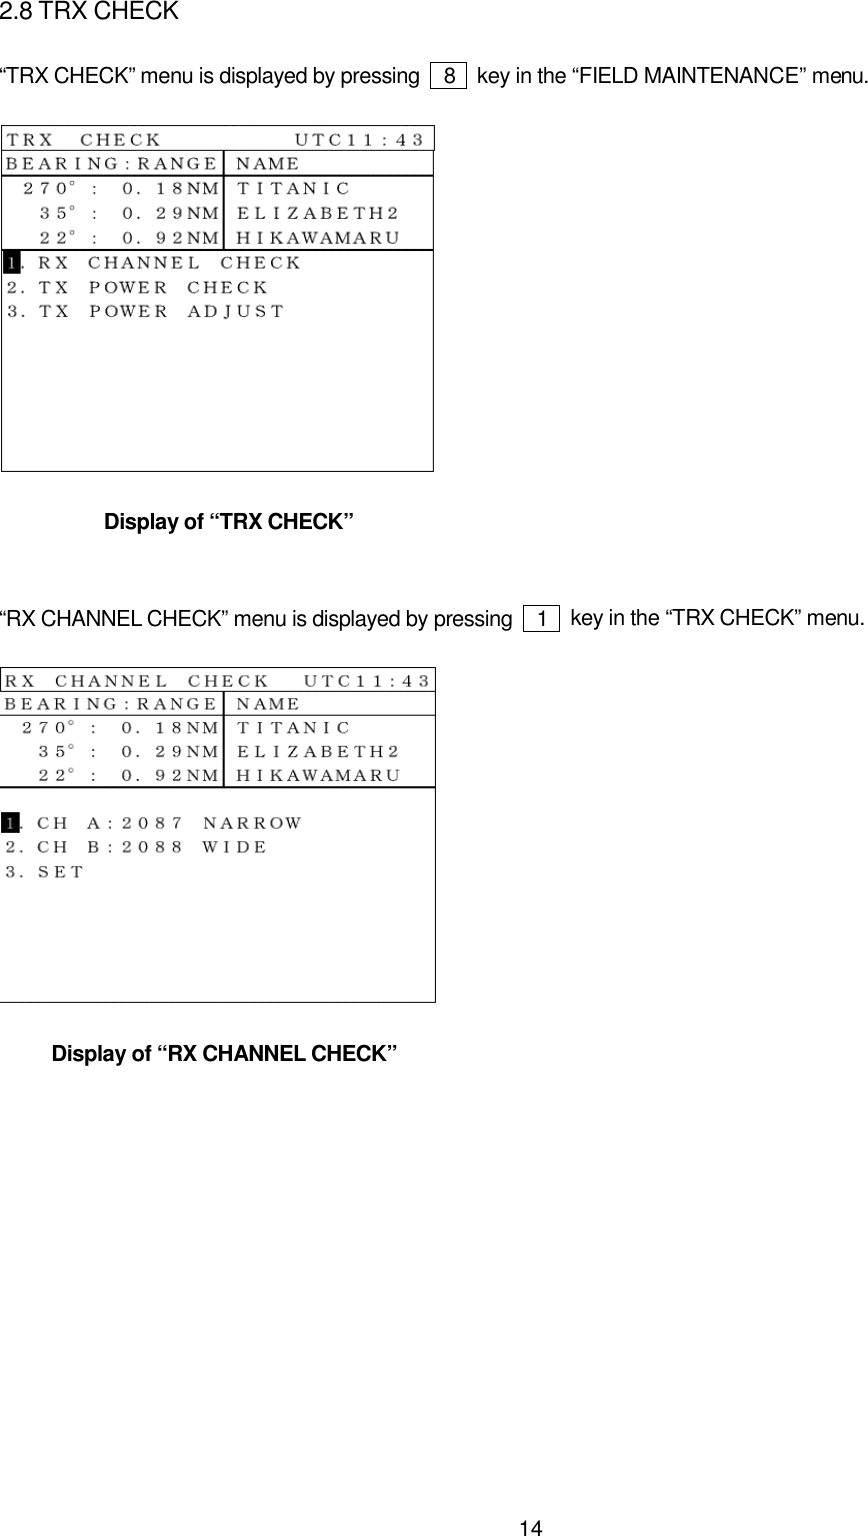
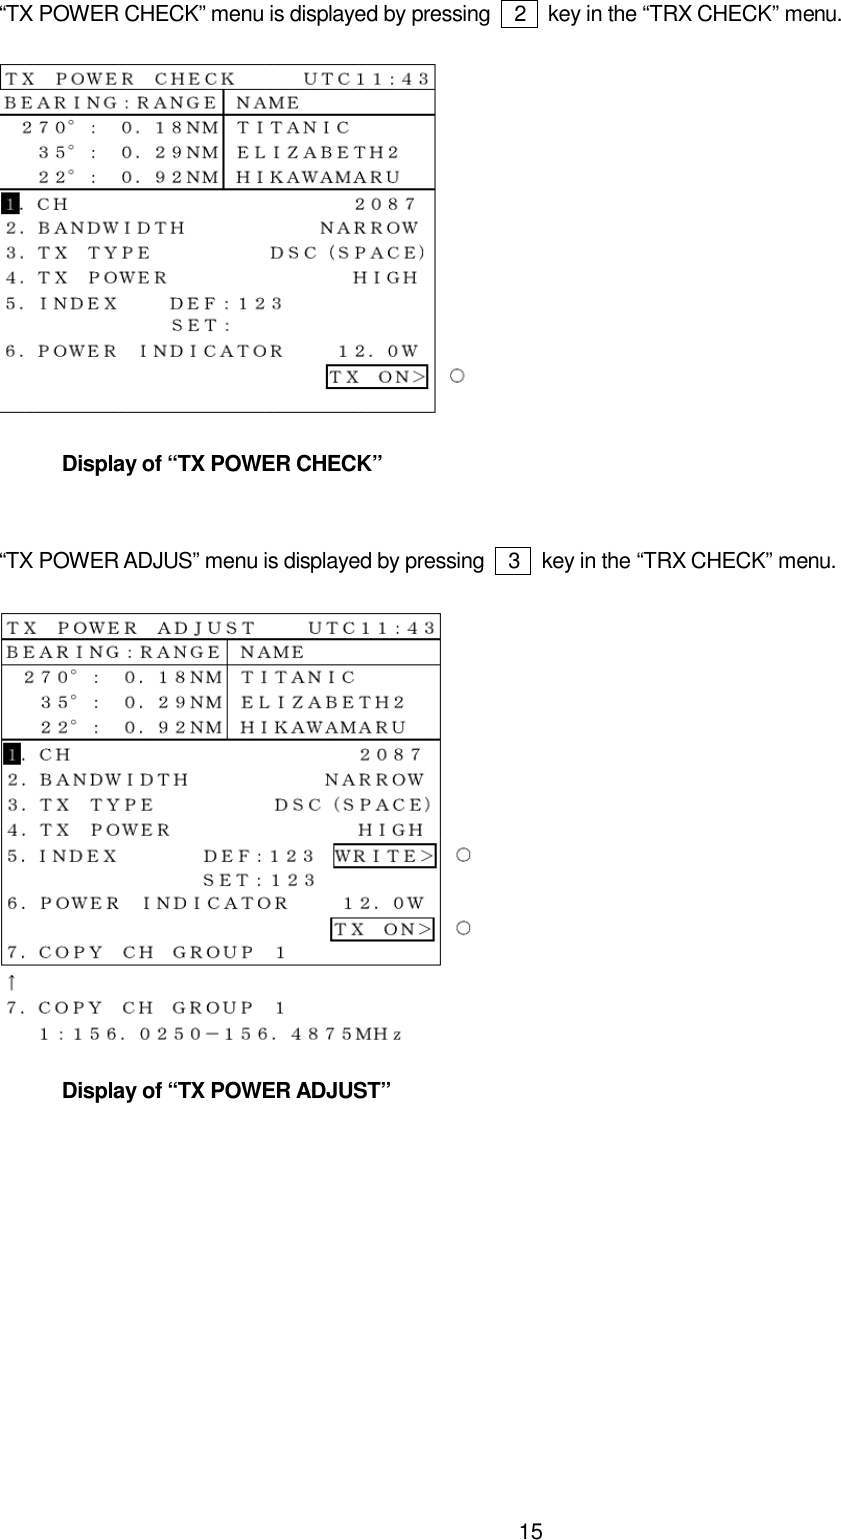
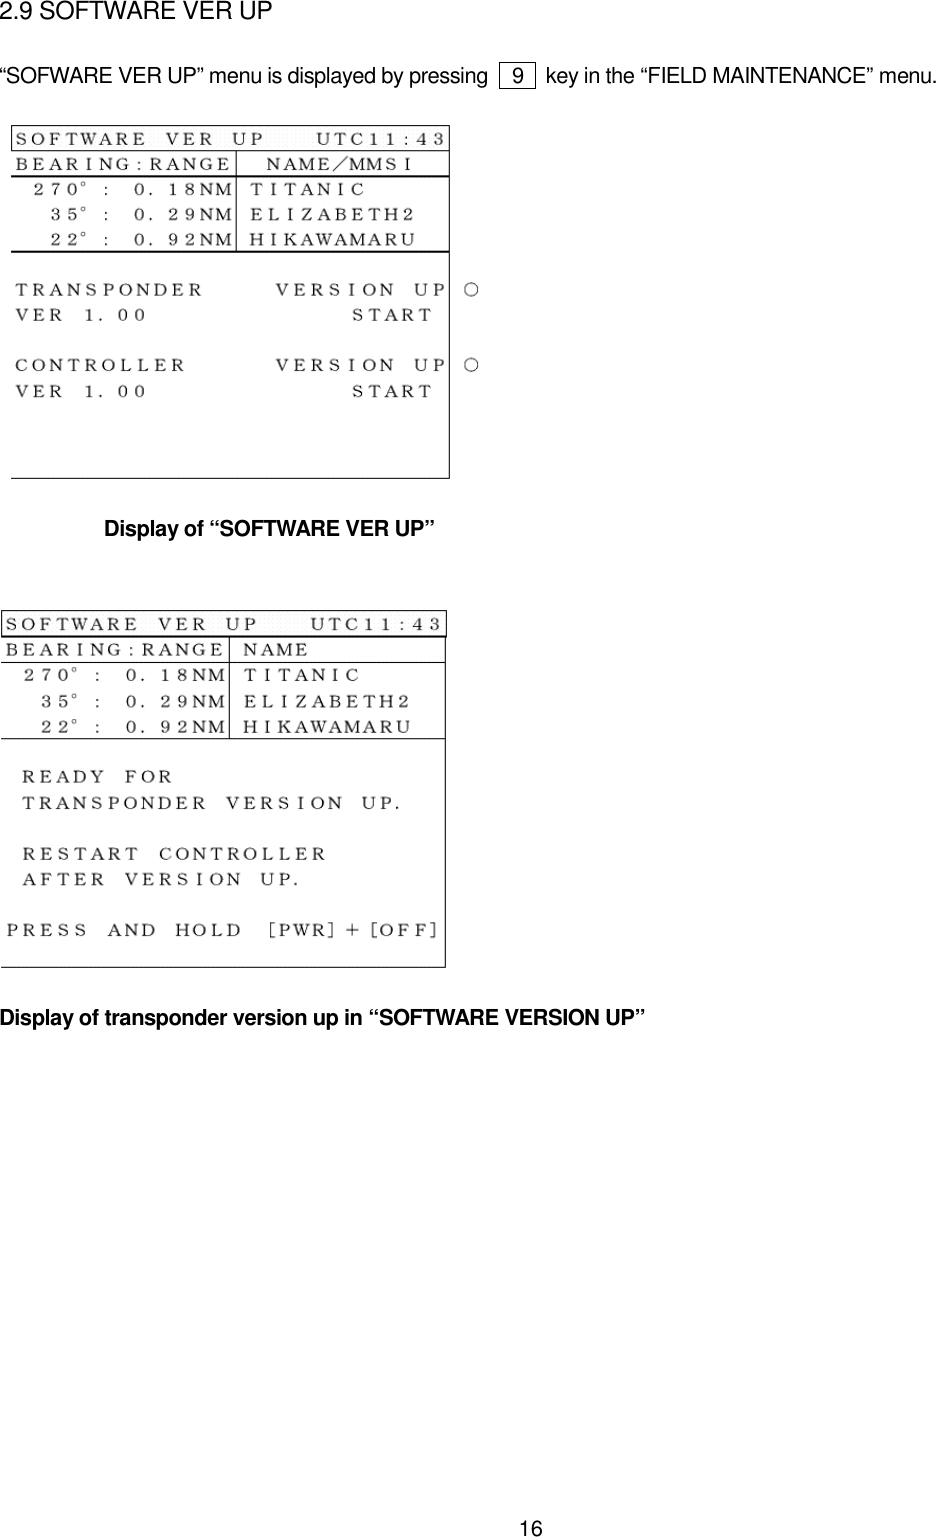
![31.Field Maintenance Mode1.1 Turning On the power for Field Maintenance modeJHS-180 can operate “Field Maintenance Mode” for installation and maintenance.To operate “Field Maintenance Mode”, JHS-180 needs special operation in turning the power on.The special operation is; When turn the power on, pressing and holding [PWR] and [MENU] until starting display “AIS CONTROLLER NOW LOADING ---” appears.In “Field Maintenance Mode” operation,- The transponder doesn’t operate automatically TDMA transmission.- Two menu item are added to the “Main Menu”. “Main Menu” in Field Maintenance Mode operation](https://usermanual.wiki/Japan-Radio/JHS-180/User-Guide-310166-Page-3.png)
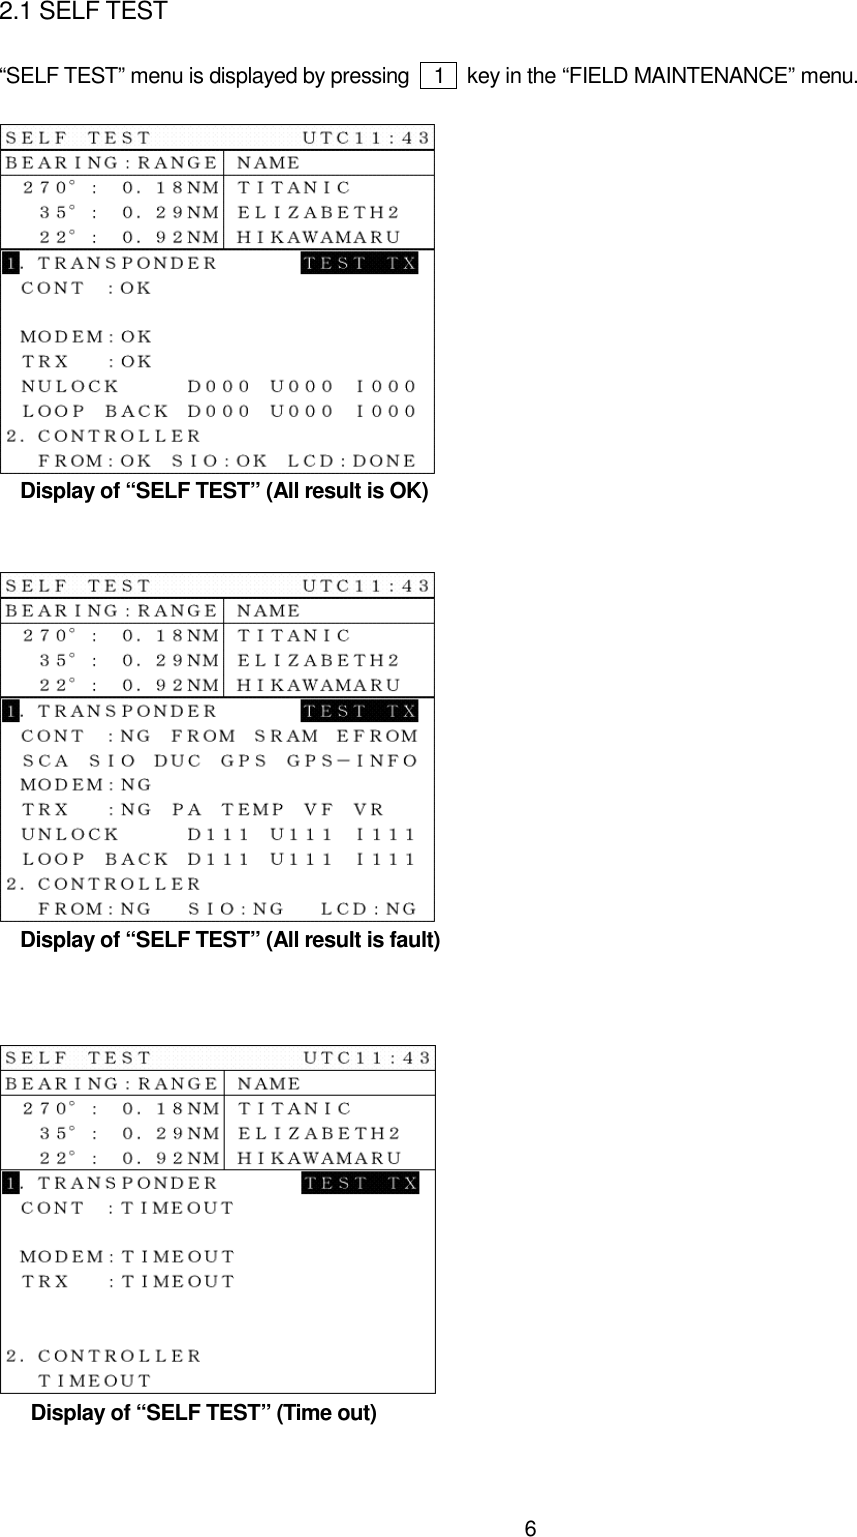
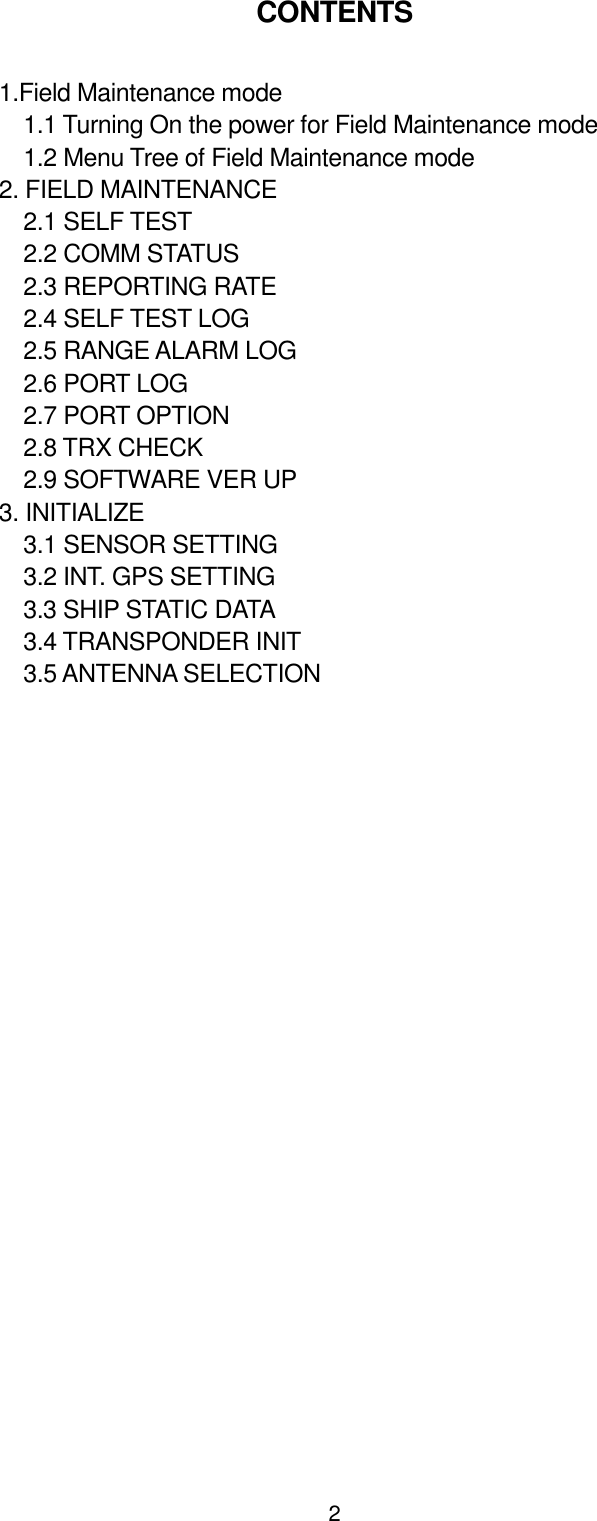
![1.2 Menu Tree of Field Maintenance mode (Power On:[MENU]+[PWR])Select(1) key(Power On)[▲]/[▼],[ENT]Other Ships List[0]-[9] or [▲]/[▼],[ENT] [0]-[9] or [▲]/[▼],[ENT] [0]-[9] or [▲]/[▼],[ENT][MENU][MENU]key3.MAIN MENU 1.MESSAGE 1.EDIT AND TX Destination addressMessage typeMessage editingTransmission2.TX TRAY Transmitted Message reading3.RX TRAY Received Message reading4.INTERROGATION Address,Req.Info., Tx and Ack5.LONG RANGE Received Long Range Message2.DESTINATION 1.DESTINATION2.WAYPOINT TEXT3.ETA4.WAYPOINT3.NAVIGATION 1.NAVIGATIONAL STATUS2.PERSONS ON-BOARD3.TYPE OF SHIP4.CARGO TYPE5.DRAUGHT6.HEIGHT OVER KEEL4.ALARM SETTING 1.RANGE2.LOST TARGET5.GROUP SHIP Registration, Deletion6.SET UP 1.PASSWORD Password changing2.CH MANAGEMENT3.OWN SHIP DATA4.LONG RANGE RESPONSE5.CONTRAST6.NUMBER OF RETRIES7.MAINTENANCE 1.TRX CONDITION2.AIS ALARM3.SENSOR STATUSUser Menu 4.POWER ON/OFF LOG5.TX ON/OFF LOG6.SOFTWARE VERSION8.FIELD MAINTENANCE 1.SELF TEST2.COMM STATUSField Maintenance Menu 3.REPORTING RATE4.SELF TEST LOG5.RANGE ALARM LOG6.PORT LOG Each port sentence log7.PORT OPTION8.TRX ADJUST9.SOFTWARE VERSION UP Transponder version up, Controller version up0.CONTROLLER INITIALIZE9.INITIALIZE 1.SENSOR SETTING 1.SENSOR1 (Sentence Select, Baudrate,Parity bit) 2.SENSOR2 (Sentence Select, Baudrate,Parity bit)3.SENSOR3 (Sentence Select, Baudrate,Parity bit)4.SENSOR4 (Sentence Select, Baudrate,Parity bit)5.SENSOR5 (Sentence Select, Baudrate,Parity bit)2.INTERNAL GPS SETTING 1.INT. GPS POSITION2.ANTENNA HEIGHT3.ROUGHLY POSITION4.UTC5.TIME DIFFERENCE3.SHIP STATIC DATA SETTING 1.SHIP NAME2.MMSI NUMBER3.IMO NUMBER4.CALL SIGN5.GPS ANT. POSITION6.SENSOR TYPE4.TRANSPONDER INITIALIZE5.ANTENNA SELECTIONOther Ship's detail Information](https://usermanual.wiki/Japan-Radio/JHS-180/User-Guide-310166-Page-4.png)