Johnson Controls Interiors 62932 Automotive Electronics Infotainment Head Unit with Bluetooth and WLAN User Manual Mazda3 8CX9 EA 13F Edition1 indb
Johnson Controls Interiors L.L.C. Automotive Electronics Infotainment Head Unit with Bluetooth and WLAN Mazda3 8CX9 EA 13F Edition1 indb
Contents
- 1. User guide part1
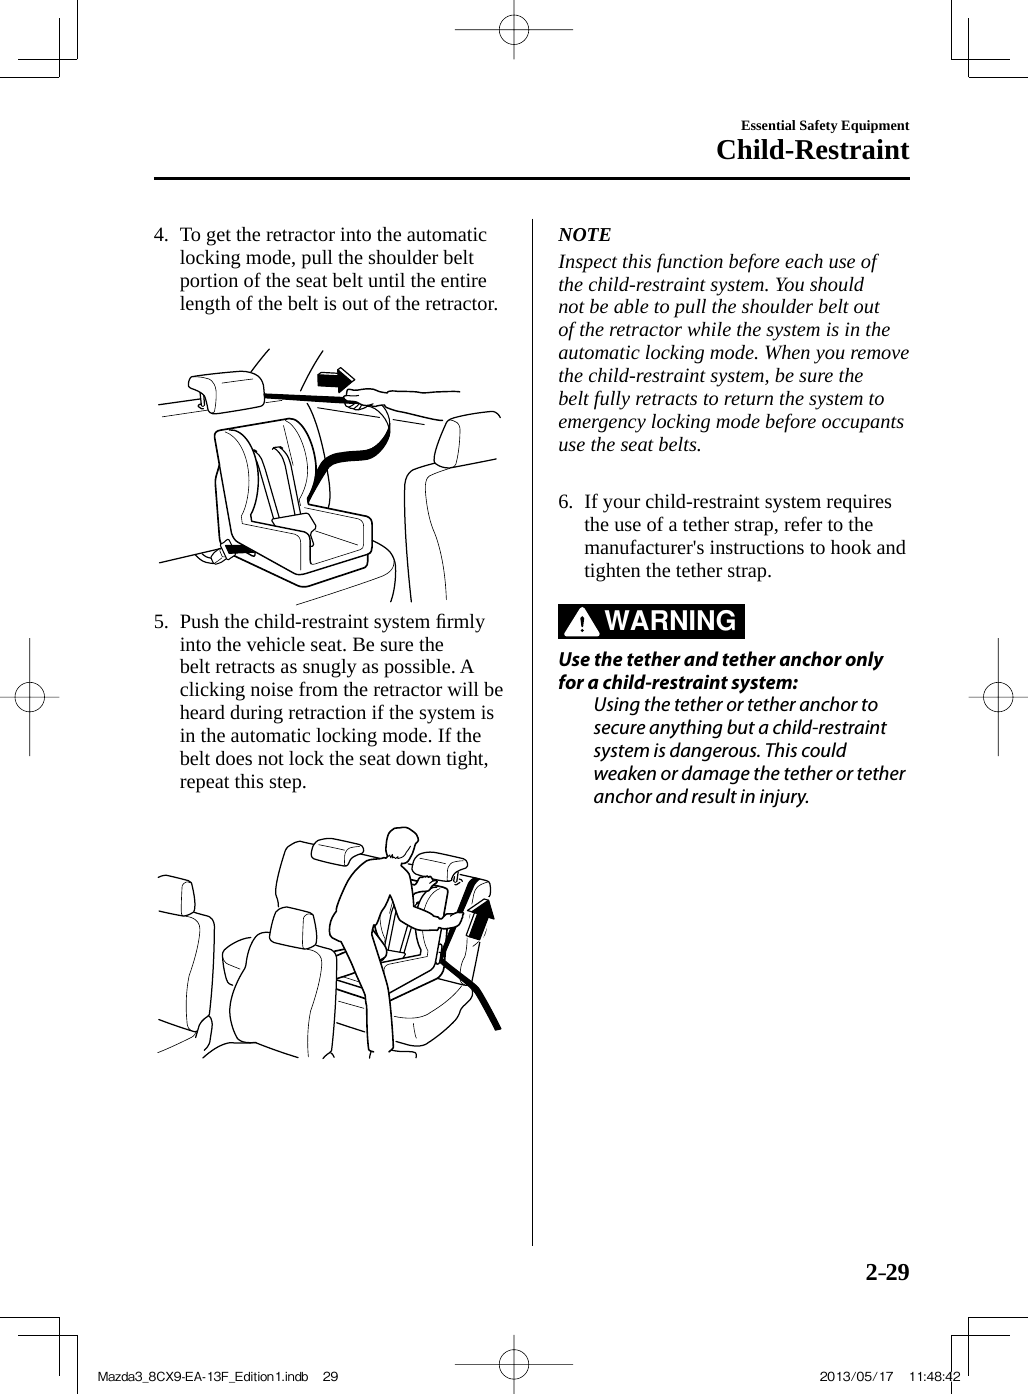
- 2. User guide part2
- 3. User guide part3
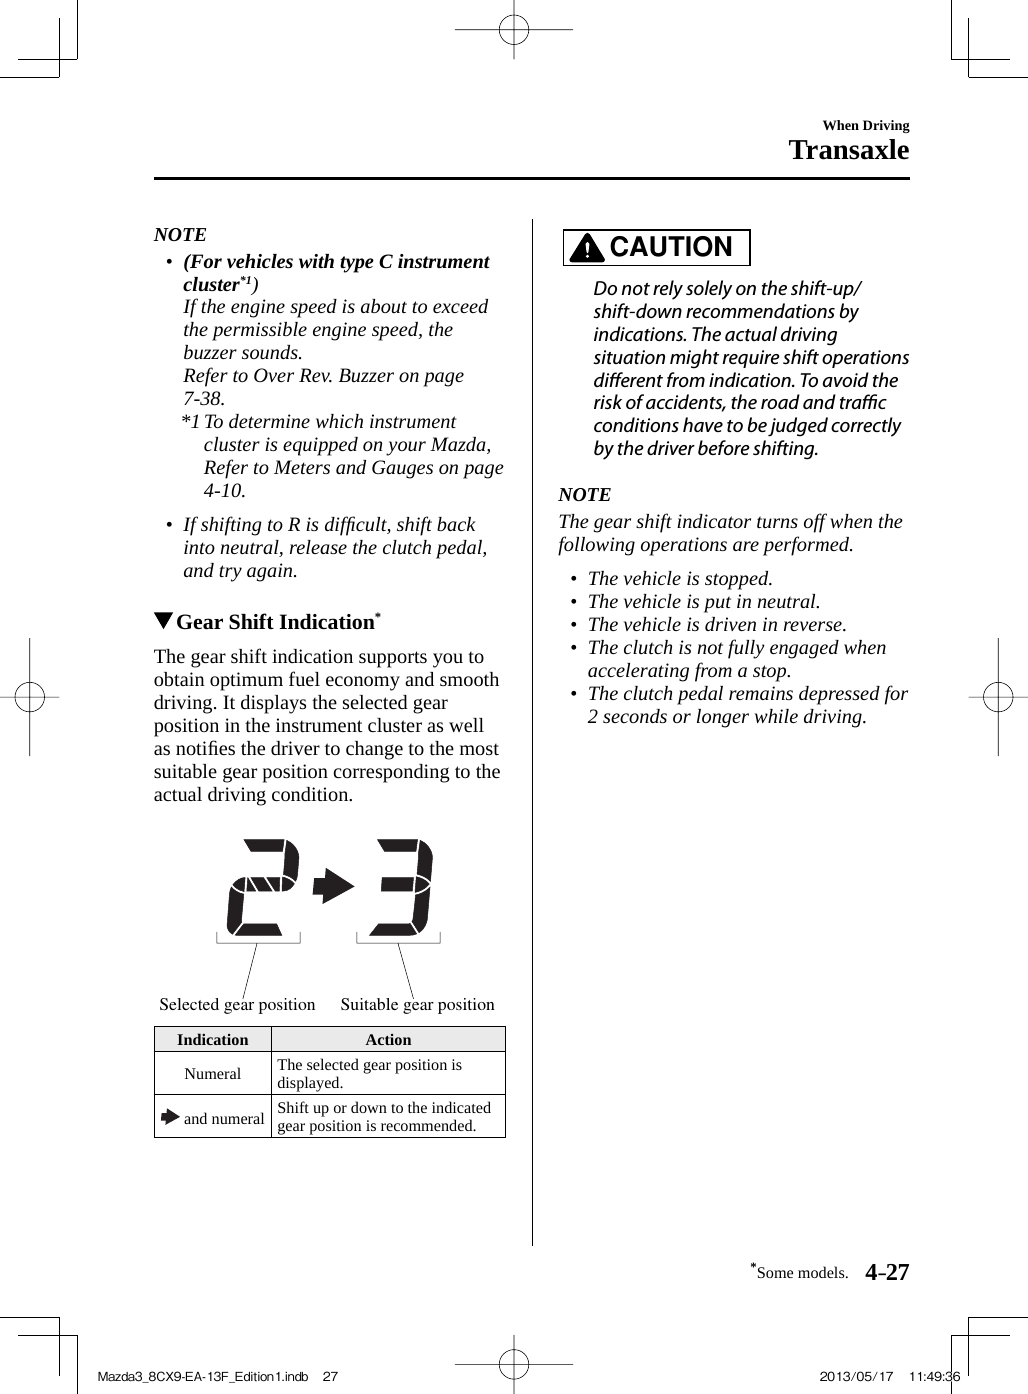
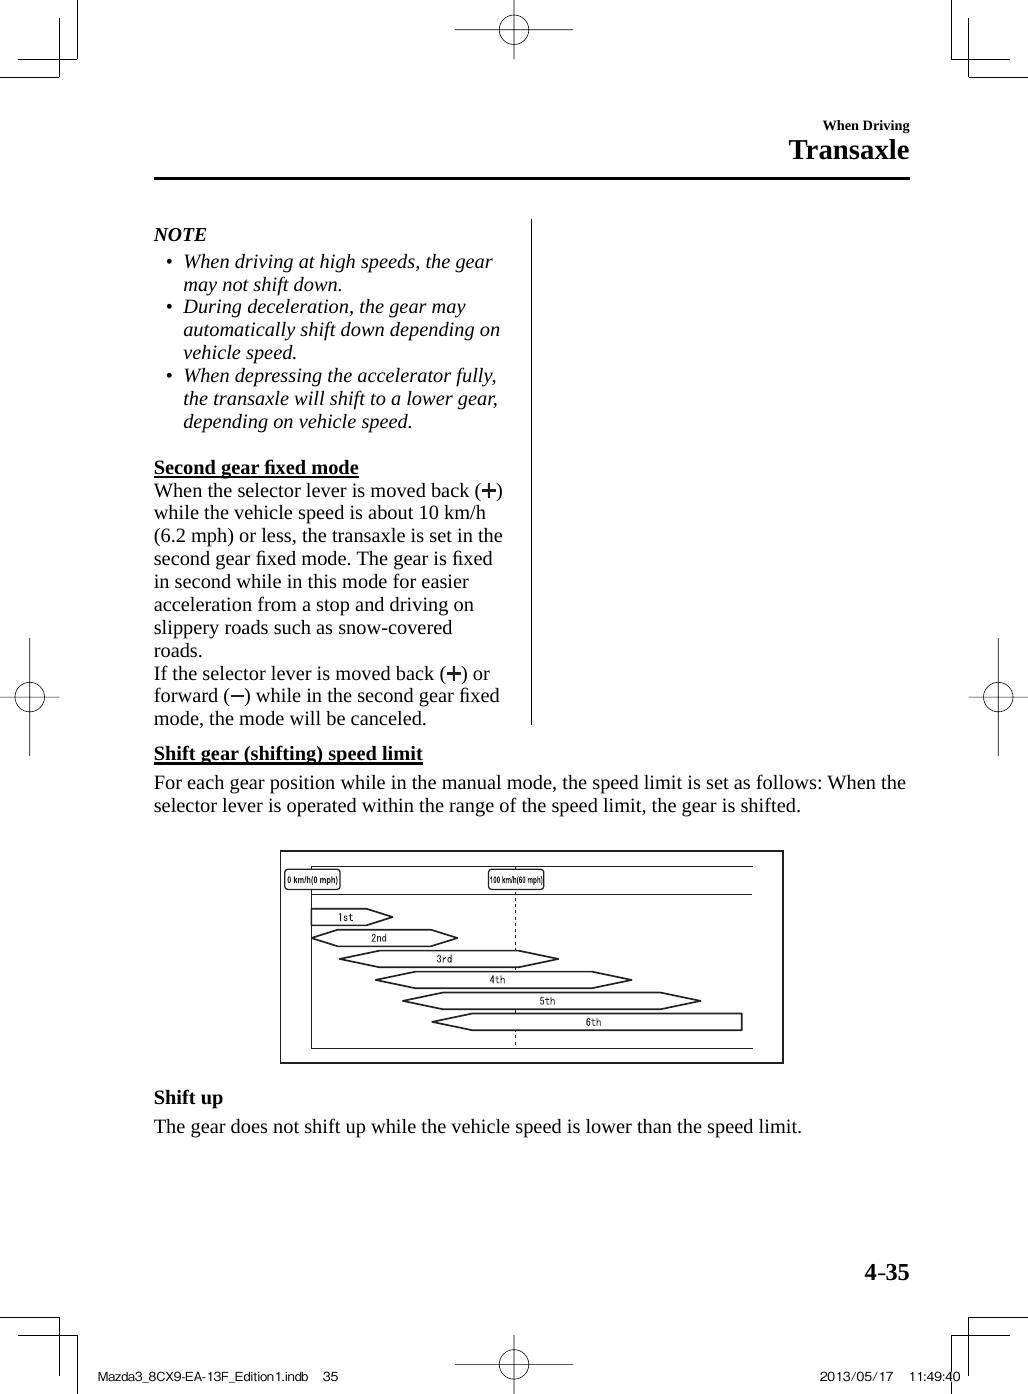
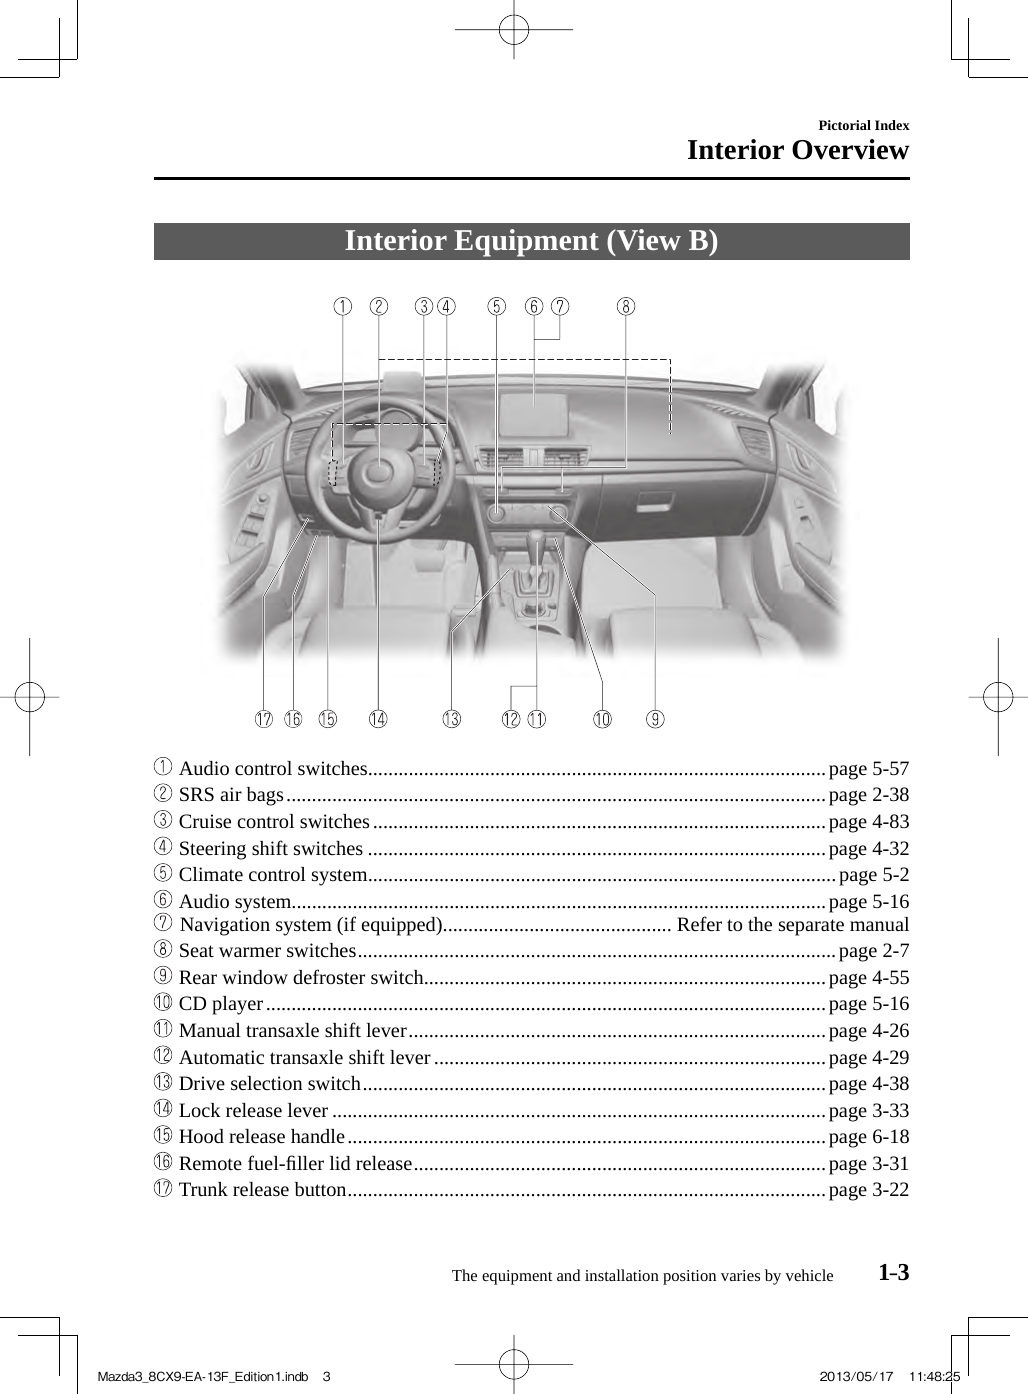
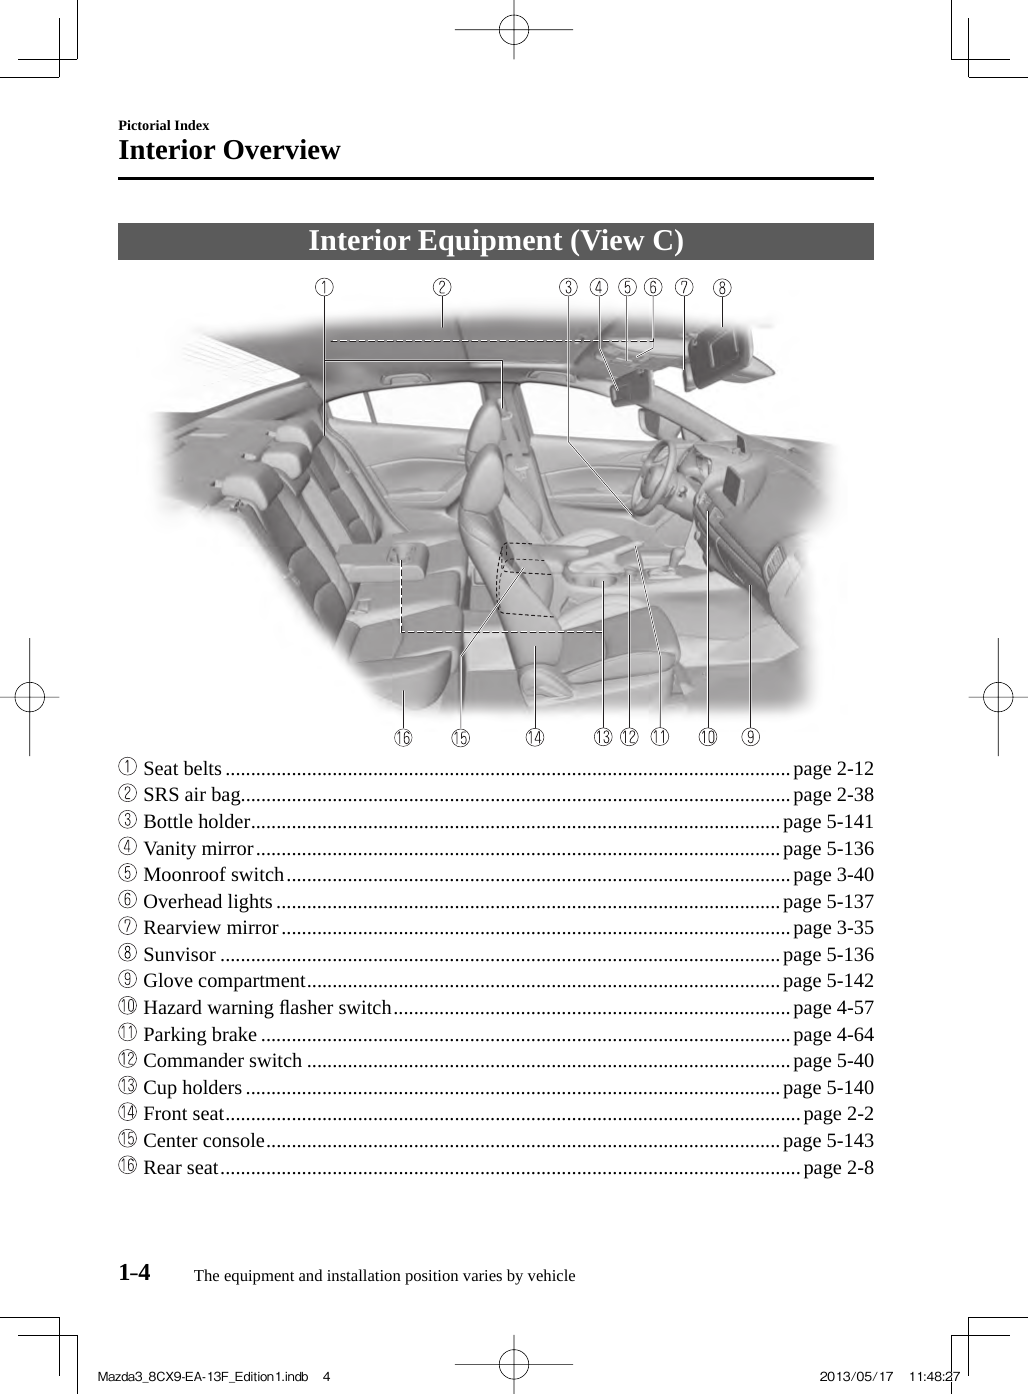
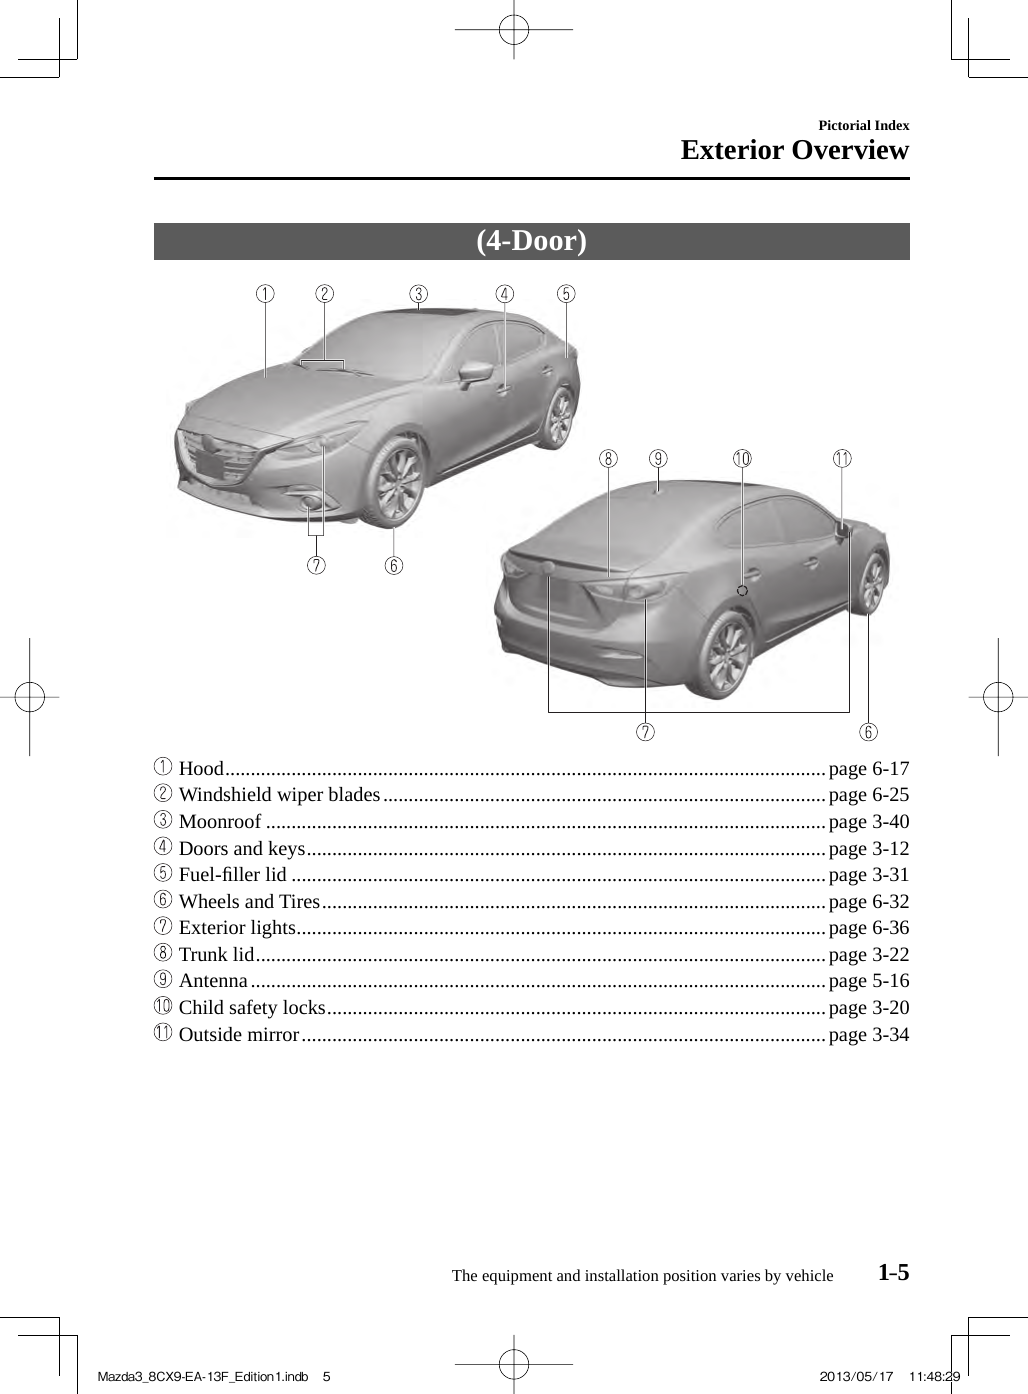
User guide part1

![A Word to Mazda Owners Thank you for choosing a Mazda. We at Mazda design and build vehicles with complete customer satisfaction in mind. To help ensure enjoyable and trouble-free operation of your Mazda, read this manual carefully and follow its recommendations. An Authorized Mazda Dealer knows your vehicle best. So when maintenance or service is necessary, that's the place to go. Our nationwide network of Mazda professionals is dedicated to providing you with the best possible service. We assure you that all of us at Mazda have an ongoing interest in your motoring pleasure and in your full satisfaction with your Mazda product. Mazda Motor Corporation HIROSHIMA, JAPAN Important Notes About This Manual Keep this manual in the glove box as a handy reference for the safe and enjoyable use of your Mazda. Should you resell the vehicle, leave this manual with it for the next owner. All specifi cations and descriptions are accurate at the time of printing. Because improvement is a constant goal at Mazda, we reserve the right to make changes in specifi cations at any time without notice and without obligation. Air Conditioning and the Environment Your Mazda's genuine air conditioner is fi lled with HFC134a (R134a), a refrigerant that has been found not to damage the earth's ozone layer. If the air conditioner does not operate properly, consult an Authorized Mazda Dealer. Perchlorate Certain components of this vehicle such as [air bag modules, seat belt pretensioners, lithium batteries,…] may contain Perchlorate Material-- Special handling may apply for service or vehicle end of life disposal. See www.dtsc.ca.gov/hazardouswaste/perchlorate. Please be aware that this manual applies to all models, equipment and options. As a result, you may fi nd some explanations for equipment not installed on your vehicle. ©2013 Mazda Motor Corporation Printed in Japan June 2013 (Print1)Mazda3_8CX9-EA-13F_Edition1.indb 3Mazda3_8CX9-EA-13F_Edition1.indb 3 2013/05/17 11:48:202013/05/17 11:48:20](https://usermanual.wiki/Johnson-Controls-Interiors/62932.User-guide-part1/User-Guide-2017092-Page-3.png)


![3–28Before DrivingFuel and Emission Fuel and Engine Exhaust Precautions Fuel Requirements Vehicles with catalytic converters or oxygen sensors must use ONLY UNLEADED FUEL, which will reduce exhaust emissions and keep spark plug fouling to a minimum. This vehicle will perform best with fuel listed in the table. Fuel Octane Rating * (Anti-knock index) Regular unleaded fuel 87 [(R M)/2 method] or above (91 RON or above) * U.S. federal law requires that octane ratings be posted on gasoline station pumps. Fuel with a rating lower than 87 octane (91 RON) could cause the emission control system to lose effectiveness. It could also cause engine knocking and serious engine damage. CAUTION USE ONLY UNLEADED FUEL. Leaded fuel is harmful to the catalytic converter and oxygen sensors and will lead to deterioration of the emission control system and or failures. This vehicle can only use oxygenated fuels containing no more than 10 % ethanol by volume. Damage to the vehicle may occur when ethanol exceeds this recommendation, or if the gasoline contains any methanol. Stop using gasohol of any kind if your vehicle engine is performing poorly. Never add fuel system additives, otherwise the emission control system could be damaged. Consult an Authorized Mazda Dealer for details. Gasoline blended with oxygenates such as alcohol or ether compounds are generally referred to as oxygenated fuels. The common gasoline blend that can be used with your vehicle is ethanol blended at no more than 10 %. Gasoline containing alcohol, such as ethanol or methanol, may be marketed under the name "Gasohol". Vehicle damage and drivability problems resulting from the use of the following may not be covered by the warranty. • Gasohol containing more than 10 % ethanol.• Gasoline or gasohol containing methanol.• Leaded fuel or leaded gasohol. Mazda3_8CX9-EA-13F_Edition1.indb 28Mazda3_8CX9-EA-13F_Edition1.indb 28 2013/05/17 11:49:042013/05/17 11:49:04](https://usermanual.wiki/Johnson-Controls-Interiors/62932.User-guide-part1/User-Guide-2017092-Page-98.png)