Johnson Controls Interiors 62932 Automotive Electronics Infotainment Head Unit with Bluetooth and WLAN User Manual Mazda3 8CX9 EA 13F Edition1 indb
Johnson Controls Interiors L.L.C. Automotive Electronics Infotainment Head Unit with Bluetooth and WLAN Mazda3 8CX9 EA 13F Edition1 indb
Contents
- 1. User guide part1
- 2. User guide part2
- 3. User guide part3
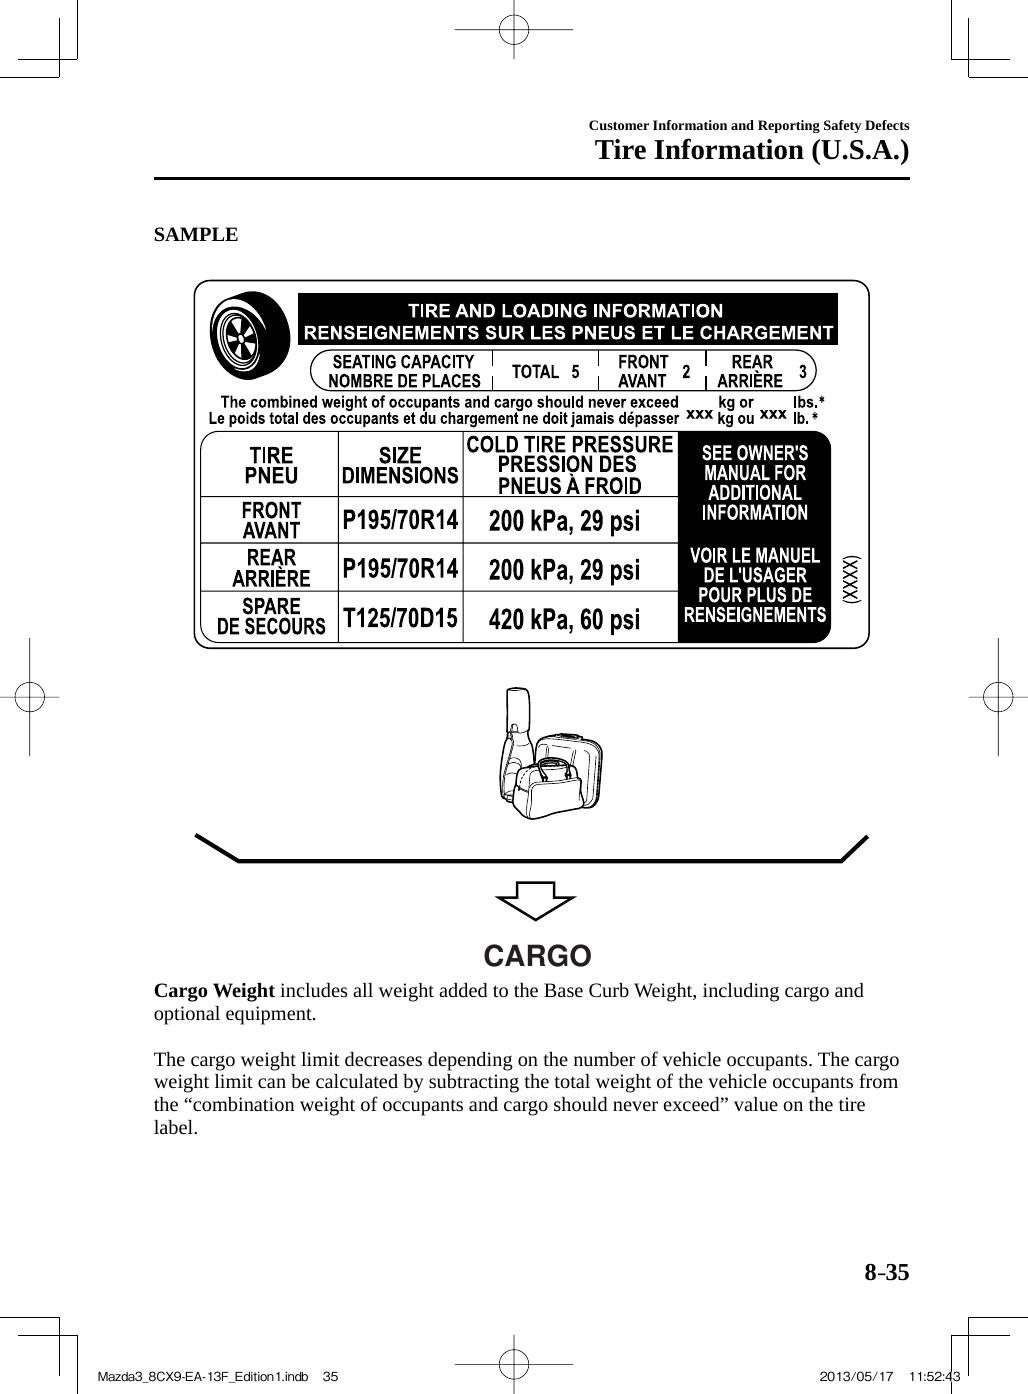
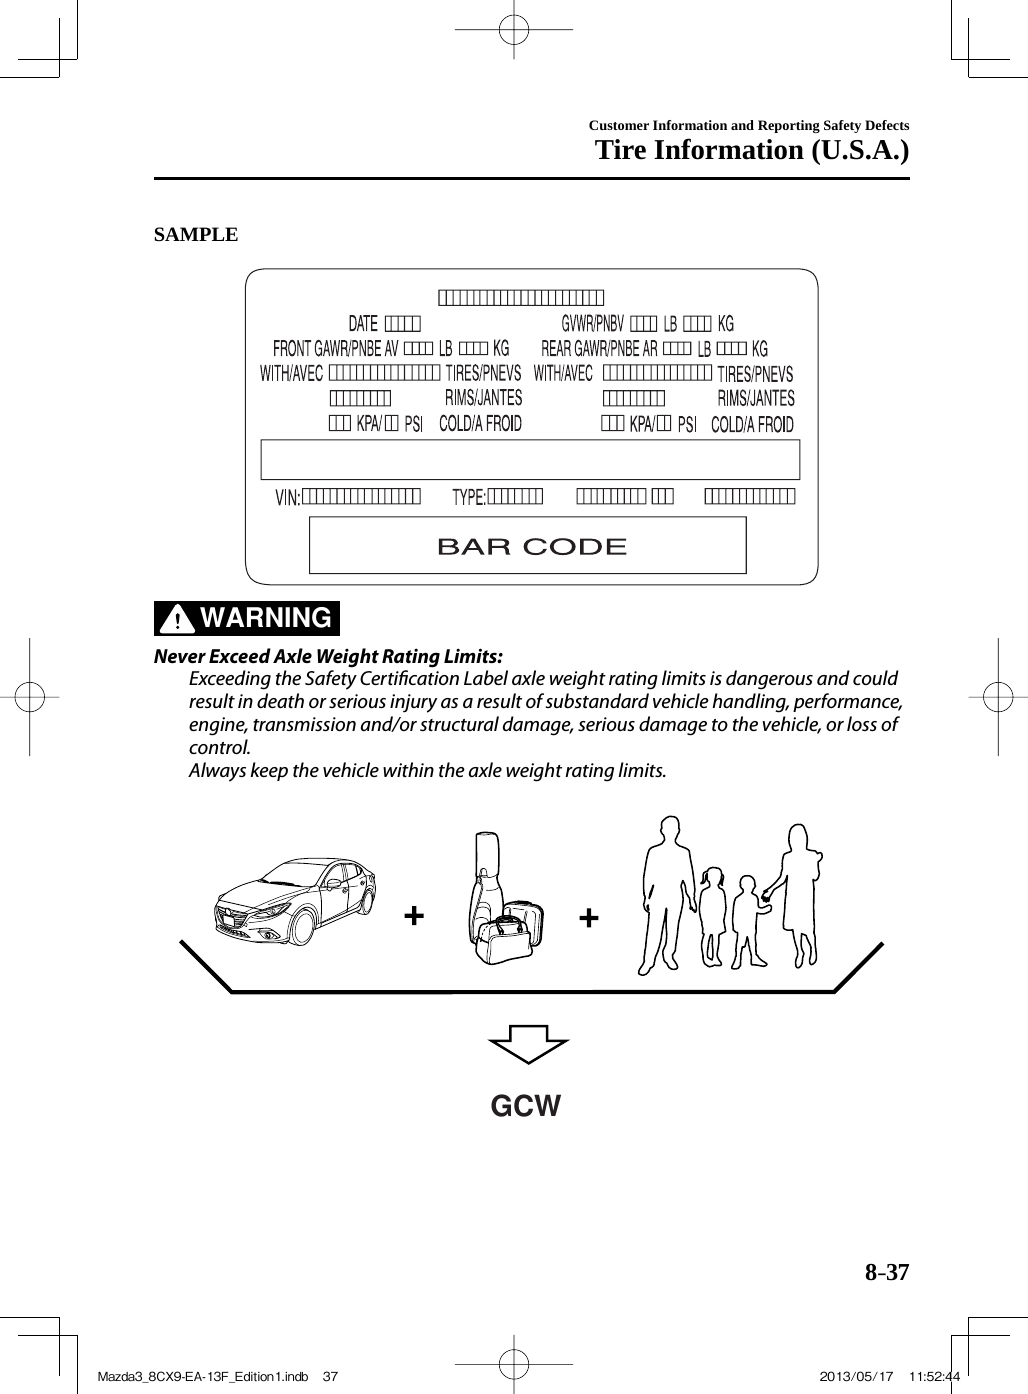
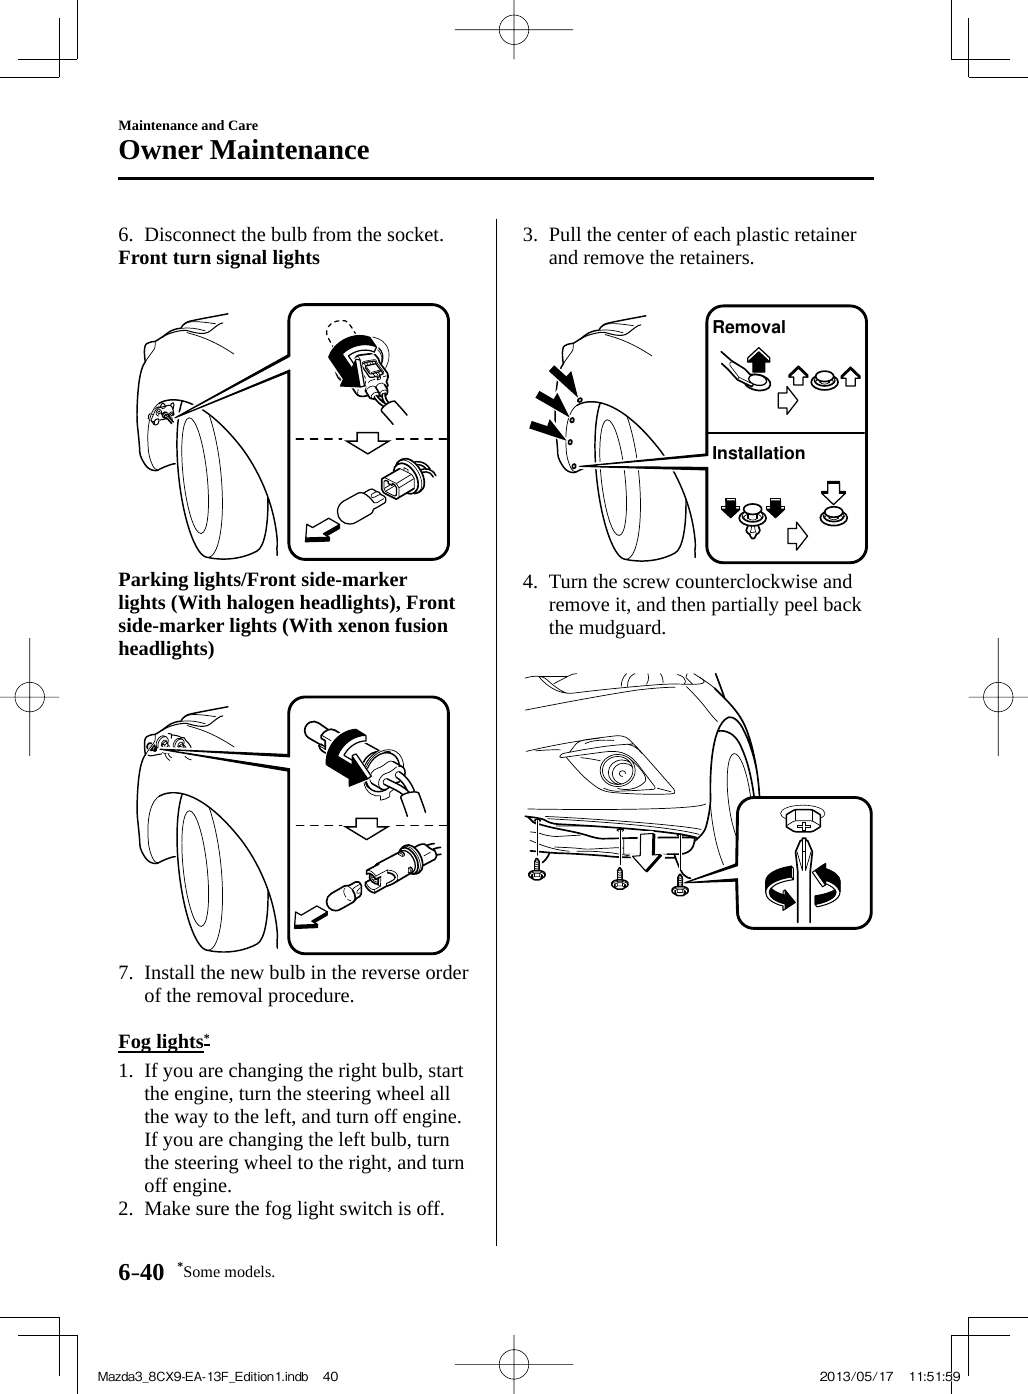
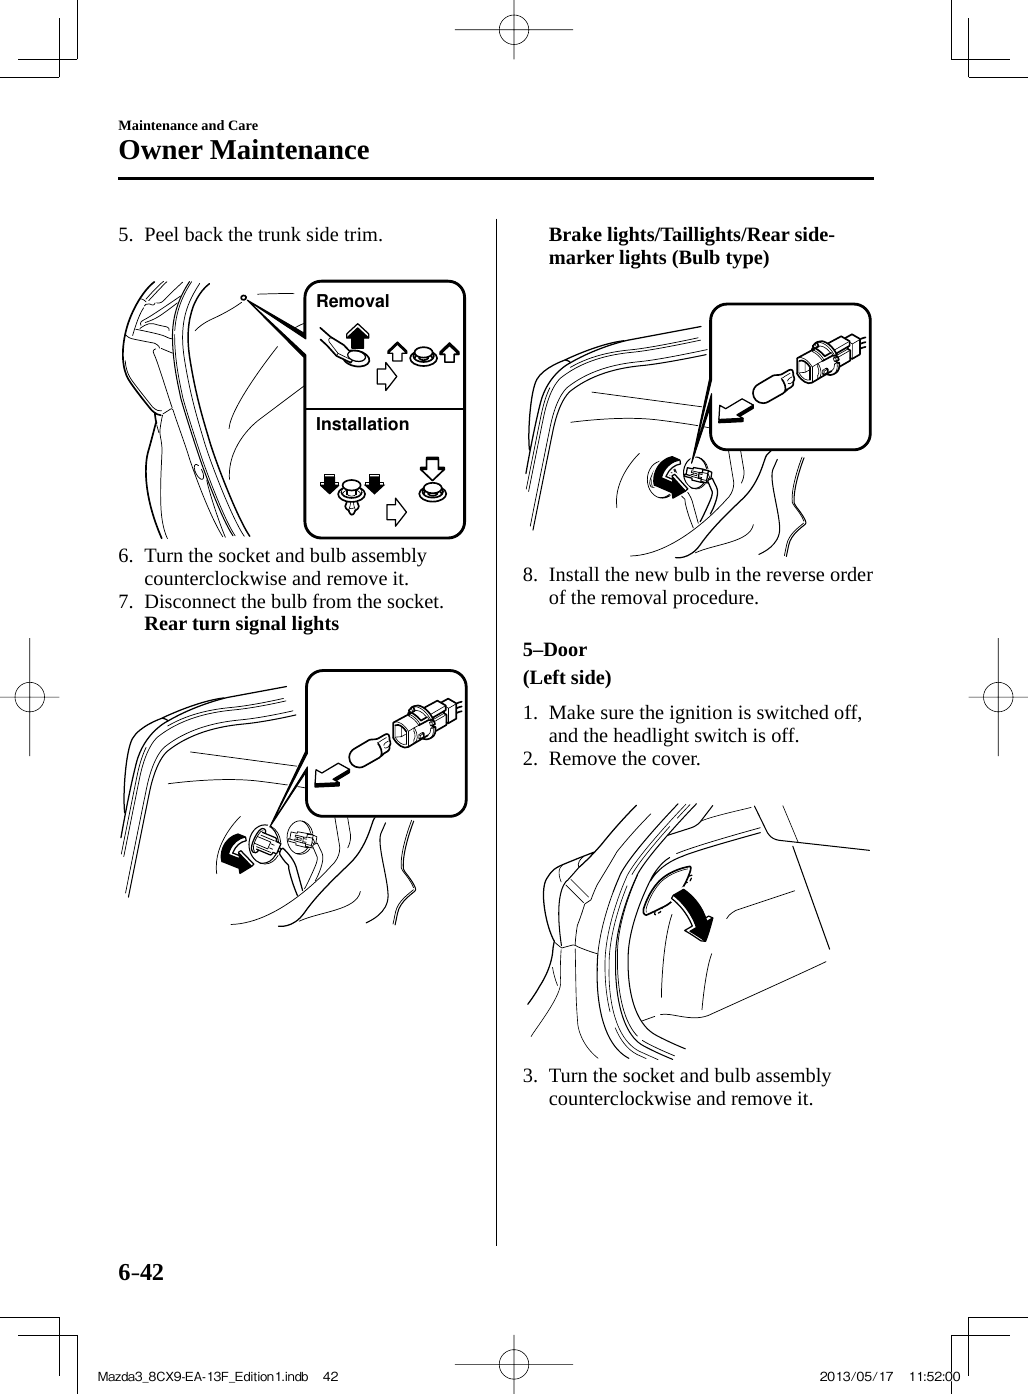
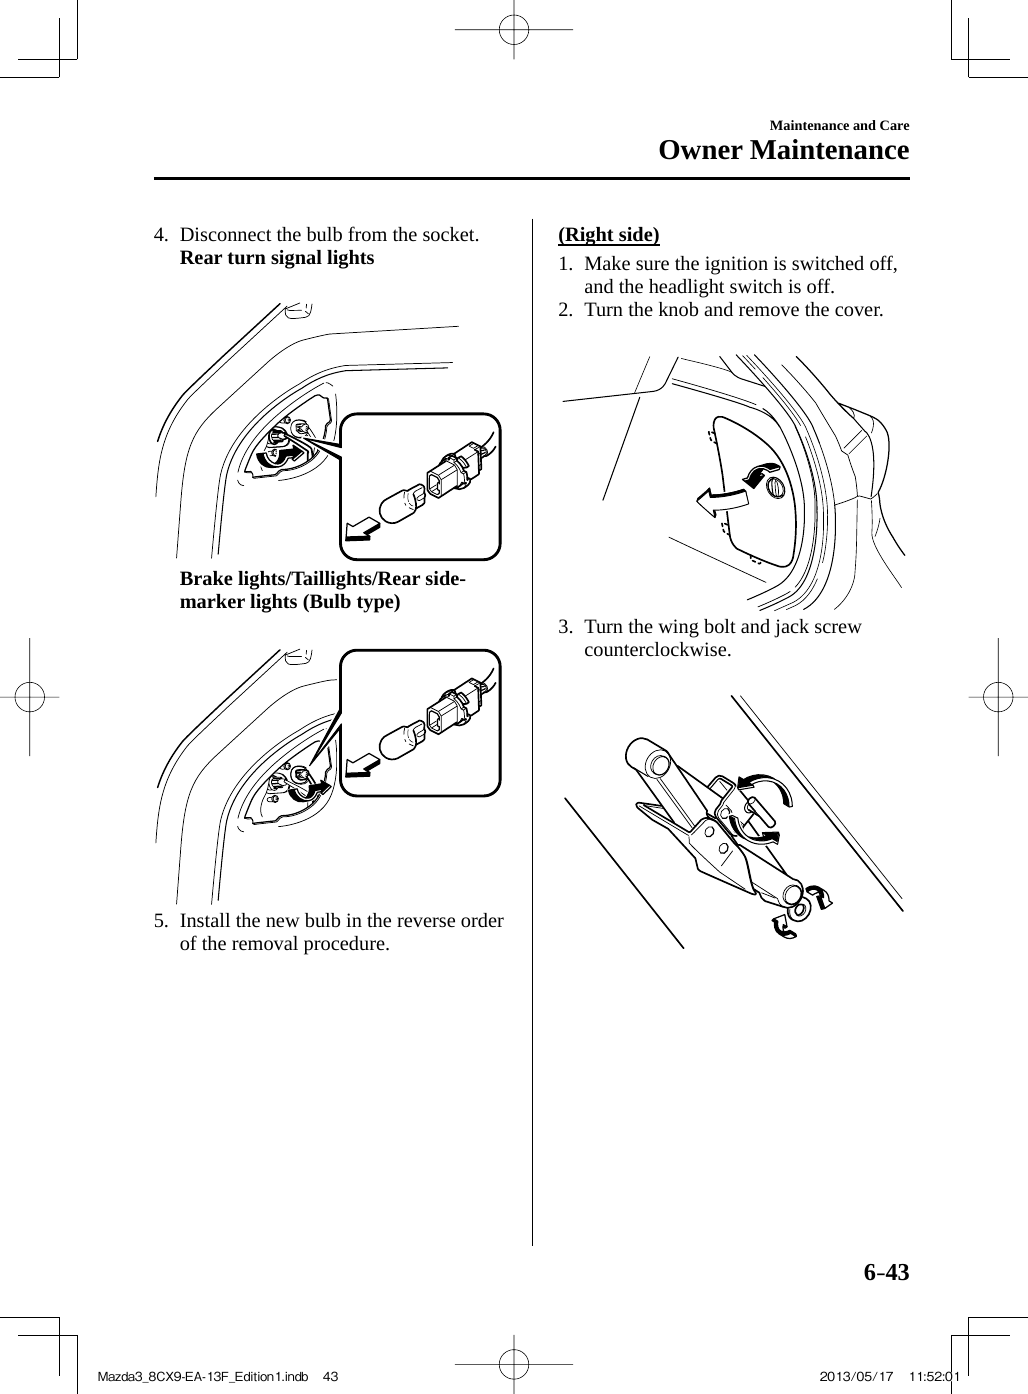
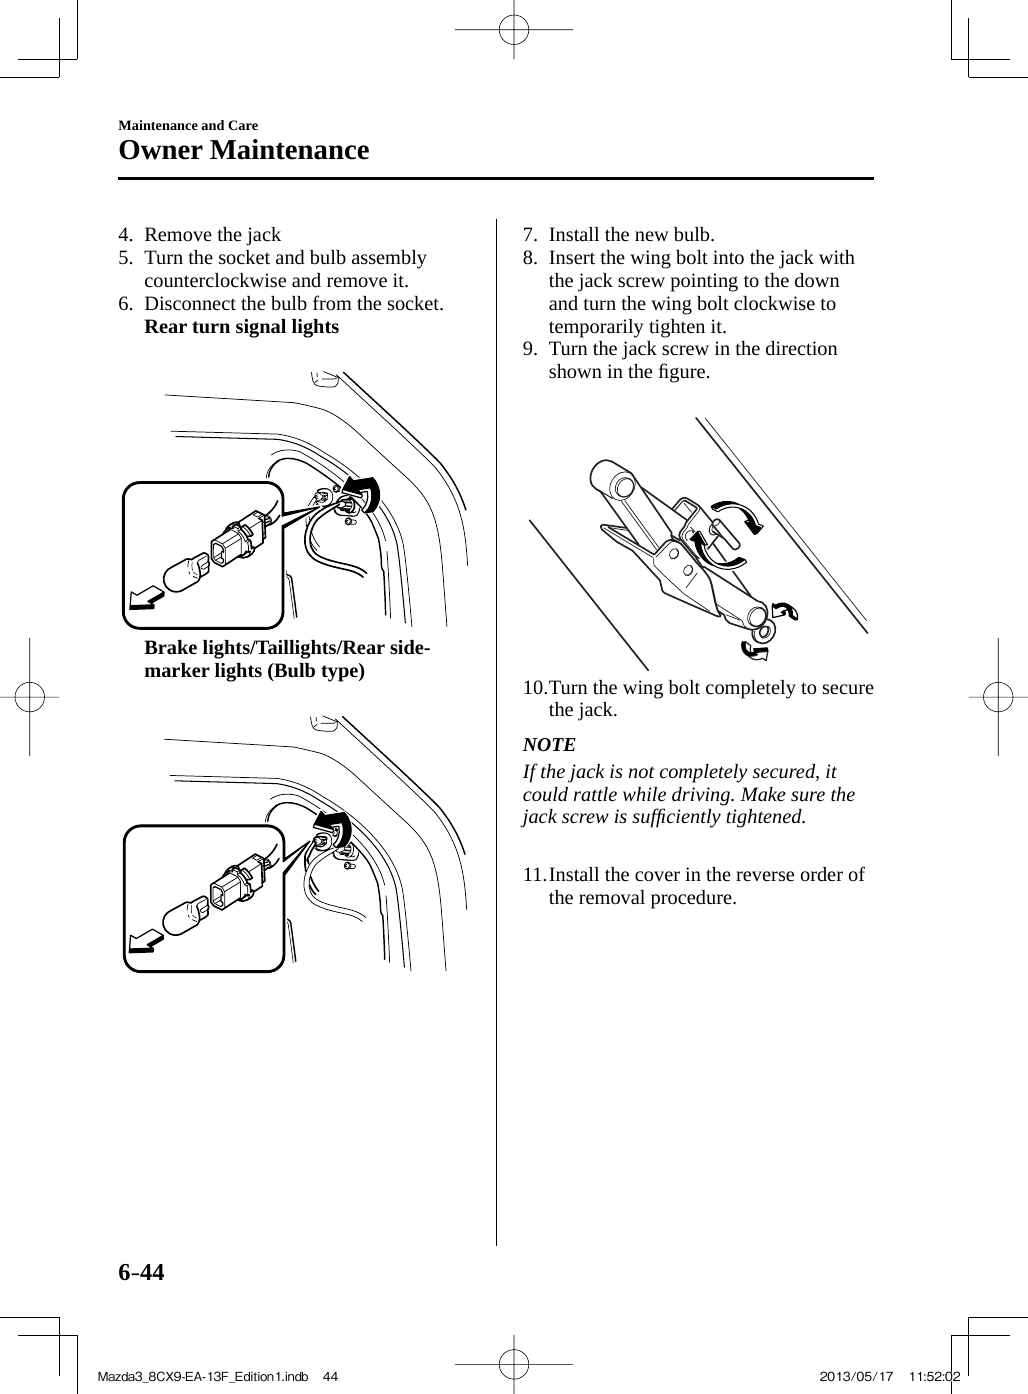
User guide part3


![8–4Customer Information and Reporting Safety DefectsCustomer Assistance Being truly committed to customer satisfaction is more than a phrase with Mazda. We hope to satisfy every customer directly, but if there is ever a question about our decision, Mazda believes in providing a fast, fair and free method such as the BBB AUTO LINE to ensure Mazda delivers on our commitment to do the right thing for our customers! California Customers 1. Mazda North American Operations participates in BBB AUTO LINE, a mediation/arbitration program administered by the Council of Better Business Bureaus [4200 Wilson Boulevard, Arlington, Virginia 22203] through local Better Business Bureaus. BBB AUTO LINE and Mazda have been certifi ed by the Arbitration Certifi cation Program of the California Department of Consumer Affairs. 2. If you have a problem arising under a Mazda written warranty, we encourage you to bring it to our attention. If we are unable to resolve it, you may fi le a claim with BBB AUTO LINE. Claims must be fi led with BBB AUTO LINE within six (6) months after the expiration of the warranty. 3. To fi le a claim with BBB AUTO LINE, call 1-800-955-5100. There is no charge for the call. 4. In order to fi le a claim with BBB AUTO LINE, you will have to provide your name and address, the brand name and vehicle identifi cation number (VIN) of your vehicle, and a statement of the nature of your problem or complaint. You will also be asked to provide: the approximate date of your acquisition of the vehicle, the vehicle's current mileage, the approximate date and mileage at the time any problem(s) were fi rst brought to the attention of Mazda or one of our dealers, and a statement of the relief you are seeking. 5. BBB AUTO LINE staff may try to help resolve your dispute through mediation. If mediation is not successful, or if you do not wish to participate in mediation, claims within the program's jurisdiction may be presented to an arbitrator at an informal hearing. The arbitrator's decision should ordinarily be issued within 40 days from the time your complaint is fi led; there may be a delay of 7 days if you did not fi rst contact Mazda about your problem, or a delay of up to 30 days if the arbitrator requests an inspection/report by an impartial technical expert or further investigation and report by BBB AUTO LINE. 6. You are required to use BBB AUTO LINE before asserting in court any rights or remedies conferred by California Civil Code Section 1793.22. You are also required to use BBB AUTO LINE before exercising rights or seeking remedies created by Title I of the Magnuson-Moss Warranty Act, 15 U.S.C. sec. 2301 et seq. If you choose to seek redress by pursuing rights and remedies not created by California Civil Code Section 1793.22 or Title I of the Magnuson-Moss Warranty Act, resort to BBB AUTO LINE is not required by those statutes.Mazda3_8CX9-EA-13F_Edition1.indb 4Mazda3_8CX9-EA-13F_Edition1.indb 4 2013/05/17 11:52:332013/05/17 11:52:33](https://usermanual.wiki/Johnson-Controls-Interiors/62932.User-guide-part3/User-Guide-2017094-Page-117.png)
![8–5Customer Information and Reporting Safety DefectsCustomer Assistance 7. California Civil Code Section 1793.2 (d) requires that, if Mazda or its representative is unable to repair a new motor vehicle to conform to the vehicle's applicable express warranty after a reasonable number of attempts, Mazda may be required to replace or repurchase the vehicle. California Civil Code Section 1793.22 (b) creates a presumption that Mazda has had a reasonable number of attempts to conform the vehicle to its applicable express warranties if, within 18 months from delivery to the buyer or 18,000 miles on the vehicle's odometer, whichever occurs fi rst, one or more of the following occurs: • The same nonconformity [a failure to conform to the written warranty that substantially impairs the use, value or safety of the vehicle] results in a condition that is likely to cause death or serious bodily injury if the vehicle is driven AND the nonconformity has been subject to repair two or more times by Mazda or its agents AND the buyer or lessee has directly notifi ed Mazda of the need for the repair of the nonconformity; OR• The same nonconformity has been subject to repair 4 or more times by Mazda or its agents AND the buyer has notifi ed Mazda of the need for the repair of the nonconformity; OR• The vehicle is out of service by reason of repair of nonconformities by Mazda or its agents for a cumulative total of more than 30 calendar days after delivery of the vehicle to the buyer. NOTICE TO Mazda AS REQUIRED ABOVE SHALL BE SENT TO THE FOLLOWING ADDRESS: Mazda North American Operations 7755 Irvine Center Drive Irvine, CA 92618 ATTN: Customer Mediation 8. The following remedies may be sought in BBB AUTO LINE: repairs, reimbursement for money paid to repair a vehicle or other expenses incurred as result of a vehicle nonconformity, repurchase or replacement of your vehicle, and compensation for damages and remedies available under Mazda's written warranty or applicable law. 9. The following remedies may not be sought in BBB AUTO LINE: punitive or multiple damages, attorneys' fees, or consequential damages other than as provided in California Civil Code Section 1794 (a) and (b). 10. You may reject the decision issued by a BBB AUTO LINE arbitrator. If you reject the decision, you will be free to pursue further legal action. The arbitrator's decision and any fi ndings will be admissible in a court action. 11. If you accept the arbitrator's decision, Mazda will be bound by the decision, and will comply with the decision within a reasonable time not to exceed 30 days after we receive notice of your acceptance of the decision. 12. Please call BBB AUTO LINE at 1-800-955-5100 for further details about the program. Mazda3_8CX9-EA-13F_Edition1.indb 5Mazda3_8CX9-EA-13F_Edition1.indb 5 2013/05/17 11:52:342013/05/17 11:52:34](https://usermanual.wiki/Johnson-Controls-Interiors/62932.User-guide-part3/User-Guide-2017094-Page-118.png)