KTV Global LT201CB 20.1" LCD TV Receiver User Manual
KTV Global Corporation 20.1" LCD TV Receiver Users Manual
Users Manual

TFT LCD TV
User’s Manual
Important Safety Instructions
43
1) Read these instructions.
2) Keep these instructions.
3) Heed all warnings.
4) Follow all instructions.
5) Do not use this apparatus near water.
6) Clean only with dry cloth.
7)
Do not block any ventilation openings. Install in accordance with the manufacturer s
instructions.
8) Do not install near any heat sources such as radiators, heat registers, stoves, or
other apparatus (including amplifiers) that produce heat.
9)
Do not defeat the safety purpose of the polarized or grounding-type plug.
A polarized plug has two blades with one wider than the other. A grounding type
plug has two blades and a third grounding prong. The wide blade or the third
prong are provided for your safety. If the provided plug does not fit into your outlet.
Consult an electrician for replacement of the obsolete outlet.
10) Protect the power cord from being walked on or pinched particularly at plugs,
convenience receptacles, and the point where they exit from the apparatus.
11) Only use attachments/accessories specified by the manufacturer.
12)
Use only with the cart, stand, tripod, bracket, or table specified by the manufacturer,
or sold with the apparatus. When a cart is used, use caution when moving the
cart/apparatus combination to avoid injury from tip-over.
13) Unplug this apparatus during lightning storms or when unused for long periods of
time.
14) Refer all servicing to qualified service personnel. Servicing is required when the
apparatus has been damaged in any way, such as power-supply cord or plug is
damaged, liquid has been moisture, does not operate normally, or has been
dropped.
15) The apparatus shall not be exposed to dripping or splashing and that no objects
filled with liquids, such as vases, shall be placed on the apparatus.
6
Important Safety Instructions
5
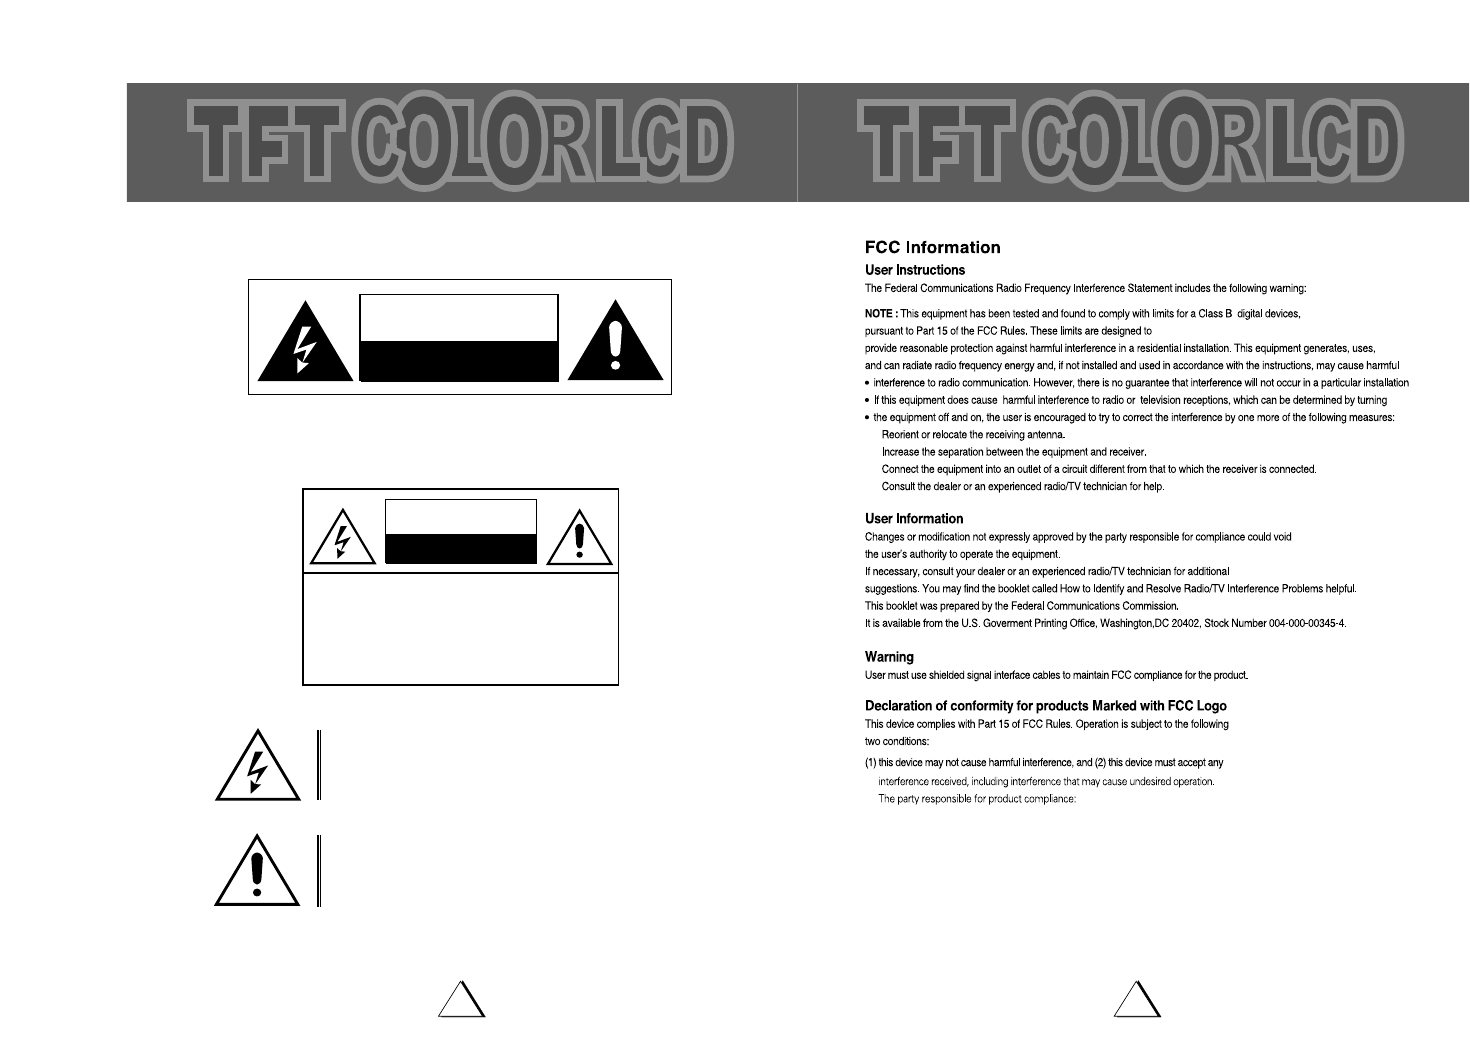
Shock Hazard Marking and Associated Graphical Symbols
Explanation of Safety Related Symbols
CAUTION
RISK OF ELECTRIC SHOCK
DO NOT OPEN
CAUTION
RISK OF ELECTRIC SHOCK
DO NOT OPEN
CAUTION : TO REDUCE THE RISK OF
ELECTRIC SHOCK, DO NOT REMOVE
COVER (OR BACK).
NO USER-SERVICEABLE PARTS
INSIDE. REFER SERVICING TO
QUALIFIED SERVICE PERSONNEL.
This symbol is intended to alert the user to the presence of
uninsulated "dangerous voltage" within the product's enclosure
that may be of sufficient magnitude to constitute a risk of electric
shock to persons.
This symbol is intended to alert the user to the presence of
important operating and maintenance (servicing) instructions
in the literature accompanying the appliance.
Regulatory Information

87
Contents
General safety precautions
109
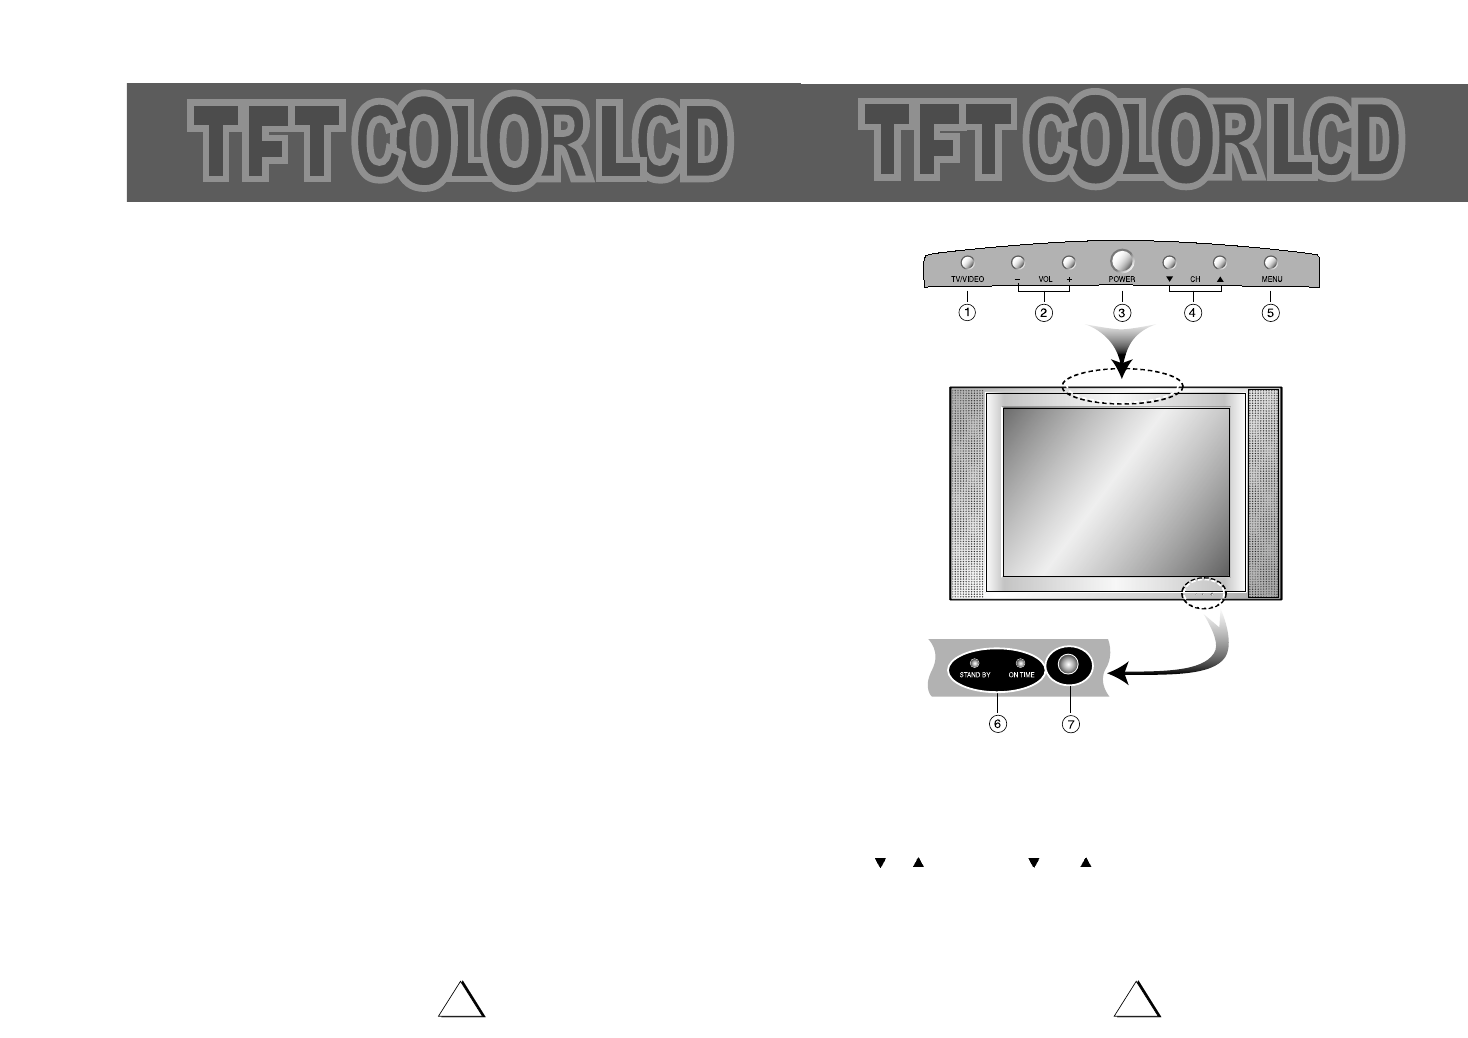
Front Panel
1 TV/VIDEO Displays a menu of the available input sources.
(TV, Monitor)
2 MENU Display the main on-screen menu. Exit from sub-menu.
3
-
VOL
+
Press the increase or decrease the volume. Also used to increase or reduce
the value of a menu option.
4CH Press CH or CH to change channels. Also used to highlight selections on
the on-screen menus.
5 POWER Turns ON/OFF the LCD TV/Monitor.
6 LED OFF : the color of LED is changed into RED.
ON : the color of LED is changed into GREEN.
7 Remote Control LED
Contents
11
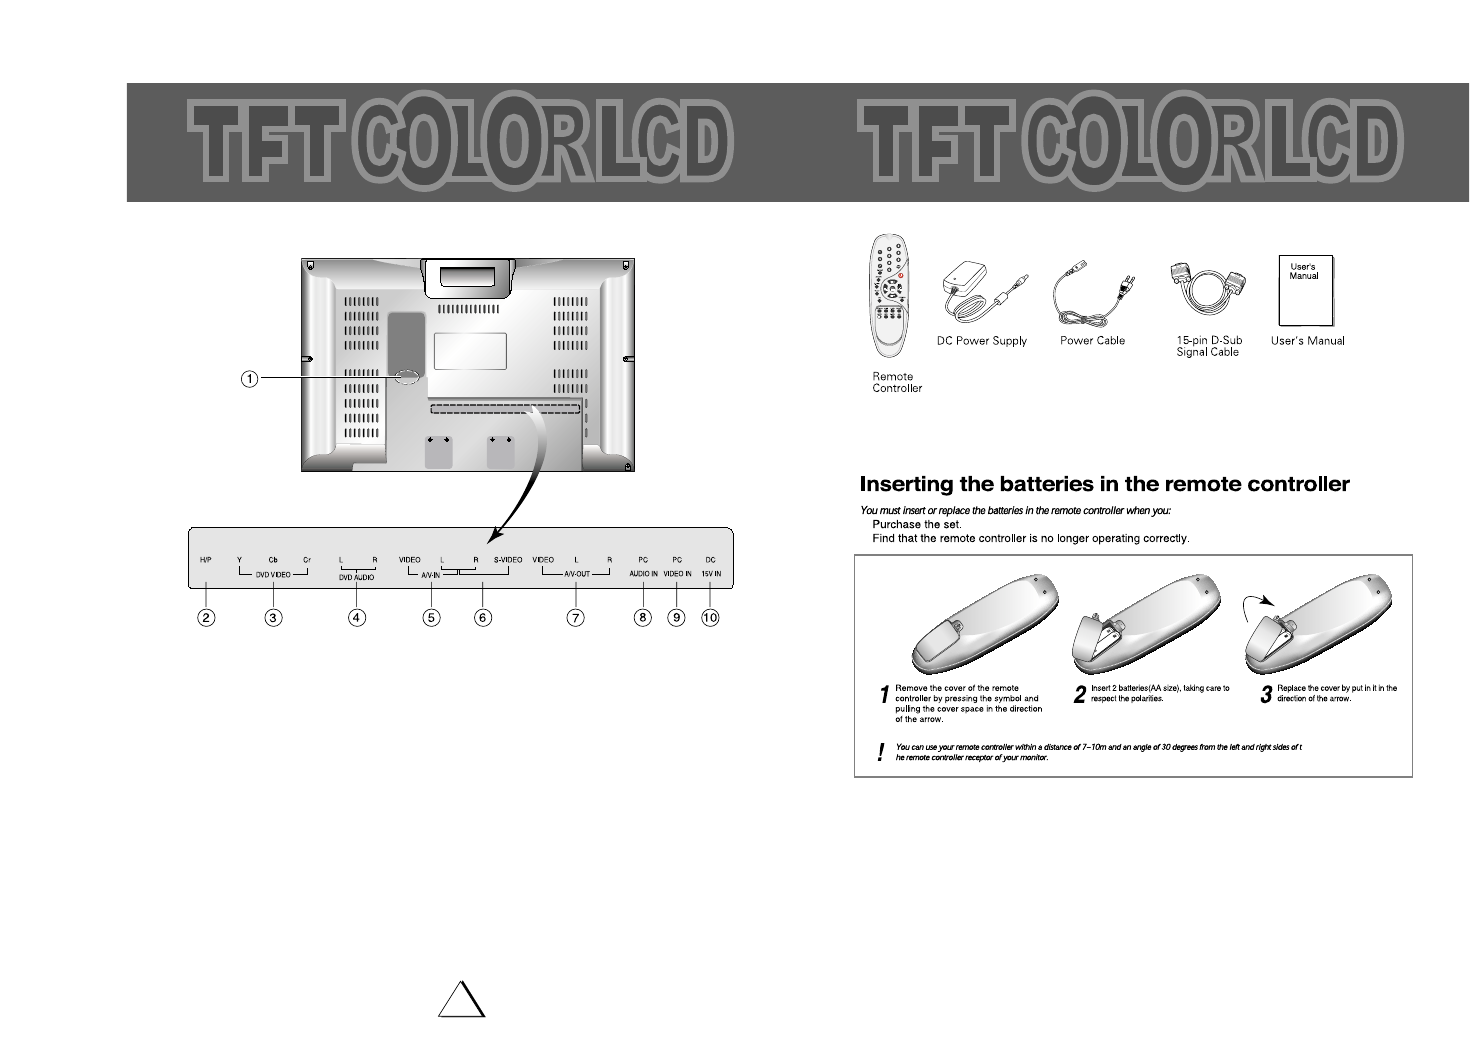
Rear Panel
▲▲▲▲▲▲▲▲▲▲▲▲▲▲▲▲
1 VHF/UHF ANTENNA JACK Connect to an antenna or a cable TV system.
2 HEAD PHONE JACK
3 DVD VIDEO (COMPONENT; Y,Pb,Pr)
Video signals from a DVD player
4 DVD AUDIO Audio signals from DVD player when using the component
video input jacks.
5 A/V IN Video & Audio signals from VCR or similar device.
6 S-VIDEO S-Video signal from an S-VHS VCR or Laserdisc player.
7 A/V OUT Out A/V signal from TFT LCD TV
8 PC AUDIO INPUT Connects to the sound-output port of a personal computer.
9 PC VIDEO INPUT Used to connect a video signal from a personal computer.
10 DC 15V IN To input DC power from power outlet.
Accessory

14
Guidance of Basic Operation
Connect either Antenna or Cable TV according to "ANTENNA CONNECTION"
instruction on page 6.
Insert batteries into the Remote Control unit according to "REMOTE CONTROL USE"
instruction on page 5.
Connect the power cord to AC outlet.
– Voltage is between 90 and 250 Volts.
– Frequency is compatible (50/60Hz)
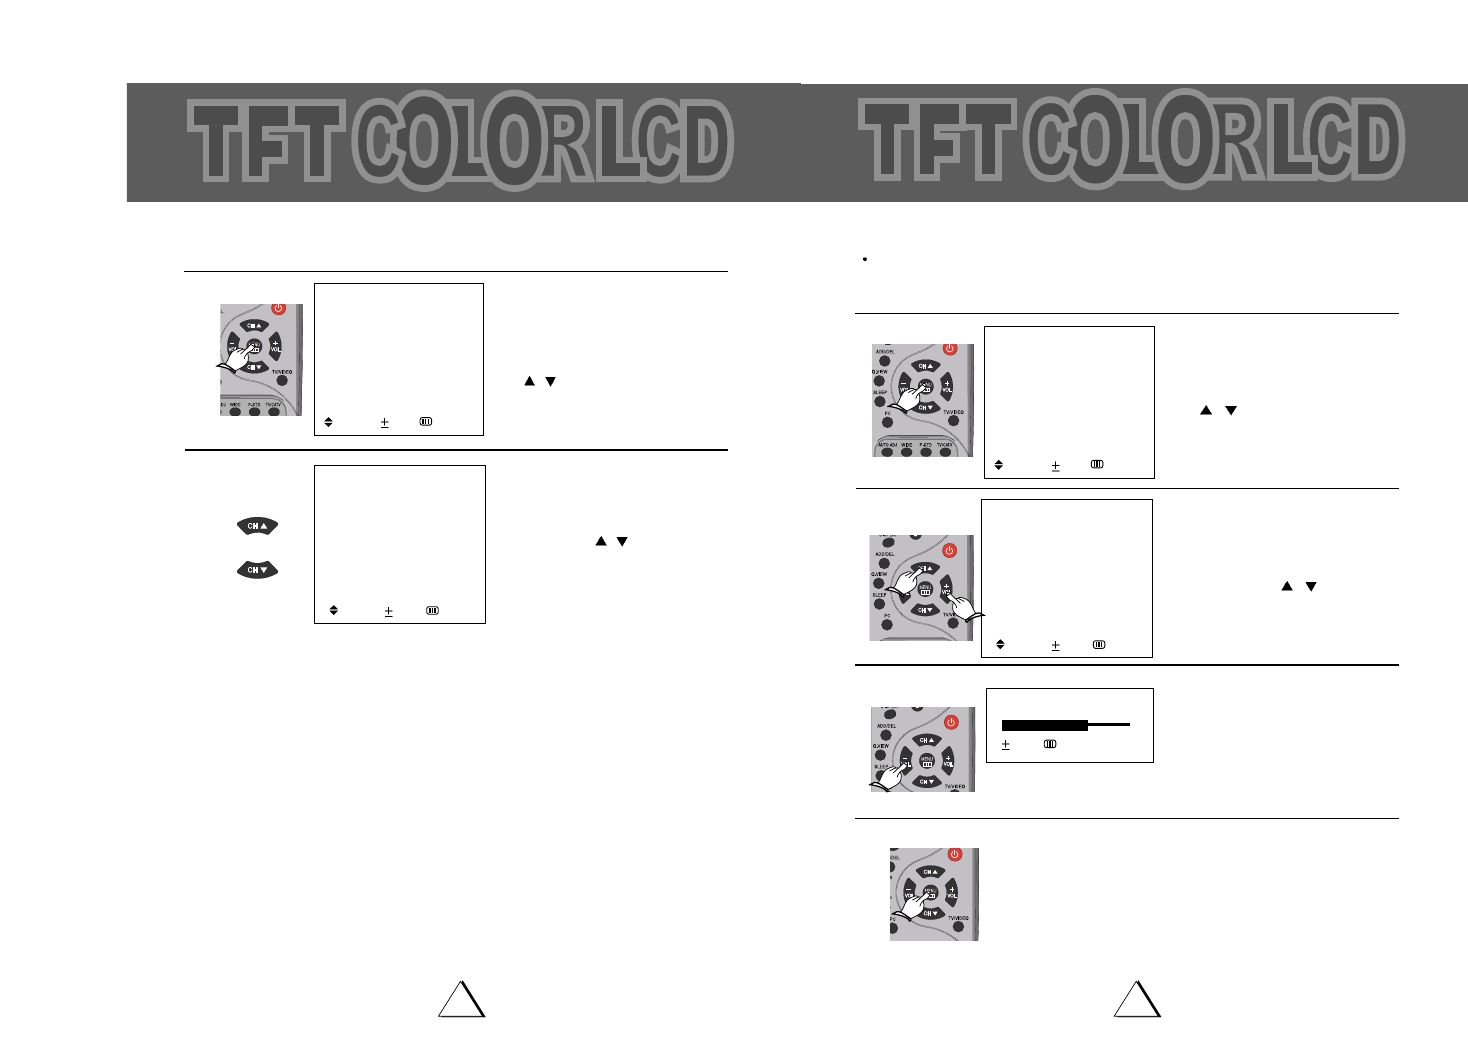
TURN ON/OFF THE TV
1. Press the "POWER" button on the front panel
or Press the "POWER" button on the Remote
Control.
2. Press these buttons again to turn the
television off.
CHANNEL SELECTION
Use CHANNEL ( ) buttons on the Remote Control (or CHANNEL ( ) buttons on the
front panel).
Pressing the ( ) button to advances for the higher channels, and press the ( ) button to go
down for the lower channels.
Channels can be selected directly by using 10-Digit Keypad on the Remote Control.
For example, if you select channel 5, press "0" first, then press "5". (Be sure to press "0" first,
before pressing "5" for channel 5.)
For channel 120, press the 100 button first, then press "2", "0". Also refer to the CABLE
CHANNEL CONVERSION CHART below.
or
(Front panel)
POWER
POWER
(Remote control)
NOTE : Certain channels have been preset at the factory. It may be necessary to add or
erase some channels in your areas. See "AUTO PROGRAM" on page 18 for pre-
setting channels.
At stand-by mode, the LED stand-by indi-
cator is in RED color.
Numeric Buttons
100 Button
Power Button
Volume Up( ) /Down( ) Button
Channel Up( ) /Down( ) Button
Menu Button
TV/Video Button
TV/CATV Button
Picture Standard Button
Closed Caption Decoder Button
Sound Standard Button
Display Button
Add/Del Button
Quick View Button
Sleep Button
PC Button
Auto Adjust Button
Wide Button
Mute Button
Mts Button
Remote Control Unit
1615
On Screen Language Selection
1. Press POWER button to turn the TV on.
2.
Press MENU button and move the cursor to "SET UP" option and press
VOLUME +
button,
then the "SET UP" menu is displayed.
3. Press VOLUME
+
button to Select ANTENNA option.(TV or CATV)
4.
Press CH /buttons to place cursor on the "AUTO PROGRAM " option and press VOL + button.
5. When you have finished "AUTO PROGRAMMING", press MENU button repeatedly until the
menu disappears.
6. Press CH /buttons to Select the channel you want.
7. Press VOL + or VOL - buttons to adjust volume to your desired listening level.
Basic Operation
AUTO PROGRAMMING
2
:
STOP
SET UP
ANTENNA CATV 2
AUTO PROGRAM
FINE TUNE 0
:
MOVE
:
SEL
:
PREV.
1) Press the MENU button.
2) Press the CHANNEL UP/DOWN button to reach
LANGUAGE mode in function.
3)
Press the VOLUME + button to select the desired language.
4) It will appear on the screen like below;
5) Press the TV MENU button to exit.
PICTURE
SOUND
TIME
SETUP
FUNCTION
LANGUAGE ENGLISH
: MOVE : ADJ. : EXIT
MENU
ENGLISH ESPAÑOL PORTUGUÊS FRANÇAIS
MENU
PICTURE
SOUND
TIME
SETUP
FUNCTION
LANGUAGE ENGLISH
:
MOVE
:
SEL
:
EXIT
SET UP
ANTENNA CATV 2
AUTO PROGRAM
FINE TUNE 0
:
MOVE
:
SEL
:
PREV.
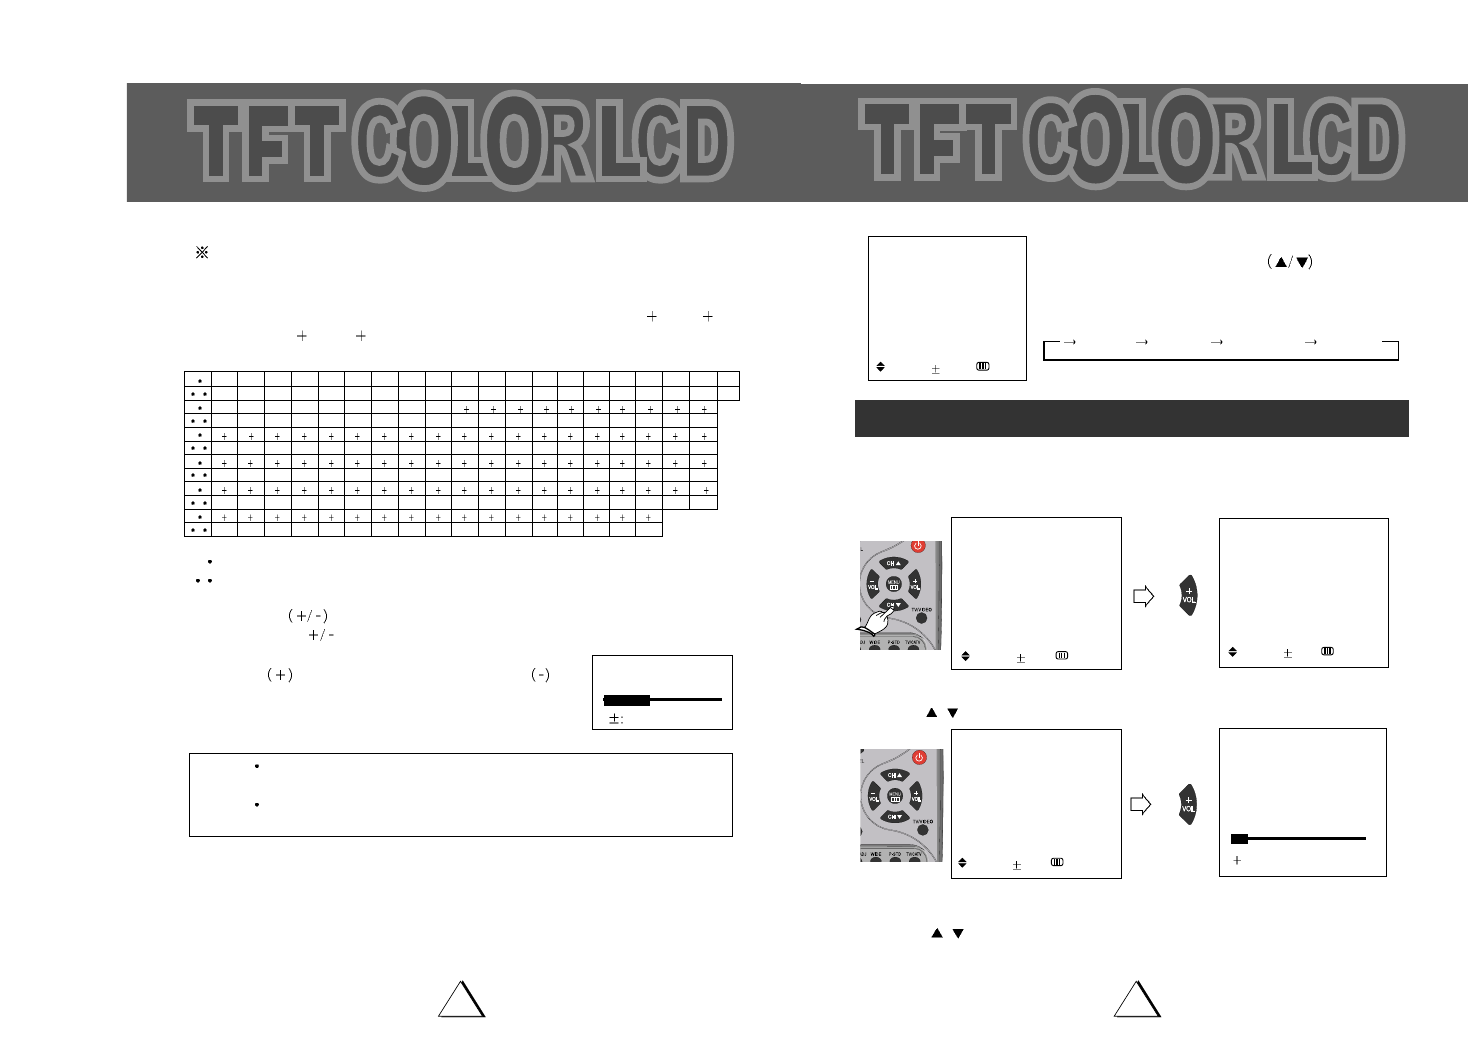
CABLE TV CHANNEL CONVERSION CHART
In addition to the normal TV reception from an antenna for VHF (Channels 2-13) and UHF
(Channel 14-69), your TV set is equipped to receive non-scrambled cable TV channels.
SubMid band (A-8, A-5-A-1), Mid band (A-I) Super band (J-W) Hyper band (W 1 - W 28)
and Ultra band (W 29 - W 84) can be received by using the channel selections as shown in
the following chart.
Regular cable channel designations.
Your TV set's corresponding on-screen CABLE channel numbers.
Press VOLUME buttons on either the
Remote Control or( ) front panel to adjust volume to your
desired listening level.
Pressing the button will increase sound volume, the
button will decrease sound volume.
The volume level is indicated on the screen by reference num-
ber (0-100)and by bar scale as shown.
NOTE TO CATV SYSTEM INSTALLER
This reminder is provided to call the CATV system installer’s attention to article 820-40 of the
NEC that provides guidelines for proper grounding and, in particular, specifies that cable ground
shall be connected to the grounding system of the building, as close to the point of cable entry as
practical.
NOTES The volume level can be muted instantly by pressing MUTE button on the Remote
Control. See "MUTE Button" on page 37.
Your TV set can receive the normal TV channel(2-13) including the CABLE TV
channel
A-8 A-4
01
28
47 48 49 50 51 52 53 54 55 56 57 58 59 60 61 62 63 64 65
66 67 68 69 70 71 72 73 74 75 76 77 78 79 80 81 82 83 84
29 30 31 32 33 34 35 36 37 38 39 40 41 42 43 44 45 46
96 97 98 99 14 15 16 17 18 19 20 21 22 23 24 25 26 27
A-3 A-2 A-1 A B C
OP QR S T U VW
W1W2
W11 W 12 W 13 W 14 W 15 W 16 W 17 W 18 W 19 W 20 W 21 W 22 W 23 W 24 W 25 W 26 W 27 W 28 W 29
W30 W 31 W 32 W 33 W 34 W 35 W 36 W 37 W 38 W 39 W 40 W 41 W 42 W 43 W 44 W 45 W 46 W 47 W 48
85 86 87 88 89 90 91 92 93 94 100 101 102 103 104 105 106 107 108
W49 W 50 W 51 W 52 W 53 W 54 W 55 W 56 W 57 W 58 W 59 W 60 W 61 W 62 W 63 W 64 W 65 W 66 W 67
109 110 111 112 113 114 115 116 117 118 119 120 121 122 123 124 125
W68 W 69 W 70 W 71 W 72 W 73 W 74 W 75 W 76 W 77 W 78 W 79 W 80 W 81 W 82 W 83 W 84
W3W4W 5W6W 7W8W9
W10
DE FGHI JKLM N
A-5
95
VOLUME 25
ADJ.
1817
Channel Memory (Set Up)
ANTENNA SELECTION
In this mode, you can change the broadcast mode between "TV" (for regular VHF/UHF chan-
nels) and " CATV " (for cable channels).
1. Press MENU button and move the cursor to "SET UP" option and press VOL + button then
the "SET UP" menu is displayed.
2. Press CH /buttons to place the cursor on the "ANTENNA" option and press VOL +
button. You can select "TV"(on-air) or "CATV"(cable TV) broadcast mode.
3. After you have finished selecting "ANTENNA" mode, press MENU button repeatedly until the
menu disappears.
MENU
PICTURE
SOUND
TIME
SETUP
FUNCTION
LANGUAGE ENGLISH
: MOVE : SEL. : EXIT
SET UP
ANTENNA CATV 2
AUTO PROGRAM
FINE TUNE 0
: MOVE : SEL. : PREV.
SET UP
ANTENNA CATV 2
AUTO PROGRAM
FINE TUNE 0
: MOVE : SEL. : PREV.
SET UP
ANTENNA TV 2
AUTO PROGRAM
FINE TUNE 0
: MOVE : SEL. : PREV.
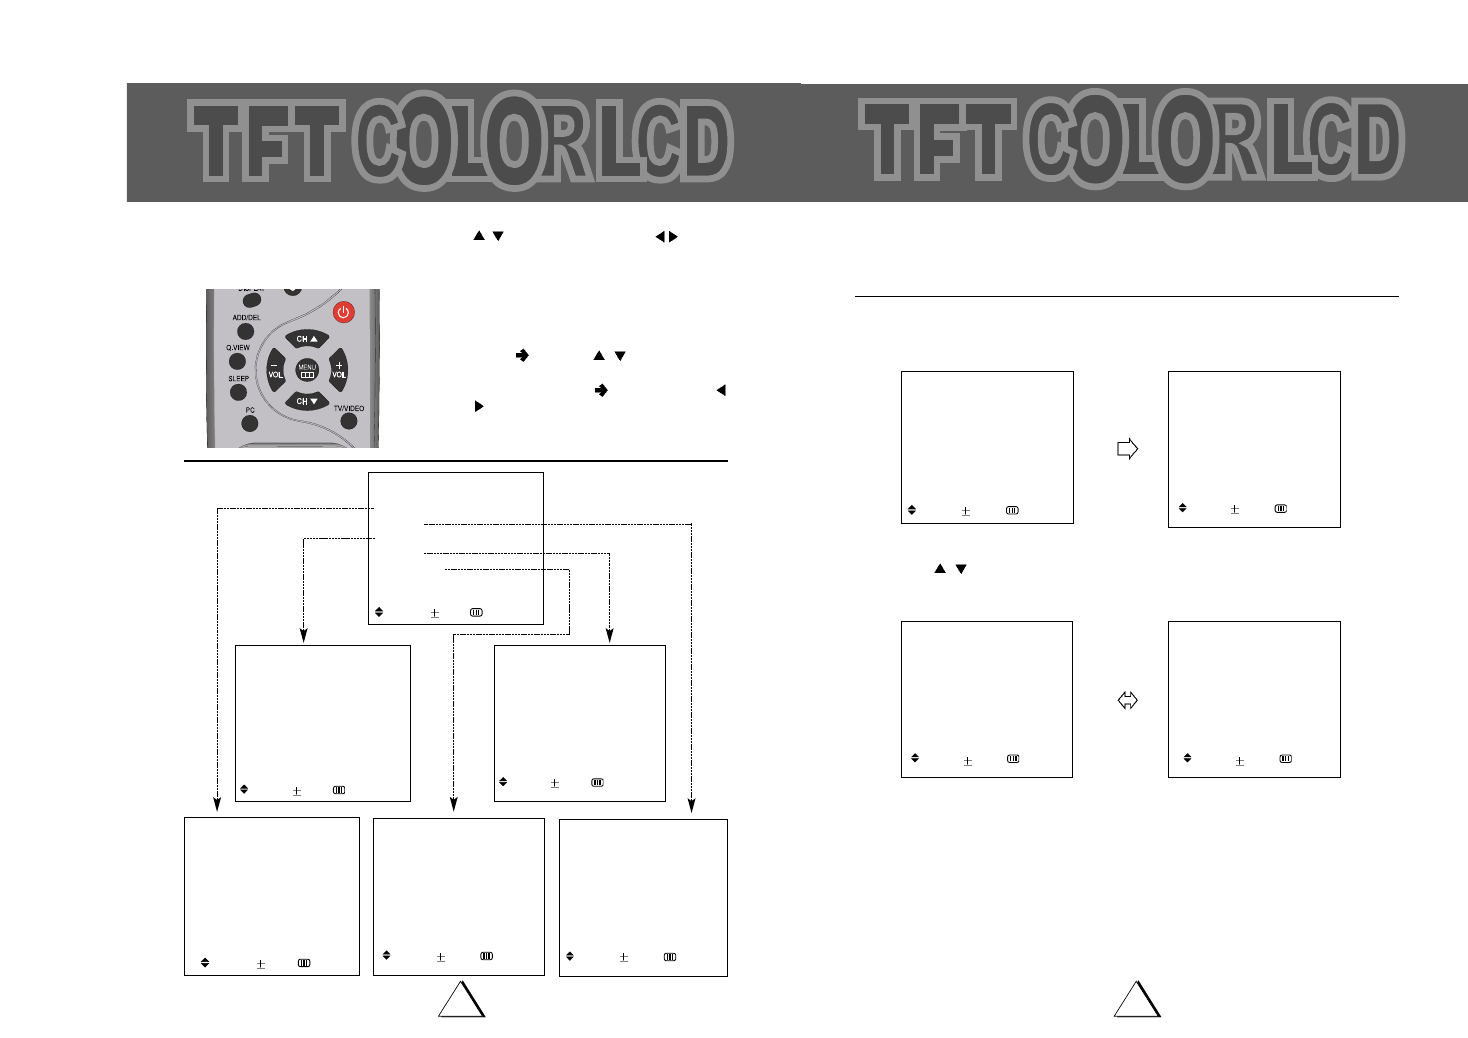
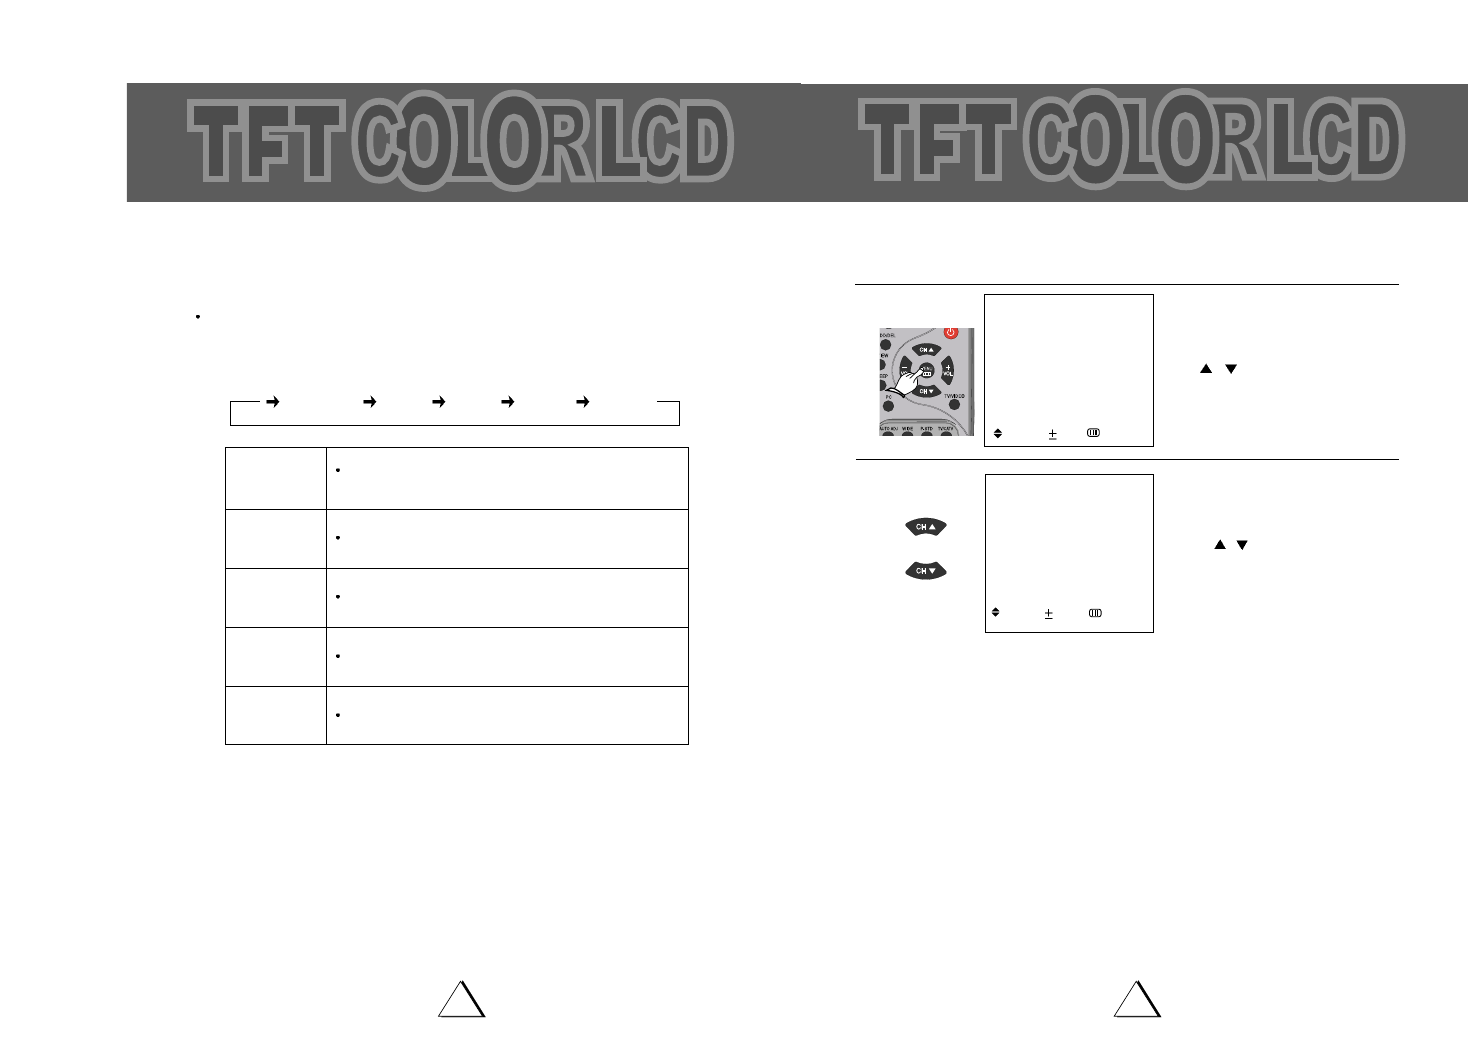
Basis of "MENU" Operation Method
You can execute every operation by pressing CH / buttons and VOL +/- or buttons
alternately.
If you learn one method, You can easily operate another function by viewing picture.
1. Pressing these buttons alternately makes
every operation easy.
2. MOVE Press CH /buttons to place
cursor.
3. PICTURE CHANGE Press VOL +/- or
buttons to change picture by inputting
selected function.
FUNCTION
BLUE BACK ON
HALF TONE ON
CCD OFF
: MOVE : ADJ. : PREV.
TIME
CLOCK AM12:00
SLEEP OFF
TIMER OFF
ON TIME AM12:00
OFF TIME AM12:00
ON CHANNEL 2
: MOVE
:
SEL : PREV.
SET UP
ANTENNA CATV2
AUTO PROGRAM
FINE TUNE 0
: MOVE
:
SEL : PREV.
MENU
PICTURE
SOUND
TIME
SETUP
FUNCTION
LANGUAGE ENGLISH
:
MOVE
:
SEL
:
EXIT
PICTURE
PICTURE STANDARD
CONTRAST 75
BRIGHTNESS 50
SHARPNESS 50
COLOR 50
TINT 0
: MOVE : ADJ. : PREV.
SOUND
SOUND STANDARD
EQUALIZER
BALANCE 0
SURROUND OFF
AVL OFF
: MOVE : ADJ. : PREV.
2019
Channel Memory (Set up)
MANUAL MEMORY(channel add/delete)
1. TO ADD A CHANNEL
If you want to add to the memory a channel the TV did not store during AUTO PROGRAM,
follow these steps.
Press the 10-Digit Keypad button to select a channel you want to view.
Press "ADD/DEL" button on the Remote Control.
The channel is added to memory and the color of the channel number changes from red
to green.
2. TO DELETE CHANNEL
You can exclude the channels of your choice from the memorized channel.
Follow these steps to delete the channel in the TV's memory.
Press CH /buttons or Press the 10-Digit keypad button to select a channel you want
to delete.
Press "ADD/DEL" button on the Remote Control.
The channel is removed from the memory, and the color of the channel number changes
from green to red.
CATV 12
channel deleted
CATV 12
channel added
CH ADDING CH DELETING
COLOR
: GREEN
COLOR
: RED
Channel Memory (Set Up)
AUTO PROGRAM
This function allows the channels to be memorized automatically to match the TV broadcasts
and cable channels in your area.
1. Press MENU button and move the cursor to "SET UP" option and press VOL + button, then
the "SET UP" menu is displayed.
2. Press CH /buttons to place cursor on the "AUTO PROGRAM" option and press VOL +
button.
When tuned to a channel in which TV program is broadcasted, this channel is memorized and
the color changes from magenta to green.
After every channels were memorized, "SET UP" menu is displayed.
3. When you have finished "AUTO PROGRAMMING", press MENU button repeatedly until the
menus disappear.
NOTES If the broadcast signal is weak, the channel will not be memorized.
In this case, perform the MANUAL MEMORY procedure.(Refer to the next page)
If you wish to stop this procedure during the operation, Press VOL + button.
SET UP
ANTENNA CATV 2
AUTO PROGRAM
FINE TUNE 0
: MOVE : SEL. : PREV.
SET UP
ANTENNA CATV 2
AUTO PROGRAM
FINE TUNE 0
: MOVE : SEL. : PREV.
AUTO PROGRAMMING
2
+ :
STOP
MENU
PICTURE
SOUND
TIME
SETUP
FUNCTION
LANGUAGE ENGLISH
: MOVE : SEL. : EXIT
2221
Picture Adjustment
P.STD BUTTON
By pressing the P.STD button on the Remote Control, you can sequentially select any one of the
four possible preferred analogue picture and sound presets.
Whenever this button is pressed, the mode will be changed as follows.
(1) STANDARD mode
(2) DYNAMIC mode
(3) MILD mode
(4) CUSTOM mode
MODE PICTURE
CUSTOM Select this mode to view the
adjusted picture you want.
Select this mode to view the
factory-presetting standard picture.
Select this mode to
-To view a powerful and clear picture.
-To watch in the brighter(daylight) environments.
Select this mode
- To emphasize mildness
- When it is dark around
- To lessen the fatigue of eyes
STANDARD
DYNAMIC
MILD
Channel Memory (Set up)
FINE TUNE
If the reception is clear, you do not have to fine-tune the channel, as this is done automatically
during auto program and manual memory.
If however the signal is weak or distorted, you may have to fine-tune the channel manually.
1. Press CH /buttons or Press the 10-Digit keypad button to adjust a channel you want.
2. Press MENU button and move the cursor to "SET UP" option and press VOL + or button,
then the "SET UP" menu is displayed.
3. Press CH / buttons to place the cursor on the "FINE TUNE" option.
4. Use VOL +/- or buttons until you obtain a sharp and clear picture and good sound quality.
5. If you wish to memorize adjusted FINE TUNE state, press "ADD/DEL" button, and then the
memorie icon is displayed.
If you wish to initialize it, press that button again, and then the icon disappear.
NOTES The memorized channel does not operate AFT(automatic frequency tuning)mode.
The FINE-TUNE is operated only selected channel.
After the "AUTO PROGRAM", the memorized channel operate AFT(automatic
frequency tuning)mode automatically.
SET UP
ANTENNA CATV 2
AUTO PROGRAM
FINE TUNE 0
A/D:MEMORY
: MOVE : ADJ. :
PREV.
SET UP
ANTENNA CATV 2
AUTO PROGRAM
FINE TUNE +1
A/D:MEMORY
: MOVE : ADJ. :
PREV.
SET UP
ANTENNA CATV 2
AUTO PROGRAM
FINE TUNE 0
: MOVE : SEL. :PREV.
MENU
PICTURE
SOUND
TIME
SETUP
FUNCTION
LANGUAGE ENGLISH
: MOVE : SEL. : EXIT
2423
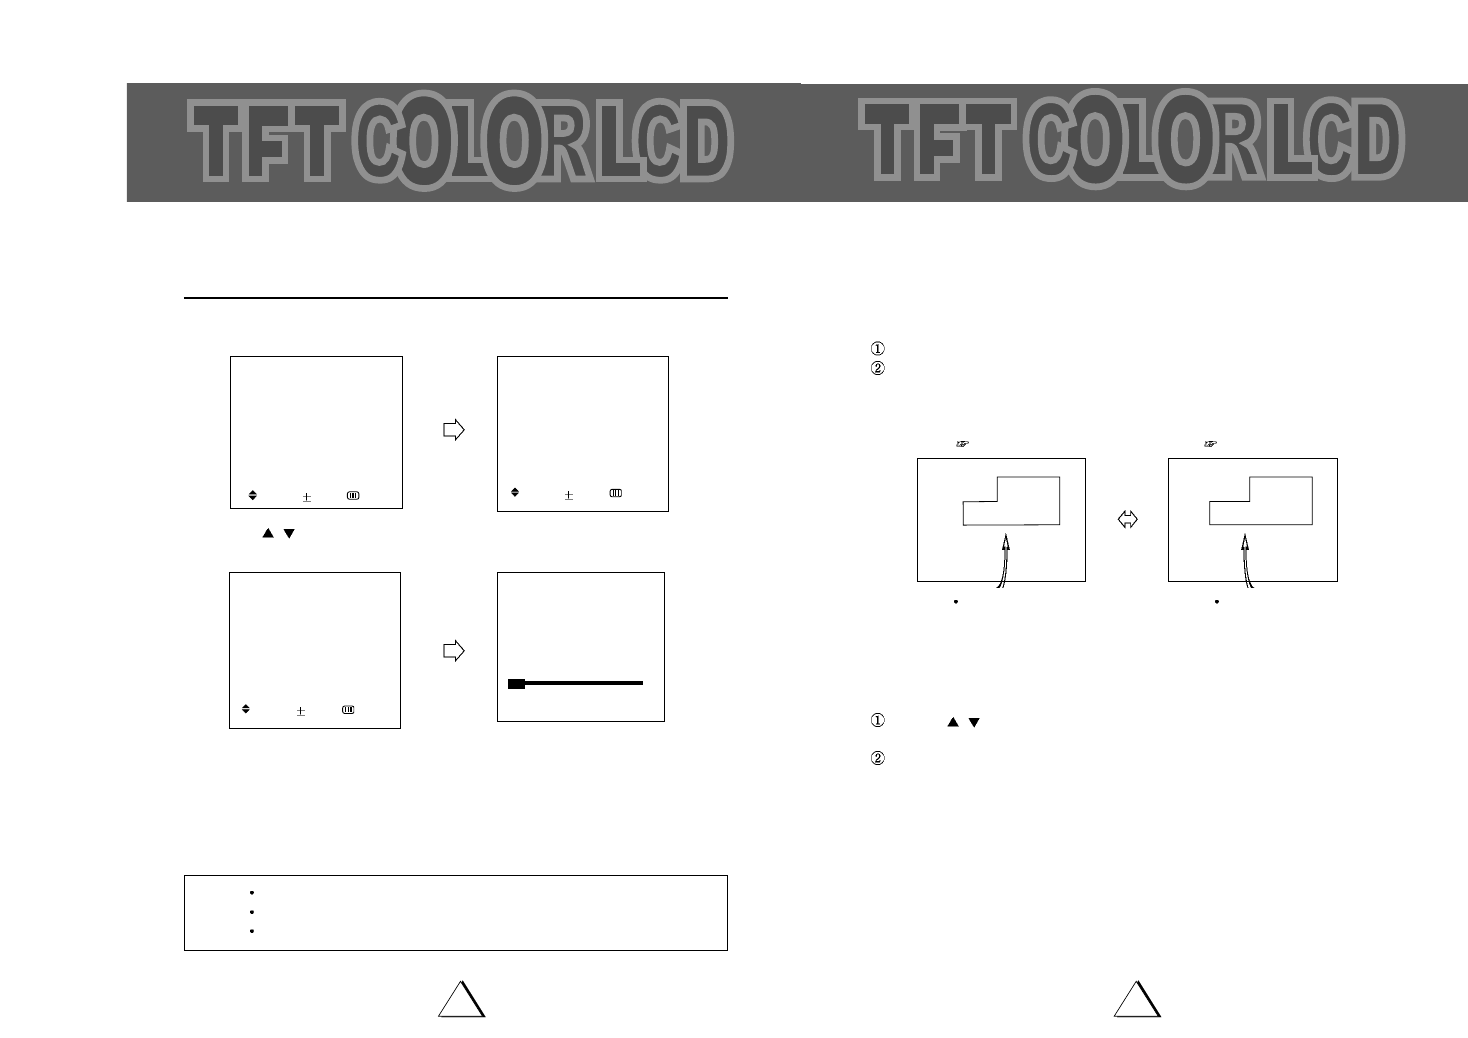
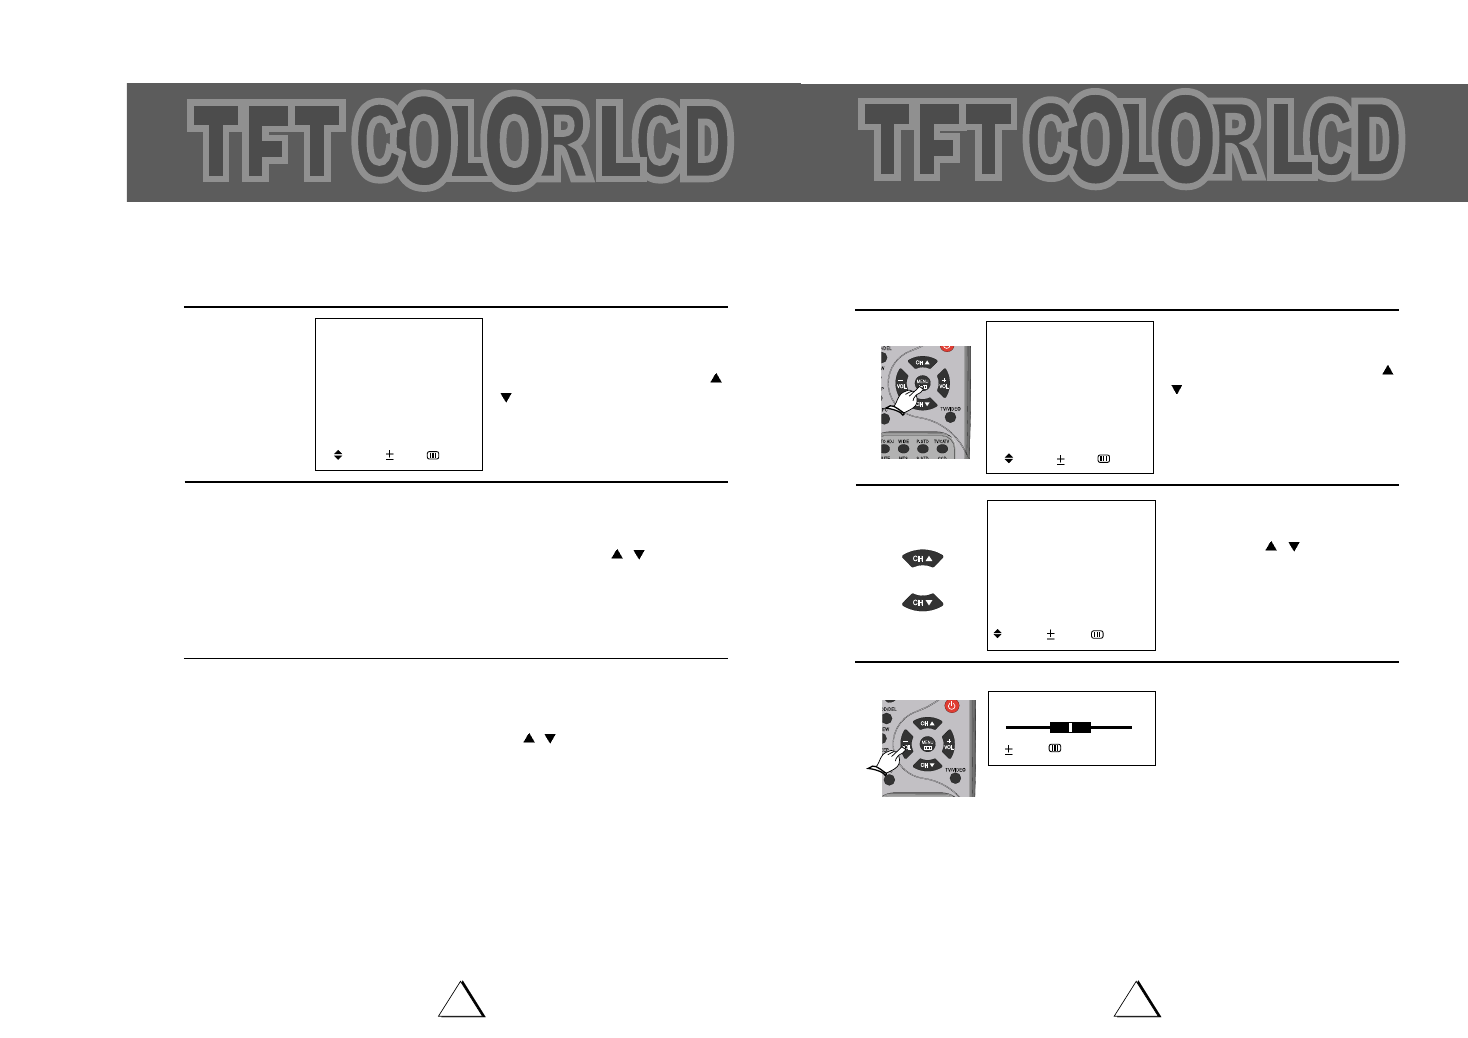
Picture Adjustment
You can sequentially select and adjust one of five picture levels.
Contrast, Brightness, Color, Sharpness or Tint
e.g. : Contrast Adjustment.
Press the MENU button. Move the
cursor to PICTURE by pressing the
CH /buttons and press the
VOL + button.
Move the cursor to CONTRAST by
pressing the CH /buttons and
press the VOL +/- buttons.
Adjust "CONTRAST" by VOL +/-
buttons
.
When you have finished contrast
adjustment, press MENU repeatedly
until the menu disappears.
1
1
2
2
3
3
4
4
CONTRAST 75
: ADJ. : PREV.
PICTURE
PICTURE STANDARD
CONTRAST 75
BRIGHTNESS 50
SHARPNESS 50
COLOR 50
TINT 0
: MOVE : ADJ. : PREV.
MENU
PICTURE
SOUND
TIME
SETUP
FUNCTION
LANGUAGE ENGLISH
:
MOVE
:
SEL
:
EXIT
Picture Adjustment
Press the MENU button. Move the
cursor to PICTURE by pressing the
CH
/buttons and press the VOL +
button.
Move the cursor to PICTURE by
pressing the CH /buttons.
1
1
2
2
PICTURE
PICTURE STANDARD
CONTRAST 75
BRIGHTNESS 50
SHARPNESS 50
COLOR 50
TINT 0
: MOVE : ADJ. : PREV.
USING ON-SCREEN MENU
You can sequentially select any one of the four possible preferred analogue picture presets.
MENU
PICTURE
SOUND
TIME
SETUP
FUNCTION
LANGUAGE ENGLISH
:
MOVE
:
SEL
:
EXIT
2625
Sound Adjustment
Press the MENU button. Move the
cursor to SOUND by pressing the
CH /buttons and press the
VOL + button.
Move the cursor to SOUND by pressing
the CH /buttons.
1
1
2
2
USING ON-SCREEN MENU
There is a choice of five audio settings by using the on-screen menu, the five settings can by
viewed in the sequence illustrated.
SOUND
EQUALIZER
BALANCE 0
SURROUND OFF
: MOVE : ADJ. : PREV.
MENU
PICTURE
SOUND
TIME
SETUP
FUNCTION
:
MOVE
:
SEL
:
EXIT
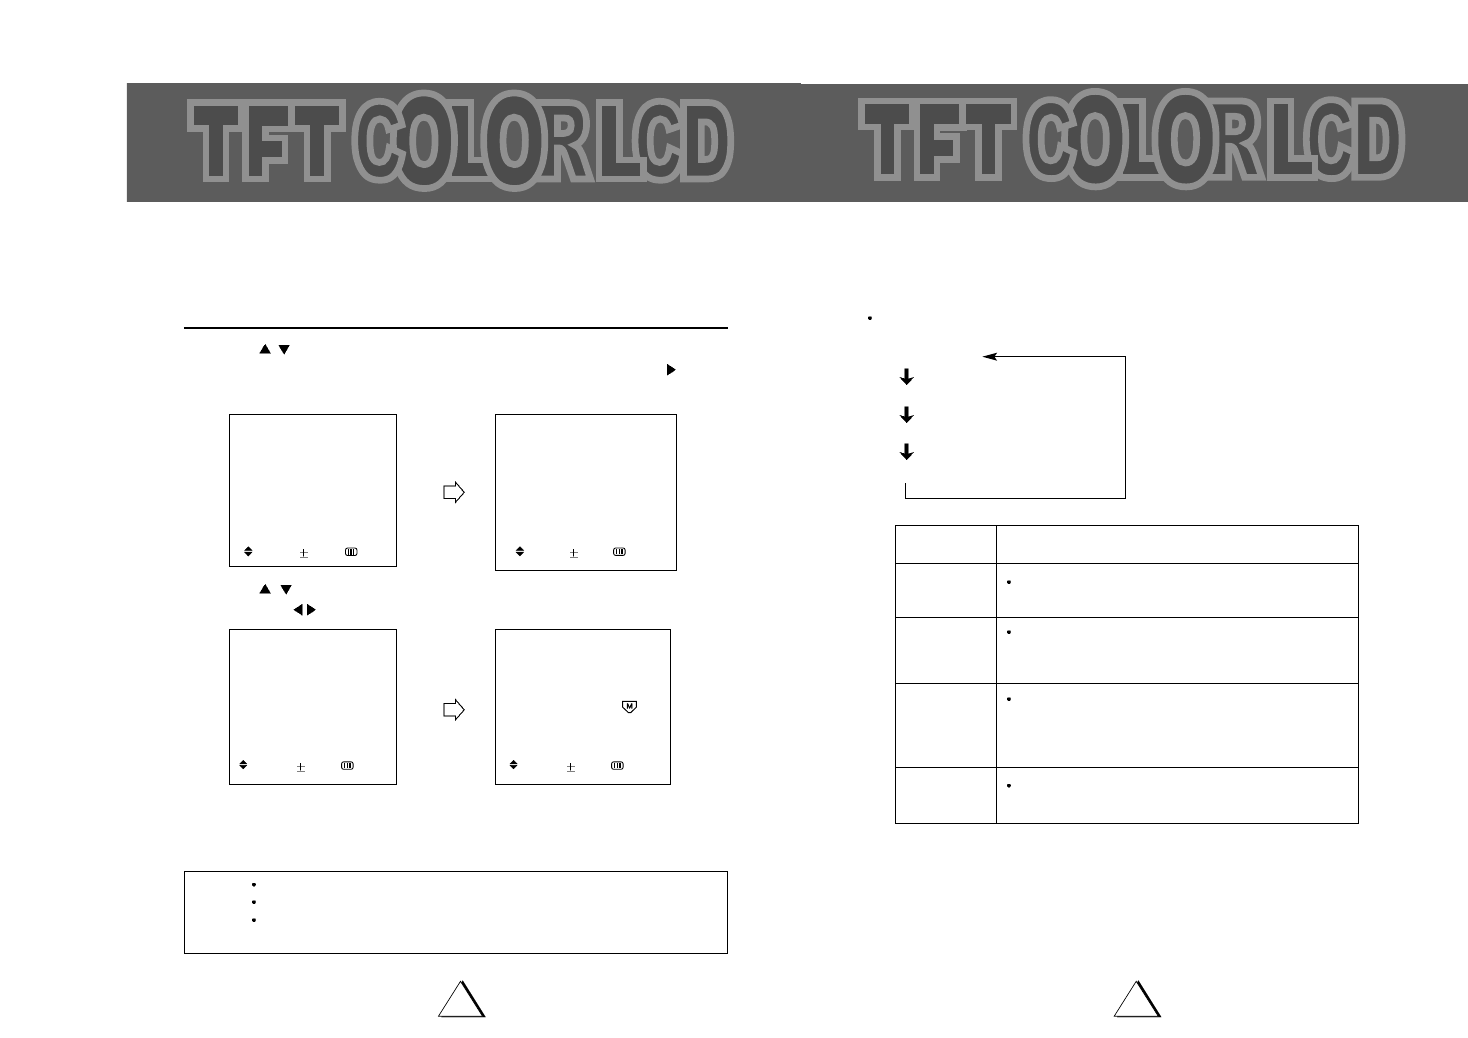
Sound Adjustment
S.STD
There is a choice of five audio settings. By pressing the S.STD button, any one of five settings
can be in the sequence illustrated.
Whenever this button is pressed, the mode will be changed as follows.
1. Press S.STD button.
Whenever this button is pressed, the mode will be changed as follows.
Select this mode to hear the adjusted sound you want
CUSTOM
Select this mode to hear the factory presetting standard
sound
STANDARD
Select this mode to hear the music
MUSIC
Select this mode to view the movie
MOVIE
Select this mode to hear the voice clearly
SPEECH
STANDARD MUSIC MOVIE SPEECH CUSTOM
2827
Sound Adjustment
BALANCE
SOUND MENU
Press the TV MENU button. Move the
cursor to SOUND by pressing the CH
/
buttons and press the
VOL +
button.
Move the cursor to BALANCE by
pressing the CH /buttons.
Press the VOL +/- buttons.
The Sound BALANCE is adjusted.
1
1
2
2
3
3
MENU
PICTURE
SOUND
TIME
SETUP
FUNCTION
LANGUAGE ENGLISH
: MOVE : SEL : EXIT
SOUND
SOUND STANDARD
EQUALIZER
BALANCE 0
SURROUND OFF
AVL OFF
: MOVE : ADJ. : PREV.
BALANCE 0
: ADJ. : PREV.
Sound Adjustment
EQUALIZER
You can adjust five frequency ranges to your preference.
Press the MENU button. Move the cur-
sor to SOUND by pressing the CH /
buttons and press the VOL + button.
Move the cursor to EQUALIZER by
pressing the CH /buttons and
press the VOL + button.
Adjust each frequency band, using
CH /buttons.
1
1
2
2
3
3
MENU
PICTURE
SOUND
TIME
SETUP
FUNCTION
: MOVE : SEL : EXIT
SOUND