Kingston Digital MLWG3 MobileLite WIRELESS G3 (MLWG3,MLWG3/64) User Manual
Kingston Digital Inc. MobileLite WIRELESS G3 (MLWG3,MLWG3/64)
UserManual.wiki
>
Kingston Digital
>
MLWG3 User Manual
User Manual
Navigation menu
Upload a User Manual
Namespaces
Wiki Guide
HTML
PDF
Info
Views
User Manual
Discussion / Help
Navigation
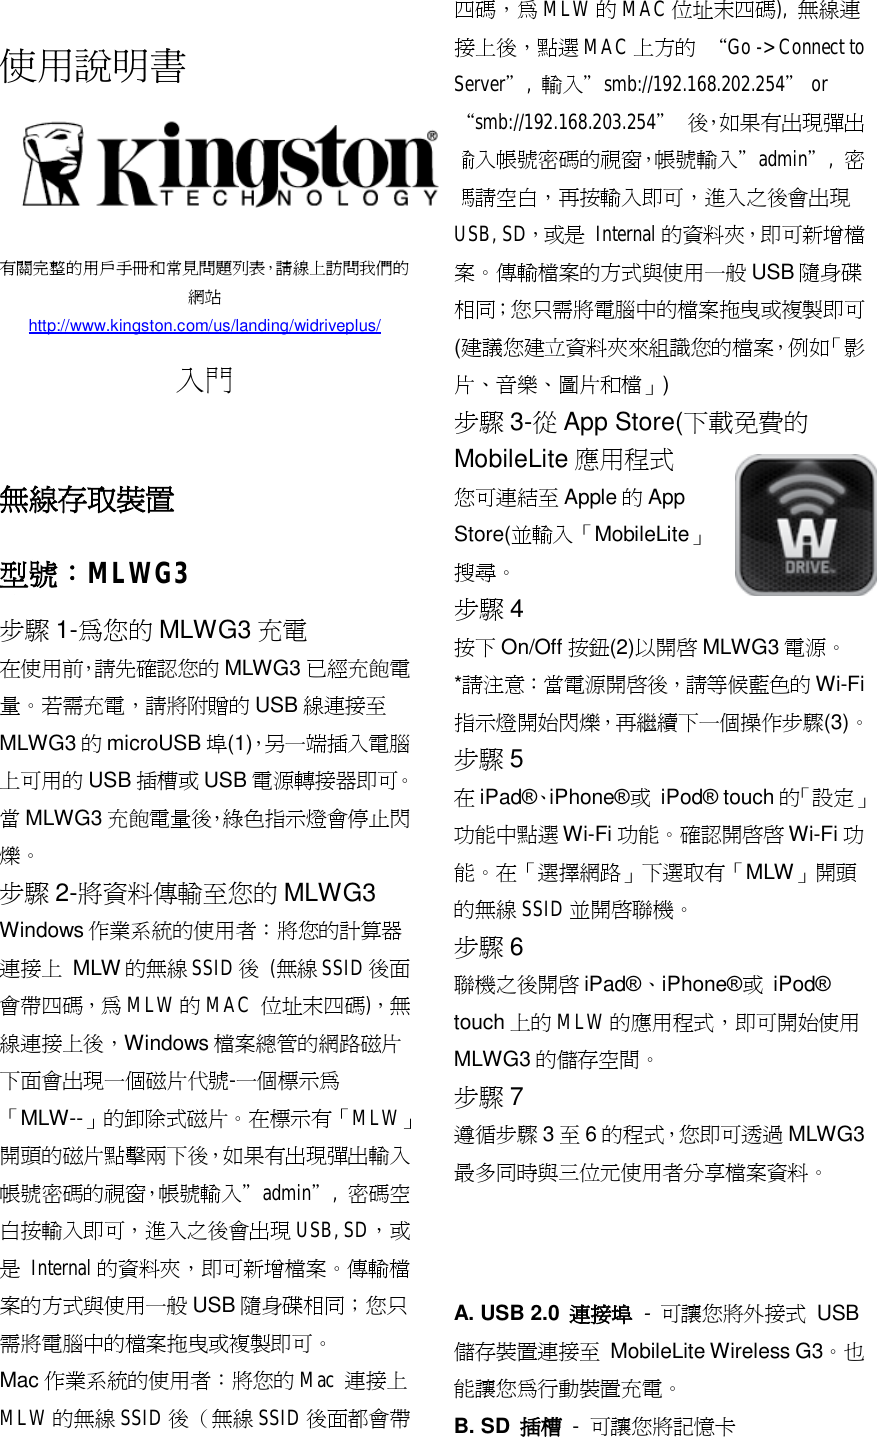
![(SD/SDHC/SDXC 或任何搭配轉接卡的 microSD 記憶卡) 連接至 MobileLite Wireless G3。(選配:無內置容量 或 ≦64GB) C. 電池 LED 指示燈/電量* - 表示目前電池和電量的狀態。 D. WiFi LED 指示燈 - 表示目前 WiFi 訊號的狀態。 E. 網路橋接 LED 指示燈 - 表示 MobileLite Wireless G3 是否已透過 Wi-Fi 或乙太網路橋接到網際網路。 F. 電源鍵 - 開啟或關閉 MobileLite Wireless G3 裝置的電源。短按 (1 秒):備用電池模式/長按 (3 秒):Wi-Fi 模式。Wireless G3 充電,或是連接到電腦上的標準 USB 連接埠,以便快速且 輕鬆地傳輸資料。當擴充連接埠在使用時,每個使用中的連接埠都需要專屬的磁碟機代號。 G. 重置按鈕 - 可讓您將 MobileLite Wireless G3裝置恢復原廠設定 (出廠預設值)。按住按鈕十秒以上。 H. Micro-B USB 連接埠 - 可為 MobileLite I. 乙太網路連接埠 – 可以連接乙太網路纜線,以建立無線網路熱點,聯機到網際網路。當連接至乙太網路時,Wi-Fi模式將暫時停用。 *電池 LED 指示燈在開啟 MobileLite Wireless G3 電源時,會顯示目前電池電量剩餘時間。綠色表示剩下 51% - 100% 的電池電量;橘色表示剩 下 25% - 50% 電池電量;而紅色表示剩下或低於 25% 的電池電量。 產品內容: 1 台 MobileLite Wireless G3 備註:本產品有黑色及白色兩種外殼 1 條 USB 傳輸線 (45 公分,A 轉 Micro-B 接頭) 1 個 內鍵 MicroSD 64G 卡 注意事項: 依據低功率電波幅射性電機管理辨法 第十二條:經型式認證合格之低功率射頻電機,非經許可,公司、商號或使用者均 不得得擅自變更頻率、加大功率或變更通原計之特性及功能。 第十四條:低功率射頻電機之使用不得影響飛航安全及干擾合法通信;經發現有干 擾現象時,應立即停用,並改善至無干擾時方得繼續使用。 前項合法通信,指依電信法規定作業之無線電通信。低功率射頻電機須忍受合法通 信或工業、科學及醫療用電波輻射性電機設備之干擾。 減少電磁波影響,請妥適使用。 [警語] 「電磁波曝露量MPE 標準值1mW/cm2,送測產品實測值為 (0.028) mW/cm2」](https://usermanual.wiki/Kingston-Digital/MLWG3/User-Guide-2860889-Page-7.png)