Kingston Digital MLWG3 MobileLite WIRELESS G3 (MLWG3,MLWG3/64) User Manual
Kingston Digital Inc. MobileLite WIRELESS G3 (MLWG3,MLWG3/64)
User Manual

User's Guide
MLWG3 Getting Started
Step 1 – Charge your MLWG3
Device
Before using, make sure your MLWG3™ is
fully charged. To
charge, connect the included USB cable to
your MLWG3’s
mini USB port (1) and the other end into an
available USB
port on your computer or to a USB wall
adapter. The green
power light will stop _ashing when MLWG3
is fully charged.
Step 2 – Add Content to your
MLWG3
Windows users: When connecting your
MLWG3 to your
computer, two drive letters will appear in
Windows Explorer
— one Read-Only labeled “CDROM” and
one Removable
Disk labeled “MLWG3” Double-click on the
drive labeled
“MLWG3” to add your content. Transfer your
_les the same
as you would for any USB drive; drag or
copy _les from your
computer to your MLWG3 device
Mac users: By default when connecting your
MLWG3 to
your computer, two drives will appear on
your desktop —
one Read-Only labeled “CDROM” and one
Removable Disk
labeled “MLWG3” Double-click on the drive
labeled
“MLWG3” to add your content. Transfer your
_les the same
as you would for any USB drive; drag or
copy _les from your
computer to your MLWG3 device.
(It is recommended that you organize your
content
by creating folders, e.g., “Videos, Music,
Pictures
and Documents”)
Step 3 – Download Kingston’s Free
MLWG3 App from the
App Store
Visit Apple’s App Store and search for
“Kingston MLWG3”.
Figure 1 – Kingston’s MLWG3 App
Icon
Step 4
Power on the MLWG3 by pressing the
On/Off button
(2).*
*Note: After you power on, wait for Blue
Wi-Fi Activity
Light to start _ashing before proceeding to
the next
step(3).
Step 5
Go to the Settings icon on your iPad®,
iPhone®, or iPod® touch
and select Wi-Fi. Con_rm that Wi-Fi is ON.
Select “Kingston

MLWG3” under “Choose a Network” and
click on it to
connect to it.
Step 6
Once connected, open the Kingston
MLWG3 app on your
iPad, iPhone, or iPod touch and enjoy your
new expanded
storage.
Step 7
Share your content with as many as three
users by having
them follow steps 3 to 6.
A. USB 2.0 port - Allows you to connect an
external USB Storage Device to MobileLite
Wireless G3. It also
allows you to charge your mobile device.
B. SD slot - Allows you to connect a
memory card (SD/SDHC/SDXC or any
microSD w/ adapter) to MobileLite Wireless
G3. (Optional: no built-in capacity or ≦ 64GB)
C. Battery LED/Power* - Indicates current
battery status and current power state.
D. Wi-Fi LED - Indicates current status of
Wi-Fi broadcast.
E. Bridged LED - Indicates whether or not
MobileLite Wireless G3 is bridged to an
Internet gateway via Wi-Fi or
Ethernet.
F. Power button - Powers on or powers off
the MobileLite Wireless G3 device. Short
press (1 second): Power
bank mode/Long press (3 seconds): Wi-Fi
mode.
G. Reset button - Allows you to reset the
MobileLite Wireless G3 device to its original
(default) configuration.
Hold the button down for more than 10
seconds.
H. Micro-B USB port - Allows you to charge
MobileLite Wireless G3 or connect it to a
standard USB port on your
computer for fast, easy data transfer. Each
media expansion port will require its own
drive letter if media are
inserted.
I. Ethernet port – Allows you to connect an
Ethernet cable to create a hotspot for
wireless internet access. Wi-Fi
mode will temporarily disable while
connected to Ethernet.
*
The battery LED also indicates how much battery time
is left while the MobileLite Wireless G3 is powered on.
Green indicates 51% - 100%
battery charge remaining; orange indicates 25% - 50%
battery charge remaining; and red indicates less than
25% battery charge remaining.
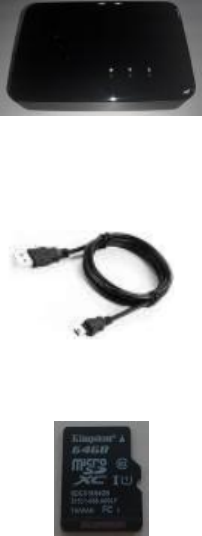
Product Content:
• 1 station MobileLite Wireless G3
Note: This product has a black and white
two kinds of housing
• 1 strip the USB cable (45 cm, A turn
Micro-B connector)
• 1 inner bond MicroSD 64G card

FCC Compliance and
Advisory Statement
This device complies with Part 15 of the FCC
rules. Operation is subject to the following two
conditions:(1) this device may not cause
harmful interference, and (2) this device must
accept
any interference received, including
interference that may cause undesired
operation.
This equipment has been tested and found to
comply with the limits for a Class B digital
device,
according to Part 15 of the FCC rules. These
limits are designed to provide reasonable
protection against harmful interference in a
residential installation. This equipment
generates,
uses and can radiate radio frequency energy
and if not installed and used in accordance
with
the instructions, may cause harmful
interference to radio communications.
However, there is
no guarantee that interference will not occur in
a particular installation. If this equipment does
cause harmful interference to radio or
television reception, which can be determined
by turning
the equipment off and on, the user is
encouraged to try correct the interference by
one or more
of the following measures:
1.Reorient the receiving antenna.
2.Increase the separation between the
equipment and receiver.
3.Connect the equipment into and outlet on a
circuit different from that to which the receiver
is
connected.
4.Consult the dealer or an experienced
radio/TV technician for help.
Any special accessories needed for
compliance must be specified in the instruction
manual.
Warning: A shielded-type power cord is
required in order to meet FCC emission limits
and
also to prevent interference to the nearby radio
and television reception. It is essential that
only the supplied power cord be used. Use
only shielded cables to connect I/O devices to
this
equipment.
CAUSION: Any changes or modifications not
expressly approved by the party responsible
for
compliance could void your authority to
operate the equipment.

Required notices to the
User of Canada (RSS)
IC statement CAN ICES-3
(B)/NMB-3(B)
This device complies with Industry
Canada licence-exempt RSS standard(s).
Operation is subject to the following two
conditions: (1) this device may not cause
interference, and (2) this device must
accept any interference, including
interference that may cause undesired
operation of the device.
Le présent appareil est conforme aux
CNR d’Industrie Canada applicables
aux appareils radio exempts de
licence. L’exploitation est autorisée
aux deux conditions suivantes : (1)
l’appareil ne doit pas produire de
brouillage, et (2) l’utilisateur de
l’appareil doit accepter tout
brouillage radioélectrique subi,
même si le brouillage est susceptible
d’en compromettre le
fonctionnement.
Complies with
IDA Standards
DAXXXXXX

使用說明書
有關完整的用戶手冊和常見問題列表,請線上訪問我們的
網站
http://www.kingston.com/us/landing/widriveplus/
入門
無線存取裝置
型號:MLWG3
步驟 1-為您的 MLWG3 充電
在使用前,請先確認您的 MLWG3 已經充飽電
量。若需充電,請將附贈的 USB 線連接至
MLWG3 的microUSB 埠(1),另一端插入電腦
上可用的 USB 插槽或 USB 電源轉接器即可。
當MLWG3 充飽電量後,綠色指示燈會停止閃
爍。
步驟 2-將資料傳輸至您的 MLWG3
Windows 作業系統的使用者:將您的計算器
連接上 MLW 的無線SSID後 (無線 SSID後面
會帶四碼,為 MLW 的MAC 位址末四碼),無
線連接上後,Windows 檔案總管的網路磁片
下面會出現一個磁片代號-一個標示為
「MLW--」的卸除式磁片。在標示有「MLW」
開頭的磁片點擊兩下後,如果有出現彈出輸入
帳號密碼的視窗,帳號輸入”admin”, 密碼空
白按輸入即可,進入之後會出現 USB, SD,或
是 Internal 的資料夾,即可新增檔案。傳輸檔
案的方式與使用一般USB 隨身碟相同;您只
需將電腦中的檔案拖曳或複製即可。
Mac 作業系統的使用者:將您的 Mac 連接上
MLW 的無線 SSID 後 (無線 SSID 後面都會帶
四碼,為 MLW 的MAC 位址末四碼), 無線連
接上後,點選 MAC 上方的 “Go -> Connect to
Server”, 輸入”smb://192.168.202.254” or
“smb://192.168.203.254” 後,如果有出現彈出
輸入帳號密碼的視窗,帳號輸入”admin”, 密
碼請空白,再按輸入即可,進入之後會出現
USB, SD,或是 Internal 的資料夾,即可新增檔
案。傳輸檔案的方式與使用一般USB 隨身碟
相同;您只需將電腦中的檔案拖曳或複製即可
(建議您建立資料夾來組識您的檔案,例如「影
片、音樂、圖片和檔」)
步驟 3-從App Store(下載免費的
MobileLite 應用程式
您可連結至Apple 的App
Store(並輸入「MobileLite」
搜尋。
步驟 4
按下 On/Off 按鈕(2)以開啟 MLWG3 電源。
*請注意:當電源開啟後,請等候藍色的 Wi-Fi
指示燈開始閃爍,再繼續下一個操作步驟(3)。
步驟 5
在iPad®、iPhone®或 iPod® touch 的「設定」
功能中點選 Wi-Fi 功能。確認開啟啟 Wi-Fi 功
能。在「選擇網路」下選取有「MLW」開頭
的無線 SSID 並開啟聯機。
步驟 6
聯機之後開啟 iPad®、iPhone®或 iPod®
touch 上的 MLW 的應用程式,即可開始使用
MLWG3 的儲存空間。
步驟 7
遵循步驟 3至6的程式,您即可透過 MLWG3
最多同時與三位元使用者分享檔案資料。
A. USB 2.0 連接埠 - 可讓您將外接式 USB
儲存裝置連接至 MobileLite Wireless G3。也
能讓您為行動裝置充電。
B. SD 插槽 - 可讓您將記憶卡
(SD/SDHC/SDXC 或任何搭配轉接卡的
microSD 記憶卡) 連接至 MobileLite
Wireless G3。(選配:無內置容量 或 ≦64GB)
C. 電池 LED 指示燈/電量* - 表示目前電池
和電量的狀態。
D. WiFi LED 指示燈 - 表示目前 WiFi 訊號
的狀態。
E. 網路橋接 LED 指示燈 - 表示
MobileLite Wireless G3 是否已透過 Wi-Fi
或乙太網路橋接到網際網路。
F. 電源鍵 - 開啟或關閉 MobileLite
Wireless G3 裝置的電源。短按 (1 秒):備用
電池模式/長按 (3 秒):Wi-Fi 模式。Wireless
G3 充電,或是連接到電腦上的標準 USB 連
接埠,以便快速且
輕鬆地傳輸資料。當擴充連接埠在使用時,每
個使用中的連接埠都需要專屬的磁碟機代號。
G. 重置按鈕 - 可讓您將 MobileLite
Wireless G3裝置恢復原廠設定 (出廠預設
值)。按住按鈕十秒以上。
H. Micro-B USB 連接埠 - 可為 MobileLite
I. 乙太網路連接埠 – 可以連接乙太網路纜
線,以建立無線網路熱點,聯機到網際網路。
當連接至乙太網路時,Wi-Fi模式將暫時停用。
*電池 LED 指示燈在開啟 MobileLite Wireless G3 電
源時,會顯示目前電池電量剩餘時間。綠色表示剩下
51% - 100% 的電池電量;橘色表示剩
下 25% - 50% 電池電量;而紅色表示剩下或低於
25% 的電池電量。
產品內容:
1 台 MobileLite Wireless G3
備註:本產品有黑色及白色兩種外殼
1 條 USB 傳輸線 (45 公分,A 轉 Micro-B
接頭)
1 個 內鍵 MicroSD 64G 卡
注意事項:
依據低功率電波幅射性電機管理辨法
第十二條:經型式認證合格之低功率射頻電機,非經
許可,公司、商號或使用者均
不得得擅自變更頻率、加大功率或變更通原計之特性
及功能。
第十四條:低功率射頻電機之使用不得影響飛航安全
及干擾合法通信;經發現有干
擾現象時,應立即停用,並改善至無干擾時方得繼續
使用。
前項合法通信,指依電信法規定作業之無線電通信。
低功率射頻電機須忍受合法通
信或工業、科學及醫療用電波輻射性電機設備之干擾。
減少電磁波影響,請妥適使用。
[警語]
「電磁波曝露量MPE 標準值1mW/cm2,送測產品實
測值為 (0.028) mW/cm2」