Kodiak Networks U400 Carbonado - Wifi Device User Manual
Kodiak Networks. Carbonado - Wifi Device
User manual
Copyright 2013, Kodiak Networks, Inc. kodiaknetwor ks.com
1
User Manual
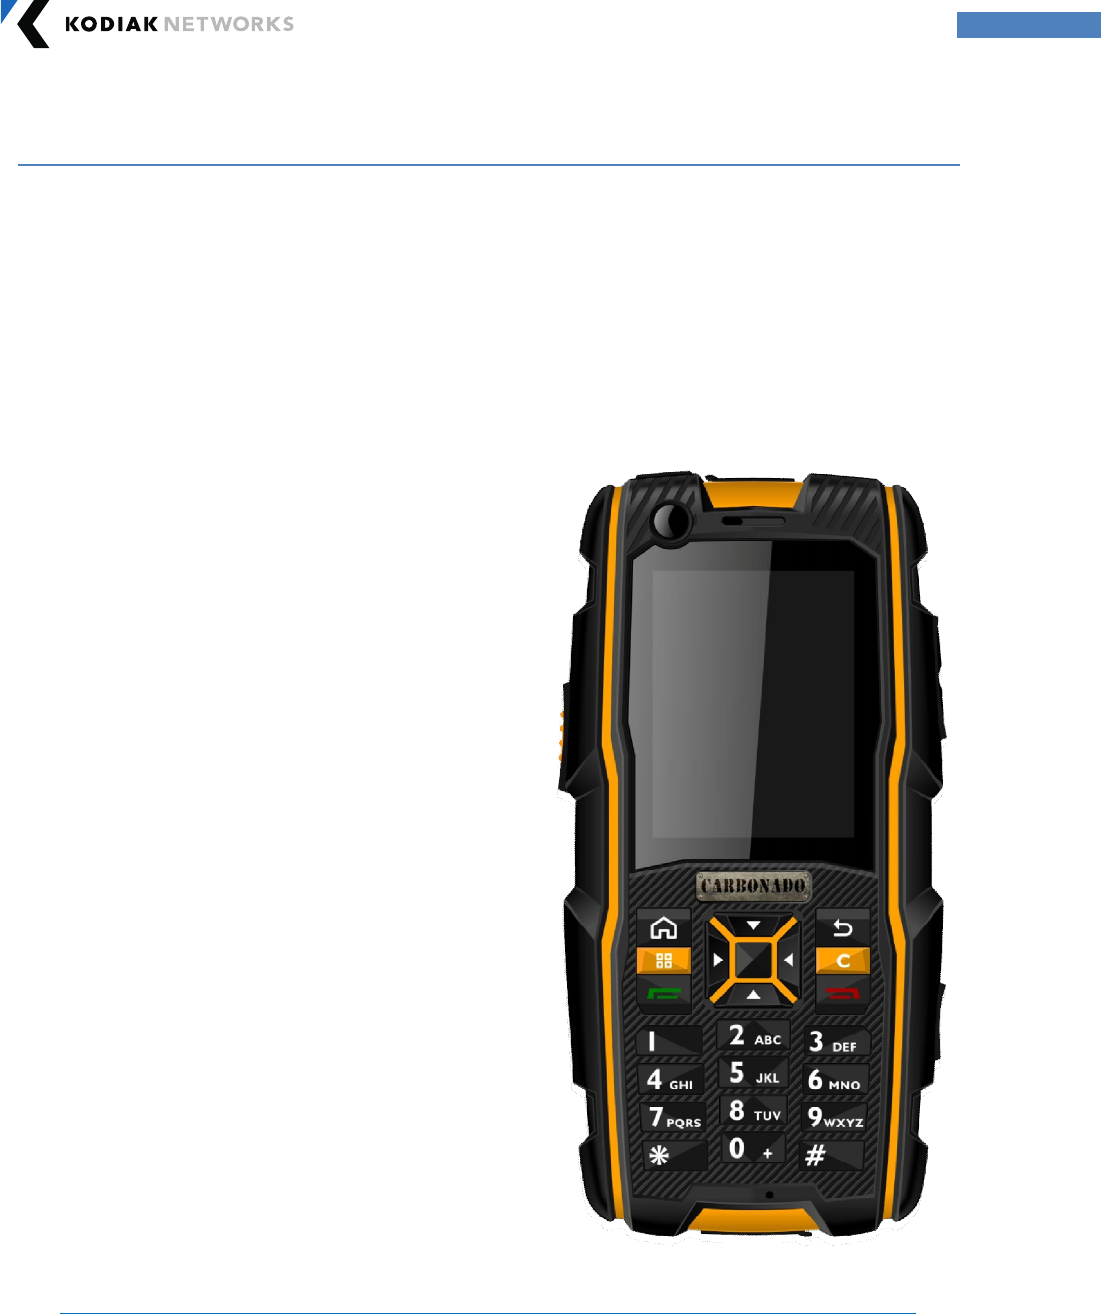
For Carbonado UA400 Handset with Android OS

Copyright 2013, Kodiak Networks, Inc. kodiaknetwor ks.com
2
Table of Contents
1. General Information .......................................................................................................................................................... 3
1.1 Phone Model Covered ................................................................................................................................................ 3
1.2 Netw ork Services ......................................................................................................................................................... 3
1.3 UA400 Suppor t Information .................................................................................................................................... 3
1.4 Safety Guidelines ......................................................................................................................................................... 3
1.5 Precautions to Use the Battery ............................................................................................................................... 4
1.6 Batter y Replacement……………………………………………………………………………………………………………….4
1.7 Avoid High Temperatures ..................................................................................................................................... ...4
1.8 Child Safety ................................................................................................................................................................. …5
1.9 Emergency Calls ......................................................................................................................................................... …5
2. Getting Started .................................................................................................................................................................. …6
2.1 Setting Up Your Phone ........................................................................................................................................... …6
2.2 Inserting the Battery .............................................................................................................................................. …6
2.3 Removing the Battery ............................................................................................................................................ …7
2.4 Charging the Batter y .............................................................................................................................................. …7
3. Basics of your Phone ...................................................................................................................................................... …9
3.1 UA400 Layout ......................................................................................................................................................... …9
3.2 UA400 Front Layout .............................................................................................................................................. …9
3.3 UA400 Back Layout ............................................................................................................................................... .10
3.4 Sw itching ON Your Phone for the first time ................................................................................................. .10
3.5 Home Screen Indicator s ...................................................................................................................................... .11
3.6 Keypad Functions .................................................................................................................................................. .11
3.7 FCC Certification .................................................................................................................................................... .13

Copyright 2013, Kodiak Networks, Inc. kodiaknetwor ks.com
3
1. General Information
Welcome to the w orld of Carbonado Rugged phones. This phone w orks as a Wi-Fi only device and
has an intuitive, feature-rich user inter face, w hich allow s you to make the best use of the available
functions
1.1 Phone Model Cover ed:
This user guide covers the Car bonado UA400 phone model. The phone model name can be read on
the phone label under the batter y.
1.2 Networ k Ser vices:
Your Carbonado device is equipped to w or k only for PoC ser vice with Wi-Fi netw or k. To make the
best of these ser vices, you must subscribe to the Wi-Fi services through Operator and obtain
instructions on how to use Wi-Fi on your device.
1.3 UA400 Suppor t Information:
If your device needs any product support, please contact Carbonado suppor t +1-972-665-0200. For
online support information, contact us at car bonado_support@kodiaknetwor ks.com.
1.4 Safety Guidelines :
Please read and understand the following safety guidelines before you use the phone. These
guidelines provide details to enable you in operating your phone safely and confor m to any legal
requirements regarding the use of Carbonado phones.
Disposal of Stale Electrical and Electronic Equipment
The symbol of the crossed-out wheeled bin indicates that within the country of the United
states of America, this pr oduct, and any enhancements marked w ith this symbol, cannot be
disposed as unsorted waste but must be taken to separ ate collection at their end-of-life.
Disposal of Batter y
Please check local regulations for disposal of batteries. The batter y should never be placed in
municipal waste. Use a battery disposal facility if available.

Copyright 2013, Kodiak Networks, Inc. kodiaknetwor ks.com
4
Guideline for Headphone and Earphone
To prevent possible hearing damage, please do not listen at high volume levels for long
periods.
Warning !
Avoid actions that could cause injur y to yourself or other s
Caution
Avoid usage of the device in situations that could cause damage to your device or other
equipments
1.5 Precautions to Use the Battery:
A rechargeable battery pow ers your device. Use the batter y only for its intended pur pose. Never
use any char ger or battery that is damaged. If the battery is completely discharged, it may take a
few minutes before the char ging indicator appears on the display or before any calls can be made.
The full perfor mance of a new batter y is achieved only after three to four complete char ge and
discharge cycles. You can charge the batter y sever al times but it w ill eventually wear out. Unplug
the charger fr om the electrical plug and the device w hen not in use. Ensur e that you do not leave
the fully char ged battery connected to a charger . If left unused, a fully charged batter y will lose its
charge over time.
1.6 Battery Replacement:
When the talk and standby times ar e noticeably shor ter than normal, replace the battery w ith an
original Carbonado battery. If a replacement batter y is being used for the first time or if the batter y
has not been used for a pr olonged period, it may take a few minutes before the char ging indicator
appears on the display or befor e any calls can be made.
1.7 Avoid High Temper atures:
If you leave the batter y in hot or cold places, such as in a closed car in summer or winter conditions,
it will r educe the capacity and lifetime of the battery. For best r esults, try to keep the battery
betw een -20°C and +55°C (-4°F and 131°F). A device with a hot or cold battery may not w or k
tempor arily, even w hen the batter y is fully charged. Batter y perfor mance is particularly limited in
temperatur es below freezing.

Copyright 2013, Kodiak Networks, Inc. kodiaknetwor ks.com
5
1.8 Child Safety:
Do not allow children to use your mobile phone or its accessories. Keep it out of their reach. They
could hurt themselves or others, or could accidentally damage the mobile phone or accessories.
Your mobile phone and its accessor ies may contain small parts, w hich could be detached and create
a choking hazar d for your child.
1.9 Emer gency Calls:
Carbonado phones operate using Wi-Fi r adio signals, w hich cannot guar antee connection under all
circumstances. Therefor e you should never solely rely upon any mobile phone for essential
communications (e.g. medical emergencies). Emer gency calls will not be possible as this is Wi-Fi
only device.
Copyright 2013, Kodiak Networks, Inc. kodiaknetwor ks.com
6
2. Getting Star ted
The following topics give you all the information needed to set up your phone for the first time.
Setting Up Your Phone:
Refer to the follow ing sections to insert and charge the battery and set up the phone. To change the
battery you can use the key supplied along w ith the device, in the absence of the key you can also
use screw driver .
Inser ting t he Batter y:
Complete the following steps to insert a Car bonado batter y into your UA400 phone.
1.
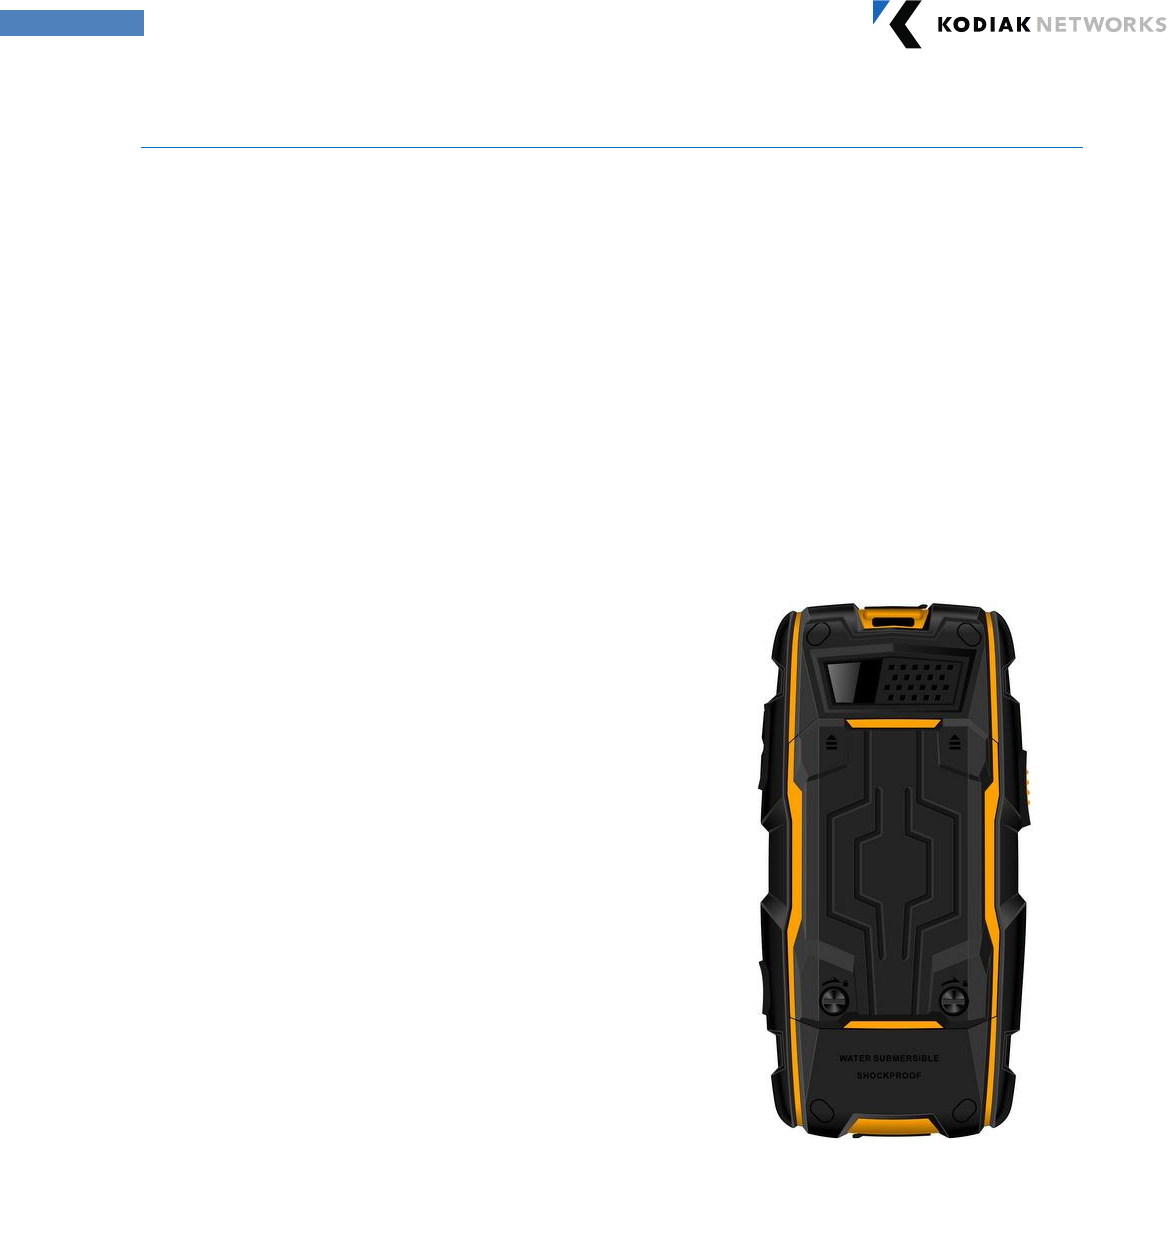
Rotate both battery cover scr ews in counter
clockw ise dir ection (as show n in the figure).
You can use a key/ scr ewdriver set.
Sometimes the scr ew s may be tight and
extra effort is required to open them.
2.
Lift the battery cover to view the
battery slot.
3.
Insert the batter y and push it into the batter y
slot such that the three metallic contacts at
the bottom of the batter y ar e aligned w ith the
metallic contacts within the batter y
compartment.
4.
Close the batter y cover . Rotate the batter y
cover scr ew s in clockwise dir ection. You can
use a key/ screwdriver to tighten the screws.
Ensur e not to over tighten.
Copyright 2013, Kodiak Networks, Inc. kodiaknetwor ks.com
7
Removing the Batter y:
Complete the following steps to remove the Carbonado battery from your UA400 phone.
Char ging the Batter y:
The battery pr ovided with your mobile phone does not come fully charged. We r ecommend that
you charge the phone at least for five hours before you use it for the first time.
Note: With a fully charged batter y, the phone can r emain in standby mode for up to 800 hours. If
the batter y is completely out of charge, the charging icon appears only after several minutes w hen
the charger is connected.
Do not use an incorr ect batter y type as it may cause explosion.
Complete the following steps to charge the phone batter y.
1. Plug the charger into a pow er outlet.
1.
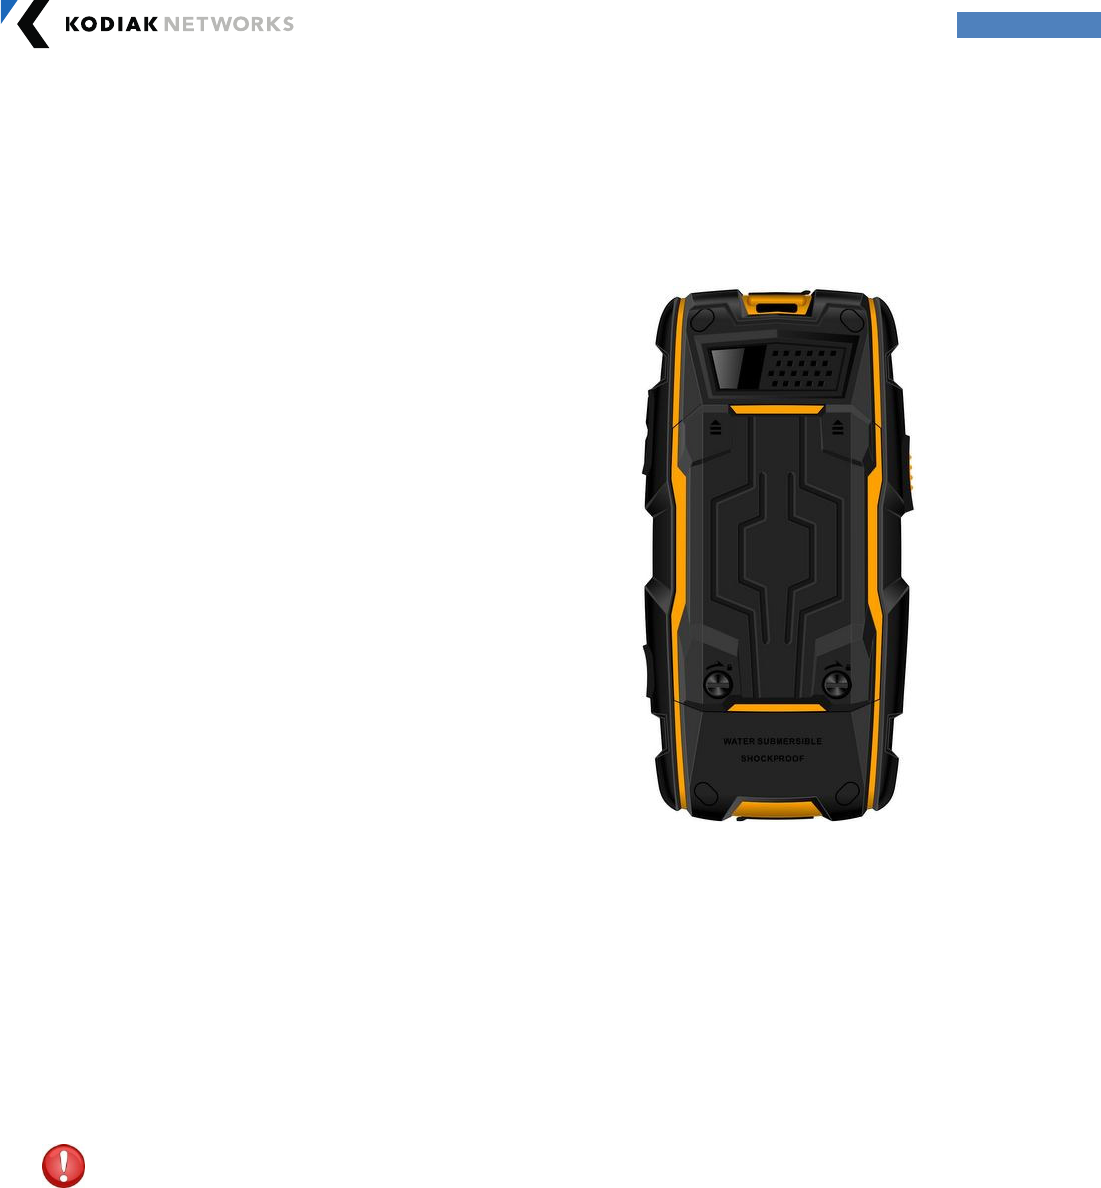
Rotate both batter y cover scr ew s in counter
clockw ise direction (as show n in the figur e).
You can use the key/ scr ew driver to open
the back. Sometimes the scr ews may be
tight and extra effor t is r equired to open
them.
2.
Lift the battery cover to
view the battery
slot.
3.
Raise th
e upper end of the batter y from
the
slot and remove the battery.
4. Close the batter y cover . Rotate the batter y
cover scr ew s in clockwise dir ection. You can
use a key/ screw driver to tighten the screws.
Ensure not to over tighten.

Copyright 2013, Kodiak Networks, Inc. kodiaknetwor ks.com
8
If the batter y is being charged while the phone is sw itched on, you will notice that the bars
in the battery charge icon (visible on the home scr een) show movement indicating that the
battery is being charged. After the phone is fully charged, the batter y bars on the display
stop scrolling. At this point, you can disconnect the phone fr om the charger .
2. The char ger port is located
at the bottom of
the phone. To access the charger port, lift the
cover with the USB sign. Insert the Micr o USB
connector into the port and inser t the other
end of the USB cable into the charger .
Alternatively, you can charge the phone with
your PC. Insert the Micro USB connector USB
cable into the charger port of the phone and
inser t the other end of the cable into a USB
por t on your PC.
3.
If the batter y is being charged w hen the
phone is switched off, only the battery icon
is displayed (as shown in the figure).
Copyright 2013, Kodiak Networks, Inc. kodiaknetwor ks.com
9
3. Basics of your Phone
Your phone comes w ith featur es that simplify your life and expand your ability to stay connected to
the people as w ell as infor mation that are important to you. Refer to the follow ing sections to
understand the basic functions and features of your phone.
Carbonado UA400 Layout:
The Carbonado UA400 comes with a single LCD screen. The TFT technology used scr een displays
262K color s. The Carbonado UA400 keypad has 11 function keys and 12 alphanumeric keys. The
left side of the phone has one key for PTT application and the right side of the phone has thr ee keys,
tw in keys at the top are used to control the volume and a single red key at the bottom used for
sending SOS . The battery and the speaker are located at the back side of the phone. For mor e
infor mation r efer to the follow ing sections.
Carbonado UA400 Fr ont Layout:
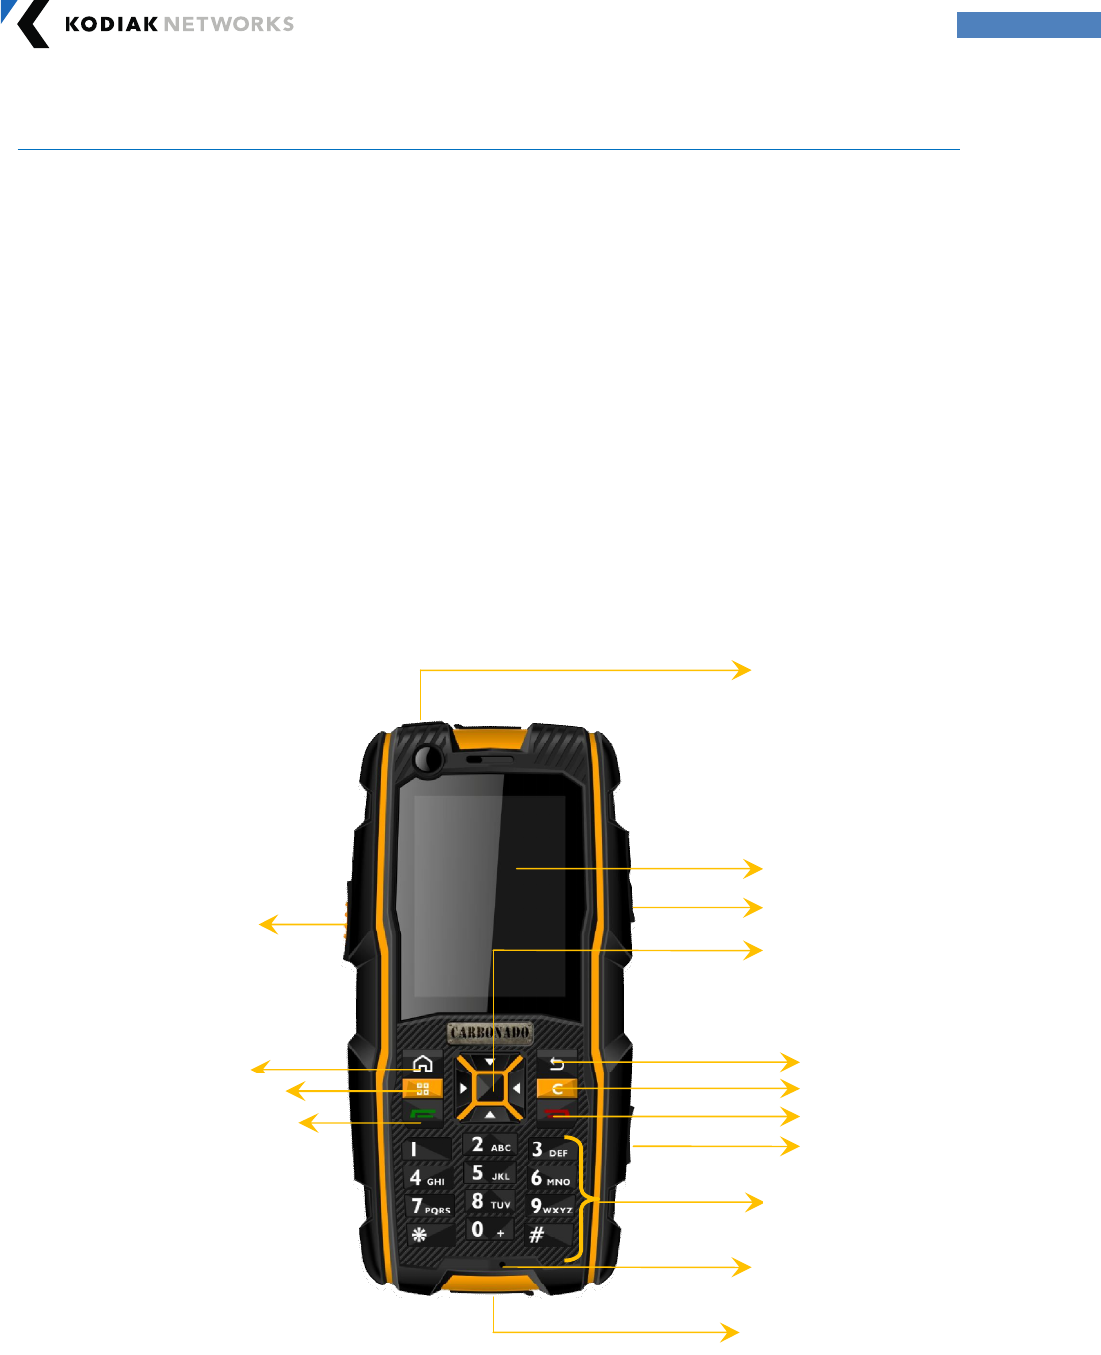
The following image pr ovides the details of the front layout of your Carbonado UA400.
Power But ton
LCD screen
Green key
Center Navigation
key
Back Button
Clear Button
SOS but ton
PTT but ton
Home Button
M enu Butt on
Volume control
Charging port
Alpha Numeric Key
pad
M icrophone
Red
key
Copyright 2013, Kodiak Networks, Inc. kodiaknetwor ks.com
10
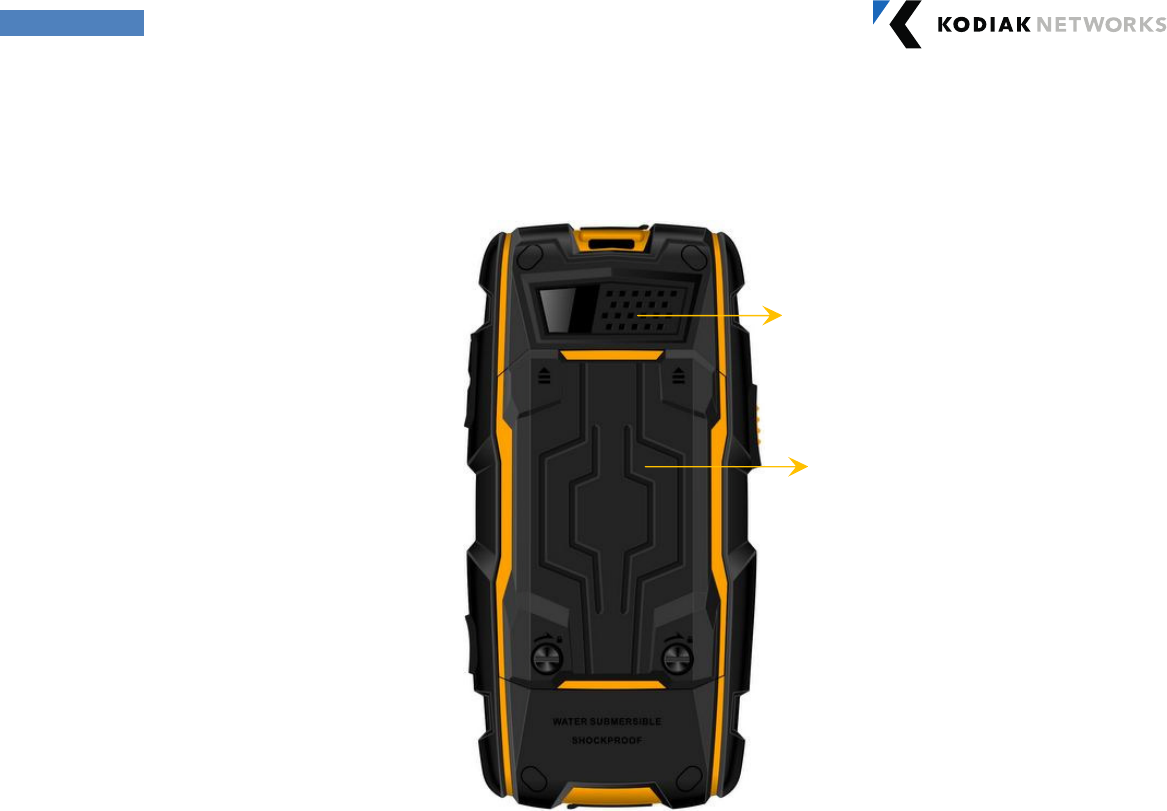
Carbonado UA400 Back Layout:
The following image pr ovides the details of the layout at the back of your Carbonado UA400.
Switching ON your Phone for the fir st time
Press and hold the Power ON/ OFF key provided at the top for two seconds to power on the phone.
When the phone is switched on, it tries to r egister with the near by Wi-Fi netw or k. In some cases
you may have to pr ovide the Passw or d for the Wi-Fi connectivity that you want to choose. After
successful r egistration, the Wi-Fi symbol is displayed on the status bar at the top of your home
scr een.
Home Scr een Indicator s:
The home screen indicators are visible in the status bar at the top of the home screen when the
phone is in standby mode. Some icons indicate the status of cer tain functionalities of the phone, for
example, the battery charge indicator , the Wi-Fi networ k status indicator , time etc. Some icons are
displayed only if the specific ser vices ar e activated.
Battery cover
Speaker
Copyright 2013, Kodiak Networks, Inc. kodiaknetwor ks.com
11
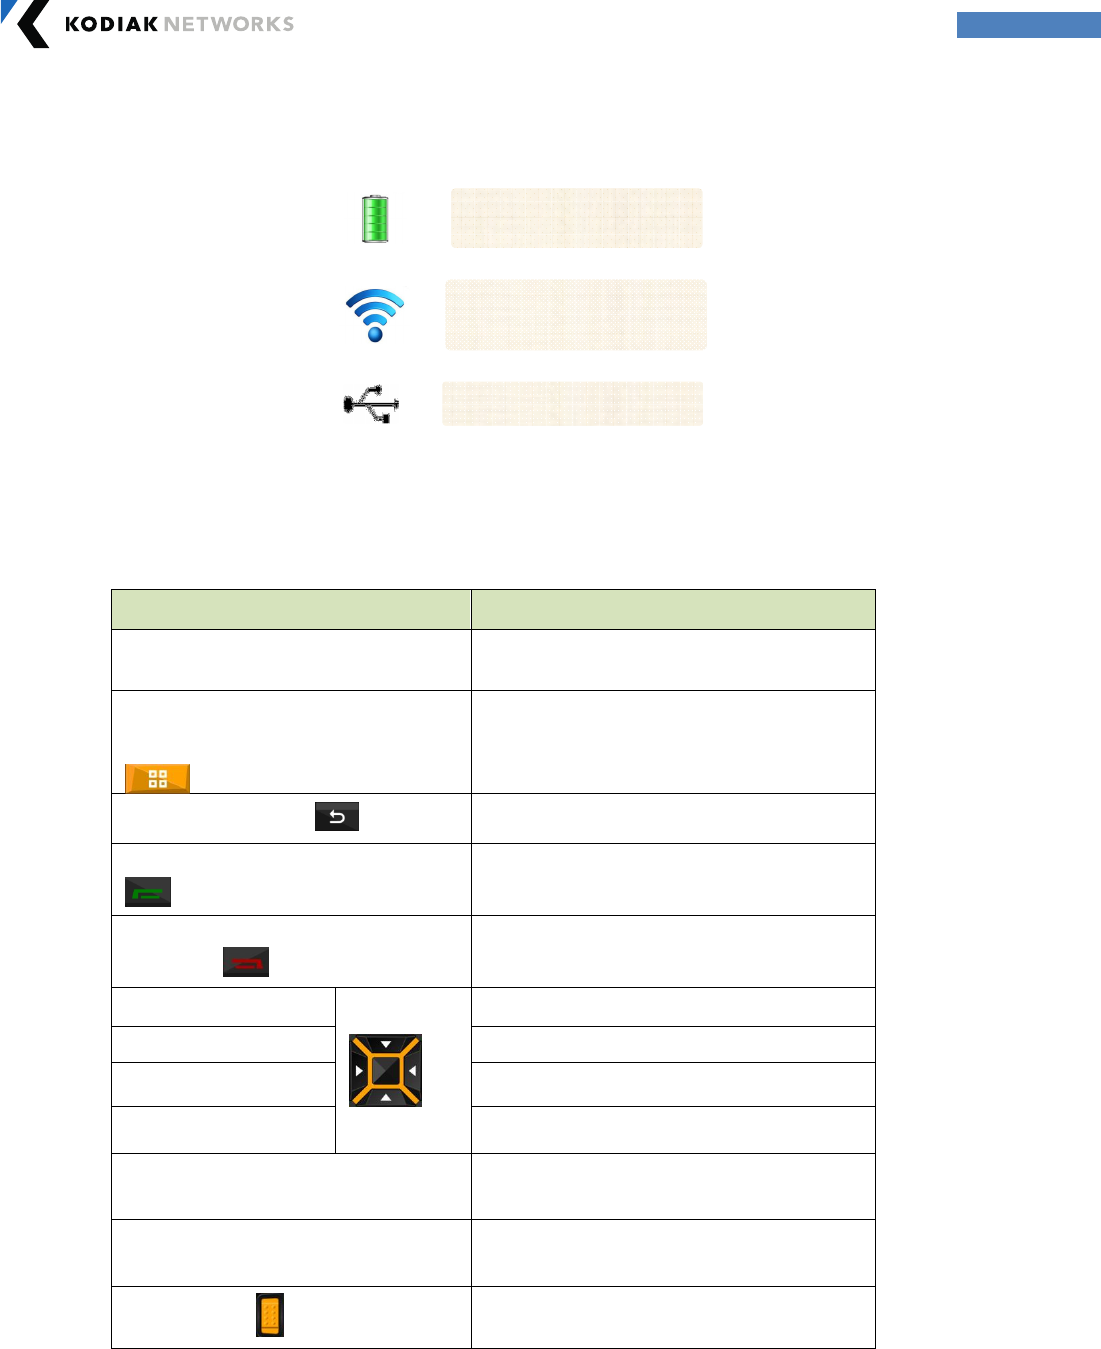
The following table describes the display indicator s in the status bar of the home screen in the your
phone.
Keypad Functions:
The following table displays the var ious keys and the corresponding functions they per form:
Keys Descr iption
Center navigation key
To select an application/ action
/ Enable
Keypad
Left Selection Key/ Menu Key
To select an application/ action
Right Selection Key To move back fr om any application
Call/ Accept/ Send Key(Gr een Key)
To make PoC calls/ send IPA’s
Call disconnect Key
(Red Key) To disconnect the call
Up navigation key
To move up by selection
Down navigation key To move down by selection
Right navigation key To move right by selection
Left navigation key To move left by selection
*
(Applicable only for PTT
applications)
To reach t op of t he list
#
(Applicable only for PTT
applications)
To reach bott om of t he list
Side PTT key
To launch PTT applicat ion
PTT floor cont r ol
Battery
Wi-Fi connectivity
USB Port connected
Copyright 2013, Kodiak Networks, Inc. kodiaknetwor ks.com
12
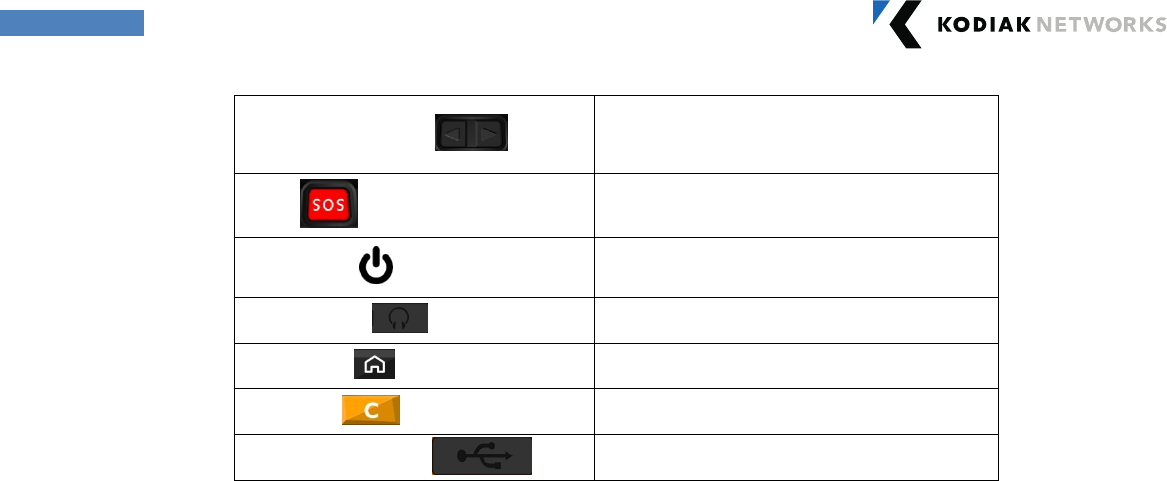
Right volume keys
To incr ease or decr ease volume
SOS
Non-functional
Pow er Key
Power key is also used for scr een wake
up/ screen t urn off
Head set Jack To inser t Head Phone jack
Home Key Home Key t o reach Home screen
Clear Key To clear t he edited t ext
USB / Char ger Por t USB connectivit y and charger por t

Copyright 2013, Kodiak Networks, Inc. kodiaknetwor ks.com
13
Car bonado
Wi-Fi Mobile Phone: UA400
FCC Regulations
This device complies w ith part 15 of the FCC Rules. Operation is subject to the following tw o
conditions:
(1) This device may not cause harmful interference
(2) This device must accept any inter ference received, including interference that may cause
undesir ed operation.
This device has been tested and found to comply w ith the limits for a Class B digital device,
pursuant to Part 15 of the FCC Rules. These limits are designed to pr ovide reasonable protection
against harmful interference in a residential installation. This equipment generates, uses and can
radiated radio frequency energy and, if not installed and used in accordance w ith the instr uctions,
may cause harmful inter ference to r adio communications. How ever, ther e is no guar antee that
interference will not occur in a particular installation If this equipment does cause har mful
interference to radio or television reception, which can be deter mined by turning the equipment off
and on, the user is encouraged to try to corr ect the inter ference by one or more of the follow ing
measur es:
-Reor ient or relocate the receiving antenna.
-Increase the separation between the equipment and receiver .
-Connect the equipment into an outlet on a circuit different from that to w hich the receiver is
connected.
-Consult the dealer or an exper ienced radio/ TV technician for help.
Changes or modifications not expr essly approved by the party responsible for compliance could
void the user‘s authority to oper ate the equipment.
RF Exposure Information
This device meets the government’s requirements for exposure to radio w aves.
This device is designed and manufactured not to exceed the emission limits for exposure to r adio
frequency (RF) energy set by the Federal Communications Commission of the U.S. Gover nment.
This device complies w ith FCC r adiation exposur e limits set forth for an uncontr olled envir onment.