Kohler PNA1 5.8GHZ TOILET VENTILATION ACCESSORY User Manual Revised Users Manual
Kohler Co. 5.8GHZ TOILET VENTILATION ACCESSORY Revised Users Manual
Kohler >
Contents
- 1. INSTALLATION MANUAL
- 2. Revised Users Manual
Revised Users Manual

85984Ć2ĆAB
VENTILATING
TOILET KIT
INSTALLATION
G U I D E
85984Ć2ĆAB Kohler Co., Kohler, WI
2
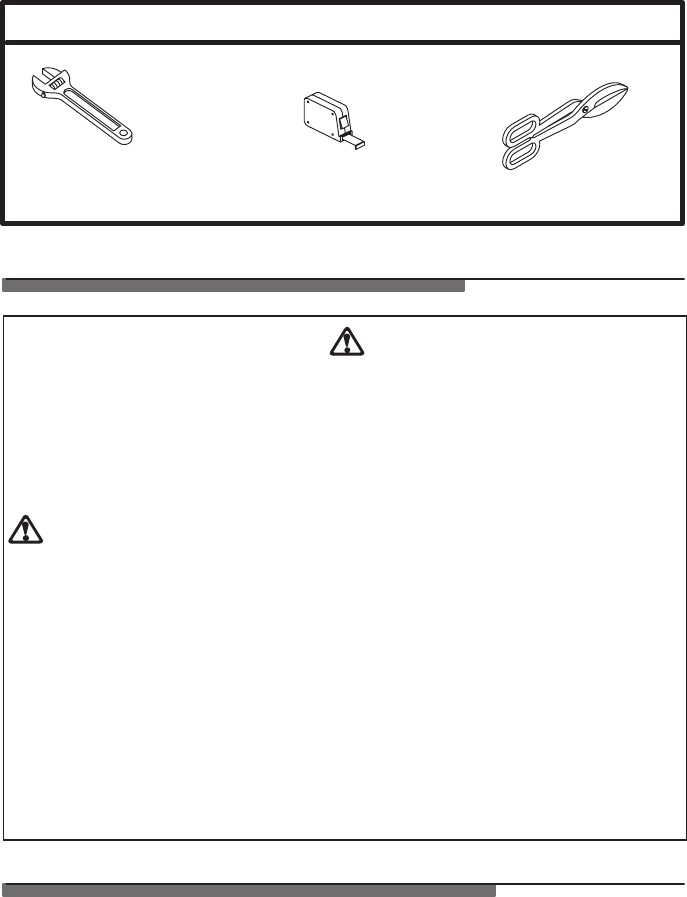
RECOMMENDED TOOLS AND MATERIALS
Adjustable
Wrench Tape
Measure
Scissors
or Snip
IMPORTANT SAFEGUARDS
When using electrical
products, especially when
children are present, basic
safety precautions should
always be followed, including
the following:
READ ALL INSTRUCTIONS
BEFORE USING THIS
APPLIANCE.
DANGER:ĄRisk of
electrical shock. To reduce
the risk of electrical shock:
Only connect the AC adapter to
a properlyĆgrounded,
groundingĆtype receptacle
which is protected by a
GroundĆFault
CircuitĆInterrupter (GFCI).
Do not drop into water or other
liquid.
Do not reach for a product that
has fallen into water. Unplug
immediately.
WARNING: To reduce the risk
of personal injury, follow
these safety precautions:
Use this ventilating toilet kit for its
intended use as described in this
manual. Do not use attachments
not recommended by Kohler Co.
Never operate this ventilating toilet
kit if it has a damaged cord or plug,
if it is not working properly, if it has
been dropped or damaged, or
dropped into water. This product
has no user adjustable parts.
Keep the cord away from heated
surfaces.
SAVE THESE INSTRUCTIONS
Operation of this equipment is authorized under a waiver issued by the
FCC, and is subject to the following conditions: (1) This device may not
cause harmful interference, and (2) this device must accept any
interference received, including interference that may cause undesired
operation. If it is determined that operation of this equipment causes
harmful interference to authorized radio operations, the operator shall
immediately cease operations and contact the Compliance and
Information Bureau of the FCC.
85984Ć2ĆAB
Kohler Co., Kohler, WI 3
BEFORE YOU BEGIN
WARNING: Do not use
inĆtank cleaners. Products
containing chlorine (calcium
hypochlorite) can seriously
damage this product as well
as the other fittings in your
toilet. Kohler Company shall
not be responsible or liable
for any damage caused by the
use of cleaners containing
chlorine.
SDo not attempt to repair or
replace the AC adapter.
SDo not use an extension
cord with this product.
SElectrical service
requirements: 120 VAC, 60 Hz
(circuit protected by a Class A
GFCI). The kit uses a 6'
lowĆvoltage electrical cord and
AC adapter.
SThis ventilating toilet kit uses
a motionĆsensing device to
automatically turn itself on
and off.
SPlug in the AC adapter only
after the ventilating toilet kit
is properly installed in the
toilet tank.
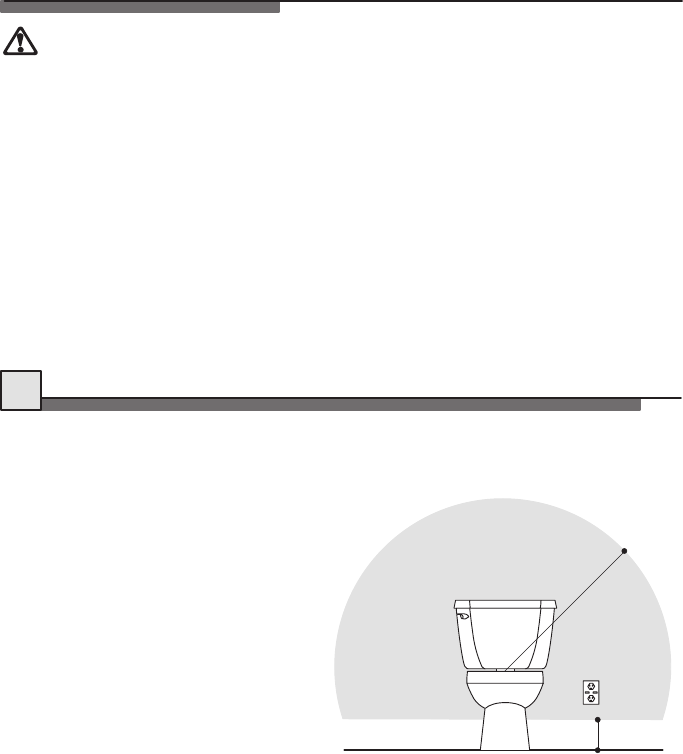
INSTALL ELECTRICAL SERVICE (IF NEEDED)
1.
NOTE: You can use an existing
electrical service if it meets the
following requirements.
A licensed electrician should
install a properlyĆgrounded,
groundingĆtype receptacle
which is protected by a GFCI.
We recommend that the
electrician locate the receptacle
no less than 6" above the floor
line, and within a 32" radius
measured level with the toilet
ledge, as shown.
NOTE: Do not connect this
product to an extension cord.
6" MIN.
32" R.
85984Ć2ĆAB Kohler Co., Kohler, WI
4
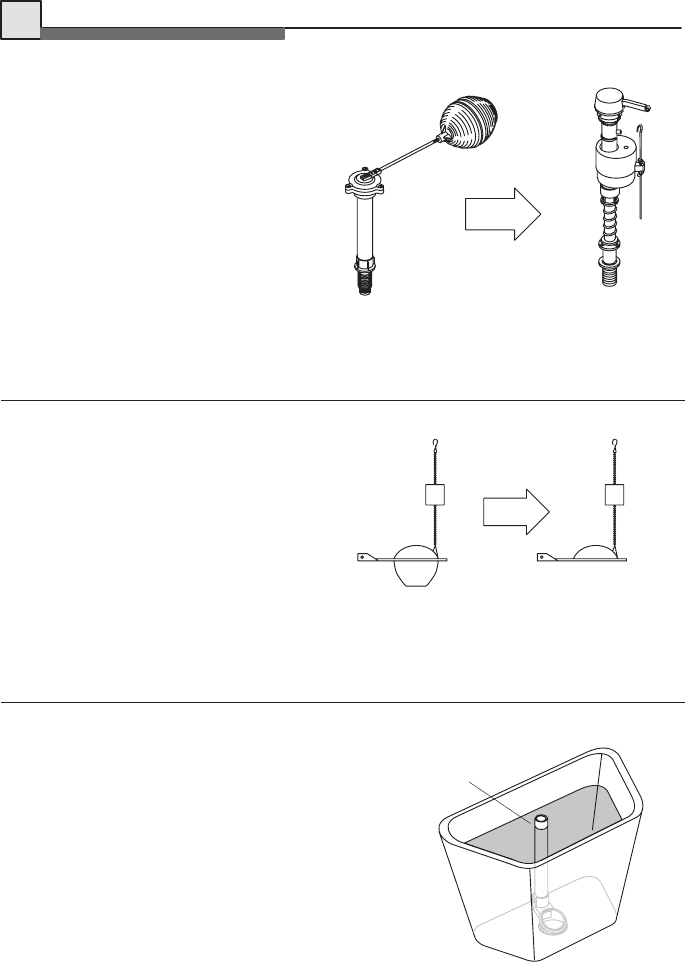
INSTALL THE KIT
2.
Remove the tank cover .
If your toilet uses a fill valve
with a float ball, you must
replace it with a compact fill
valve such as a Fluidmaster
400A. Replace the fill valve
according to the manufacturer's
instructions. Replace
FloatĆBall Type
Fill Valve with
Compact Valve
We recommend a flapper
without a bottom cone to
optimize performance of the
ventilating toilet kit.
Flapper with
Bottom Cone
Flapper without
Bottom Cone
Adjust the tank water line so it
is at least 7/8" from the top of
the overflow to ensure correct
operation of the ventilating kit.
Adjust Water
Line to at Least
7/8" From
Overflow
85984Ć2ĆAB
Kohler Co., Kohler, WI 5
Shut off the water supply to the
toilet, and flush the toilet to
relieve the water pressure.
Remove and discard the
existing refill tube from the fill
valve.
Position the snorkel assembly
over the overflow tube, and
hang the snorkel assembly on
the back wall of the tank.
Adjust the snorkel assembly
from sideĆtoĆside and
frontĆtoĆback to prevent
interference with the trip lever
linkage, fill valve, and tank
walls.
Snorkel
Assembly
Overflow
Tube
Existing
Refill Tube
Connect the new refill tube to
the overflow tube. Make sure
the refill tube points directly
down into the overflow tube to
ensure proper toilet operation.
Trim away any excess tube
length. Then connect the new
refill tube to the fill valve.
Turn on the water supply to the
toilet. Allow the toilet tank to
fill until it shuts off. ReĆcheck
the water level to ensure a 7/8"
minimum space between the
water line and the top of the
overflow.
Refill
Tube
85984Ć2ĆAB Kohler Co., Kohler, WI
6
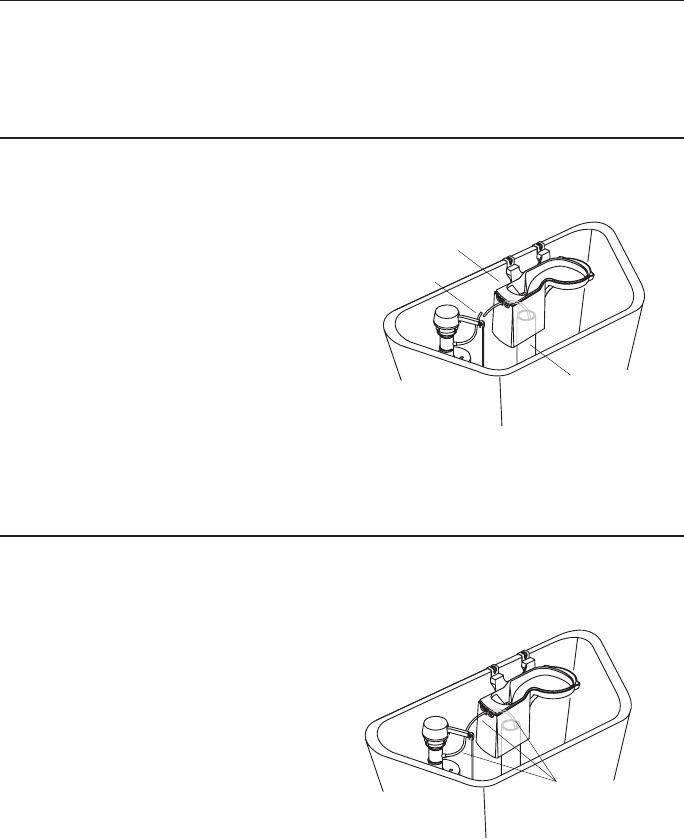
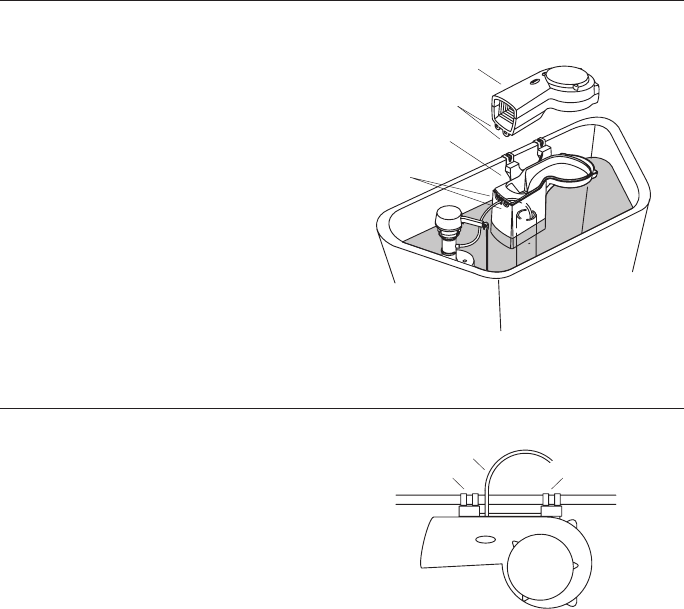
Install the fan and filter
assembly to the snorkel
assembly by first engaging the
two clips located on the left side
of each assembly. Then squeeze
the right side of both assemblies
together to snap in place.
Fan and Filter
Assembly
Snorkel
Assembly
Clips
Clips
Route the power cord between
the hooks, and plug the AC
adapter into a
properlyĆgrounded,
groundingĆtype receptacle
which is protected by a GFCI.
ReĆinstall the tank cover.
Power Cord Hook
Hook

85984Ć2ĆAB
Kohler Co., Kohler, WI 7
OPERATION
3.
This kit is equipped with a
builtĆin motion sensor for
automatic activation and
deĆactivation from inside the
toilet tank.
SThe ventilating toilet kit
will run for up to 60
seconds when initially
plugged in.
SThe kit turns on when it
senses motion above the
toilet bowl area, or when
the toilet is flushed.
SThe kit remains on as long
as it senses motion every
90 seconds.
SThe kit turns off
automatically about 90
seconds after the user
leaves the toilet, or after
the toilet flush sequence
ends.

85984Ć2ĆAB Kohler Co., Kohler, WI
8
TROUBLESHOOTING
4.
SYMPTOM CAUSE REMEDY
Noise after the
flush.
A gurgling noise may
occur after the flush
due to air and water
interaction.
Normal operation.
Bowl water level is
low.
Refill tube not
pointing down
overflow tube.
Reposition the refill tube.
Water in filter. Less than 7/8" from
water line to top of
overflow.
Adjust water line to at least
7/8" from top of overflow.
Refill tube not
pointing down
overflow tube.
Reposition the refill tube.
Kit activates by
itself.
Leaking flapper
causing tank refill
cycle.
Replace the flapper.
Kit does not turn
on.
Unit not plugged in
or power turned off.
Plug in or turn on power.
Kit does not turn
off.
A metal object is on
the tank lid.
Remove metal object from
the tank lid.
Questions? Problems? First review the installation instructions to
ensure correct installation. For additional assistance in the USA, call
our Customer Service Department for direct help. You may also contact
us at our web site listed below.
1Ć800Ć4ĆKOHLER
CALL US FOR HELP
www.kohlerco.com
E2001 Kohler Co.
Kohler Co., Kohler, WI 85984Ć2ĆAB