Contents
- 1. User Manual 1 of 2
- 2. User Manual 2 of 2
User Manual 1 of 2
SID Cover 2001.11.29 10:19 AM Page 1
Warning! Important Safety Instructions
32
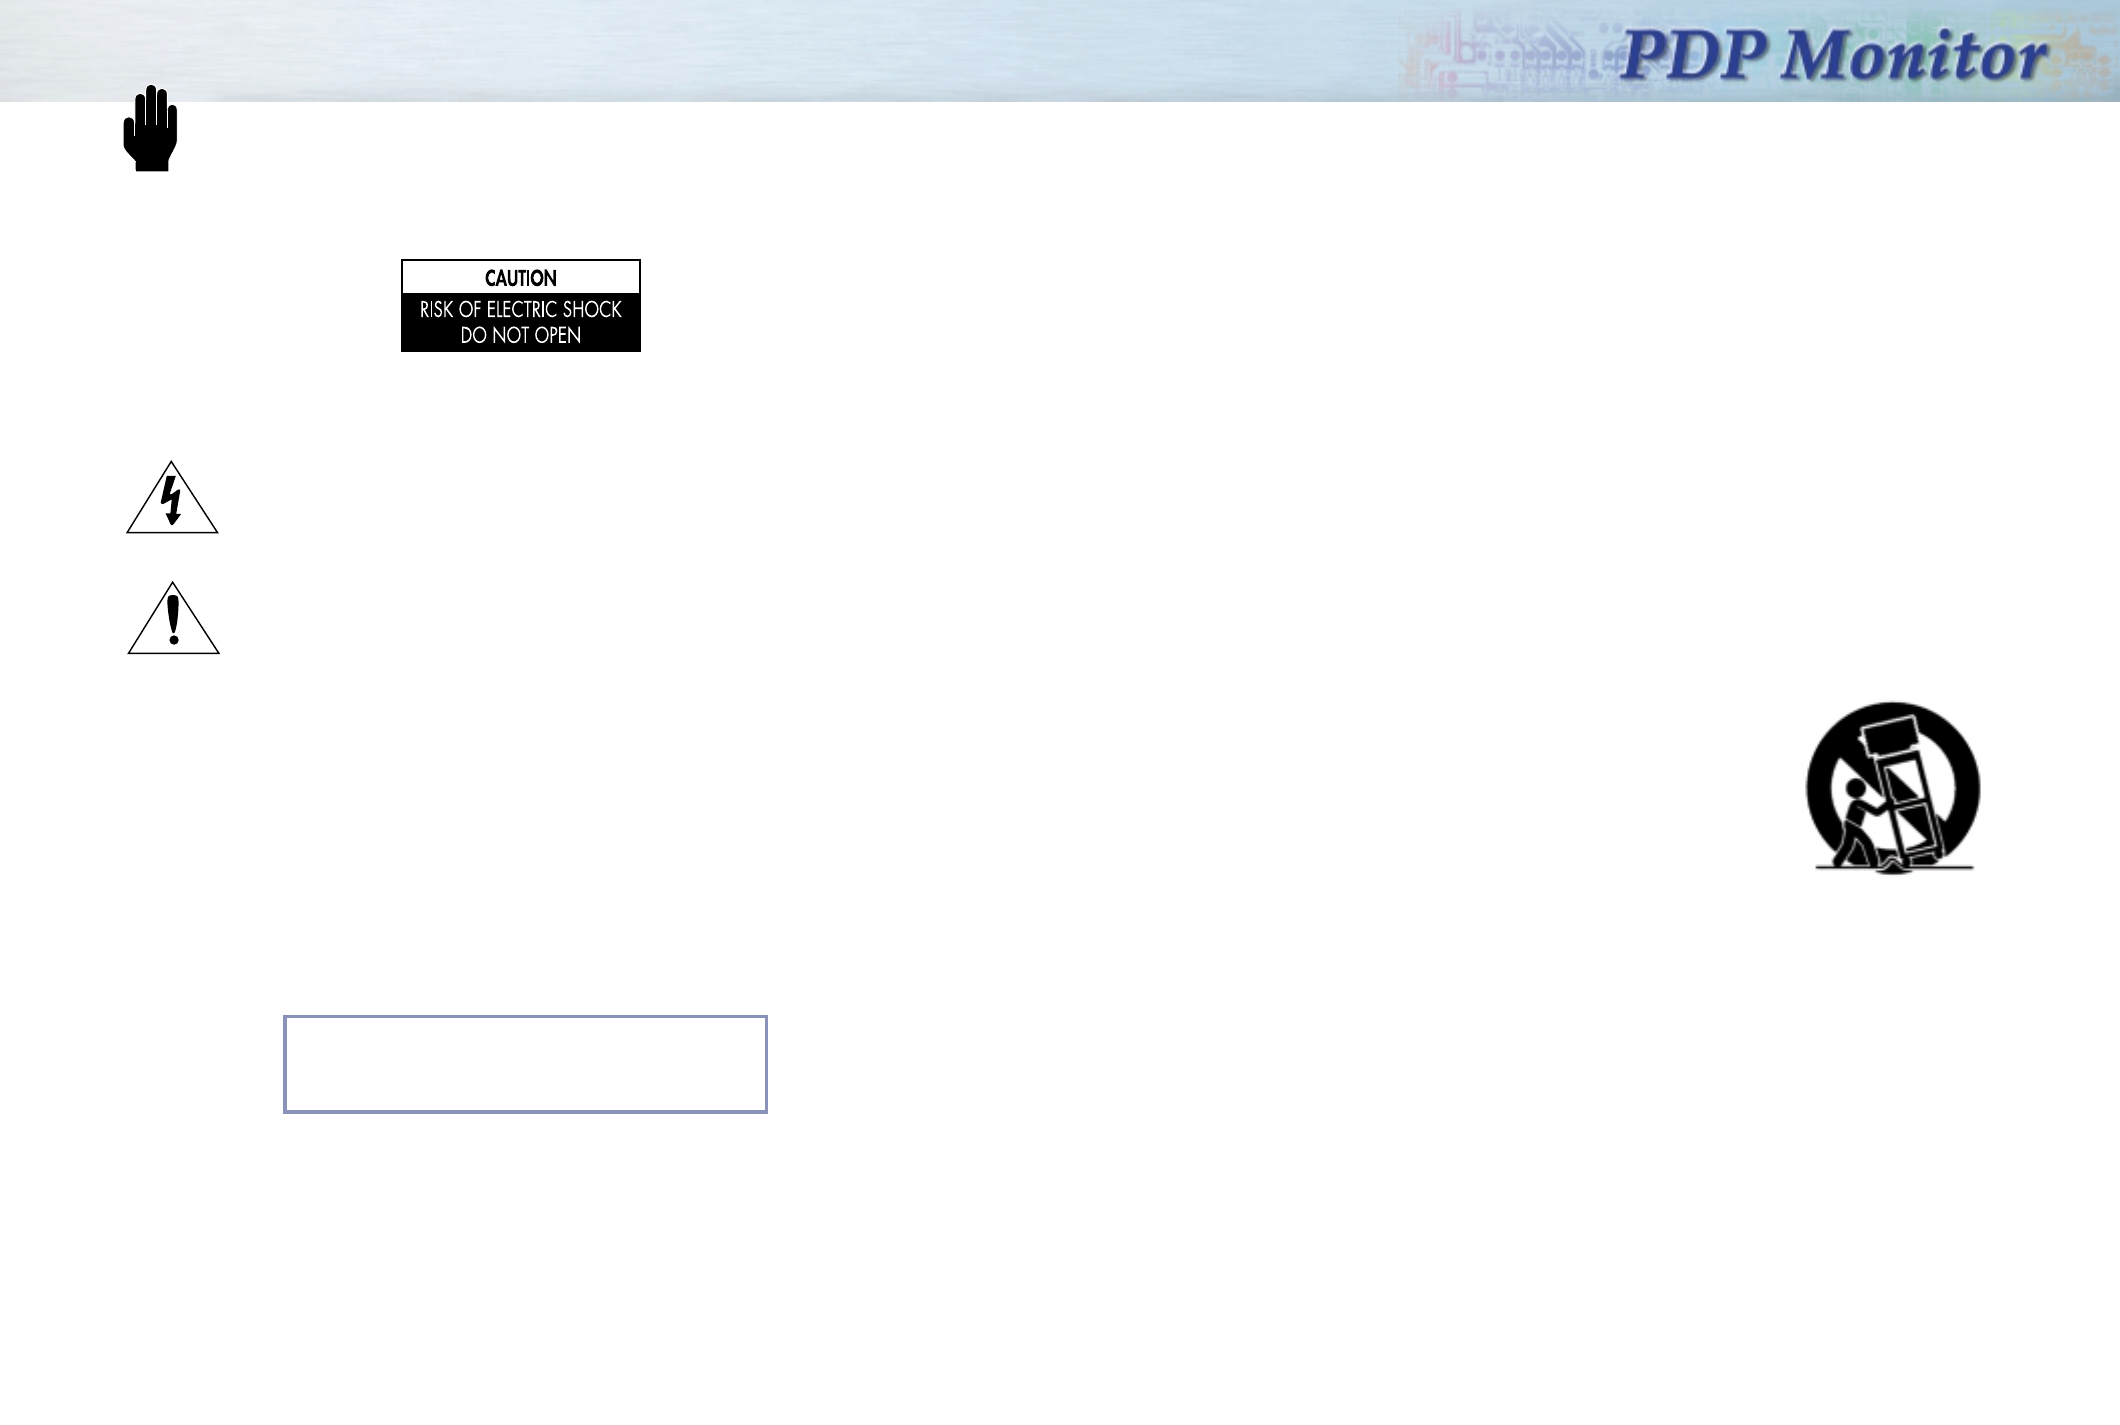
CAUTION: TO REDUCE THE RISK OF ELECTRIC SHOCK, DO NOT REMOVE COVER (OR BACK).
NO USER SERVICEABLE PARTS INSIDE. REFER SERVICING TO QUALIFIED SERVICE PERSONNEL.
This symbol indicates high voltage is present inside. It is dangerous to make any kind of
contact with any inside part of this product.
This symbol alerts you that important literature concerning operation and maintenance
has been included with this product.
Note to CATV system installer: This reminder is provided to call CATV system installer's attention
to Article 820-40 of the National Electrical Code (Section 54 of Canadian Electrical Code, Part I), that
provides guidelines for proper grounding and, in particular, specifies that the cable ground shall be
connected to the grounding system of the building as close to the point of cable entry as practical.
Caution: FCC/CSA regulations state that any unauthorized changes or modifications to this
equipment may void the user's authority to operate it.
Caution: To prevent electric shock, match the wide blade of plug to the wide slot, and fully insert the
plug.
Caution: Danger of explosion if battery is incorrectly replaced.
Attention: pour eviter les chocs electriques, introduire la lame le plus large de la fiche dans la borne
correspondante de la prise et pousser jusqu'au fond.
Important: One Federal Court has held that unauthorized recording of copyrighted PDP Monitor
programs is an infringement of U.S. copyright laws.
Certain Canadian programs may also be copyrighted and any unauthorized recording in whole or in
part may be in violation of these rights.
TO PREVENT DAMAGE WHICH MAY RESULT IN FIRE OR ELECTRIC SHOCK HAZARD, DO NOT EXPOSE
THIS APPLIANCE TO RAIN OR MOISTURE.
Important Safety Information
Always be careful when using your PDP Monitor. To reduce the risk of fire, electrical shock, and other
injuries, keep these safety precautions in mind when installing, using, and
maintaining your machine.
• Read all safety and operating instructions before operating your PDP Monitor.
• Keep the safety and operating instructions for future reference.
• Heed all warnings on the PDP Monitor and in the operating instructions.
• Follow all operating and use instructions.
• Unplug the PDP Monitor from the wall outlet before cleaning. Use a damp cloth; do not use liquid or
aerosol cleaners.
• Never add any attachments and/or equipment without approval of the manufacturer. Such additions
can increase the risk of fire, electric shock, or other personal injury.
• Do not use the PDP Monitor where contact with or immersion in water is a possibility, such as near
bath tubs, sinks, washing machines, swimming pools, etc.
• Do not place the PDP Monitor on an unstable cart, stand, tripod, floor,
bracket, or table where it can fall. A falling PDP Monitor can cause
serious injury to a child or adult, and serious damage to the
appliance. Use only with a cart, stand, tripod, bracket, or table
recommended by the manufacturer or sold with the PDP Monitor.
Follow the manufacturer's instructions when mounting the unit, and use
a mounting accessory recommended by the manufacturer. Move the
PDP Monitor and cart with care. Quick stops, excessive force, and
uneven surfaces can make the unit and cart unsteady and likely to
overturn.
• Provide ventilation for the PDP Monitor. The unit is designed with slots in the cabinet for ventilation to
protect it from overheating. Do not block these openings with any object, and do not place the PDP
Monitor on a bed, sofa, rug, or other similar surface. Do not place it near a radiator or heat register.
If you place the PDP Monitor on a rack or bookcase, ensure that there is adequate ventilation and
that you've followed the manufacturer's instructions for mounting.
• Operate your PDP Monitor only from the type of power source indicated on the marking label. If you
are not sure of the type of power supplied to your home, consult your appliance dealer or local
power company.
• Use only a grounded or polarized outlet. For your safety, this PDP Monitor is equipped with a
polarized alternating current line plug having one blade wider than the other. This plug will fit into
the power outlet only one way. If you are unable to insert the plug fully into the outlet, try reversing
the plug. If the plug still does not fit, contact your electrician to replace your outlet.
• On setup, please place the PDP Monitor on the table which has at least above 20cm height.
(Do not place it in the floor)
Replace only with the same or equivalent type
recommended by the manufacturer.
Fispose of used batteries according
to the manufacture’s instructions.
Sdi42-1.qxd 2002.2.6 8:57 AM Page 2

User Instructions
The Federal Communications Commission Radio
Frequency Interference Statement includes the
following warning:
NOTE: This equipment has been tested and found
to comply with the limits for a Class B digital
device, pursuant to Part 15 of the FCC Rules.
These limits are designed to provide reasonable
protection against harmful interference in a
residential installation. This equipment generates,
uses, and can radiate radio frequency energy
and, if not installed and used in accordance with
the instructions, may cause harmful interference to
radio communications. However, there is no
guarantee that interference will not occur in a
particular installation .
If this equipment does cause harmful interference
to radio or television receptions, which can be
determined by turning the equipment off and on,
the user is encouraged to try to correct the
interference by one or more of the following
measures:
• Reorient or relocate the receiving antenna.
• Increase the separation between the equipment
and receiver.
• Connect the equipment into an outlet on a
circuit different from that to which the receiver is
connected.
• Consult the dealer or an experienced radio/TV
technician for help.
User Information
Changes or modifications not expressly approved
by the party responsible for compliance could
void the user’s authority to operate the equipment.
If necessary, consult your dealer or an
experienced radio/television technician for
additional suggestions. You may find the booklet
called How to Identify and Resolve Radio/TV
Interference Problems helpful. This booklet was
prepared by the Federal Communications
Commission. It is available from the U.S.
Government Printing Office, Washington, DC
20402, Stock Number 004-000-00345-4 .
Warning
User must use shielded signal interface cables to
maintain FCC compliance for the product.
Declaration of conformity for products marked
with FCC Logo. This device complies with Part 15
of the FCC Rules. Operation is subject to the
following two conditions:
(1) this device may not cause harmful interference,
and
(2) this device must accept any interference
received, including interference that may
cause undesired operation.
The party responsible for product compliance:
Provided with this monitor is a detachable power
supply cord with IEC320 style terminations.
It may be suitable for connection to any UL Listed
personal computer with similar configuration.
Before making the connection, make sure the
voltage rating of the computer convenience outlet
is the same as the monitor and that the ampere
rating of the computer convenience outlet is equal
to or exceeds the monitor voltage rating.
For 100 Volt applications, use only UL Listed
detachable power cord with NEMA configuration
5-15P type (parallel blades) plug cap. For 240
Volt applications use only UL Listed Detachable
power supply cord with NEMA configuration
6015P type (tandem blades) plug cap.
IC Compliance Notice
This Class A digital apparatus meets all
requirements of the Canadian Interference-
Causing Equipment Regulations of ICES-003.
Notice de Conformité IC
Cet appareil numérique de classe A respecte
toutes les exigences du Règlement ICES-003 sur
les équipements produisant des interférences au
Canada.
European Notice
Products with the CE Marking comply with both
the EMC Directive (89/336/EEC), (92/31/EEC),
(93/68/EEC) and the Low Voltage Directive
(73/23/EEC) issued by the Commission of the
European Community. Compliance with these
directives implies conformity to the following
European Norms:
• EN55022 : 1998 Class B
• EN55024 : 1998
• EN61000 - 3 - 2 : 1995
• EN61000 - 3 - 3 : 1995
• EN60950 (LEC60950) - Product Safety.
5
• Protect the power cord. Power supply cords should be routed so that they won’t be walked on or pinched
by objects placed on or against them. Pay particular attention to cords at plugs, convenience
receptacles, and the point where they exit from the unit.
• Unplug the PDP Monitor from the wall outlet and disconnect the antenna or cable system during a
lightning storm or when left unattended and unused for long periods of time. This will prevent damage to
the unit due to lightning and power-line surges.
• Avoid overhead power lines. An outside antenna system should not be placed in the vicinity of overhead
power lines or other electric light or power circuits or where it can fall into such power lines or circuits.
When installing an outside antenna system, be extremely careful to keep from touching the power lines
or circuits. Contact with such lines can be fatal.
• Do not overload the wall outlet or extension cords. Overloading can result in fire or electric shock.
• Do not insert anything through the openings in the unit, where they can touch dangerous voltage points
or damage parts. Never spill liquid of any kind on the PDP Monitor.
• Ground outdoor antennas. If an outside antenna or cable system is connected to the TV system with
PDP Monitor, be sure the antenna or cable system is grounded so as to provide some protection against
voltage surges and built-up static charges. Section 810 of the National Electrical Code, ANSI/NFPA
No.70-1984, provides information about proper grounding of the mast and supporting structure,
grounding of the lead-in wire to an antenna discharge unit, size of grounding conductors, location of
antenna discharge unit, connection to grounding electrodes, and requirements for the grounding
electrode.
• Do not attempt to service the PDP Monitor yourself. Refer all servicing to qualified service personnel.
Unplug the unit from the wall outlet and refer servicing to qualified service personnel under the following
conditions:
- when the power-supply cord or plug is damaged
- if liquid has been spilled on the unit or if objects have fallen into the unit
- if the PDP Monitor has been exposed to rain or water
- if the PDP Monitor does not operate normally by following the operating instructions
- if the PDP Monitor has been dropped or the cabinet has been damaged
- when the PDP Monitor exhibits a distinct change in performance
• If you make adjustments yourself, adjust only those controls that are covered by the operating
instructions. Adjusting other controls may result in damage and will often require extensive work by a
qualified technician to restore the PDP Monitor to normal.
• When replacement parts are required, be sure the service technician uses replacement parts specified by
the manufacturer or those that have the same characteristics as the original part. Unauthorized
substitutions may result in additional damage to the unit.
• Upon completion of any service or repairs to this PDP Monitor, ask the service technician to perform
safety checks to determine that the PDP Monitor is in a safe operating condition.
This device complies with part 15 of the FCC Rules. Operation is subject to the following two conditions:
(1) This device may not cause harmful interference, and
(2) this device must accept any interference received, including interference that may cause undesired operation.
4
FCC Information
Sdi42-1.qxd 2001.11.29 10:8 AM Page 4

Start up
Your New Plasma Display Monitor . . . . . . . . . . . . . . . . . . . . . . . . . . . . . . . . . . . . . . . . . . . . . . . . . . . . . . 10
Remote Control Buttons . . . . . . . . . . . . . . . . . . . . . . . . . . . . . . . . . . . . . . . . . . . . . . . . . . . . . . . . . . . . . . 12
Turning the PDP On and Off. . . . . . . . . . . . . . . . . . . . . . . . . . . . . . . . . . . . . . . . . . . . . . . . . . . . . . . . . . . 14
Connecting PC and Operation
Connecting to a PC. . . . . . . . . . . . . . . . . . . . . . . . . . . . . . . . . . . . . . . . . . . . . . . . . . . . . . . . . . . . . . . . . 18
Adjusting the PC Screen . . . . . . . . . . . . . . . . . . . . . . . . . . . . . . . . . . . . . . . . . . . . . . . . . . . . . . . . . . . . . 22
Changing the Position of the Image. . . . . . . . . . . . . . . . . . . . . . . . . . . . . . . . . . . . . . . . . . . . . . . . . . . . . . 23
Picture Quality Adjustment . . . . . . . . . . . . . . . . . . . . . . . . . . . . . . . . . . . . . . . . . . . . . . . . . . . . . . . . . . . . 24
Changing the Aspect Ratio . . . . . . . . . . . . . . . . . . . . . . . . . . . . . . . . . . . . . . . . . . . . . . . . . . . . . . . . . . . 27
Enlarge of the Image (Zoom) . . . . . . . . . . . . . . . . . . . . . . . . . . . . . . . . . . . . . . . . . . . . . . . . . . . . . . . . . . 28
Move Expanded Picture (Pan). . . . . . . . . . . . . . . . . . . . . . . . . . . . . . . . . . . . . . . . . . . . . . . . . . . . . . . . . . 29
Power Saver (PC mode only) . . . . . . . . . . . . . . . . . . . . . . . . . . . . . . . . . . . . . . . . . . . . . . . . . . . . . . . . . . 30
Connection (Connecting Receiver)
Connecting a VCR/Cable Box . . . . . . . . . . . . . . . . . . . . . . . . . . . . . . . . . . . . . . . . . . . . . . . . . . . . . . . . . 32
Connecting a DTV Set-Top-Box/DVD . . . . . . . . . . . . . . . . . . . . . . . . . . . . . . . . . . . . . . . . . . . . . . . . . . . . . 33
Picture Control
Using Automatic picture setting. . . . . . . . . . . . . . . . . . . . . . . . . . . . . . . . . . . . . . . . . . . . . . . . . . . . . . . . . 36
Customizing the Picture . . . . . . . . . . . . . . . . . . . . . . . . . . . . . . . . . . . . . . . . . . . . . . . . . . . . . . . . . . . . . . 37
Changing the Screen Size . . . . . . . . . . . . . . . . . . . . . . . . . . . . . . . . . . . . . . . . . . . . . . . . . . . . . . . . . . . . 38
Freezing the Picture. . . . . . . . . . . . . . . . . . . . . . . . . . . . . . . . . . . . . . . . . . . . . . . . . . . . . . . . . . . . . . . . . 39
Auto Pixel Shift. . . . . . . . . . . . . . . . . . . . . . . . . . . . . . . . . . . . . . . . . . . . . . . . . . . . . . . . . . . . . . . . . . . . 39
Sound Control
Using the Mute. . . . . . . . . . . . . . . . . . . . . . . . . . . . . . . . . . . . . . . . . . . . . . . . . . . . . . . . . . . . . . . . . . . . 42
Adjusting the Volume. . . . . . . . . . . . . . . . . . . . . . . . . . . . . . . . . . . . . . . . . . . . . . . . . . . . . . . . . . . . . . . . 43
Customizing the Sound . . . . . . . . . . . . . . . . . . . . . . . . . . . . . . . . . . . . . . . . . . . . . . . . . . . . . . . . . . . . . . 44
Time
Setting the Clock . . . . . . . . . . . . . . . . . . . . . . . . . . . . . . . . . . . . . . . . . . . . . . . . . . . . . . . . . . . . . . . . . . 46
Setting the Timers . . . . . . . . . . . . . . . . . . . . . . . . . . . . . . . . . . . . . . . . . . . . . . . . . . . . . . . . . . . . . . . . . . 48
Setting the Sleep Timer . . . . . . . . . . . . . . . . . . . . . . . . . . . . . . . . . . . . . . . . . . . . . . . . . . . . . . . . . . . . . . 50
Function Description
Selection the Menu Language. . . . . . . . . . . . . . . . . . . . . . . . . . . . . . . . . . . . . . . . . . . . . . . . . . . . . . . . . . 52
Setting the Position . . . . . . . . . . . . . . . . . . . . . . . . . . . . . . . . . . . . . . . . . . . . . . . . . . . . . . . . . . . . . . . . . 53
Setting the Turn Off Time of OSD . . . . . . . . . . . . . . . . . . . . . . . . . . . . . . . . . . . . . . . . . . . . . . . . . . . . . . . 54
Setting the Pin . . . . . . . . . . . . . . . . . . . . . . . . . . . . . . . . . . . . . . . . . . . . . . . . . . . . . . . . . . . . . . . . . . . . 55
Using RS 232C cable (optional) . . . . . . . . . . . . . . . . . . . . . . . . . . . . . . . . . . . . . . . . . . . . . . . . . . . . . . . . 56
Appendix
Troubleshooting . . . . . . . . . . . . . . . . . . . . . . . . . . . . . . . . . . . . . . . . . . . . . . . . . . . . . . . . . . . . . . . . . . . 58
Care and Maintenance . . . . . . . . . . . . . . . . . . . . . . . . . . . . . . . . . . . . . . . . . . . . . . . . . . . . . . . . . . . . . . 59
Specifications. . . . . . . . . . . . . . . . . . . . . . . . . . . . . . . . . . . . . . . . . . . . . . . . . . . . . . . . . . . . . . . . . . . . . 60
7
User Instructions
Screen Image retention
Do not display a still image (such as on a video game or when hooking up a Pc to this Monitor) on the
plasma monitor panel for more than 2 hours as it can cause screen image retention. This image retention is
also known as “screen burn”. To avoid such image retention, refer to page 37 of this manual to reduce the
degree of brightness and contrast of this screen when displaying a still image.
Cell Defects
The Plasma monitor displays images using a group of minute pixels. Therefore, if 99.9% of the pixels
indicate normal conditions, the monitor is acceptable and approved. You don't need to be concerned
about the light emitted from part of the pixels or any pixels that are kept lit as your panel has been
approved.
Warranty
Warranty Period: One year starting from the purchase of your main system.
Warranty does not cover any damage caused by image retention.
6
Table of Contents
Sdi42-1.qxd 2001.11.19 4:18 PM Page 6
Your New Plasma Display Monitor ................................................10
Remote Control Buttons ................................................................12
Turning the PDP On and Off ..........................................................14
Start up
Start up
Start up
Sdi42-1.qxd 2001.11.16 4:59 PM Page 8

Front
11
Your New Plasma Display Monitor
10
Rear
Auto Adj. Zoom
Checking Parts
Remote Control/
AAA Batteries Power Cord Diskette
(Plug & Play RS-232C) PC Cable
(15Pin) S-VHS Cable Owner’s
Instruction
RS-232C Input jack
PC Input jack (15pin) Connect to the RGB output jack on your PC.
S-video Input jack Connect a S-Video signal from S-VHS VCRs or DVD players.
Video Input jack Connect a video signal from VCRs or DVD players.
DTV/DVD Input (Y, Pb(Cb), Pr(Cr)) jacks
Connect a video signal from a DVD player or DTV receiver.
PC Connect to the Audio output jack on your PC.
Video/S-Video Connect to the Audio output jack on your Video/S-Video.
DTV/DVD Connect to the Audio output jack on your DTV/DVD.
Power Input jack
1
2
3
4
5
6
7
8
9
6 7 8 91 2 3 54
1 2 3 5 6 7 84
1
2
3
4
5
6
7
8
Source Press the display of the available video sources in sequence
(i.e, PC, Video, S-Video, DVD, DTV ).
Menu Press the see the on-screen menu.
- Vol + Press to lower or raise the Volume.
Press the volume +/- buttons to enter the sub-menu in the menu window.
To change items in the picture mode, press the volume +/- buttons.
Contrast Press to increase or decrease the value of the contrast.
To increse or decrease the value, press the volume +/- buttons.
Brightness Press to increase or decrease the value of the brightnes.
To increse or decrease the value, press the volume +/- buttons.
When you select the item in the menu, move to contrast or brightness and then
select the item you want.
Remote Control Sensor Aim the remote control towards this spot on the PDP Monitor.
LED Lamp
Power Button Press to turn the PDP on and off.
Sdi42-1.qxd 2001.11.29 10:9 AM Page 10
13
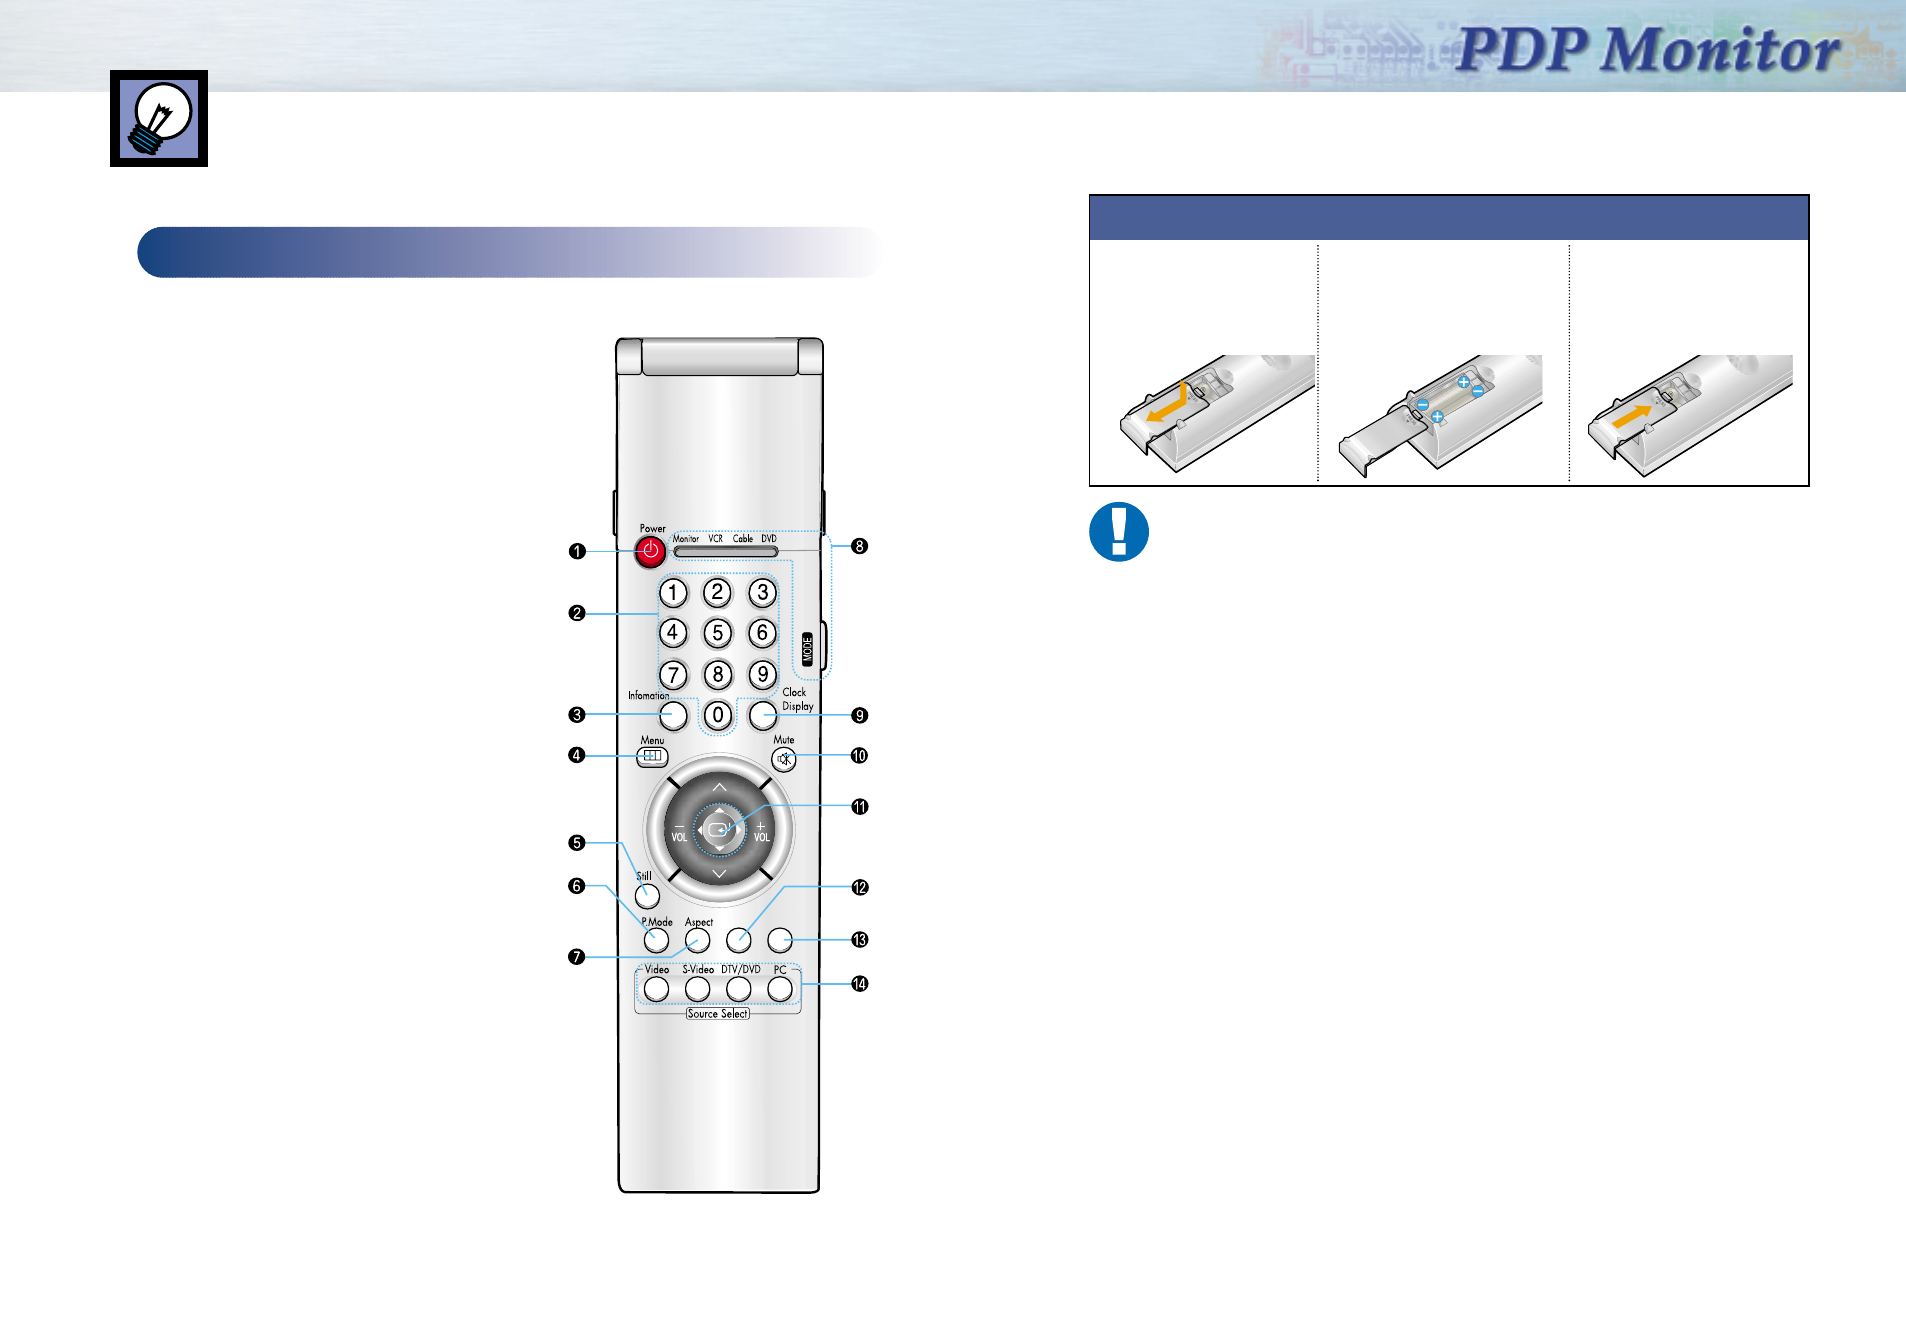
Remote Control Buttons
12
Remote Control
ŒPower button
Turns the PDP on and off.
´Number buttons
ˇInformation button
Press to display information on the PDP screen.
¨Menu button
Displays the main on-screen menu.
ˆStill button
Press to pause the current screen.
ØP.Mode button
Adjust the PDP picture by selecting on of the preset
factory settings (or select your personal, customized
picture settings.)
∏Aspect button
Press to change the screen size.
”Mode button
Selects a target device(Monitor only) to be controlled
by the remote control.
’Clock Display button
Press to display clock on the PDP screen.
˝Mute button
Press to mute the Monitor sound.
ÔJoystick button
Use to highlight on-screen menu items and change
menu values.
This key is also used as a hot key to adjust Volume
up/down, contrast and brightness.
Auto Adjustment button
Adjusts PC screen automatically.
ÒZoom button
This key operates only with PC.
ÚSource selection buttons
Press to directly select to Video, S-Video, DTV, DVD,
PC.
Auto Adj. Zoom
Installing the Batteries in Your Remote Control
1Slide the back cover
to open the battery
compartment of the
remote control
3Slide the cover back into
place.
Remote Control Operation Range.
You can use your remote control within a distance of 7~10m and an angle of 30 degrees
from the left and right sides of the remote control receptor of the monitor.
2Install two AAA size
batteries. Make sure to
match the “+” and “-” ends
of the batteries with the
diagram inside the
compartment.
Sdi42-1.qxd 2001.11.16 4:59 PM Page 12
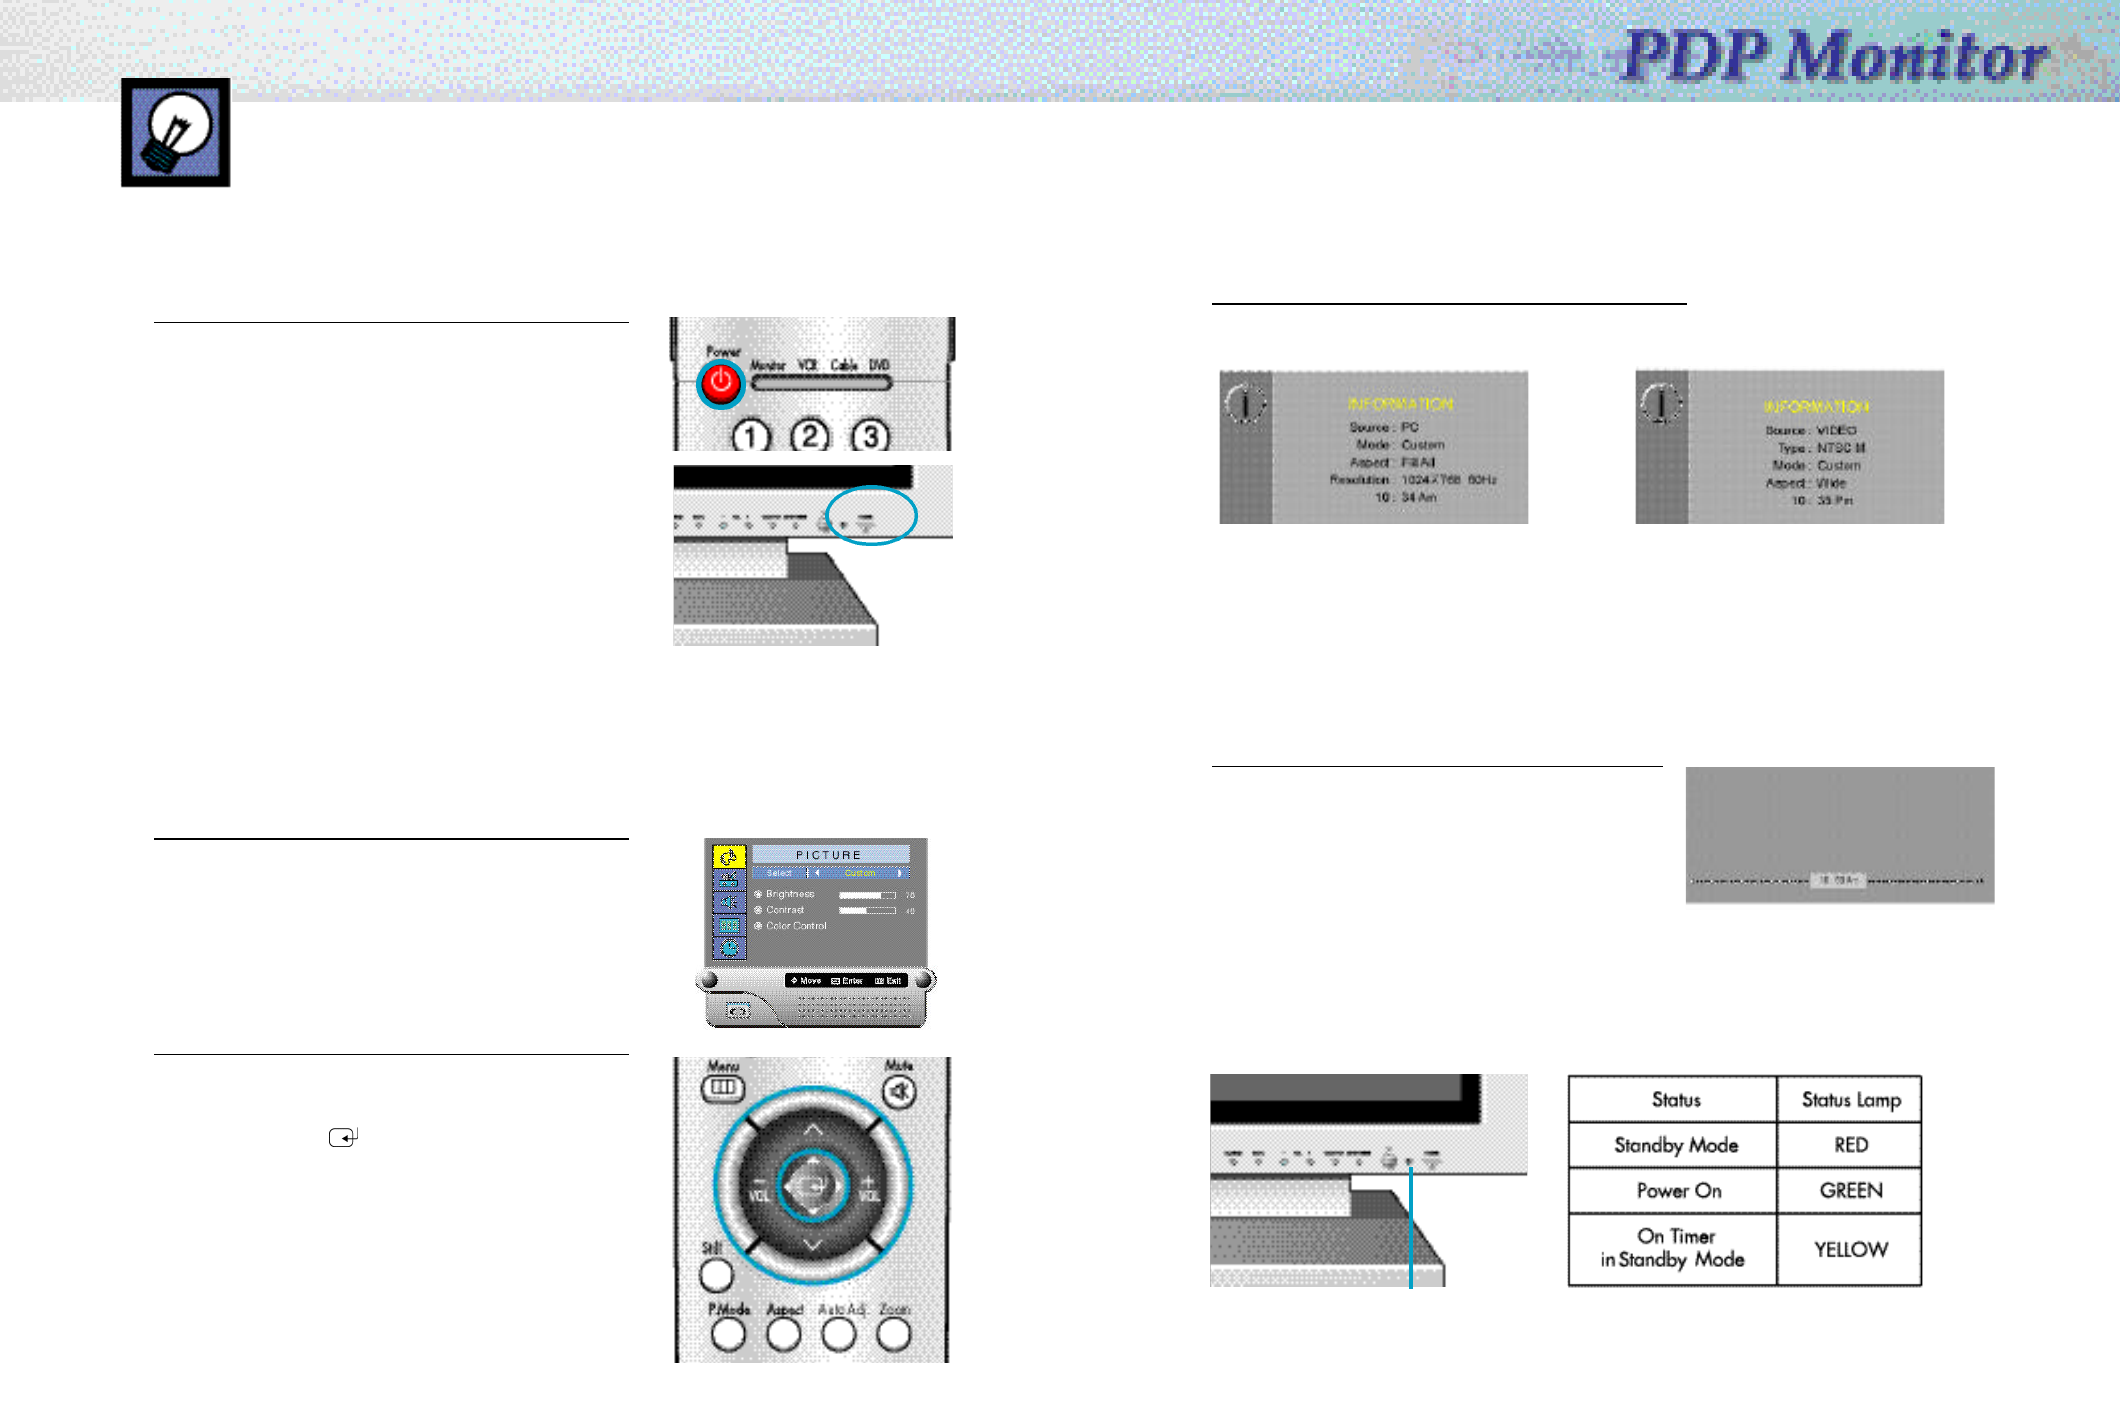
Displaying Status Information
Press the Information button on the remote control.
The PDP will display the Display Information and Time.
Signal Auto Detection
This PDP Monitor allows the signal to be tuned automatically, regardless of its type (PAL or NTSC).
If tuning doesn’t work, then re-tune after changing to a different tuning mode (PC mode or Video mode).
Displaying Clock
Press the Clock Display button on the remote control.
The Current time will display on the screen.
15
Turning the PDP On and Off
Turning the PDP On and Off
Press the POWER button on the remote control.
The PDP will turn on and you will be ready to use its
features.
Viewing the Menus and Displays
Your PDP has a simple, easy-to-use menu system that appears on the PDP screen. This system makes it
convenient and fast to use features on the PDP. Your PDP also lets you display the status of many of your
PDP’s features.
Viewing the Menus
1 With the power on, press the MENU button on the
remote control. The main menu appears on the screen.
2 Use the joystick(up,down) button to the move items in
the menu. Use the joystick(left, right) button to display,
change, or use the selected items.
Use the joystick ( ) button to enter items in the menu.
On screen menus disappear from the screen
automatically after a few seconds, or you can
press the MENU button on your remote control to exit
the menu.
14
(PC/DTV) (Video/S-Video/DVD)
You can also use the Power button on the front of the
PDP.
Indication Lights
Status Indication Lamp
Sdi42-1.qxd 2001.11.29 10:7 AM Page 14

Connection PC and
operation
Connection PC and
Operation
Connecting PC and Operation
Connecting to a PC ......................................................................18
Adjusting the PC Screen................................................................22
Changing the Position of the Image ................................................23
Picture Quality Adjustment ............................................................24
Changing the Aspect Ratio............................................................27
Enlarge of the Image (Zoom)..........................................................28
Move Expanded Picture (Pan) ........................................................29
Power Saver (PC mode only)..........................................................30
Sdi42-2.qxd 2001.11.16 5:4 PM Page 16
1918
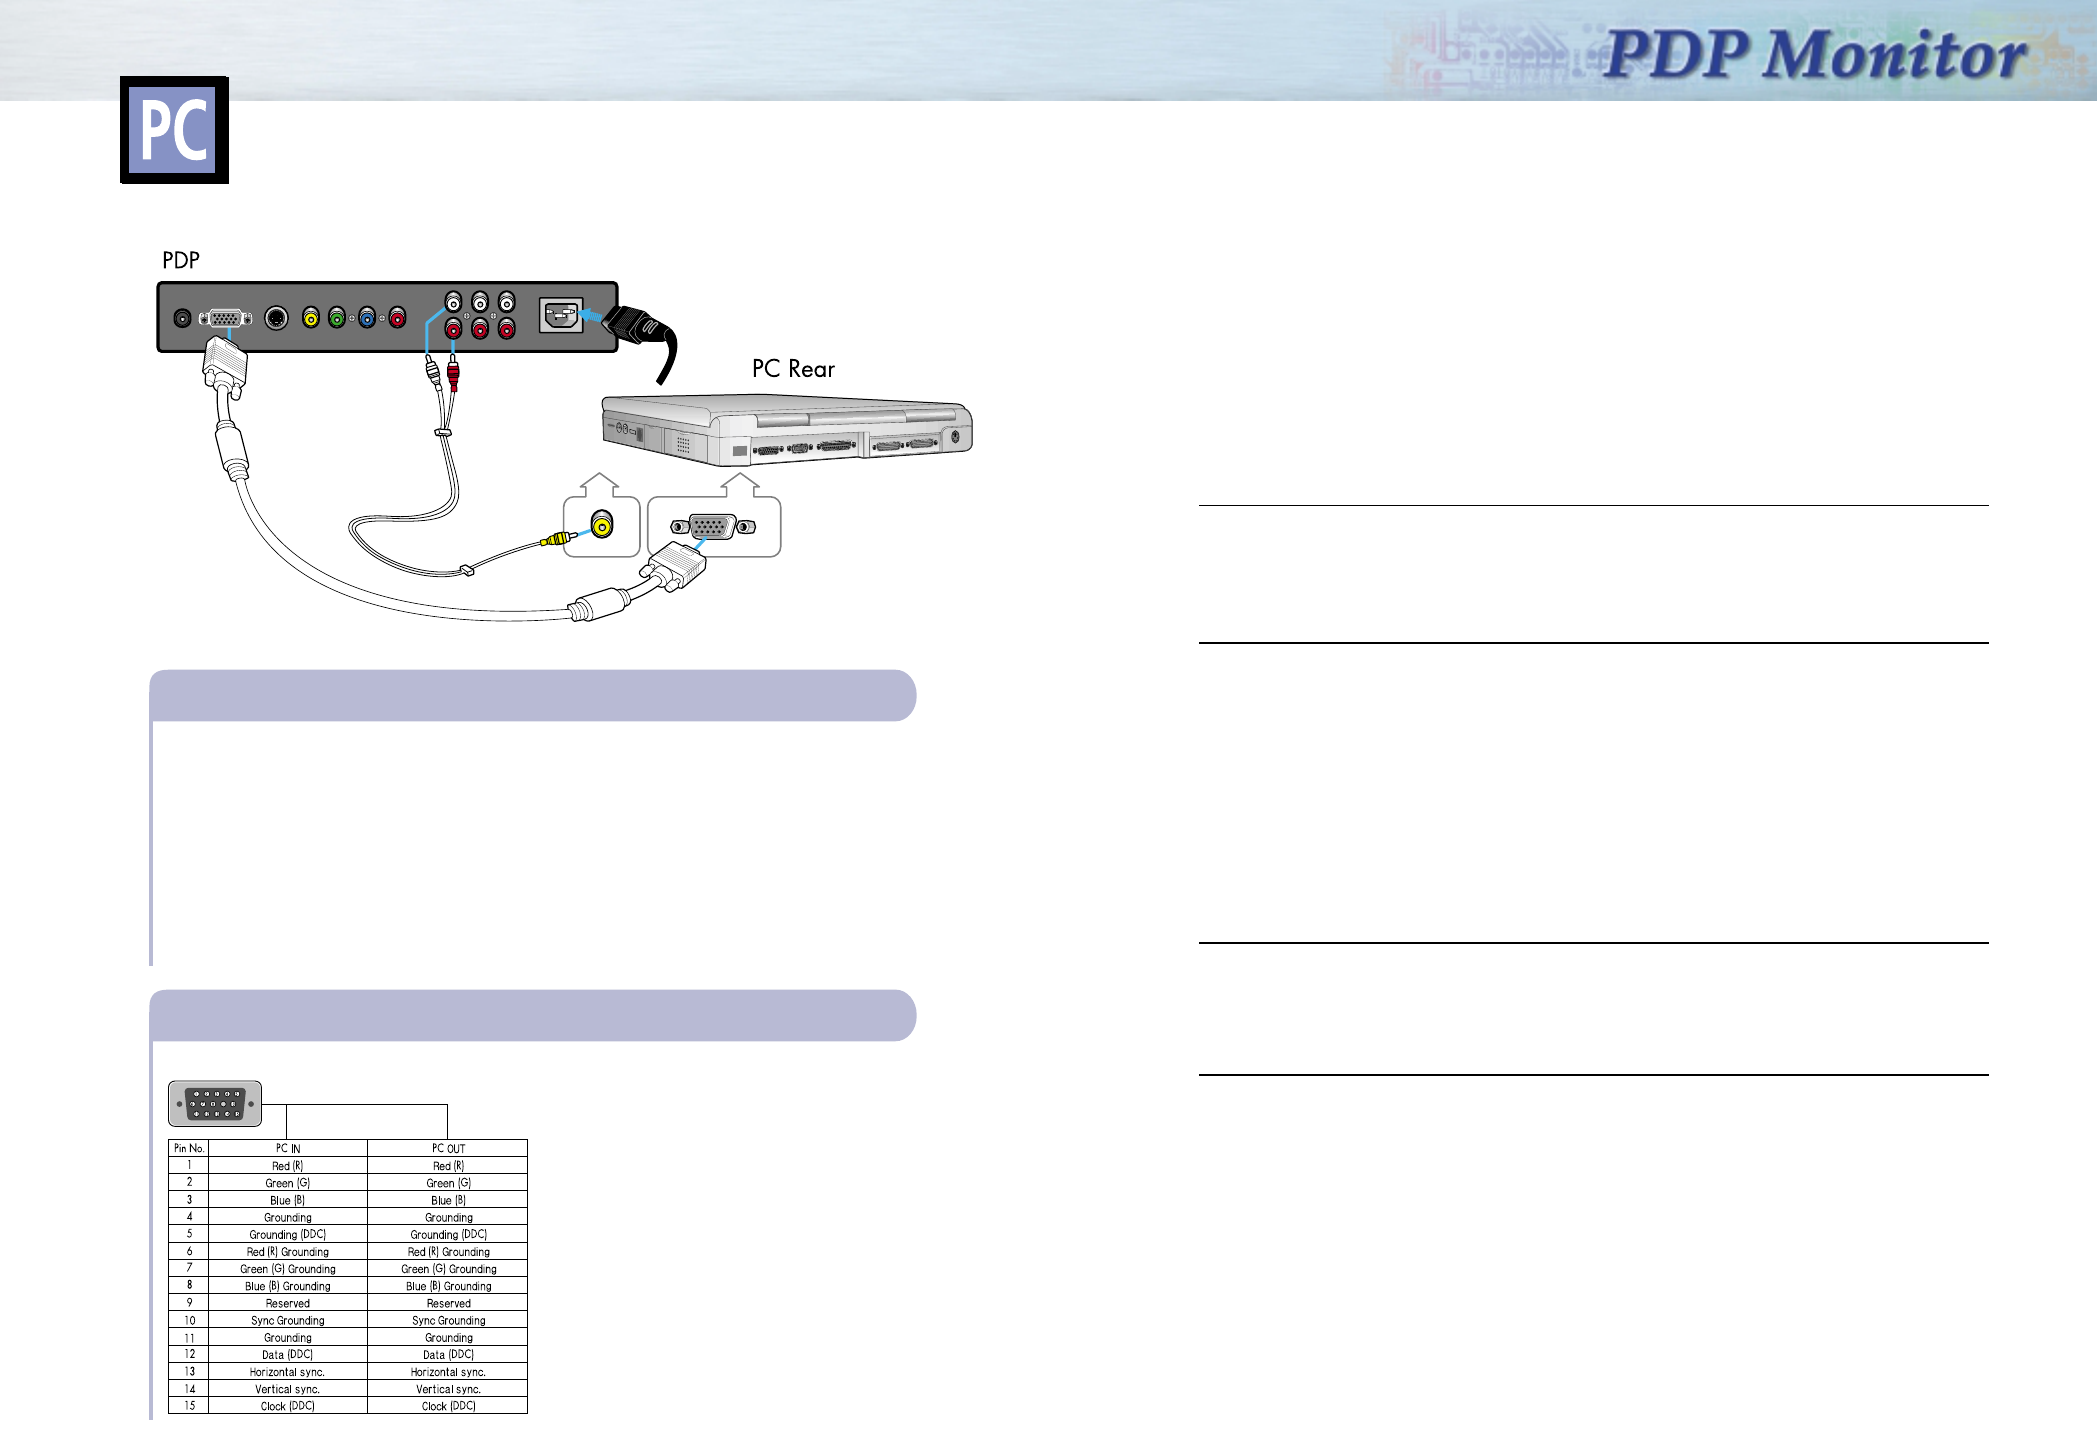
Connecting to a PC
This PDP set is not compatible with Macintosh PC.
Power Plug
Connect a PC (15pin) cable between the Video Output jack on the PC and the RGB in
(15p D-SUB) on the PDP.
• For an explanation of Component video, see your PC owner’s instruction.
To watch the PC screen:
1. Turn on PDP and press the PC button to select the PC mode.
2. Turn on PC and check for PC system requirements.
(Refer to pages 20 and 21 for PC system requirements.)
3. Adjust the PC screen. (Refer to page 22.)
Connecting a PC to the PDP
• 15Pin Signal Cable (based on protruded pin)
Pin Configuration
PC (15pin) Cable
PC
Audio Cable
Setting up Your Monitor Plug and Play
Our adoption of the new VESAPlug and Play solution eliminates complicated and time consuming
setup. It allows you to install your monitor in a Plug and Play compatible system without the usual
hassles and confusion. Your PC system can easily identify and configure itself for use with your display.
This monitor automatically tells the PC system its Extended Display Identification Data(EDID) using
Display Data Channel (DDC) protocols so the PC system can automatically configure itself to use the
flat panel display. If your PC system needs a video driver, following the instructions given below
according to the operating system your computer uses.
Installing the Video Driver
When prompted by the operating system for the monitor driver, insert the Driver diskette included with
this monitor. Driver installation is slightly different from one operating system to another. Follow the
directions as appropriate for the operating system you have.
Windows98, WindowsMe and Windows2000
1. Windows_ 98, Windows_ Me and Windows_ 2000 will auto-detect your new monitor and start
the "Add New Hardware Wizard" if the drivers are not already installed. Click the NEXT button
to search for drivers.
2. Check the diskette drive box to install the drivers off the diskette provided with your monitor and
click NEXT.
3. Confirm that Windows found the driver on the diskette and click NEXT again to install the driver.
To manually install or update the driver, follow the directions below:
1. Click on START, SETTINGS, CONTROL PANEL, DISPLAY SETTINGS tab, ADVANCED, MONITOR
tab, CHANGE, This will start the "Add New Hardware Wizard".
2. Follow the same directions as given in the steps in the section above.
Version 4.00.950A
1. Click on START, SETTINGS, CONTROL PANEL, DISPLAY SETTINGS tab, CHANGE DISPLAY TYPE,
CHANGE, HAVE DISK.
2. Type the diskette drive letter in the box and click OK.
Version 4.00.950B
1. Click on START, SETTINGS, CONTROL PANEL, DISPLAY, ADVANCED PROPERTIES, MONITOR tab,
HAVE DISK.
2. Type the diskette letter in the box and click OK
Sdi42-2.qxd 2001.11.19 4:25 PM Page 18
2120
How to Set up Your PC Software (Windows only)
The Windows display-settings for a typical computer are shown below. But the actual screens on your
PC will probably be different, depending upon your particular version of Windows and your particular
video card. But even if your actual screens look different, the same, basic set-up information will apply
in almost all cases. (If not, contact your computer manufacturer.)
On the windows screen, select in the following
sequence : Start ➝ Settings ➝ Control Panel.
Select the “Settings” tab in the display dialog-box.
The two key variables that apply the PDP-PC
interface are “resolution” and “colors.” The
correct settings for these two variables are:
• Size (sometimes called “resolution”):
640 x 480 pixels.
• Color: “24-bit” color (might also be expressed
as “16 million colors”)Shown at left is a typical
screen for “Display” dialog box.
If a vertical-frequency option exists on your
display settings dialog box, the correct value is
“60” or “60 Hz.” Otherwise, just click “OK” and
exit the dialog box.
Continued...
When the control panel screen appears, click on
“Display” and a display dialog-box will appear.
Notes:
Both screen position and size will vary, depending on the type of PC monitor and its resolution. The table
below shows all of the display modes that are supported:
• The interlace mode is not supported.
• The PDP operates abnormally if a non-standard video format is selected.
Notes:
• When this PDP is used as a PC display, 24-bit color is supported (over 16 million colors).
• Your PC display screen might appear different.
Depending on the manufacturer (and depending on your particular version of Windows).
Check your PC instruction book for information about connecting your PC to a PDP.
• If a vertical and horizontal frequency-select mode exists, select 60Hz (vertical) and 31.5kHZ (horizontal).
• In some cases, abnormal signals (such as stripes) might appear on the screen when the PC power is turned
off (or if the PC is disconnected). If so, press the Source button to enter the VIDEO mode.
Also, make sure that the PC is connected.
• Connect only a PC monitor to the monitor output port while viewing the PC screen. (Otherwise, random
signals might appear).
Video signal Dot X Line
640 X 350
640 X 400
720 X 400
640 X 480
800 X 600
1024 X 768
70.086
85.080
85.080
70.087
85.039
59.940
70.000
72.809
75.000
85.008
56.250
60.317
72.188
75.000
85.061
60.004
70.069
75.029
84.997
31.469
37.861
37.861
31.469
37.927
31.469
35.000
37.861
37.500
43.269
35.156
37.879
48.077
46.875
53.674
48.363
56.476
60.023
68.677
N
N
P
P
P
N
N
N
N
N
N/P
P
P
P
P
N
N
P
P
P
P
N
N
N
N
N
N
N
N
N/P
P
P
P
P
N
N
P
P
Vertical
Frequency (Hz) Horizontal
Frequency (Hz) Vertical
polarity Horizontal
polarity
IBM PC / AT
Compatibler
Sdi42-2.qxd 2001.11.16 5:4 PM Page 20

22 23
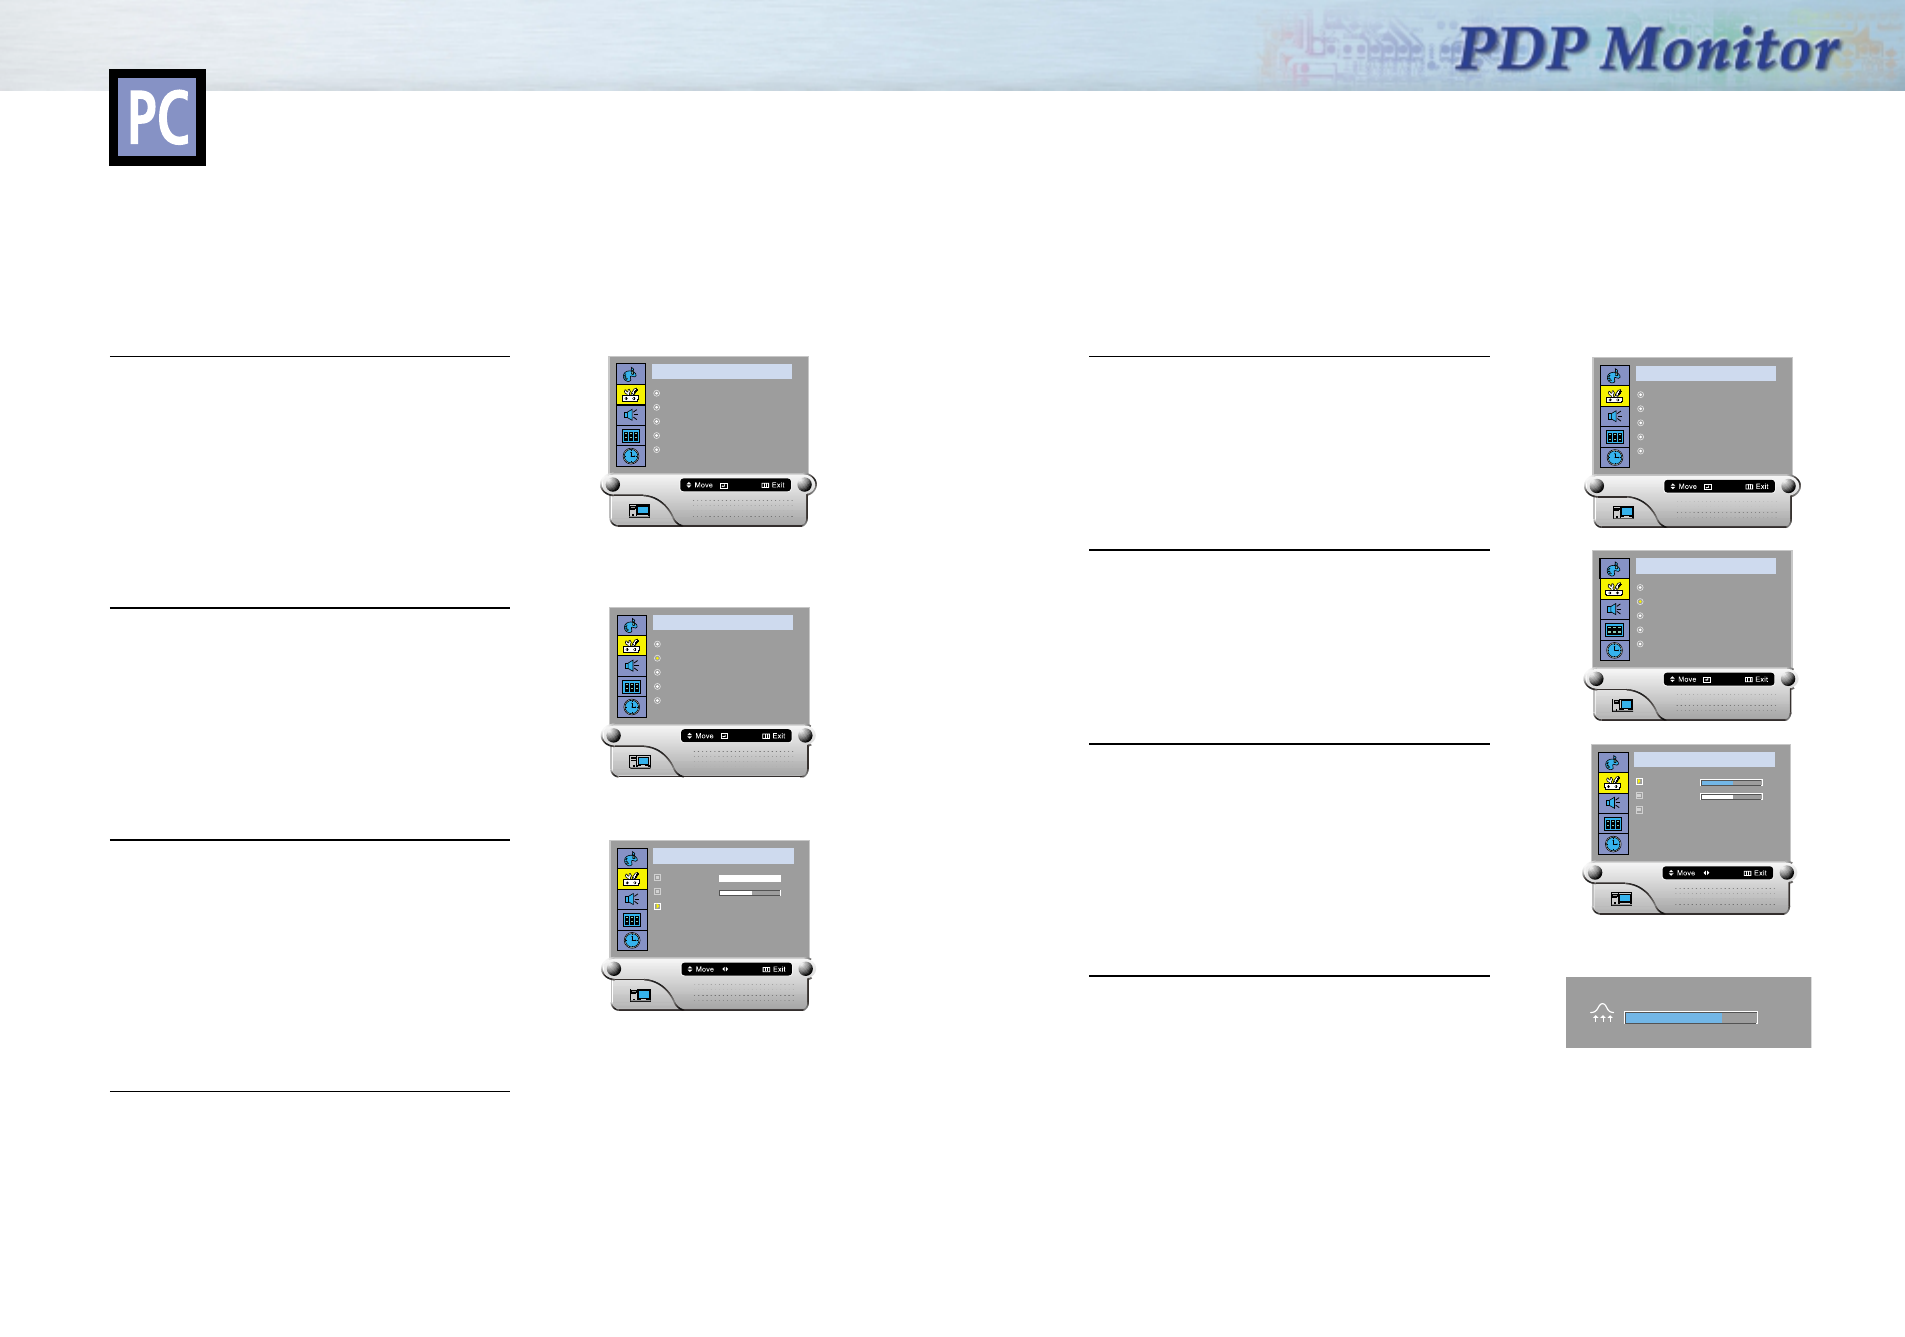
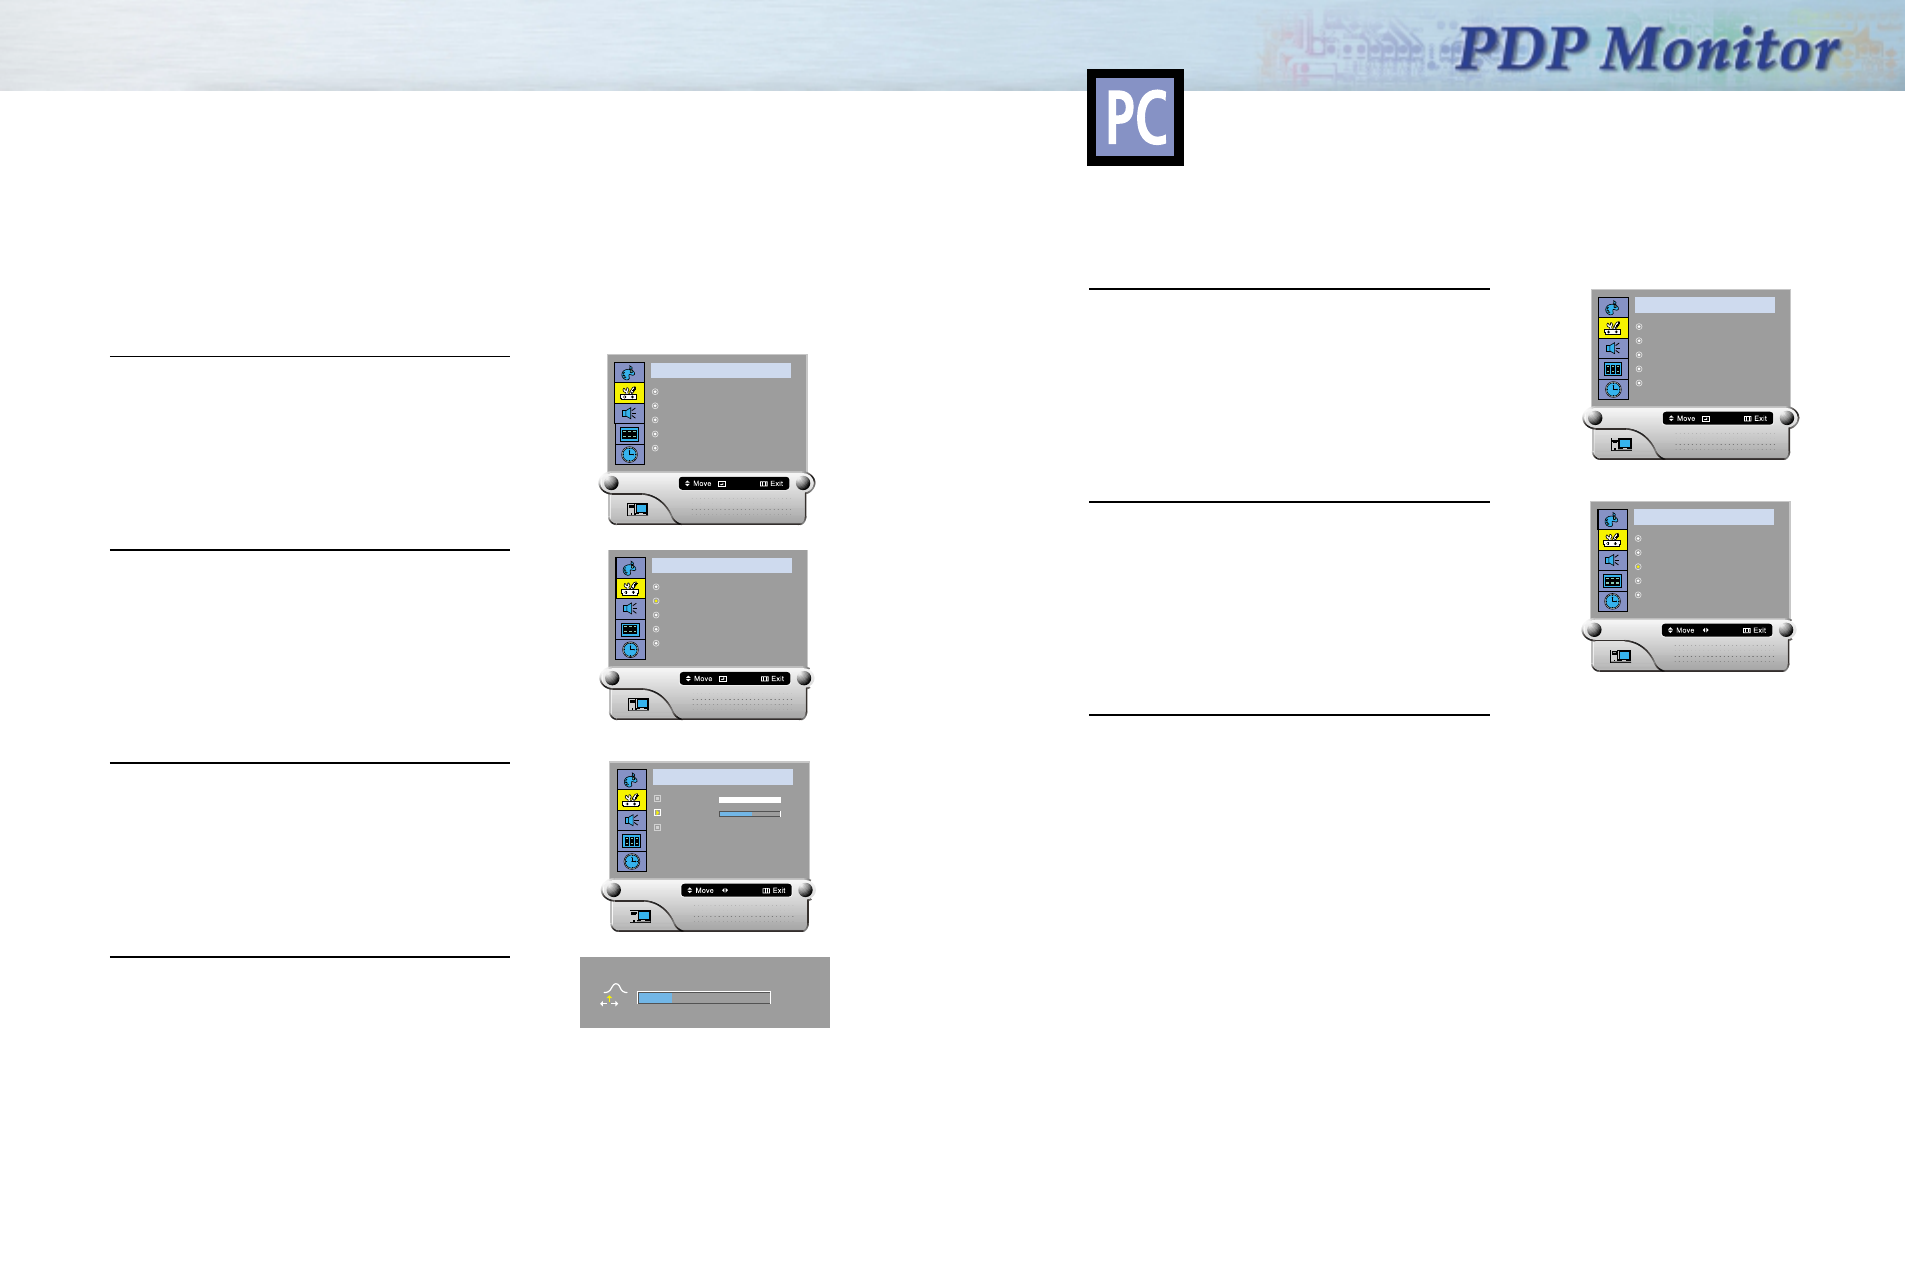
Adjusting the R.G.B
Preset:
• Press the PC button to select the PC mode.
1 Press the Menu button , then press the Joystick to
enter the sub-menu.
Move the joystick left or right to select “Custom”.
You will see the items “Brightness”, “Contrast” and
“Color Control”.
2 Move the joystick up or down to select the
"Color Control", then press the joystick to enter.
3 Move the joystick left or right to select the “User”,
then move the joystick up or down to select the item
you want to change.
4 Move the joystick left or right to increase or
decrease the value of a particular item.
5 Press the Menu button to exit.
P I C T U R E
Brightness
Contrast
Color Control
Select Custom
70
40
P I C T U R E
Brightness
Contrast
Color Control
Select Custom
70
40
P I C T U R E
Red
Green
Blue
Select User
50
50
50
Red 70
After connecting the PDP to your PC, adjust the position of screen if it is not well-aligned.
Preset:
• Press the PC button to select the PC mode.
1 Press the Menu button. Move the joystick up or down to
select the "SETUP", then press the joystick to enter the
sub-menu.
2 Press the joystick to enter the "Position" mode, then
adjust the position of screen by using the joystick
button.
3 Press the Menu button to exit.
Changing the Position of the ImageAdjusting the PC Screen
S E T U P
Position
Image Lock
Aspect Radio Fill All
Zoom/Pan
Pin
Enter
S E T U P
Position
Image Lock
Aspect Radio Fill All
Zoom/Pan
Pin
Enter
Sdi42-2.qxd 2001.11.19 4:26 PM Page 22
2524
Picture Automatic Adjustment
Preset:
•Press the PC button to select the PC mode.
1 Press the Menu button. Move the joystick up or
down to select the "SETUP", then press the joystick
to enter the sub-menu.
Quick way to access the Auto Adjustment : Just press
"Auto Adjust." on the remote control.
2 Move the joystick up or down to select the "Image
Lock", then press the joystick to enter the
sub-menu .
3 Move the joystick up or down to select "Auto
Adjustment", then press the joystick to adjust the PC
stable. This is recommended to perform for new PC
mode.
4 Press the Menu button to exit.
Picture Quality Adjustment
S E T U P
Position
Image Lock
Aspect Radio Fill All
Zoom/Pan
Pin
Enter
S E T U P
Position
Image Lock
Aspect Radio Fill All
Zoom/Pan
Pin
Enter
S E T U P
Coarse
Fine
Auto Adjustment
Enter
50
50
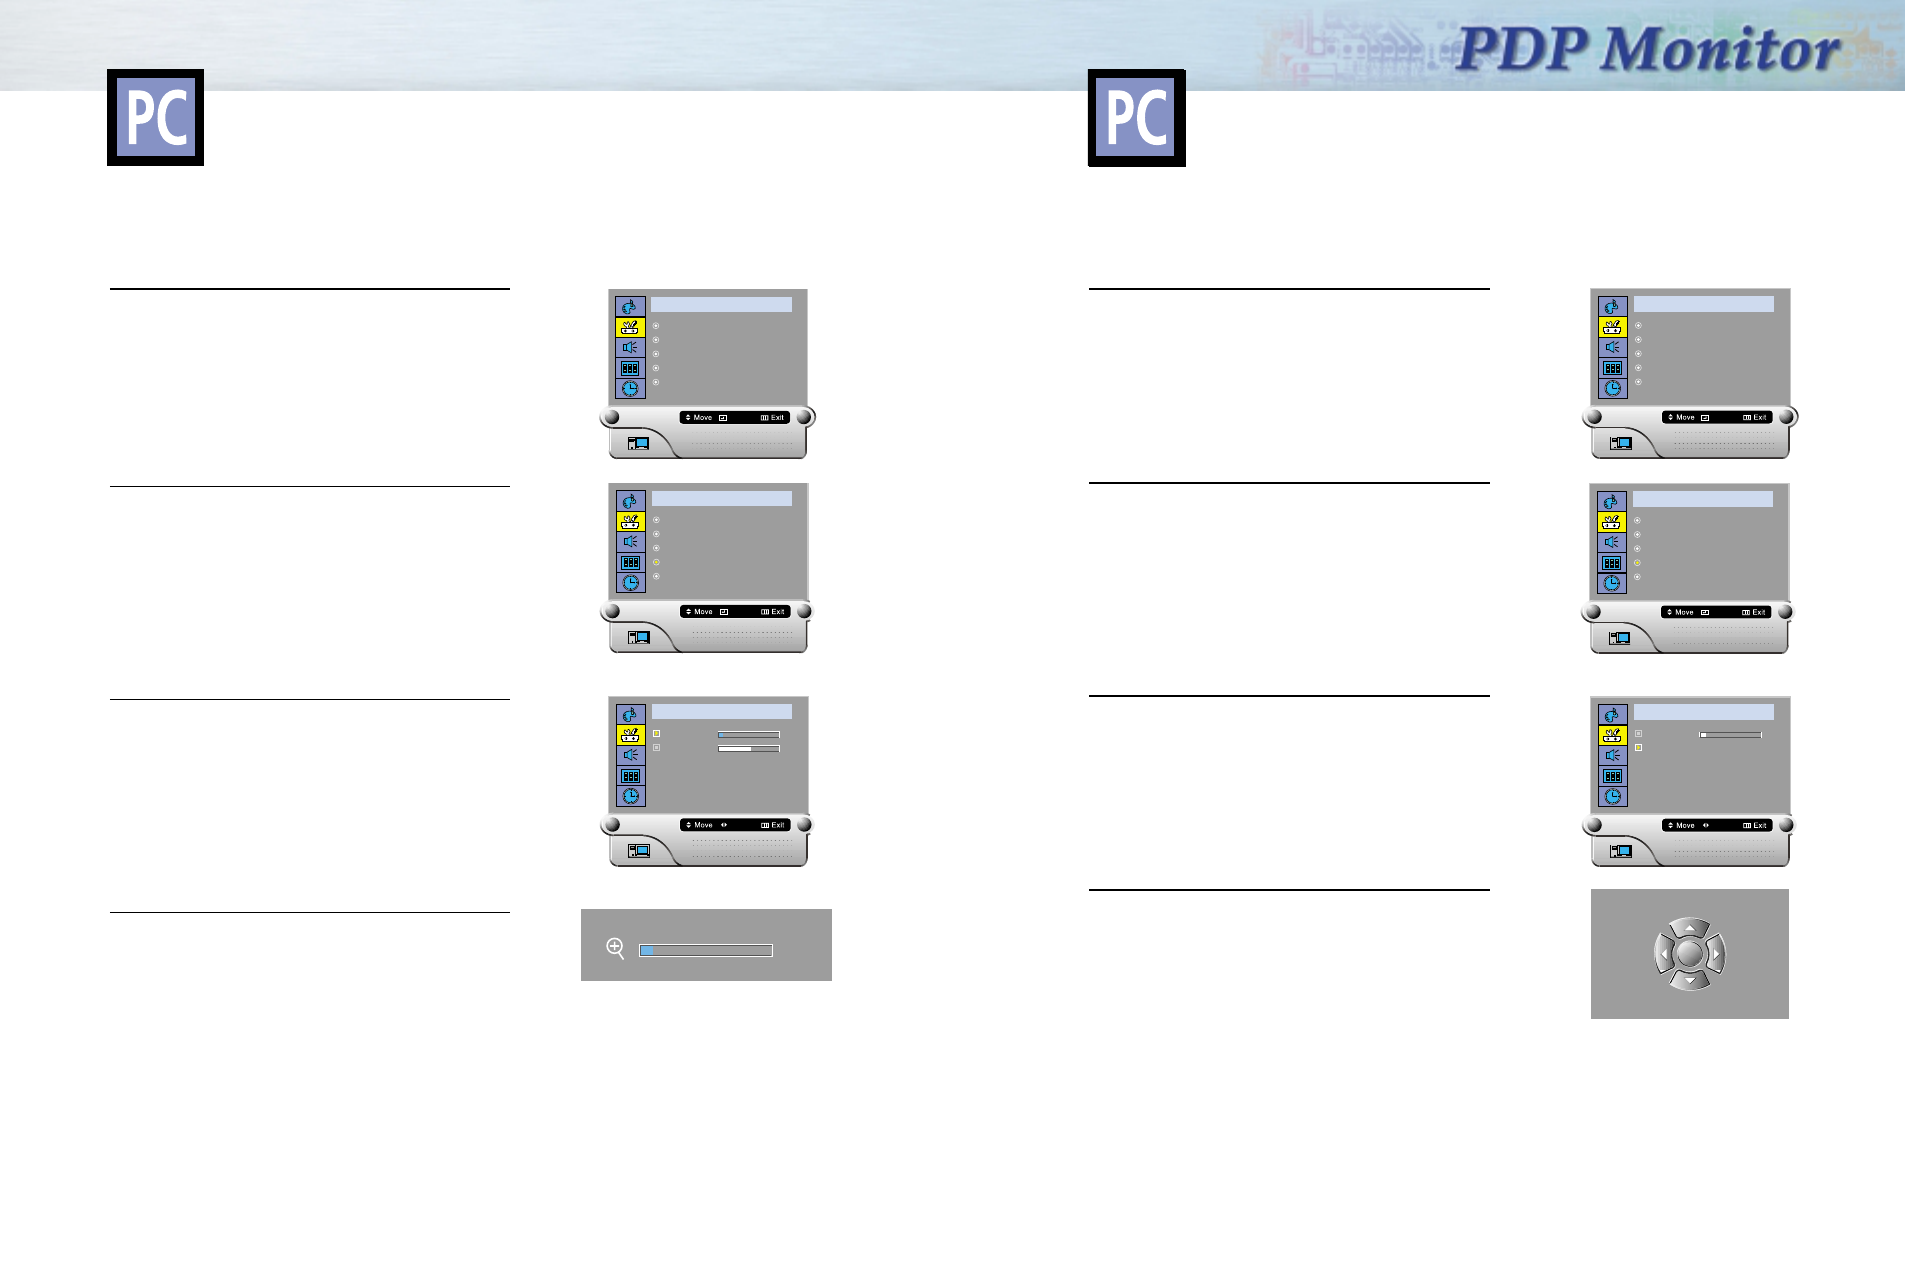
Horizontal Size Adjustment (Pixel Frequency Adjustment)
Preset:
•Press the PC button to select the PC mode.
1 Press the Menu button. Move the joystick up or
down to select the "SETUP", then press the joystick
to enter the sub-menu.
2 Move the joystick up or down to select the "Image
Lock", then press the joystick to enter the sub-menu.
3 Move the joystick up or down to select "Coarse",
then move the joystick left or right to remove picture
noise (vertical stripes) on the screen.
(If frequency is not set properly, the vertical stripes
will appear on the screen.)
4 Press the Menu button to exit.
S E T U P
Position
Image Lock
Aspect Radio Fill All
Zoom/Pan
Pin
Enter
S E T U P
Position
Image Lock
Aspect Radio Fill All
Zoom/Pan
Pin
Enter
S E T U P
Coarse
Fine
Auto Adjustment
Adjust
50
50
Coarse
70
n
Sdi42-2.qxd 2001.11.16 5:4 PM Page 24
2726
Fine Tuning (Phase)
Preset:
•Press the PC button to select the PC mode.
1 Press the Menu button. Move the joystick up or
down to select the "SETUP", then press the joystick
to enter the sub-menu.
2 Move the joystick up or down to select the "Image
Lock", then press the joystick to enter the sub-menu .
3 Move the joystick up or down to select "Fine", then
move the joystick left or right to remove picture
noise (vertical stripes) on the screen.
(If phase is not set properly, the picture may be
blurry.)
4 Press the Menu button to exit.
S E T U P
Position
Image Lock
Aspect Radio Fill All
Zoom/Pan
Pin
Enter
S E T U P
Position
Image Lock
Aspect Radio Fill All
Zoom/Pan
Pin
Enter
S E T U P
Coarse
Fine
Auto Adjustment
Adjust
50
50
Fine
23
Preset:
•Press the PC button to select the PC mode.
1 Press the Menu button. Move the joystick up or
down to select the "SETUP", then press the joystick
to enter the sub-menu.
2 Move the joystick up or down to select the "Aspect
Ratio", then move the joystick left or right to
select the "Fill All" or "Normal".
3 Press the Menu button to exit.
S E T U P
Position
Image Lock
Aspect Radio Fill All
Zoom/Pan
Pin
Enter
S E T U P
Position
Image Lock
Aspect Radio Fill All
Zoom/Pan
Pin
Select
Changing the Aspect Ratio
Sdi42-2.qxd 2001.11.16 5:4 PM Page 26
2928
Preset:
•Press the PC button to select the PC mode.
1 Press the Menu button. Move the joystick up or
down to select the "SETUP", then press the joystick
to enter the sub-menu.
Quick way to access the zoom:
Just press “zoom” on the remote control.
2 Move the joystick up or down to select the
"Zoom/Pan", then press the joystick button to enter
the sub-menu.
3 Move the joystick left or right to enlarge the image.
•
The picture can be enlarged level 2 to level10 in
Zoom mode.
4 Press the Menu button to exit.
Enlarge of the Image (Zoom)
S E T U P
Position
Image Lock
Aspect Radio Fill All
Zoom/Pan
Pin
Enter
S E T U P
Zoom
Pan
Adjust
2
50
Zoom
2
S E T U P
Position
Image Lock
Aspect Radio Fill All
Zoom/Pan
Pin
Enter
Preset:
•Press the PC button to select the PC mode.
1 Press the Menu button. Move the joystick up or
down to select the "SETUP", then press the joystick
to enter the sub-menu.
2 Move the joystick up or down to select the
"Zoom/Pan", then press the joystick to enter
the sub-menu .
3 Move the joystick up or down to select the "Pan",
then Move the joystick left or right to expanded
the image.
The PAN feature operates only when the picture is
expanded more than level 2.
4 Press the Menu button to exit.
Move Expanded Picture(Pan)
S E T U P
Position
Image Lock
Aspect Radio Fill All
Zoom/Pan
Pin
Enter
S E T U P
Zoom
Pan
Move
2
S E T U P
Position
Image Lock
Aspect Radio Fill All
Zoom/Pan
Pin
Enter
Sdi42-2.qxd 2001.11.16 5:4 PM Page 28
30
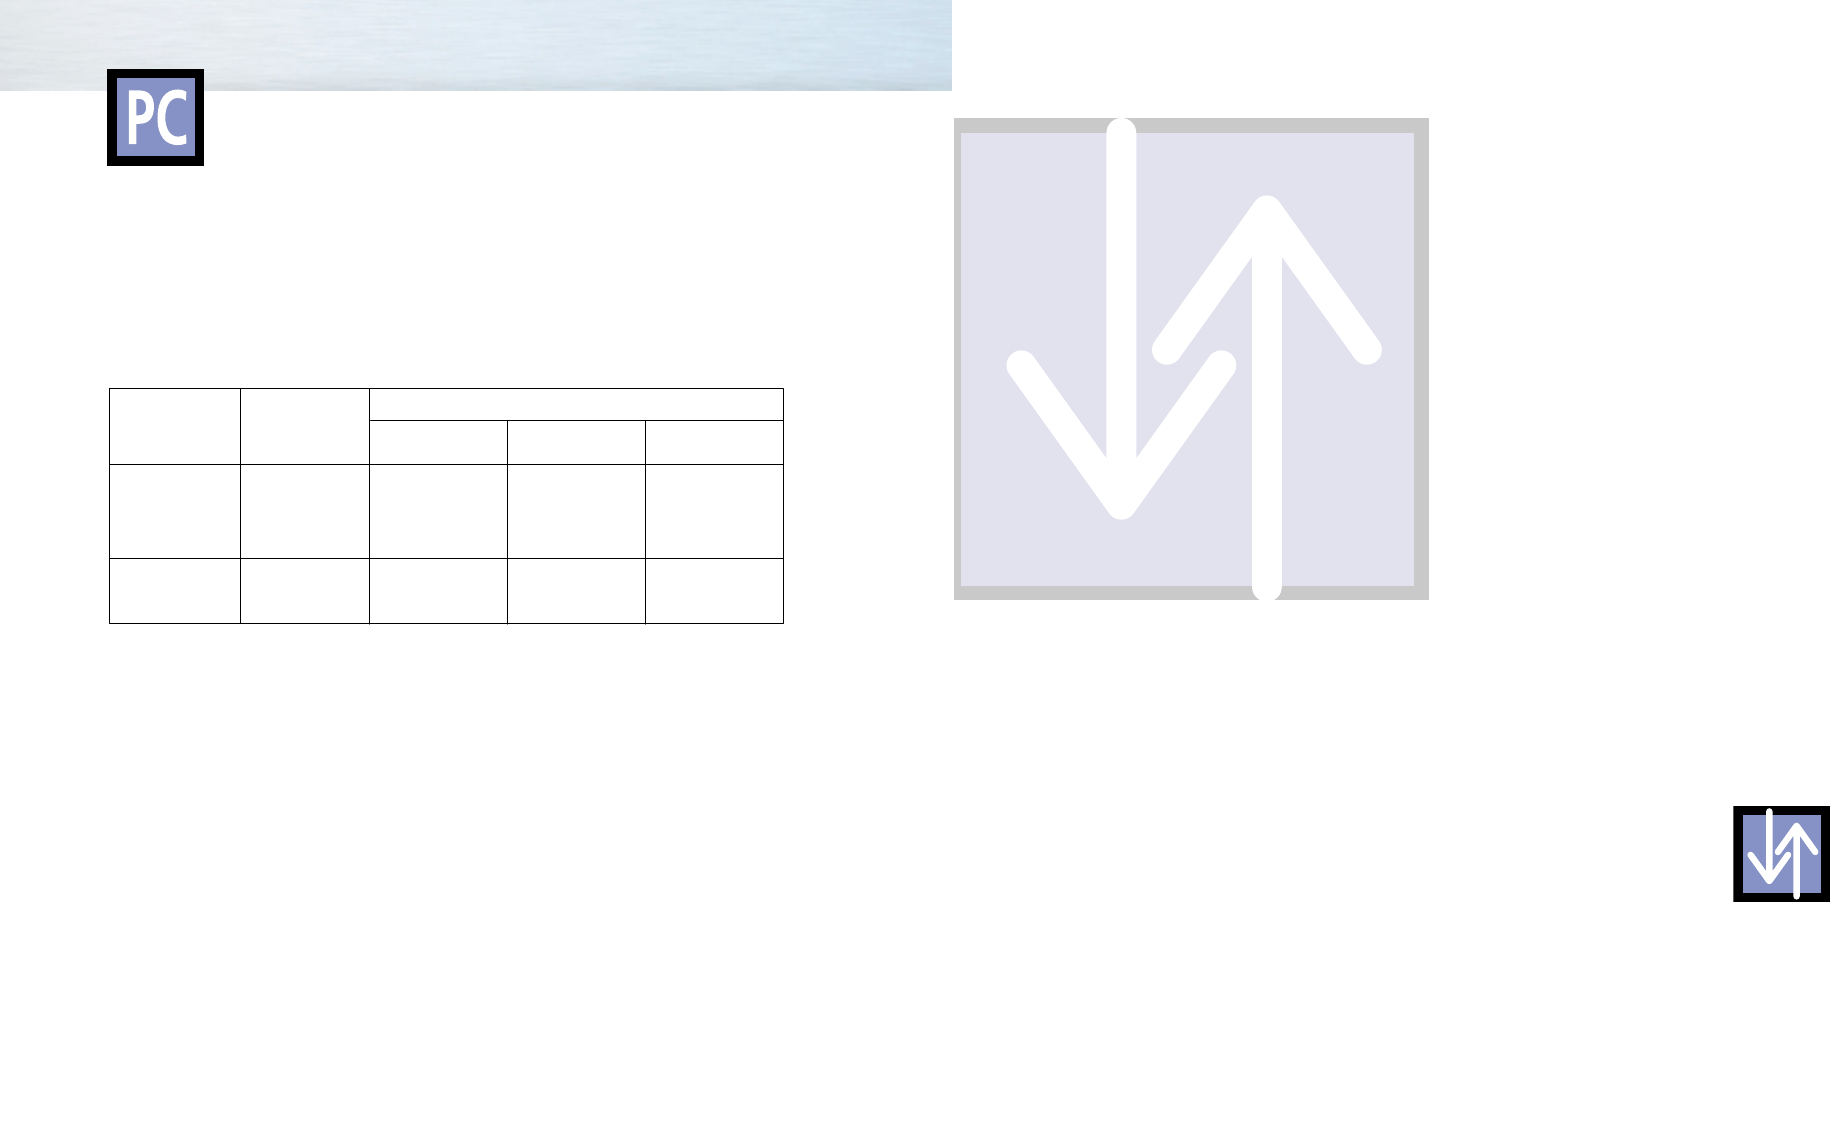
Power Saver (PC mode only)
This monitor has a built-in power management system called Power Saver. This power management system
saves energy by switching your monitor into a low-power mode when it has not been used for a certain
amount of time. This power management system operates with a VESA DPMS compliant video card installed
in your computer. You use a software utility installed on your computer to set up this feature.
See the table below for details.
Table 1. Power-saving modes
Notes:
•This monitor automatically returns to normal operation when horizontal and vertical sync return.
•This occurs when move the computer’s mouse or press a key on the keyboard.
•For energy conservation, turn your monitor OFF when it is not needed, or when leaving it unattended for
long periods.
State Normal
Operation
Power-saving Function Mode
Inactive
Active
Blanked
Amber Blinking
(0.5 sec Interval)
Active
Inactive
Blanked
Amber Blinking
(0.5 sec Interval)
Inactive
Inactive
Blanked
Amber Blinking
(0.5 sec Interval)
Horizontal Sync
Vertical Sync
Video
Power
Indicator
Active
Active
Active
Green
Standby Mode Suspend Mode
Position A1 Power-off Mode
Position A2
Connection(Connecting Receiver)
Connecting a VCR/Cable Box ......................................................32
Connecting a DTV Set-Top-Box/DVD ..............................................33
Connection
Connection
Sdi42-2.qxd 2001.11.16 5:4 PM Page 30
3332 3332
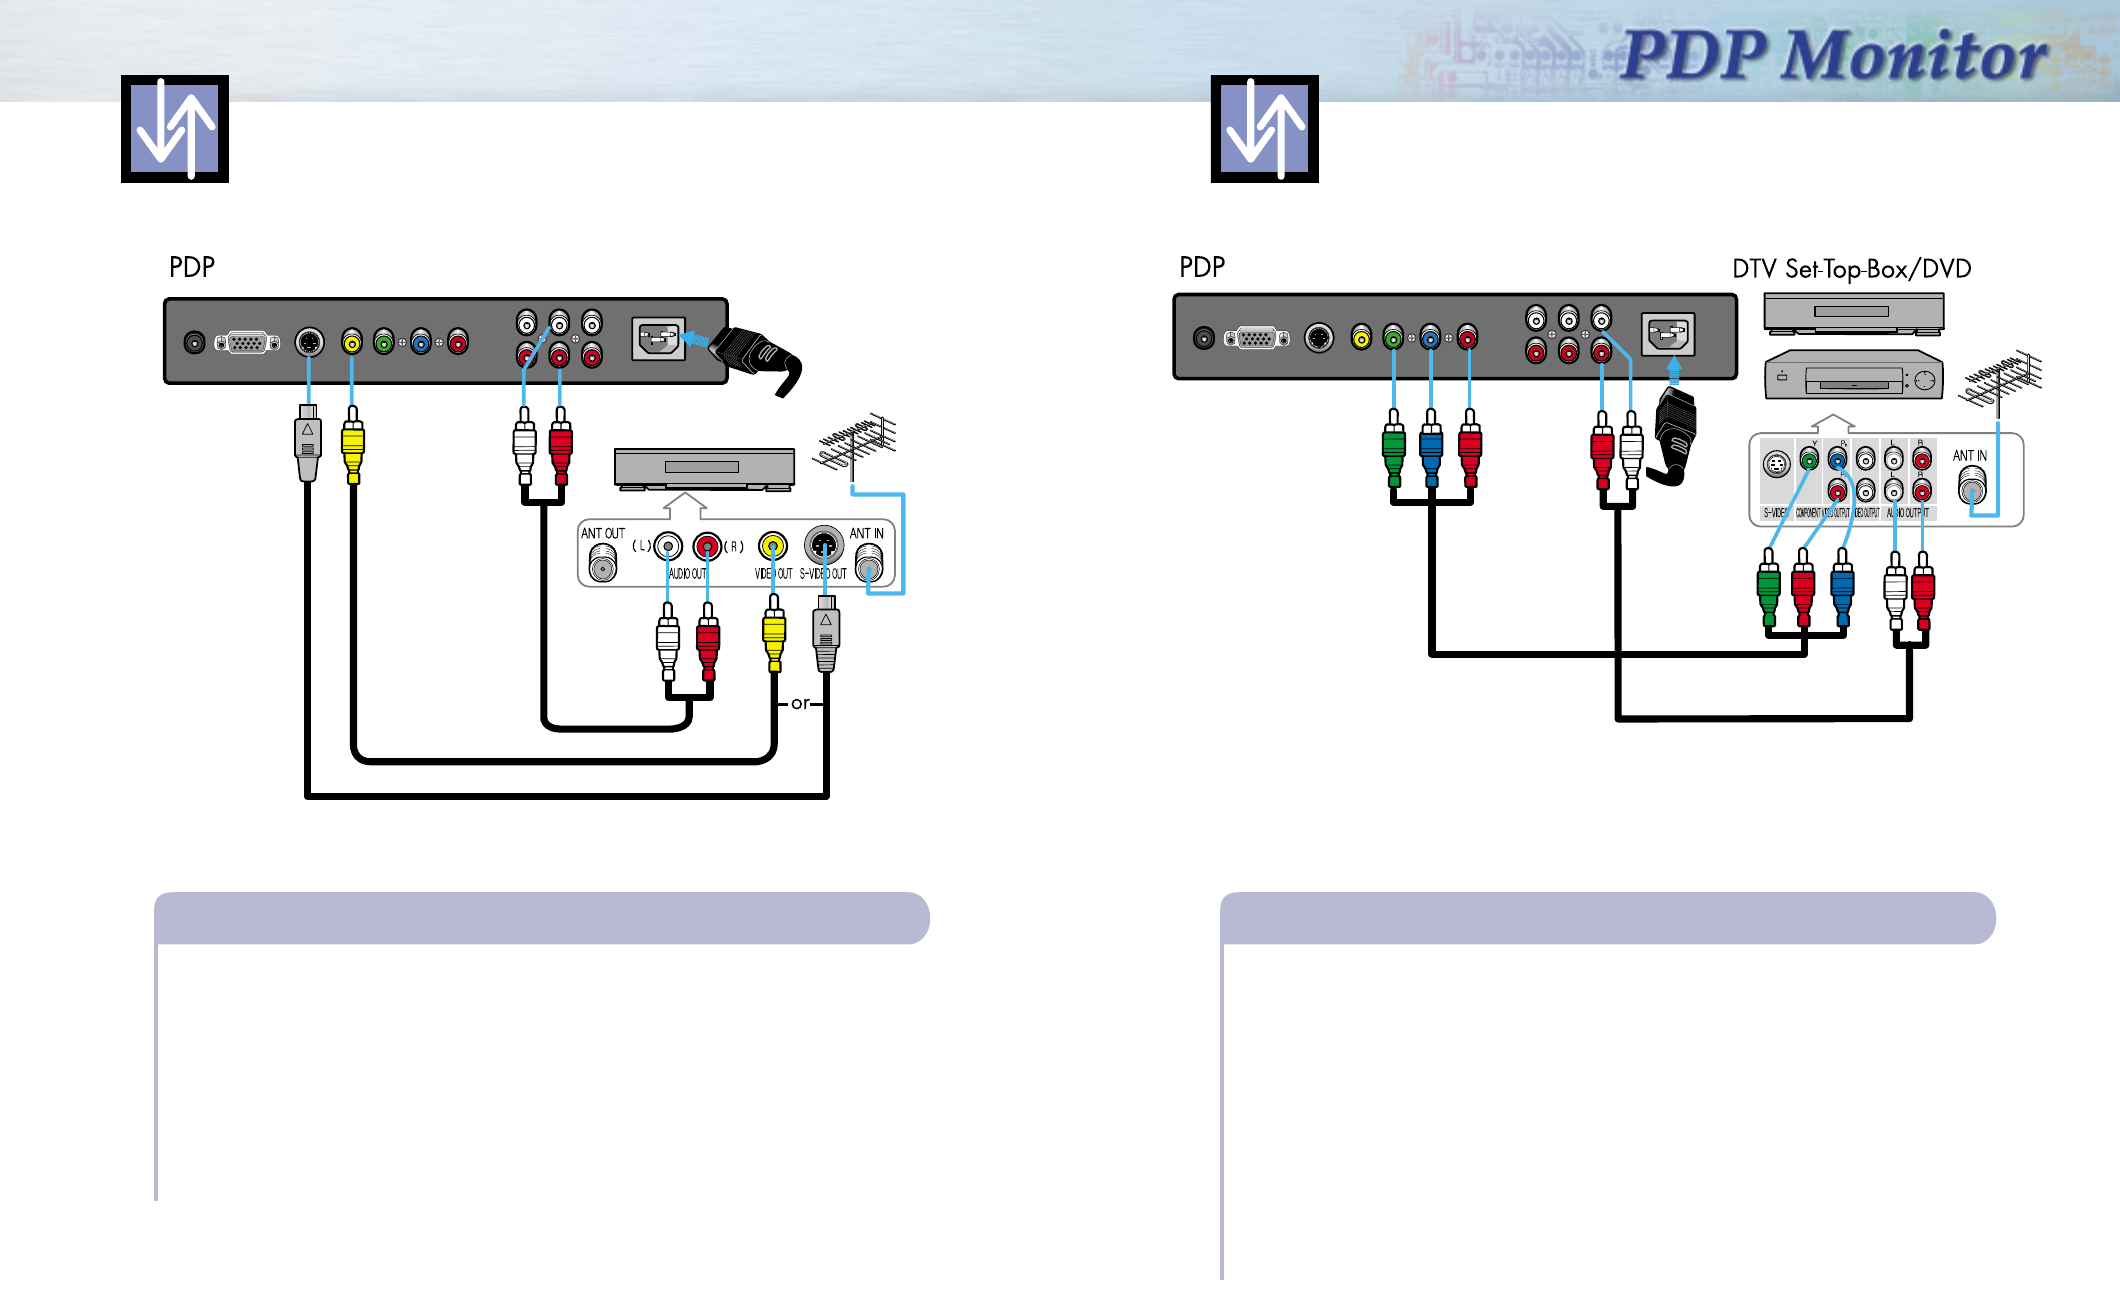
Connecting a DTV Set-Top-Box/DVD
Video (Y, Pb(Cb), Pr(Cr)) Cable
Connect a Video cable between the DTV Set-Top Box/DVD (Y,Pb(Cb),Pr(Cr)) Output jacks on the
DVD/DTV Set-Top Box and the Video Component (Y,Pb(Cb),Pr(Cr)) Input jack on the PDP.
• Note: That it is essential to match the color-coded connectors with a compatible DVD or DTV STB.
To Play DVD:
1. Turn on your DVD, insert a disc and press the Play button on the DVD remote control.
2. Turn on PDP and press the DVD button to select the DVD mode.
To Watch DTV:
1. Turn on your DTV receiver.
2. Turn on PDP and press the DTV button to select the DTV mode.
✻ When the Mode is selected in no signal, the Warning Message is displayed.
Connecting a Video jack/Audio Jack
Power Plug
Audio Cable
Connecting a VCR/Cable Box
VCR/Cable Box
Video Cable
S-Video Cable
Audio Cable
Connect an Video/S-Video cable between the Video/S-Video Output jack on the VCR/Cable
box and the Video Input jack on the PDP.
• Connect an Audio cable.
Videotape Playback:
1. Turn on your VCR, insert a videotape and press the Play button on the VCR remote control.
2. Turn on PDP and press the Video or S-Video(if S-Video jack is connected.) button to select the
VIDEO or S-VIDEO mode.
✻ When the Mode is selected in no signal, the Warning Message is displayed.
Connecting a Video or S-Video jack/Audio Jack
Power Plug
Sdi42-2.qxd 2001.11.19 4:27 PM Page 32

Picture Control
Picture Control
Picture Control
Using Automatic picture setting ......................................................36
Customizing the Picture ................................................................37
Changing the Screen Size ............................................................38
Freezing the picture......................................................................39
Auto Pixel Shift ............................................................................39
Sdi42-3.qxd 2001.11.16 5:5 PM Page 34
37
1 Press the Menu button, then press the joystick to
select the “PICTURE”. Move the joystick left or right
to select “Custom”. You will see the items
“Brightness”, “Contrast”, “Sharpness”, “Tint” and
“Color”.
2 Move the joystick up or down to select the item you
want to change.
3 Move the joystick left or right to increase or
decrease the value of the item.
4 Press the Menu button to exit.
NN
NNoo
oott
ttee
ee::
::
1. Only R, G, B Color control appear in PC mode.
2. In case of the PAL or SECAM system, the tint feature doesn’t operate in video mode.
P I C T U R E
Brightness
Contrast
Sharpness
Tint
Color
Select Custom
70
40
60
40
5050 L R
P I C T U R E
Contrast
Sharpness
Tint
Color
Select Custom
40
60
40
5050 L R
Brightness 70
Brightness
70
36
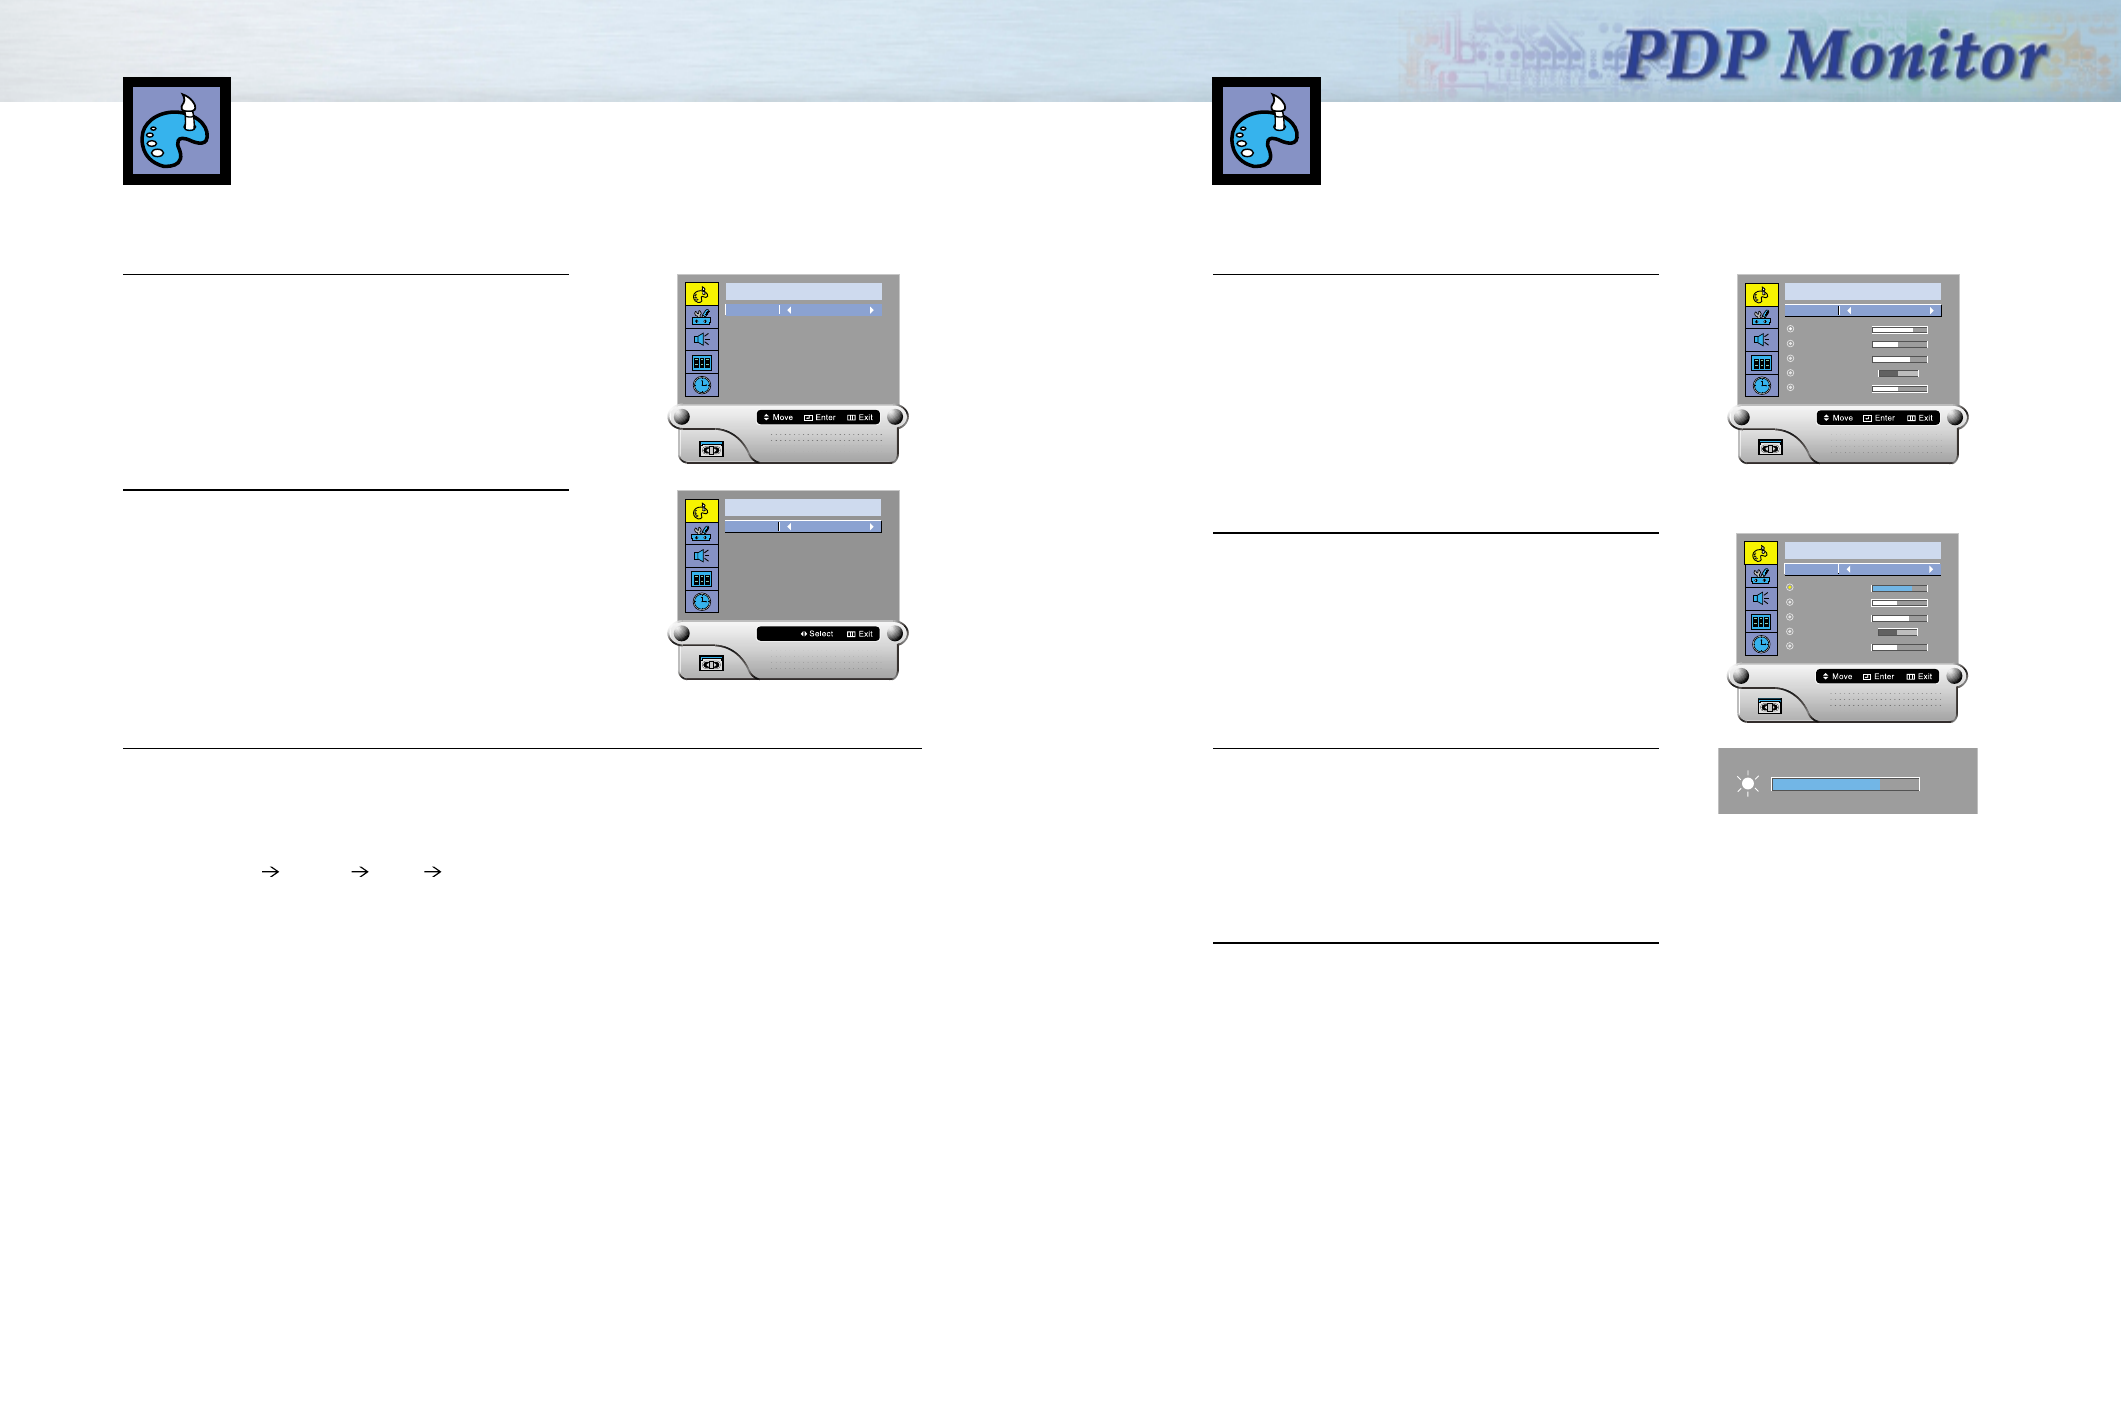
Using Automatic Picture Settings
Your PDP has automatic picture settings that allow you to adjust the video display easily.
1 Press the Menu button, then press the joystick to
enter.
Quick way to access the picture setting: Just press
“P.Mode” on the remote control.
2 Move the joystick left or right to select the “Custom”,
“Standard”, “Dynamic”, “Movie” or “Mild” picture
setting.
NN
NNoo
oott
ttee
ee::
::The picture setting is available for video,
S-Video, DVD and DTV.
3 Press the Menu button to exit.
NN
NNoo
oott
ttee
ee::
::The Automatic picture settings feature doesn’t operate in the PC mode.
You will see four items in PC mode in the following sequence:
Low Middle High Custom.
P I C T U R E
Select Standard
P I C T U R E
Select Movie
Customizing the Picture
Quick way to access the Brightness and Contrast:
Move the joystick up or down to access.
Sdi42-3.qxd 2001.11.20 9:27 AM Page 36
3938
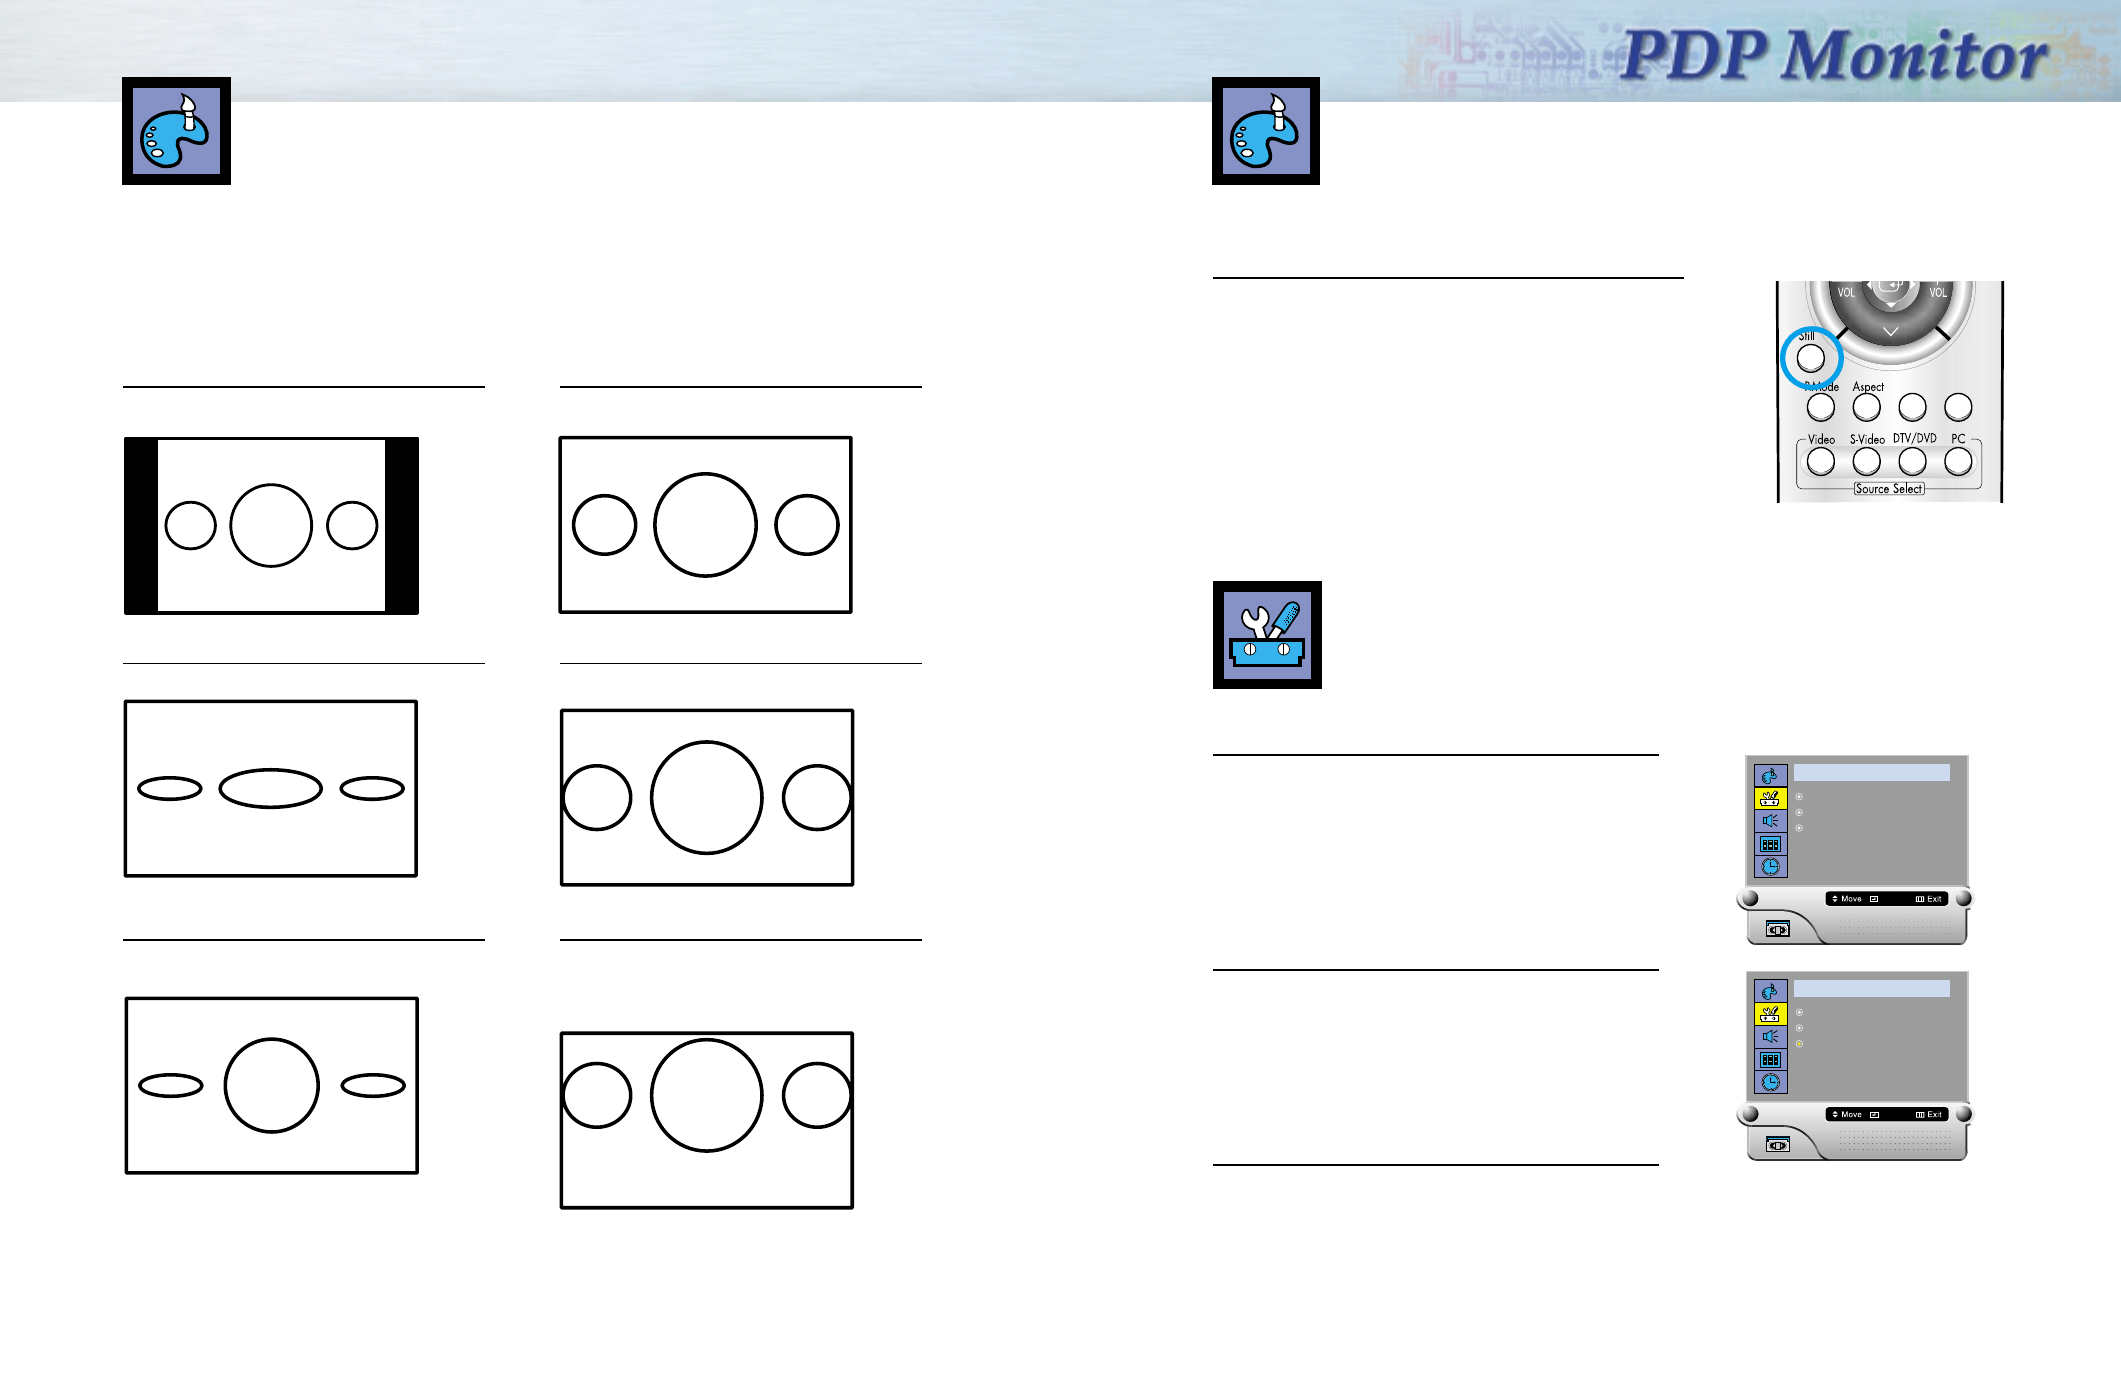
Still
Press the Still button on the remote control to freeze a
moving picture into a still one. Press again to cancel.
Freezing the Picture
Auto Adj. Zoom
Normal(4:3)
Sets the picture to normal mode. This is a
standard PDP screen size.
Wide
Sets the picture to 16:9 wide mode.
Panorama
Use this mode for the wide aspect ratio of a
panoramic picture.
Zoom1
Magnify the size of the picture vertically on
screen.
Zoom2
Magnify the size of the picture more than
Zoom1.
Stretch
Moves the Zoom2 picture up a little to fully
show the bottom. Use this picture size. If you
want to view Zoom2 picture along with
captions when watching movies.
Caption
NN
NNoo
oott
ttee
ee::
::
• In VIDEO, S-VIDEO, DVD mode, all screen modes can be selected.
(Normal Wide Panorama Zoom1 Zoom2 Stretch Normal...)
• In DTV mode (Wide Zoom1 Zoom2 Wide...)
• In PC mode (Fill All Normal Fill All...)
• You can use the Aspect button on the remote control to change the aspect ratio.
When you press the Aspect button on the remote control, the PDP’s screen mode choices appear in
sequence. The screen displays in this order: Normal, Wide, Panorama, Zoom1, Zoom2, Stretch.
Note
• If you watch a still image or the normal mode for a long time, image may be burned onto the
screen, view the monitor in wide mode or panorama mode as possible.
Changing the Screen Size
Auto Pixel Shift
To prevent image retention, the screen automatically moves by one pixel.
1 Press the Menu button. Move the joystick up or
down to select “SETUP”, then press the joystick
to enter.
2 Move the joystick up or down to select “Auto Pixel
Shift”.
Move the joystick left or right to select “On”.
3 Press the Menu button to exit.
NN
NNoo
oott
ttee
ee::
::
• Auto pixel shift doesn’t operate in the PC mode.
S E T U P
Aspect Radio Zoom
Pin
Auto Pixel Shift On
Enter
S E T U P
Aspect Radio Zoom
Pin
Auto Pixel Shift On
Select
Sdi42-3.qxd 2001.11.20 9:2 AM Page 38