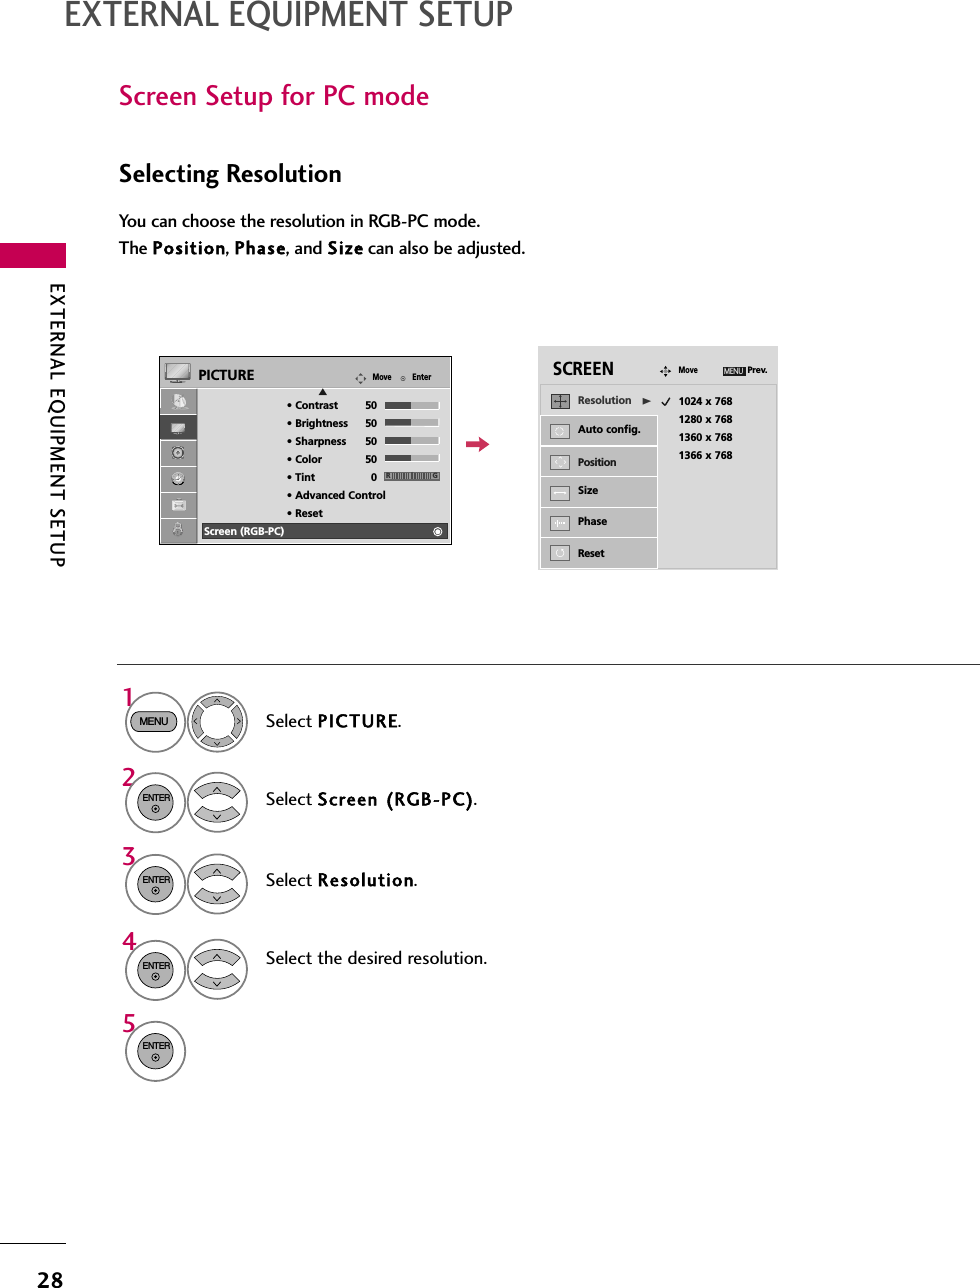
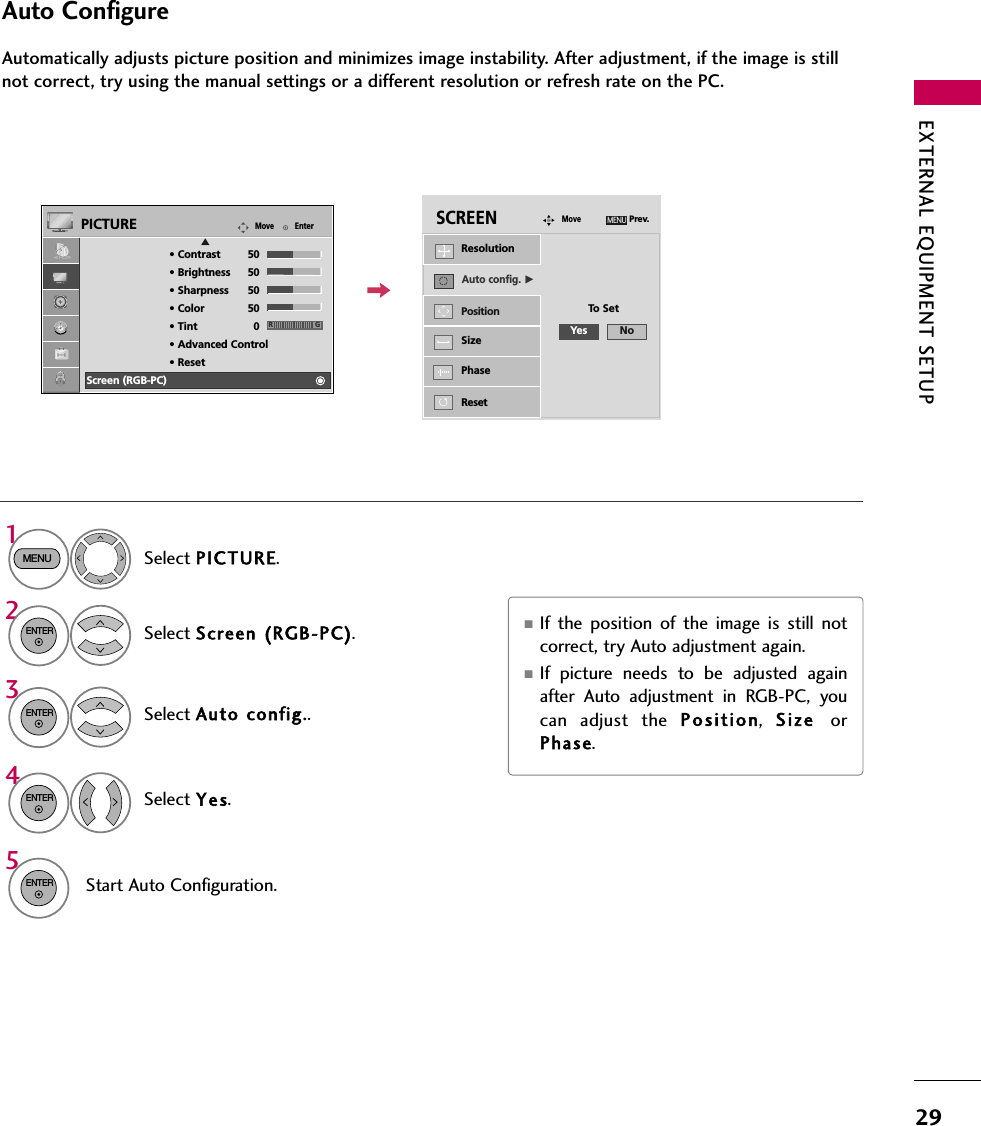
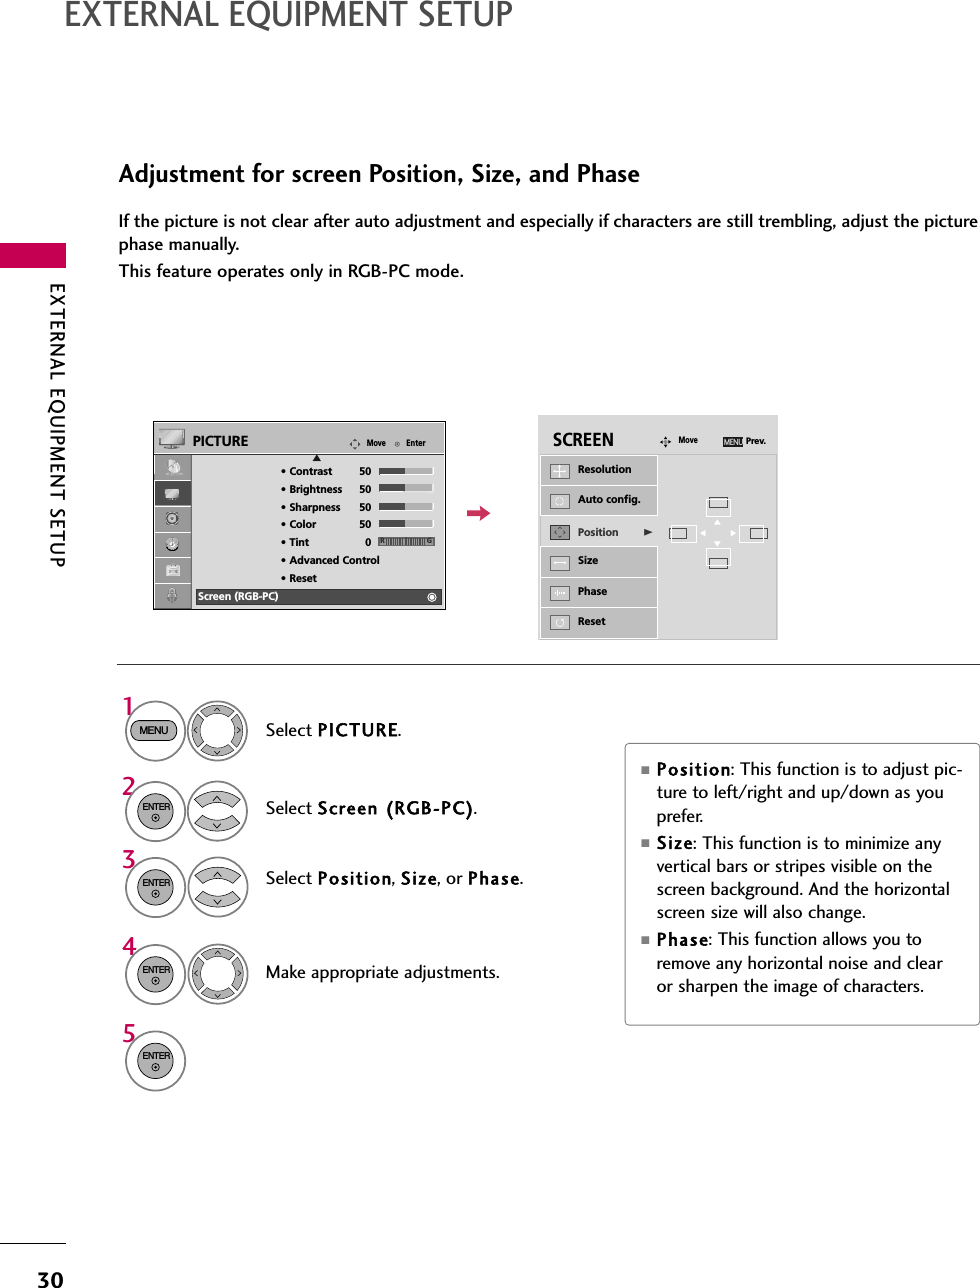
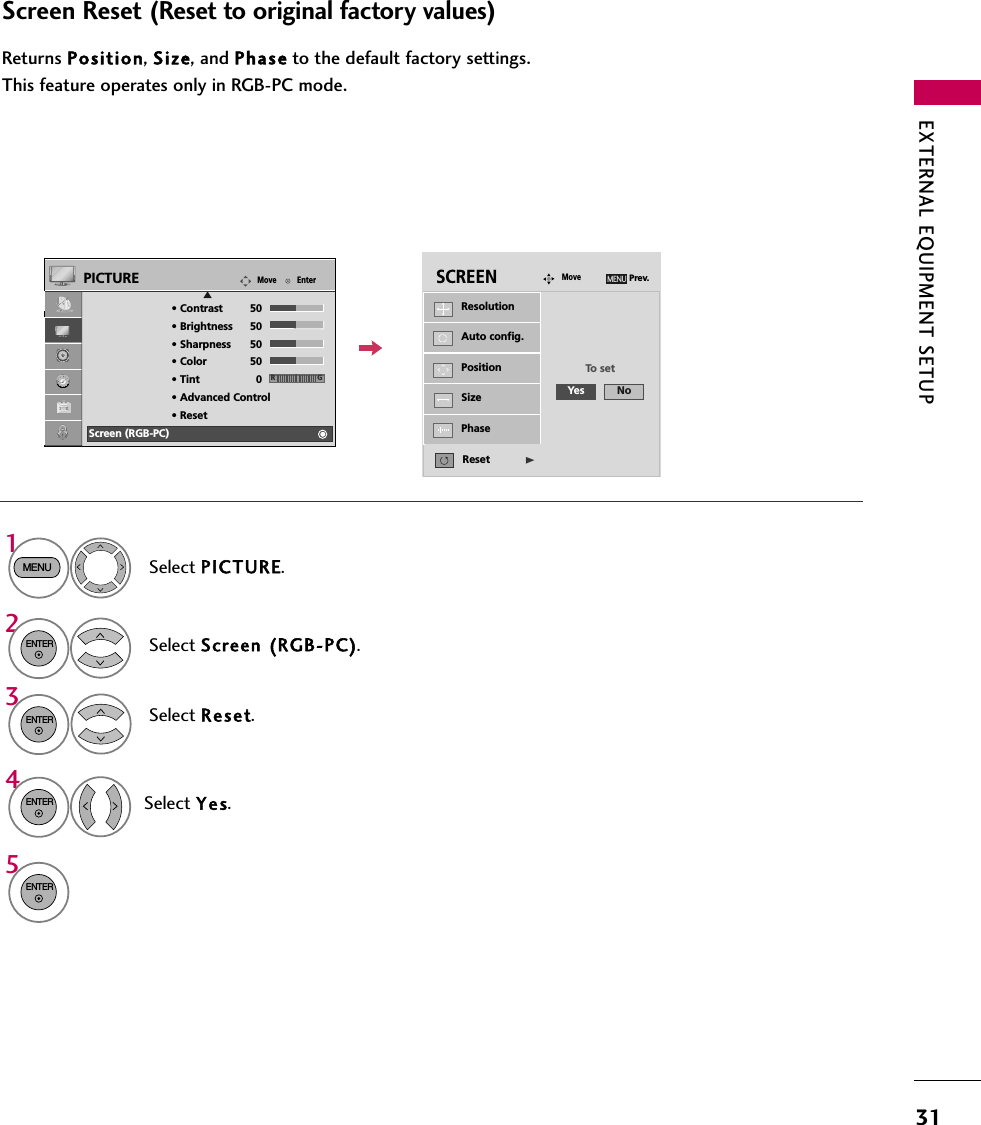
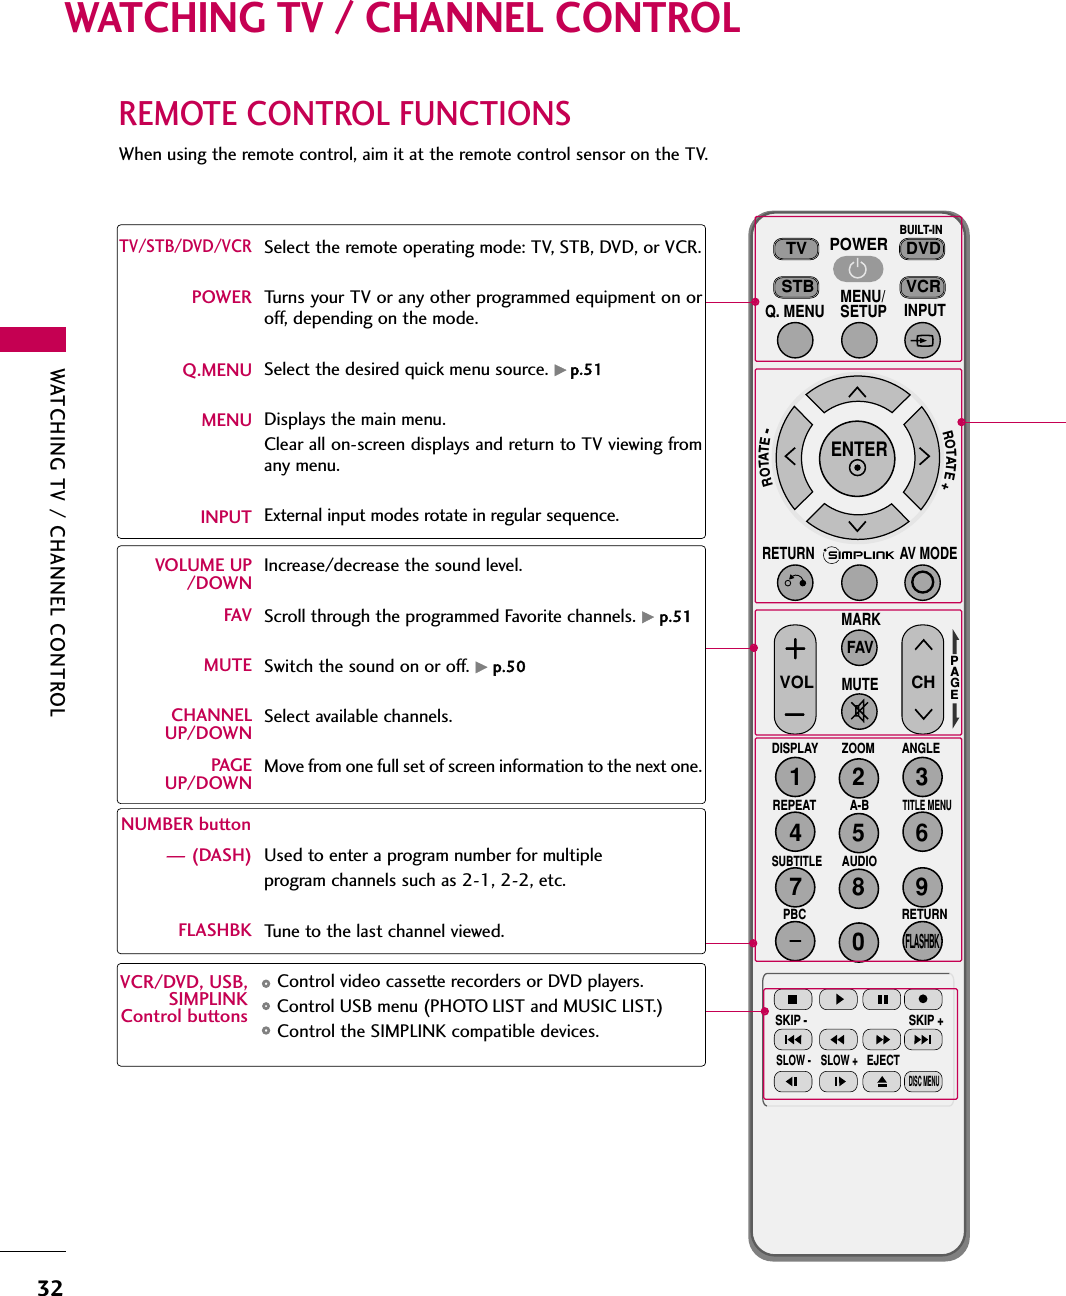
LG Electronics USA 26LG40UA LCD TV/MONITOR User Manual 26LG40 UA manual 1
LG Electronics USA LCD TV/MONITOR 26LG40 UA manual 1
UserManual.wiki
>
LG Electronics USA
>
26LG40UA User Manual
>
User manual 1 of 2
Contents
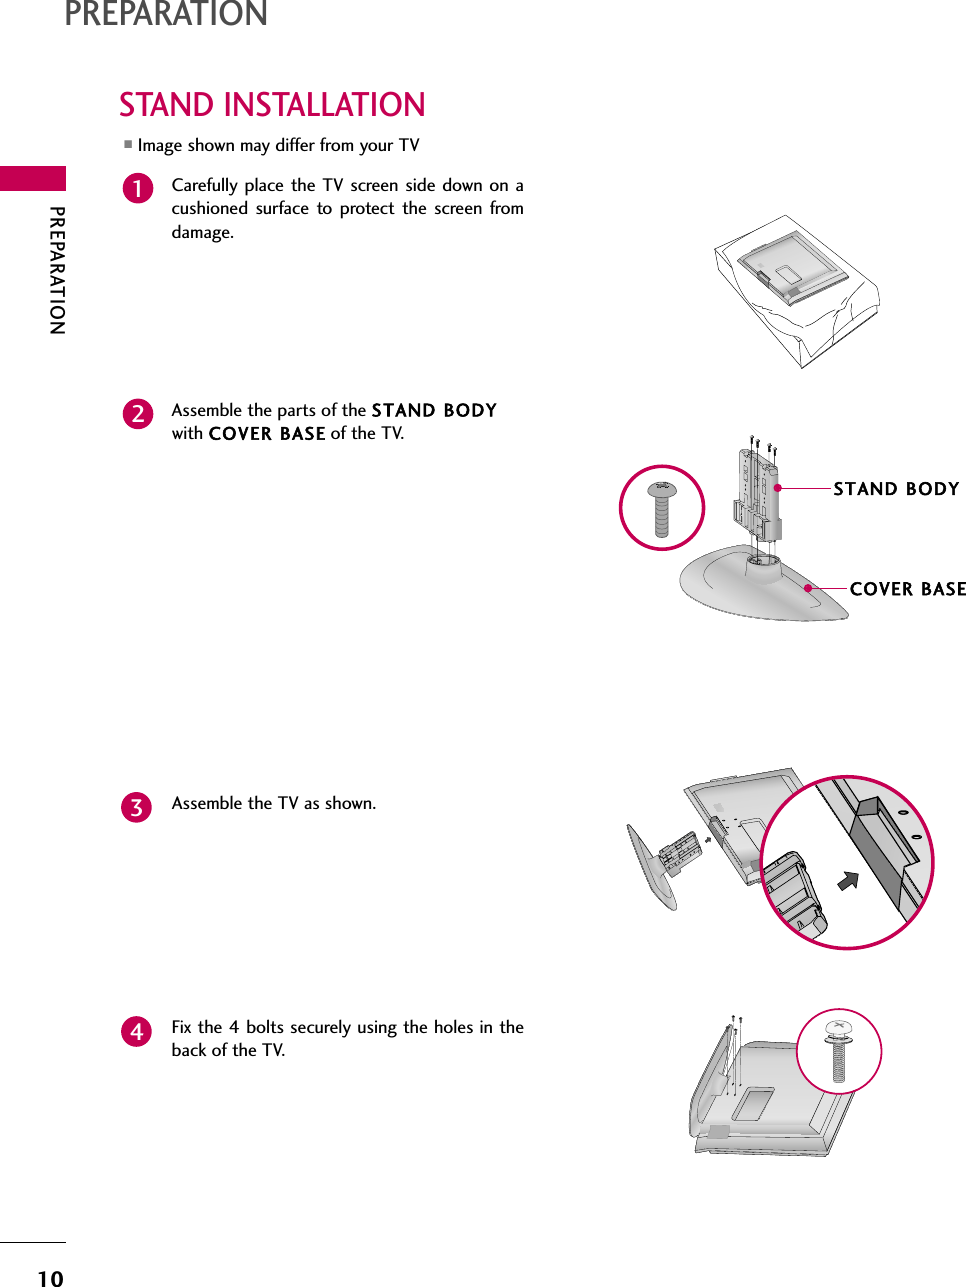
1.
User manual 1 of 2
2.
User manual 2 of 2
User manual 1 of 2
Navigation menu
Upload a User Manual
Namespaces
Wiki Guide
HTML
PDF
Info
Views
User Manual
Discussion / Help
Navigation


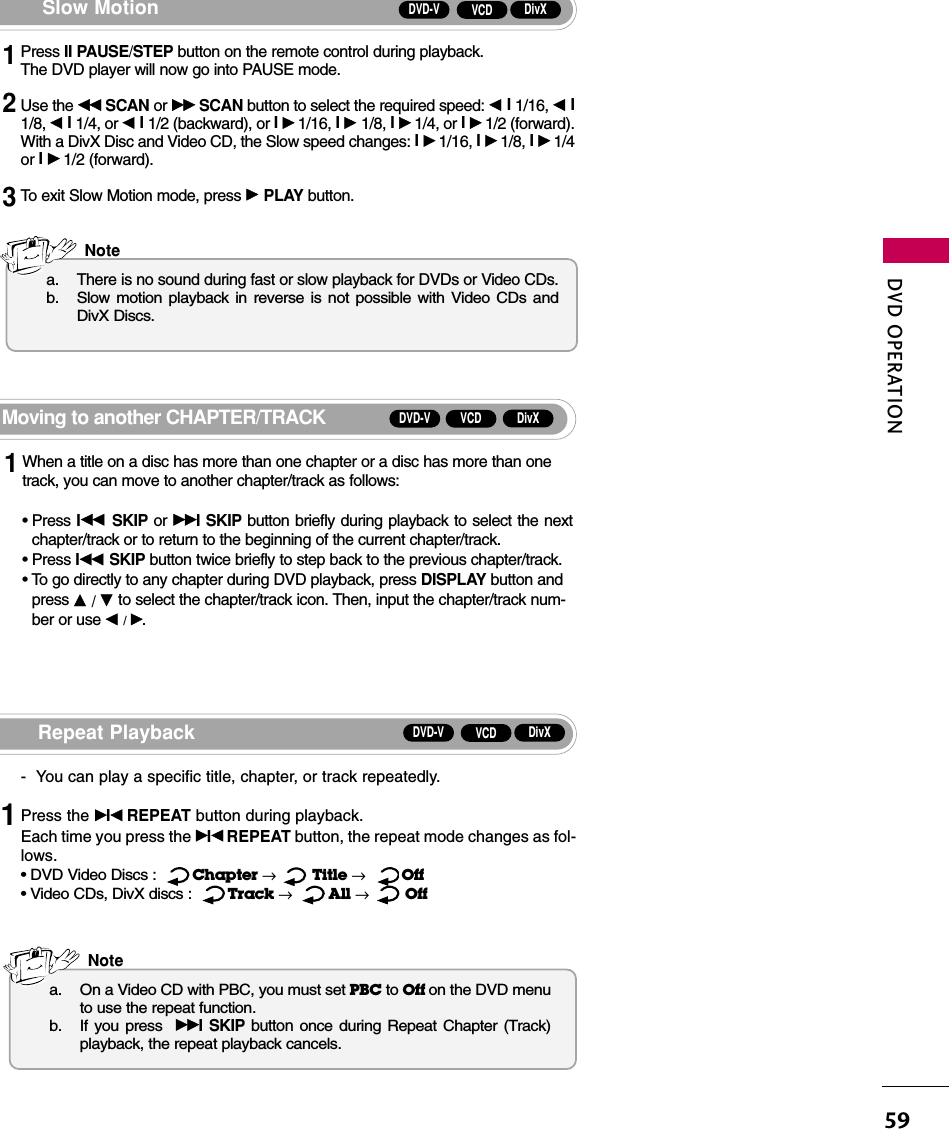

![DVD OPERATION64DVD OPERATIONPlaying an Playing an Audio CD or MP3/WMAAudio CD or MP3/WMA DiscDisc- The DVD player can play MP3/WMA formatted recordings on CD-ROM, CD-R, or CD-RW discs.A MP3 / WMA1. Press D /Ebutton to select a folder, and press OKbutton to see the folder contents.2. Press D /Ebutton to select a track then press GPLAY or OK button. Playback starts.A Audio CD1. Once you insert an audio CD a menu appears onthe TV screen. 2. Press D /Ebutton to select a track then press GPLAY or OK button. Playback starts.CD WMAMP3A ID3 TAG• When playing a file containing information such as track titles,you can see the information by pressing DISPLAY button.[Title, Artist, Album, Year, Comment ]• If there is no information, NO ID3 TAG appear on the display.Pause Playback (Still mode)12Press II PAUSE/STEP button during playback.To return to playback, press G PLAY,OK or press II PAUSE/STEP button again.MP3CD WMAMoving to another Track123Press IFF SKIP or GGI SKIP button briefly during playback to go to the next track or to return to the beginning ofthe current track.Press IFF SKIP button twice briefly to go back to the previous track.You can play any track by inputting its number.Fast Forward/Backward123Press FF SCAN or GG SCAN button during playback.Press FF SCAN or GG SCAN button repeatedly to select the required speed.• X2, X4 or X8Press the G PLAY button again to return to normal playback.MP3CD WMAMP3CD WMAEListAUDIO CDTrack 1Track 2Track 3Track 4Track 5Track 6Track 7Track 8 Clear AllProgram1/12PROGRAM EditA 0 : 52 : 07 EListMUSIC1-Music 12-Music 23-Music 34-Music 45-Music 56-Music 67-Music 7 Clear AllProgram1/12PROGRAM EditDISPLAY InfoA 0 : 00 : 00](https://usermanual.wiki/LG-Electronics-USA/26LG40UA.User-manual-1-of-2/User-Guide-924096-Page-65.png)