LG Electronics USA 42PX3DUE Plasma Display Panel User Manual 527Cen 1
LG Electronics USA Plasma Display Panel 527Cen 1
Contents
- 1. User Manual 1
- 2. User Manual 2
- 3. User Manual 3
User Manual 2

CONNECTIONS & SETUP
30
CONNECTIONS & SETUP
When connecting HDMI to DVI cable
GGHDMI2 source does not support DVI source.
GGIf the PC has a DVI output and no HDMI output, a separated audio connection is necessary.
GGIf the PC does not support Auto DVI, you need to set the output resolution appropriately. To get the
best picture quality, adjust the output resolution of PC graphics card's output resolution to 1024x768,
60Hz.
NOTE
!
ANTENNA
IN
CABLE
IN
DIGITAL AUDIO
OUT
OPTICAL
RS-232C IN
(CONTROL
&
SERVICE)
ANTENNA
IN
CABLECABLE
IN
HDMI IN
2
1(DVI)
REMOTE
CONTROL IN
DVI-PC OUTPUT AUDIO
RGB (PC
/
DTV)
AUDIO (RGB/DVI)
RGB IN
RGB INRGB IN
AUDIO (RGB/DVI)AUDIO (RGB/DVI)
RGB (PC
/
DTV)
Connect the DVI output of the PC to the HHDDMMII IINN 11((DDVVII)) jack on the set.
Connect the PC audio output to the AAUUDDIIOO ((RRGGBB//DDVVII))jack on the set.
1. How to connect
■Turn on the PC and the set
■Select HHDDMMII11//DDVVIIinput source with using the IINNPPUUTTbutton on the remote control.
2. How to use
2
1
1 2
527Cen-1 80/1/2 4:15 PM Page 30
CONNECTIONS & SETUP
31
GGTo get the the best picture quality, adjust the PC
graphics card to 1024x768, 60Hz.
GGDepending on the graphics card, DOS mode may
not work if a HDMI to DVI Cable is in use.
GGWhen Source Devices are connected with
HDMI/DVI Input, the output PC Resolution (VGA,
SVGA, XGA), Position and Size may not fit on the
Screen. As shown in the picture, press the
ADJUST button to adjust the screen Position of
the TV SET and contact a PC graphics card ser-
vice center.
GGWhen Source Devices connected with HDMI/DVI
Input, output TV SET Resolution (480p, 720p,
1080i) and TV SET Display fit EIA/CEA-861-B
Specification to Screen. If not, refer to the Manual
of HDMI/DVI Source Devices or contact your ser-
vice center.
GGIf the HDMI/DVI Source Device is not connected
to the Cable or if there is a poor cable connec-
tion, "No signal" is displayed in the HDMI/DVI
Input. In this case, that Video Resolution is not
supported. If "Invalid Format" is displayed, refer to
the Source Device manual or contact your service
center.
GGAvoid keeping a fixed image on the screen for a
long period of time. The fixed image may become
permanently imprinted on the screen.
GGThe synchronization input form for Horizontal
and Vertical frequencies is separate.
NOTES
!
Supported Display Specifications (RGB/HDMI-PC)
Horizontal Vertical
Frequency(KHz)Frequency(Hz)
31.468 70.09
31.469 70.08
31.469 59.94
37.861 72.80
37.500 75.00
35.156 56.25
37.879 60.31
48.077 72.18
46.875 75.00
48.363 60.00
56.476 70.06
60.023 75.02
47.776 59.870
47.720 59.799
Resolution
720x400
1360x768
640x350
* RGB-PC mode only: 640x350, 720X400
* HDMI-PC mode only: 1280x768
640x480
800x600
1024x768
Supported Display Specifications (RGB/HDMI-DTV)
Horizontal Vertical
Frequency(KHz)Frequency(Hz)
31.47 60
31.47 59.94
45.00 60.00
44.96 59.94
33.75 60.00
33.72 59.94
Resolution
720x480
1280x720
1920x1080
1280x768
527Cen-1 80/1/2 4:15 PM Page 31
CONNECTIONS & SETUP
32
CONNECTIONS & SETUP
Screen Setup for PC mode
Overview
When RGB connect to PC output and select the RGB-PC in Main
Input, this function is used.
When HDMI IN 1 (DVI) connect to PC output and select HDMI1/DVI
input, this function is used.
In RGB-DTV mode, SIZE and PHASE is not available.
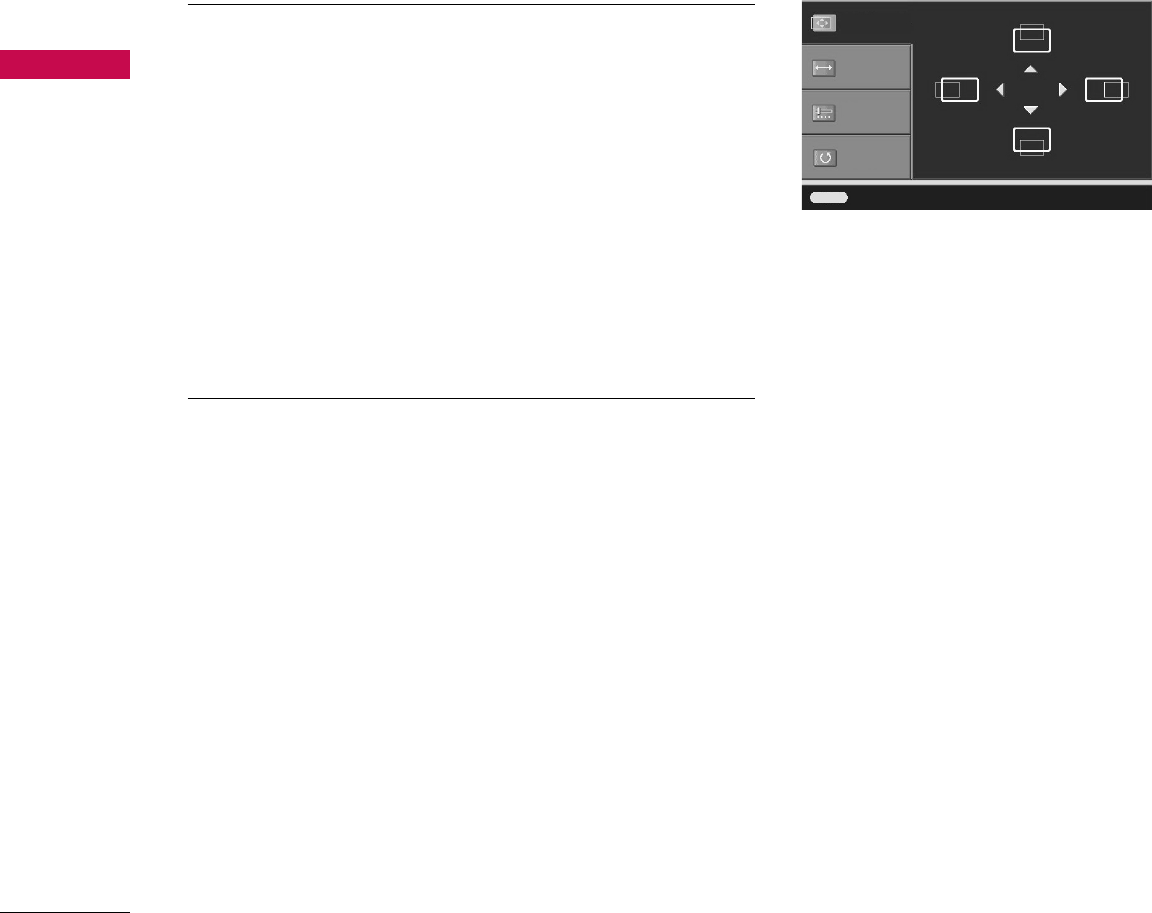
Adjustment for screen Position, Size, Phase, Reset
Press the AADDJJUUSSTTbutton and then use DDor EEbutton to
select PPoossiittiioonn, SSiizzee, or PPhhaassee.
Press the EENNTTEERRbutton and then use DDEE FFGG button to
make appropriate adjustments.
■The PPhhaasseeadjustment range is --1166 ~++1166.
■The SSiizzeeadjustment range is --3300 ~++3300.
Press the EENNTTEERRbutton.
SPECIAL FUNCTIONS / PIP / POP / TWIN PICTURE
58
APM
TIMER
ADJUST
SWAP
PIP CH +PIP CH +PIP CH -PIP CH -
PIPPIP
PIP INPUTPIP INPUT
EZ SOUND
EZ PIC
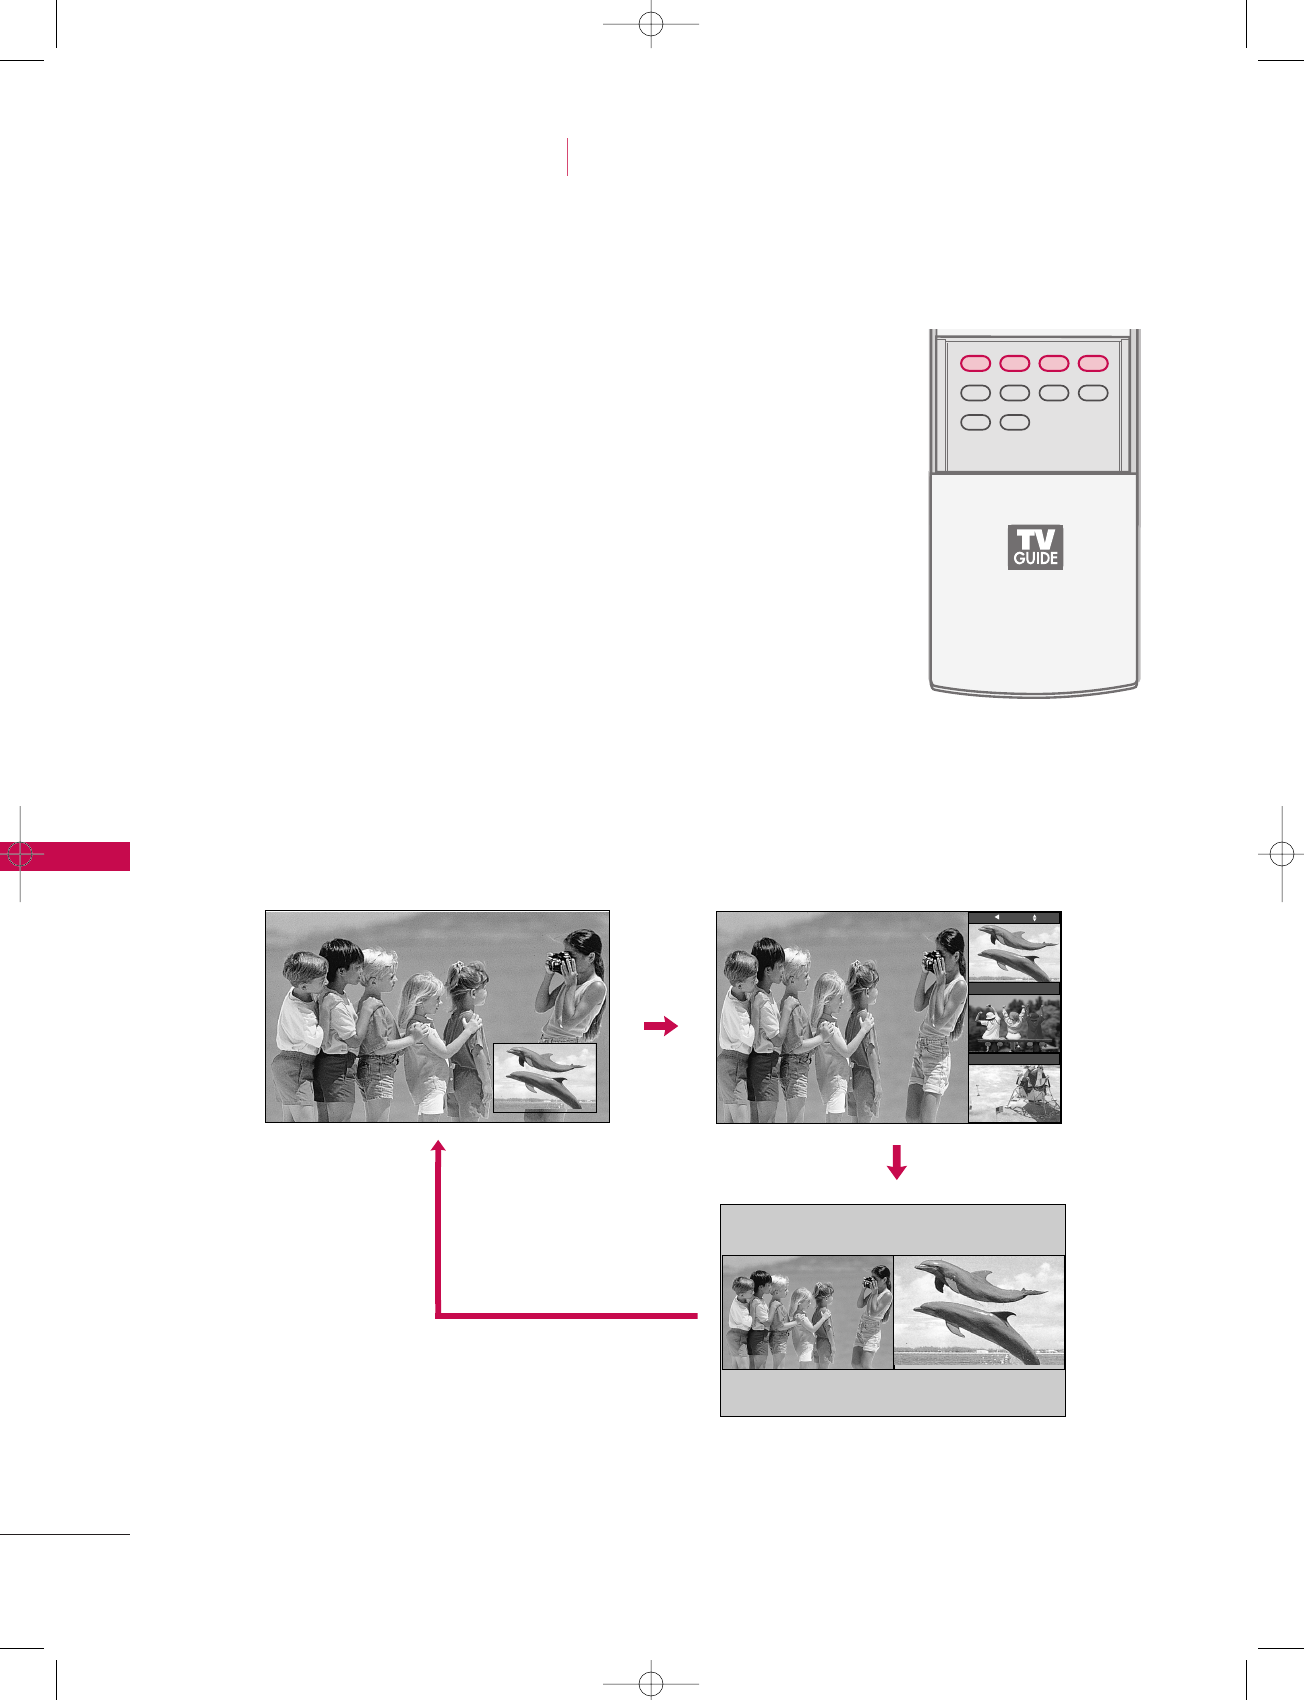
Watching PIP/POP/Twin Picture
Press the PPIIPPbutton to access the sub picture.
Each press of PIP changes the PIP options as shown below.
PIP Mode POP Mode
Twin Picture Mode
PIP lets you view 2 different inputs (sources) on your TV screen
at the same time. One source will be large, and the other
source will show a smaller inset image.
Twin Picture mode splits the screen into two images, allowing
two picture sources to be shown on the TV screen at the same
time. Each source is given half the screen.
PIP Off
TV 2-0
TV 4-0
TV 6-0
SPECIAL FUNCTIONS PIP / POP / Twin Picture
527Cen-2 80/1/2 4:29 PM Page 58

SPECIAL FUNCTIONS / PIP / POP / TWIN PICTURE
59
Selecting an Input Signal Source for PIP/Twin Picture
Use the PPIIPP IINNPPUUTTbutton to select the input source for the sub picture. Each press of PPIIPP IINNPPUUTTbutton
changes the PIP source. You can also select sources for the SSuubb IInnppuuttin the SSEETTUUPPmenu.
Main Picture Source Available Sub Picture Sources
DTV/CADTV Analog (TV/CATV), AV1, and AV2
TV/CATV, AV1, AV2, Component1,
Component2, RGB-PC/RGB-DTV, DTV/CADTV, Analog(TV/CATV), AV1, and AV2
HDMI1/DVI, HDMI2
TV Program Selection for PIP
Moving the PIP Sub Picture
Press the PPIIPPbutton.
Select the AAnntteennnnaaor CCaabblleeoption on the Sub input menu or with the PPIIPP
IINNPPUUTTbutton. Use the PPIIPP CCHH++/ PPIIPP CCHH--button to select a channel for
the sub picture.
(You can’t select DTV for main and sub picture simultaneously).
In PIP mode, press the DDEE FFGG button to move the sub
picture to a different location on the screen.
1
1
2
527Cen-2 80/1/2 4:29 PM Page 59
SPECIAL FUNCTIONS / PIP / POP / TWIN PICTURE
60
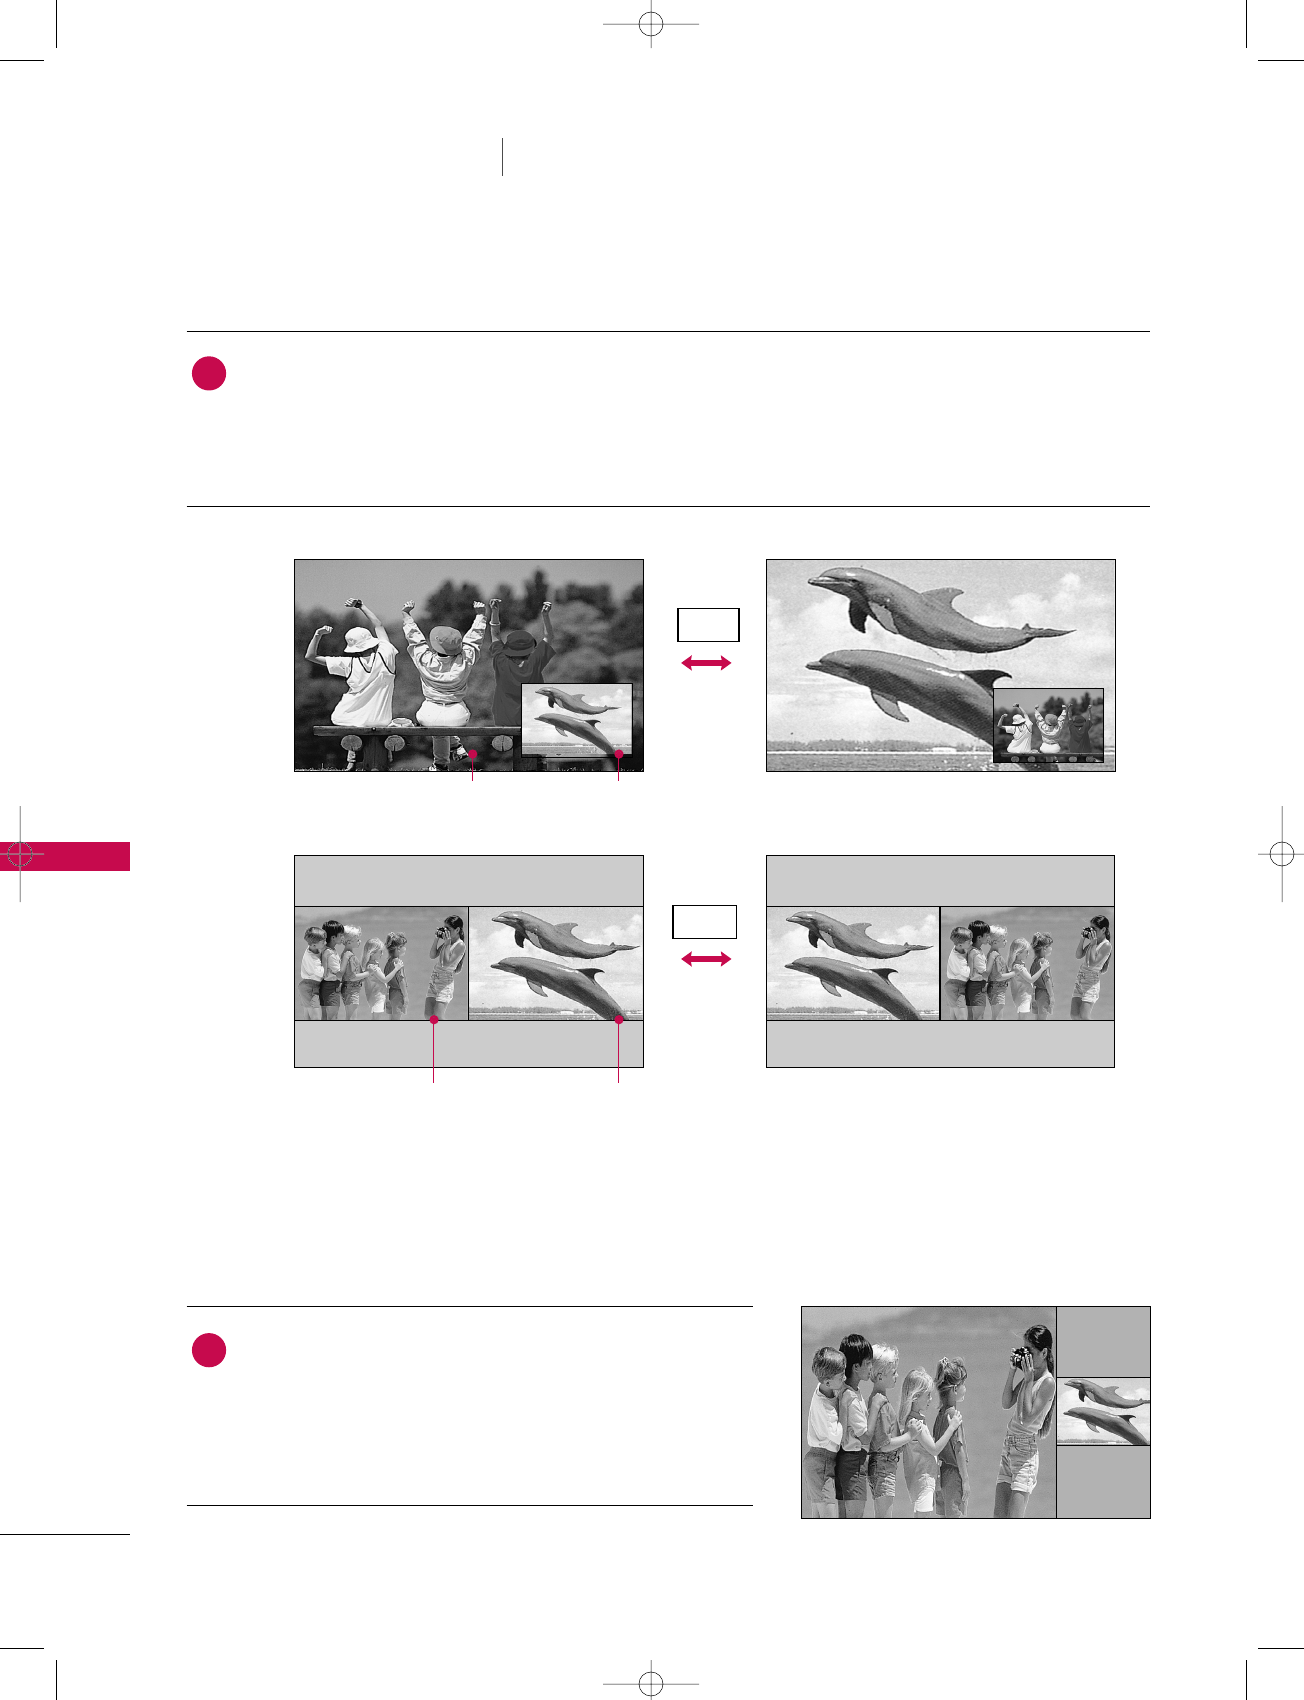
Swapping the PIP/Twin Picture
SPECIAL FUNCTIONS PIP / POP / Twin Picture
Repeatedly, use the SSWWAAPPbutton to switch the main and sub pictures.
■Component 1, Component 2, RGB-PC (or RGB-DTV), HDMI1/DVI, HDMI2 input sources for the main
picture can’t be used to swap the main and sub pictures.
Main Picture Sub Picture
Adjusting Main and Sub Picture Sizes for Twin Picture
Use the DDEE FFGG button to change main and sub picture
sizes in Twin Picture mode.
■If screen is adjusted to the maximum size, the large screen
is filled with entire screen vertically as shown.
Main Picture Sub Picture
SWAP
SWAP
PIP
Twin
Picture
1
1
527Cen-2 80/1/2 4:29 PM Page 60
SPECIAL FUNCTIONS / PIP / POP / TWIN PICTURE
61
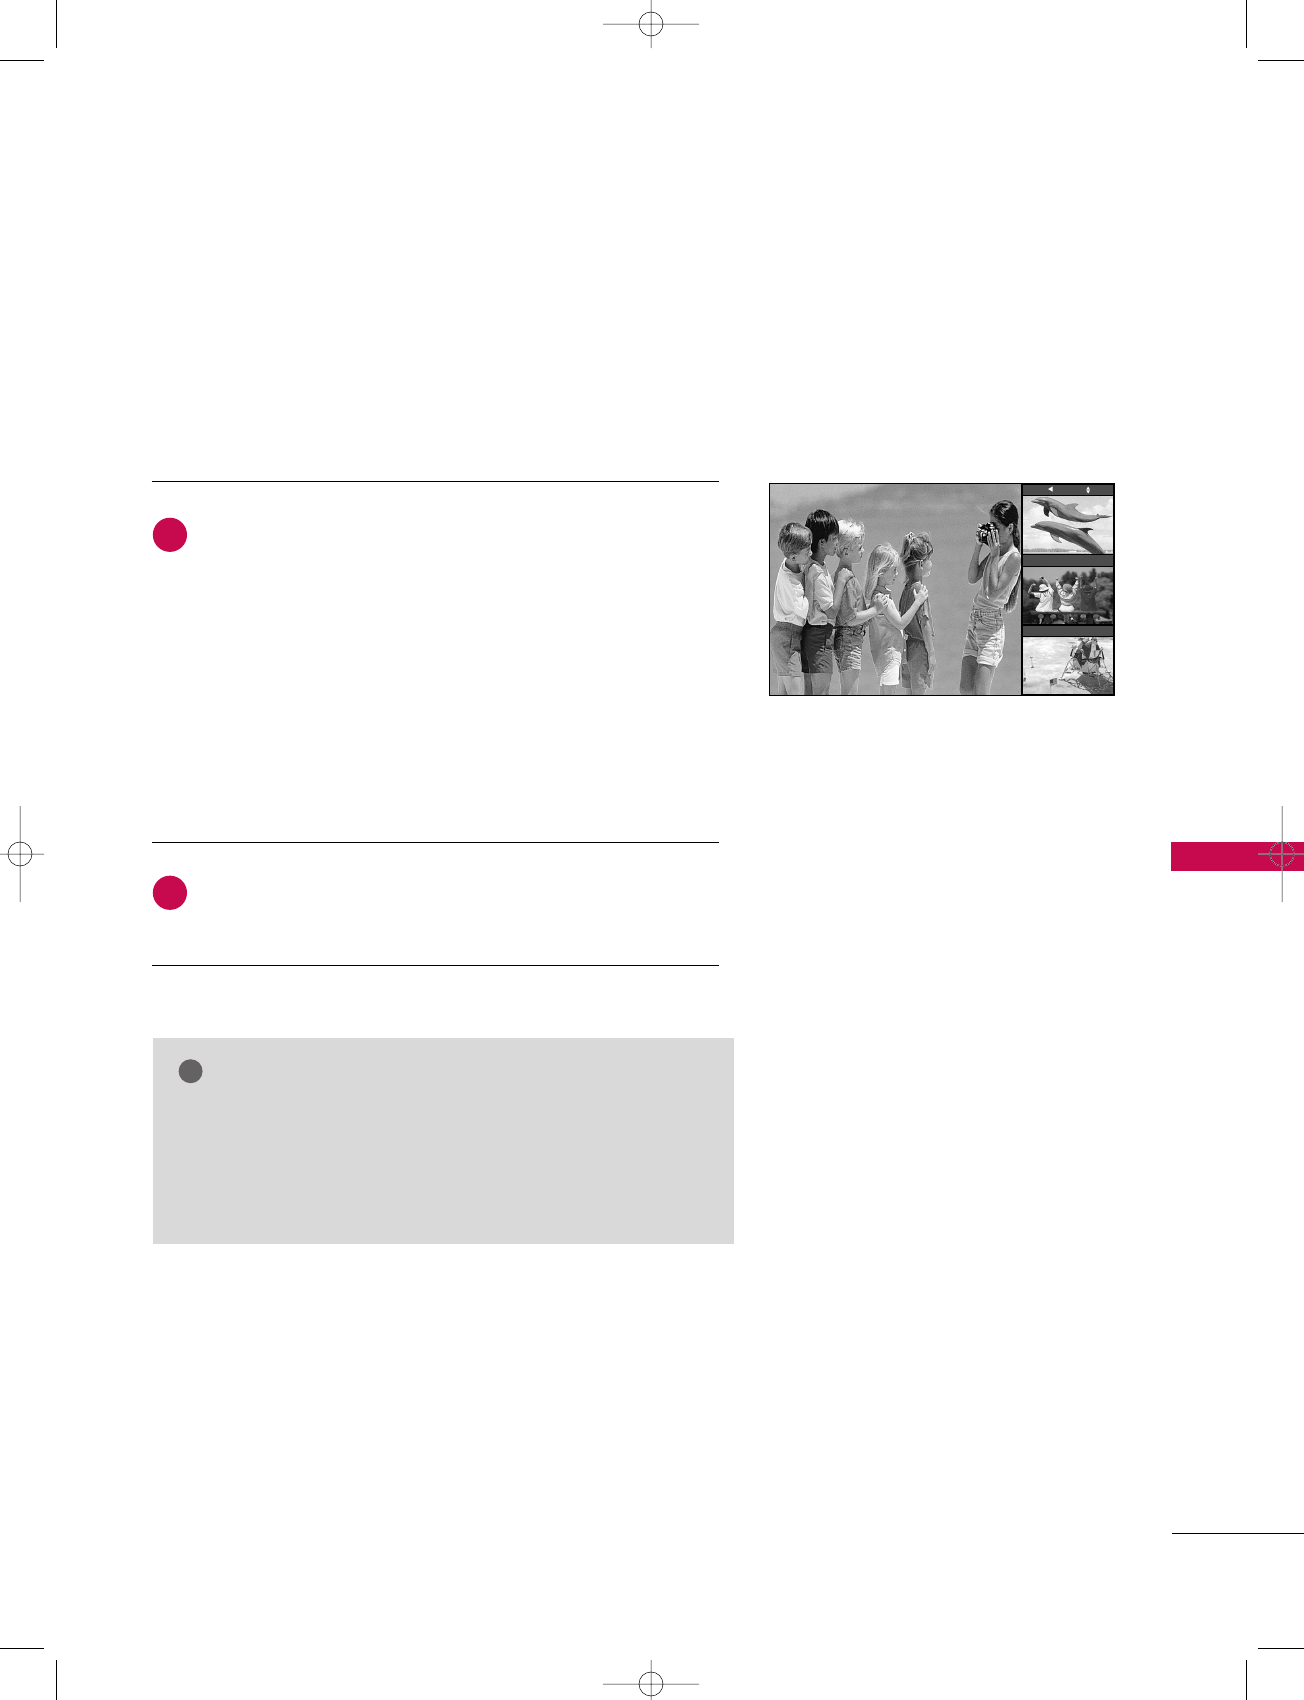
POP (Picture-out-of-Picture : Channel Scan)
Press the PPIIPPbutton to activate the PPOOPP mmooddeewhile in PPIIPP
mmooddee..
■CChhaannnneell sseelleeccttiioonn: Use FFbutton to enlarge the
selected channel being searched on the PIP screen to
shift it for viewing on the Main screen.
■PPIIPP sseelleeccttiioonn: Use DD or EE button to select one of 3
PIP screen pictures in PPOOPPmode.
■When watching TV/CATV, TV/DTV or CATV/CADTV Sub
pictures are scanned. However, when watching
DTV/CADTV, only TV/CATV Sub pictures are scanned.
Press the EEXXIITTbutton to cancel POP mode.
Use POP to search the programs of all the memorized channels
one-by-one on the 3 PIP screen display, (while the main picture
source remains the current channel). The pictures of all the
programmed channels are searched with the 3 POP screens.
NOTE
!
GGRun EZ Scan channel search before using POP mode.
GGWhen Sub pictures are changed from the TV/DTV to
CATV/CADTV in POP mode, you may hear a noise from the
Tuner switch.
TV 2-0
TV 4-0
TV 6-0
1
2
527Cen-2 80/1/2 4:29 PM Page 61
TV MENU
62
ON SCREEN MENUS SELECTION AND ADJUSTMENT
TV MENU
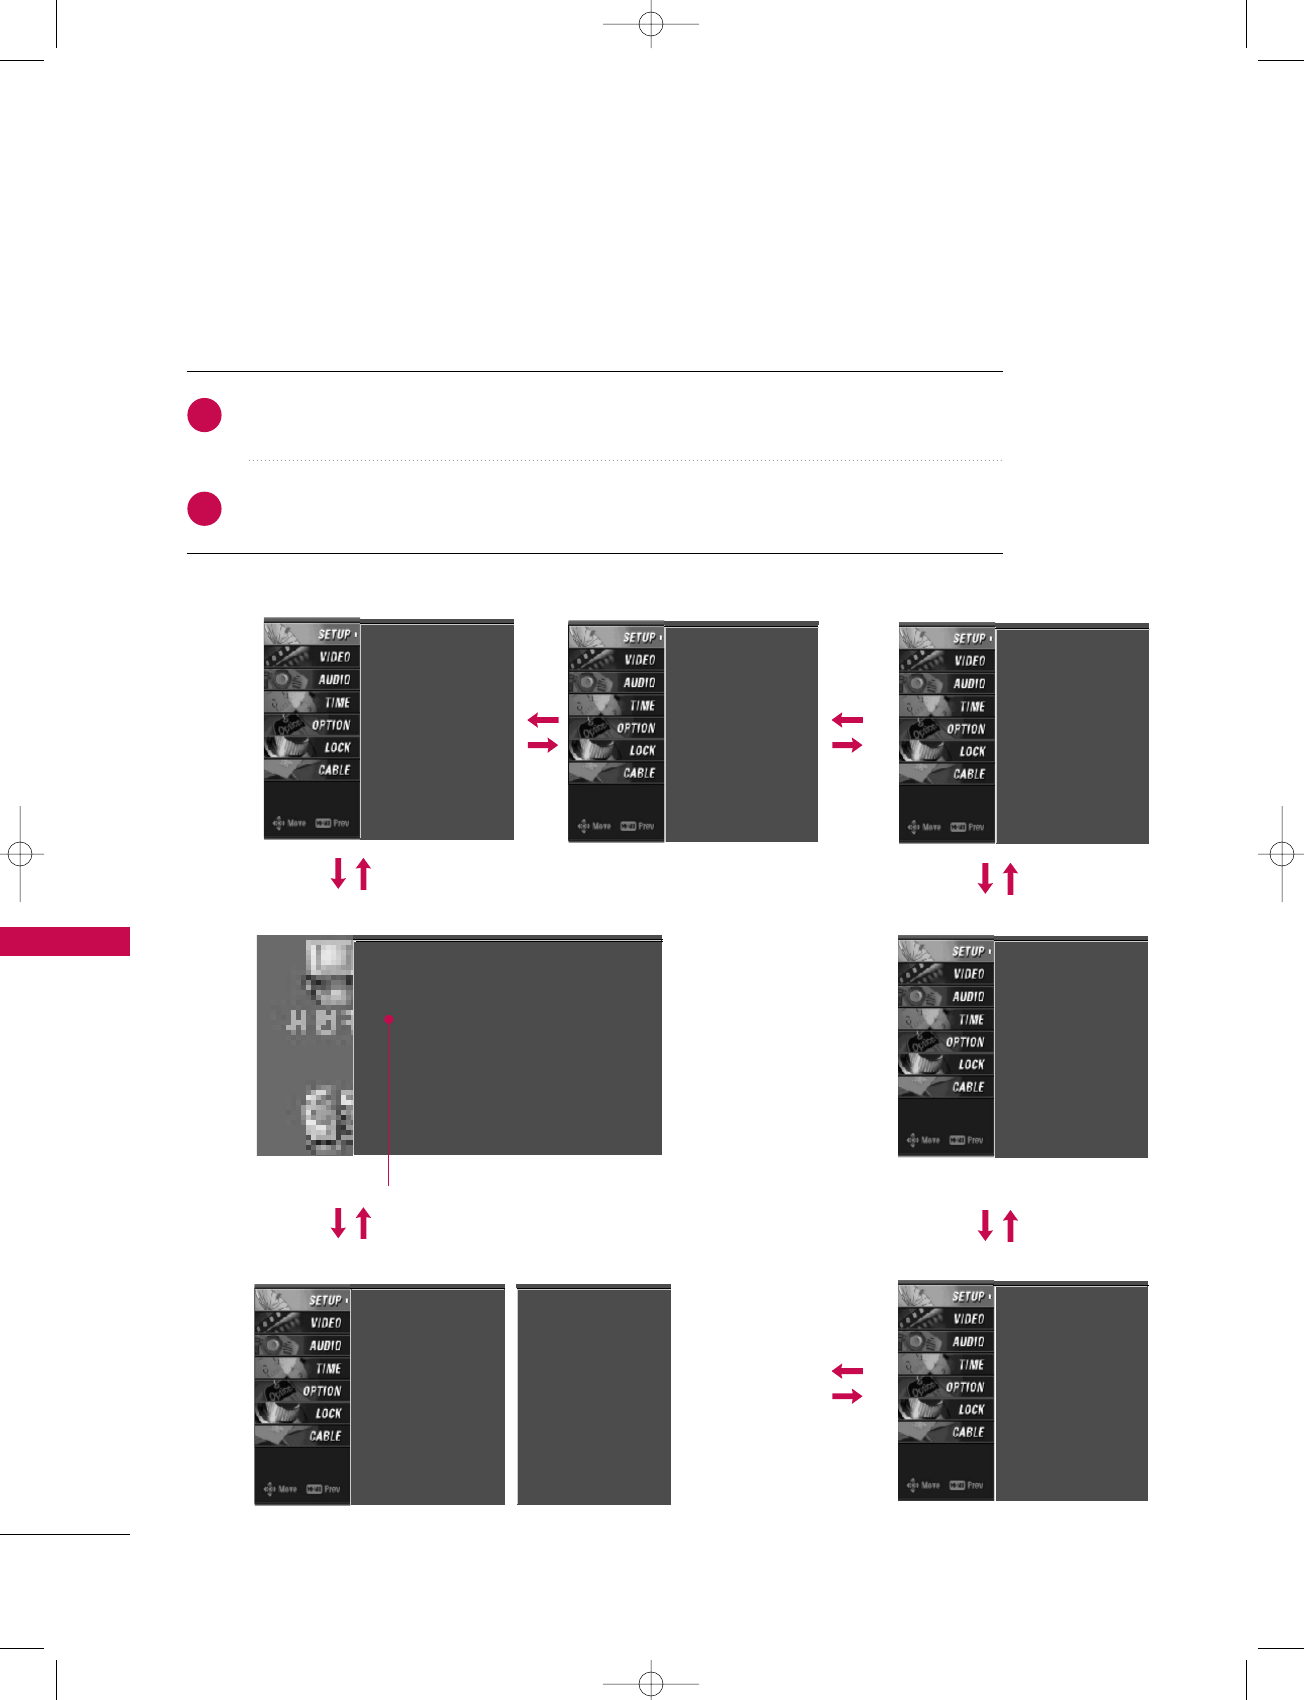
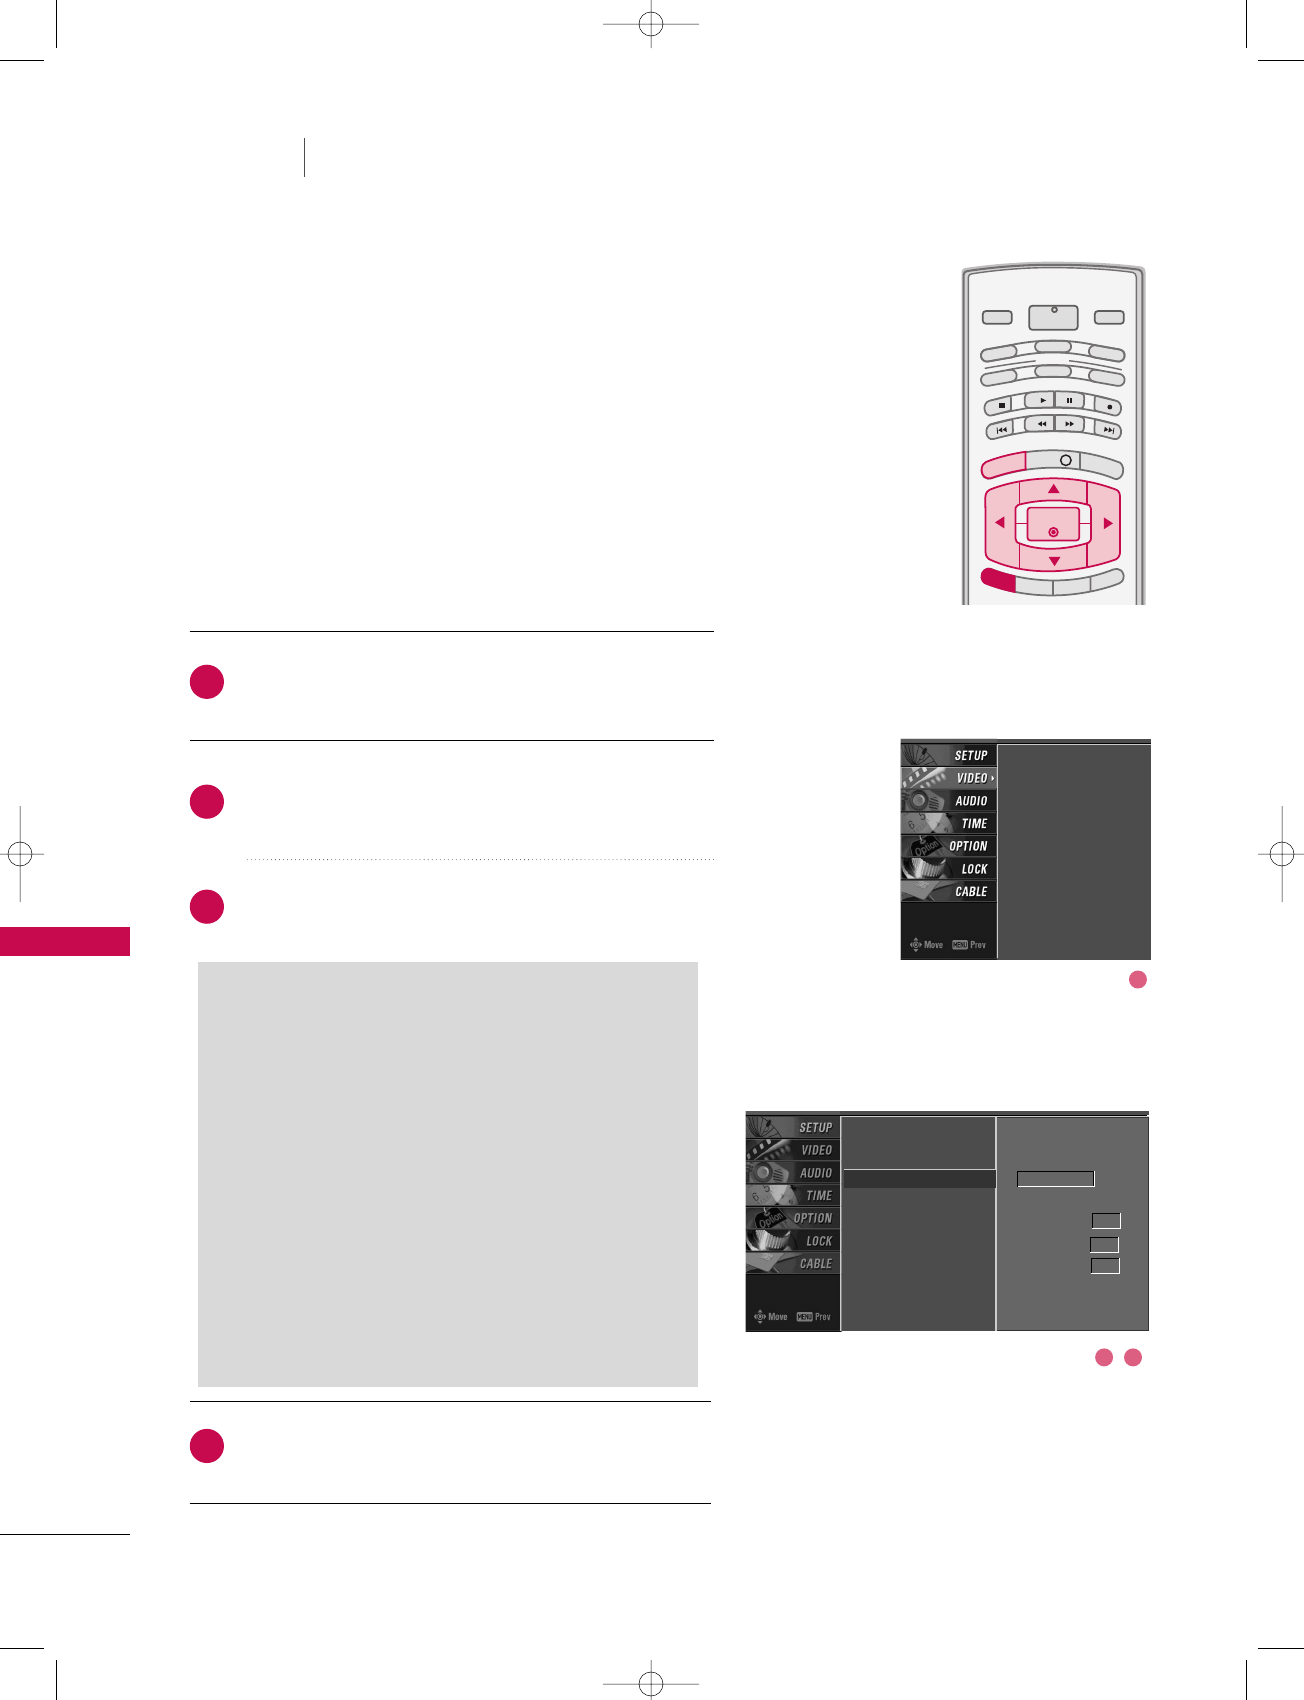
Press the MMEENNUUbutton and then use DD or EE button to select the each menu.
Press the GG button and then use DDEE FFGG button to display the available menus.
Your TV's OSD (On Screen Display)may differ slightly from what is shown in this manual.
SETUP VIDEO
CABLE
OPTIONLOCK
TIME
EZ Scan
Manual Scan
Channel Edit
DTV Signal
Main Input
Sub Input
Input Label
Set ID
EZ Picture
Color Temperature
XD
Advanced
Video Reset
Auto Clock
Manual Clock
Off Timer
On Timer
Sleep Timer
Auto Off
Aspect Ratio
Caption/Text
Caption Option
Language
ISM Method
Low Power
AUDIO
Audio Language
EZ SoundRite
EZ Sound
Balance
TV Speaker
BBE
Lock System
Set Password
Block Channel
Movie Rating
TV Rating-Children
TV Rating-General
Input Block
SA CableCARD CP Screen G
SA CableCARD Diag Screen
SA CableCARD Host ID Screen
2
1
In case of Scientific Atlanta CableCARD™
Lock System
Set Password
Block Channel
TV Rating-English
TV Rating-French
Input Block
For USA For Canada
527Cen-2 80/1/2 4:29 PM Page 62
TV MENU / SETUP(CHANNEL)
63
AUTO CHANNEL SEARCH (EZ SCAN)
TV MENU
INFO i
TV GUIDE
ENTERENTER
SAP
CC
RATIO
POWER
DAY -
DAY+
VCR
TV
DVD
AUDIO
CABLE
STB
MODE
TV INPUT INPUT
MENUMENU
EXIT
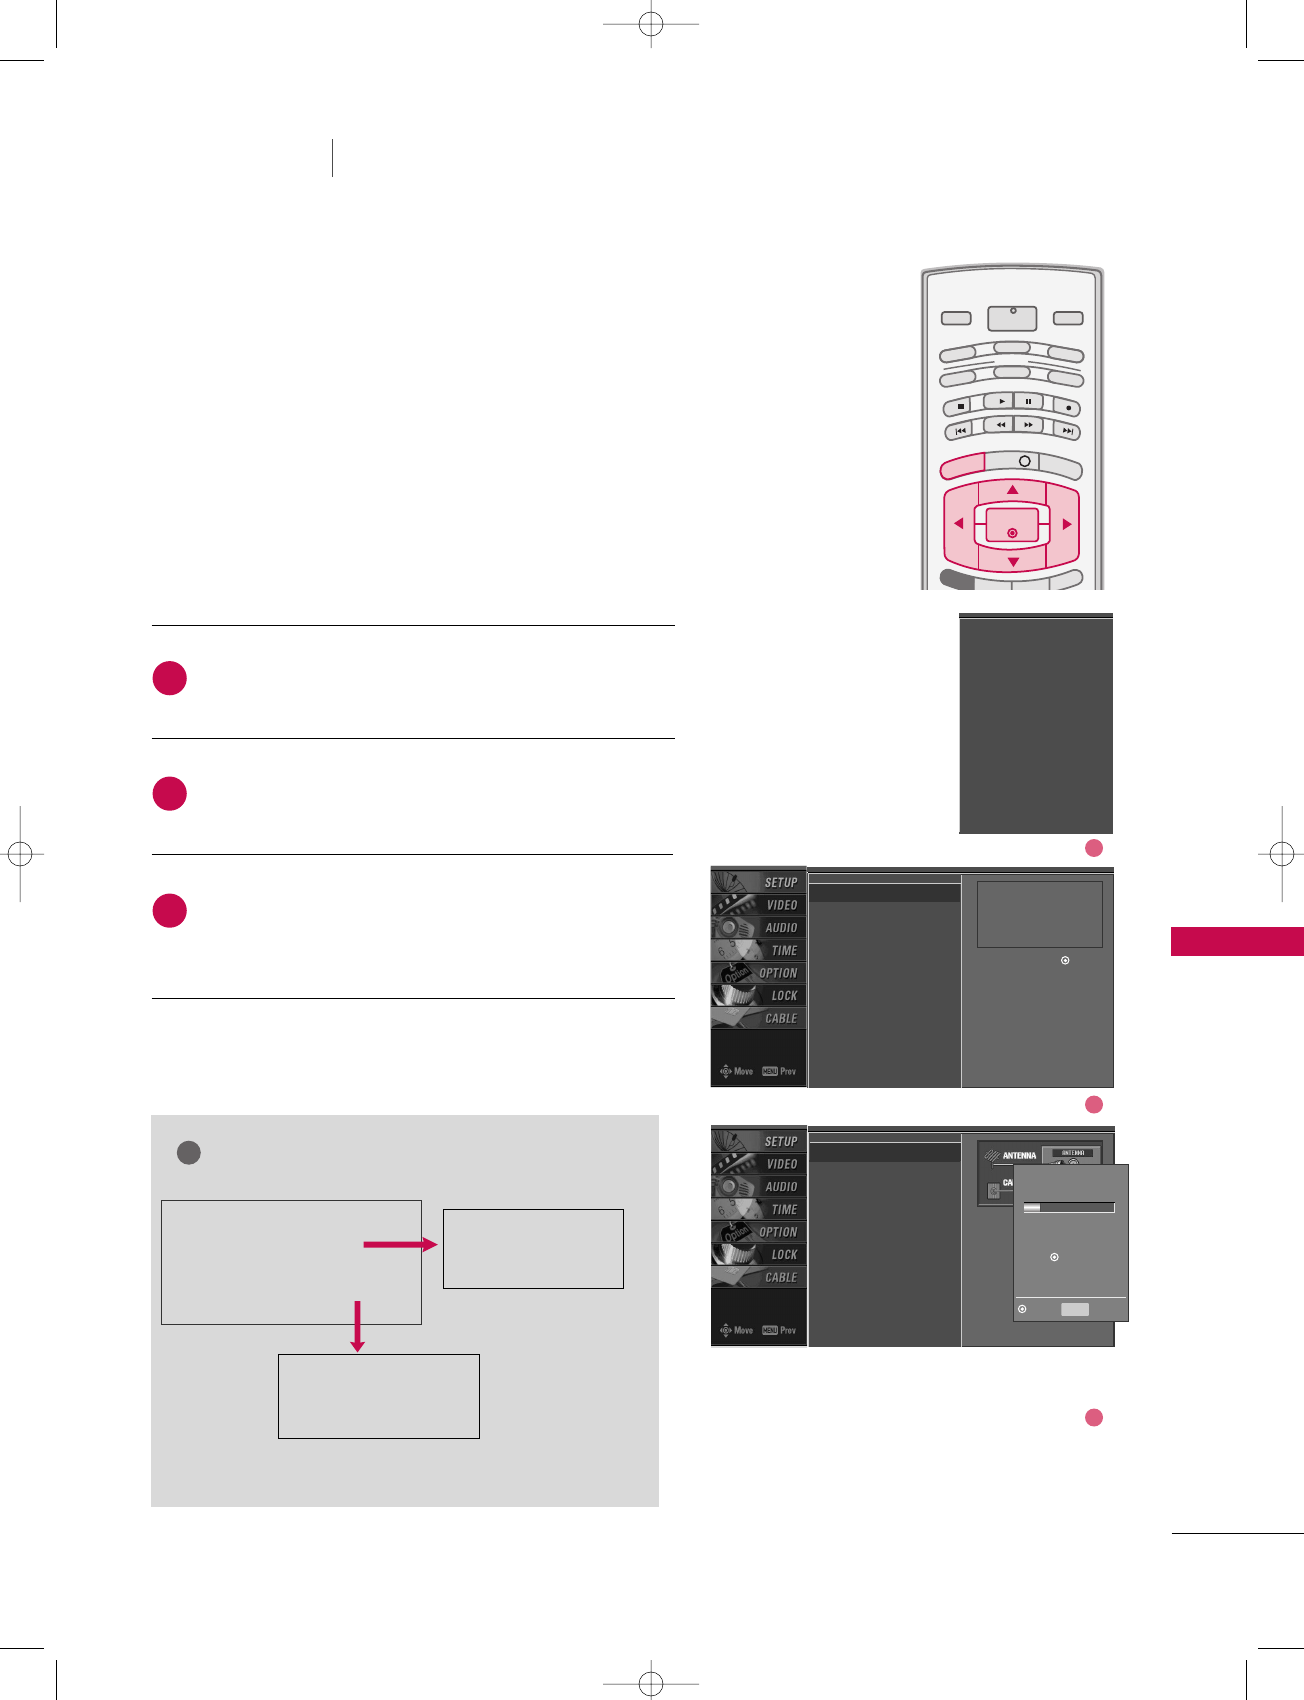
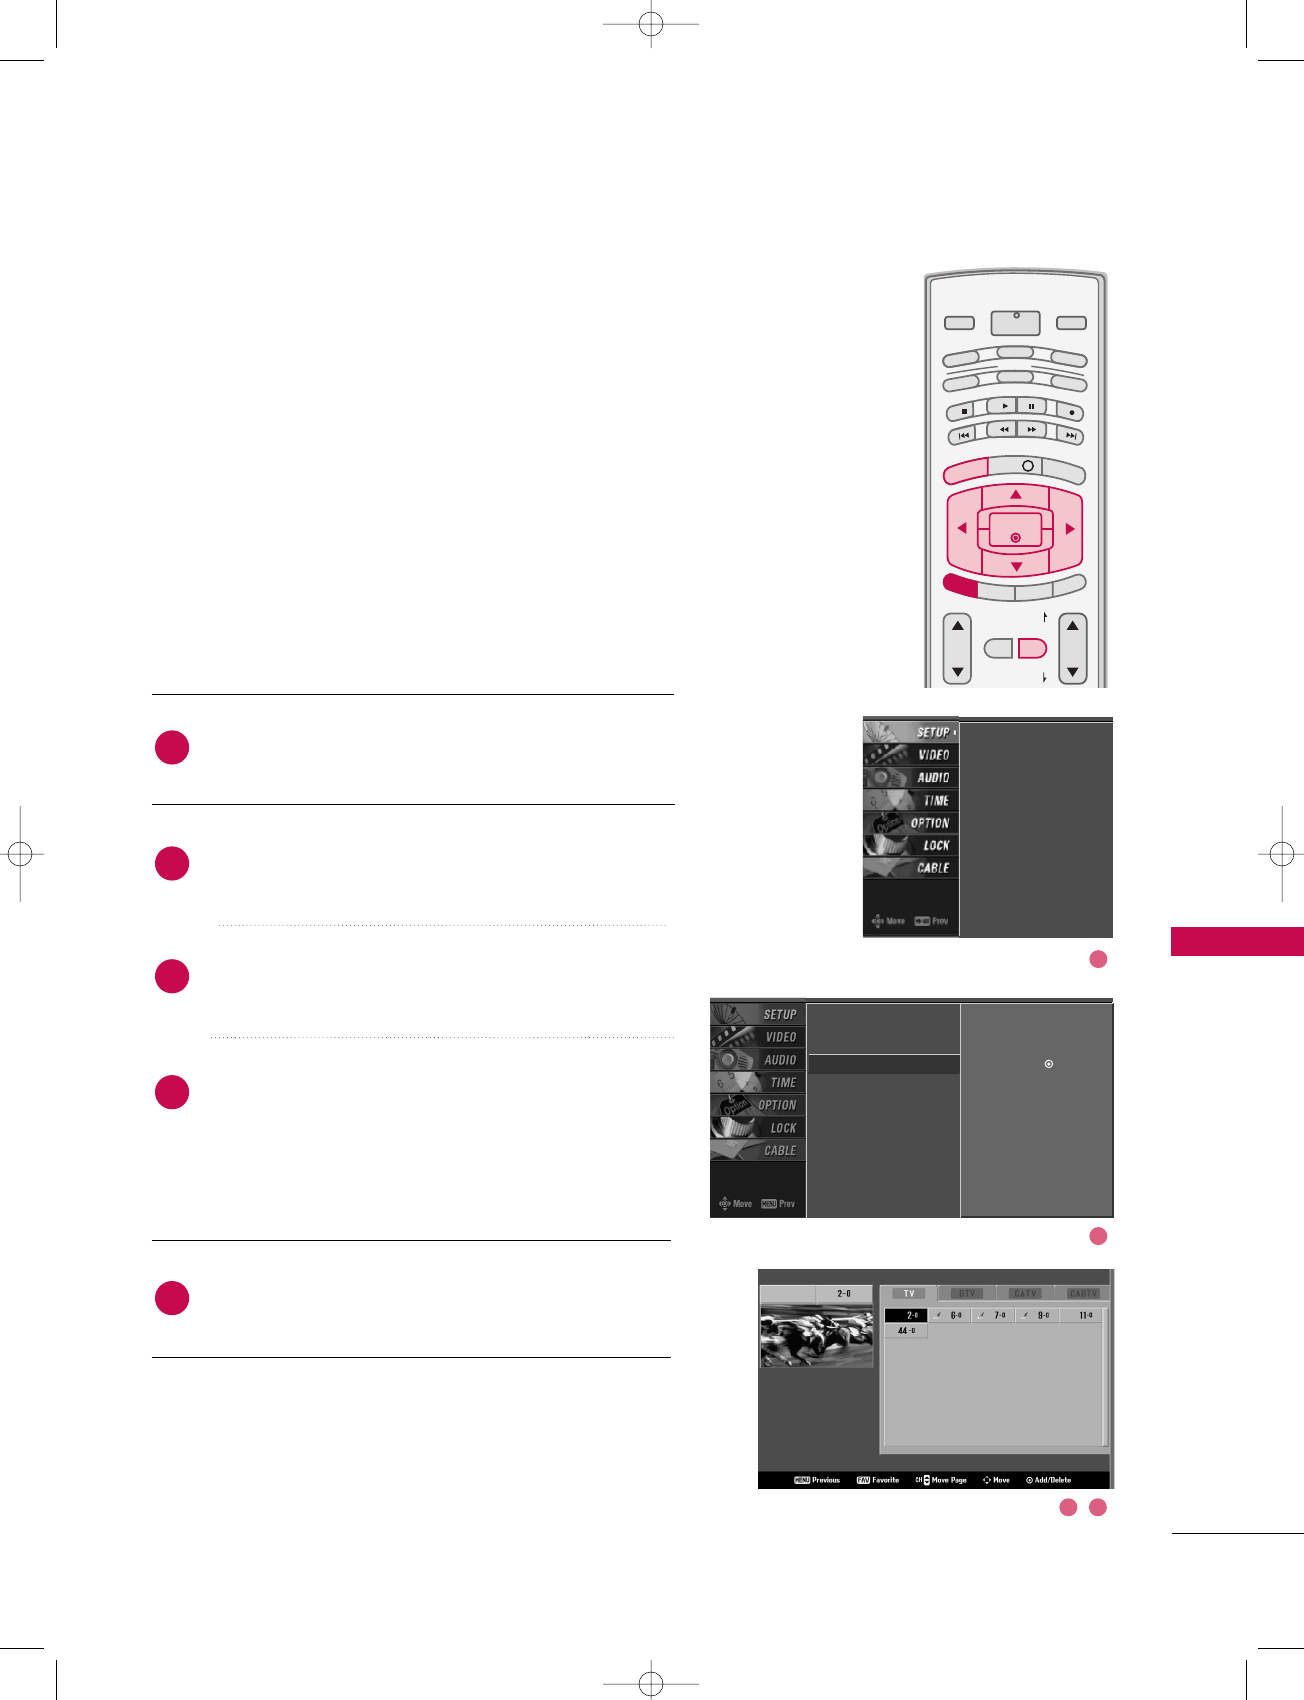
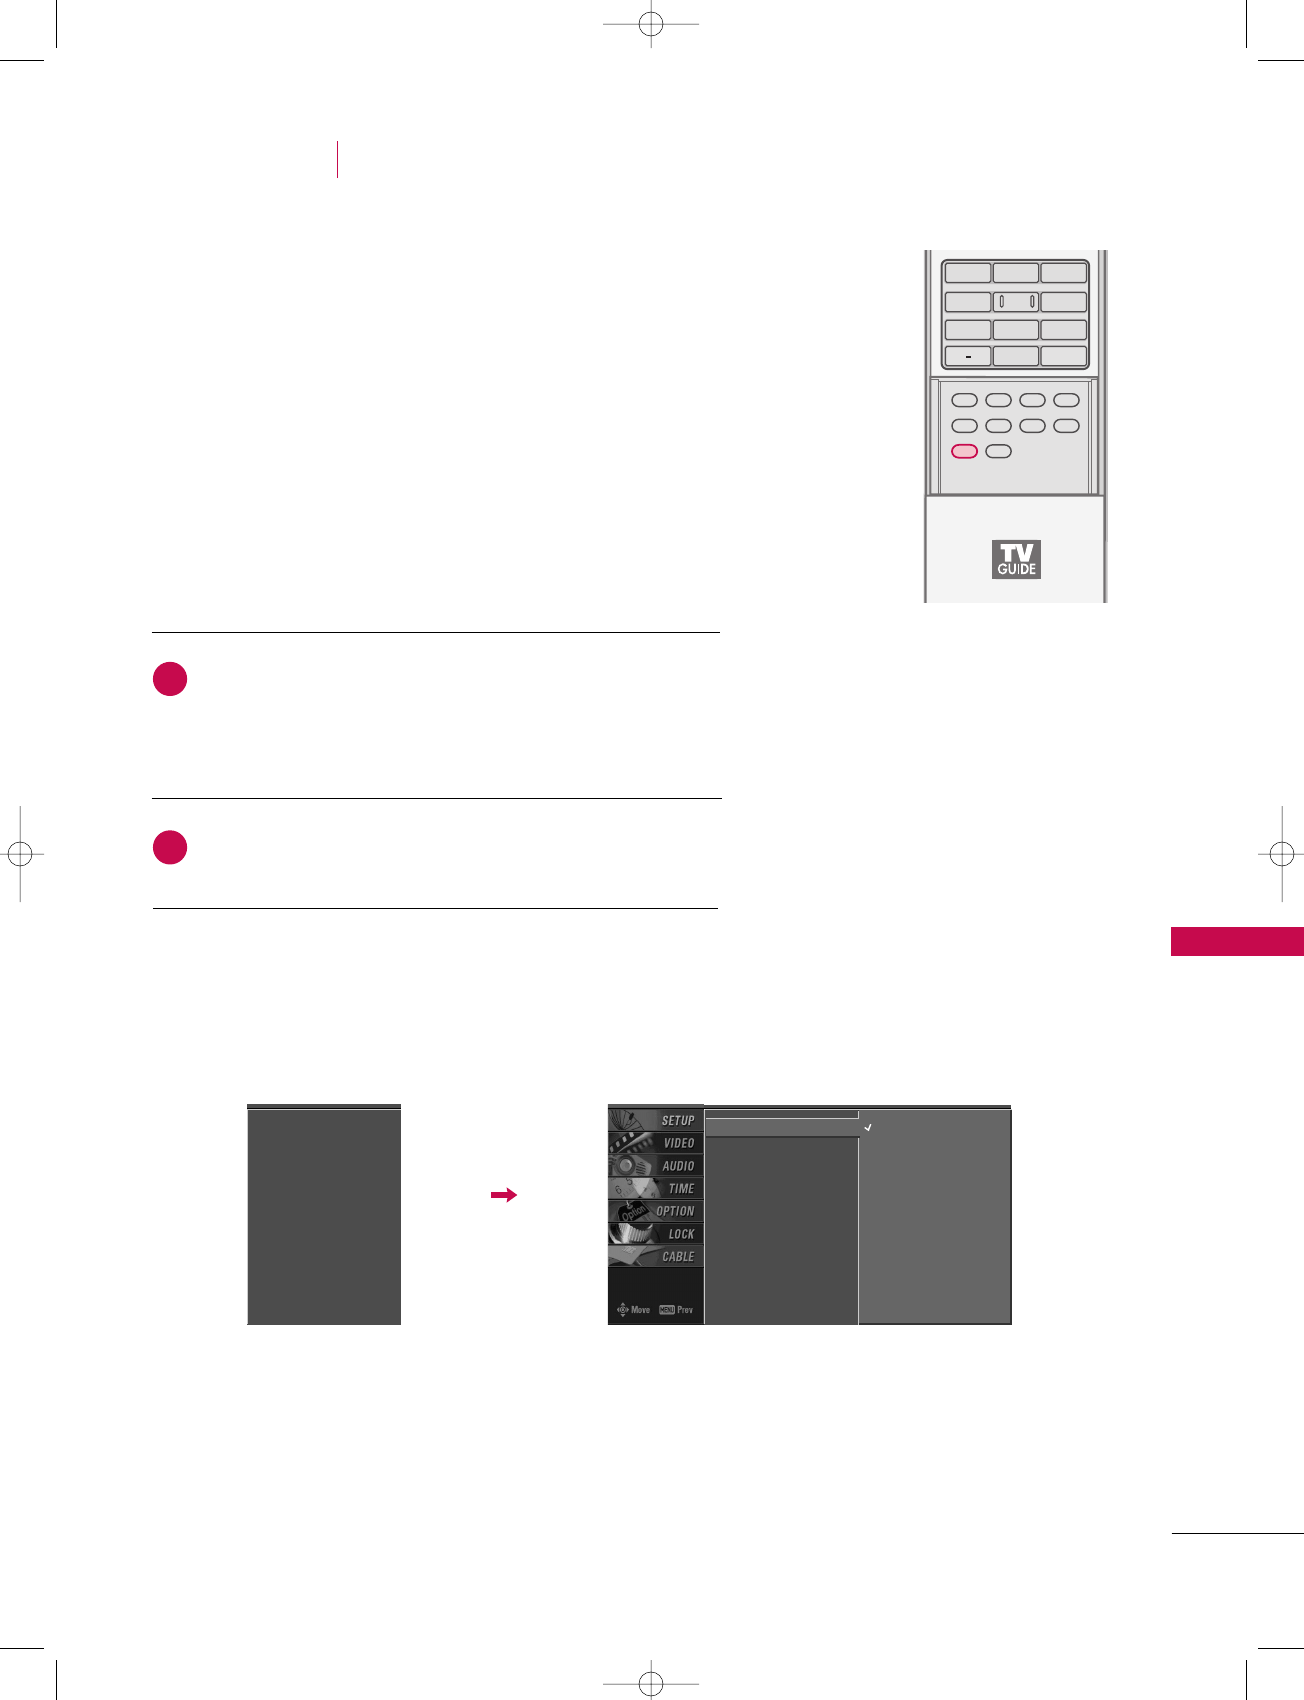
Press the MMEENNUUbutton and then use DD or EE button
to select the SSEETTUUPPmenu.
Press the GG button and then use DD or EE button to
select EEZZ SSccaann.
Press the EENNTTEERRbutton to begin the channel search.
Allow EEZZ SSccaannto complete the channel search cycle
for AANNTTEENNNNAAand CCAABBLLEE.
Automatically finds all channels available through antenna
or cable inputs, and stores them in memory on the channel
list.
Run EZ Scan again after any Antenna/Cable connection
changes.
A password is required to gain access to EZ Scan menu if
the Lock System is turned on.
EZ Scan
Manual Scan
Channel Edit
DTV Signal
Main Input
Sub Input
Input Label
Set ID
Selection ( Gor )
leads you to the EZ
scan screen.
EZ Scan
Manual Scan
Channel Edit
DTV Signal
Main Input
Sub Input
Input Label
Set ID
EZ Scan G
Manual Scan
Channel Edit
DTV Signal
Main Input
Sub Input
Input Label
Set ID
Selection ( Gor )
leads you to the EZ
scan screen.
2
3
1
Processing EZ scan...
ANTENNA Ch.20
11 channel(s) found
Press to stop the
current scan and start
CABLE channel scan.
MENU Previous
Next
NOTE
!
Analog TV signal
Digital DTV signal
Analog CATV signal
Digital CADTV signal
1
2
3
SETUP(Channel)
527Cen-2 80/1/2 4:29 PM Page 63
TV MENU / SETUP(CHANNEL)
64
MANUAL CHANNEL SEARCH (MANUAL SCAN)
TV MENU SETUP(Channel)
A password is required to gain access to Manual Scan
menu if the Lock System is turned on.
While using the CableCARDTM, CATV, CADTV is not work-
ing in Manual Scan.
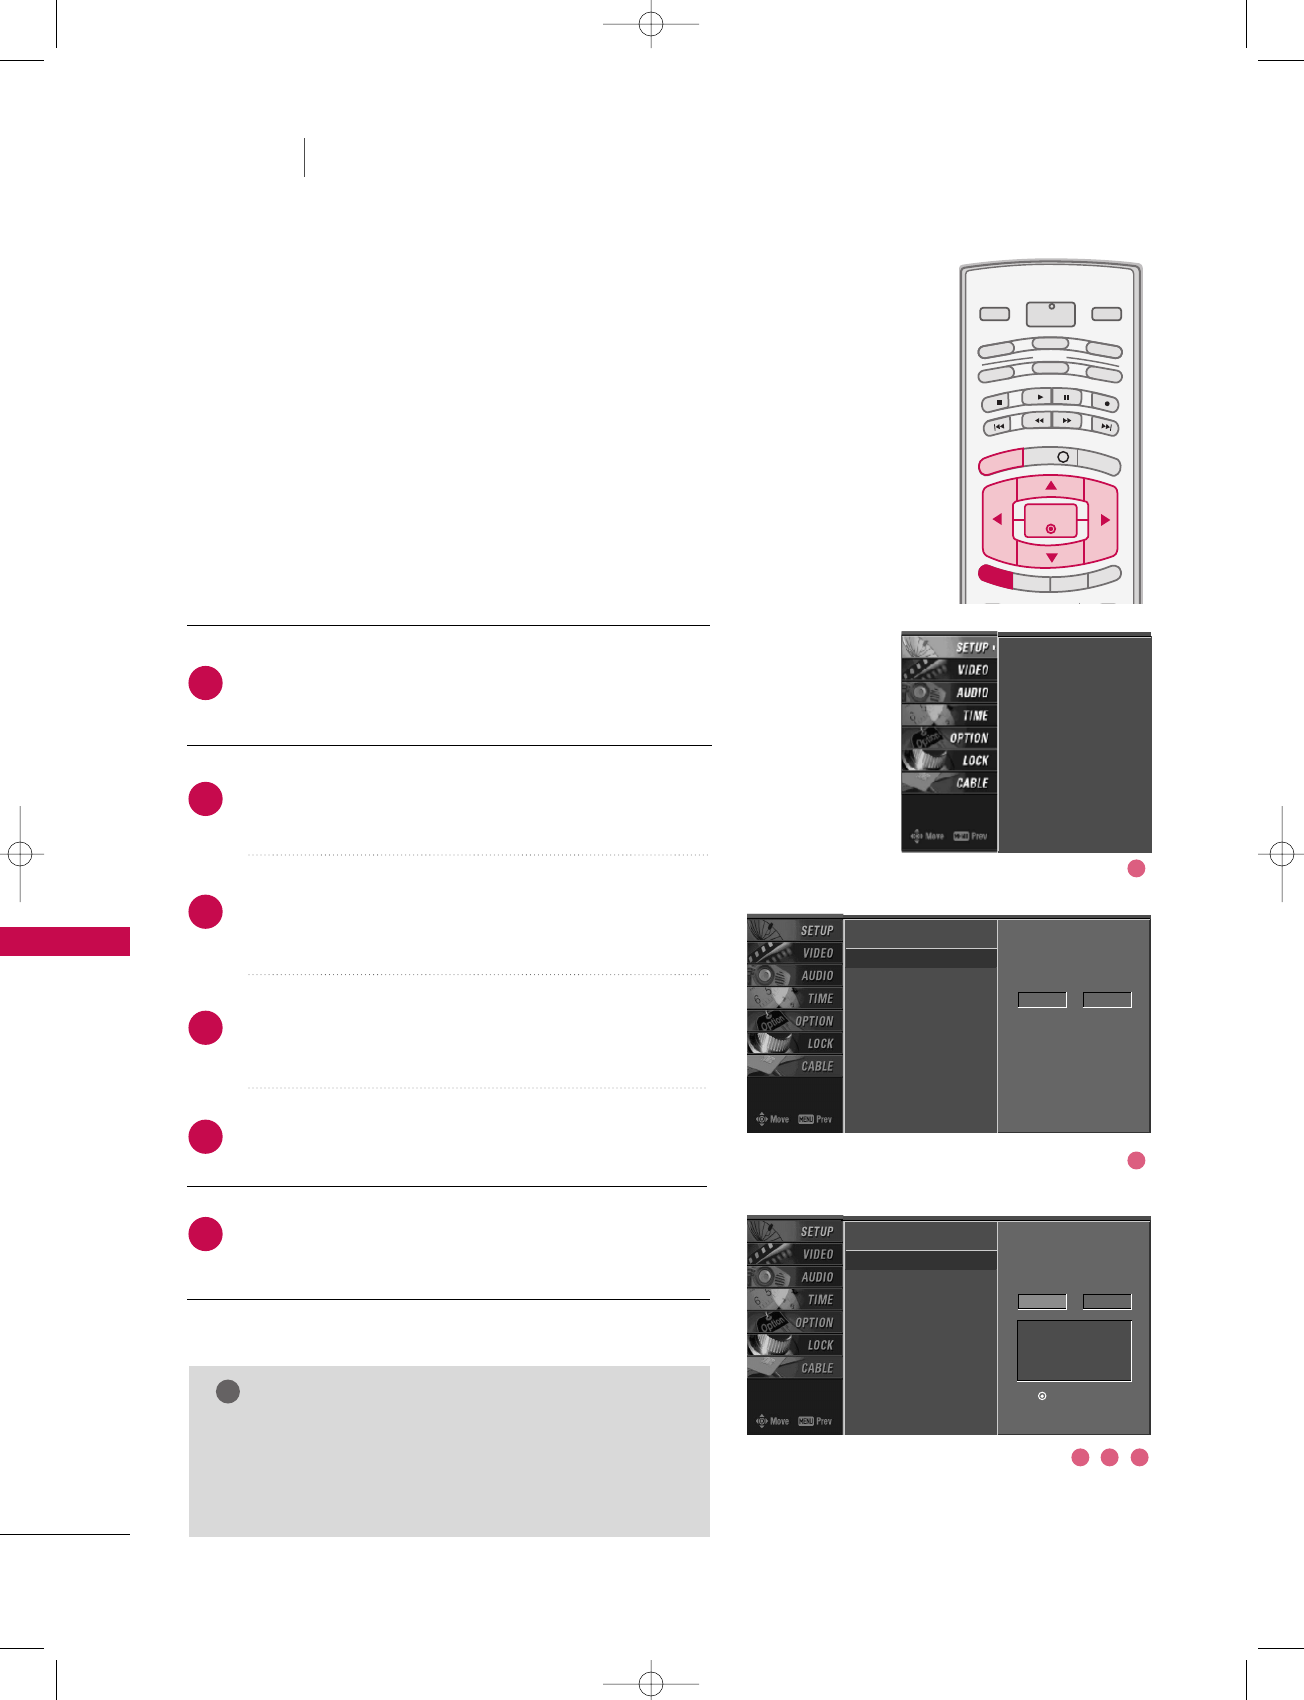
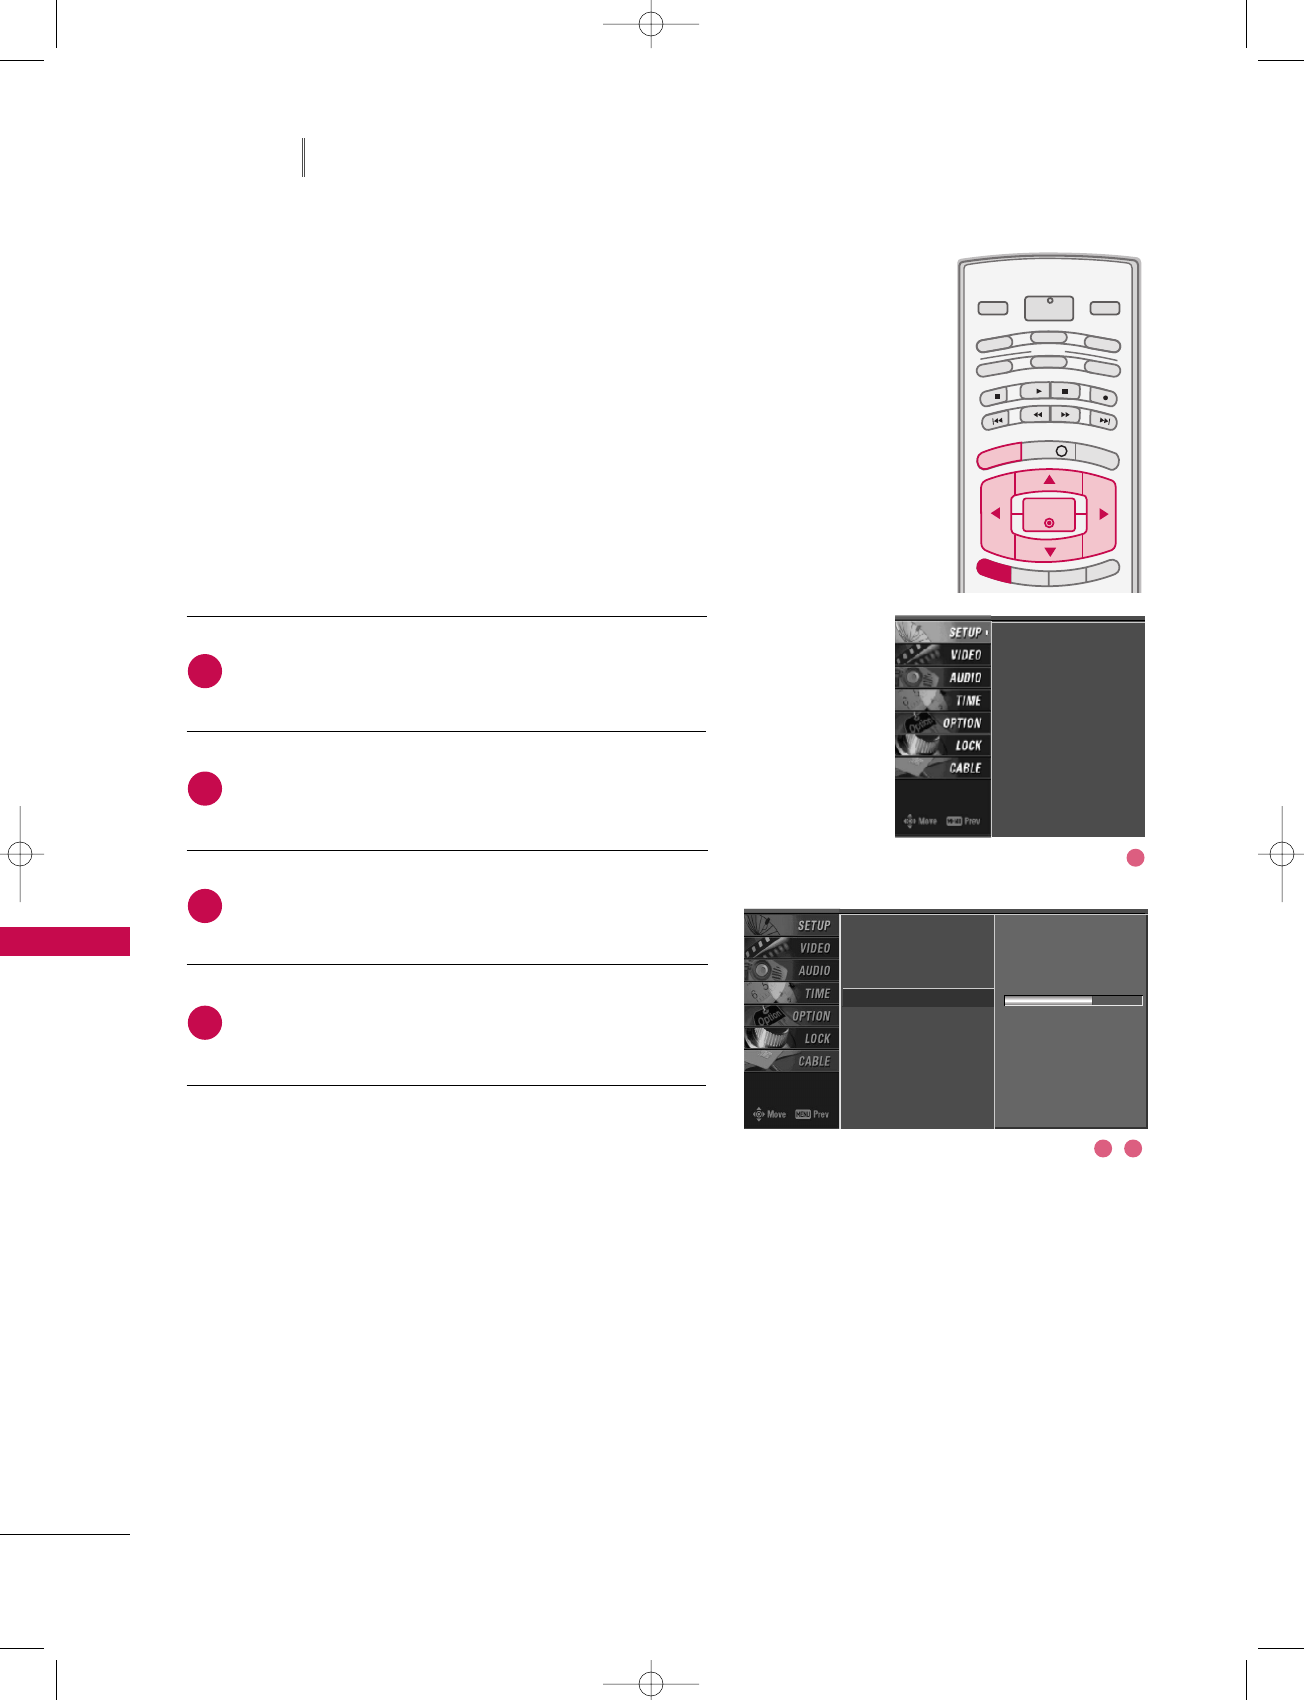
Press the MMEENNUUbutton and then use DD or EE button
to select the SSEETTUUPPmenu.
Press the GG button and then use DD or EE button to
select MMaannuuaall SSccaann.
Press the GG button and then use DD or EE button to
select TTVV, DDTTVV, CCAATTVV, and CCAADDTTVV.
Press the GG button and then use DD or EE button to
select channel you want to add or delete.
Press the EENNTTEERRbutton to add or delete the channel.
Press the EEXXIITTbutton to return to TV viewing or press
MMEENNUUbutton to return to the previous menu.
INFO i
TV GUIDE
ENTERENTER
SAP
CC
RATIO
POWER
DAY -
DAY+
VCR
TV
DVD
AUDIO
CABLE
STB
MODE
TV INPUT INPUT
MENUMENU
EXIT
NOTE
!
GGThis digital channel number is a physical channel
number, which is different from the normal channel
number shown in Channel Edit.
EZ Scan
Manual Scan G
Channel Edit
DTV Signal
Main Input
Sub Input
Input Label
Set ID
Select channel type and
RF-channel number.
TV 2
EZ Scan
Manual Scan
Channel Edit
DTV Signal
Main Input
Sub Input
Input Label
Set ID
EZ Scan
Manual Scan
Channel Edit
DTV Signal
Main Input
Sub Input
Input Label
Set ID
2
1
4
3
6
5
Select channel type and
RF-channel number.
TV GG2
Press to delete the
channel
TV 2-0
DD
EE
1
2
3 4 5
527Cen-2 80/1/2 4:29 PM Page 64
TV MENU / SETUP(CHANNEL)
65
CHANNEL EDIT
From the default channel list created from the EZ Scan channel
search, you can create two different types of channel lists in
memory: “custom list” and “favorite channel list”.
A custom list can be created by toggling each channel on or off
with EENNTTEERRbutton. The channels in the Custom List are dis-
played in black and the channels deleted from the Custom List
are displayed in gray. Once a channel is highlighted you can add
or delete the channel by referring to the small window at the
top-left corner of the screen.
You can create your own Favorite List. Use the FFAAVVbutton on
the remote control when a channel is highlighted and then add
or delete the channel to/from your Favorite List.
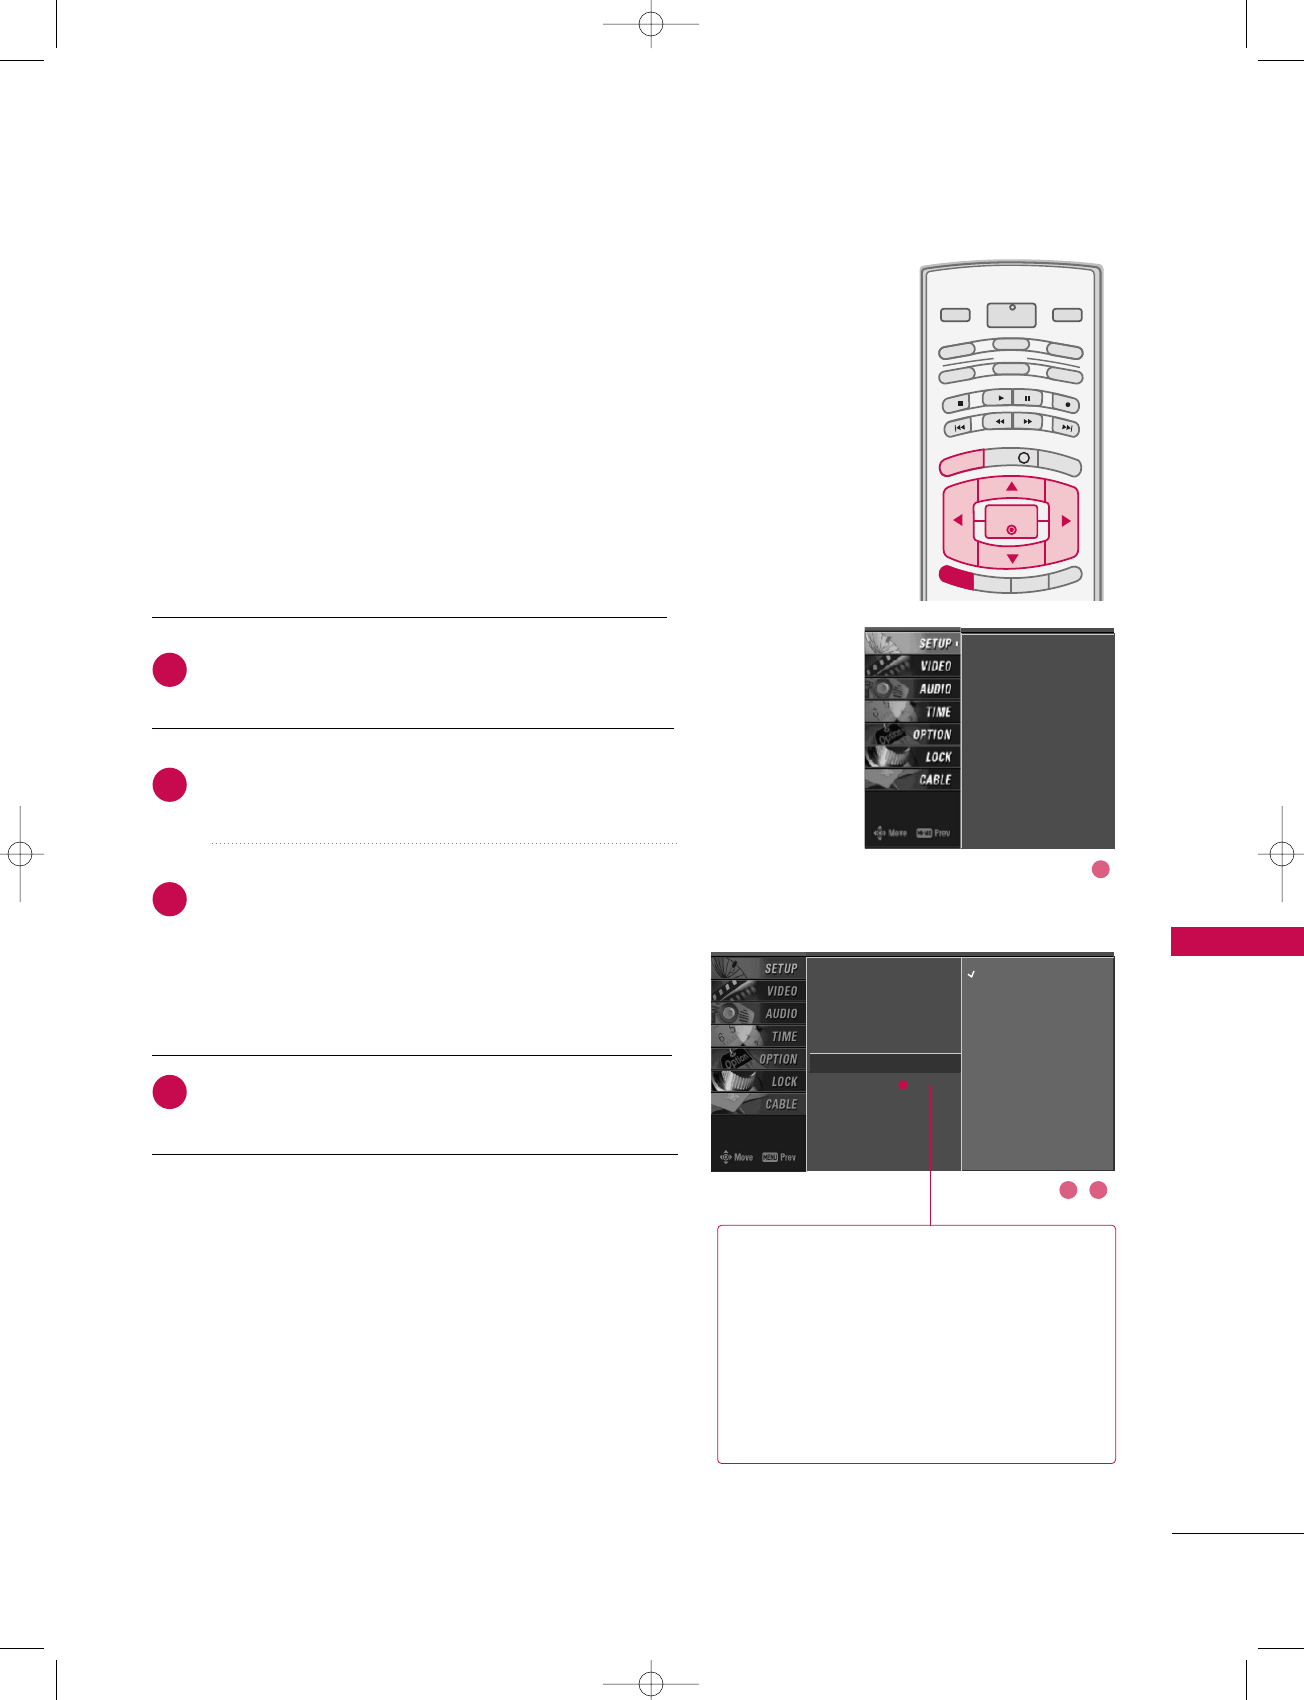
Press the MMEENNUUbutton and then use DD or EE button
to select the SSEETTUUPPmenu.
Press the GG button and then use DD or EE button to
select CChhaannnneell EEddiitt.
Press the GG button. You will now see a screen filled
with channel numbers and a preview picture.
Use DDEE FFGG button to select a channel and then
use the EENNTTEERRbutton to add or delete it.
Press FFAAVVbutton to add the channel to the Favorite List.
The surfing icon mark will appear in front of that
channel number.
Press EEXXIITTbutton to return to TV viewing or press
MMEENNUUbutton to return to the previous menu.
VOL CH
MUTE
FAV
PAG E
PAG E
INFO i
TV GUIDE
ENTER
SAP
CC
RATIO
POWER
DAY -
DAY+
VCR
TV
DVD
AUDIO
CABLE
STB
MODE
TV INPUT INPUT
MENUMENU
EXIT
EZ Scan
Manual Scan
Channel Edit G
DTV Signal
Main Input
Sub Input
Input Label
Set ID
Selection ( Gor ) leads
you to the channel edit
screen.
EZ Scan
Manual Scan
Channel Edit
DTV Signal
Main Input
Sub Input
Input Label
Set ID
2
1
4
3
5
1
2
3 4
527Cen-2 80/1/2 4:29 PM Page 65
TV MENU / SETUP(CHANNEL)
66
DTV SIGNAL STRENGTH
TV MENU SETUP(Channel)
This feature displays the DTV signal levels being received
and indicates whether you need to adjust your antenna or
digital cable input. The higher the signal strength, the less
likely you are to experience picture degradation.
DTV Signal: This function is only available when the input
signal is DTV or CADTV.
Press the MMEENNUUbutton and then use DD or EE button
to select the SSEETTUUPPmenu.
Press the GG button and then use DD or EE button to
select DDTTVV SSiiggnnaall..
View the on-screen signal strength monitor to see
the quality of the signal being received.
Press EEXXIITTbutton to return to TV viewing or press
MMEENNUUbutton to return to the previous menu.
INFO i
TV GUIDE
ENTERENTER
SAP
CC
RATIO
POWER
DAY -
DAY+
VCR
TV
DVD
AUDIO
CABLE
STB
MODE
TV INPUT INPUT
MENUMENU
EXIT
EZ Scan
Manual Scan
Channel Edit
DTV Signal
Main Input
Sub Input
Input Label
Set ID
Bad Normal Good
EZ Scan
Manual Scan
Channel Edit
DTV Signal
Main Input
Sub Input
Input Label
Set ID
2
3
4
1
1
2 3
527Cen-2 80/1/2 4:29 PM Page 66
TV MENU / SETUP(CHANNEL)
67
MAIN PICTURE SOURCE SELECTION
Changes the picture source so you can watch your off-air
TV, cable TV, VCR, DVD, or any other devices that are con-
nected to your TV.
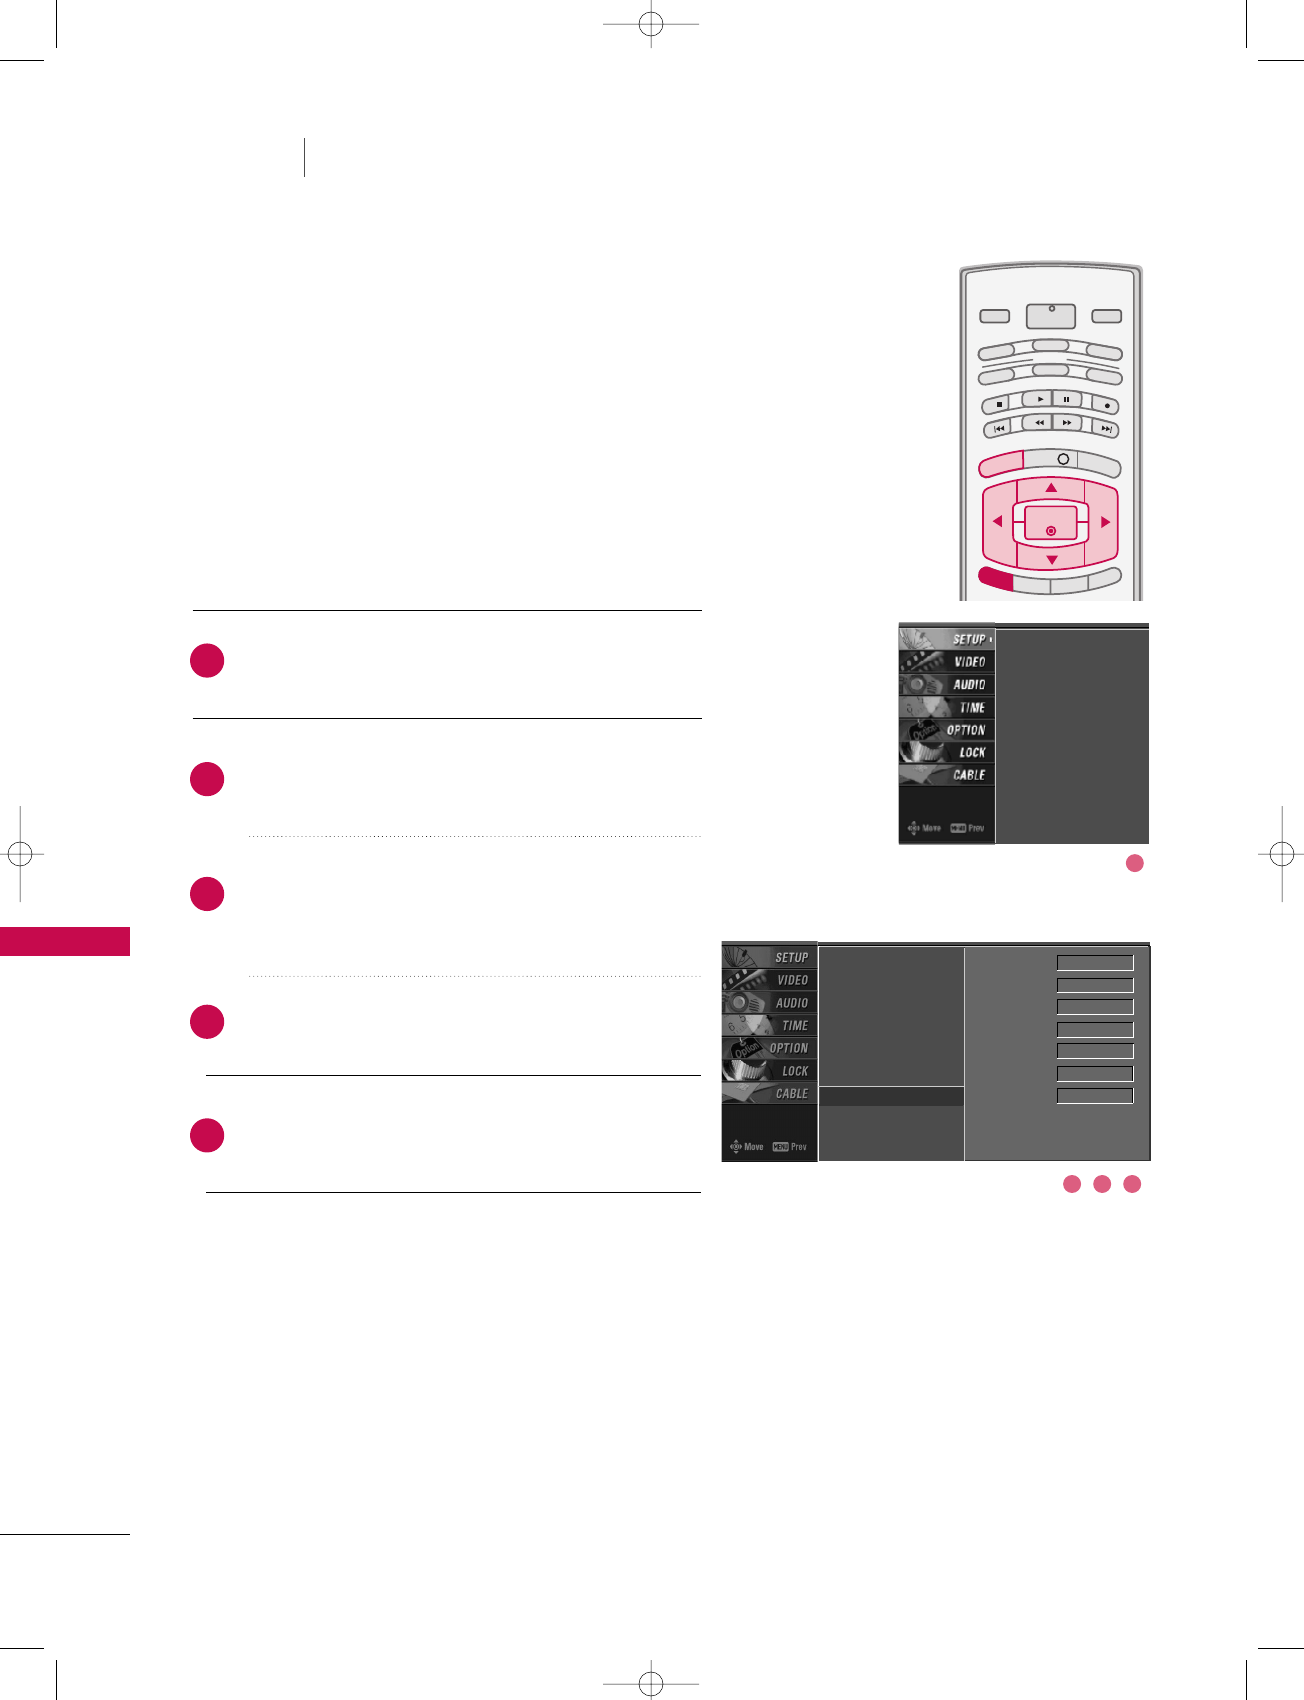
Press the MMEENNUUbutton and then use DD or EE button
to select the SSEETTUUPPmenu.
Press the GG button and then use DD or EE button to
select MMaaiinn IInnppuutt..
Press the GG button and then use DD or EE button to
select the source: AAnntteennnnaa, CCaabbllee, AAVV11, AAVV22,
CCoommppoonneenntt11, CCoommppoonneenntt22, RRGGBB--PPCC(or RRGGBB--
DDTTVV), HHDDMMII11//DDVVII, or HHDDMMII22.
■ To toggle RGB-DTV and RGB-PC, select RGB-PC (or
RGB-DTV) and press the GG button.
Press EEXXIITTbutton to return to TV viewing or press
MMEENNUUbutton to return to the previous menu.
Select sources for the SSuubb IInnppuuttin the
SSEETTUUPPmenu.
See Page 59 for selecting the input
source for the sub picture by pressing the
PPIIPP IINNPPUUTTbutton.
Sub Picture Source Selection
INFO i
TV GUIDE
ENTERENTER
SAP
CC
RATIO
POWER
DAY -
DAY+
VCR
TV
DVD
AUDIO
CABLE
STB
MODE
TV INPUT INPUT
MENUMENU
EXIT
EZ Scan
Manual Scan
Channel Edit
DTV Signal
Main Input G
Sub Input
Input Label
Set ID
Antenna
Cable
AV1
AV2
Component1
Component2
RGB-PC
HDMI1/DVI
HDMI2
EZ Scan
Manual Scan
Channel Edit
DTV Signal
Main Input
Sub Input
Input Label
Set ID
2
3
4
1
1
2 3
527Cen-2 80/1/2 4:29 PM Page 67
TV MENU / SETUP(CHANNEL)
68
INPUT LABEL
TV MENU SETUP(Channel)
Sets a label to each input source which is not in use when
you press the INPUT button.
Press the MMEENNUUbutton and then use DD or EE but-
ton to select the SSEETTUUPPmenu.
Press the GG button and then use DD or EE button to
select IInnppuutt LLaabbeell.
Press the GG button and then use DD or EE button to
select the source: AAVV11, AAVV22,CCoommppoonneenntt11,
CCoommppoonneenntt22, RRGGBB, HHDDMMII11//DDVVIIor HHDDMMII22.
Press the FF or GG button to select the label.
Press EEXXIITTbutton to return to TV viewing or press
MMEENNUUbutton to return to the previous menu.
INFO i
TV GUIDE
ENTERENTER
SAP
CC
RATIO
POWER
DAY -
DAY+
VCR
TV
DVD
AUDIO
CABLE
STB
MODE
TV INPUT INPUT
MENUMENU
EXIT
EZ Scan
Manual Scan
Channel Edit
DTV Signal
Main Input
Sub Input
Input Label G
Set ID
AV1 Cable Box
AV2 VCR
Component1 DVD
Component2 Set Top Box
RGB PC
HDMI1/DVI Game
HDMI2 Satellite
EZ Scan
Manual Scan
Channel Edit
DTV Signal
Main Input
Sub Input
Input Label
Set ID
2
3
4
5
1
1
3 42
527Cen-2 80/1/2 4:29 PM Page 68
TV MENU / VIDEO ADJUSTMENT
69
AUTO PICTURE CONTROL (EZ PICTURE)
Press the EEZZ PPIICCbutton repeatedly to select the picture
appearance setup option as below :
DDaayylliigghhtt, NNoorrmmaall, NNiigghhtt TTiimmee, UUsseerr11, and UUsseerr22
(your own settings).
Press the EEXXIITTbutton to save and return to TV viewing.
■You can also use the VVIIDDEEOOmenu to adjust EEZZ PPiiccttuurree.
APM
TIMER
ADJUST
SWAP
PIP CH +PIP CH -
PIP
PIP INPUT
1 2 3
456
78
0
9
FLASHBK
EZ SOUND
EZ PICEZ PIC
EZ Picture adjusts the TV for the best picture appearance.
Select the preset value in the EZ Picture menu based on the
program category.
DDaayylliigghhtt,NNoorrmmaall,NNiigghhtt TTiimmeeSettings are preset for optimum
picture quality at the factory and are not adjustable.
In the UUsseerr11, and UUsseerr22modes only, user can directly adjust
the contrast, brightness, color, sharpness, tint.
TV MENU VIDEO ADJUSTMENT
2
1
EZ Picture G
Color Temperature
XD
Advanced
Video Reset
Daylight
Normal
Night Time
User 1
User 2
EZ Picture
Color Temperature
XD
Advanced
Video Reset
527Cen-2 80/1/2 4:29 PM Page 69
TV MENU / VIDEO ADJUSTMENT
70
ADAPTIVE PICTURE MODE (APM)
TV MENU VIDEO ADJUSTMENT
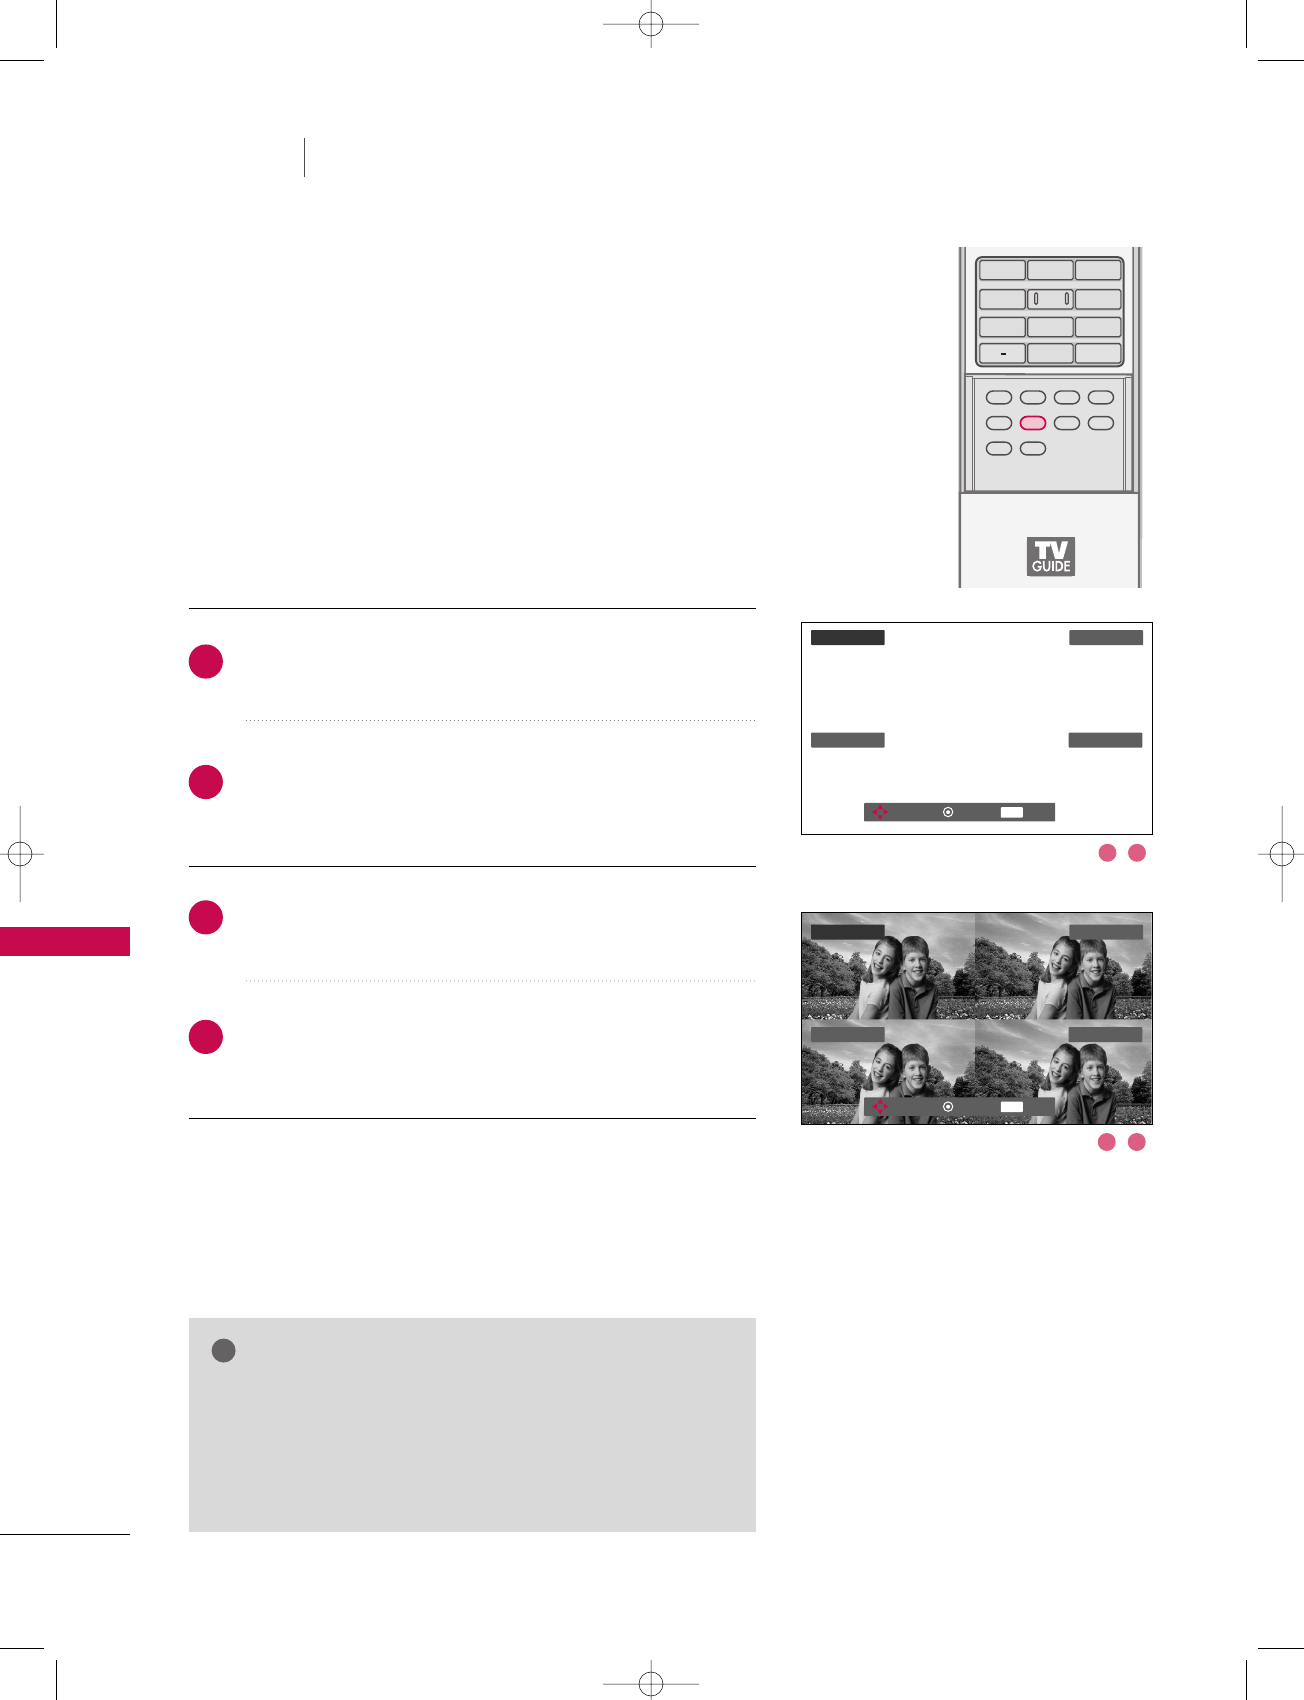
Press the AAPPMMbutton at once. As shown below, the screen
is divided to 4-split.
Use the DDEE FFGG button to navigate 4 EZ Pictures.
By pressing the EENNTTEERRbutton, you can select the desired
mode.
Press the AAPPMMbutton twice. The 4-same screens are dis-
played. You can easily compare with 4 modes.
Use the DDEE FFGG button to navigate 4 EZ Pictures.
By pressing the EENNTTEERRbutton, you can select the desired
mode.
Allows you to select your preferred picture mode after
comparing the four different picture (Daylight, Normal,
Night Time, User1 (or User2)) settings.
APMAPM
TIMER
ADJUST
SWAP
PIP CH +PIP CH -
PIP
PIP INPUT
1 2 3
4 5 6
78
0
9
FLASHBK
EZ SOUND
EZ PIC
DDaayylliigghhttNormal
User1Night Time
EXIT
Navigate Select Exit
DDaayylliigghhttNormal
User1Night Time
EXIT
Navigate Select Exit
NOTE
!
GGWhile operating the 4-split, any button except AAPPMM,
EENNTTEERR, EEXXIITT, DDEE FFGG, VVOOLLUUMMEEDD or EE, MMUUTTEEbutton
on the remote control are not usable.
GGAPM screen will automatically disappear after approx. 40
seconds unless a button is pressed.
2
3
4
1
1 2
3 4
527Cen-2 80/1/2 4:29 PM Page 70
TV MENU / VIDEO ADJUSTMENT
71
MANUAL PICTURE CONTROL
(EZ Picture-UUsseerroption)
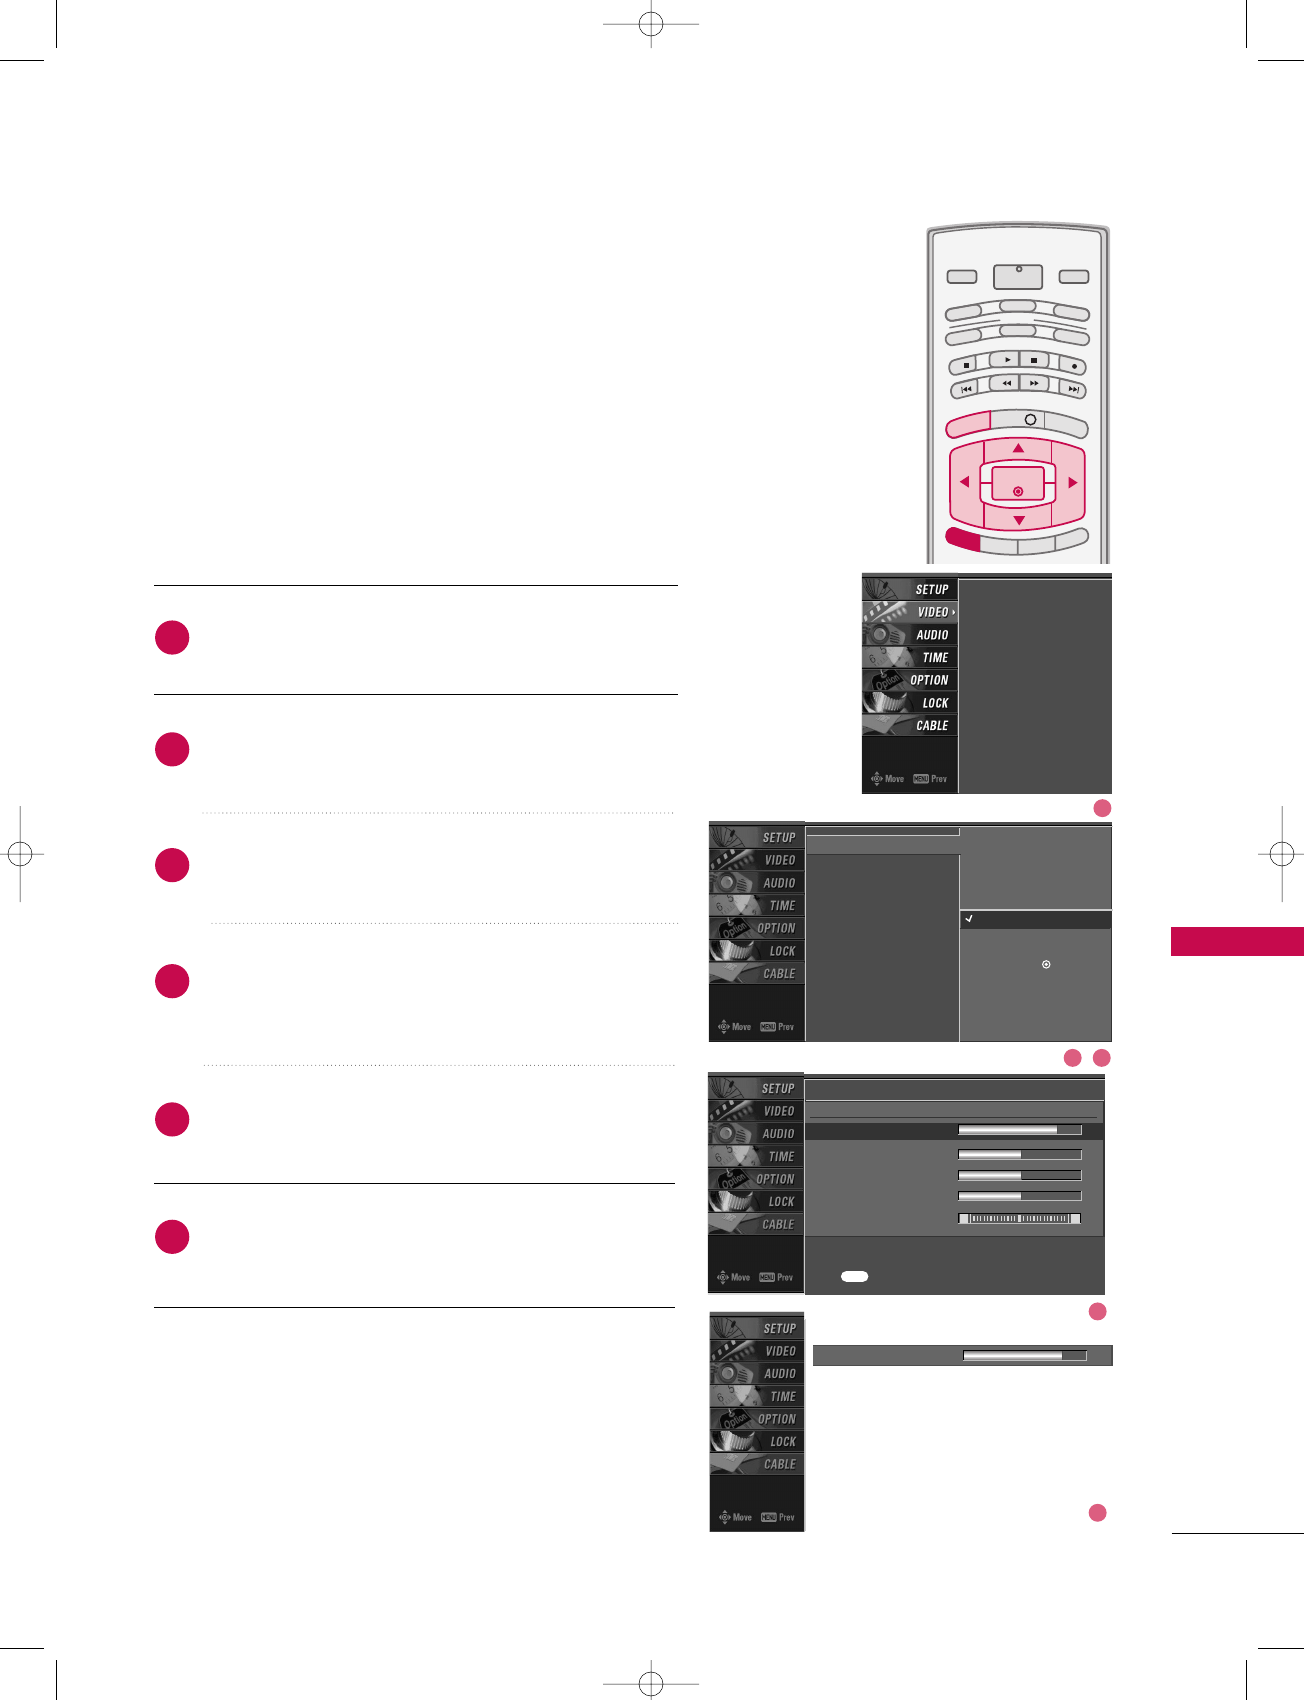
Press the MMEENNUUbutton and then use DD or EE button
to select the VVIIDDEEOOmenu.
Press the GG button and then use DD or EE button to
select EEZZ PPiiccttuurree.
Press the GG button and then use DD or EE button to
select UUsseerr 11or UUsseerr 22.
Press the GG button and then use DD or EE button to
select the desired picture option ((CCoonnttrraasstt,
BBrriigghhttnneessss,CCoolloorr,SShhaarrppnneessss, or TTiinntt)).
Press the GG button and then use FFor GGbutton to
make appropriate adjustments.
Press EEXXIITTbutton to return to TV viewing or press
MMEENNUUbutton to return to the previous menu.
INFO i
TV GUIDE
ENTERENTER
SAP
CC
RATIO
POWER
DAY -
DAY+
VCR
TV
DVD
AUDIO
CABLE
STB
MODE
TV INPUT INPUT
MENUMENU
EXIT
Adjust the picture appearance to suit your preference and
viewing situations.
EZ Picture
Color Temperature
XD
Advanced
Video Reset
Daylight
Normal
Night Time
User 1 G
User 2
Selection ( Gor ) leads you
to the detailed setting
screen.
Contrast 85 FF G
EE
User1
Contrast 85 G
Brightness 50
Color 50
Sharpness 50
Tint 0 R G
Press to confirm.
MENU
EZ Picture
Color Temperature
XD
Advanced
Video Reset
2
3
4
5
6
1
1
2 3
4
5
527Cen-2 80/1/2 4:29 PM Page 71

TV MENU / VIDEO ADJUSTMENT
72
COLOR TEMPERATURE CONTROL
TV MENU VIDEO ADJUSTMENT
Auto Color Temperature Control
Choose one of three automatic color adjustments. Set to
warm to enhance hotter colors such as red, or set to cool
to see less intense colors with more blue.
Press the MMEENNUUbutton and then use DD or EE button
to select the VVIIDDEEOOmenu.
Press the GG button and then use DD or EE button to
select CCoolloorr TTeemmppeerraattuurree.
Press the GG button and then use DD or EE button to
select either CCooooll,MMeeddiiuumm, WWaarrmm or UUsseerr.
Press EEXXIITTbutton to return to TV viewing or press
MMEENNUUbutton to return to the previous menu.
INFO i
TV GUIDE
ENTERENTER
SAP
CC
RATIO
POWER
DAY -
DAY+
VCR
TV
DVD
AUDIO
CABLE
STB
MODE
TV INPUT INPUT
MENUMENU
EXIT
EZ Picture
Color Temperature G
XD
Advanced
Video Reset
Cool
Medium
Warm
User
EZ Picture
Color Temperature
XD
Advanced
Video Reset
2
3
4
1
1
2 3
527Cen-2 80/1/2 4:29 PM Page 72
TV MENU / VIDEO ADJUSTMENT
73
Manual Color Temperature Control
You can also adjust the detailed settings(Red, Green, Blue)
by selecting the UUsseerrmenu.
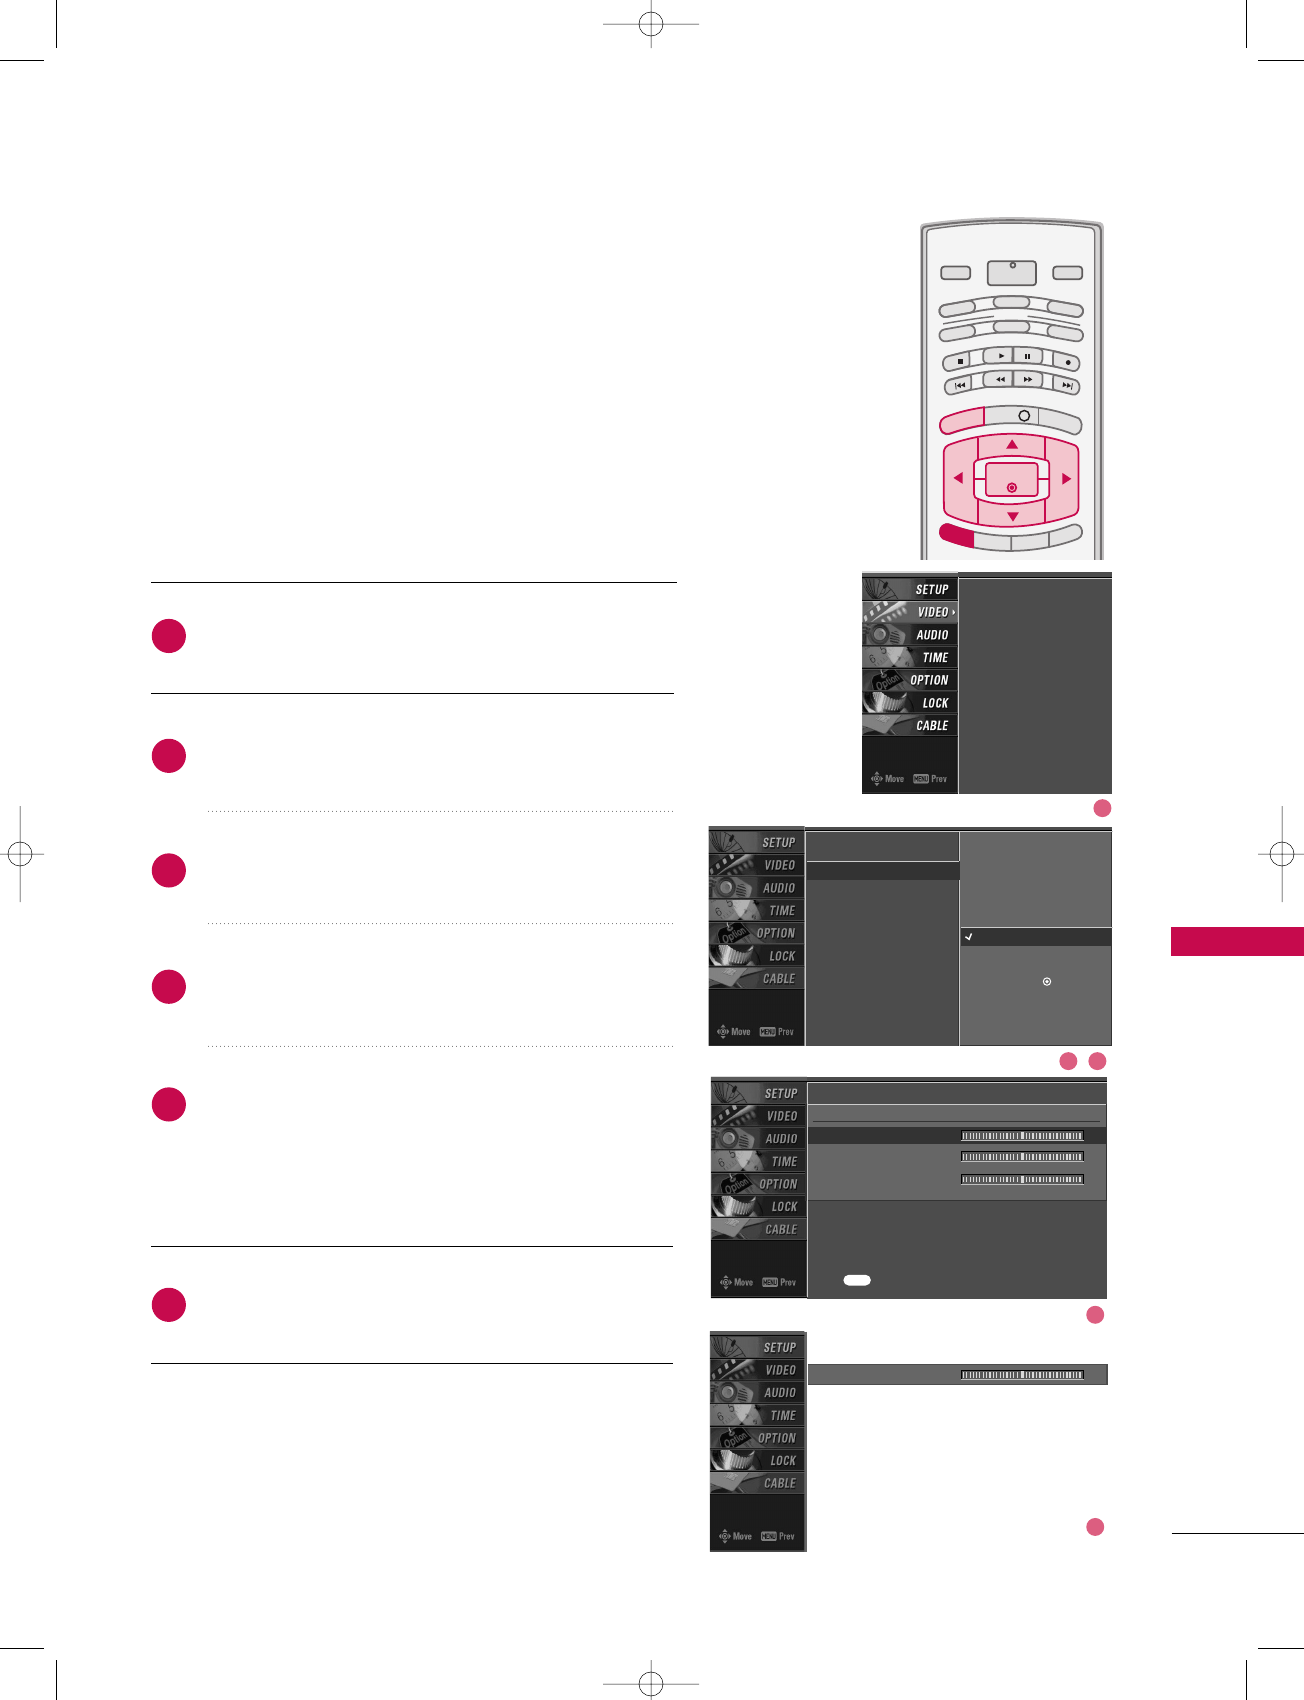
Press the MMEENNUUbutton and then use DD or EE button
to select the VVIIDDEEOOmenu.
Press the GG button and then use DD or EE button to
select CCoolloorr TTeemmppeerraattuurree.
Press the GG button and then use DD or EE button to
select UUsseerr.
Press the GG button and then use DD or EE button to
select RReedd, GGrreeeenn, or BBlluuee.
Press the GG button and then use FF or GG button to
make appropriate adjustments.
■The adjustment range of RRGGBB, GGrreeeenn, or BBlluueeis
-20~+20.
Press EEXXIITTbutton to return to TV viewing or press
MMEENNUUbutton to return to the previous menu.
INFO i
TV GUIDE
ENTERENTER
SAP
CC
RATIO
POWER
DAY -
DAY+
VCR
TV
DVD
AUDIO
CABLE
STB
MODE
TV INPUT INPUT
MENUMENU
EXIT
EZ Picture
Color Temperature
XD
Advanced
Video Reset
EZ Picture
Color Temperature
XD
Advanced
Video Reset
2
3
4
5
6
1
User
Red 0 G
Green 0
Blue 0
Press to confirm.
MENU
Selection ( Gor ) leads you
to the detailed setting
screen.
Cool
Medium
Warm
User G
Red 0 FFG
EE
2 3
1
4
5
527Cen-2 80/1/2 4:29 PM Page 73
TV MENU / VIDEO ADJUSTMENT
74
TV MENU VIDEO ADJUSTMENT
XD
Press the MMEENNUUbutton and then use DD or EE button
to select the VVIIDDEEOOmenu.
Press the GG button and then use DD or EE button to
select XXDD.
Press the GG button and then use DD or EE button to
select AAuuttoo or MMaannuuaall.
Press EEXXIITTbutton to return to TV viewing or press
MMEENNUUbutton to return to the previous menu.
INFO i
TV GUIDE
ENTERENTER
SAP
CC
RATIO
POWER
DAY -
DAY+
VCR
TV
DVD
AUDIO
CABLE
STB
MODE
TV INPUT INPUT
MENUMENU
EXIT
XD is LG Electronic’s unique picture improving technology
to display a real HD source through an advanced digital
signal processing algorithm.
When selecting EZ Picture options (Daylight, Normal and
Night time), XD is automatically changed to Auto.
When selecting EZ Picture options (User 1 and User 2),
you can choose the Auto / Manual.
When selecting the Manual, you can adjust the XD
Contrast, XD color and XD Noise.
EZ Picture
Color Temperature
XD G
Advanced
Video Reset
Manual
XD Contrast On
XD Color On
XD Noise On
EZ Picture
Color Temperature
XD
Advanced
Video Reset
2
3
4
1
SSeelleeccttiinngg tthhee MMaannuuaall
1. Press the GG button and then use FF or GG but-
ton to select XXDD CCoonnttrraasstt, XXDD CCoolloorror
XXDD NNooiissee.
■XXDD CCoonnttrraasstt:: Optimizing the contrast
automatically according to the brightness of
the reflection.
■XXDD CCoolloorr::Adjusting the colors of the
reflection automatically to reproduce as
closely as possible to the natural colors.
■XXDD NNooiissee :: Removing the noise up to the
point where it does not damage the original
picture.
2. Use the DD or EE button to select OOnnor OOffff.2 3
1
527Cen-2 80/1/2 4:29 PM Page 74