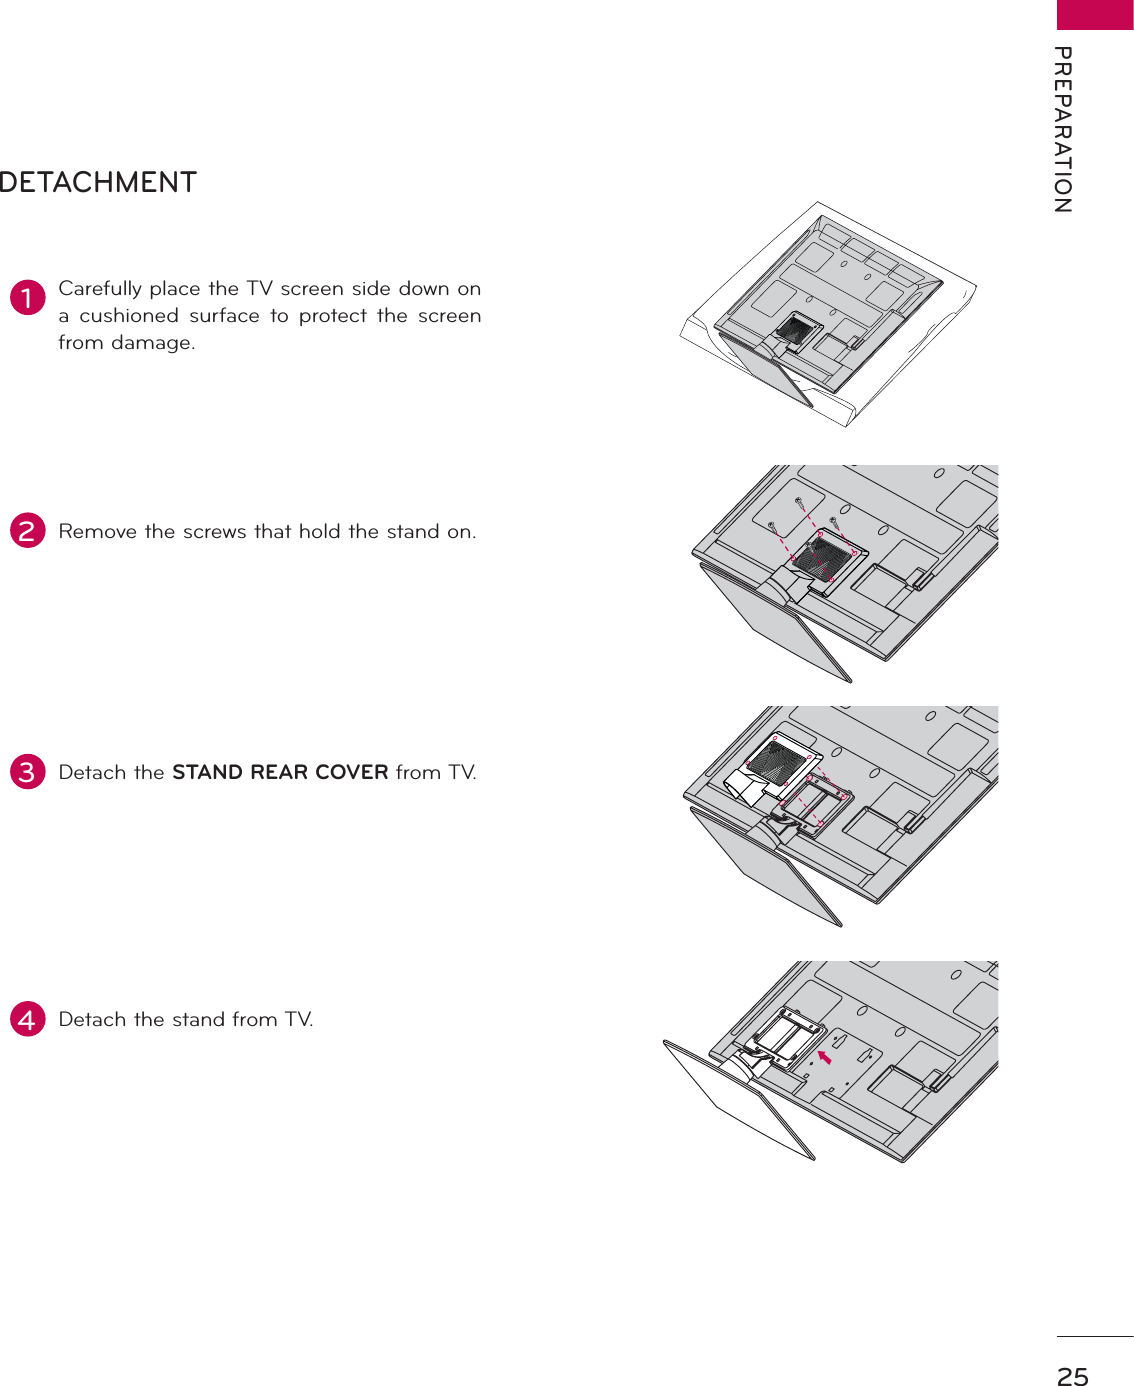
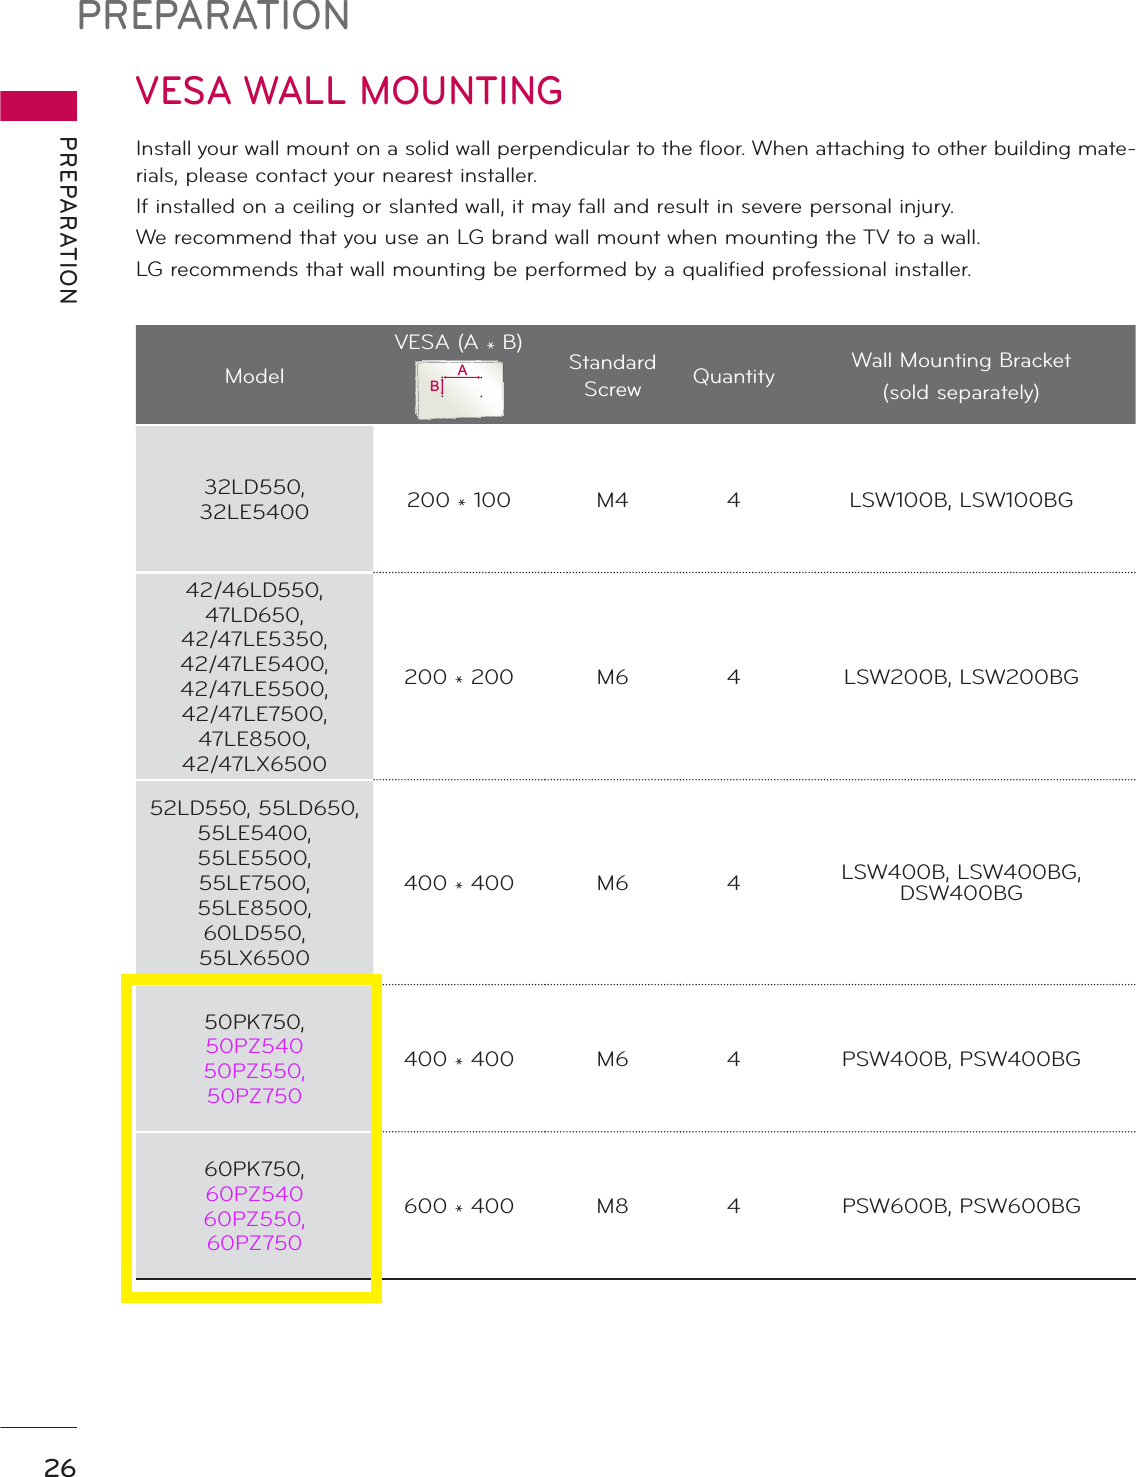
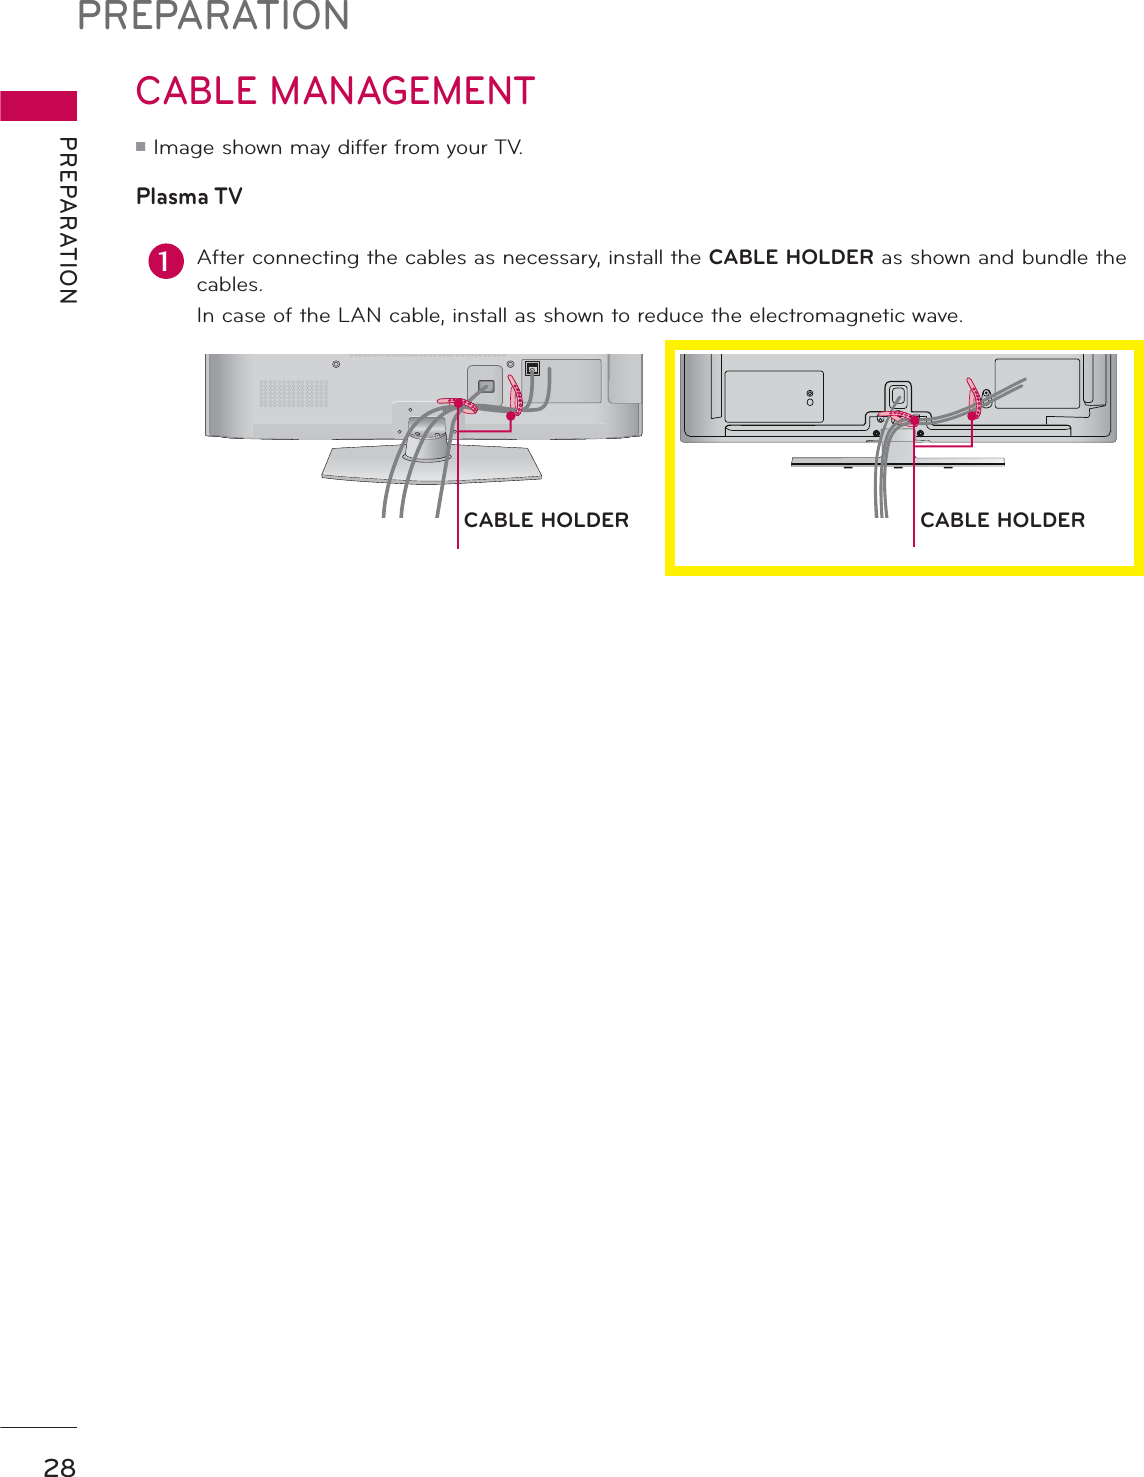
LG Electronics USA 60PZ750UA Plasma Monitor User Manual PZ5 7 1007
LG Electronics USA Plasma Monitor PZ5 7 1007
UserManual.wiki
>
LG Electronics USA
>
60PZ750UA User Manual
>
User Manual part 1 of 2
Contents
1.
User Manual part 1 of 2
2.
User Manual part 2 of 2
User Manual part 1 of 2
Navigation menu
Upload a User Manual
Namespaces
Wiki Guide
HTML
PDF
Info
Views
User Manual
Discussion / Help
Navigation
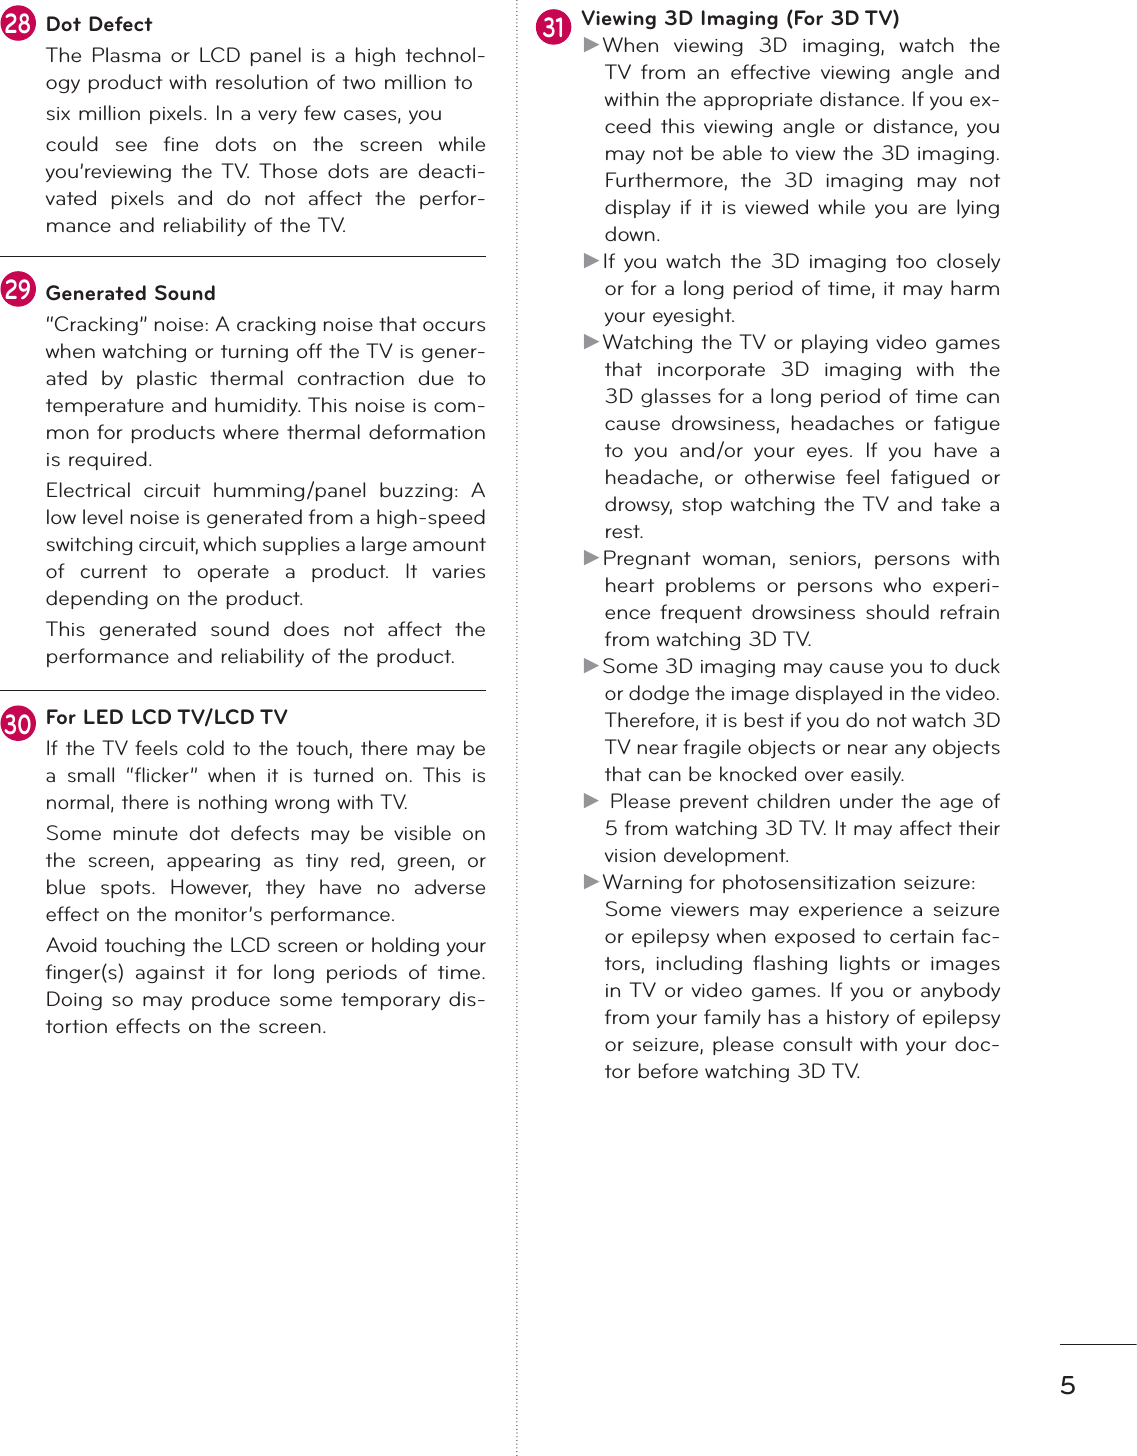
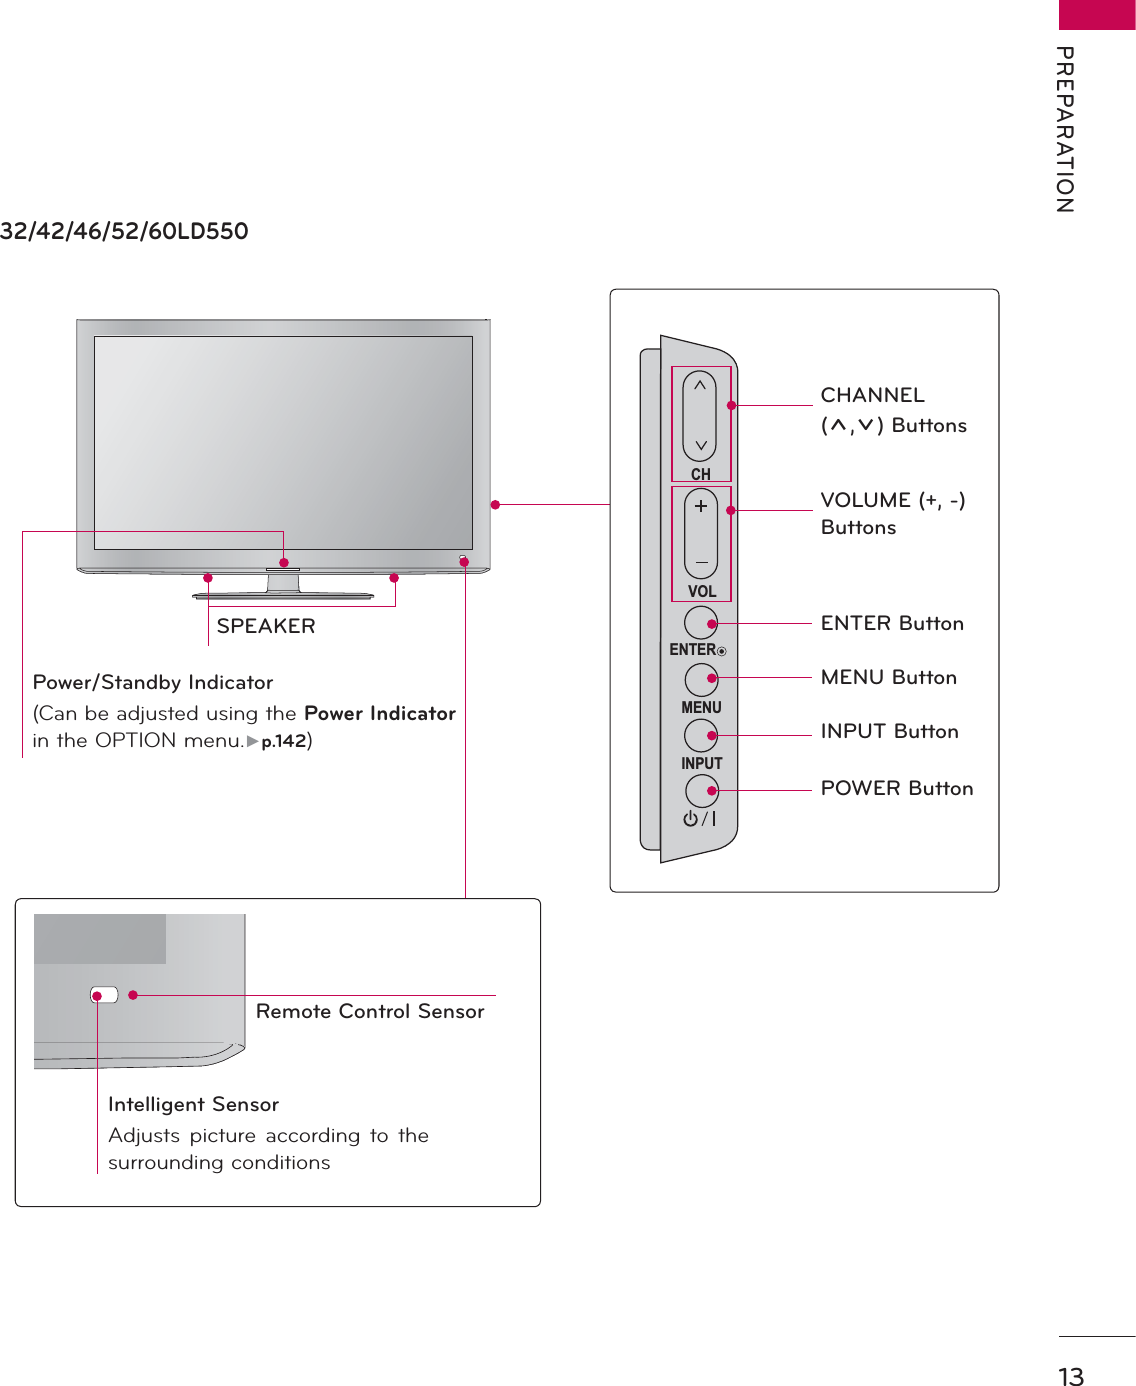
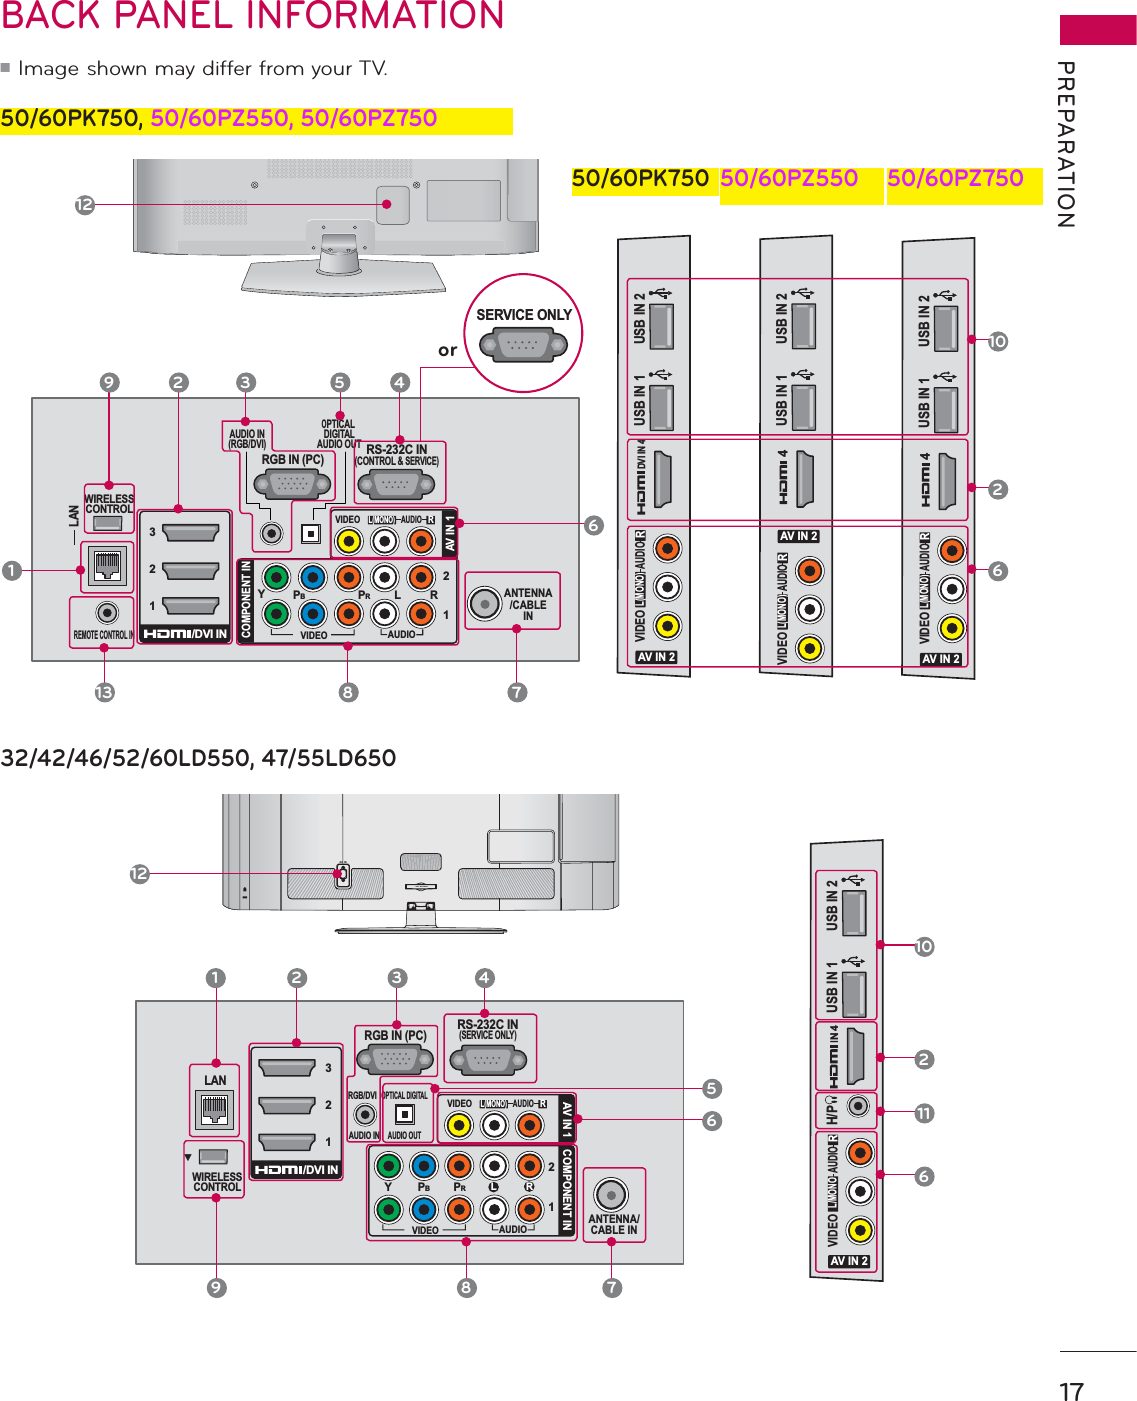


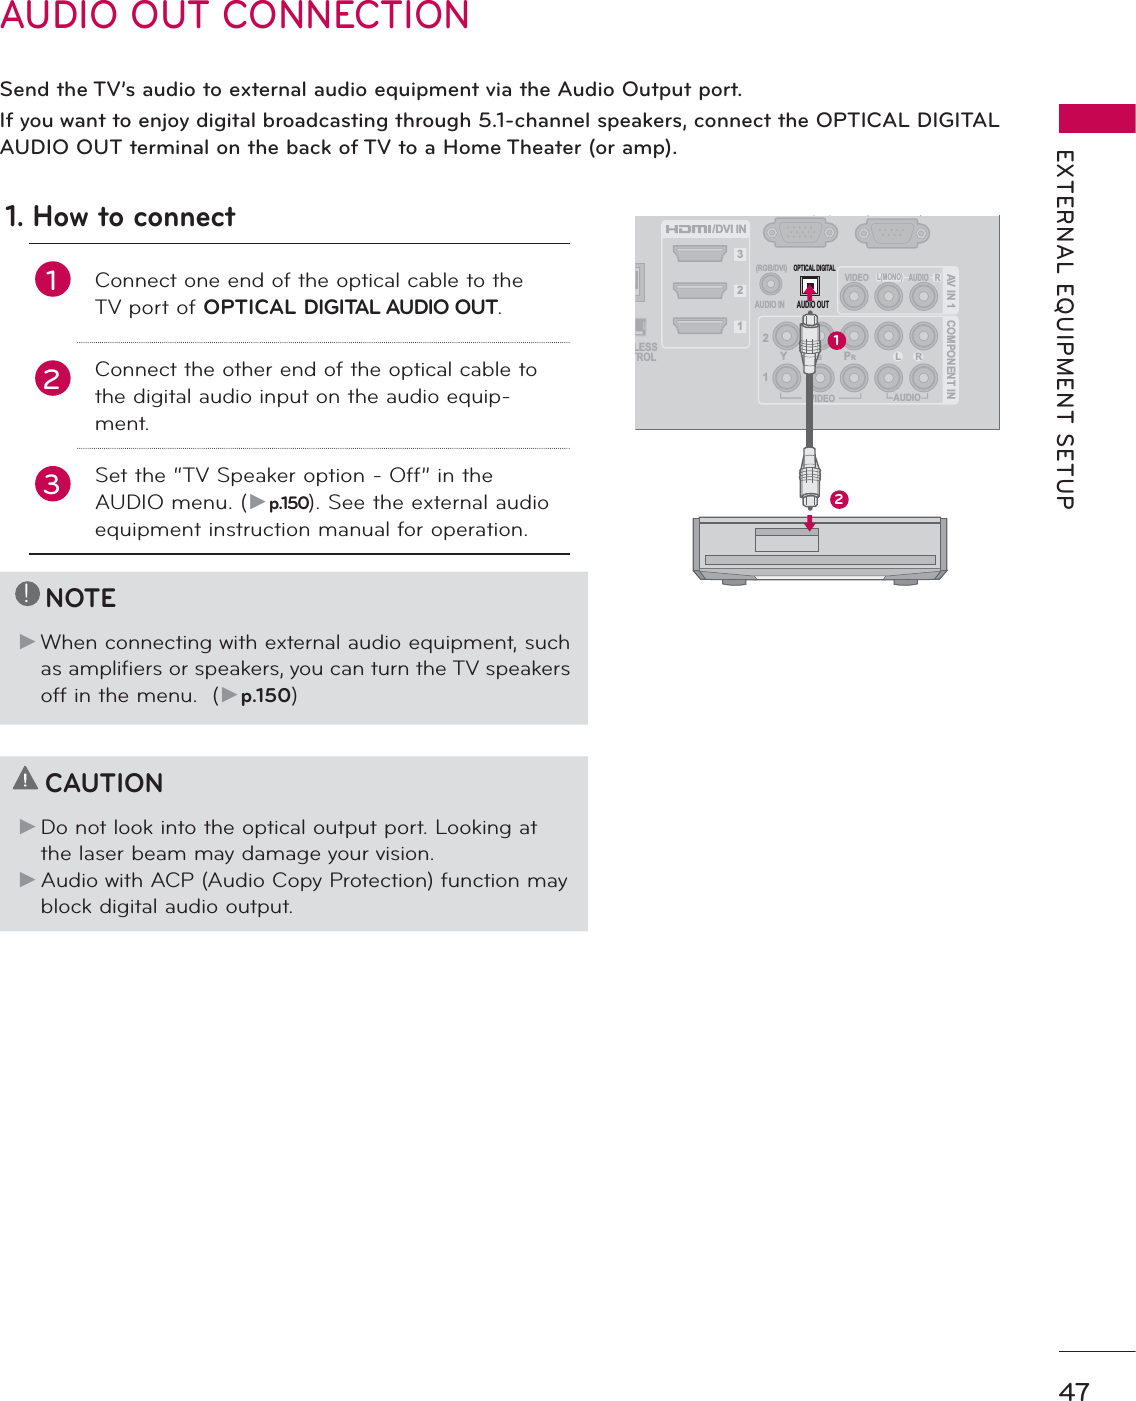
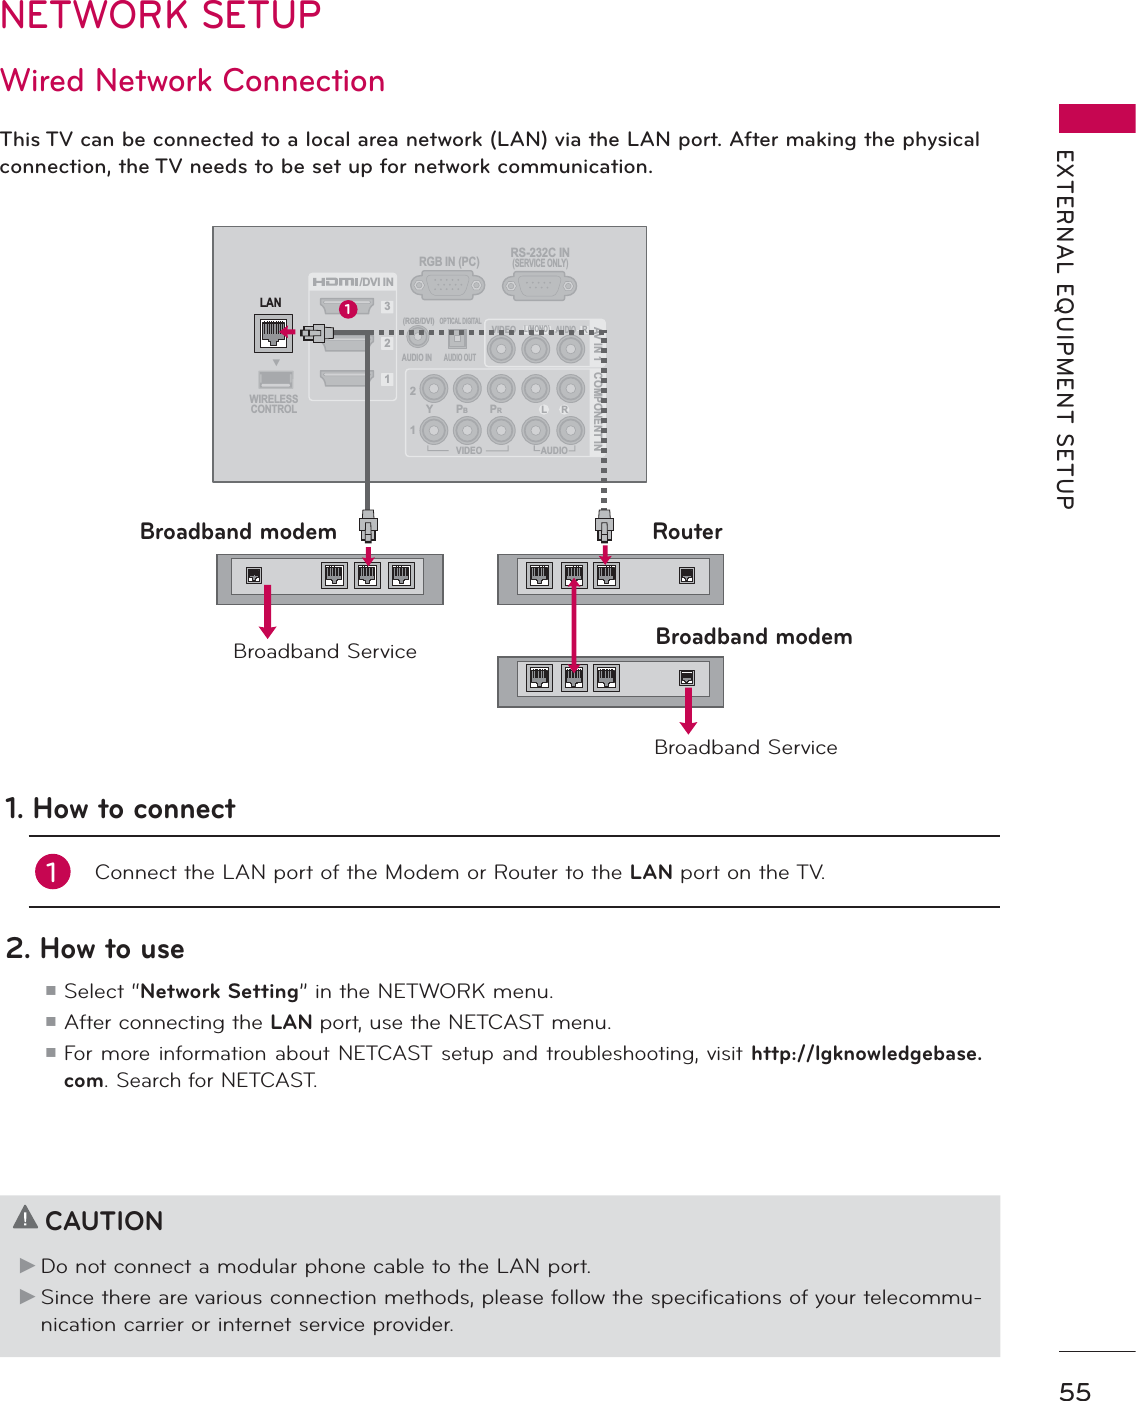
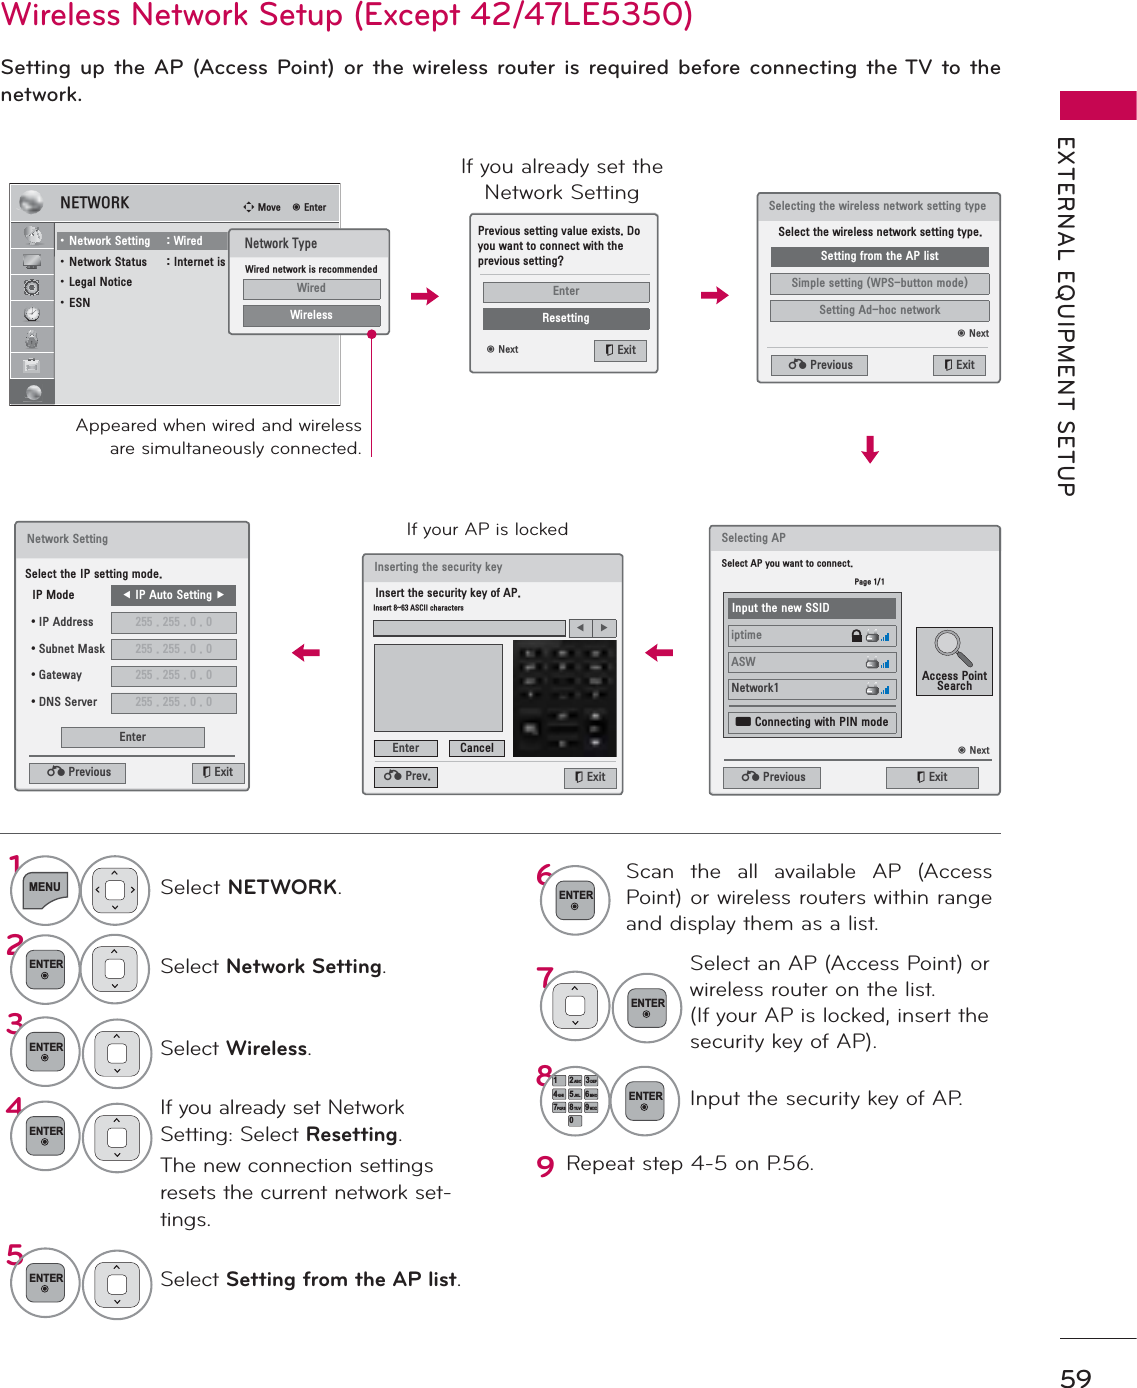
![EXTERNAL EQUIPMENT SETUPEXTERNAL EQUIPMENT SETUP52Screen Setup for PC modeYou can choose the resolution in RGB-PC mode.The Position, Phase, and Size can also be adjusted.You can choose this option only when the PC resolution is set to 1024X768, 1280X768 or 1360X768.Selecting Resolutionᯡ[۳[۳[$XWR&RQILJ5HVROXWLRQ3RVLWLRQ6L]HPhaseReset6&5((1ᯒ0RYHᰙ3UHY1MENUSelect PICTURE.2ENTERSelect Screen (RGB-PC).3ENTERSelect Resolution.4ENTERSelect the desired resolution.5ENTER3,&785( ᯒ0RYHᯙ(QWHUᯐᯙ ؒ&RORU ؒ7LQW ؒ&RORU7HPS ؒ$GYDQFHG&RQWURO ؒ3LFWXUH5HVHWؒ7UX0RWLRQؒ6FUHHQ5*%3&ؒ/('/RFDO'LPPLQJ2QR*W&](https://usermanual.wiki/LG-Electronics-USA/60PZ750UA.User-Manual-part-1-of-2/User-Guide-1374326-Page-52.png)
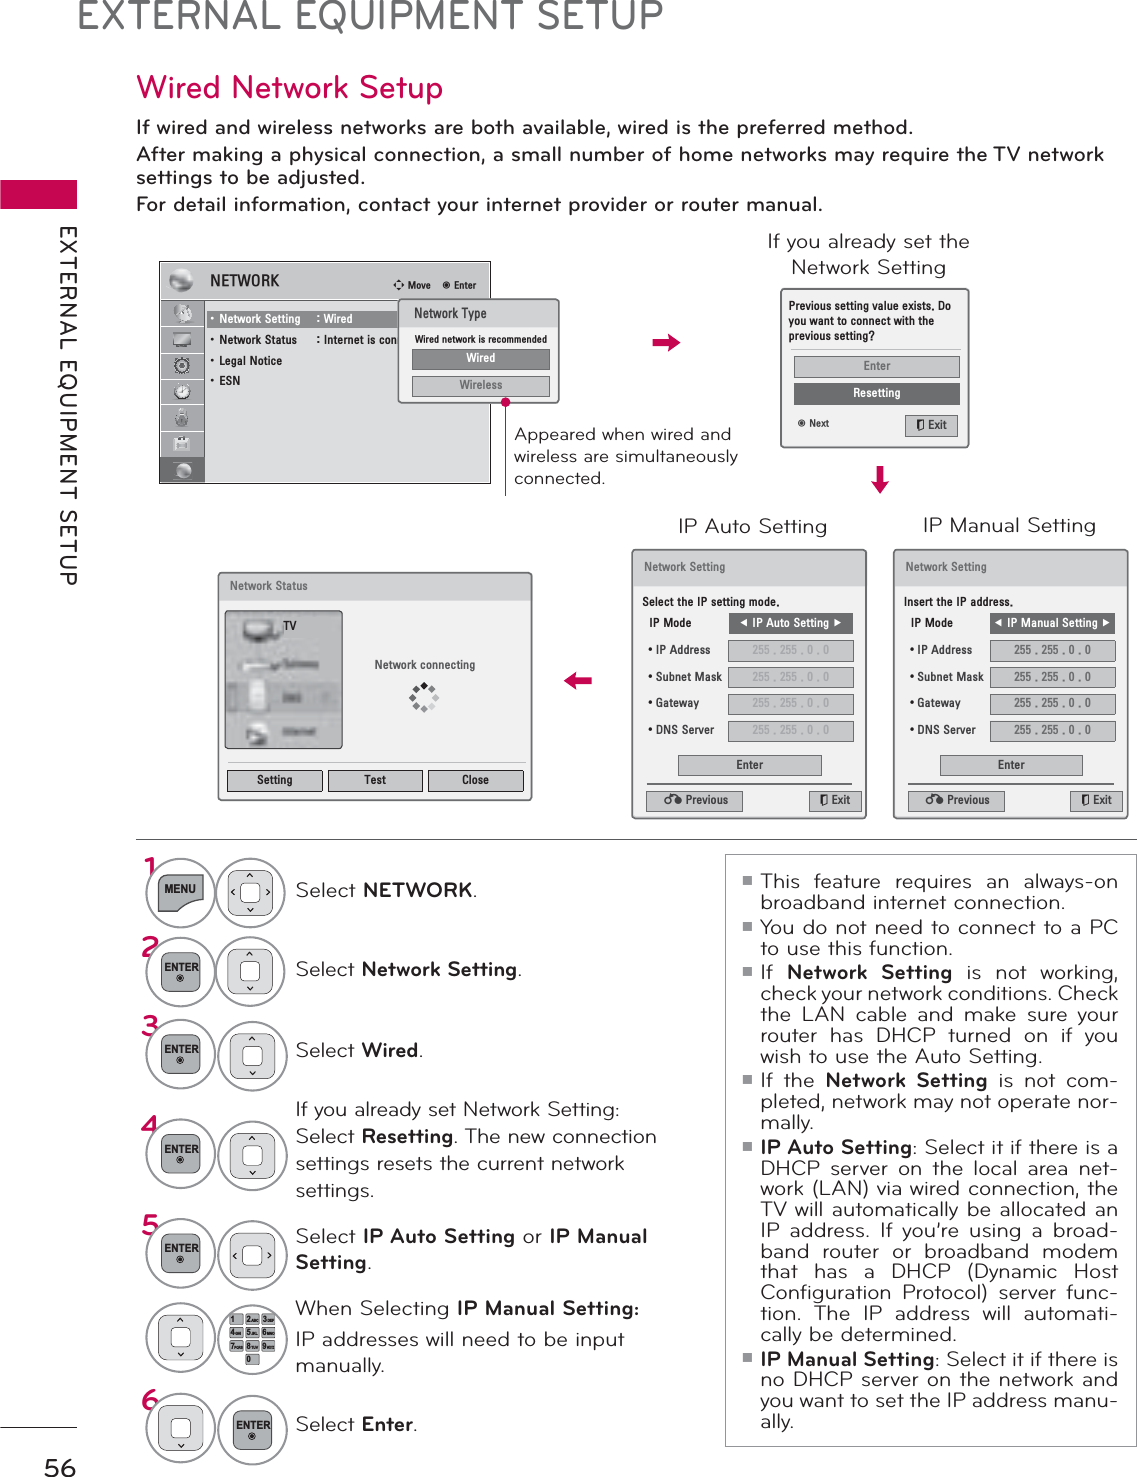
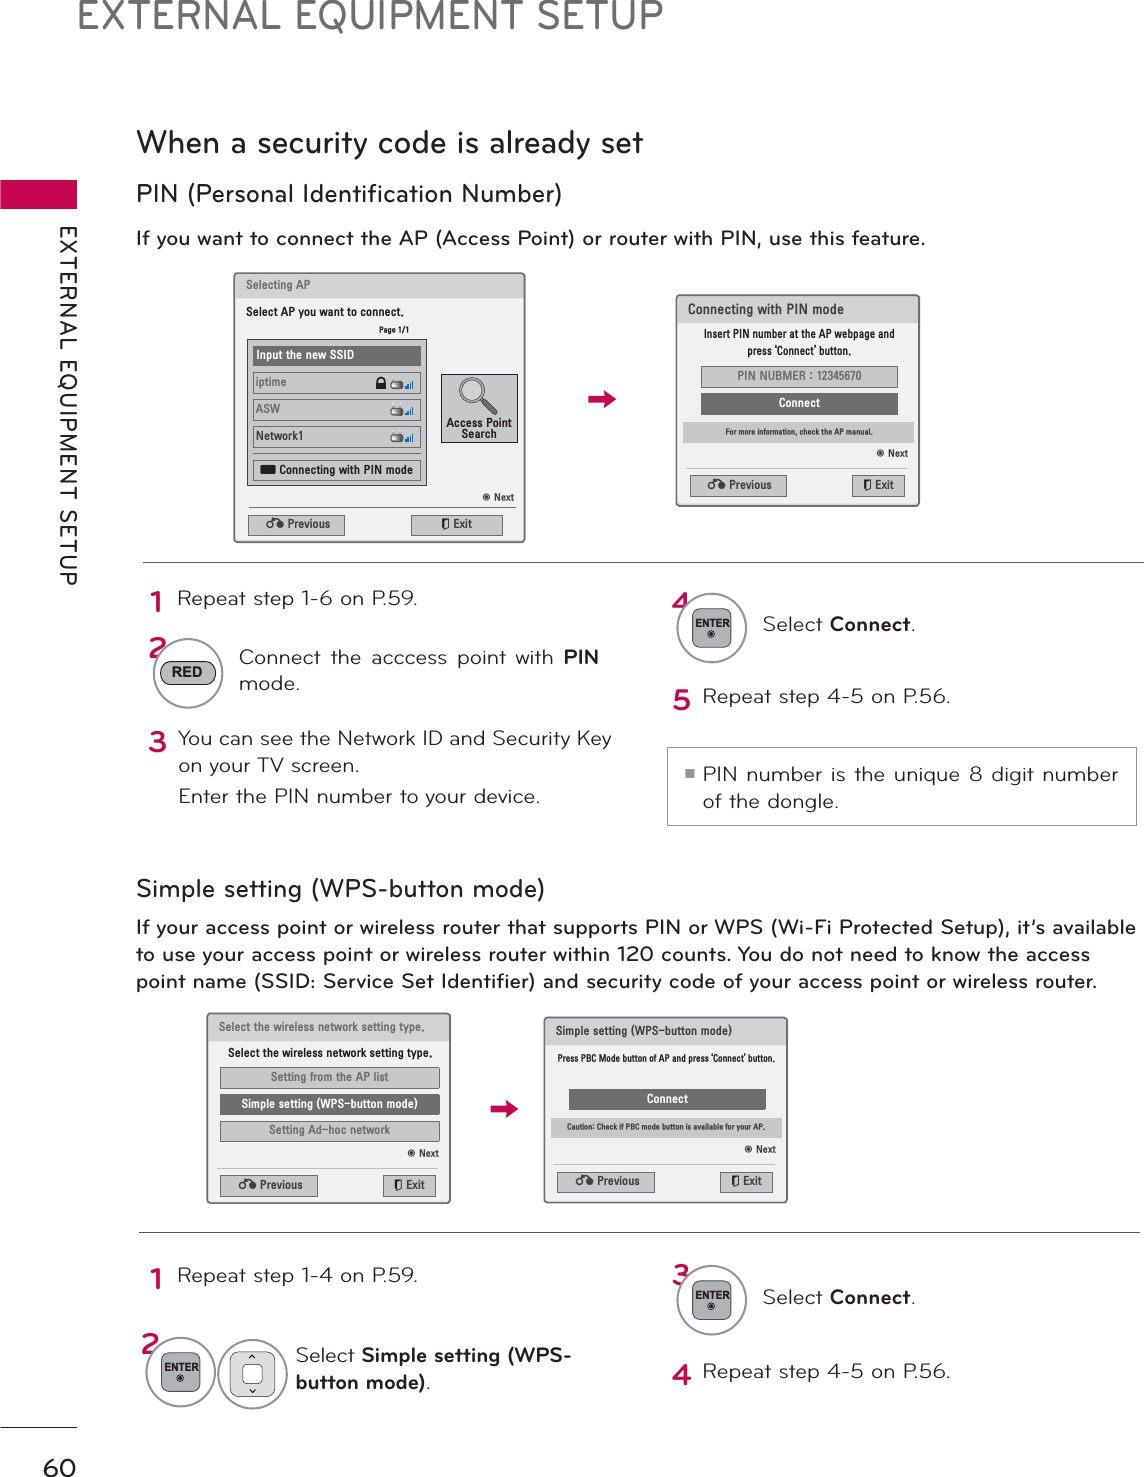
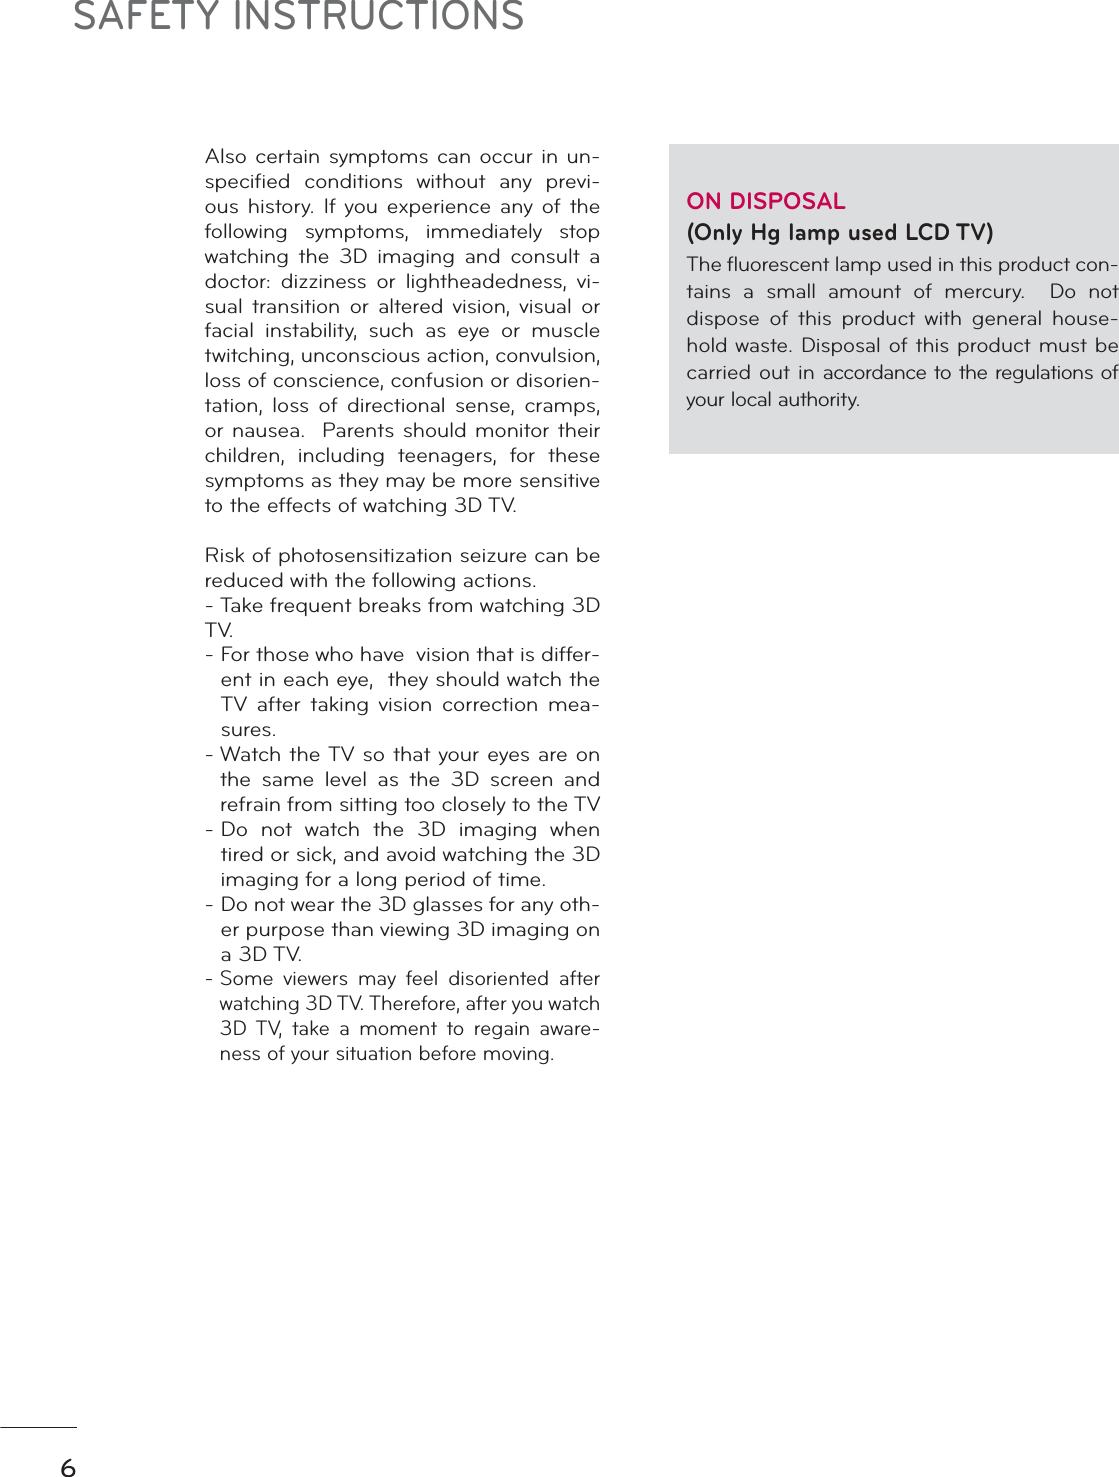
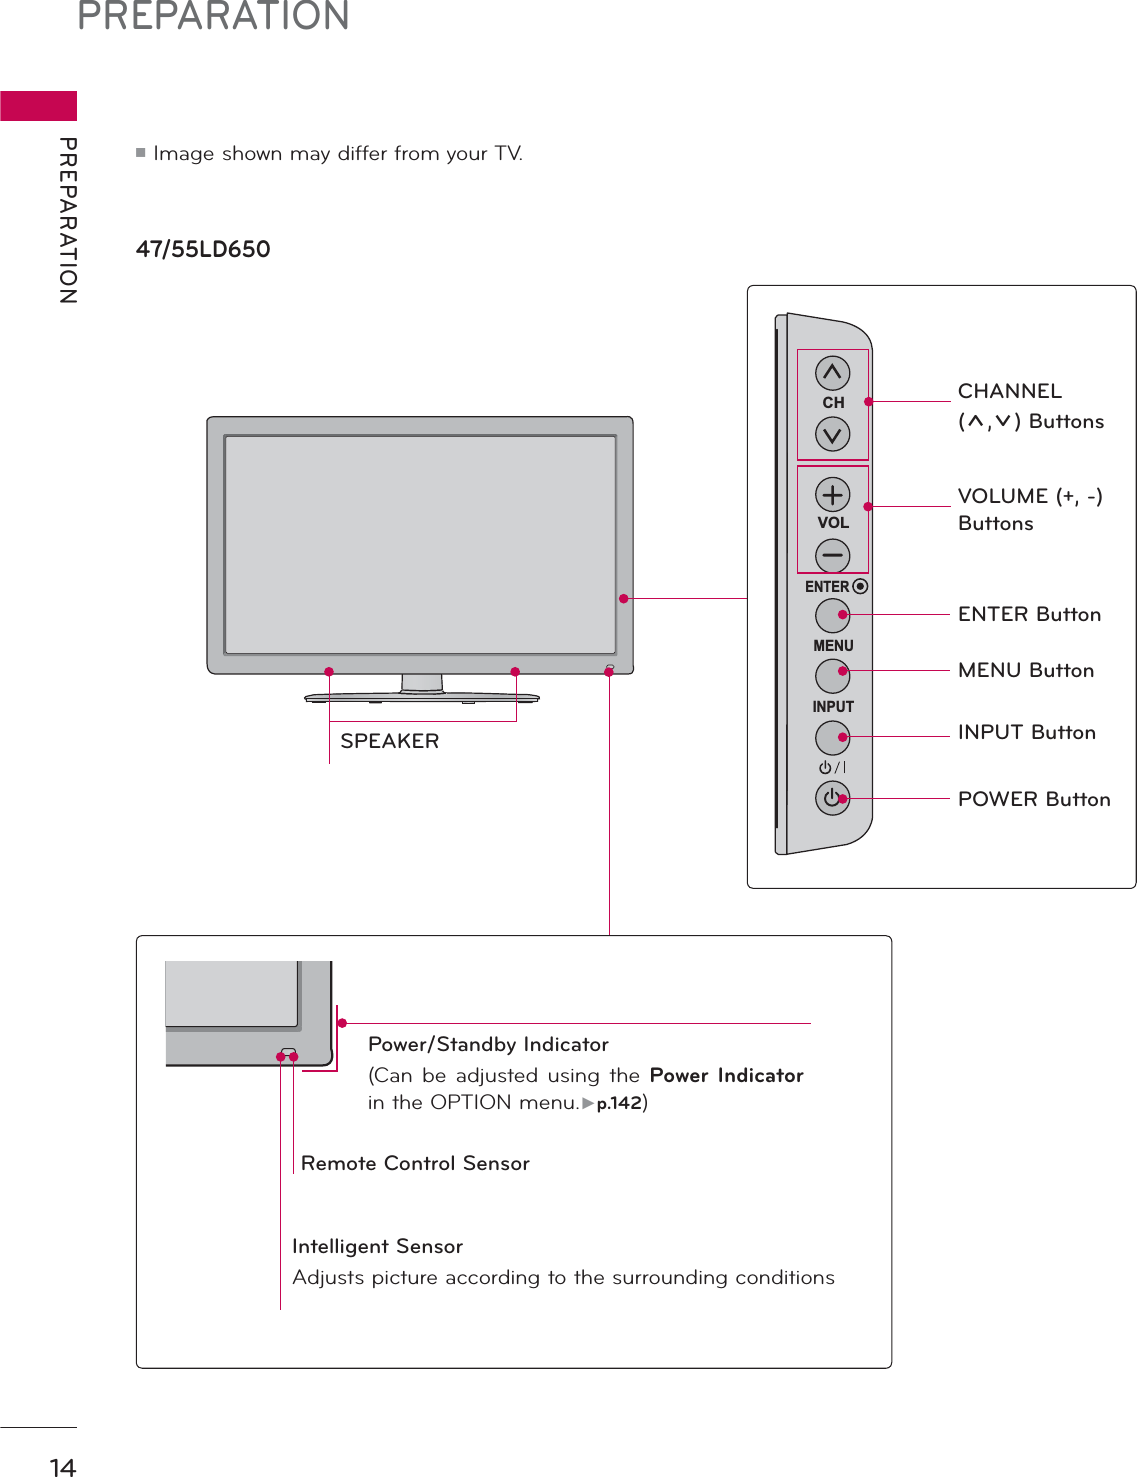
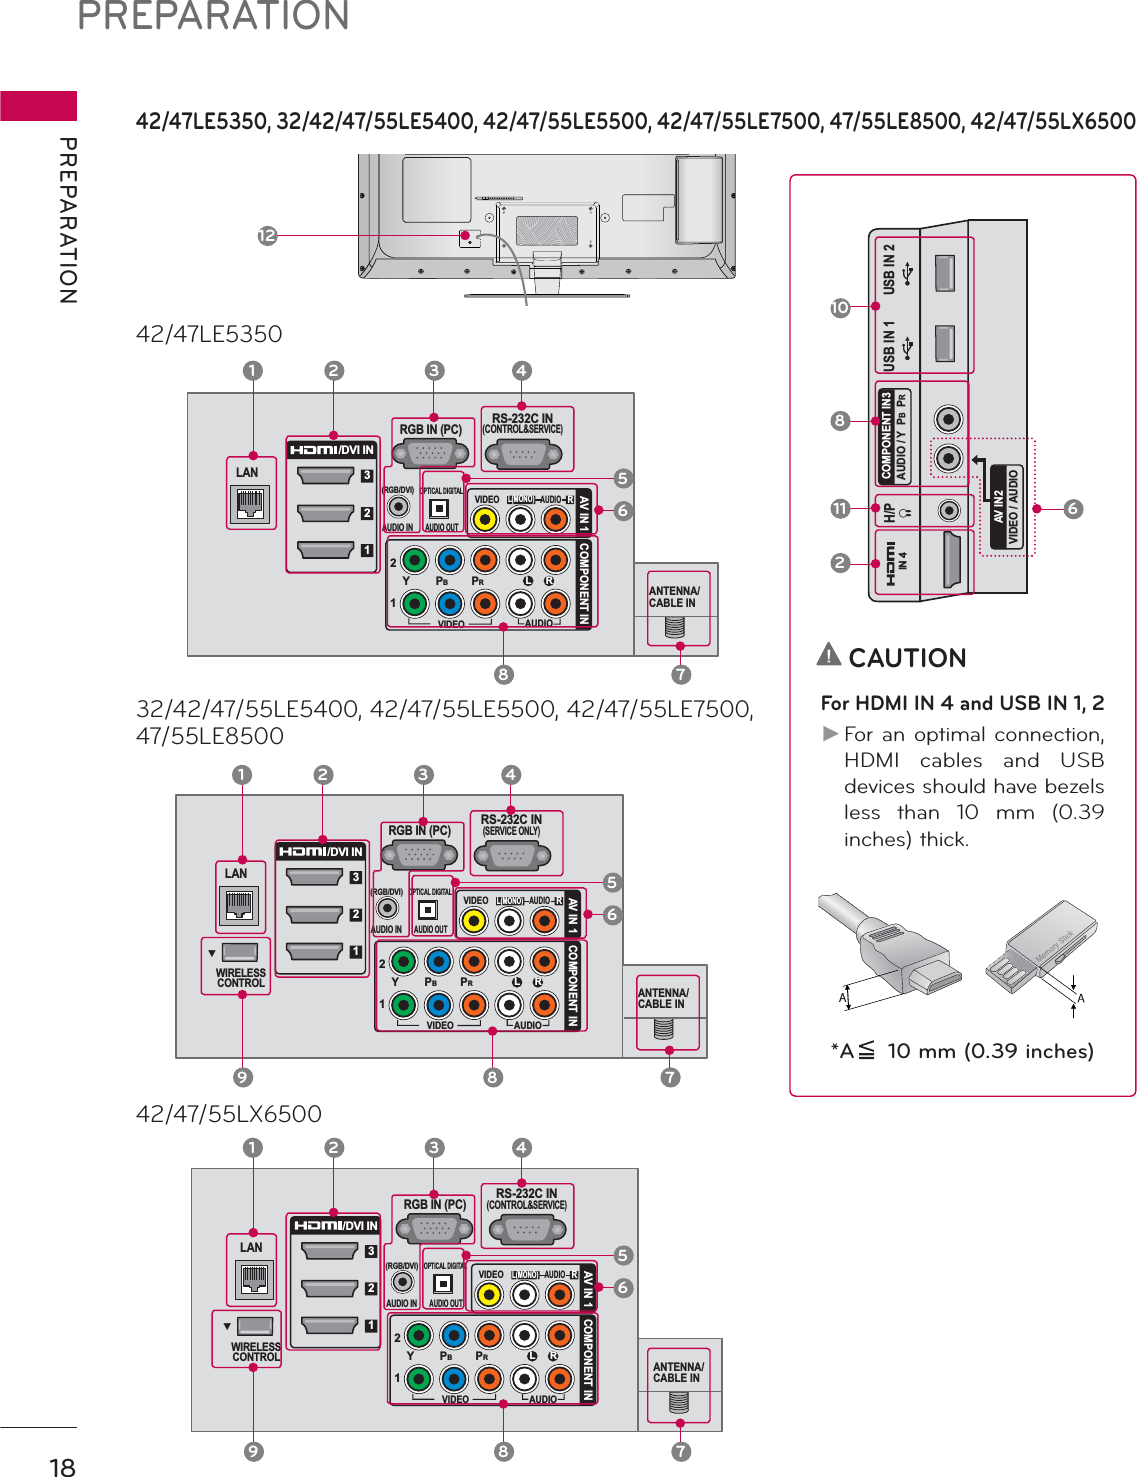
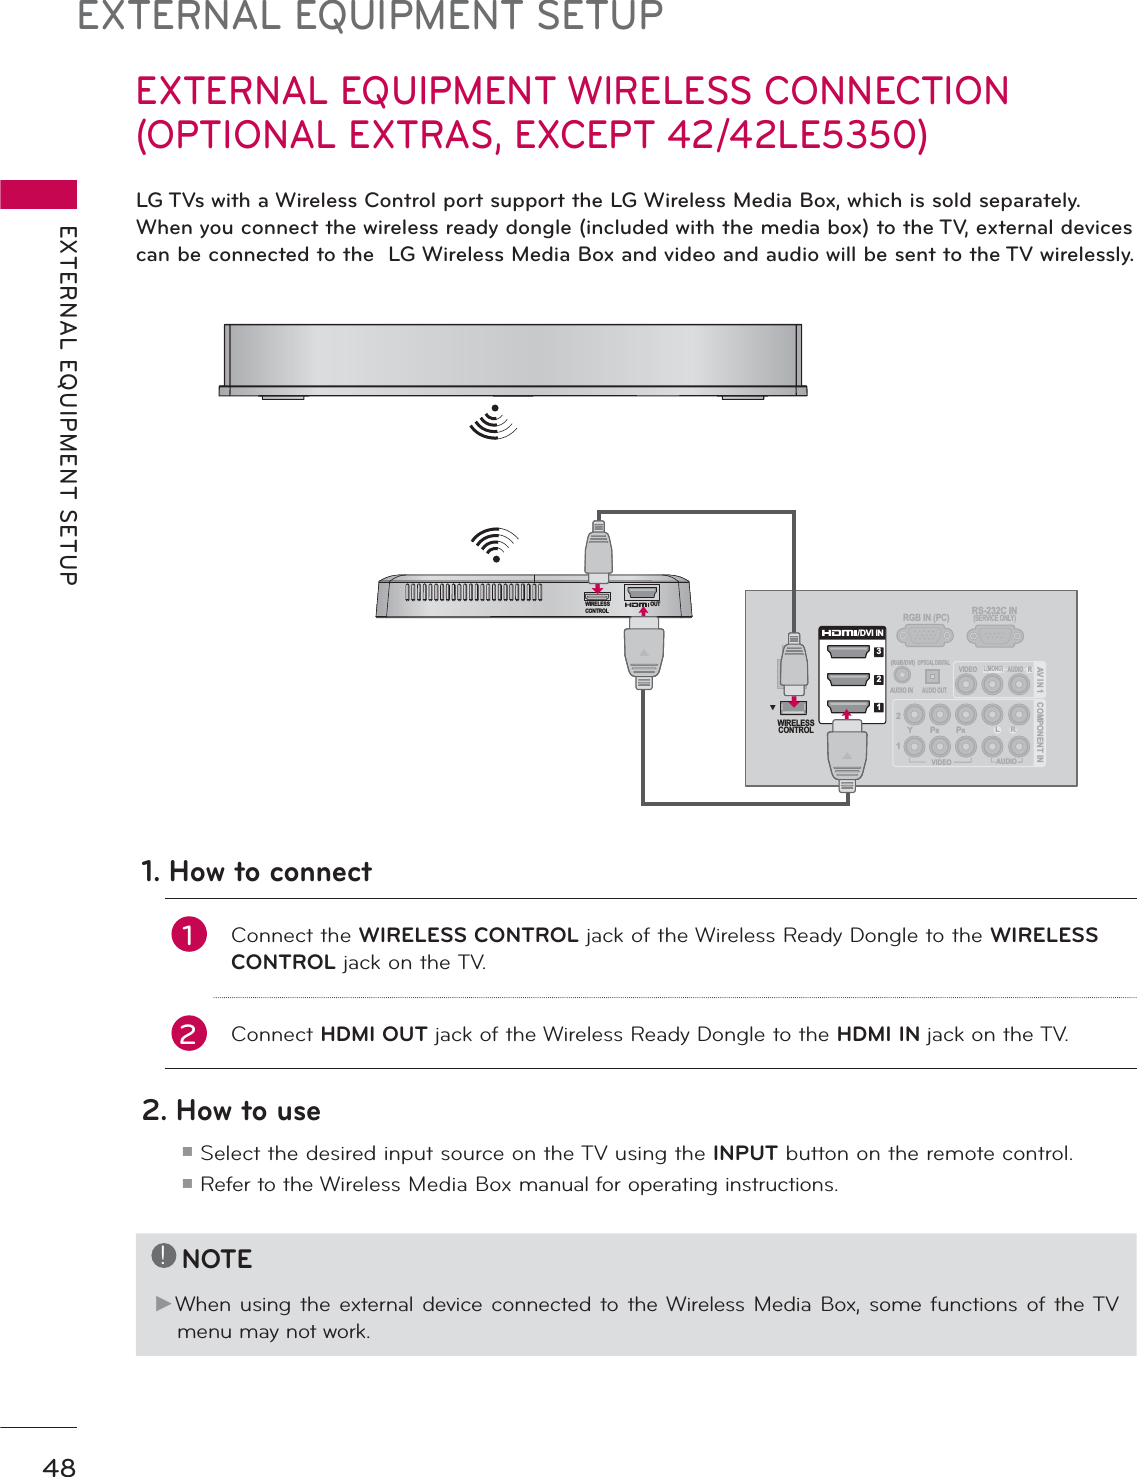
![53EXTERNAL EQUIPMENT SETUPAutomatically adjusts picture position and minimizes image instability. After adjustment, if the image is still not correct, try using the manual settings or a different resolution or refresh rate on the PC.Auto Configure1MENUSelect PICTURE.2ENTERSelect Screen (RGB-PC).3ENTERSelect Auto Config. or Reset.4ENTERSelect Yes.5ENTERᯫIf the position of the image is still not correct, try Auto adjustment again.ᯫIf picture needs to be adjusted again after Auto adjustment in RGB-PC, you can adjust the Position,Size orPhase.$XWR&RQILJ5HVROXWLRQ3RVLWLRQ6L]HPhaseReset$XWR&RQILJYes 1R6&5((1ᯒ0RYHᰙ3UHY3,&785( ᯒ0RYHᯙ(QWHUᯐᯙ ؒ&RORU ؒ7LQW ؒ&RORU7HPS ؒ$GYDQFHG&RQWURO ؒ3LFWXUH5HVHWؒ7UX0RWLRQؒ6FUHHQ5*%3&ؒ/('/RFDO'LPPLQJ2QR*W&Returns Position,Size, and Phase to the default initial settings.This feature operates only in RGB-PC mode.Screen Reset (Reset to original initial values)$XWR&RQILJ3RVLWLRQ5HVROXWLRQ6L]HPhaseReset7R6HWYes 1R6&5((1ᯒ0RYHᰙ3UHY](https://usermanual.wiki/LG-Electronics-USA/60PZ750UA.User-Manual-part-1-of-2/User-Guide-1374326-Page-53.png)
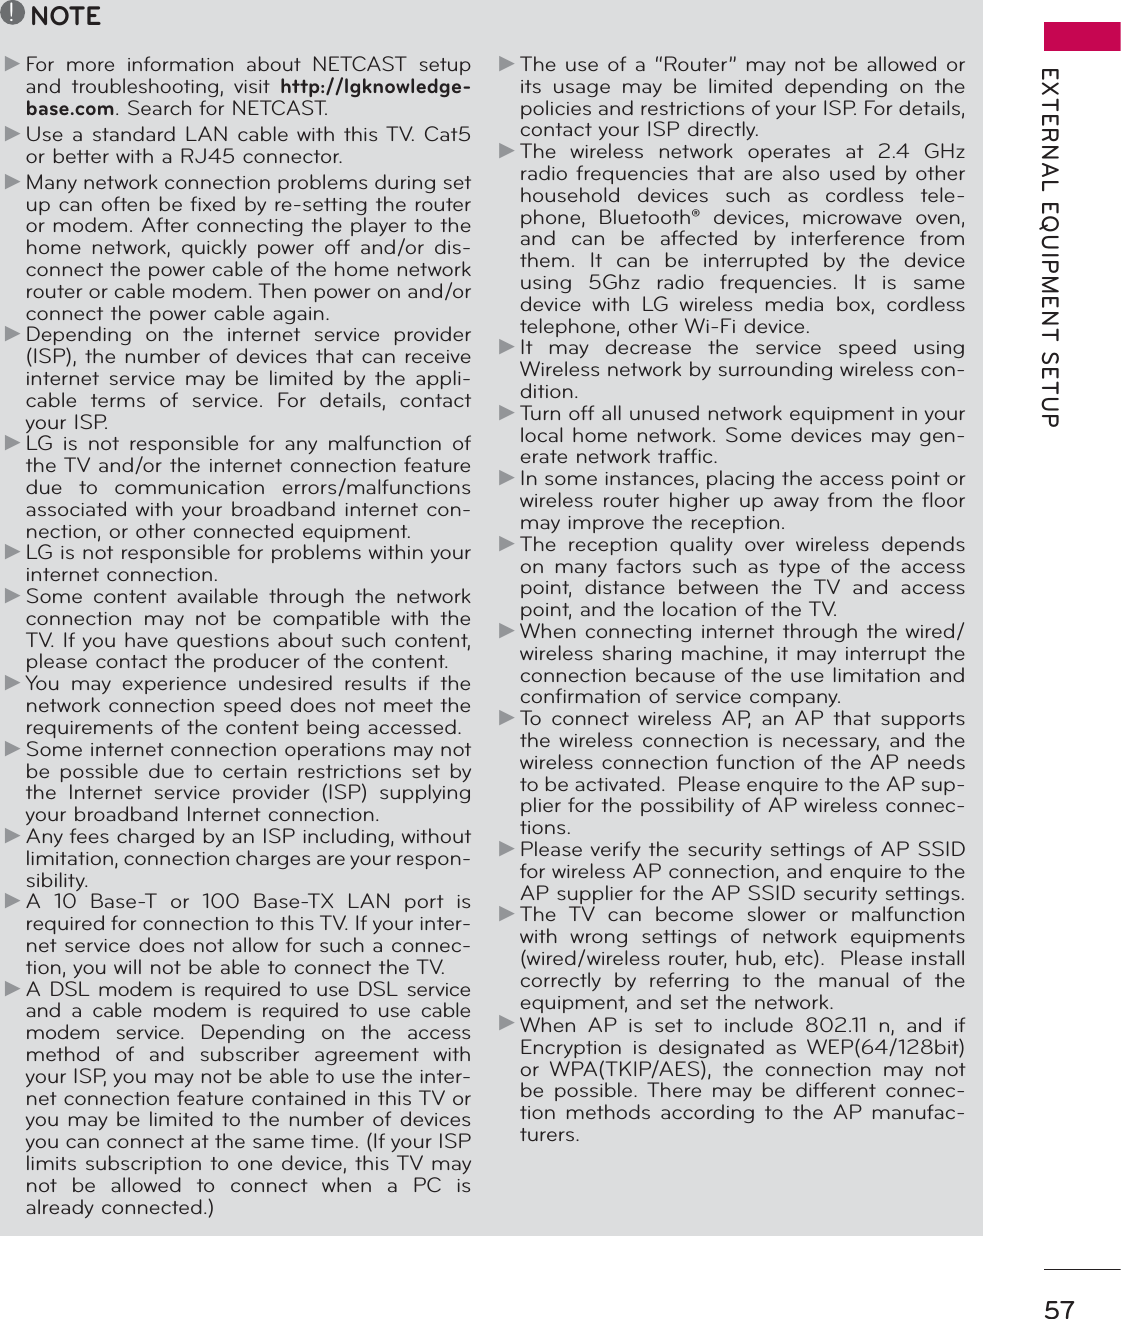
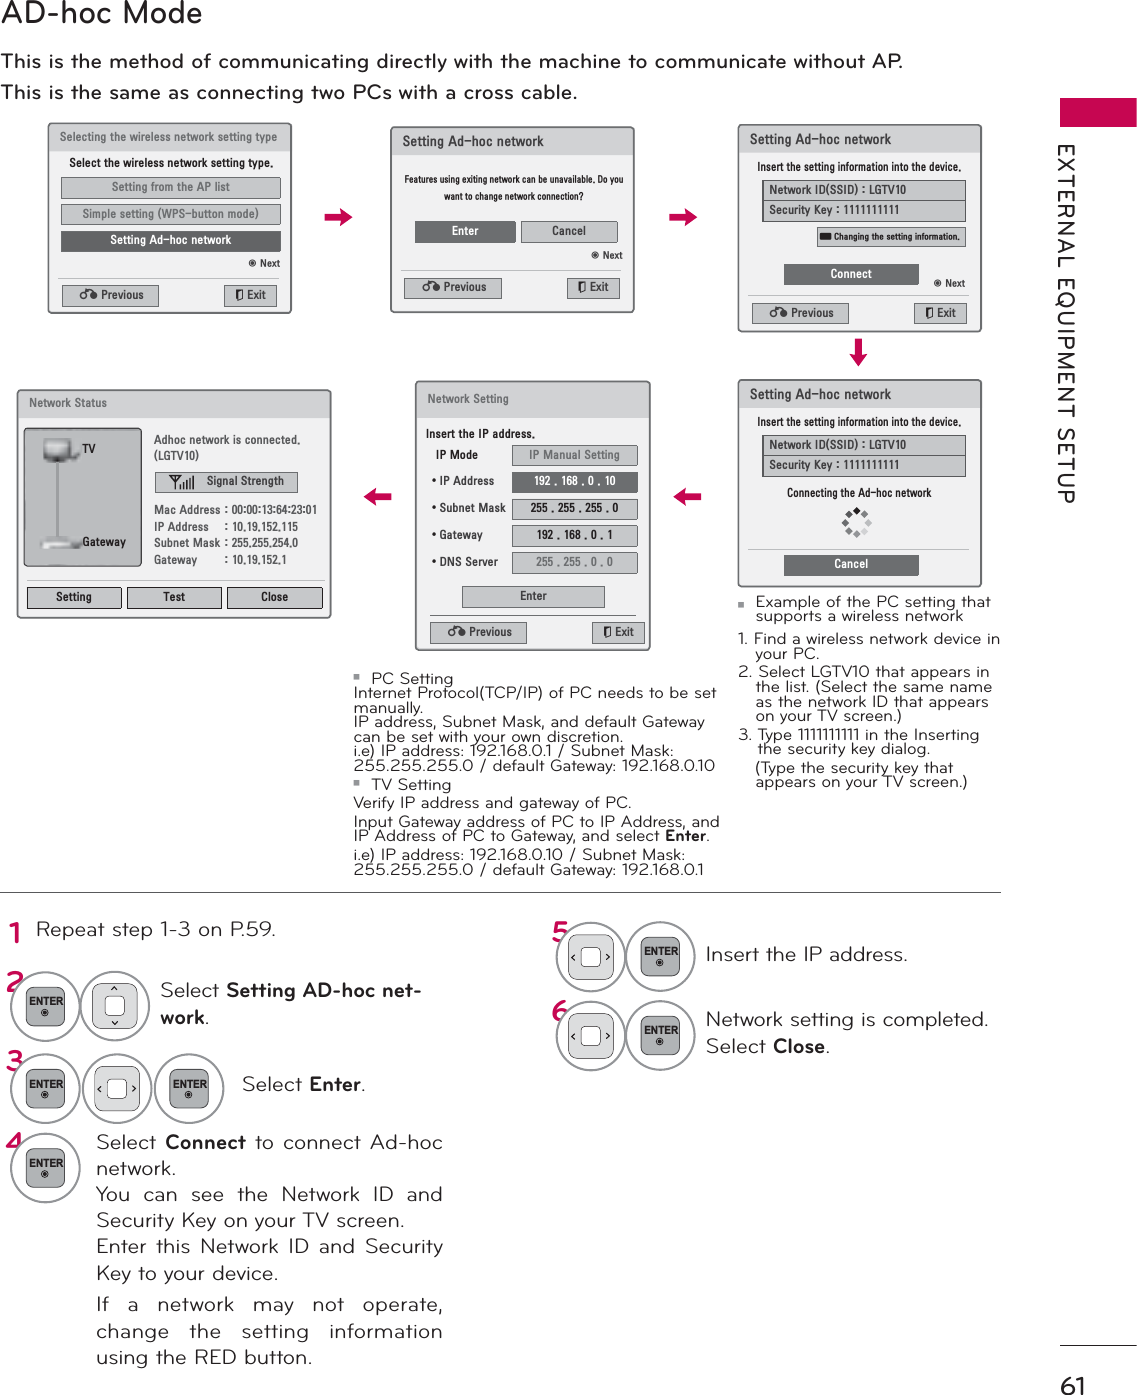
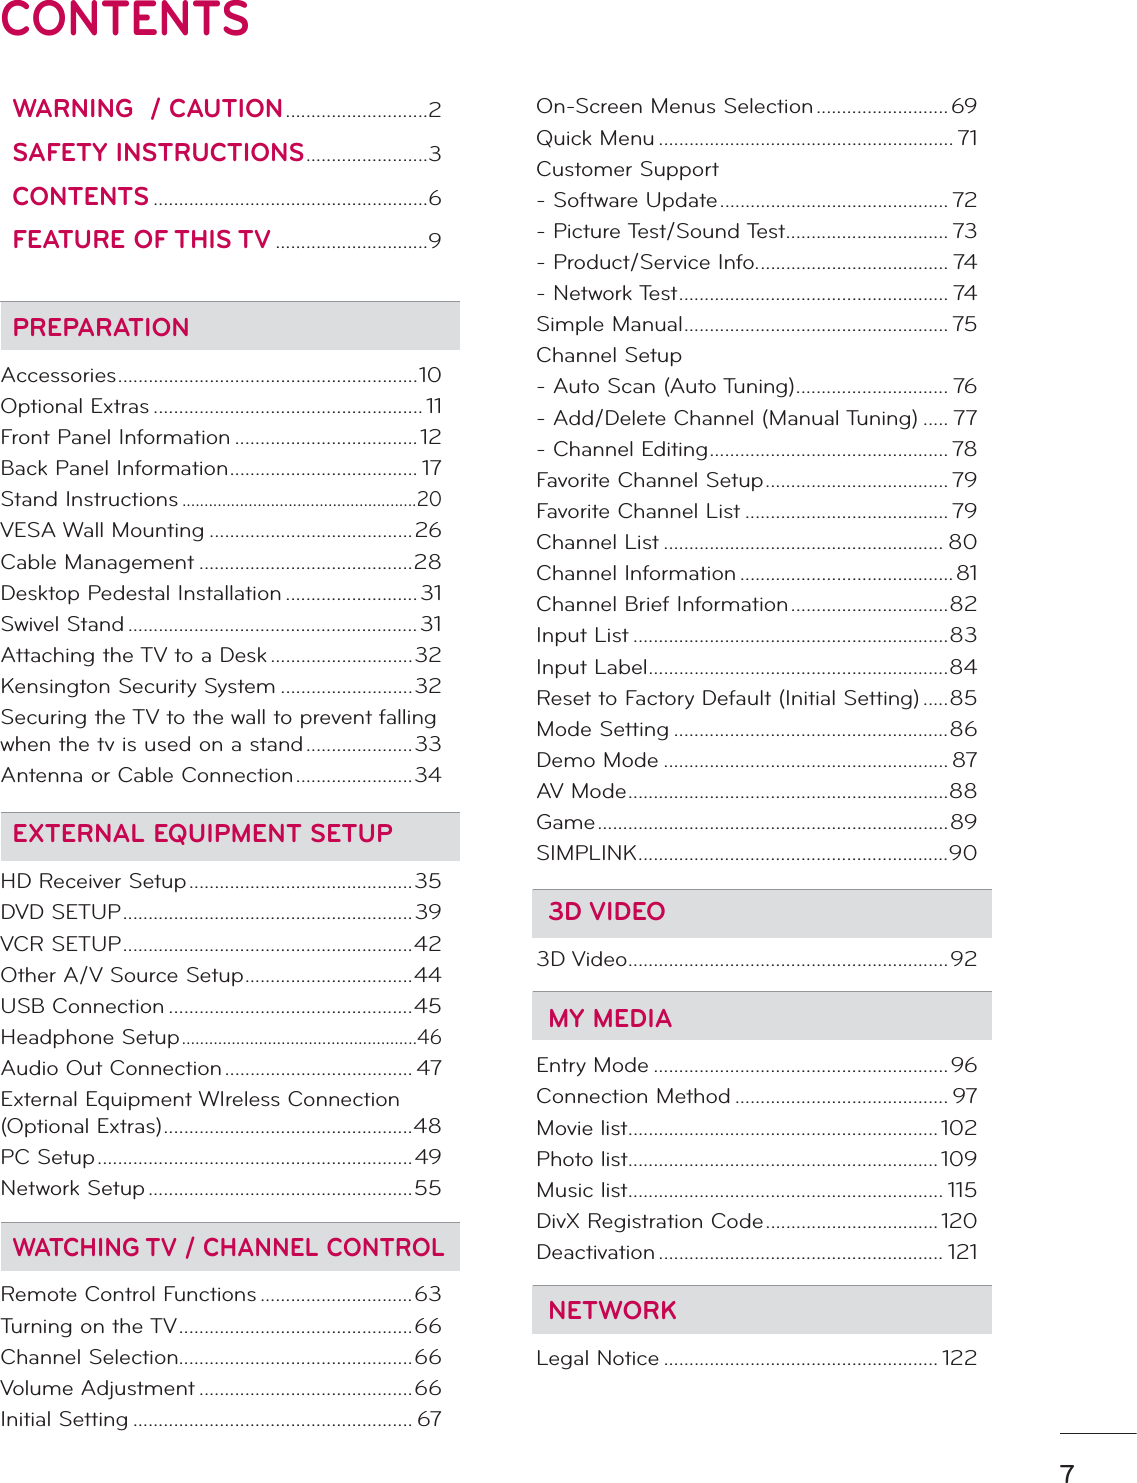
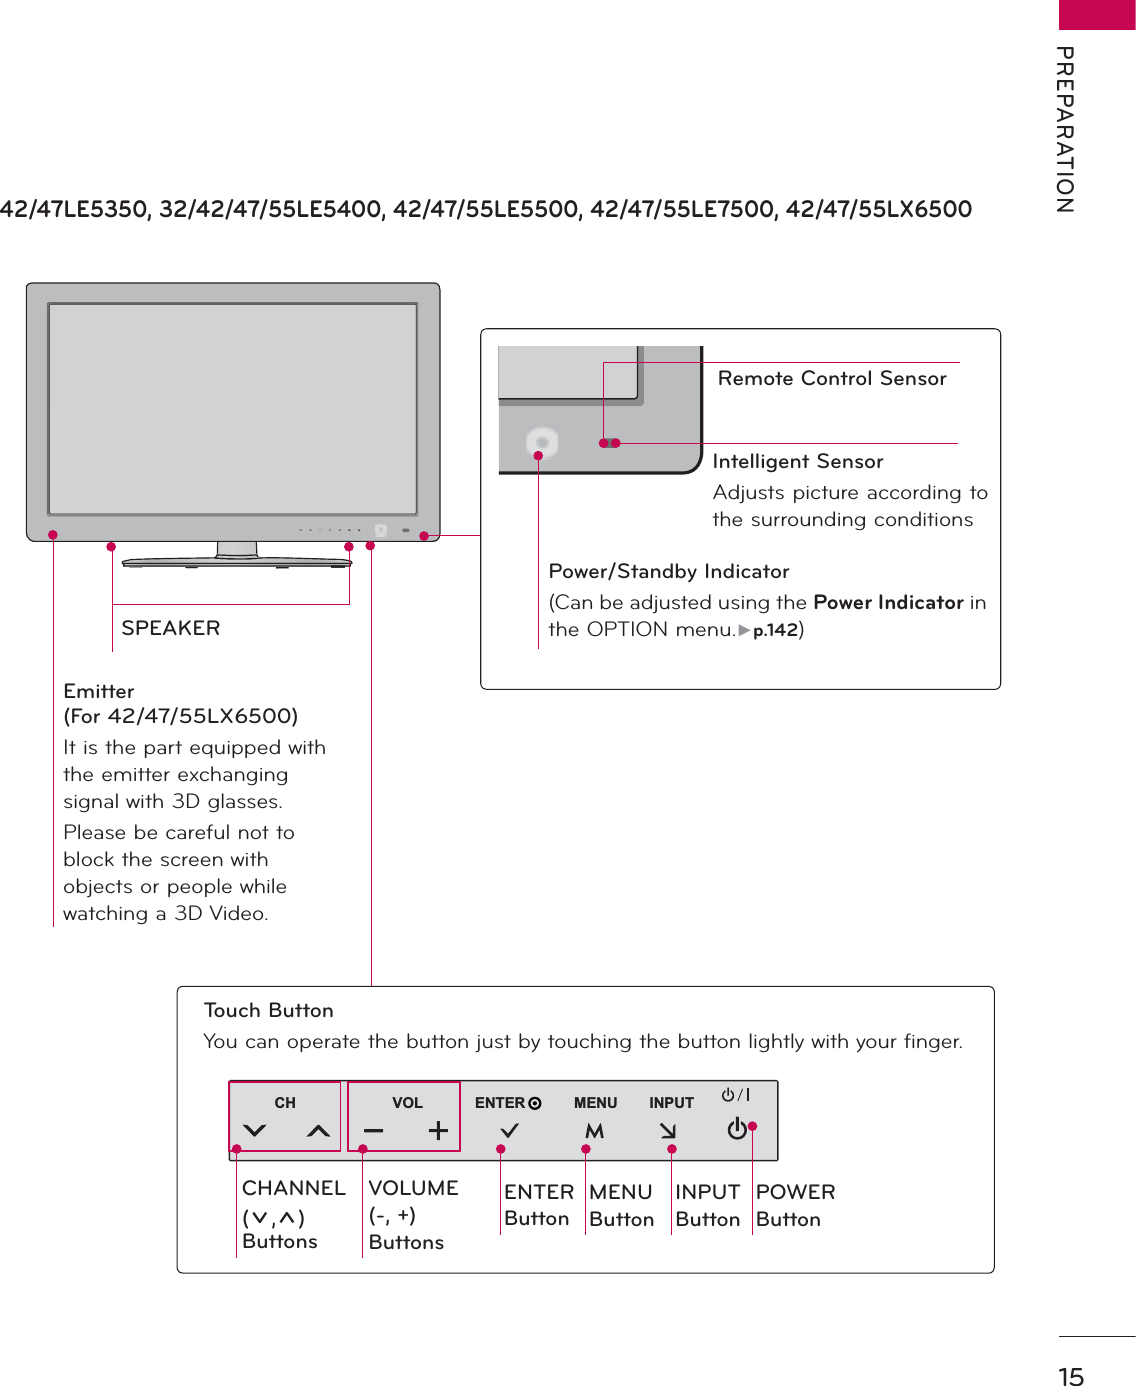
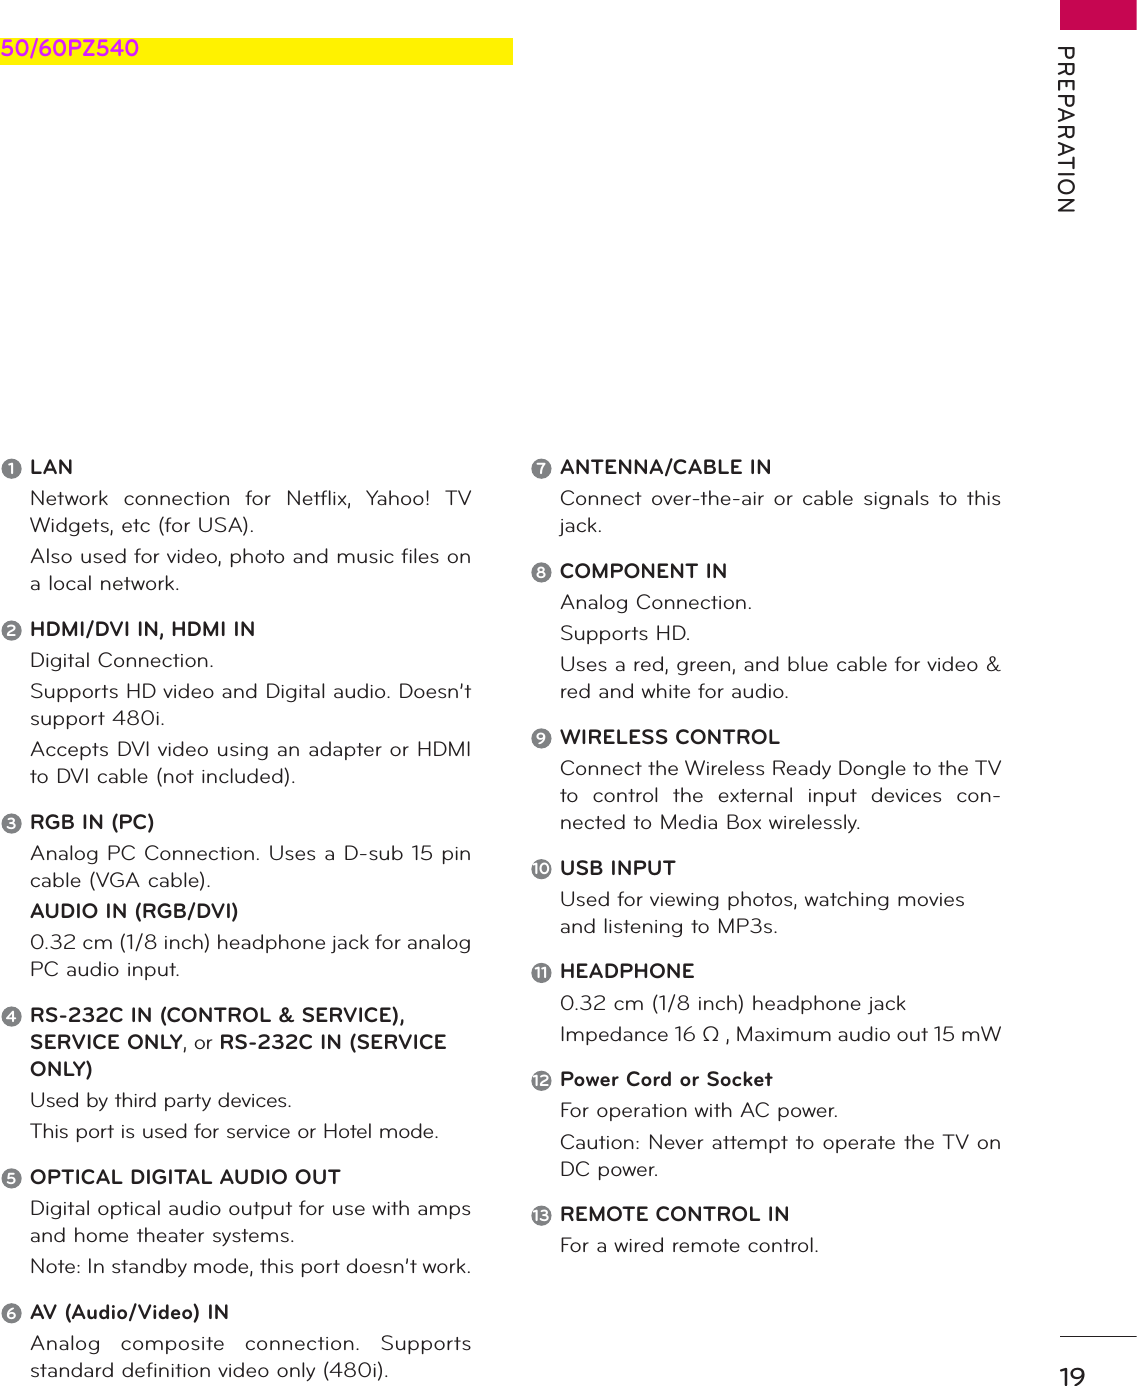
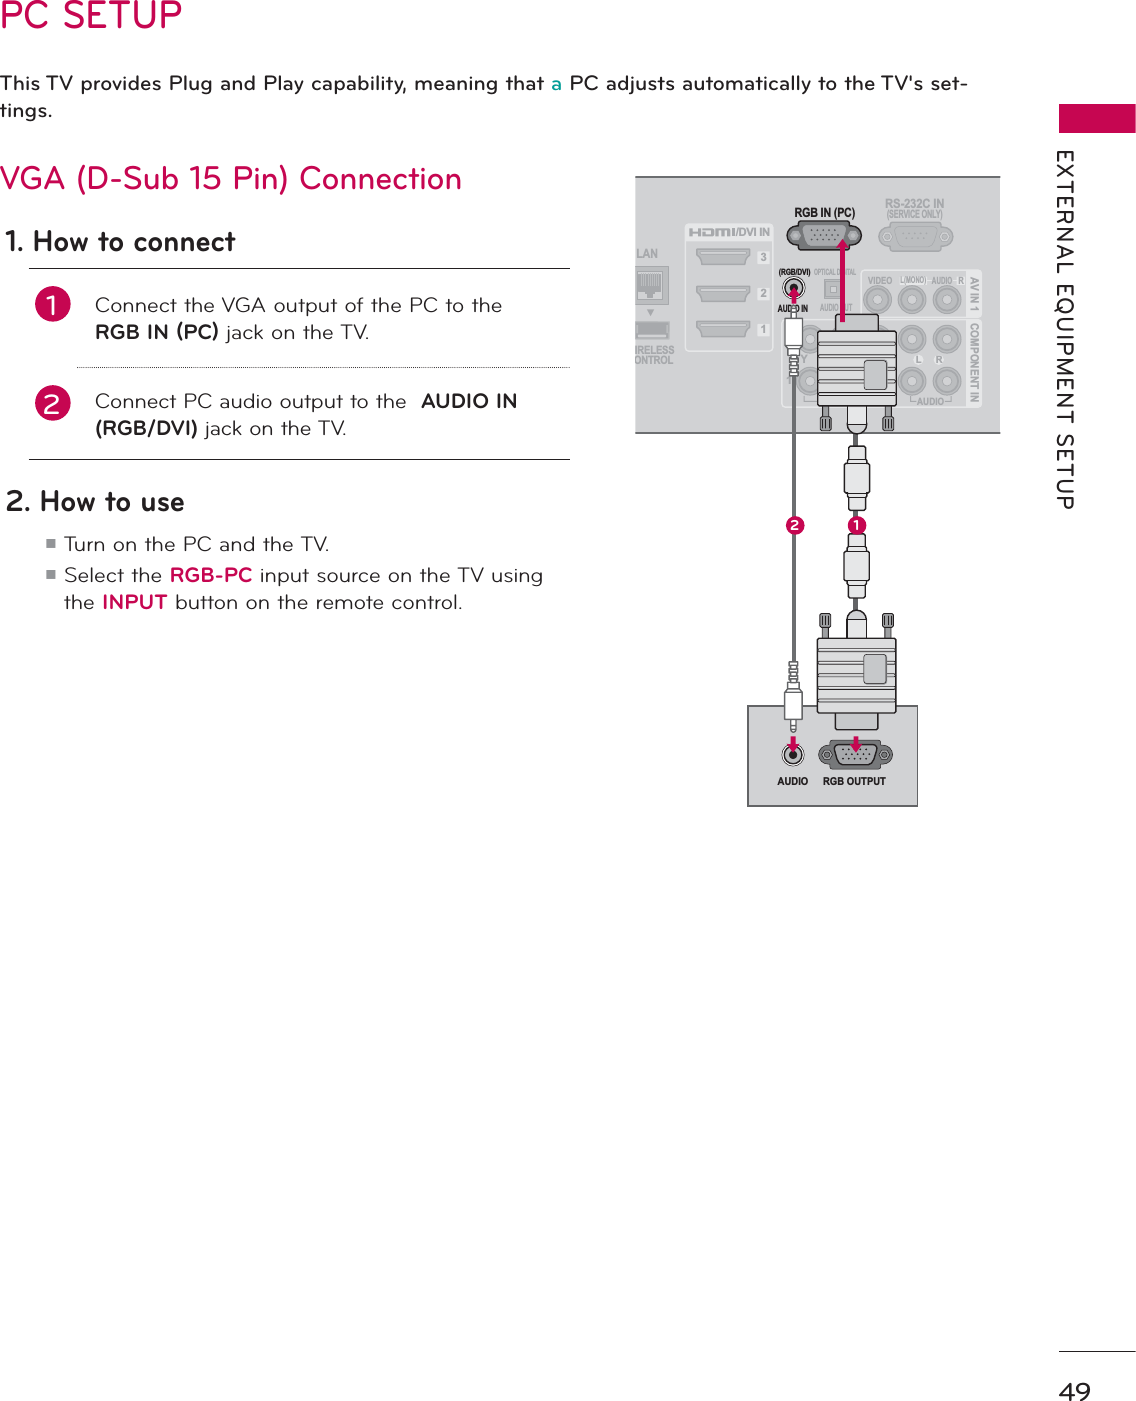
![EXTERNAL EQUIPMENT SETUPEXTERNAL EQUIPMENT SETUP54If the picture is not clear after auto adjustment or if text is shaking, adjust the picture phase manually.This feature operates only in RGB-PC mode.Adjustment for screen Position, Size, and Phase1MENUSelect PICTURE.2ENTERSelect Screen (RGB-PC).3ENTERSelect Position,Size, or Phase.4ENTERMake appropriate adjustments.5ENTERᯫPosition: This function is to adjust picture to left/right and up/down as you prefer. ᯫSize: This function is to minimize any vertical bars or stripes visible on the screen background. And the horizon-tal screen size will also change.ᯫPhase: This function allows you to remove any horizontal noise and clear or sharpen the image of char-acters.$XWR&RQILJ5HVROXWLRQ3RVLWLRQ6L]HPhaseReset6&5((1ᯒ0RYHᰙ3UHY3,&785( ᯒ0RYHᯙ(QWHUᯐᯙ ؒ&RORU ؒ7LQW ؒ&RORU7HPS ؒ$GYDQFHG&RQWURO ؒ3LFWXUH5HVHWؒ7UX0RWLRQؒ6FUHHQ5*%3&ؒ/('/RFDO'LPPLQJ2QR*W&ۻ܁۽ۿ](https://usermanual.wiki/LG-Electronics-USA/60PZ750UA.User-Manual-part-1-of-2/User-Guide-1374326-Page-54.png)