LG Electronics USA DT-CG Personal Computer User Manual DT final EN 2
LG Electronics USA Personal Computer DT final EN 2
UserManual.wiki
>
LG Electronics USA
>
DT-CG User Manual
>
Users Manual Part 2
Contents
1.
Users Manual Part 1
2.
Users Manual Part 2
Users Manual Part 2
Navigation menu
Upload a User Manual
Namespaces
Wiki Guide
HTML
PDF
Info
Views
User Manual
Discussion / Help
Navigation
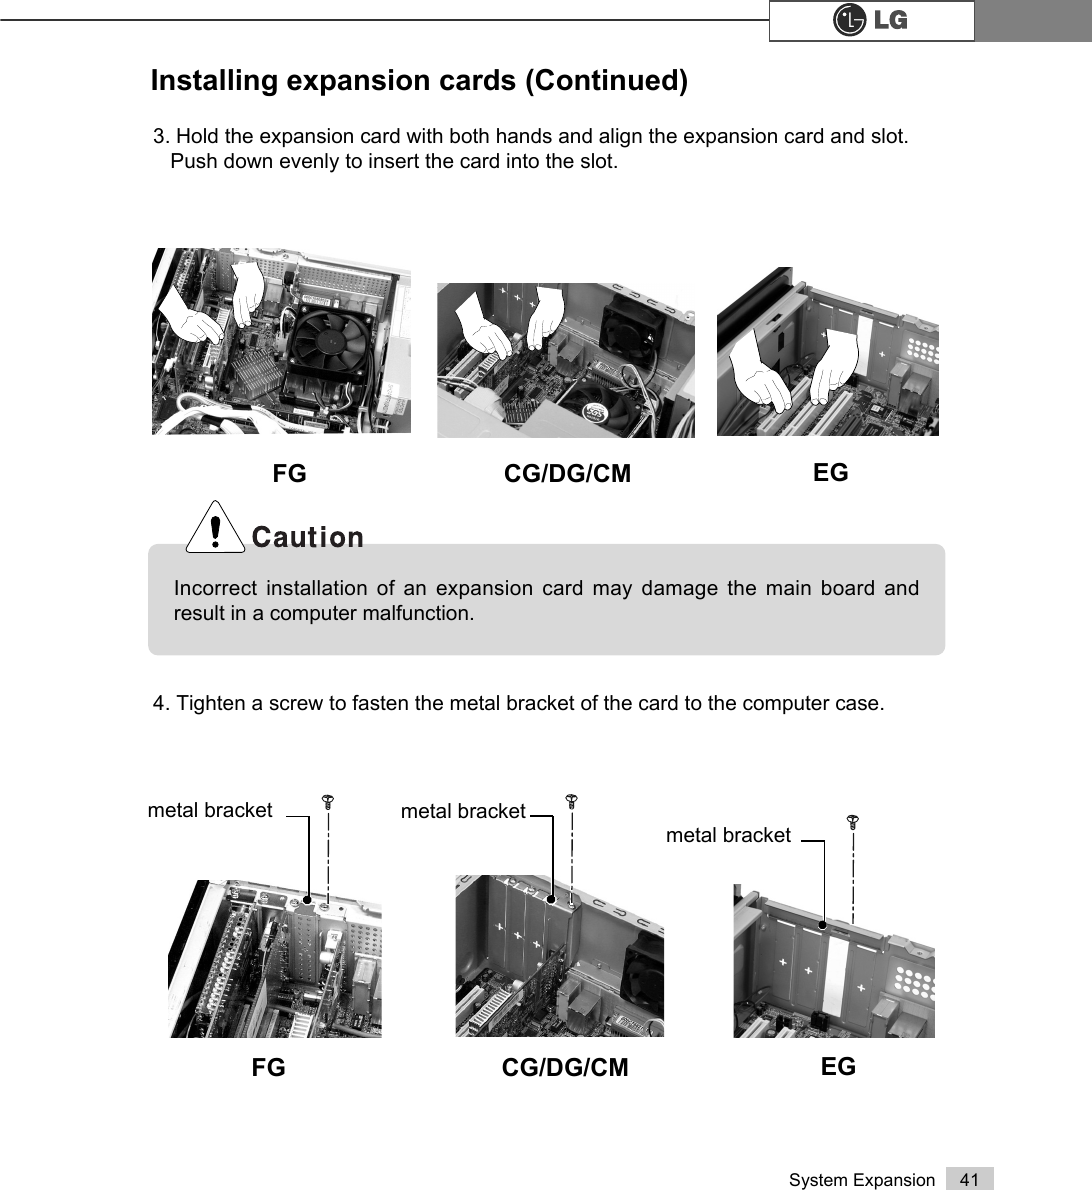
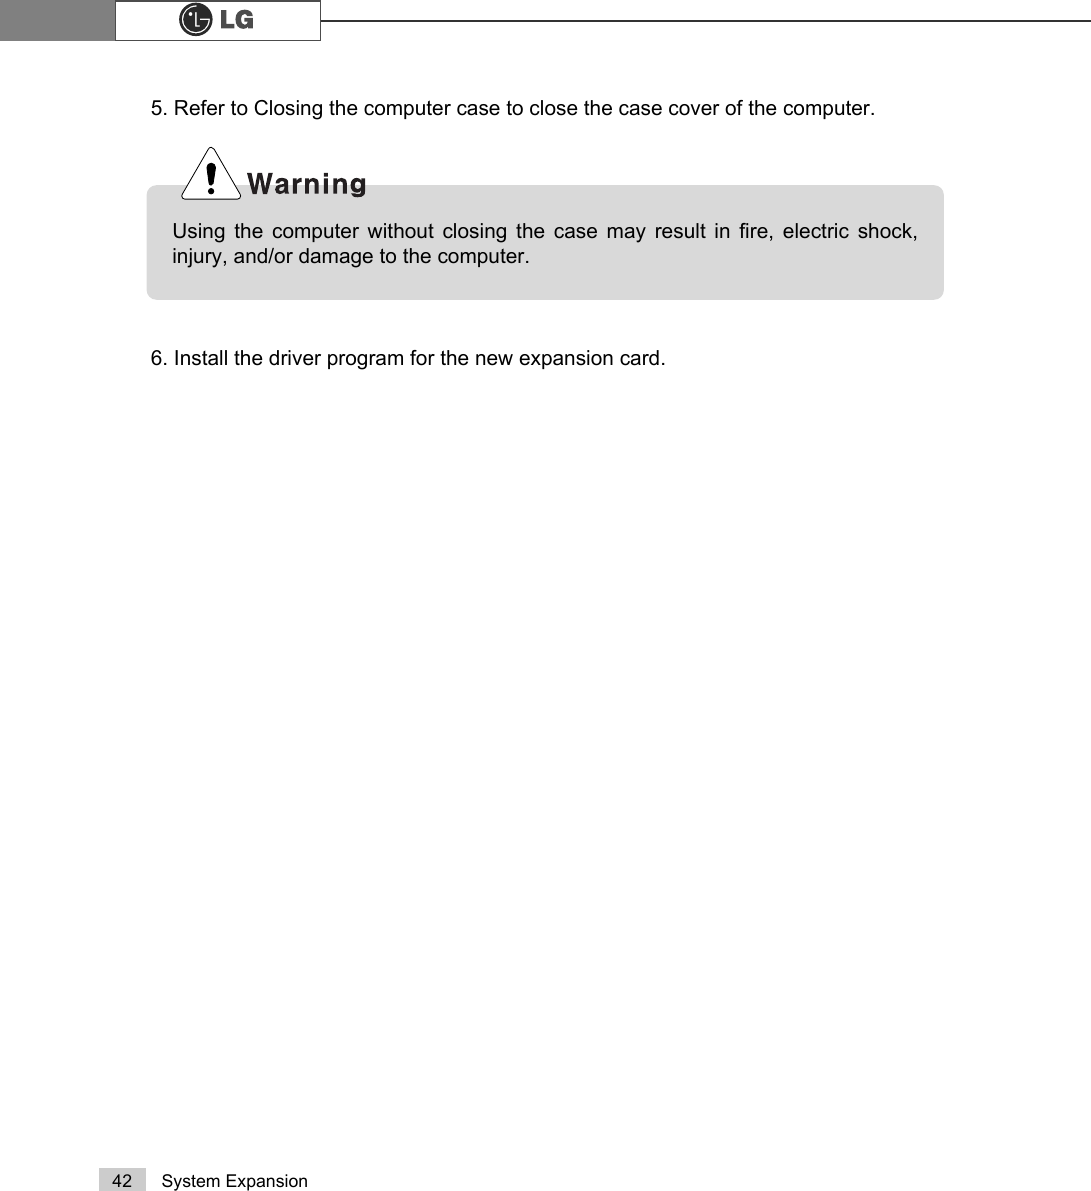
![31System ExpansionChecking the size of the installed memoryThe computer automatically recognizes the newly installed memory; therefore, you donot need to change the system setup. Follow the instruction below to check the sizeof the installed memory.1. Connect the power cord and other devices, and turn on the computer and monitor.2. Press Delete when the following logo screen appears. In CMOS Setup Utility, selectAdvanced BIOS Features. Change Full Screen Logo Show Selectable from Enabled toDisabled. Press F10, and Enter to save the new setting.3. The computer restarts. Press Esc at the logo screen shown above. If the following screen appears, press Pause to stop and check the size of memory next toMemory Testing.4. Press Esc to continue the startup.Press DEL to enter SETUP$ZDUG0RGXODU%,26Y;;;;;$Q(QHUJ\6WDU$OO\&RS\ULJKW&$ZDUG6RIWZDUH,QF%XLOG,'/*;;;;;;;;;;;;;;0DLQ3URFHVVRU,QWHO53HQWLXP5;3URFHVVRU;;;0+]0HPRU\7HVW;;;;;;2.3UHVV'(/WRHQWHU6(783;;;;;;;;;;;;;;;;;;;;;;;;;0HPRU\7HVWLQJ;;;;;;2.To stop the logo screen for a moment,press Delete key ⎀AdvancedBIOS Features ⎀Full ScreenLogo Show Selectable, and thenselect DisableNote:](https://usermanual.wiki/LG-Electronics-USA/DT-CG.Users-Manual-Part-2/User-Guide-478433-Page-9.png)