LG Electronics USA DT-CK PERSONAL COMPUTER User Manual CKDK
LG Electronics USA PERSONAL COMPUTER CKDK
UserManual.wiki
>
LG Electronics USA
>
DT-CK User Manual
>
USER MANUAL 1 OF 4
Contents
1.
USER MANUAL 1 OF 4
2.
USER MANUAL 2 OF 4
3.
USER MANUAL 3 OF 4
4.
USERS MANUAL 4 OF 4
USER MANUAL 1 OF 4
Navigation menu
Upload a User Manual
Namespaces
Wiki Guide
HTML
PDF
Info
Views
User Manual
Discussion / Help
Navigation
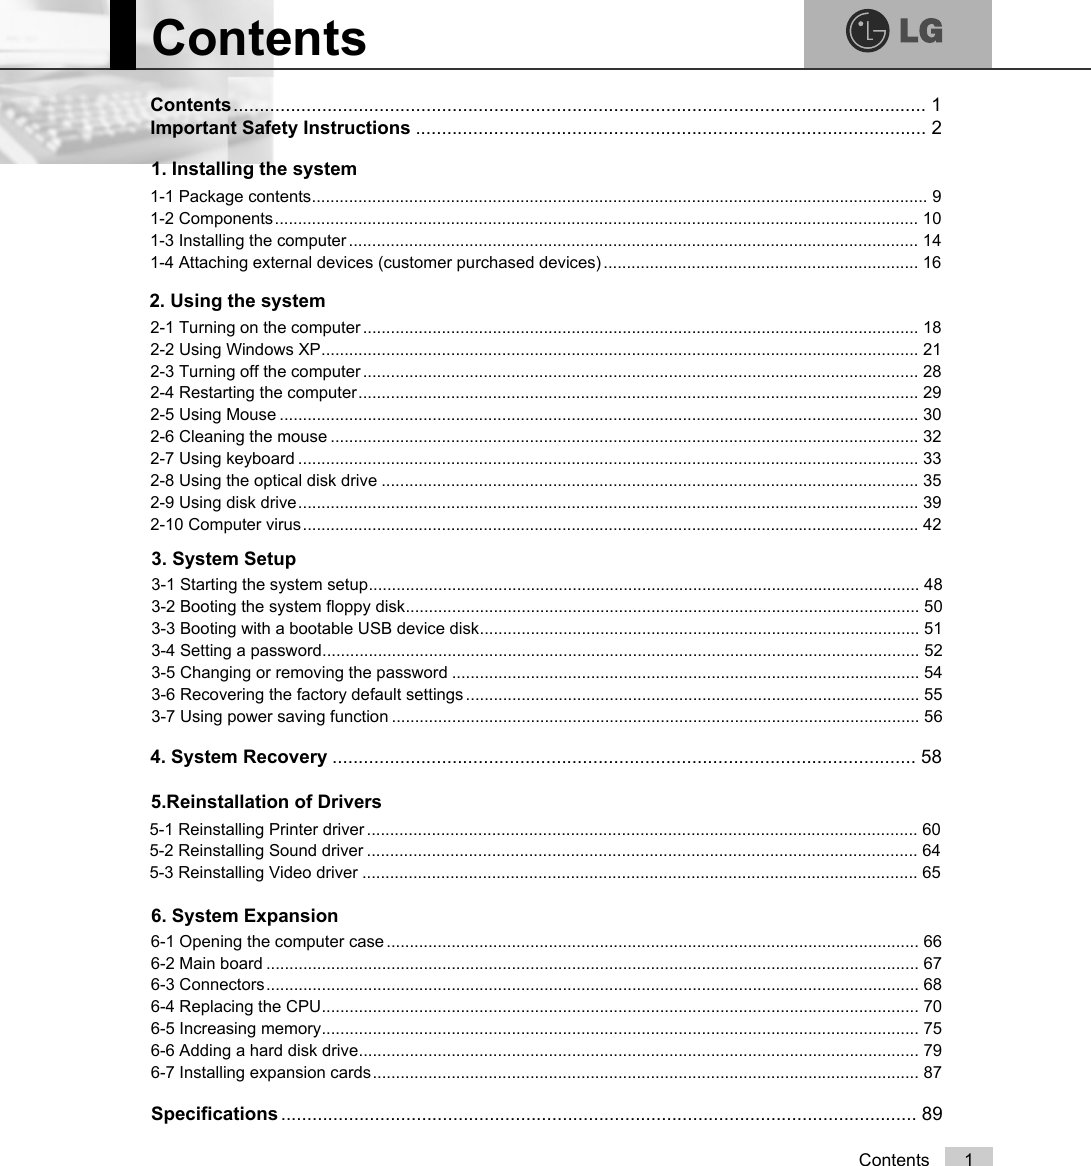

![8 Helf and support1. Click [Help and Support] to learn how to solve problems you may encounterwhile using the computer. Click [Start] - [Help and Support].Help and SupportThen, the following screen will appear.Suggested items, textsearch result, MicrosoftKnowledge Base andother contents areinvestigated. MicrosoftKnowledge Base issupported only when theInternet is connected.By selecting properitems, the user cancheck functions ofWindows XP and trou-bleshooting.Through the Internetconnection, the usercan ask others for ahelp and receive thetelephone number ofthe technical supportcenter.The user can configurethe optimal environmentfor computers.](https://usermanual.wiki/LG-Electronics-USA/DT-CK.USER-MANUAL-1-OF-4/User-Guide-570601-Page-10.png)

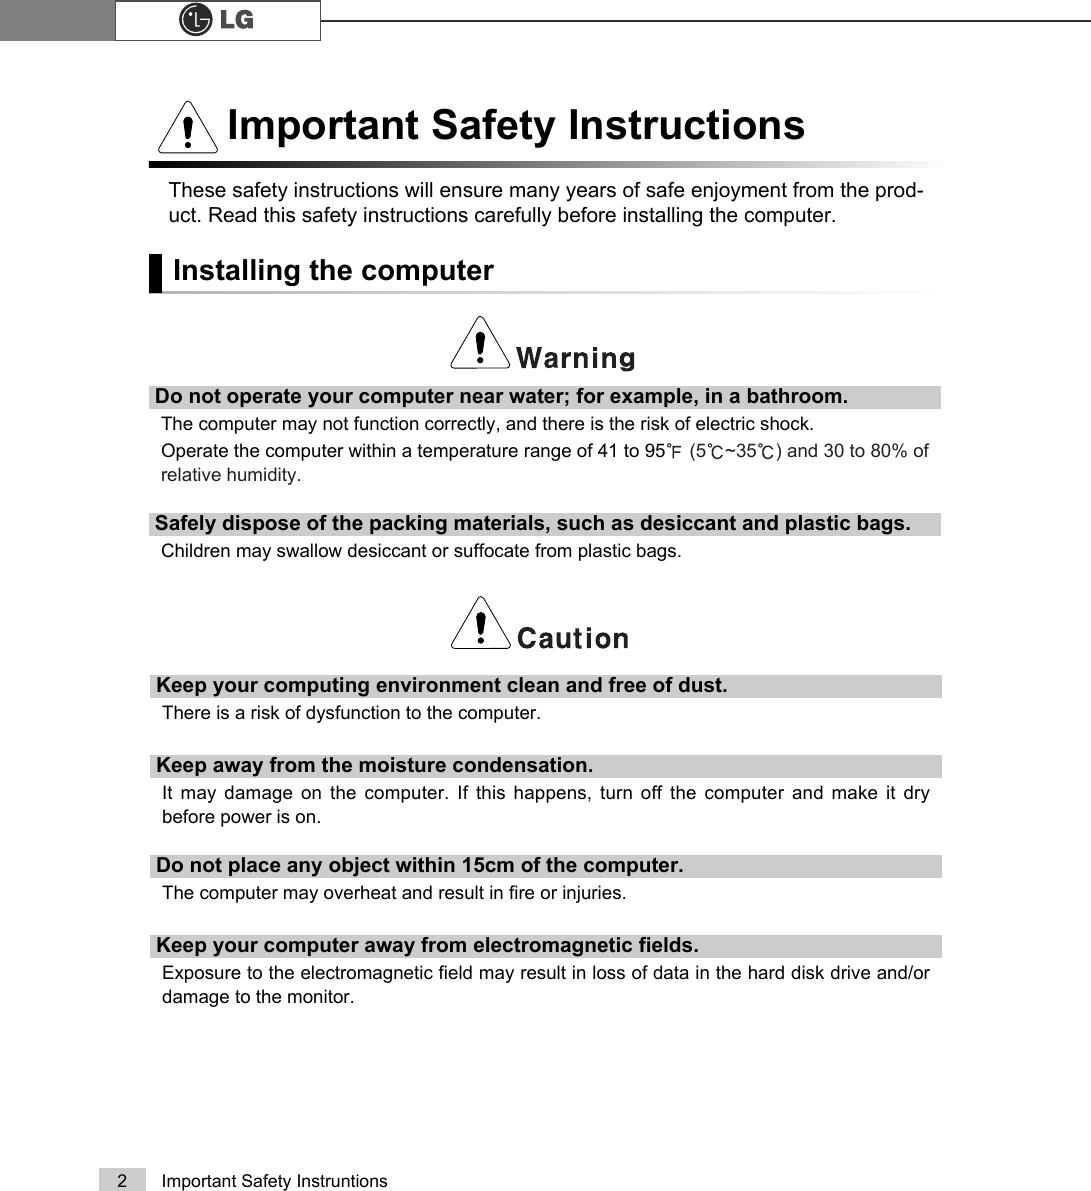
![17Installing the systemConnecting a monitor(customer purchased device)The monitor cable and power cord are included with the monitor. For using the monitor, refer to the user manual that comes with the monitor.Connecting a printer(customer purchased device)The printer cable and power cord are included with the printer. For using the printer, refer to the user manual that comes with the printer.Connecting the Speakers (To BE Separately Purchased)Your computer does not have built-in speakers. You must attach an external speaker to output sound.℘Connect the monitor signal cable to the Video portto transmit computer signals to the monitor.ℙConnect the monitor power cable both to the moni-tor and the power outlet to supply power to themonitor. When turning on/off the computer, turnon/off the monitor. When using the same powersupply unit for the computer and the monitor,check the voltage of the monitor before turning on.ℚConnect the printer cable to the parallel connector on the computer.ℛConnect the printer cable to the parallel connector on the printer.ℜ, ℝConnect the power cord to the printer and plug it into an elec-trical outlet.℞Connect a speaker cable to the speaker connector on the real of the computer.ãIn the case where sound is to low or mute, adjust thevolume by clicking on the [Volume] icon on the rightend of the Windows task bar.NoteWhen using abuilt-in video When the videocard is installed](https://usermanual.wiki/LG-Electronics-USA/DT-CK.USER-MANUAL-1-OF-4/User-Guide-570601-Page-19.png)
![2.Using the System18 Using the systemCheck if the floppy disk drive on the front part of the computer is empty and the powercord and the peripheral devices are connected to the computer on the rear panel.After installing the system, register user information. Turn on the power of the mainbody, and register user information by following the Windows screen instructions.2-1.Turning on the computerⓞPressing the power switch starts the self-diagnostic procedures; then Windows(R) XPstartup screen is displayed .In a moment, a dialogue box, saying "Welcome toMicrosoft Windows" appears on the screen. Then Click [Next].Registration processⓟAfter "Help protect your PC" message appears on the screen, select "Help protectmy PC by turning on Automatic Updates now" and then press [Next].](https://usermanual.wiki/LG-Electronics-USA/DT-CK.USER-MANUAL-1-OF-4/User-Guide-570601-Page-20.png)