LG Electronics USA H525N Cellular/PCS GSM/EDGE and Cellular WCDMA Phone with WLAN, Bluetooth and RFID User Manual 1
LG Electronics MobileComm USA, Inc. Cellular/PCS GSM/EDGE and Cellular WCDMA Phone with WLAN, Bluetooth and RFID Users Manual 1
Contents
- 1. Users Manual 1
- 2. Users Manual 2
Users Manual 1
User Guide
• Somecontentandillustrationsmaydifferfromyourdevicedependingonthe
region,serviceprovider,softwareversion,orOSversion,andaresubjectto
changewithoutpriornotice.
• AlwaysusegenuineLGaccessories.Thesupplieditemsaredesignedonlyforthis
deviceandmaynotbecompatiblewithotherdevices.
• Thisdeviceisnotsuitableforpeoplewhohaveavisualimpairmentduetothe
touchscreenkeyboard.
• Copyright©2015LGElectronics,Inc.Allrightsreserved.LGandtheLGlogoare
registeredtrademarksofLGGroupanditsrelatedentities.Allothertrademarks
arethepropertyoftheirrespectiveowners.
• Google™,GoogleMaps™,Gmail™,YouTube™,Hangouts™andPlayStore™
aretrademarksofGoogle,Inc.
ENGLISH

2Table of contents
Guidelines for safe and efficient use .......4
Important notice .....................................13
Getting to know your phone ...................16
Phone layout .......................................... 16
Installing the SIM or USIM card and
battery ...................................................18
Charging the battery .............................. 20
Inserting a memory card ........................ 21
Removing the memory card ................... 22
Locking and unlocking the device ..........22
Your Home screen ................................... 24
Touch screen tips ..................................24
Home screen .........................................25
Customizing the Home screen ...............26
Returning to recently-used
applications ...........................................27
Notifications panel .................................27
On-screen keyboard ..............................30
Special Features .....................................31
Gesture shot ..........................................31
Glance View ........................................... 32
KnockON ...............................................32
Knock Code ...........................................32
QuickMemo+ ......................................... 33
Google account setup ............................. 35
Creating your Google account ................35
Signing into your Google account ........... 35
Connecting to Networks and Devices .... 37
Wi-Fi .....................................................37
Bluetooth ...............................................38
Wi-Fi Direct ...........................................39
Transferring data between a PC and
the device .............................................. 40
Calls ........................................................41
Making a call .........................................41
Calling your contacts .............................41
Answering and rejecting a call ...............41
Making a second call .............................42
Viewing your call logs ............................42
Call settings ........................................... 42
Contacts ..................................................43
Searching for a contact .......................... 43
Adding a new contact ............................43
Favourites contacts ................................43
Creating a group .................................... 44
Messaging ............................................... 45
Sending a message ...............................45
Conversation view .................................46
Changing your messaging settings ........46
E-mail ......................................................47
Managing email accounts ......................47
Working with account folders .................47
Table of contents

3
Table of contents
Composing and sending email ...............48
Camera and Video ...................................49
Camera options on the viewfinder .......... 49
Using the advanced settings ..................50
Taking a photo .......................................51
Once you have taken a photo ................. 51
Burst shot .............................................. 51
Recording a video ..................................52
After recording a video...........................52
Gallery ................................................... 53
Multimedia ..............................................56
Music ....................................................56
Utilities ....................................................58
Clock .....................................................58
Calculator ..............................................59
Calendar ................................................ 60
Voice Recorder ......................................60
Voice Search..........................................60
Downloads ............................................61
FM Radio ...............................................61
Web Browser ...........................................62
Internet .................................................. 62
Chrome .................................................63
Settings ...................................................64
Networks ...............................................64
Sound .................................................... 66
Display ..................................................68
General .................................................. 70
PC software (LG PC Suite) ......................76
For Windows OS ....................................76
For Mac OS ............................................77
Phone software update ..........................79
Phone software update ..........................79
About this user guide .............................81
About this user guide ............................. 81
Trademarks ...........................................81
Accessories ............................................. 82
Troubleshooting ......................................83
FAQ ..........................................................86

4Guidelines for safe and efficient use
Pleasereadthesesimpleguidelines.Notfollowingtheseguidelinesmaybedangerous
orillegal.
Shouldafaultoccur,asoftwaretoolisbuiltintoyourdevicethatwillgatherafaultlog.
Thistoolgathersonlydataspecifictothefault,suchassignalstrength,cellIDposition
insuddencalldropandapplicationsloaded.Thelogisusedonlytohelpdeterminethe
causeofthefault.Theselogsareencryptedandcanonlybeaccessedbyanauthorized
LGRepaircentreshouldyouneedtoreturnyourdeviceforrepair.
Exposure to radio frequency energy
RadiowaveexposureandSpecificAbsorptionRate(SAR)information.
ThismobilephonemodelLG-H525nhasbeendesignedtocomplywithapplicable
safetyrequirementsforexposuretoradiowaves.Theserequirementsarebasedon
scientificguidelinesthatincludesafetymarginsdesignedtoassurethesafetyofall
persons,regardlessofageandhealth.
• Theradiowaveexposureguidelinesemployaunitofmeasurementknownasthe
SpecificAbsorptionRate,orSAR.TestsforSARareconductedusingstandardised
methodswiththephonetransmittingatitshighestcertifiedpowerlevelinallused
frequencybands.
• WhiletheremaybedifferencesbetweentheSARlevelsofvariousLGphone
models,theyarealldesignedtomeettherelevantguidelinesforexposuretoradio
waves.
Guidelines for safe and efficient use

5
Guidelines for safe and efficient use
Product care and maintenance
WARNING
Only use batteries, chargers and accessories approved for use with this
particular phone model. The use of any other types may invalidate any
approval or warranty applying to the phone and may be dangerous.
• Donotdisassemblethisunit.Takeittoaqualifiedservicetechnicianwhenrepair
workisrequired.
• Repairsunderwarranty,atLG'sdiscretion,mayincludereplacementpartsor
boardsthatareeitherneworreconditioned,providedthattheyhavefunctionality
equaltothatofthepartsbeingreplaced.
• KeepawayfromelectricalappliancessuchasTVs,radiosandpersonalcomputers.
• Theunitshouldbekeptawayfromheatsourcessuchasradiatorsorcookers.
• Donotdrop.
• Donotsubjectthisunittomechanicalvibrationorshock.
• Switchoffthephoneinanyareawhereyouarerequiredtobyspecialregulations.
Forexample,donotuseyourphoneinhospitalsasitmayaffectsensitivemedical
equipment.
• Donothandlethephonewithwethandswhileitisbeingcharged.Itmaycausean
electricshockandcanseriouslydamageyourphone.

6Guidelines for safe and efficient use
• Donotchargeahandsetnearflammablematerialasthehandsetcanbecomehot
andcreateafirehazard.
• Useadryclothtocleantheexterioroftheunit(donotusesolventssuchas
benzene,thinneroralcohol).
• Donotchargethephonewhenitisonsoftfurnishings.
• Thephoneshouldbechargedinawellventilatedarea.
• Donotsubjectthisunittoexcessivesmokeordust.
• Donotkeepthephonenexttocreditcardsortransporttickets;itcanaffectthe
informationonthemagneticstrips.
• Donottapthescreenwithasharpobjectasitmaydamagethephone.
• Donotexposethephonetoliquidormoisture.
• Useaccessorieslikeearphonescautiously.Donottouchtheantennaunnecessarily.
• Donotuse,touchorattempttoremoveorfixbroken,chippedorcrackedglass.
Damagetotheglassdisplayduetoabuseormisuseisnotcoveredunderthe
warranty.
• Yourphoneisanelectronicdevicethatgeneratesheatduringnormaloperation.
Extremelyprolonged,directskincontactintheabsenceofadequateventilation
mayresultindiscomfortorminorburns.Therefore,usecarewhenhandlingyour
phoneduringorimmediatelyafteroperation.
• Ifyourphonegetswet,immediatelyunplugittodryoffcompletely.Donotattempt
toacceleratethedryingprocesswithanexternalheatingsource,suchasanoven,
microwaveorhairdryer.
• Theliquidinyourwetphone,changesthecoloroftheproductlabelinsideyour
phone.Damagetoyourdeviceasaresultofexposuretoliquidisnotcovered
underyourwarranty.

7
Guidelines for safe and efficient use
Efficient phone operation
Electronics devices
Allmobilephonesmayreceiveinterference,whichcouldaffectperformance.
• Donotuseyourmobilephonenearmedicalequipmentwithoutrequesting
permission.Avoidplacingthephoneoverpacemakers,forexample,inyourbreast
pocket.
• Somehearingaidsmightbedisturbedbymobilephones.
• MinorinterferencemayaffectTVs,radios,PCsetc.
• Useyourphoneintemperaturesbetween0ºCand40ºC,ifpossible.Exposing
yourphonetoextremelyloworhightemperaturesmayresultindamage,
malfunction,orevenexplosion.
Road safety
Checkthelawsandregulationsontheuseofmobilephonesintheareawhenyou
drive.
• Donotuseahand-heldphonewhiledriving.
• Givefullattentiontodriving.
• Pullofftheroadandparkbeforemakingoransweringacallifdrivingconditions
sorequire.
• RFenergymayaffectsomeelectronicsystemsinyourvehiclesuchascarstereos
andsafetyequipment.
• Whenyourvehicleisequippedwithanairbag,donotobstructwithinstalledor
portablewirelessequipment.Itcancausetheairbagtofailorcauseseriousinjury
duetoimproperperformance.
• Ifyouarelisteningtomusicwhilstoutandabout,pleaseensurethatthevolume
isatareasonablelevelsothatyouareawareofyoursurroundings.Thisisof
particularimportancewhennearroads.

8Guidelines for safe and efficient use
Avoid damage to your hearing
To prevent possible hearing damage, do not listen at high volume
levels for long periods.
Damagetoyourhearingcanoccurifyouareexposedtoloudsoundforlongperiodsof
time.Wethereforerecommendthatyoudonotturnonoroffthehandsetclosetoyour
ear.Wealsorecommendthatmusicandcallvolumesaresettoareasonablelevel.
• Whenusingheadphones,turnthevolumedownifyoucannothearthepeople
speakingnearyou,orifthepersonsittingnexttoyoucanhearwhatyouare
listeningto.
NOTE: Excessive sound pressure from earphones and headphones can
cause hearing loss.
Glass Parts
Somepartsofyourmobiledevicearemadeofglass.Thisglasscouldbreakifyour
mobiledeviceisdroppedonahardsurfaceorreceivesasubstantialimpact.Iftheglass
breaks,donottouchorattempttoremoveit.Stopusingyourmobiledeviceuntilthe
glassisreplacedbyanauthorisedserviceprovider.
Blasting area
Donotusethephonewhereblastingisinprogress.Observerestrictionsandfollowany
regulationsorrules.

9
Guidelines for safe and efficient use
Potentially explosive atmospheres
• Donotuseyourphoneatarefuelingpoint.
• Donotusenearfuelorchemicals.
• Donottransportorstoreflammablegas,liquidorexplosivesinthesame
compartmentofyourvehicleasyourmobilephoneoraccessories.
In aircraft
Wirelessdevicescancauseinterferenceinaircraft.
• Turnyourmobilephoneoffbeforeboardinganyaircraft.
• Donotuseitonthegroundwithoutpermissionfromthecrew.
Children
Keepthephoneinasafeplaceoutofthereachofsmallchildren.Itincludessmallparts
whichmaycauseachokinghazardifdetached.
Emergency calls
Emergencycallsmaynotbeavailableonallmobilenetworks.Thereforeyoushould
neverdependsolelyonyourphoneforemergencycalls.Checkwithyourlocalservice
provider.

10 Guidelines for safe and efficient use
Battery information and care
• Youdonotneedtocompletelydischargethebatterybeforerecharging.Unlike
otherbatterysystems,thereisnomemoryeffectthatcouldcompromisethe
battery'sperformance.
• UseonlyLGbatteriesandchargers.LGchargersaredesignedtomaximisethe
batterylife.
• Donotdisassembleorshort-circuitthebattery.
• Keepthemetalcontactsofthebatteryclean.
• Replacethebatterywhenitnolongerprovidesacceptableperformance.The
batterypackmayberechargedhundredsoftimesbeforeitneedsreplacing.
• Rechargethebatteryifithasnotbeenusedforalongtimetomaximiseusability.
• Donotexposethebatterychargertodirectsunlightoruseitinhighhumidity,such
asinthebathroom.
• Donotleavethebatteryinhotorcoldplaces,asthismaydeterioratebattery
performance.
• Thereisriskofexplosionifthebatteryisreplacedwithanincorrecttype.
• Disposeofusedbatteriesaccordingtothemanufacturer'sinstructions.Please
recyclewhenpossible.Donotdisposeashouseholdwaste.
• Ifyouneedtoreplacethebattery,takeittothenearestauthorisedLGElectronics
servicepointordealerforassistance.
• Alwaysunplugthechargerfromthewallsocketafterthephoneisfullychargedto
saveunnecessarypowerconsumptionofthecharger.
• Actualbatterylifewilldependonnetworkconfiguration,productsettings,usage
patterns,batteryandenvironmentalconditions.
• Makesurethatnosharp-edgeditemssuchasanimal'steethornails,comeinto
contactwiththebattery.Thiscouldcauseafire.
11
Guidelines for safe and efficient use
Open Source Software Notice Information
To obtain the source code under GPL, LGPL, MPL, and other
open source licenses, that is contained in this product, please
visit http://opensource.lge.com.
In addition to the source code, all referred license terms, warranty
disclaimers and copyright notices are available for download.
LG Electronics will also provide open source code to you on CD-ROM for a
charge covering the cost of performing such distribution (such as the cost of
media, shipping, and handling) upon email request to opensource@lge.com.
This offer is valid for three (3) years from the date on which you purchased the
product.
HOW TO UPDATE YOUR DEVICE
Access to latest firmware releases, new software functions and improvements.
• Select the software update in settings menu on your device.
• Update your device by connecting it to your PC. For more information
about using this function, please visit http://www.lg.com/common/index.jsp
select country and language.
DECLARATION OF CONFORMITY
Hereby, LG Electronics declares that this LG-H525n product is in
compliance with the essential requirements and other relevant provisions of
Directive 1999/5/EC. A copy of theDeclaration of Conformity can be found
at http://www.lg.com/global/declaration
Contact office for compliance of this product:
LG Electronics Inc.
EU Representative, Krijgsman 1,
1186 DM Amstelveen, The Netherlands
12 Guidelines for safe and efficient use
Disposal of your old appliance
1 Allelectricalandelectronicproductsshouldbedisposedofseparately
fromthemunicipalwastestreamviadesignatedcollectionfacilities
appointedbythegovernmentorthelocalauthorities.
2 Thecorrectdisposalofyouroldappliancewillhelppreventpotential
negativeconsequencesfortheenvironmentandhumanhealth.
3 Formoredetailedinformationaboutdisposalofyouroldappliance,
pleasecontactyourcityoffice,wastedisposalserviceortheshop
whereyoupurchasedtheproduct.
Disposal of waste batteries/accumulators
1 Thissymbolmaybecombinedwithchemicalsymbolsformercury(Hg),
cadmium(Cd)orlead(Pb)ifthebatterycontainsmorethan0.0005%
ofmercury,0.002%ofcadmiumor0.004%oflead.
2 Allbatteries/accumulatorsshouldbedisposedseparatelyfromthe
municipalwastestreamviadesignatedcollectionfacilitiesappointedby
thegovernmentorthelocalauthorities.
3 Thecorrectdisposalofyouroldbatteries/accumulatorswillhelpto
preventpotentialnegativeconsequencesfortheenvironment,animal
andhumanhealth.
4 Formoredetailedinformationaboutdisposalofyouroldbatteries/
accumulators,pleasecontactyourcityoffice,wastedisposalserviceor
theshopwhereyoupurchasedtheproduct.

13
Important notice
Please read this before you start using your phone!
Pleasechecktoseewhetheranyproblemsyouencounteredwithyourphoneare
describedinthissectionbeforetakingthephoneinforserviceorcallingaservice
representative.
1. Phone memory
Whenthereislessthan10MBofspaceavailableinyourphonememory,yourphone
cannotreceivenewmessages.Youmayneedtocheckyourphonememoryanddelete
somedata,suchasapplicationsormessages,tomakemorememoryavailable.
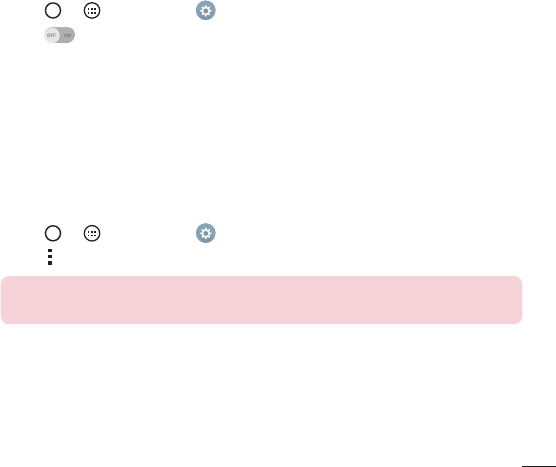
To uninstall applications:
1 Tap > >Appstab> >Generaltab>Apps.
2 Onceallapplicationsappear,scrolltoandselecttheapplicationyouwantto
uninstall.
3 Tap Uninstall.
2. Optimizing battery life
Extendyourbattery'spowerbyturningofffeaturesthatyoudonotneedtorun
constantlyinthebackground.Youcanmonitorhowapplicationsandsystemresources
consumebatterypower.
Extending your phone's battery life:
• Turnoffradiocommunicationswhenyouarenotusing.IfyouarenotusingWi-Fi,
BluetoothorGPS,turnthemoff.
• Reducescreenbrightnessandsetashorterscreentimeout.
• TurnoffautomaticsyncingforGmail,Calendar,Contactsandotherapplications.
Important notice
14 Important notice
• Someapplicationsyoudownloadmayconsumebatterypower.
• Whileusingdownloadedapplications,checkthebatterychargelevel.
NOTE: If you accidently press the Power/Lock Button while the device is
in your pocket, the screen will turn off automatically in order to save battery
power.
3. Before installing an open source application and OS
WARNING
If you install and use an OS other than the one provided by the manufacturer
it may cause your phone to malfunction. In addition, your phone will no longer
be covered by the warranty.
WARNING
To protect your phone and personal data, only download applications from
trusted sources, such as Play Store™. If there are improperly installed
applications on your phone, the phone may not work normally or a serious
error may occur. You must uninstall those applications and all associated data
and settings from the phone.
4. Using the Hard Reset (Factory Reset)
Ifyourphonedoesnotrestoretoitsoriginalcondition,useaHardReset(FactoryReset)
toinitializeit.
1 Turnthepoweroff.
2 PressandholdthePower/Lock Button + Volume Down Buttononthebackofthe
phone.
15
Important notice
3 ReleasethePower/Lock Buttononlywhenthebootlogoisdisplayed,then
immediatelypressandholdthePower/Lock Buttonagain.
4 ReleaseallButtonswhentheFactoryresetscreenisdisplayed.
5 PresstheVolume ButtonstoselectYes,andthenpressthePower/Lock Button to
performaHardReset.
WARNING
If you perform a Hard Reset, all user applications, user data and DRM licenses
will be deleted. Please remember to backup any important data before
performing a Hard Reset.
5. Opening and switching applications
MultitaskingiseasywithAndroid;youcankeepmorethanoneapplicationrunningat
thesametime.Thereisnoneedtoquitanapplicationbeforeopeninganother.Useand
switchbetweenseveralopenapplications.Androidmanageseachapplication,stopping
andstartingthemasneededtomakesurethatidleapplicationsdon'tconsume
resourcesunnecessarily.
1 Tap .Apppreviewsofrecentlyusedapplicationswillbedisplayed.
2 Taptheapplicationyouwanttoaccess.Thisdoesnotstopthepreviousappfrom
runninginthebackground.Makesuretotap tobackoutofanappafterusingit.
• Tocloseanappfromtherecentappslist,swipetheapppreviewtotheleftorright.
Toclearallapps,tapClear all.
16 Getting to know your phone
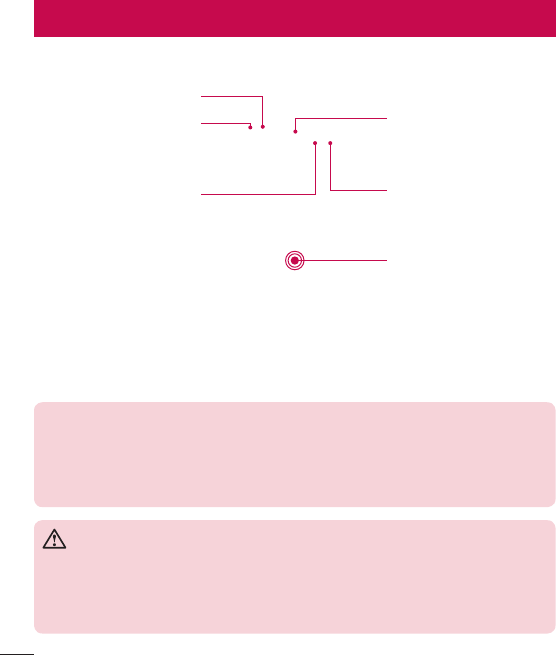
Phone layout
Touch Screen
Proximity Sensor
Earpiece
Headset Jack
Front Camera Lens
Microphone
NOTE: Proximity sensor
When receiving and making calls, the proximity sensor automatically turns
the backlight off and locks the touch screen by sensing when the phone is
near your ear. This extends battery life and prevents you from unintentionally
activating the touch screen during calls.
WARNING
Placing a heavy object on the phone or sitting on it can damage the display
and touch screen functions. Do not cover the proximity sensor with screen
protectors or any other type of protective film. This could cause the sensor to
malfunction.
Getting to know your phone
17
Getting to know your phone
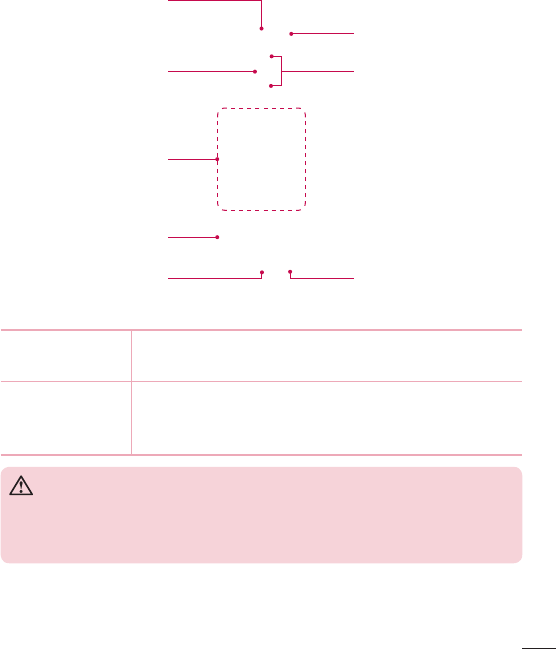
Microphone
Volume Buttons
NFC Touch Point
Charger/USB port
Power/Lock Button
Rear Camera Lens
Speaker
Flash
Power/Lock
Button
• Turnyourphoneon/offbypressingandholdingthisbutton
• Shortpresstolock/unlockthescreen
Volume Buttons (While screen is off)
• LongPressUptolaunchQuickMemo+
• LongPressDowntolaunchCamera
WARNING
• The NFC antenna for this model is on the back cover.
• Be careful not to damage the NFC touch point on the phone, which is part
of the NFC antenna.

18 Getting to know your phone
Installing the SIM or USIM card and battery
InserttheSIMorUSIMcardprovidedbythemobiletelephoneserviceprovider,andthe
includedbattery.
1 Toremovethebackcover,holdthephonefirmlyinonehand.Withyourotherhand,
liftoffthebackcoverwithyourthumbnailasshowninthefigurebelow.
2 SlidetheSIMcardintothelowerslotfortheSIMcardasshowninthefigure.Make
surethegoldcontactareaonthecardisfacingdownward.
19
Getting to know your phone
WARNING
Do not insert a memory card into the SIM card slot. If a memory card
happens to be lodged in the SIM card slot, take the device to a LG Service
Centre to remove the memory card.
NOTE: Only the microSIM cards work with the device.
3 Insertthebattery.
4 Toreplacethecoverontothedevice,alignthebackcoveroverthebattery
compartment andpressitdownuntilitclicksintoplace .
20 Getting to know your phone
Charging the battery
Chargethebatterybeforeusingitforfirsttime.Usethechargertochargethebattery.
Acomputercanalsobeusedtochargethebatterybyconnectingthephonetoitusing
theUSBcable.
WARNING
Use only LG-approved chargers, batteries and cables. If you use unapproved
chargers, batteries or cables, it may cause battery charging delay. Or this can
cause the battery to explode or damage the device, which are not covered by
the warranty.
Thechargerconnectorislocatedatthebottomofthephone.Insertthechargerand
plugitintoapoweroutlet.
NOTE: Do not open the back cover while your phone is charging.
21
Getting to know your phone
Inserting a memory card
Yourdevicesupportsuptoa32GBmicroSDcard.Dependingonthememorycard
manufacturerandtype,somememorycardsmaynotbecompatiblewithyourdevice.
WARNING
Some memory cards may not be fully compatible with the device. Using an
incompatible card may damage the device or the memory card, or corrupt the
data stored in it.
NOTE: Frequent writing and erasing of data shortens the lifespan of memory
cards.
1 Removethebackcover.
2 Insertamemorycardwiththegold-colouredcontactsfacingdownwards.
3 Replacethebackcover.
22 Getting to know your phone
Removing the memory card
Beforeremovingthememorycard,firstunmountitforsaferemoval.
1 Tap > > >Generaltab>Storage>Unmount SD card.
2 Removethebackcoverandpulloutthememorycard.
WARNING
Do not remove the memory card while the device is transferring or accessing
information. Doing so can cause data to be lost or corrupted or damage to
the memory card or device. It is not responsible for losses that result from the
misuse of damaged memory cards, including the loss of data.
Locking and unlocking the device
PressingthePower/Lock Buttonturnsoffthescreenandputsthedeviceintolock
mode.Thedeviceautomaticallygetslockedifitisnotusedforaspecifiedperiod.This
helpstopreventaccidentaltapsandsavesbatterypower.
Tounlockthedevice,pressthePower/Lock Buttonandswipethescreeninany
direction.
NOTE: Double-tapping on the screen also can wake up the screen instead of
the Power/Lock Button.
Changing the screen lock method
Youcanchangethewaythatyoulockthescreentopreventothersaccessingyour
personalinformation.
1 Tap > > >Displaytab>Lock screen>Select screen lock.
2 SelectadesiredscreenlockfromNone,Swipe,KnockCode,Pattern,PINand
Password.
23
Getting to know your phone
NOTE: Create a Google account before setting an unlock pattern and
remember the Backup PIN you created when creating your pattern lock.
Caution! If you haven't created a Google account on the phone and you
forgot your PIN, Password, and the backup PIN, you need to perform a
hard reset. But if you perform a hard reset, all user applications and user
data will be deleted. Please remember to back up any important data before
performing a hard reset.
TIP! Smart Lock
You can use Smart Lock to make unlocking your phone easier. You can set
it to keep your phone unlocked when you have a trusted Bluetooth device
connected to it, when it's in a familiar location like your home or work, or
when it recognises your face.
Setting up Smart Lock
1 Tap > > Apps tab > .
2 Tap Display tab > Lock screen > Smart Lock.
3 Before you add any trusted devices, trusted places, or trusted face, you
need to set up a screen lock (pattern, PIN, or password).

24 Your Home screen
Touch screen tips
Herearesometipsonhowtonavigateonyourphone.
• Tap or touch–Asinglefingertapselectsitems,links,shortcutsandlettersonthe
on-screenkeyboard.
• Touch and hold–Touchandholdanitemonthescreenbytappingitandnot
liftingyourfingeruntilanactionoccurs.
• Drag–Touchandholdanitemforamomentandthen,withoutliftingyourfinger,
moveyourfingeronthescreenuntilyoureachthetargetposition.Youcandrag
itemsontheHomescreentorepositionthem.
• Swipe or slide–Toswipeorslide,quicklymoveyourfingeracrossthesurface
ofthescreen,withoutpausingwhenyoufirsttapit(soyoudon'tdraganitem
instead).
• Double-tap–Double-taptozoomonawebpageoramap.
• Pinch-to-Zoom–Useyourindexfingerandthumbinapinchingorspreading
motiontozoominoroutwhenusingthebrowser,Maps,orwhenviewingpictures.
• Rotate the screen–Frommanyapplicationsandmenus,thescreenorientation
adjuststothedevice'sphysicalorientation.
NOTE:
• Do not press too hard; the tap screen is sensitive enough to pick up a light,
yet firm tap.
• Use the tip of your finger to tap the option you want. Be careful not to tap
any other keys.
Your Home screen
25
Your Home screen
Home screen
TheHomescreenisthestartingpointformanyandfunctions.Itallowsyoutoadd
itemslikeappshortcutsandGooglewidgetstogiveyouinstantaccesstoinformation
andapplications.Thisisthedefaultcanvasandaccessiblefromanymenubytapping
.
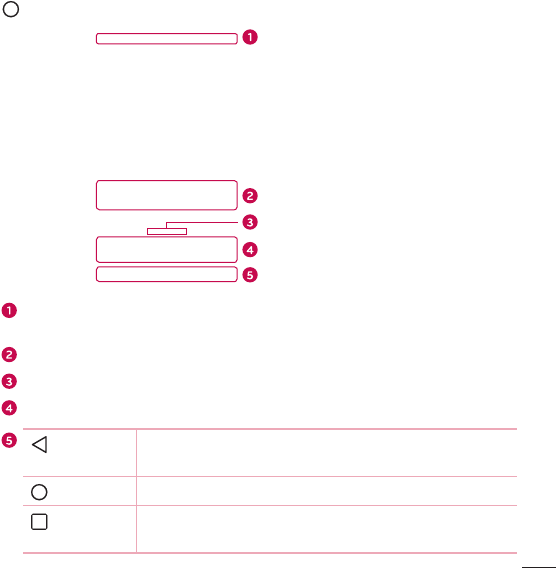
Status Bar
Application Icons
Location Indicator
Quick Key Area
Home touch keys
Showsthephone'sstatusinformation,includingthetime,signalstrength,battery
statusandnotificationicons.
Tapanicon(application,folder,etc.)toopenanduseit.
IndicateswhichHomescreencanvasyouarecurrentlyviewing.
Providesone-touchaccesstothefunctioninanyHomescreencanvas.
Back Key Returnstothepreviousscreen.Alsoclosespop-upitems,
suchasmenus,dialogboxesandtheon-screenkeyboard.
Home Key ReturntotheHomescreenfromanyscreen.
Recent Key Displaysrecentlyusedapplications.Ifyoutouchandholdthis
key,itopensamenuofavailableoptions.

26 Your Home screen
Extended Home screen
TheoperatingsystemprovidesmultipleHomescreencanvasestoprovidemorespace
foraddingicons,widgetsandmore.
• SlideyourfingerleftorrightacrosstheHomescreentoaccessadditional
canvases.
Customizing the Home screen
YoucancustomizeyourHomescreenbyaddingappsandwidgetsandchanging
wallpapers.
Adding items on your Home screen
1 TouchandholdtheemptypartoftheHomescreen.
2 IntheAddModemenu,selecttheitemyouwanttoadd.Youthenseethisadded
itemontheHomescreen.
3 Dragittothedesiredlocationandliftyourfinger.
TIP! To add an application icon to the Home screen from the Apps screen,
touch and hold the application you want to add.
Removing an item from the Home screen
• WhileontheHomescreen,touchandholdtheiconyouwanttoremove>dragit
to .
Adding an app to the Quick Key area
• FromtheAppsscreenorontheHomescreen,touchandholdanapplicationicon
anddragittotheQuickKeyarea.Thenreleaseitinthedesiredlocation.
27
Your Home screen
Removing an app from the Quick Key area
• TouchandholdthedesiredQuickKey,dragitto .
NOTE: The Apps Key cannot be removed.
Customizing app icons on the Home screen
1 Touchandholdanapplicationiconuntilitunlocksfromitscurrentposition,then
releaseit.Theeditingicon appearsintheupper-rightcorneroftheapplication.
2 Taptheapplicationiconagainandselectthedesiredicondesignandsize.
3 Tap OKtosavethechange.
Returning to recently-used applications
1 Tap .Apppreviewsofrecentlyusedapplicationswillbedisplayed.
2 Tapanapppreviewtoopentheapplication.Ortap toreturntoyourprevious
screen.
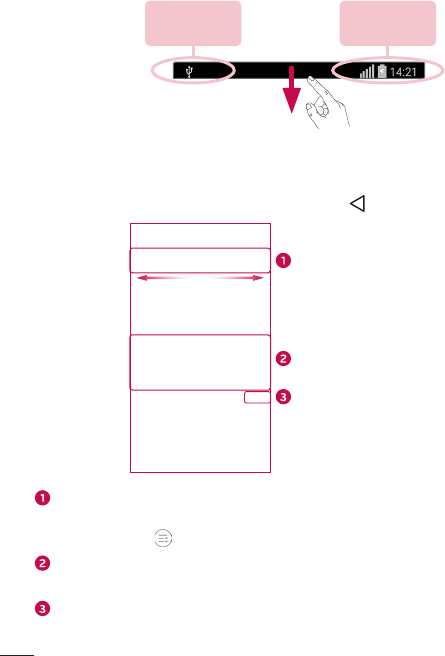
Notifications panel
Notificationsalertyoutothearrivalofnewmessages,calendareventsandalarms,as
wellasongoingevents,suchaswhenyouareonacall.
Whenanotificationarrives,itsiconappearsatthetopofthescreen.Iconsforpending
notificationsappearontheleft,andsystemicons,suchasWi-Fiandbatterystrength
areshownontheright.
NOTE: The available options may vary depending on the region or service
provider.
28 Your Home screen
Pending
notifications
System
notifications
Opening the notifications panel
Swipedownfromthestatusbartoopenthenotificationspanel.Toclosethe
notificationspanel,swipethescreenupwardsortap .
Quick Settings Area
Notifications
Clear
Tapeachquicksettingkeytotoggleiton/off.Touchandholdthedesiredkeyto
directlyaccessthesettingsmenuforthefunction.Toseemoretogglekeys,swipe
leftorright.Tap toremove,addorrearrangequicksettingkeys.
Currentnotificationsarelisted,eachwithabriefdescription.Tapanotificationto
viewit.
Taptoclearallthenotifications.
29
Your Home screen
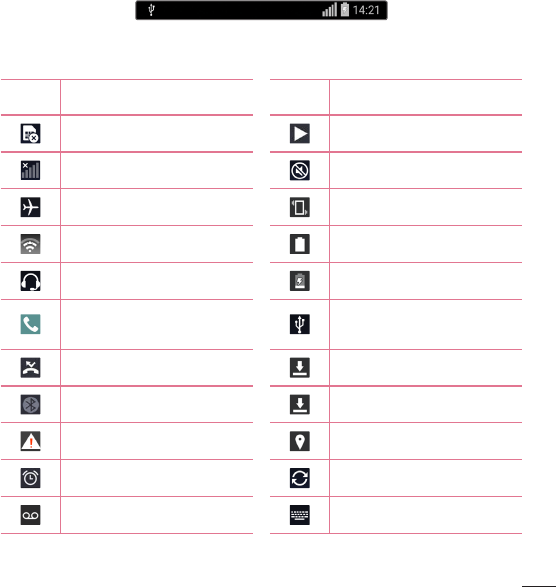
Indicator icons on the Status Bar
Indicatoriconsappearonthestatusbaratthetopofthescreentoreportmissedcalls,
newmessages,calendarevents,devicestatusandmore.
Theiconsdisplayedatthetopofthescreenprovideinformationaboutthestatusofthe
device.Theiconslistedinthetablebelowaresomeofthemostcommonones.
Icon Description Icon Description
NoSIMcardinserted Asongiscurrentlyplaying
Nonetworksignalavailable Ringerissilenced
Airplanemodeison Vibratemodeison
ConnectedtoaWi-Finetwork Batteryfullycharged
Wiredheadsetconnected Batteryischarging
Callinprogress Thephoneisconnectedtoa
PCviaaUSBcable
Missedcall Downloadingdata
Bluetoothison Uploadingdata
Systemwarning GPSison
Analarmisset Dataissynchronizing
Newvoicemailavailable Chooseinputmethod
30 Your Home screen
Newtextormultimedia
message
Mediaservercontentsharing
ison
NFCison Wi-Fihotspotisactive
NOTE: The icon's location in the status bar may differ according to the
function or service.
On-screen keyboard
Youcanentertextusingtheon-screenkeyboard.Theon-screenkeyboardappearson
thescreenwhenyoutapanavailabletextentryfield.
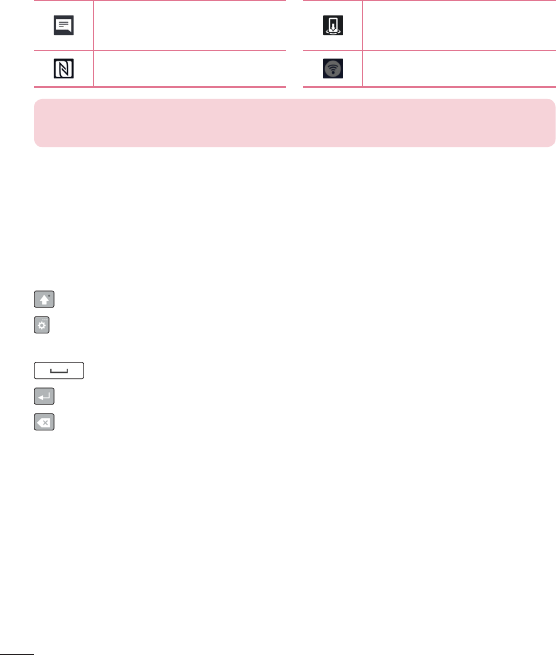
Using the keypad and entering text
Taponcetocapitalizethenextletteryoutype.Double-tapforallcaps.
Taptogotothekeyboardsettings.Touchandholdtoentertextbyvoiceoraccess
thecliptray.
Taptoenteraspace.
Taptocreateanewline.
Taptodeletethepreviouscharacter.
Entering accented letters
WhenyouselectFrenchorSpanishasthetextentrylanguage,youcanenterspecial
FrenchorSpanishcharacters(e.g."á").
Forexample,toinput"á",touchandholdthe"a"keyuntilthezoom-inkeyexpands
anddisplayscharactersfromdifferentlanguages.Thenselectthespecialcharacteryou
want.
31
Special Features
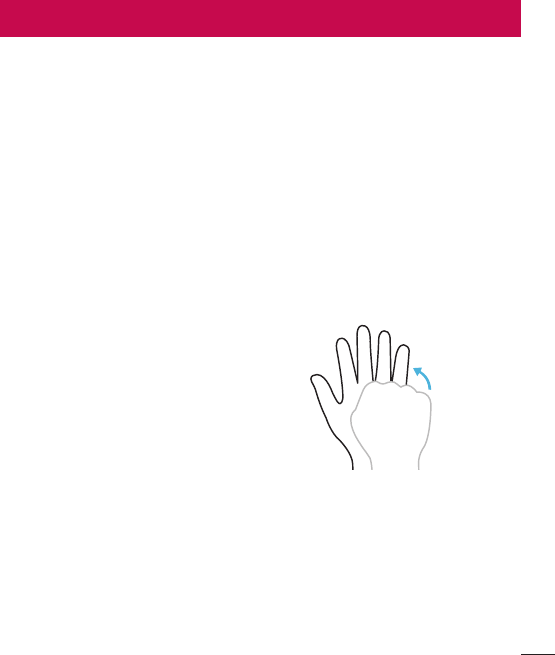
Gesture shot
TheGestureshotfeatureallowsyoutotakeapicturewithahandgestureusingthe
frontcamera.
To take photo
TherearetwomethodsforusingtheGestureshotfeature.
• Raiseyourhand,withanopenpalm,untilthefrontcameradetectsitandabox
appearsonthescreen.Thencloseyourhandintoafisttostartthetimer,allowing
youtimetogetready.
• Raiseyourhand,inaclenchedfist,untilthefrontcameradetectsitandabox
appearsonthescreen.Thenunclenchyourfisttostartthetimer,allowingyoutime
togetready.
or
Special Features
32 Special Features
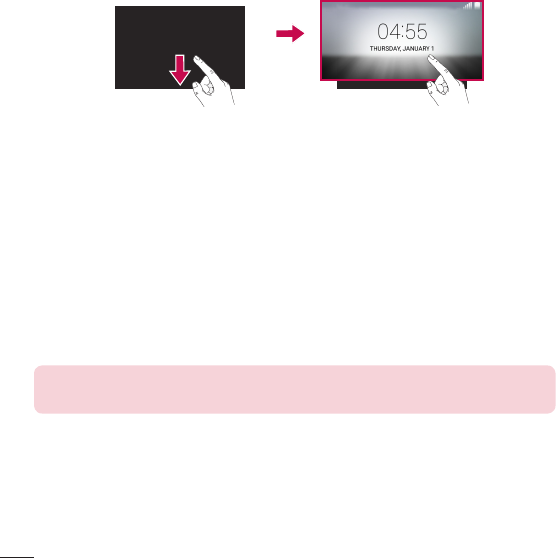
Glance View
Whenthephonescreenisoff,youcanseethestatusbar,timeanddatebydragging
yourfingerdownonthescreen.
KnockON
TheKnockONfeatureallowsyoutodouble-tapthescreentoeasilyturnitonoroff.
To turn the screen on
1 Double-tapthecenteroftheLockscreentoturnthescreenon.
2 Unlockthescreenoraccessanyoftheavailableshortcutsorwidgets.
To turn the screen off
1 Double-tapanemptyareaoftheHomescreenortheStatusBar.
2 Thescreenwillturnoff.
NOTE: Tap on the center area of the screen. If you tap on the bottom or the
top area, the recognition rate may decrease.
Knock Code
TheKnockCodefeatureallowsyoutocreateyourownunlockcodeusinga
combinationofknocksonthescreen.YoucanaccesstheHomescreendirectlywhen
thescreenisoffbytappingthesamesequenceonthescreen.
33
Special Features
NOTE:
• If you enter the wrong Knock Code 6 times, it will compulsorily take you to
your google account log in/backup PIN.
• Use the fingertip instead of finger nail to tap the screen for turning it on or
off.
• When the Knock Code is not in use, you can use Knock On function by
taping the screen.
1 Tap > >Appstab> >Display tab>Lock screen>Select screen
lock>Knock Code.
2 TapthesquaresinapatterntosetyourKnockCode.YourKnockCodepatterncan
be3to8taps.
Unlocking the screen using the Knock Code
YoucanunlockthescreenbytappingtheKnockCodepatternyoualreadyset,when
thescreenturnsoff.
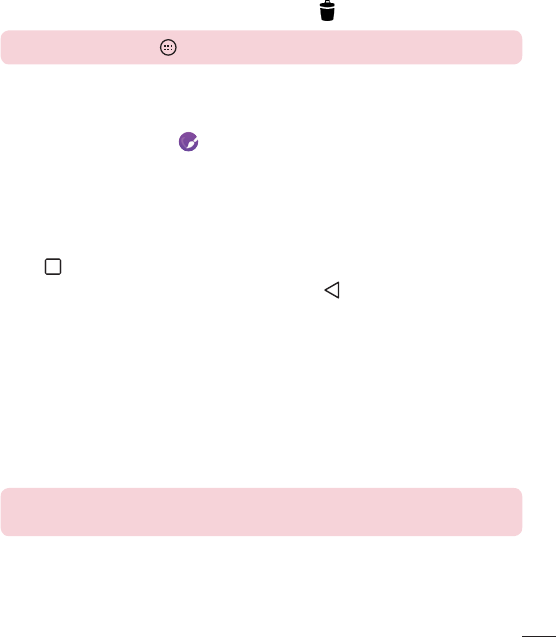
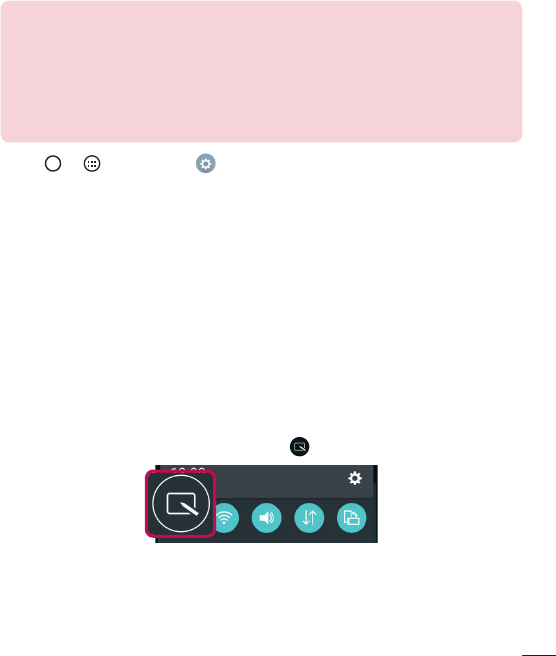
QuickMemo+
TheQuickMemo+featureallowsyoutocreatememosandcapturescreenshots.
YoucanuseQuickMemo+toeasilyandefficientlycreatememosduringacall,witha
savedpictureoronthecurrentphonescreen.
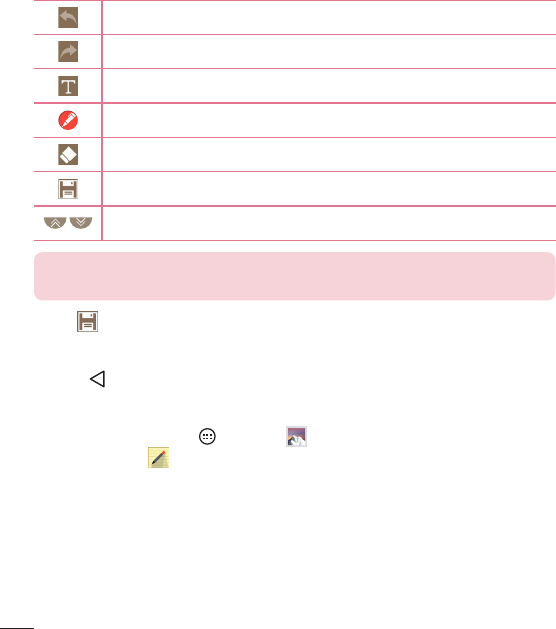
1 TouchanddragtheStatusBardownandtap .
34 Special Features
2 Createamemousingthefollowingoptions:
Taptoundothemostrecentaction.
Taptoredothemostrecentlydeletedaction.
Taptoinserttextintoyourmemo.
Taptoselectthepentypeandcolor.
Taptousetheerasertoerasethepenmarksonthememo.
Taptosavethememoyou'vecreated.
Taptohideordisplaythetoolbar.
NOTE: Please use a fingertip while using the QuickMemo+ feature. Do not
use your fingernail.
3 Tap tosavethecurrentmemototheQuickMemo+ orGallery.
Discard QuickMemos
• Tap .
View the Saved Memo
FromtheHomescreentap >GalleryandselecttheQuickMemo+albumor
tapQuickMemo+andselectthedesiredmemo.
35
Google account setup
ThefirsttimeyouopenaGoogleapplicationonyourphone,youwillberequiredtosign
inwithyourexistingGoogleaccount.IfyoudonothaveaGoogleaccount,youwillbe
promptedtocreateone.
Creating your Google account
1 FromtheHomescreen,tap .
2 Tap >Generaltab>Accounts & sync>Add account>Google>Create a
New Account.
3 Enteryourfirstandlastname,thentapNext.
4 EnterausernameandtapNext.YourphonewillcommunicatewithGoogleservers
andcheckforusernameavailability.
5 EnteryourpasswordandtapNext.
6 Followtheinstructionsandentertherequiredandoptionalinformationaboutthe
account.Waitwhiletheservercreatesyouraccount.
Signing into your Google account
1 FromtheHomescreen,tap .
2 Tap >Generaltab>Accounts & sync>Add account>Google>Existing.
3 EnteryouremailaddressandtapNext.
4 Aftersigningin,youcanuseGmailandtakeadvantageofGoogleservicesonyour
phone.
5 OnceyouhavesetupyourGoogleaccount,yourphonewillautomatically
synchronisewithyourGoogleaccountontheweb(ifadataconnectionisavailable).
Google account setup

36 Google account setup
Aftersigningin,yourphonewillsyncwithyourGoogleservices,suchasGmail,
Contacts,andGoogleCalendar.YoucanalsouseMaps,downloadapplicationsfrom
PlayStore,backupyoursettingstoGoogleservers,andtakeadvantageofotherGoogle
servicesonyourphone.
IMPORTANT
• Some applications, such as Calendar, work only with the first Google Account
you add. If you plan to use more than one Google Account with your phone,
be sure to sign into the one you want to use with such applications first. When
you sign in, your contacts, Gmail messages, Calendar events, and other
information from these applications and services on the web are synchronized
with your phone. If you don't sign into a Google Account during setup, you will
be prompted to sign in or to create a Google Account the first time you start
an application that requires one, such as Gmail or Play Store.
• If you have an enterprise account through your company or other organization,
your IT department may have special instructions on how to sign into that
account.
37
Connecting to Networks and Devices
Wi-Fi
Youcanusehigh-speedInternetaccesswhilewithinthecoverageofthewireless
accesspoint(AP).
Connecting to Wi-Fi networks
1 Tap > >Apps tab> >Networks tab>Wi-Fi.
2 Tap toturnWi-FionandstartscanningforavailableWi-Finetworks.
3 Tapanetworktoconnecttoit.
• Ifthenetworkissecuredwithalockicon,youwillneedtoenterasecuritykeyor
password.
4 ThestatusbardisplaysiconsthatindicateWi-Fistatus.
NOTE: If you are out of the Wi-Fi zone or have set Wi-Fi to Off, the device
may automatically connect to the Web using mobile data, which may incur
data charges.
TIP! How to obtain the MAC address
Tap > > Apps tab > > Networks tab > Wi-Fi > > Advanced
Wi-Fi > MAC address.
Connecting to Networks and Devices
38 Connecting to Networks and Devices
Bluetooth
Bluetoothisashort-rangecommunicationstechnologythatallowsyoutoconnect
wirelesslytoanumberofBluetoothdevices,suchasheadsetsandhands-freecar
kits,andBluetooth-enabledhandhelds,computers,printers,andwirelessdevices.
TheBluetoothcommunicationrangeisusuallyuptoapproximately30feet.
NOTE:
• LG is not responsible for the loss, interception or misuse of data sent or
received via the Bluetooth feature.
• Always make sure that you share and receive data with devices that are
trusted and properly secured.
• If there are obstacles between the devices, the operating distance may be
reduced.
• Some devices, especially those that are not tested or approved by Bluetooth
SIG, may be incompatible with your device.
Pairing your phone with another Bluetooth device
1 Tap > >Apps tab> >Networks tab>Bluetooth.
2 Tap toturnBluetoothon.
3 Tap Search for devicestoviewthevisibledevicesinrange.
4 Choosethedeviceyouwanttopairwithfromthelist.Oncetheparingissuccessful,
yourphoneconnectstotheotherdevice.
NOTE: Pairing between two Bluetooth devices is a one-time process. Once
a pairing has been created, the devices will continue to recognize their
partnership and exchange information.
TIP! Please consult documentation included with Bluetooth device for
information on pairing mode and passcode (typically 0 0 0 0 – four zeroes).
39
Connecting to Networks and Devices
Sending data via Bluetooth
1 Selectafileoritemsuchasacontactormediafile.
2 SelecttheoptionforsendingdataviaBluetooth.
3 SearchforandpairwithaBluetooth-enableddevice.
• DuetodifferentspecificationsandfeaturesofotherBluetooth-compatibledevices,
displayandoperationsmaybedifferent,andfunctionssuchastransferor
exchangemaynotbepossiblewithallBluetoothcompatibledevices.
Receiving data via Bluetooth
1 Tap > >Apps tab> >Networks tab>Bluetooth.
2 Tap toturnBluetoothon.
3 Youwillreceivearequesttoacceptapairingattemptfromthesendingdevice.Be
suretoselectAccept.
Wi-Fi Direct
Wi-FiDirectprovidesadirectconnectionbetweenWi-Fienableddeviceswithout
requiringanaccesspoint.
Turning on Wi-Fi Direct
1 Tap > >Apps tab> > Networks tab > Wi-Fi.
2 Tap > Advanced Wi-Fi > Wi-Fi Direct.
NOTE: When in this menu, your device is visible to other visible Wi-Fi Direct
devices nearby.
40 Connecting to Networks and Devices
Transferring data between a PC and the device
YoucancopyormovedatabetweenaPCandthedevice.
Transferring data
1 ConnectyourdevicetoaPCusingtheUSBcablethatcamewithyourphone.
2 OpentheNotificationspanel,tapthecurrentconnectiontype,andselectMedia
device (MTP).
3 Awindowwillpop-uponyourPC,allowingyoutotransferthedesireddata.
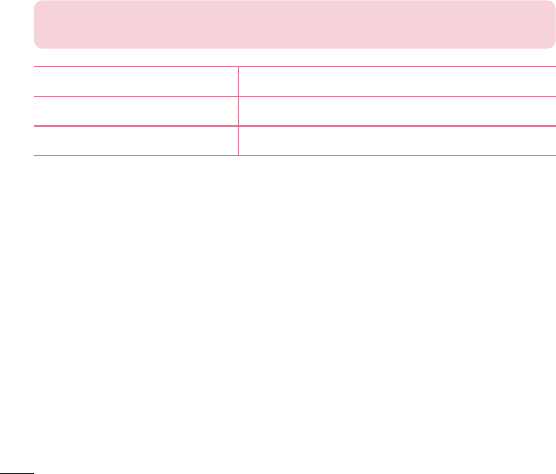
NOTE: The LG Android Platform Driver is required to be installed on your PC
to be able to detect the phone.
Items Requirement
OS MicrosoftWindowsXPSP3,Vistaorhigher
WindowMediaPlayerversion WindowsMediaPlayer10orhigher
41
Calls
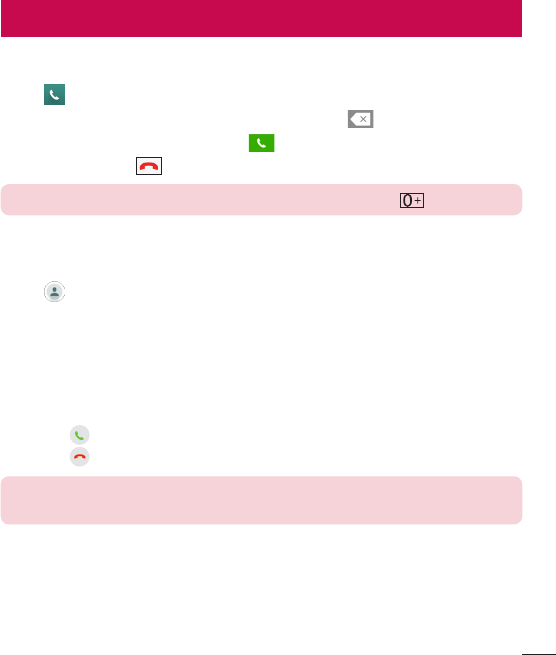
Making a call
1 Tap toopenthedialer.
2 Enterthenumberusingthedialer.Todeleteadigit,tap .
3 Afterenteringthedesirednumber,tap toplacethecall.
4 Toendthecall,tap .
TIP! To enter "+" to make international calls, touch and hold .
Calling your contacts
1 Tap toopenyourcontacts.
2 Scrollthroughthecontactlist.Youcanalsoenterthecontact'snameintheSearch
fieldorscrollalongthealphabetlettersontherightedgeofthescreen.
3 Inthelistthatisdisplayed,tapthecontactyouwanttocall.
Answering and rejecting a call
• Swipe inanydirectiontoanswertheincomingcall.
• Swipe inanydirectiontodeclineanincomingcall.
NOTE: Tap or swipe the Decline with message if you want to send a
message to the caller.
Calls
42 Calls
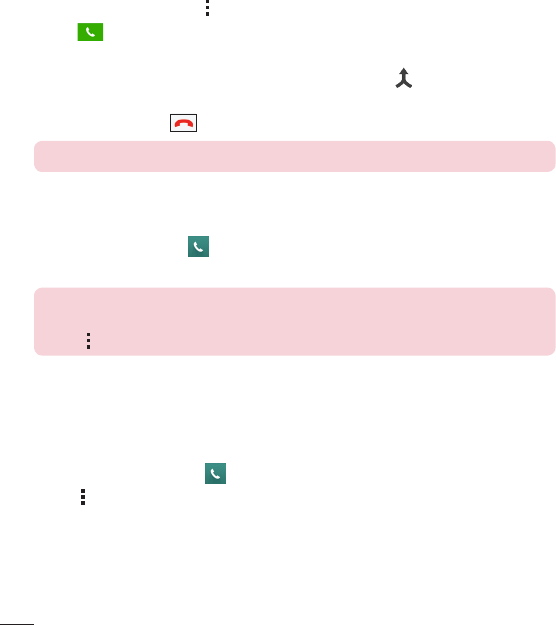
Making a second call
1 Duringyourfirstcall,tap >Add callandenterthenumber.
2 Tap toplacethecall.
3 Bothcallsaredisplayedonthecallscreen.Yourinitialcallislockedandputonhold.
4 Tapthedisplayednumbertotogglebetweencalls.Ortap tostartaconference
call.
5 Toendallcalls,tap .
NOTE: You are charged for each call you make.
Viewing your call logs
OntheHomescreen,tap andselectCall logs.
Viewalistofalldialed,receivedandmissedcalls.
TIP!
• Tap any call log entry to view the date, time and duration of the call.
• Tap , then tap Delete all to delete all of the recorded items.
Call settings
Youcanconfigurephonecallsettings,suchascallforwarding,aswellasotherspecial
featuresofferedbyyourcarrier.
1 OntheHomescreen,tap toopenthedialer.
2 Tap todisplaytheavailableoptions.
3 Tap Call settingsandconfigurethedesiredoptions.
43
Contacts
Youcanaddcontactsonyourphoneandsynchronizethemwiththecontactsinyour
GoogleAccountorotheraccountsthatsupportsyncingcontacts.
Searching for a contact
1 Tap toopenyourcontacts.
2 Tap Search contactsandenterthecontactnameusingthekeyboard.
Adding a new contact
1 Tap andenterthenewcontact'snumber.TaptheNew contactfield,or >
Add to Contacts>New contact.
2 Ifyouwanttoaddapicturetothenewcontact,taptheimagearea.
ChooseTake photoorSelect from Gallery.
3 Enterthedesiredinformationforthecontact.
4 Tap Save.
Favourites contacts
Youcanclassifyfrequentlycalledcontactsasfavourites.
Adding a contact to your favourites
1 Tap toopenyourcontacts.
2 Tapacontacttoviewitsdetails.
3 Tapthestaratthetoprightofthescreen.Thestarturnsyellow.
Contacts

44 Contacts
Removing a contact from your favourites list
1 Tap toopenyourcontacts.
2 TaptheFavouritestab,andchooseacontacttoviewitsdetails.
3 Taptheyellowstaratthetoprightofthescreen.Thestarturnsadarkcolorandthe
contactisremovedfromyourfavourites.
Creating a group
1 Tap toopenyourcontacts.
2 Tap Groups> >New group.
3 Enteranameforthenewgroup.Youcanalsosetadistinctringtoneforthenewly
createdgroup.
4 Tap Add memberstoaddcontactstothegroup.
5 Tap Savetosavethegroup.
NOTE:
• If you delete a group, the contacts assigned to that group will not be lost.
They will remain in your contact list.
45
Messaging
Yourphonecombinestextandmultimediamessagingintooneintuitive,easyto-use
menu.
Sending a message
1 Tap ontheHomescreenandtap tocreateanewmessage.
2 EnteracontactnameorcontactnumberintotheTofield.Asyouenterthecontact
name,matchingcontactsappear.Youcantapasuggestedrecipientandaddmore
thanonecontact.
NOTE: You may be charged for each text message you send. Please consult
with your service provider.
3 Tapthetextfieldandstartenteringyourmessage.
4 Tap toopentheoptionsmenu.Choosefromanyoftheavailableoptions.
TIP! You can tap to attach the file that you want to share with message.
5 Tap Sendtosendyourmessage.
TIP!
• The 160-character limit may vary from country to country depending on how
the text message is coded and the language used in the message.
• If an image, video, or audio file is added to a text message, it will be
automatically converted into a multimedia message and you will be charged
accordingly.
NOTE: When you get a text message during a call, there will be an audible
notification.
Messaging

46 Messaging
Conversation view
Messagesexchangedwithanotherpartyaredisplayedinchronologicalordersothat
youcanconvenientlyseeandfindyourconversations.
Changing your messaging settings
Yourphone'smessagingsettingsarepredefinedtoallowyoutosendmessages
immediately.Youcanchangethesettingsbasedonyourpreferences.
• Tap ontheHomescreen,tap >Settings.