LG Electronics USA IS11LG Cellular CDMA Phone with WLAN and Bluetooth User Manual
LG Electronics MobileComm USA, Inc. Cellular CDMA Phone with WLAN and Bluetooth
Users Manual

IS11LG
INSTRUCTION MANUAL
Part 15.21 statement
" Change or Modifications that are not expressly approved by the manufacturer could void
the user's authority to operate the equipment. “
Part 15.105 statement
This equipment has been tested and found to comply with the limits for a class B digital
device, pursuant to Part 15 of the FCC Rules.
These limits are designed to provide reasonable protection against harmful interference in
a residential installation. This equipment generates uses and can radiate radio frequency
energy and, if not installed and used in accordance with the instructions, may cause harmful
interference to radio communications. However, there is no guarantee that interference will
not occur in a particular installation. If this equipment does cause harmful interference or
television reception, which can be determined by turning the equipment off and on, the user
is encouraged to try to correct the interference by one or more of the following measures:
- Reorient or relocate the receiving antenna.
- Increase the separation between the equipment and receiver.
- Connect the equipment into an outlet on a circuit different from that to
which the receiver is connected.
- Consult the dealer or an experienced radio/TV technician for help.
This device is not intended for sale in the USA.
(%%2CTV%NCUU$%QORNKCPEG
7KLVGHYLFHDQGLWVDFFHVVRULHVFRPSO\ZLWKSDUWRI)&&
UXOHVDQG,&(6&ODVV%GLJLWDODSSDUDWXVUHTXLUHPHQWV
IRU,QGXVWU\&DQDGD2SHUDWLRQLVVXEMHFWWRWKHIROORZLQJ
WZRFRQGLWLRQV7KLVGHYLFHDQGLWVDFFHVVRULHVPD\QRW
FDXVHKDUPIXOLQWHUIHUHQFHDQGWKLVGHYLFHDQGLWV
DFFHVVRULHVPXVWDFFHSWDQ\LQWHUIHUHQFHUHFHLYHGLQFOXGLQJ
LQWHUIHUHQFHWKDWPD\FDXVHXQGHVLUHGRSHUDWLRQ
$QF[YQTP1RGTCVKQP
7KLVGHYLFHZDVWHVWHGIRUW\SLFDOERG\ZRUQRSHUDWLRQV
ZLWKWKHEDFNRIWKHSKRQHNHSWFPLQFKHVEHWZHHQ
WKHXVHUĜVERG\DQGWKHEDFNRIWKHSKRQH7RFRPSO\ZLWK
)&&5)H[SRVXUHUHTXLUHPHQWVDPLQLPXPVHSDUDWLRQ
GLVWDQFHRIFPLQFKHVPXVWEHPDLQWDLQHGEHWZHHQ
WKHXVHUVERG\DQGWKHEDFNRIWKHSKRQH7KLUGSDUW\
EHOWFOLSVKROVWHUVDQGVLPLODUDFFHVVRULHVFRQWDLQLQJ
PHWDOOLFFRPSRQHQWVVKRXOGQRWEHXVHG%RG\ZRUQ
DFFHVVRULHVWKDWFDQQRWPDLQWDLQFPLQFKHV
VHSDUDWLRQGLVWDQFHEHWZHHQWKHXVHUVERG\DQGWKHEDFN
RIWKHSKRQHDQGKDYHQRWEHHQWHVWHGIRUW\SLFDOERG\
ZRUQRSHUDWLRQVPD\QRWFRPSO\ZLWK)&&5)H[SRVXUH
OLPLWVDQGVKRXOGEHDYRLGHG
%QPHQTOKVoCWZPQTOGU(%%2CTV%NCUU$
&HWDSSDUHLOHWVHVDFFHVVRLUHVVRQWFRQIRUPHVDX[
QRUPHV)&&3DUW&ODVV%GHOD)HGHUDO
&RPPXQLFDWLRQV&RPPLVVLRQHWDX[H[LJHQFHVSRXU
DSSDUHLOVQXPpULTXHV,&(6&ODVV%GĜ,QGXVWULH
&DQDGD6RQIRQFWLRQQHPHQWHVWVXMHWDX[GHX[FRQGLWLRQV
VXLYDQWHV&HWDSSDUHLOHWVHVDFFHVVRLUHVQHGRLYHQW
SDVSURYRTXHUGHEURXLOODJHSUpMXGLFLDEOHHWFHW
DSSDUHLOHWVHVDFFHVVRLUHVGRLYHQWDFFHSWHUWRXWHVOHV
LQWHUIpUHQFHVUHoXHV\FRPSULVFHOOHVSRXYDQWFDXVHUXQ
IRQFWLRQQHPHQWLQGpVLUDEOH
7VKNKUCVKQPEQOOGCRRCTGKNRQTVCVKH
&HWpOpSKRQHDpWpWHVWpHQYXHGĜXQHXWLOLVDWLRQW\SH
FRPPHDSSDUHLOSRUWDWLIDYHFXQHGLVWDQFHGHFP
SRXFHVHQWUHOĜDUULqUHGHOĜDSSDUHLOHWOHFRUSVGH
OĜXWLOLVDWHXU3RXUVDWLVIDLUHDX[H[LJHQFHVGHOD)&&HQ
PDWLqUHGĜH[SRVLWLRQDX[UDGLRIUpTXHQFHVXQHGLVWDQFH
GĜDXPRLQVFPSRXFHVGRLWrWUHPDLQWHQXHHQWUH
OHFRUSVGHOĜXWLOLVDWHXUHWOĜDUULqUHGXWpOpSKRQH/HV
SLQFHVGHFHLQWXUHOHVpWXLVHWDXWUHVDFFHVVRLUHV
VHPEODEOHVGĜDXWUHVPDUTXHVHWFRQWHQDQWGHV
FRPSRVDQWHVPpWDOOLTXHVQHGRLYHQWSDVrWUHXWLOLVpV/HV
DFFHVVRLUHVSRUWDWLIVHPSrFKDQWOHPDLQWLHQGĜXQH
GLVWDQFHGHFPSRXFHVHQWUHOHFRUSVGH
OĜXWLOLVDWHXUHWOĜDUULqUHGXWpOpSKRQHHWTXLQĜRQWSDVpWp
WHVWpVHQYXHGĜXQHXWLOLVDWLRQW\SHFRPPHDFFHVVRLUHV
SRUWDWLIVSHXYHQWQHSDVVDWLVIDLUHDX[OLPLWHVGĜH[SRVLWLRQ
DX[UDGLRIUpTXHQFHVVWLSXOpHVSDUOD)&&HWSDU
FRQVpTXHQWQHGRLYHQWSDVrWUHXWLOLVpV
Touch Screen Operations
The display of the terminal has a touch screen that
allows you to perform various operations by touching it.
Precautions on Using Touch
Screen
The touch screen has been designed for finger touching
slightly. Do not press it with sharp objects (nail, ballpoint
pen, pin etc.) or forcibly with your finger.
The following user actions may cause the touch screen
not to work properly. They may also cause malfunction.
sTouching the screen with gloved hands
sTouching the screen with the tip of a fingernail
sPlacing a foreign object on the screen
sSticking a protective sheet or seal on the screen
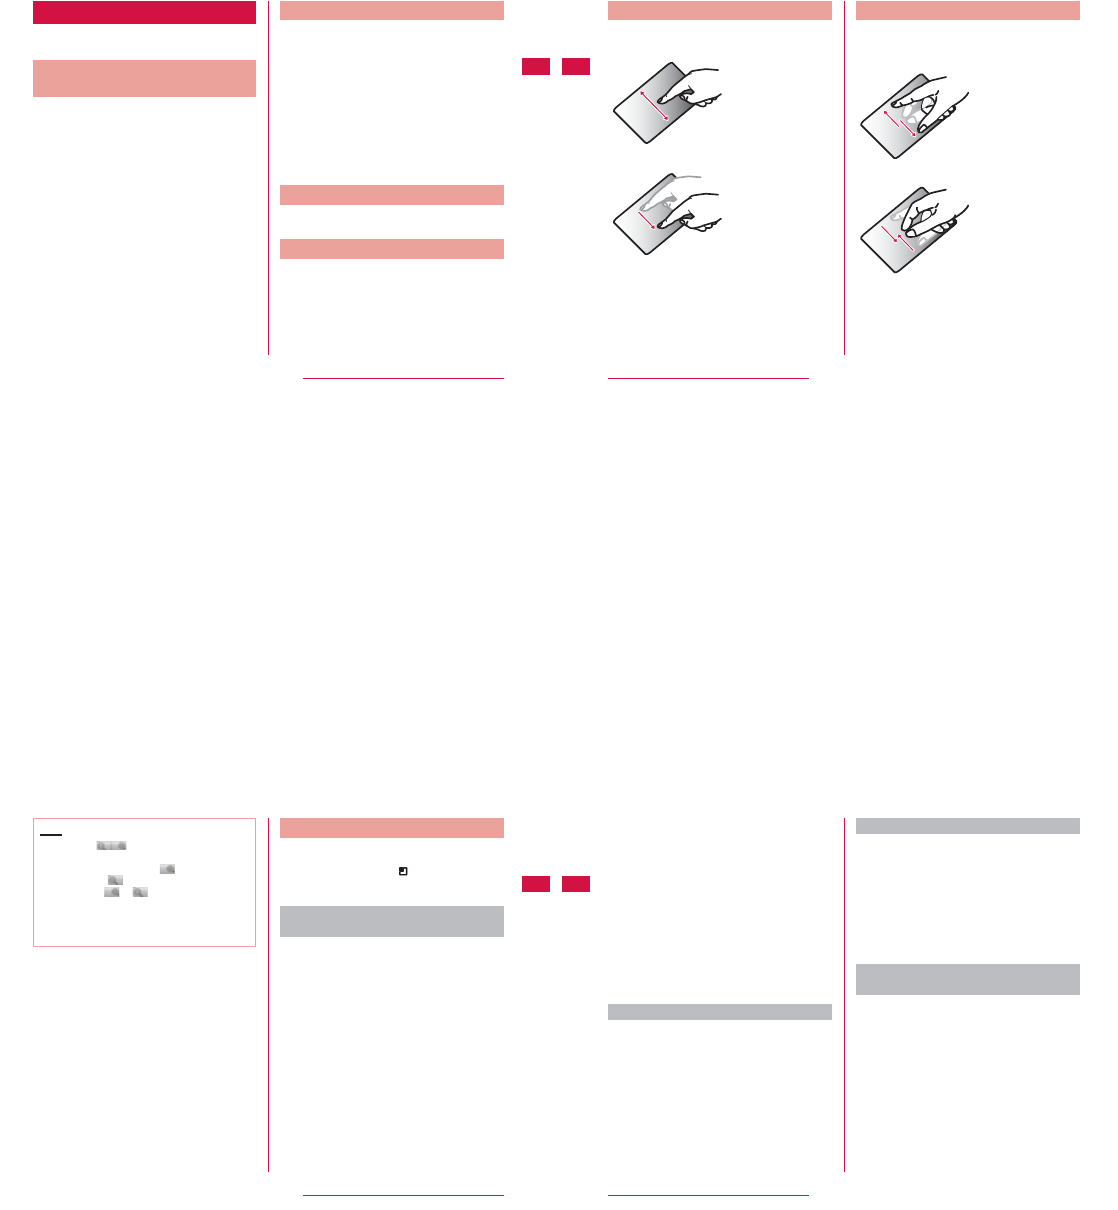
Touch Screen Operations
You can perform the following actions on the touch
screen.
sTap: Touch the screen lightly
sDouble-tap: Touch the screen lightly twice
successively
sTouch: Touch and hold down the screen
sSwipe: Lightly flick the screen
sDrag: Touch and hold down to flick the screen, and
then release your finger
sPinch-out: Touch the screen with 2 fingers and then
move them apart
sPinch-in: Touch the screen with 2 fingers apart widen
and then move them together, as if pinching
Opening Items
Tap an item
Marking or Unmarking Options
Tap an item that has a checkbox
sIf the checkbox was unmarked, a tick now
appears in it.
sIf the checkbox was marked, the tick now
disappears from it.
Confirmation and Settings before Using
Scrolling Screen
You can scroll the screen up or down. On some web
pages, you can also scroll sideways.
Drag up or down to
scroll.
Swipe to scroll quickly.
To stop scrolling, touch
the screen.
Zooming in or out
Some applications allow you to zoom in on small
characters that are difficult to read. After zooming in,
you can also zoom out to a full-screen view.
The movement of your
fingers enlarges the
screen display by
pinching it out.
sThe movement of
your fingers reduces
the screen display by
pinching it in.
sPinch in on the Home
screen to set the
number of screens.
Confirmation and Settings before Using
Note
sSometimes appears when you drag the
screen. You can also zoom in or out by tapping
this zoom control icon. Tap to zoom in by
one level. Tap to zoom out by one level.
However, the or part of the zoom control
icon turns to gray if you have already zoomed in
or to the maximum or zoom out to the minimum.
This indicates that you cannot zoom in or out any
further.
Using Motion Gesture
Operate simply by moving the terminal or pressing G
key.
sTo use motion gesture, tap X "Settings" X
"Gesture" X "Use motion gestures" from the Home
screen, and place a check mark in each item.
Using motion gesture on the Home
screen
To move the icon rightward or leftward on the Home
screen
From the Home screen, touch an icon
for over 1 second
Tip the terminal leftward or rightward
sThe left or right area is displayed.
Drag an icon to a desired location and
release your finger
Confirmation and Settings before Using
Display the right or left area of the Home screen
From the Home screen, tip the terminal
leftward or rightward with G key being
pressed
sThe left or right area is displayed.
Using motion gesture on alarm
To stop alarm to snooze
Flip the terminal while alarm is set
sAlarm stops and snooze turns on.
Using motion gesture on video player
To pause while playing a video
Flip the terminal while playing a video
sThe video is paused.
Using motion gesture while an incoming
call arrives
To mute the ringtone
When an incoming call arrives, flip the
terminal
sThe ringtone becomes mute.
Confirmation and Settings before Using
Receiving a call
When you receive an incoming call,
shake the terminal with G key being
pressed
Ending a call
Shake the terminal with G key being
pressed while answering a call
Using motion gesture in gallery
To move image display of the gallery
While an image in gallery is being
displayed, tap the left or right side of the
terminal
sThe left or right image is displayed.
Confirmation and Settings before Using
To move a thumbnail list display in gallery
While a thumbnail list is being
displayed, tip the terminal leftward or
rightward with G key being pressed
sThe thumbnail list is moved leftward or
rightward.
To enlarge or reduce an image
While an image in gallery is being
displayed, press G key
sThe image is enlarged or reduced.
Changing Screen Orientation
The terminal screen automatically rotates to horizontal
(landscape) and vertical (portrait) views, depending on
the direction in which it is turned.
Note
sScreen orientation may not change in some
applications.
sYou can disable screen rotation by tapping X
"Settings" X "Display" in the Home screen, and
unmarking the "Auto-rotate screen" checkbox in
the "Display settings" screen.
Confirmation and Settings before Using
Initial Settings
First-time Settings
When the power is first turned ON, you need to set the
language and date for the terminal. Once you set those
settings, there is no need to set them the next time the
power is turned ON. You can also change these settings
later.
sProcedures change depending on the connection
with network and settings skip.
sIf tap "Skip", the corresponding settings are skipped.
Press and hold the power key for over 1
second
"Continue"
Select a language
Set the date and tap "Next"
Set whether to use mobile network when
Wi-Fi is not available
Set Wi-Fi settings and tap "Next"
sFor details, refer to "Configuring Wi-Fi Settings"
(P46).
Tap "Next" in Google account setting
sEnter the login information, etc. following the on-
screen instruction.
sFor the details about character input method,
refer to "Text Entry" (P71).
"OK"
45
Confirmation and Settings before Using
Configuring Wi-Fi Settings
The terminal connects to the Internet via access points
for Wi-Fi networks or public wireless LAN services.
To connect, you must configure the access point
connection settings on the terminal.
Reception interference caused by Bluetooth devices
sThe terminal's wireless LAN devices and
Bluetooth device use the same frequency
(2.4GHz), reception interference may occur or the
communications speed may lower. Also, you may
hear noise or have a connection problem. In these
cases, do the following:
-Keep the wireless LAN device over 10 m away
from the Bluetooth device.
-Within 10 m, turn off either the wireless LAN
device or the Bluetooth device.
Wi-Fi network status
When the terminal is connected to a Wi-Fi network,
appears in the status bar. always appears in the
status bar. An open network with no security protection
is detected when Wi-Fi network notification is set to ON.
46
Confirmation and Settings before Using
Connecting to a Wi-Fi network
From the Home screen, X "Settings"
X "Wireless & networks"
sThe "Wireless & network settings" screen
appears.
Place a check mark on "Wi-Fi"
"Wi-Fi settings"
sThe "Wi-Fi settings" screen appears.
Tap the Wi-Fi network that you want to
connect to
sIf you try to connect to a protected Wi-Fi
network, you will be prompted to enter the
security key for that Wi-Fi network. Tap the
"Password" box, enter the network password
and tap "Connect".
sUsually, when you enter a password, an
immediate entered character is displayed and
"・" appears instead of any previous entered
characters. All characters can be displayed
when you place a check mark on "Show
password".
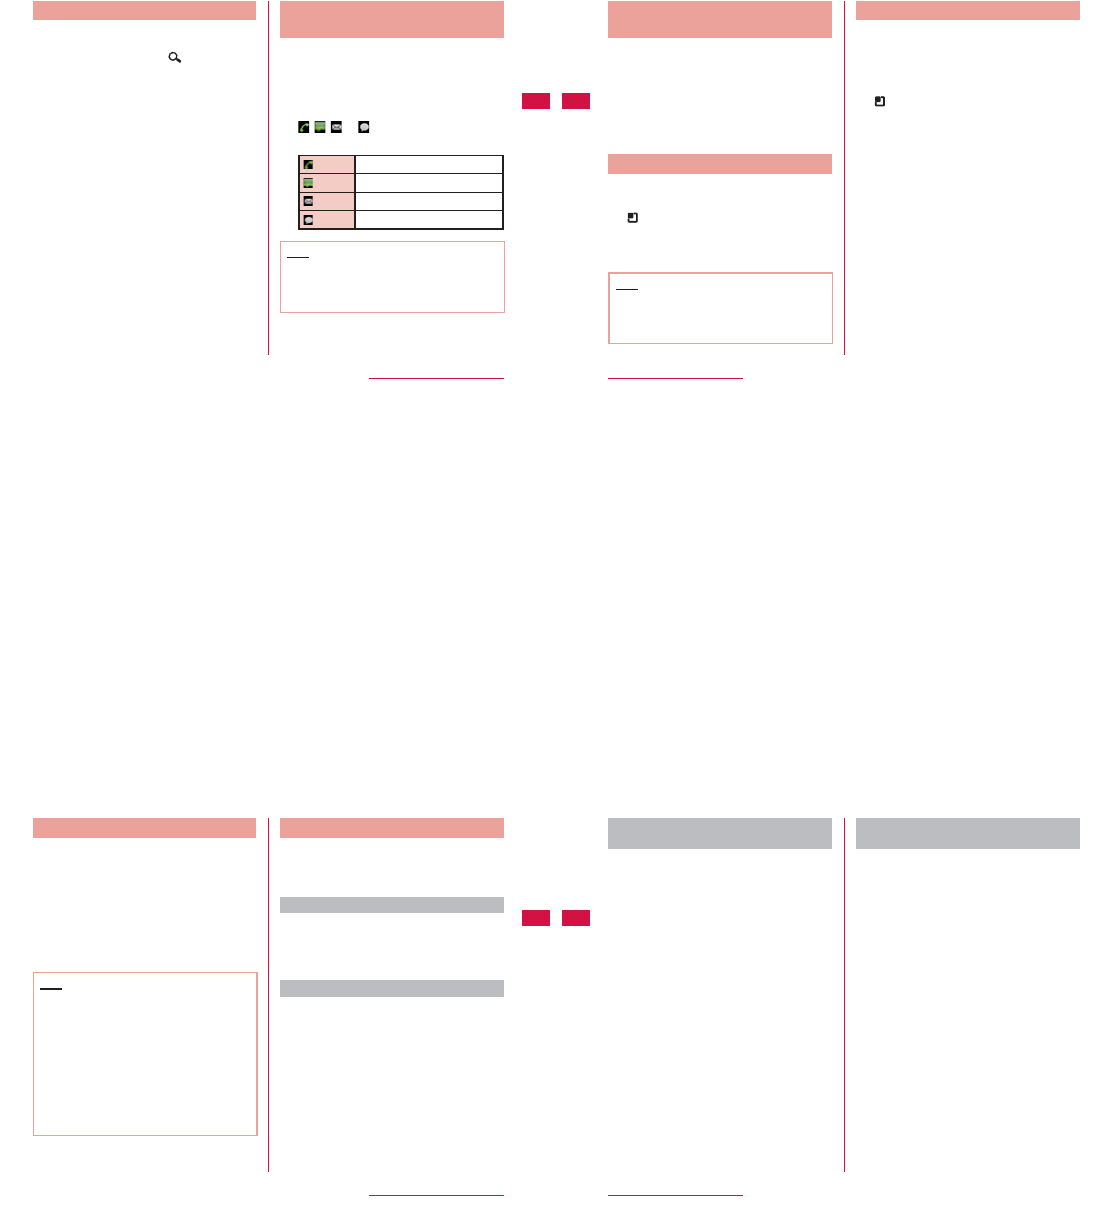
Note
sThere are two types of available networks - open
networks and protected networks. The network
type is indicated by an icon to the network name.
represents an open network and represents
a protected network.
sThe icon also indicates the signal strength.
Strong signal
Weak signal
sTo search Wi-Fi network again, from the Home
screen, tap X "Settings" X "Wireless &
networks" X "Wi-Fi settings", and then tap X
"Scan".
sNetwork name does not appear depending on the
settings for the access point even if the network
is connectable. If this happens, you can still
connect to the network. Refer to "Adding a Wi-Fi
network" (P49).
sWhen establishing a Wi-Fi network connection,
the required information is generally obtained
from a DHCP server automatically. However, it is
possible to specify these items separately.
sYou can check MAC address and IP address for
Wi-Fi, from the Home screen, tap X "Settings"
X "Wireless & networks" X "Wi-Fi settings", and
then tap X "Advanced".
47
Confirmation and Settings before Using
Connecting to a Wi-Fi network by
specifying a static IP address
From the Home screen, X "Settings"
X "Wireless & networks" X "Wi-Fi
settings"
sThe "Wi-Fi settings" screen appears.
X "Advanced"
Place a check make on "Use static IP"
Tap "IP address", "Gateway",
"Netmask", "DNS 1", and "DNS 2" in
order
sA menu appears for each item. Set the
appropriate value for each item. Make sure
to enter value on "IP address", "Gateway",
"Netmask", and "DNS 1".
Notifying when Wi-Fi network with no
security protection is detected
From the Home screen, X "Settings"
X "Wireless & networks" X "Wi-Fi
settings"
sThe "Wi-Fi settings" screen appears.
Place a check mark on "Wi-Fi"
Place a check mark on "Network
notification"
sYou will be automatically notified when an open
network without security protection is detected.
48
Confirmation and Settings before Using
Adding a Wi-Fi network
From the Home screen, X "Settings"
X "Wireless & networks" X "Wi-Fi
settings"
sThe "Wi-Fi settings" screen appears.
Place a check mark on "Wi-Fi"
"Add Wi-Fi network"
sThe "Add Wi-Fi network" menu appears.
Tap the "Network SSID" box and enter
network SSID
"Security"
sThe "Security" menu appears. Select the
appropriate type from "Open", "WEP", "WPA/
WPA2 PSK", and "802.1× EAP".
Tap the "Password" box and enter
password
sYou do not need to enter this if "Security" is set
to "Open".
"Save"
sThe Wi-Fi network is added.
Changing the Wi-Fi network password
From the Home screen, X "Settings"
X "Wireless & networks" X "Wi-Fi
settings"
sThe "Wi-Fi settings" screen appears.
Touch the Wi-Fi network name for over 1
second
sA menu appears.
"Modify network"
sThe network settings are displayed. Tap the
"Password" box and enter the new password.
Disconnecting from a Wi-Fi network
From the Home screen, X "Settings"
X "Wireless & networks" X "Wi-Fi
settings"
sThe "Wi-Fi settings" screen appears.
Touch the name of Wi-Fi network that
you want to disconnect from for over 1
second
sA menu appears.
"Forget network"
sYou are disconnected from the Wi-Fi network.
49
Confirmation and Settings before Using
Setting Wi-Fi to sleep mode
Set Wi-Fi to sleep mode and specify the timing of
switching data communication of the terminal.
From the Home screen, X "Settings"
"Wireless & networks" X "Wi-Fi
settings"
s"Wi-Fi settings" screen appears.
X "Advanced"
"Wi-Fi sleep policy"
s"Wi-Fi sleep policy" menu appears. Choose from
"When screen turns off", "Never when plugged
in" and "Never".
Setting Online Service Accounts
You can update your status on Google, Microsoft
Exchange ActiveSync and other online services
once you have set up your online service account on
the terminal. You can also configure the terminal to
automatically sync updates from the online
service.
You can also delete accounts.
Adding an online service account
From the Home screen, X "Settings"
X "Accounts & sync"
sThe "Accounts & sync settings" screen appears.
"Add account"
sThe "Add an account" screen appears.
Tap the online service that you want to
set an account
sFollow the screen instructions and enter your
login details.
sWhen you have finished adding the account, the
added online service appears in the "Manage
accounts" group.
50
Confirmation and Settings before Using
Note
sIf you mark the "Background data" checkbox,
all installed applications on the terminal
will automatically communicate with their
respective services. If you mark the "Auto-
sync" checkbox, the applications will also
automatically synchronize data with their
respective services. These operations may incur
packet communication charges. Marking these
checkboxes also runs down the battery due to the
increased background activity.
Manually synchronizing online service
data
From the Home screen, X "Settings"
X "Accounts & sync"
sThe "Accounts & sync settings" screen appears.
Tap the account that you want to
synchronize with
sA list of the online service's synchronized data
list appears.
sThe data with check mark is synchronized.
Place a check mark on synchronized
data
sThe data with check mark is synchronized.
Deleting an online service account
From the Home screen, X "Settings"
X "Accounts & sync"
sThe "Accounts & sync settings" screen appears.
Tap the account that you want to delete
sThe "Data & synchronization" screen appears.
"Remove account"
sThe "Remove account" screen appears.
"Remove account"
sThe selected account is deleted.
Note
sGoogle account that you set for the first time
cannot delete with the operation above. To delete
it, initialization of the terminal is required from the
Home screen, tap X "Settings" X "Privacy" X
"Factory data reset".
51
Confirmation and Settings before Using
Notification Panel
Notification icons are displayed in the Notification
panel. You can open notifications, such as messages,
reminders, or event notifications, directly from the
Notification panel.
Opening the Notification panel
Drag or swipe the status bar downwards
sThe Notification panel appears. Icons are
displayed at the top of the Notification panel.
Icons are blue when they are on, and gray when
they are off.
54
Confirmation and Settings before Using
a Silent mode
Switch between on and off. Touch for over 1 second
to display the "Sound settings" screen.
b Wi-Fi
Switch between on and off. Touch for over 1 second
to display the "Wi-Fi settings" screen.
c Bluetooth
Switch between on and off. Touch for over 1 second
to display the "Bluetooth settings" screen.
d GPS
Switch between on and off. Touch for over 1 second
to display the "Location & security settings" screen.
e Mobile network settings
When Wi-Fi is not available, set if access to mobile
network. Touch for over 1 second to display "Mobile
network settings" screen.
f Clear
Delete notification information and icons.
g Notification information
Display details of notification information.
Viewing notification details
Tap the notification message on the
Notification panel
sThe notification details are displayed in the
appropriate application.
Clearing notification informations
Tap "Clear" on the Notification panel
Note
sSome notifications cannot be cleared, depending
on their content.
Closing the Notification panel
Drag or swipe the bottom of the
Notification panel upwards
Note
sYou can also close the Notification panel by
tapping .
55
Confirmation and Settings before Using
Home Screen
You can customize the Home screen by adding or
moving shortcuts and widgets, and by changing the
wallpaper.
The Home screen has two screens each on the left and
right for adding shortcuts and widgets.
a Extended home location
Display location of the Home screen which is
currently displayed.
b Widget (Ex: quick search box)
Tap to activate or operate Widget (applications on
the Home screen).
c User customized part
Customization which you perform in the Home
screen is reflected. Moving/deleting application
shortcuts or widgets are available.
d Shortcut
Tap to activate an application or items in terminal
settings.
e
Open application list. In application list screen,
"Applications"/"Downloads" tab is selectable.
56
Confirmation and Settings before Using
Switching the Home Screen
From the Home screen, "Applications"
X "Home selector"
sHome selector opens.
Tap a Home application that you want to
change
sHome screen is changed.
Note
s"Home" is the only application that pre-installed in
the terminal when purchasing. The Home screen
will be changed after downloading the Home
application.
sFollow the instructions of the downloaded Home
application and tap "Home selector" X "Home" to
go back to the former Home screen.
sThe description in this manual is based on the
operations when Home selector is set to "Home"
and the contents of the Home screen are in
initial settings. Operations, such as opening an
application, may differ if the Home screen is
changed to the downloaded Home application or
when the Home screen contents are changed.
Viewing the Extended Screens
Rightward or Leftward
Drag the Home screen rightward or
leftward
sThe extended screens on the right or left appear.
Adding a Widget to the Home
Screen
Touch the Home screen for over 1
second
s"Widgets" tab appears.
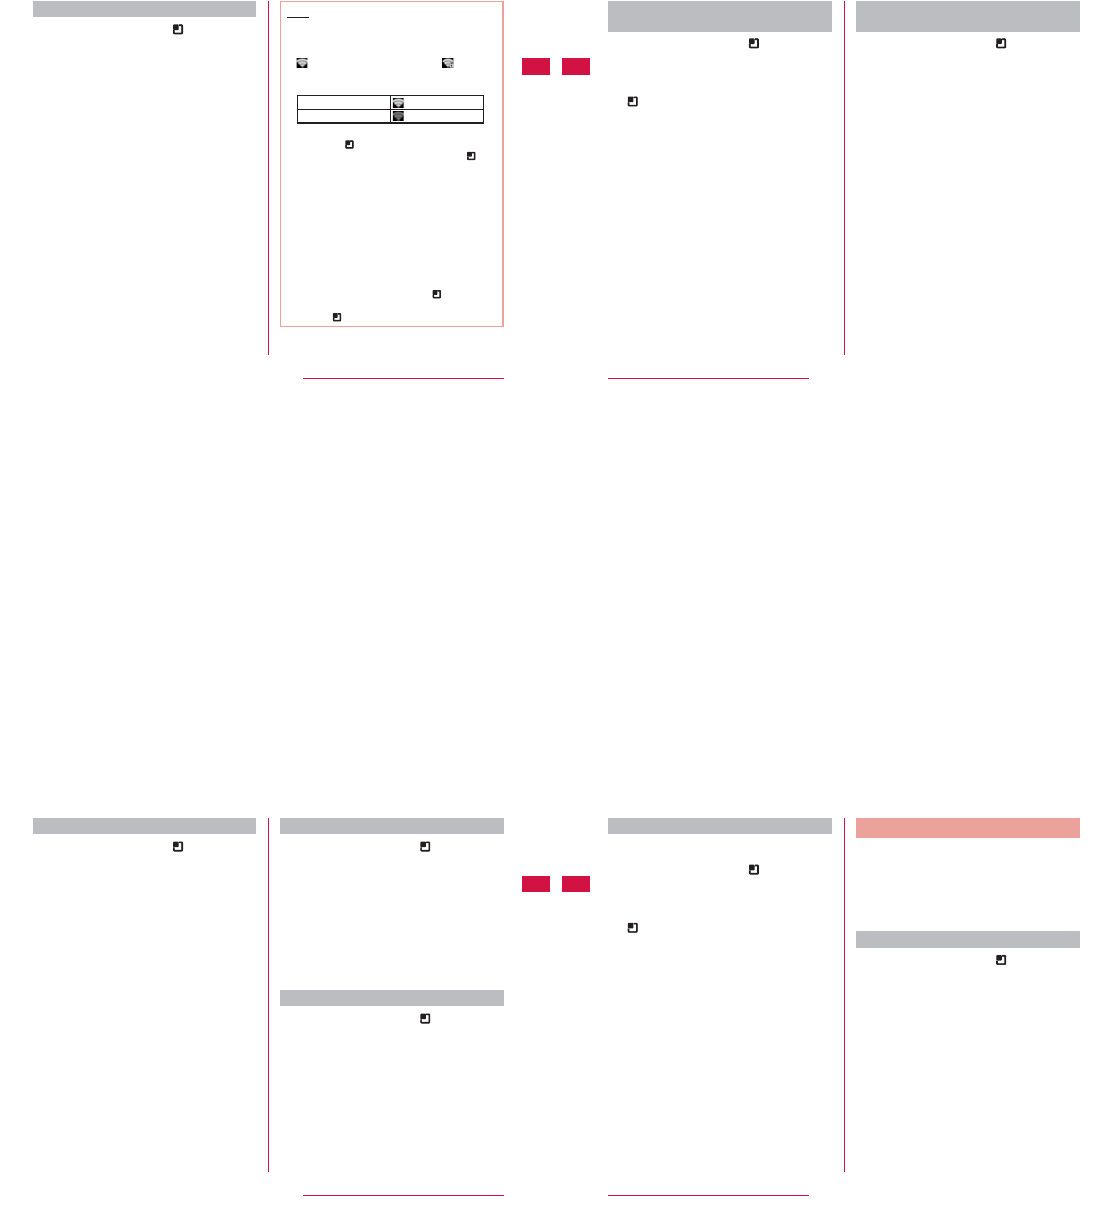
Widget Function
Latitude Show current location
YouTube Play videos
Analog clock Analog clock
Task Manager Manage the application
running
Rate Places Take notes shops nearby
Calendar Calendar
News & Weather News and weather forecast
57
Confirmation and Settings before Using
Widget Function
Home screen tips Show hint of the operation
Market Android Market
Music Play music tool
Google Search Search tool
Power Control A tool to manage Power
Tap a widget to add
sTouch the widget for over 1 second and drag it
to user customization area. Release your finger
at the location you desired.
sThe widget is added to the Home screen.
Adding a Shortcut to the Home
Screen
Touch the Home screen for over 1
second
"Shortcuts"
Tap a shortcut type you want to add
Tap a shortcut you want to add
sThe shortcut icon is added to the Home screen.
sIt may be required to set some items depending
on the shortcut. Set the settings according to
the on-screen instruction.
Creating a Folder on the Home
Screen
Tap the Home screen for over 1 second
"Folders"
Tap a folder you want to add
sThe folder is added to the Home screen.
58
Confirmation and Settings before Using
Adding a Shortcut to a Folder
From the Home screen, touch a shortcut
icon you want to add to a folder for over
1 second
Drag the icon to the folder and release
your finger
Tap the folder
sAfter the folder window opens, confirm whether
the shortcut has been added.
Change a Folder Name
Tap a folder you want to change name
sThe folder window opens.
Touch the title bar for over 1 second
s"Rename folder" menu appears.
Enter a new name of the folder and tap
"OK"
sThe name of the folder is changed.
Moving a Shortcut Icon
From the Home screen, touch a shortcut
icon that you want to move for over 1
second
Keep your finger on the icon, drag it to
the new location and release your finger
sThe shortcut icon is moved.
Note
sYou can also drag the shortcut icon to one of the
Home screen's extended screens to the left or
right.
59
Confirmation and Settings before Using
Changing the Home Screen
Wallpaper
Touch the Home screen for over 1
second
"Wallpapers"
Tap "Wallpapers" or a wallpaper
sIf you have tapped "Wallpapers" X "Gallery",
tap an image that you want to use as wallpaper.
Drag the square displayed on the screen to
select the section that you want to use as
wallpaper, and then tap "Save".
sLive wallpaper list appears when tapping
"Wallpapers" X "Live wallpapers". Tap to
select one of the live wallpaper, then tap "Set
wallpaper". Depending on the type of wallpaper,
you can set the live wallpaper settings by
tapping "Settings...".
Deleting a Home Screen Icon
From the Home screen, touch a shortcut
icon or widget for over 1 second
Keep your finger on the icon, drag it to
"Remove" and release your finger
sThe icon is deleted from the Home screen.
Searching
The "Google Search" widget allows you to search for
Contacts or applications in the terminal, or web pages.
You can also change the type of information that you
are searching for and the search range.
Searching by text entry
Tap the search box in the Search widget
in the Home screen
sThe Quick Search box appears.
Enter a word to search
sA list of search candidates, search results in the
terminal, and previously selected search results
are displayed in accordance with the entered
words.
Tap one of the items in the list
sThe selected item is displayed by the
appropriate application.
Note
sIf there is no search result that you want, you can
tap to search web pages.
60
Confirmation and Settings before Using
Voice-activating search
Tap of the Search widget on the
Home screen
When "Speak now" appears, clearly
speak the search word towards the
microphone
sYour spoken word is converted into text. A "Did
you mean..." list of information containing the
search term is displayed.
sGoogle home page with the search words in the
search box are shown if there is no suggestion.
sTap "Speak again" in the "No matches found"
screen if your voice cannot be recognized.
Tap one of the lists
sGoogle home page with the search words in the
search box are shown.
Note
sIf your spoken word is not converted correctly,
search by tapping again and speak the work
or enter the word to search.
Configuring search settings
From the Home screen, tap search box
in the Search widget
X "Search settings"
sThe "Search settings" screen appears.
Change the settings if required
Web
Google
search
Show web
suggestions
Set if display the
Google search
options when
inputting.
Use My
Location
Set if allow Google
to use location
information to
search or improve
the service quality.
Search
history
Set if display the
customized search
history.
Manage
search
history
Set if use Google
account to manage
the customized
search history.
61
Confirmation and Settings before Using
Phone
Searchable
items
Web Enter Web search,
Bookmark and
Browser history to
search.
Apps Enter the installed
application name
to search.
Music Enter artist, album
and track to
search.
Messaging Enter the text of
a message to
search.
Contacts Enter a contact
name to search.
Voice
Search
Enter voice search
history to search.
Clear
shortcuts
Delete the shortcut of the latest
selected search word.
Application Screen
On the Application screen, icons of all applications
stored in the terminal are displayed. You can tap an icon
to open the application.
Opening an application from the
application screen
From the Home screen, "Applications"
Tap an icon
sThe application for the tapped icon opens.
Note
sThe icon in category will be hidden if tap the title
bar of a category on the application screen. Tap
the title bar again to display the icon.
62
Confirmation and Settings before Using
Changing the layout of an application
screen
Application screen is displayed with three versions of
layout: category, page and list.
From the Home screen, "Applications"
X "Layout"
Tap "Category", "Page" or "List"
63
Confirmation and Settings before Using
Managing Category
Manage categories on the application screen and sort
icons.
Adding a category
From the Home screen, "Applications"
X "Manage category"
"Add"
Enter a category name and tap "Save"
sThe category is added on the application
screen.
Changing a category name
From the Home screen, "Applications"
X "Manage category"
Tap a category
Enter a category name and tap "Save"
sThe category name is changed.
Note
sThe names of categories which are pre-installed
in the terminal when purchasing cannot be
changed.
69
Confirmation and Settings before Using
Moving a category
From the Home screen, "Applications"
X "Manage category"
Tap of a category and drag
sThe category is moved.
Deleting a category
From the Home screen, "Applications"
X "Manage category"
"Delete"
Place a check mark on the category to
delete
"Delete" X "OK"
sThe category is deleted.
Note
sThe categories installed in the terminal when
purchasing cannot be deleted.
Managing Applications
Manage applications on the application screen.
Moving an application
From the Home screen, "Applications"
X "Manage app"
Touch an application for over 1 second
Drag the application and release your
finger
sThe application is moved.
Deleting an application
From the Home screen, "Applications"
X "Manage app"
Tap an application
s"Application info" screen appears.
"OK"
sThe application is deleted.
Note
sApplications installed in the terminal when
purchasing cannot be deleted.
70
Confirmation and Settings before Using
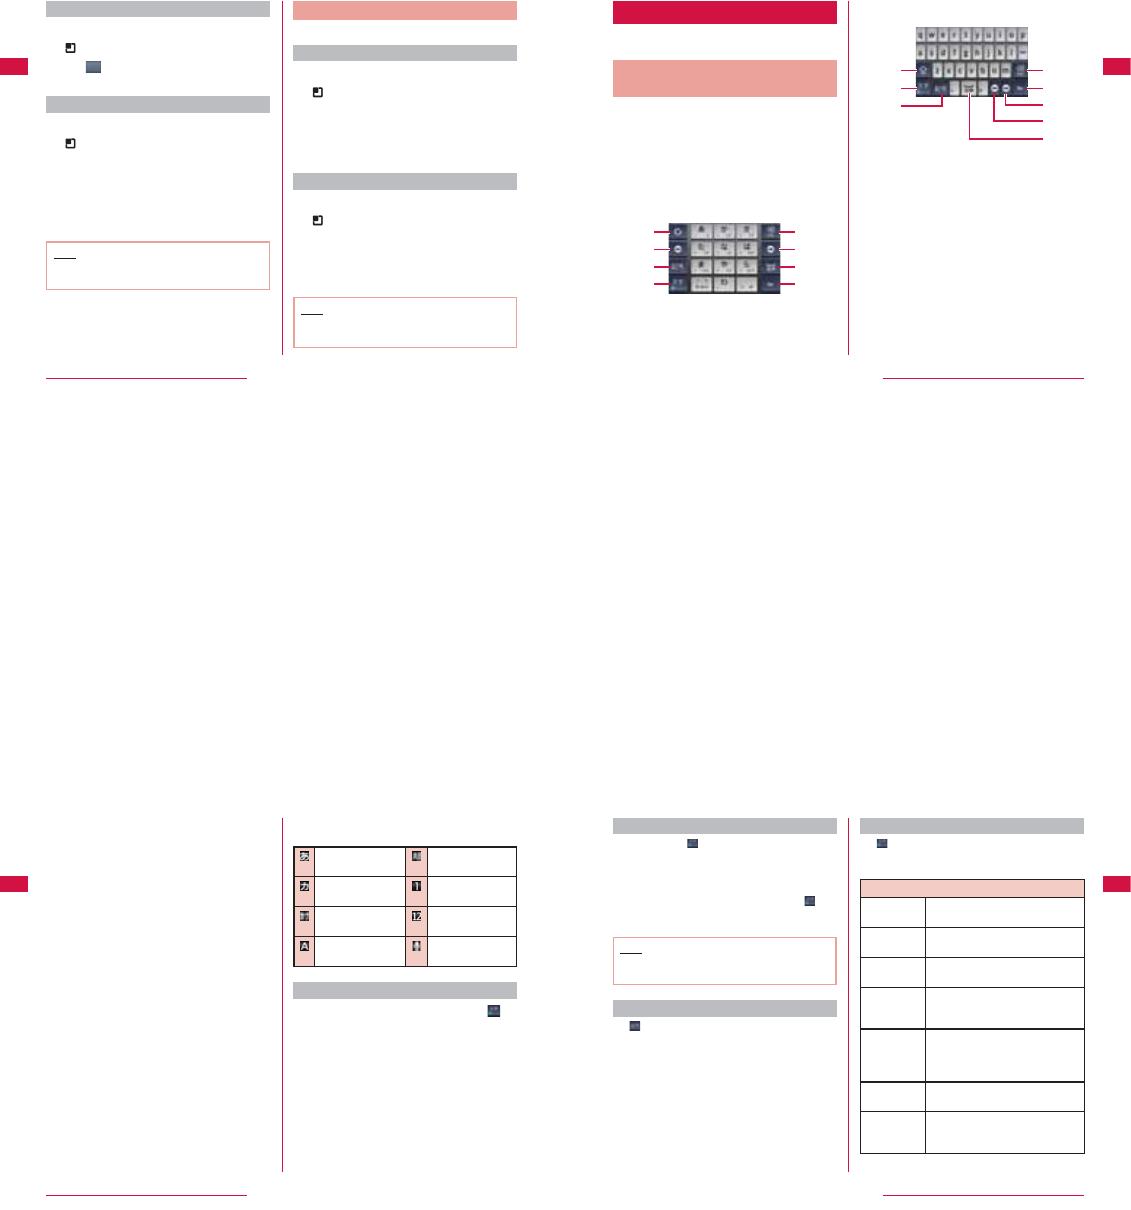
Text Entry
The terminal has an on-screen keyboard that is
displayed in the touch screen for text entry.
Text Entry Using the On-screen
Keyboard
If you tap a text box on the screen, the on-screen
keyboard appears in the touch panel. The terminal
provides two types of on-screen keyboard for Japanese
entry - an on-screen 10-key keyboard and an on-screen
QWERTY keyboard.
Tap key icon to switch the entering operation such as
letter type change.
On-screen 10-key keyboard
Use this for entering Japanese in "Kana character
input".
a e
b f
c g
d h
On-screen QWERTY keyboard
Use this for entering Japanese in "Roman letter input".
f
b
g
c
ie
dh
a Reverse order key/Undo key
Displays the previous character (reverse
sequence). When "Undo" is displayed, this undoes
the last operation.
b Left cursor key
The highlight moves to the left. It continues to move
if you touch the icon for over 1 second. It can also
narrow the conversion range.
c Symbol key
Displays a list of symbols and emoticons.
d Switch character type key/Setting key
Switch the character type. Touch for over 1 second
"iWnn IME Menu" appears.
e Deletion key
Deletes the character to the left of the cursor. The
characters continue to be deleted if you touch the
icon for over 1 second.
71
Confirmation and Settings before Using
f Right cursor key
The highlight moves to the right. Touch this for over
1 second to move it continuously. It can also widen
the conversion range. Also, if you tap this icon when
the highlight is at the right end of an unconfirmed
character string, the number of characters
applicable to predictive conversion increases.
g Space key/Conversion key
Enter a space. With an unconfirmed character,
tapping this icon will display conversion candidates.
h Execution key/Enter key
Confirms the entered characters or conversed
characters. If the entered characters or conversed
characters have already been confirmed, this
executes the function of the text box in which the
characters were entered.
i Shift key
Switch between upper case letter and lower case
letter.
There are 8 character input modes. The current mode is
indicated by the following icons in the status bar.
Hiragana and Kanji
input
Half-width alphabet
input
Full-width Katakana
input
Full-width number
input
Half-width Katakana
input
Half-width number
input
Full-width alphabet
input
Voice input
Switching the keyboard
On the on-screen keyboard, touch for
over 1 second
s"iWnn IME Menu" appears.
"10-key ⇔ QWERTY"
sThe keyboard is switched.
72
Confirmation and Settings before Using
Switching the character mode
Each time you tap on a text entry screen, the
character mode switches in the order of "Hiragana-
Kanji" X "Half-width Alphabet" X "Half-width Numeric".
If you check "Voice Input" on "Common Keyboard
Settings", voice input is enabled.
You can also switch the input mode by touching for
over 1 second and then tapping "Input Mode" on the
"iWnn IME Menu" that appears.
Note
sIn some text entry screens, certain character
modes may not be available or selectable.
Entering symbols/emoticons
Tap in a text entry screen to switch to symbol/
emoticon input mode, and display the available symbols
and emoticons on the display.
Tap "Symbol" and "Emoticon" to display respectively
the available symbols and emoticons. Tap one of the
available symbols or emoticons to enter it.
Tap "Cancel" to return to the on-screen keyboard that
was displayed before the symbol or emoticon was
entered.
Changing text entry settings
Tap for over 1 second on a text entry screen to
display "iWnn IME Menu". Tap "Change Settings" to
change the text entry settings.
Common Keyboard Settings
Sound on Key
Press
Mark this checkbox to play a brief
sound on each key press.
Vibrate on
Key Press
Mark this checkbox to make the
terminal vibrate on each key press.
Key Preview Mark this checkbox to display an
enlarged popup of the entered key.
Auto
Capitalization
Mark this checkbox to automatically
capitalize the first letter of the first
word at the beginning of a sentence.
Keyboard
Type
This allows you to set the type of
keyboard to use on each screen
view (horizontal/vertical) or for each
input mode.
Keyboard
Image
This allows you to set the keyboard
design.
Voice Input Mark the checkbox to enable voice
input, and add it to the text input
modes.
73
Confirmation and Settings before Using
10-key Keyboard
Flick Input Mark this checkbox to change the
input method on the on-screen 10-
key keyboard to flick input. Unmark
this checkbox to change it back to
toggle input.
Flick
Sensitivity
If you tap this while the "Flick Input"
checkbox has been marked, the
"Flick Sensitivity(Low⇔High)" menu
appears, allowing you to set the flick
sensitivity using a slide bar.
Toggle Input If you mark this checkbox while the
"Flick Input" checkbox has been
marked, toggle input is enabled as
well as flick input.
Auto Cursor
Movement
Specify the speed for auto cursor
movement.
Conversion
Input Word
Learning
If you mark this checkbox, the
phrase confirmed by the conversion
process is learnt by iWnn IME.
Word
Prediction
Mark this checkbox to display the
predictive conversion candidates.
Typing Error
Correction
Mark this checkbox to display the
candidates for corrections for input
errors.
Wildcard
Prediction
Mark this checkbox to display
conversion candidates based on the
number of characters in the word or
phrase.
Lines of
Candidate
Area
This allows you to set the number
of lines of conversion candidates
displayed in horizontal (landscape)
and vertical (portrait) screens.
74
Confirmation and Settings before Using
External Application
Mushroom This allows you to set whether to use
the Mushroom application.
Dictionary
Japanese
User
Dictionary
Tap this to display the "Word List in
Japanese User Dictionary" screen.
Tap to register, edit or delete
words, or to delete the entire
Japanese User Dictionary.
English User
Dictionary
Tap this to display the "Word List in
English User Dictionary" screen.
Tap to register, edit or delete
words, or to delete the entire English
User Dictionary.
Clear
Learning
Dictionary
Delete all contents of the learning
dictionary.
About IME
iWnn IME Displays information about iWnn
IME, such as its version.
75
Confirmation and Settings before Using
Calling / Network Services
Making/Receiving Calls
Making a Call
You can use the terminal to make international calls
and emergency calls, as well as standard calls. You can
also enter a pause when using phone services, such as
reserving tickets or checking your bank balance.
Making a call
From the Home screen, "Phone"
sThe "Phone" tab appears.
Enter the phone number X
sIf you enter a wrong number, tap to delete
the number.
Entering a pause
From the Home screen, "Phone"
sThe "Phone" tab appears.
Enter the phone number, X "Add
2-sec pause"
s
A comma "," is displayed after the phone number.
Enter the menu number of the service
that you are using X
Ending a call
During a call, "End"
Emergency numbers
Emergency numbers Telephone number
Police 110
Fire department or
ambulance service
119
Japan Coast Guard 118
76
Calling / Network Services
Calls to fixed-line telephone
From the Home screen, "Phone"
sThe "Phone" tab appears.
"010" X Country code X Area code X
Recipient's phone number, and tap
Calls to mobile phone
From the Home screen, "Phone"
sThe "Phone" tab appears.
"010" X Country code X Recipient's
mobile number, and tap
Note
sIf a recipient's mobile number or an area code
begins with "0", omit "0". However, "0" may be
required when calling a recipient's mobile or some
countries or areas, such as Italy.
s"+" (touch "0" for over 1 second to input "+") or
"009130-010" can also be used instead of "010".
sFor details on WORLD CALL, refer to
"International Services website".
Receiving a Call
The terminal plays a ringtone when there is an incoming
call. In Silent mode, the ringtone does not sound. If the
terminal has been set to Vibrate, it vibrates when there
is an incoming call.
Receiving a call
When a call is received, drag rightward
sYou can talk to the caller.
Note
sIf the caller has been saved in Contacts, the
caller's name and phone number are displayed. If
the caller is not saved in Contacts, only the phone
number is displayed.
Declining a call
When a call is received, drag leftward
sThe incoming call is declined.
Muting ringtone
Press the Volume key (upper)/Volume
key (lower) while an incoming call
ringing
sRingtone gets muted.
78
Calling / Network Services
Operations during a Call
During a call, you can adjust the volume, turn the
speaker ON/OFF, mute the microphone, and put the call
on hold, depending on the usage conditions.
Adjusting Call Volume
During a call, you can adjust the reception volume.
Press Volume key (upper)/Volume key
(lower)
sThe call volume changes accordingly.
Using Call Options
During a call, you can put the caller onto speaker or
temporarily mute the microphone.
Turning the speaker ON/OFF
During a call, "Speaker"
sYou can hear the caller's voice through the
speaker.
With the speaker ON, "Speaker"
sYou can no longer hear the caller's voice
through the speaker.
Note
sDo not hold the terminal against your ear with the
speaker ON.
sSpeak into the terminal from a distance of no more
than 50 cm. If you find it difficult to hear what is
being said, turn off the speaker.
Muting the microphone
During a call, "Mute"
sThe caller can no longer hear what you are
saying.
With the microphone OFF, "Mute"
sThe caller can hear what you are saying again.
Putting the call on hold
During a call, "Hold"
sThe call is put on hold.
In the hold state, "Unhold"
sHold is cancelled, and you can resume the call.
79
Calling / Network Services
Call Log
This automatically records a history of your incoming
and outgoing calls. You can also use the call log to call a
phone number or add it in Contacts.
Calling to Answer a Missed Call
When you have missed calls, a missed call notification
appears in the status bar.
If you see in the status bar, drag or
swipe the status bar downwards
sNotification of the missed call appears in the
Notification panel. The missed call notification
displays the caller's phone number or the
caller's name that is saved in Contacts, and the
time or date of the missed call.
Tap the missed call notification
sThe "Call log" tab is displayed.
sFor the missed call log, is displayed.
Tap on the right of the missed call log
sThe call is made.
Calling a Number from the Call
Log
You can make calls to the phone numbers stored in the
call log.
From the Home screen, "Phone" X "Call
log" tab
sThe "Call log" tab appears.
Tap on the right of the other party's
name or phone number
sThe call is made.
Note
sYou can also make a call by touching the desired
name or phone number on the "Call log" tab for
over 1 second and then tapping "Call ×××-×××-
×××××" in the menu that appears.
80
Calling / Network Services
Adding a Phone Number from
the Call Log to Contacts
You can add phone numbers from the call log to
Contacts.
On the "Call log" tab, touch the phone
number for over 1 second
sA menu appears.
"Add to contacts"
sThe Contacts screen appears.
The contact in which you want to add a
number or "Create new contact"
sThe "Create contact under account" screen
appears when selecting the "Create new
contact", select an account.
Enter the contact information and tap
"Save"
sThe contact is added to Contacts.
Deleting the Call Log
Calls are automatically added to the call log. However,
you can delete a call log or all call logs for any phone
number or contact.
Deleting a phone number or contact
from the call log
On the "Call log" tab, touch the phone
number for over 1 second
sA menu appears.
"Remove from call log"
sThe call log is deleted.
Deleting all call logs
On the "Call log" tab, X "Clear call
log" X "OK"
sThe entire call log is deleted.
81
Calling / Network Services
Contacts
In Contacts, you can enter information about your
personal contacts, such as their phone number, email
address and web service accounts.
Viewing a Contact
You can view all the contact information that is saved in
Contacts.
From the Home screen, "Contacts"
sThe "Contacts" tab appears.
sIf the "Favorites" tab appears, tap "Contacts".
Adding a Contact
You can add a new contact to Contacts.
On the "Contacts" tab or "Favorites"
tab, X "New contact"
sSelect an account from "Create contact under
account" screen.
Enter the contact information, and tap
"Save"
sThe entered information is added to Contacts.
Editing a Contact
You can edit a contact that has already been added to
Contacts.
On the "Contacts" tab, touch a contact
that you want to edit for over 1 second
sA menu appears.
"Edit contact"
sThe Edit contact screen containing previously
entered information appears.
Add, delete or edit the information, and
tap "Save"
sContacts is updated.
82
Calling / Network Services
Searching for a Contact
You can search for a contact on the "Contacts" tab by
dragging in the tab or by text entry.
On the "Contacts" tab,
Enter the search text
sSuggestions, search results in the terminal
and previously selected search results are
displayed.
Tap one of the contacts
sThe contact information is displayed.
Making Calls/Sending Emails/
Chatting via Contacts
You can make a call directly from Contacts. If you have
added an email address or chat account to the contact's
entry, you can also send the contact an email or launch
a chat application and chat with the contact.
On the "Contacts" tab, tap a contact
sThe contact information is displayed.
, , or
sYou can now make a call, send an email or chat.
Make a call.
Send an SMS message.
Send an email.
Start a chat.
Note
sTouch the contact for over 1 second to display a
menu. You can now make a call if you tap "Call
contact", or send an SMS message if you tap "Text
contact".
83
Calling / Network Services
Viewing the Map of a Contact's
Address
If the contact's address has been added to Contacts,
you can view its location in a map.
On the "Contacts" tab, tap a contact
sThe contact information is displayed.
"View xxxx address"
sThe "Maps" application opens, displaying the
location of the contact's address that is saved in
Contacts.
Deleting a Contact
On the "Contacts" tab, tap a contact
sThe contact information is displayed.
X "Delete contact"
sA confirmation message appears.
"OK"
sThe contact is deleted.
Note
sYou can also delete a contact by touching a
contact on the "Contacts" tab for over 1 second,
and tapping "Delete contact" in the menu that
appears.
Sharing a Contact
You can share the contacts saved in the terminal with
other applications.
On the "Contacts" tab, tap one of the
contacts
sThe contact information appears.
X "Share"
sA menu listing the applications that the contact
can be shared with appears.
Tap one of the applications
sThe screen of the selected application appears.
Follow the instructions on the screen.
84
Calling / Network Services
Adding a Contact to Favorites
When you add a contact to Favorites, it appears on the
"Favorites" tab. The "Favorites" tab allows you to quickly
display a specific contact.
On the "Contacts" tab, touch the contact
that you want to add to Favorites for
over 1 second
sA menu appears.
"Add to favorites"
sThe contact is added to the "Favorites" tab.
Note
sWhen you display a contact that has been added
to Favorites, the star icon in the top right-hand
corner of the screen turns yellow.
sIf you tap the yellow star icon, it turns gray.
- If the contact has call log, the contact is
displayed in "Frequently contacted" of
"Favorites" tab.
- If the contact has no call log, the contact is
undisplayed in "Favorites" tab.
sIf you tap a gray star icon, it turns yellow and the
contact is displayed in "Favorites" of "Favorites"
tab.
Using Phonebook Copy Tool
Copy Phonebook data between this terminal and other
terminals via microSD card. Also, you can copy the
Phonebook data saved to your Google account to your
account.
Open Phonebook copy tool
From the Home screen, "Applications"
X "PhoneBookCopy"
sFor first time users, to accept "使用許諾契約書
(Licence agreement)" is required.
Exporting Phonebook to microSD card
Insert a microSD card to the terminal
From "エクスポート (Export)" tab
screen, "開始 (Start)"
sPhonebook data stored on account is saved to
microSD card.
"OK"
85
Calling / Network Services
Importing Phonebook from microSD
card
Insert the microSD card on which your
Phonebook data is saved inside to the
terminal
From "インポート (Import)" tab
screen, tap a file to import X "上書き
(Overwrite)"/"追加 (Add)"
sThe imported Phonebook data is saved to
account.
"OK"
Copying Contacts on Google account to
account
From "アカウントへコピー (Copy to
account)" tab screen, tap the Google
account you want to copy X "上書き
(Overwrite)"/" 追加 (Add)"
sThe copied Phonebook data is saved on
account.
"OK"
86
Calling / Network Services
Voice Mail Service
If you are in a location with no radio reception, the
terminal is powered off, or you are unable to take the
call within the preset ring time, the Voice Mail Service
answers a call with a voice mail greeting and records
the caller's message.
Basic flow of the Voice Mail Service
Start the Voice Mail Service.
T
A call is made to your terminal.
T
If you do not answer the voice call, a
connection is made to the Voice Mail Service
Center.
T
A message is recorded.
T
You are notified of the message at the Voice
Mail Service Center.
T
Play the message.
88
Calling / Network Services
Setting the Voice Mail Service
From the Home screen, X "Settings"
X "Call settings" X "Voice mail service"
sThe "Voice mail service" screen appears. The
following operations are available to you.
Activate Tap "OK" to start the Voice Mail
Service.
Ring time Enter 0 to 120 (seconds) for the
ring time.
If the ring time is set to "0", calls
will not be saved to the call logs.
Deactivate Tapping "OK" when setting the
Voice Mail Service stops the Voice
Mail Service.
Check
setting
Display the setting state of the
Voice Mail Service.
Play
messages
Tap "OK" to connect to the Voice
Mail Service Center. Follow
the voice prompts to play the
message.
Setting Tap "OK" to connect to the Voice
Mail Service Center. Change the
Voice Mail settings by following
the voice prompts.
Check
messages
Check whether there is a new
Voice Mail message. After
checking, the completion
message appears.
Tone/
Vibration
message
notification
The "Tone/Vibration message
notification" screen appears. Mark
the "Sound" or "Vibrate" checkbox
to be alerted of a new Voice Mail
message by a tone or vibration or
both.
89
Calling / Network Services
Missed call
notification
The "Missed call notification"
screen appears. Configure
settings of the SMS message
notification that will be received
for calls that were missed while
the terminal was powered off or
outside of the service area. The
SMS message contains the date
and time of the missed call and
the caller's phone number and
will be sent the next time that
the terminal is powered on or re-
enters the service area.
sTap "Activate" to specify the
type of missed calls to be
notified about. Select "All calls"
to be notified of all missed calls.
Select "Calls with caller ID" to
be notified only of missed calls
with caller ID.
sTap "Deactivate" and then tap
"OK" during a notification to
deactivate the notification.
sTap "Check setting" to display
the current notification settings.
Delete icon The Voice Mail notification is
deleted.
Note
sIf you have messages at the Voice Mail Service
Center, appears in the status bar. Once all
messages have been cleared or stored, following
the guidance, will disappear.
Playing a voice message
Drag or swipe the status bar downwards
sThe Notifications panel is displayed.
"New voicemail" X "Yes"
sThe terminal is connected to the Voice Mail
Service Center. Follow the guidance to play
messages.
90
Calling / Network Services
Call Waiting Service
When there is another incoming call while you are on a
call, the in-call ringtone notifies you of the second call.
You can answer the second call by putting the first call
on hold. You can also put your current call on hold and
place a call to another party.
Note
sEven when the call is on hold, the caller is
charged for a call fee.
Setting the Call Waiting Service
From the Home screen, X "Settings"
X "Call settings" X "Call waiting"
sThe "Call waiting" screen appears. The following
operations are available to you.
Activate Tap "OK" to start the Call Waiting
Service.
Deactivate Tap "OK" to stop the Call Waiting
Service.
Check setting The current settings are
displayed.
Putting the current call on hold and
answering an incoming call
If you hear a beep during a call, drag
to rightward
sThe first call is automatically put on hold and the
incoming call is received.
Switch to the first call
sTo end the second call, tap "End". The second
call is terminated and you return to the first call.
sTo put the second call on hold, tap "Swap". The
second call is put on hold and you return to the
first call. Tapping "Swap" switches to the other
party.
Ending the current call and answering
an incoming call
X "End current call & answer" or
"End active call" during a call
sThe first call is terminated and the incoming call
is received.
91
Calling / Network Services
Putting the current call on hold and
making a call to another party
During a call, "Add call"
sThe "Phone" tab appears.
Enter the other party's phone number,
and tap
sThe first call is automatically put on hold and
you are put through to the new call. You can also
search for a contact if you tap the "Contacts" tab
or "Call log" tab.
Switch to the first call
sTo terminate the new call, tap "End". The new
call is terminated and you return to the first call.
sTo put the new call on hold, tap "Swap". The new
call is put on hold and you return to the first call.
Tapping "Swap" switches to the other party.
Call Forwarding Service
The Call Forwarding Service forwards a call to a preset
forwarding number if you do not answer the call within
the preset ring time, or are outside of the service area
or if the terminal is powered off.
Note
sIf you do not answer an incoming call when the
Call Forwarding Service is set to "Activate", the
call is saved in "Call log" as a missed call, and
appears in the status bar.
Basic flow of the Call Forwarding
Service
Register the forwarding number.
T
Set the Call Forwarding Service to start.
T
A call is made to your terminal.
T
If you do not answer a call, it is automatically
forwarded to the specified forwarding number.
92
Calling / Network Services
Call charge for the Call Forwarding
Service
Caller
TCall charges are incurred by
the caller.
Subscriber to the Call Forwarding Service
T
Call charges are incurred
by the subscriber to the Call
Forwarding Service.
Forwarding number
Note
sEven when the Call Forwarding Service is active,
you can answer a call while the ringtone sounds.
Setting the Call Forwarding Service
From the Home screen, X "Settings"
X "Call settings" X "Call forwarding"
sThe "Call forwarding" screen appears. The
following operations are available to you.
Activate Change
forwarding
number
Enter the forwarding
number.
Register
ring time
Enter 0 to 120 (seconds)
for the ring time. If the
ring time is set to "0",
incoming calls are not
saved in the call log.
Deactivate Tap "OK" to stop the Call
Forwarding Service.
Register number Enter a new forwarding
number and tap "OK" to
change the forwarding
number. You can
also activate the Call
Forwarding Service by
marking the "Activate"
checkbox when the
service is deactivated.
93
Calling / Network Services
Forwarding number
busy
Tap "Connect" to
automatically connect
an incoming call to
the Voice Mail Service
Center if the forwarding
number is busy*.
Check setting The current Call
Forwarding Service
settings are displayed.
* A subscription to the Voice Mail Service is
required.
Setting on/off the Call Forwarding voice
prompts
From the Home screen, "Phone"
sThe "Phone" tab appears.
"1" X "4" X "2" X "9" X
sFollow the voice prompts to configure the
setting. For details, refer to "Mobile Phone User's
Guide [Network Services]".
Caller ID Notification Service
When making a call, your phone number can be shown
in the display of the other party's phone.
Note
sThe Caller ID Notification Service is not available
when (out of service area) is displayed.
sThe service is only in operation when the other
party's phone can display the caller ID.
sIf an announcement requesting caller ID is heard
when making a call, activate Caller ID Notification
or add the "186" prefix to the phone number and
call again.
From the Home screen, X "Settings"
X "Call settings" X "Caller ID
notification"
sThe "Caller ID notification" screen appears. The
following operations are available to you.
Check
setting
The current Caller ID Notification
settings are displayed.
Setting Set whether the other party is
notified of your caller ID. Tap
"Notify" to enable notification, and
"Not notify" to disable notification.
94
Calling / Network Services
Additional Services
When a new network service is introduced by au, you
can use it after registering it in the menu.
Note
sWhen using the service, enter "Special Numbers"
or "service code" informed by au. "Special
Numbers" is the number to access service center.
"service code (USSD)" is the number to inform to
service center.
Setting additional services
From the Home screen, X "Settings"
X "Call settings" X "Additional service"
sThe "Additional service" screen appears.
"Add USSD functions" X "Add USSD
functions"
sThe "Add USSD functions" menu appears.
Enter "Service name" and "USSD
string", and tap "OK"
sEnter "Service name" using 20 double-byte
characters or 20 single byte characters.
Registering the response message
when using the service
From the Home screen, X "Settings"
X "Call settings" X "Additional service"
sThe "Additional service" screen appears.
"Add message" X "Add message"
sThe "Add message" menu appears.
Enter "Answer word" and "USSD string"
and tap "OK"
sThe new service is added.
sEnter "Answer word" using 20 double-byte
characters or 20 single byte characters.
Using the registered service
From the Home screen, X "Settings"
X "Call settings" X "Additional service"
sThe "Additional service" screen appears.
"Add USSD functions" X Tap the
registered service
sThe registered service is available to use.
95
Calling / Network Services
Sound
This allows you to configure various sound settings,
such as the type and volume of ringtones, Silent mode
and Vibrate. The menu and functions displayed on this
screen are shown below.
General
Silent mode Enable/disable Silent mode. When
in Silent mode, all sounds apart from
music/video and alarms are muted.
Vibrate Set when to use the vibrator.
Volume Set the volume of the ringtone,
music/video and alarms. Sound
volume of notification also can be
adjusted.
Incoming calls
Phone
ringtone
Set the sound used as the ringtone.
Notifications
Notification
ringtone
Set the sound used for notifications.
Feedback
Audible touch
tones
Set whether a sound is played when
a phone number is entered.
Audible
selection
Set whether a sound is played when
a menu item is selected.
Screen lock
sounds
Set whether a sound is played when
the screen is locked/unlocked.
Haptic
feedback
Set whether to enable to vibrate
during specific operations, such as
, , and .
102
Settings
Display
This allows you to configure display settings, such
as screen brightness and animation. The menu and
functions displayed on this screen are shown below.
Brightness Set the screen brightness.
Auto-rotate
screen
Set whether to automatically change
the screen display when the terminal
is rotated.
Animation Configure the animation settings.
Screen
timeout
Set how long to keep the backlight
on after the last time using the
terminal.
103
Settings
Security Codes and UIM
Protection
For convenient and secure use of the terminal, you
can set codes to lock the terminal and network security
codes to be used with network services. You can make
better use by dividing the codes depending on different
purposes.
Note
sAvoid setting security codes using your birthday,
part of your phone number, your address or room
number, "1111" or "1234", which can be easily
guessed by others. Be sure to write down the
security codes and store them in a safe location.
sDo not reveal your security codes to others. is
not responsible for damage caused by misuse of
your security codes by others.
sIf you forget your security codes, you need to
bring your identification document (driver's
license, etc.), the terminal and the UIM to a Shop.
For details, contact "General Inquiries" provided
on the last page of this manual.
sYour PIN unblocking key is written in the
application form (copy for subscriber) given at
the time of contract. If you have subscribed at a
place other than a Shop, bring your identification
document (driver's license, etc.) and the UIM to a
Shop, or contact "General Inquiries" provided on
the last page of this manual.
105
Settings
Network security code
The network security code is a 4-digit number
necessary for using the Network Services or
identification at reception of your request in Shop or
at Information Center. It can be set any number at the
subscription and also changed later by yourself. You
can change your network security code to the new one
through PC if you have a " ID/ Password" on General
support site for PC "My ".
PIN code
The UIM can set security code named PIN code. This
code is set to "0000" at the time of subscription, but you
may subsequently change it.
PIN code are 4- to 8-digit numbers that are entered to
check the user when the UIM is inserted in the terminal
or the terminal power is turned on. It is intended to
prevent unauthorized use of the terminal by a third
party. You can use the terminal by entering PIN code.
Note
sIf you use a UIM that has been currently used
when you buy a new terminal, use the same PIN
code that had been set on the current terminal.
The code is "0000" if the default setting has not
been changed.
sIf you enter incorrect PIN code three times in a
row, the code will be locked. In that case, unlock
with "PUK code".
106
Settings
PIN unblocking key (PUK)
The PIN unblocking key (PUK) is an 8-digit number
used to unblock the PIN code. You cannot change it by
yourself.
sIf you enter the PUK code incorrectly ten times in a
row, the UIM will be locked. If this happens, please
contact a Shop.
Enabling UIM's PIN code
From the Home screen, X "Settings"
X "Location & security"
"Set up SIM card lock"
sThe "SIM card lock settings" screen appears.
"Lock SIM card"
sThe "Lock SIM card" screen appears.
Enter PIN code and "OK"
sYou are asked to enter the PIN code when the
terminal is powered on.
Changing PIN code
From the Home screen, X "Settings"
X "Location & security"
"Set up SIM card lock"
sThe "SIM card lock settings" screen appears.
"Change SIM PIN"
sThe "SIM PIN" menu appears, and you are
prompted to enter the PIN code.
Enter the current PIN code, and "OK"
sYou are prompted to enter the PIN code in the
"SIM PIN" screen.
Enter the new PIN code, and "OK"
sYou are prompted to enter the PIN code again in
the "SIM PIN" screen.
Enter the same PIN code that was
entered in Step 5, and "OK"
sThe PIN code is changed.
Note
sDefault setting for PIN code is "0000".
107
Settings
Entering PIN code
Perform the following operations if you are asked to
enter the PIN code when the terminal is powered on.
Enter the PIN code of the UIM, and "OK"
Unblocking the PUK locked UIM
Follow the procedures below to unlock PIN when you
enter PIN code 3 times incorrectly in a row.
Enter PUK on PIN unblocking code screen
and "OK"
Enter a new PIN code and "OK"
Enter the same PIN code that you
entered in step 2 and "OK"
Applications
This allows you to configure applications' settings. The
menu and functions displayed on this screen are shown
below.
Unknown
sources
Configure whether the installation of
the applications, which are supplied
by other than Android market are
allowed.
Manage
applications
List/delete installed applications.
Running
services
List/stop the active services.
Storage use Display storage status used for
application.
Battery use Display applications which are using
battery and battery usage.
Development Configure the various settings
required for application
development.
108
Settings
Accounts & Sync
Allows you to configure the settings of accounts and
their synchronization. The menu and functions displayed
on this screen are shown below.
General sync settings
Background
data
Set whether synchronization
applications always synchronize and
whether send/receive data.
Auto-sync Set whether synchronization
applications automatically
synchronize data.
Manage accounts
Add or delete an account used in this terminal, such
as Microsoft Exchange, Google, etc.
Privacy
Allows you to initialize data. The menu and functions
displayed on this screen are shown below.
Personal data
Factory data
reset
Delete all data from the terminal.
Initializing Terminal
From the Home screen, X "Settings"
X "Privacy"
"Factory data reset" X "Reset phone" X
"Erase everything"
Note
sBackup your data such as images, videos and
music on PC. For details about connection method,
refer to "File Management" (P140) and "External
Device Connection" (P147).
109
Settings
Storage
This allows you to display the microSD card status,
mount and format, and the free space in internal
memory. The menu and functions displayed on this
screen are shown below.
SD card
Total space Display the total space on mircoSD
card.
Available
space
Display free space on mircoSD card.
Unmount SD
card/Mount
SD card
sUnmount the microSD card to
remove it safely.
sMount the microSD card before
using.
Erase SD
card
Erase all data (music, photo, etc.)
inside microSD card.
Internal storage
Available
space
Display free space of internal
storage.
Language & Keyboard
This allows you to configure the terminal's language and
keyboard settings. The menu and functions displayed in
this screen are shown below.
Language settings
Select
language
Select the language used on the
terminal.
User dictionary Procedures such as registration are
required when using the character
entry application supplied by
Google. You can download
the character entry application
provided by Google from Android
market.
Keyboard settings
iWnn IME Set screen keyboard settings.
110
Settings
Voice Input & Output
This allows you to configure settings for voice input
and output. The menu and functions displayed on this
screen are shown below.
Voice input
Voice
recognizer
settings
Configure the settings of voice
recognizer.
Voice output
Text-to-speech
settings
Configure the settings for reading
out text.
111
Settings
Mail / Internet
Email
You can send/receive emails in the same way that you
do with a PC. As well as normal email, you can also
send/receive emails using Microsoft Exchange Server.
Opening an Email
From the Home screen, "Applications"
X "Email"
sThe "Inbox" screen appears.
sAutomatically receive new emails.
Setting an Email Account
From the Home screen, "Applications"
X "Email"
sThe "Set up email" screen is displayed.
Enter your email address and password
on the "Set up email" screen
"Manual setup" or "Next"
sTap "Manual setup" to select account type.
Follow the on-screen instructions. For the
settings and other information, contact the
server administrator.
114
Mail / Internet
Viewing an Email
Tap an email on the "Inbox" screen
sThe contents of the email are displayed on the
mail screen.
Note
sIf set new email checking frequency to "Never",
new emails will not be received automatically.
sIf mopera U email is set to "メール自動受信
(Receive email automatically)", emails will be
received automatically regardless of email
application settings.
* If emails are not received automatically, tap
X "Refresh".
Creating and Sending an Email
From the "Inbox" screen, X
"Compose"
sThe "Compose" screen appears.
Tap the "To" box to enter the recipient
email address
Enter subject in the "Subject" box
Tap the "Compose Mail" box to enter
your message
"Send"
Note
sTap "Send" with an invalid email address entered,
is displayed at the right side of "To" box. Enter
the correct email address.
115
Mail / Internet
Adding an Account
You can register and use multiple email accounts in the
"Email" application.
From the "Inbox" screen, X
"Accounts"
sThe "Email" screen appears.
X "Add account"
sThe "Set up email" screen appears.
Enter your email address and password
"Manual setup" or "Next"
sTap "Manual setup" to select account type.
Follow the on-screen instructions. For the
settings and other information, contact the
server administrator.
Changing Email Settings
From the "Inbox" screen, X "Account
settings"
sThe "Account settings" screen appears.
Change the settings if required
General
settings
Set the account name, name,
signature, frequency of checking
for new emails and the default
account.
Notification
settings
Set the notification of a new
email and the ringtone, vibrator,
etc. for received emails.
Server
settings
Configure the settings of the
incoming/outgoing server.
116
Mail / Internet
sp-mode Mail
This allows you to send and receive emails using an
i-mode mail address.
It allows you to use Pictograms and Deco-mail, and also
supports auto receive.
For details about sp-mode, refer to "Mobile Phone
User's Guide (sp-mode <Smart phone>)".
From the Home screen, "Applications"
X "sp モードメール (sp-mode mail)"
sFollow the instruction on the screen.
Gmail
If you have a Google account, you can send and
receive emails using Gmail. If you do not have a Google
account, you must open an account before using Gmail.
Opening Gmail
From the Home screen, "Applications"
X "Gmail"
sGmail opens, and the "Inbox" screen appears.
Note
sIf your Google account settings have not been
completed, the "Add a Google Account" screen
appears. Follow the on-screen instructions to add
the account. If you do not have a Google account,
operations to get an account are available.
sFor details about Gmail, refer to X "More" X
"Help".
117
Mail / Internet
Creating and Sending an Gmail
From the "Inbox" screen, X
"Compose"
s"Compose" screen appears.
Enter email address in "To" box
Enter a subject in "Subject" box
Enter a message in "Compose Mail" box
sOn "Compose" screen, X Tap "Send" to send
an email.
SMS
You can send and receive text messages containing
up to 70 double-byte characters (or 160 single-byte
alphanumerical characters) to other terminals.
Sending an SMS Message
From the Home screen, "Messaging"
sThe "Messaging" screen appears.
"New message"
Tap the "To" box X Enter the recipient
phone number
sA list of contacts beginning with the entered
number or name appears.
Tap the "Type to compose" box X Enter
your message
"Send"
sThe message is sent.
118
Mail / Internet
Note
sYou can insert a smiley if you tap X "Insert
smiley" when entering your message. Although an
emoticon appears on your "Type to compose" box,
the smiley is displayed if the message is received
on an Android compatible phone.
sTo receive notification that the SMS message is
received, tap X "Settings" on the "Messaging"
screen, and mark the "Delivery reports" checkbox.
sYou can also send/receive SMS messages to/from
users of overseas network operators other than
. For available countries/compatible overseas
network operators, refer to "Mobile Phone
User's Guide [International Services]" or the
"International Services website".
sTo send SMS messages to users of overseas
network operators other than , enter "+" X
"Country code" X "the recipient mobile phone
number". Omit "0" if the recipient phone number
starts with "0". You can also send an SMS
message by entering "010", "Country code" and
"the recipient mobile phone number". (To reply
to an SMS message sent from overseas, enter
"010".)
Receiving/Viewing an SMS
Message
From the Home screen, "Messaging"
sThe "Messaging" screen appears.
Tap one of the threads
sThe message is displayed.
Note
sWhen you receive an SMS message, appears
in the status bar. To read the message, drag or
swipe the status bar downwards to open the
Notification panel, and tap a new message.
119
Mail / Internet
Browser
Browser allows you to view web pages in the same way
that you can from a PC.
Opening Browser
From the Home screen, "Applications"
X "Browser"
sBrowser opens, displaying the last web page
that you viewed. The home page appears if you
have not been recently using Browser.
Note
sWhen viewing a web page that has been
designed for PCs, it is displayed in full size for the
first time use. However, you may zoom in or out,
or scroll through the page. For more details, refer
to "Touch Screen Operations" (P39).
sWeb page operations may vary depending on
their format and content.
sFor information on the file formats that can be
viewed and played on the terminal, refer to "File
formats" (P212).
Viewing a Web Page
Viewing a web page by entering its URL
Tap the search box on the Browser
screen
Enter the URL of the web page
sBefore you finish entering the URL, a list of web
page suggestions and search suggestions that
match the entered characters appears.
Tap one of the listed web pages or finish
entering the URL, and tap
sThe web page for the specified URL appears.
Note
sTo stop displaying a web page, tap or X
"Stop".
120
Mail / Internet
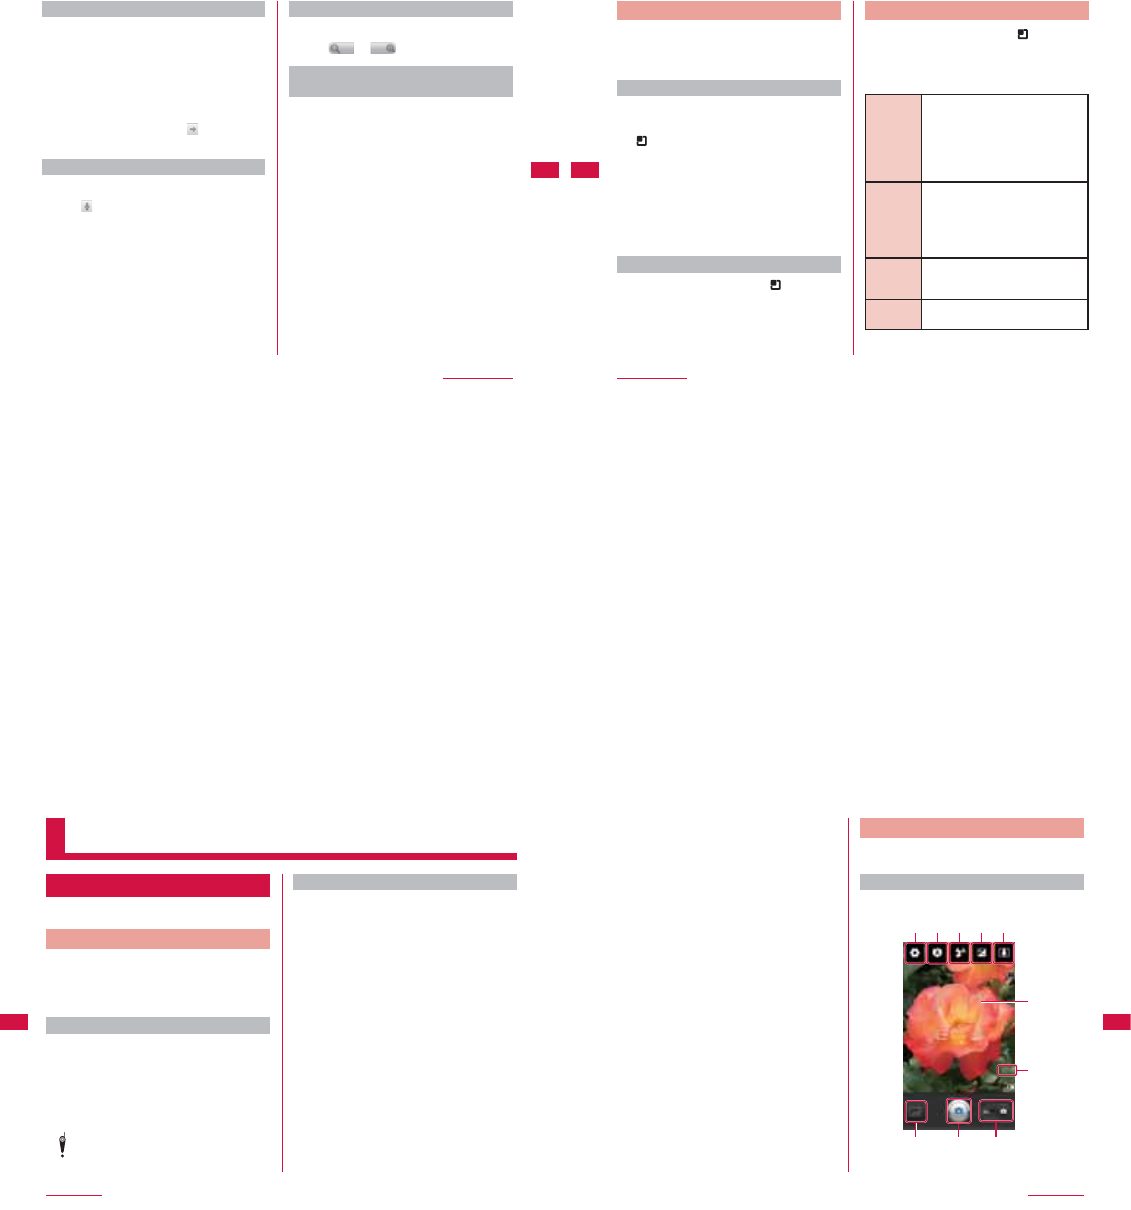
Searching for a web page by text entry
Tap the search box
Enter the word(s) that you are looking
for
sBefore you finish entering the text, a list of web
pages that include the entered search word(s)
appears.
Tap one of the listed web pages or finish
entering the text and tap
sThe selected web page opens.
Searching for a web page by voice entry
Tap the search box
Tap
s"Speak now" appears.
Clearly speak the search word(s) into
the microphone
sYour voice is converted into text which is entered
in the search box.
Tap one of the listed web pages
sThe web page is displayed.
Zooming in/out on a web page
Drag or swipe the Browser screen
Tap or
Zooming in/out on specific point on a
web page
Pinch out on the web page
sThe display is enlarged, with the center of
enlargement at the point where your pinch-out
started.
Pinch in on the web page
sThe display is reduced.
121
Mail / Internet
Using Bookmark and History
Bookmarking a web page allows you to quickly access
that web page.
You can also view previously visited web pages by
displaying your browsing history.
Adding a bookmark
View the page that you want to
bookmark
X "Bookmarks"
sA thumbnail of the bookmarked page appears
on the "Bookmarks" tab.
"★ Add"
Edit the name and URL if required, and
tap "OK"
sThumbnails of the web pages displayed on the
list of bookmarks appear.
Viewing a bookmarked web page
From the Browser screen, X
"Bookmarks"
sThe "Bookmarks" tab appears.
Tap the displayed bookmark
sThe selected web page opens.
Changing Browser Settings
From the Browser screen, X "More"
X "Settings"
sA menu appears.
Change the settings if required
Page
content
settings
Set the text size and default scaling
on web pages, the encoding of text
on web pages, whether to display
popup windows, whether to import
images, whether to enable JavaScript
and plugins, the home page and other
items.
Privacy
settings
Clear the browser cache, the browsing
history, cookies, form data and access
permission for location information.
Configure the settings about whether
to accept cookies, to save form data
and to enable location information.
Security
settings
Set whether to save passwords and
whether to display security warnings.
You can also clear saved passwords.
Advanced
settings
Restore default values for website
settings and browser settings.
122
Mail / Internet
Multimedia
Shooting with Camera
The terminal has a built-in camera that can shoot
photos and shoot videos.
Before Shooting
All photos and videos shot on your terminal are saved
to a microSD card. Please insert a microSD card before
using Camera.
You cannot shoot photos while you are transferring files
to the microSD card.
Copyright and portrait rights
Avoid copyright infringements when copying or
editing photos and videos that have been shot on the
terminal. You should also avoid infringing the portrait
rights of other people by using or modifying their
portraits without their consent. Note that the shooting or
recording of stage performances, shows or exhibitions
may be prohibited, even for personal use.
Please be considerate of the privacy of
individuals around you when shooting and
sending photos using camera-equipped the
terminals.
Notes for capturing images
sThe Camera employs high precision technology, but
some pixels or lines may seem brighter or darker
than others. Also, when you shoot photos in places
with insufficient lighting, noises seen as white line
increase. This is normal.
sClean the lens with a soft cloth before capturing. If
the lens is stained with fingerprints or oil, the shot
photo may appear out of focus or blurred.
sDo not leave the terminal in a warm place or under a
direct sunlight for a long period of time. The quality
of shot photos or video may deteriorate.
sIf you shoot under a fluorescent light, mercury lamp
or sodium lamp flickering at high speed, flickering
such as stripes may appear. The color tone of photos
or videos may vary depending on the capturing
timing.
sDo not expose the lens to direct sunlight for a long
period of time and do not point at the sun or a bright
light directly. The image may become discolored or
the camera may fail.
124
Multimedia
sDo not cover the lens with your fingers or hair when
capturing.
sCapturing a fast moving object may result in an
image slightly distorted from the image displayed on
the screen at the time of capturing, or the image may
be blurred.
sWhen the battery level is low, you may not be able to
save shot photos or videos. Check the battery level
before using the camera.
sShot photos or videos may differ from the actual
subjects in brightness or color tone.
sYou can hear shutter sound even when the terminal
is set to manner mode.
Shooting Photos
Enable to shoot photos with both horizontal and vertical
screen.
Viewing capture screen
The meanings of marks (icons and others) on the photo
shooting screen are as follows:
h i j
a b c d e
f
g
125
Multimedia
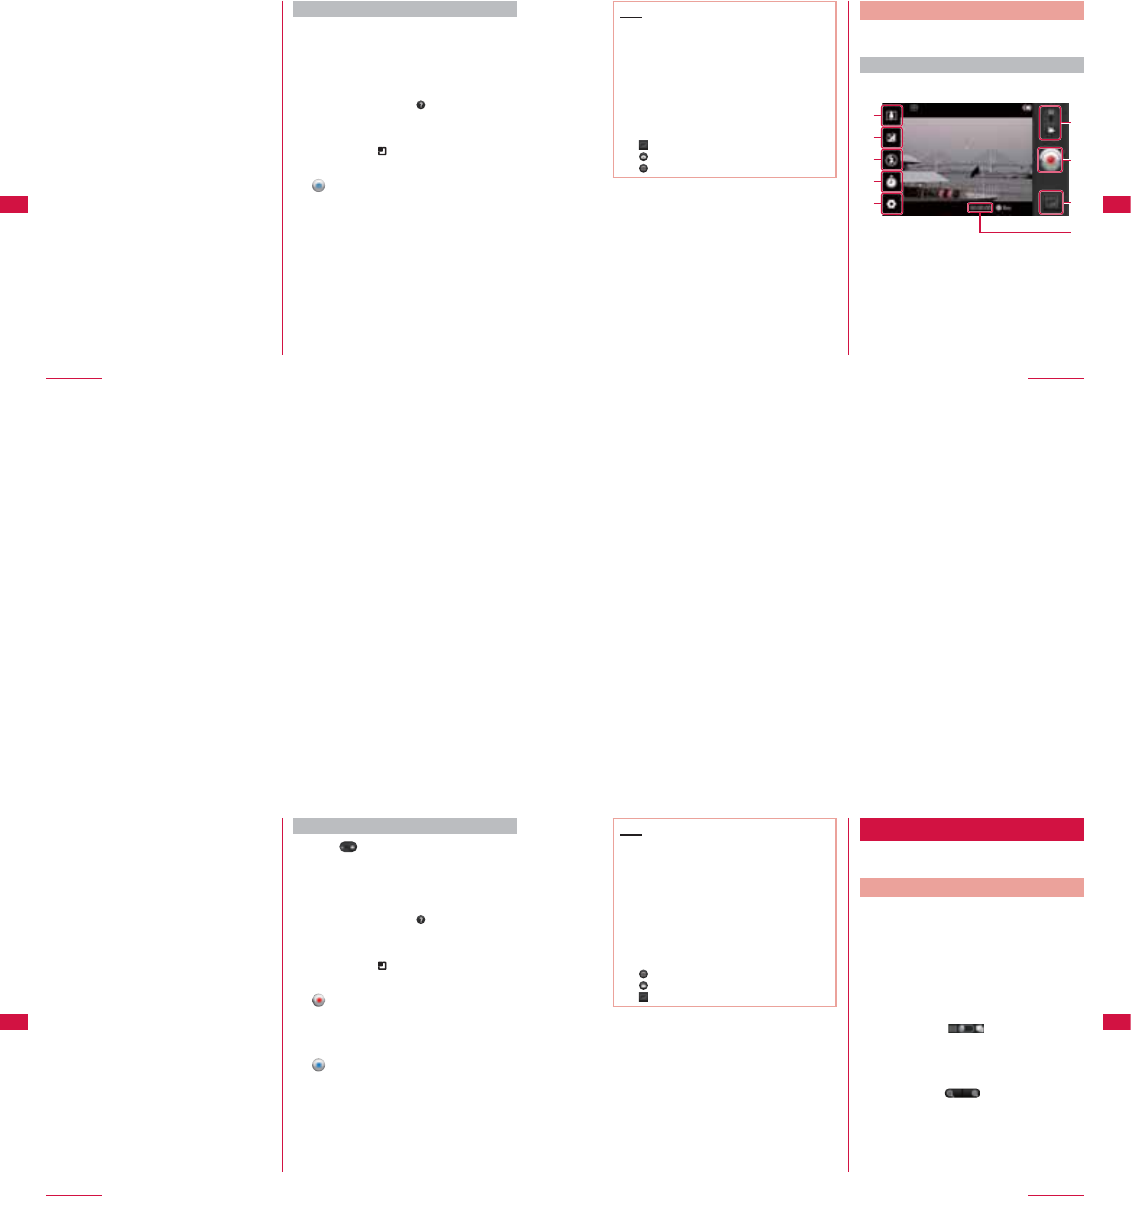
a Settings (while shooting photos)
Set Image size/Scene mode/ISO/White balance/
Color effect/Timer/Shot mode/Image Quality/Auto
review/Shutter sound/Tag location (horizontal
screen).
b Focus mode
Adjust the focus to a specified position(Auto/Macro/
Continuous AF/Face tracking/Manual).
c Flash
Set Auto/Red-eye removal/On/Off.
d Brightness
Adjust brightness.
e Zoom
Adjust zoom.
f Auto focus frame
It shows green color when auto focus is successfully
done. It turns to red color if auto focus is failed.
g Possible number of capture images
h Thumbnail
Tap to display the preview screen and confirm the
shot videos. Also you can edit the photos.
i Shutter
j Switch button
Switch between photo mode and video mode.
Shooting a photo
From the Home screen, "Applications"
X "Camera"
sThe photo shooting screen is displayed.
sThere is a menu displayed on the screen that
allow you to configure various settings to suit the
scene and shooting conditions.
sIf you tap a menu icon, appears. Tap this icon
to check details about the respective function.
sThe menus automatically disappear after a
set period. To bring them back, tap the touch
screen or tap .
Point the camera at the subject
sThe shutter sound plays and the photo is shot.
sAfter shooting, you can view a preview of the
photo.
sThe shot data are saved in "Gallery".
126
Multimedia
Note
sAfter shooting, menu is displayed on the preview
screen. The following operations are available.
<Top part (Left part for horizontal screen)>
- "Rename": To edit the name of the shot photo.
- "Set as": To set to wallpaper or contact icon.
- "Share": To send the photo via Bluetooth, Gmail,
Picasa or Email*.
* Appears only when email account is registered.
<Bottom part (Right part for horizontal screen)>
- : Confirm and edit the shot photos.
- : To shoot a new photo.
- : Delete the displayed photo.
Shooting Videos
You can shoot videos by switching modes. Videos are
shot horizontally.
Viewing shooting screen
The meanings of marks (icons and others) on the
shooting video screen are as follows:
a
b
c
d
e
f
g
h
i
a Zoom
Adjust zoom.
b Brightness
Adjust brightness.
c Flash
Set flash mode to ON or OFF.
127
Multimedia
d Recording duration
Set recording duration (Normal/Mail). The time
duration restriction may happen when select "Mail".
e Settings (when shooting video)
Set the video size/white balance/color effects/video
quality/audio recording/auto review.
f Switch button
Switch between photo mode and video mode.
g Recording button
h Thumbnail
Tap to display the preview screen and confirm the
shot videos.
i Shooting duration
Shooting videos
Drag on the photo shooting screen
sThe screen switches to the video shooting
screen.
sMenus appear on the screen to allow you to
configure various settings to suit the scene and
conditions for shooting.
sIf you tap a menu icon, appears. Tap this icon
to check details about the respective function.
sThe menus automatically disappear after a
set period. To bring them back, tap the touch
screen or tap .
Point the camera at the subject
sThe recording start sound plays and Camera
starts shooting.
sWhile you are recording, "Rec" appears in red
and a red circle blinks.
sRecording stops, and the screen displayed at
the start of recording appears. Recording start
screen is displayed later on.
sThe shot data are saved in "Gallery".
128
Multimedia
Note
sMenus are displayed on the preview screen after
shooting videos. The following operations are
available.
<Left part>
- "Play": Play the shot video.
- "Share": To send the video via Bluetooth, Gmail,
YouTube or Email*.
- "Rename": To edit the name of the shot video.
* Appears only when email account is registered.
<Right part>
- : Delete the displayed video.
- : To shoot new video.
- : Confirm the shot video.
Using Gallery
Gallery allows you to view photos in a slide show or edit
them.
Viewing Photos and Videos
From the Home screen, "Applications"
X "Gallery"
sThe Gallery screen appears.
sGallery contains both photos and videos shot
with camera and those downloaded.
Tap a folder
sBoth photos and videos shot by this terminal are
displayed by thumbnail.
sPhotos and videos are categorized by shooting
date if you tap .
sTo view photos or videos shot by this terminal,
tap "100ANDRO".
Tap one of the thumbnails
sPhoto size can be enlarged or reduced either
when you tap or pinch out/pinch in on
the touch screen.
sThe video is played if you tap a video thumbnail.
129
Multimedia
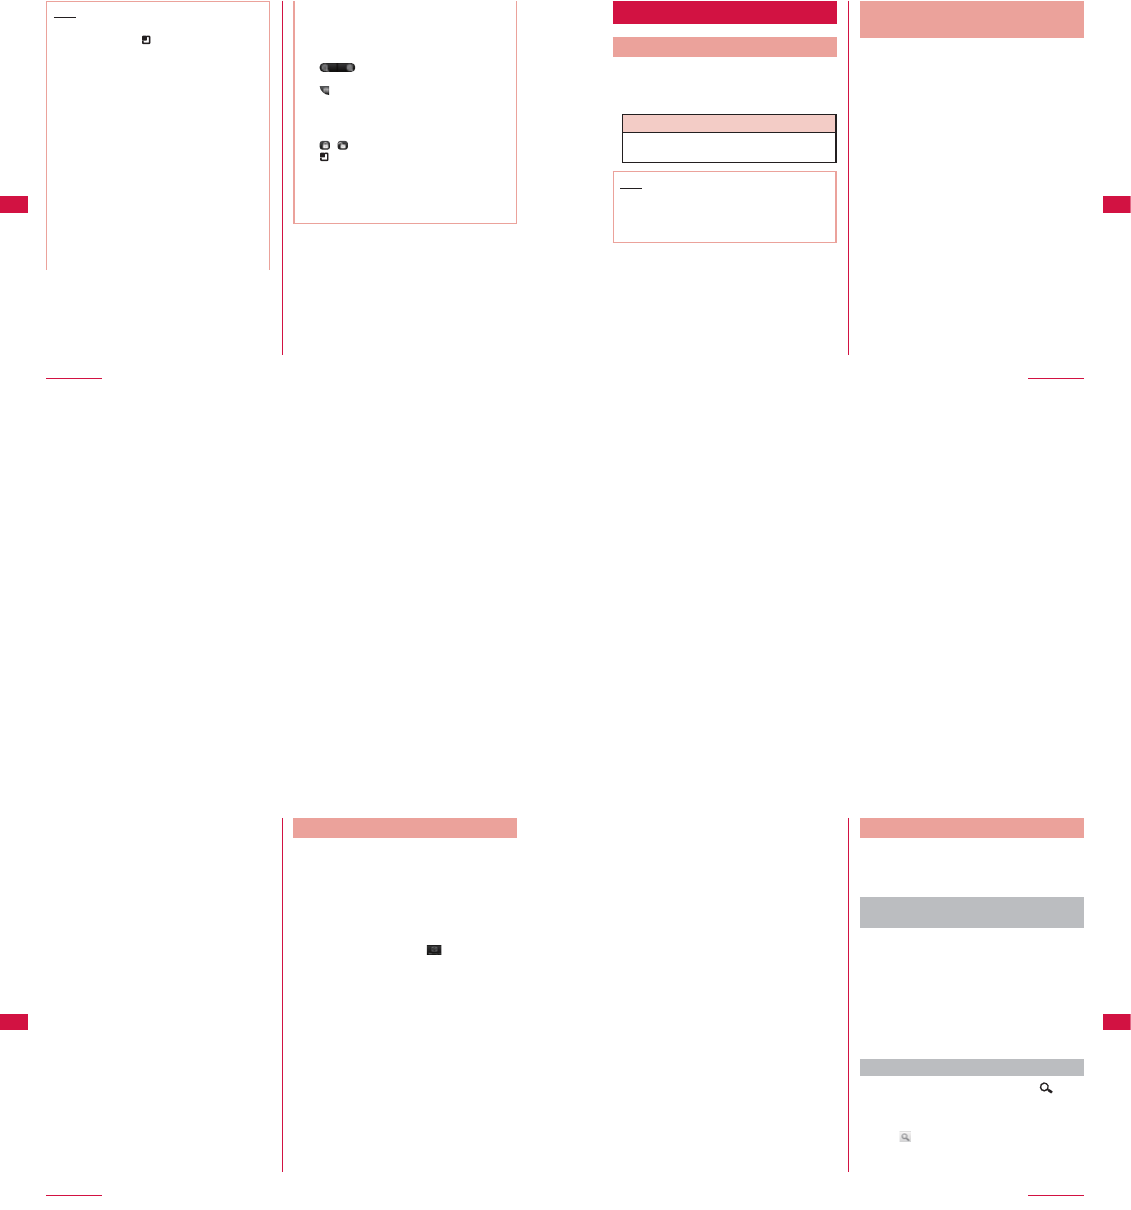
Note
sA screen appears to enable/disable thumbnail
selection if you tap on the Gallery screen,
or touch one thumbnail for over 1 second. The
following operations are available.
<Top part>
- "Select All": Select all the thumbnail.
-"
●● item(s)": Show the number of the selected
thumbnails.
- "Deselect All": Cancel all the selected
thumbnails.
<Bottom part>
- "Share": The selected photos are sent via
Picasa, Gmail, Bluetooth or Email*, and the
select videos are sent via YouTube, Gmail,
Bluetooth or Email*.
- "Delete": Delete the selected photos or videos.
- "More": Confirm the detailed information of
photos and videos. Also you can register and
edit the photos.
* Appears only when email account is registered.
sThe following operations are available from the
photo display screen.
- "Slideshow": The photos and videos saved in
terminal are displayed in slide show order.
- "Menu": Available to share or delete photos.
- : Available to enlarge or reduce image
size.
- : Camera is activated to enable capturing
photos and shooting video.
sThe following operations are available from the
video display screen.
- / : Lock or unlock screen.
- : The menus of "Details" and "Screen Ratio"
are displayed.
Tap "Details" to confirm the detailed information
of video.
Tap "Screen Ratio" to select the screen size
when playing a video.
130
Multimedia
Using Music Player
Music
The "Music" application plays digital audio files that are
stored on a microSD card. Music supports the following
music file formats.
Available file formats
File Format
MP3, AAC, AAC+, HE-AAC, MIDI, AMR, OGG,
PCM(WAVE)
Note
sSome files may not be played even with the
supported file format.
sSome music data is protected by copyright and
may not be played.
Copying Audio Files to the
Terminal
To use Music, you must first copy your audio files to a
microSD card.
Connect the terminal with a PC via the
supplied USB connection cable L01
(P147)
Open removable disk on the PC
Create a folder in the root folder of
microSD card
sMusic inside the created sub folder are available
to manage.
Copy audio file to the created folder
Disconnect the terminal from PC (P148)
131
Multimedia
Viewing Music Library Screen
From the Home screen, "Applications"
X "Music"
sThe Music Library screen appears.
sOn the Music library screen, there are five tabs.
They are "Artists", "Albums", "Songs", "Playlists"
and "Now playing". Tap "Artists", "Albums",
"Songs", "Playlists" tab to search a song to play.
If "Now playing" tab is changed to horizontal
screen, tap the displayed to confirm the
name of the song that being displayed.
132
Multimedia
a Artist
Displays a list of artist names. Tap a name to view a
list of the available albums or music.
b Album
Displays a list of album titles. Tap one of the album
to view a list of available songs.
c Song
Displays a list of song titles.
d Playlist
Displays a list of song titles that have been added
to playlists.
e Artist name
f Album number/Song number
Searching for a Song
You can search for a song by artist name, album title or
song title, or by text entry. If you are searching by text
entry, any artist name, album title and song title that
matches your entered text appears.
Searching by artist name, album title,
song title, or playlist
Tap any of the "Artists", "Albums",
"Songs" or "Playlists" tabs
sThe results for the tapped category appear.
Tap one of the listed items
sIf you are searching by artist name, you can
view the song title by tapping an artist name X
an album title.
sIf you are searching by album title, you can view
the song title by tapping the album title.
Searching by text entry
From the Music Library screen,
sThe Quick Search screen appears.
Enter a search term
Tap icon of the search box
133
Multimedia
Managing Songs
Deleting a song
From the Music library screen, touch a
song to delete for over 1 second
sMenu appears.
"Delete" X "OK"
Setting ringtone
From the Music library screen, tap a
song to set to ringtone
Touch a song for over 1 second
sMenu appears.
"Use as phone ringtone"
Playing Music
Music data saved on the microSD card is played in track
order. You can also shuffle the playback order and play
music in a random order.
Playing music in track order
Search for the song that you want to
play
Tap the song title
sThe Music screen appears and the tapped song
is played.
134
Multimedia
a Jacket image
b Artist name
c Album
d Title
e Elapsed time
f Playlist
g Shuffle
Turn shuffle on/off. Shuffle turns on when icon is
green. Shuffle turns off when icon is gray.
h Repeat setting
Turn repeat on/off. Repeat all/repeat one turns on
when icon is green. Repeat turns off when icon is
gray.
i Guide
:
Start playing from the beginning of the
current song.
Double-tap to start playing from the
beginning of the previous song. Touch
for over 1 second to rewind a song
during playback.
/ : Pause/play.
: Start playing from the beginning of the
next song. Touch for over 1 second to
fast forward a song during playback.
j Total time
k Playback progress bar
sDrag or tap to play the current song from a
desired point within the song.
Note
s is displayed on the status bar while playing.
Playing music in a random order
Search for the song that you want to
play
Tap the song title
sThe Music screen appears and the tapped song
is played.
Tap
sPlay the songs from the album containing the
current song in a random order.
Note
sTo play all songs from the Music Library in a
random order, tap X "Party shuffle" on the
Music screen. To turn off music shuffle, tap X
"Party shuffle off".
135
Multimedia
Using Playlists
Playlists allow you to group your favorite songs for easy
playback. You can create multiple playlists.
Creating a playlist
Search for your favorite songs in the
Music Library screen
Touch one of your favorite songs for
over 1 second
sA menu appears.
"Add to playlist"
sThe "Add to playlist" menu appears.
Tap the playlist that you want to add the
song to
sTap "Current playlist" to add the song to an
existing playlist.
sTap "New" to specify a new playlist name and
add the song to the new playlist.
sIf a registered playlist exists, tap the playlist
name to add.
Note
sFrom Music playback screen, tap X "Add to
Playlist", the selected music is added to a new
playlist or a registered one.
Viewing a playlist/playing music
Tap the "Playlists" tab
sCurrent playlists are displayed.
Tap one of the playlists
sThe songs contained in the playlist are
displayed.
Tap one of the songs
sThe tapped data is played.
Note
sTouch the playlist name for over 1 second to
display a menu. Tap "Play" in the menu to play the
songs in the playlist in order.
136
Multimedia
Managing Playlists
After you have created a playlist, you can rename it and
its songs, and delete songs from it. You can also set a
playlist's song as a ringtone.
Renaming a playlist
On the "Playlists" tab, touch the playlist
name for over 1 second
sA menu appears.
"Rename"
sA screen for entering the playlist name appears.
Enter the playlist name and tap "Save"
sThe new name appears in the "Playlists" tab.
Note
sYou cannot delete or rename the playlists in
"Recently added".
Changing the playback order of a
playlist
Open the playlist of which the playback
order you want to change
Drag to the left of the song to the
desired position within the playlist
sThe song is changed to the position that has
been dragged and the playback order also
changes.
Setting a playlist song as ringtone
Tap a playlist that contains the ringtone
songs on the "PlayLists" tab
sSongs from the selected playlist are displayed.
Touch the song for over 1 second
sA menu appears.
"Use as phone ringtone"
sThe selected song is set as ringtone. For details
on ringtones, refer to "Sound" (P102).
Note
sOn music playback screen, tap X "Use as
ringtone" to set a song as ringtone.
137
Multimedia
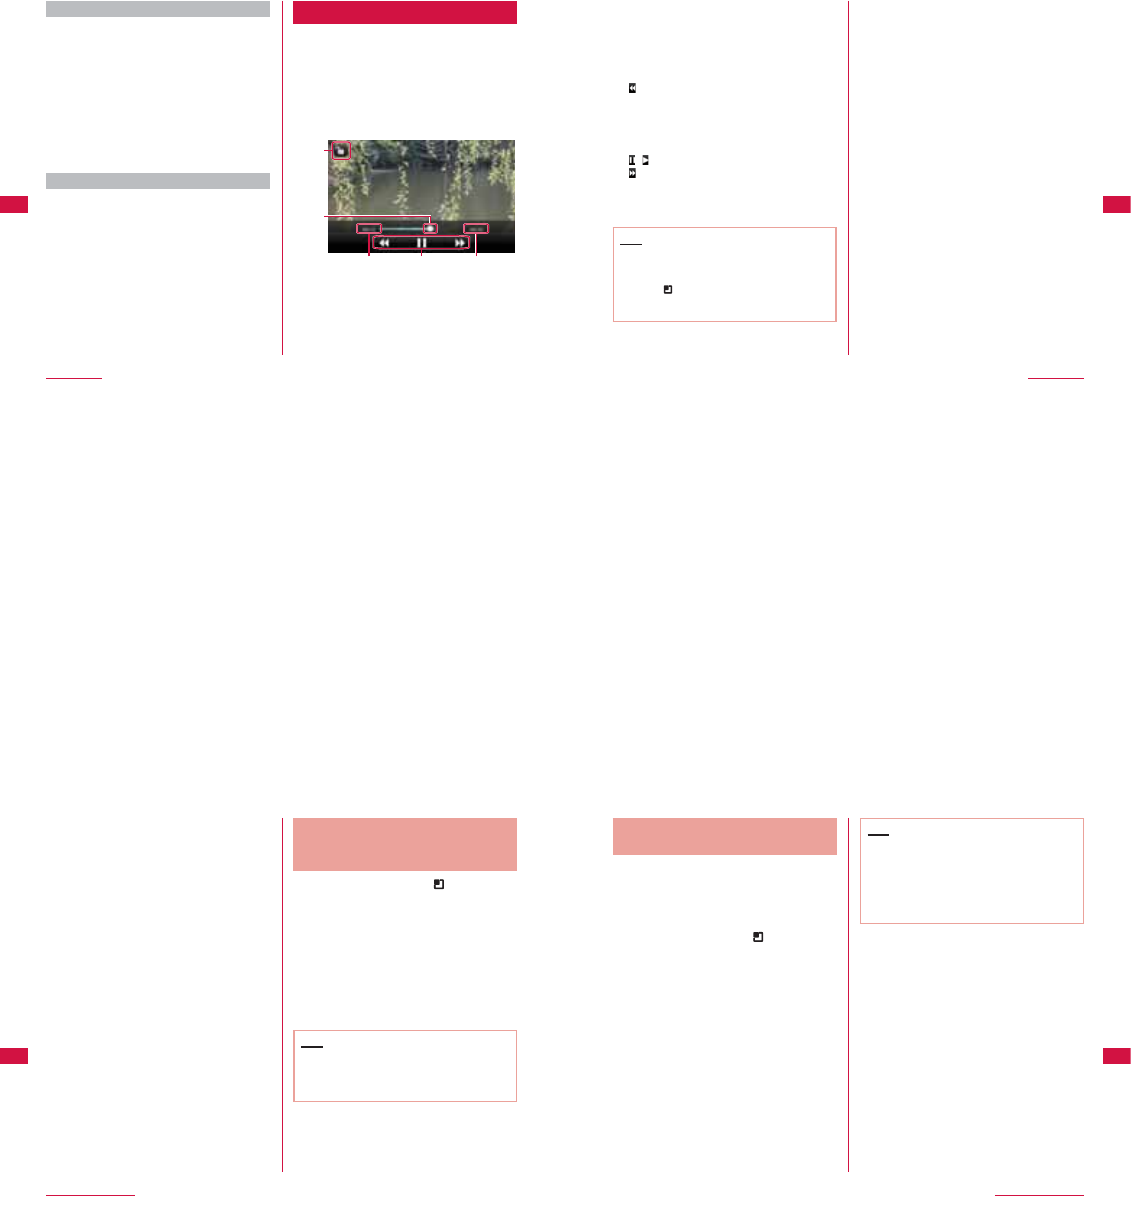
Deleting a song from a playlist
On the "Playlists" tab, tap the playlist
that contains the song that you want to
delete
sThe songs contained in the selected playlist are
displayed.
Touch the song that you want to delete
for over 1 second
sA menu appears.
"Remove from playlist"
sThe song is deleted from the playlist.
Deleting a playlist
On the "Playlists" tab, touch the playlist
that you want to delete for over 1
second
sA menu appears.
"Delete"
sThe playlist is deleted.
Using Video Player
You can easily play videos that have been saved on a
microSD card.
From the Home screen, "Applications"
X "Video player"
sA list of the videos saved on the microSD card
appears.
Tap one of the videos
sThe video is played back.
a
b
c e
d
138
Multimedia
a Screen lock
b Playback progress bar
Drag or tap to play the current song from a desired
point within the song.
c Elapsed time
d Guide
:
Start playing from the beginning of the
current song.
Double-tap to start playing from the
beginning of the previous song. Touch for
over 1 second to rewind a song during
playback.
/ : Pause/play.
: Start playing from the beginning of the
next song. Touch for over 1 second to
fast forward a song during playback.
e Total time
Note
sYou can delete one video by touching it for over 1
second in video display list X "Delete" X "OK".
sYou can delete all or some of the videos by
tapping X "Multiselect" X Tap "Select all"/ tap
a video to select X "Delete" X "OK" or a video X
"Delete" while the list of videos is being displayed.
139
Multimedia
Turning ON Bluetooth
Function to Make the Terminal
Discoverable
From the Home screen, X "Settings"
X "Wireless & networks" X "Bluetooth
settings"
Place a check mark on "Bluetooth"
sBluetooth function turns ON.
Tap "Device name" and enter a name of
the terminal X "OK"
Place a check mark on "Discoverable"
sThe terminal can be searched by another
Bluetooth device for approx. 120 seconds.
Note
sWhen you do not use Bluetooth function, turn it
OFF to save the battery.
sThe setting of the Bluetooth ON/OFF is not
changed even when the power is turned off.
144
File Management
Pairing/Connecting with a
Bluetooth Device
To transfer data by Bluetooth connection, perform
pairing (pairing setting) with the device in advance and
register it to the terminal.
sDepending on Bluetooth device, only pairing is
performed or pairing and connecting is performed
successively.
From the Home screen, X "Settings"
X "Wireless & networks" X "Bluetooth
settings" X "Scan for devices"
sDetected Bluetooth devices list appears.
Tap a device that you want to connect
with
sIf pass code (PIN) is set on Bluetooth devices,
enter pass code (PIN) and tap "OK".
sFor some Bluetooth devices, after completion
of pairing, connection may be established
successively by tapping device.
Note
sEven for device requiring entry of pass code(PIN)
when pairing, once pairing is performed,
entering pass code(PIN) is not necessary for next
connection.
sPairing can be set if a device is unable to connect
such as non-profile-compliant. However, it can not
be connected even if tap the device.
145
File Management
When the other device requests for
pairing
When a screen asking for pairing for Bluetooth
connection appears, tap "Pair" or enter pass code (PIN)
if required and tap "OK".
Disconnecting
Tap the connected device X "OK" on
"Bluetooth devices" list
sTouch the connected device for over 1 second
X "Disconnect" to disconnect.
Canceling the pairing
From"Bluetooth devices" list, touch a
device to unpair for over 1 second X
"Disconnect & unpair"
sIf you want to unpair with a device being only
paired, tap the device for over 1 second X
"Unpair".
Sending/Receiving Data via
Bluetooth Function
sSet the Bluetooth function to ON beforehand to be
discoverable.
Sending data via Bluetooth
You can send data of Contacts (namecard data in vcf
format) or Schedule, business data, files such as photos
or videos, etc. to a Bluetooth device (PC etc.).
sFor sending, perform the operation from the menu
such as "Share"/"Send" of each application.
Receiving data via Bluetooth
Set the terminal to discoverable
Tap "Accept" when Bluetooth
recognition screen appears
s is displayed on the Status bar, and data
reception starts.
sAvailable to confirm data reception on
notification panel.
sMessage screen appears at the bottom screen
after receiving data.
146
File Management
Alarm/Clock
Opening a Clock
From the Home screen, "Applications"
X "Alarm/Clock"
sClock screen is displayed. Date, week day and
weather forecast for a specific area set in "News
& Weather" are displayed on the clock screen.
Setting Alarm
On Clock screen,
sThe "Alarms" screen appears. The current time
is displayed at the bottom part of the screen.
"Add alarm"
sAlarm time setting screen appears.
Set alarm time and tap "Set"
sThe duration before alarm rings is displayed
and disappears automatically. The "Set alarm"
screen is displayed.
Place a check mark on "Turn alarm on"
and set other options, then tap "Done"
sThe "Alarms" screen is displayed. The set
alarm is added to the list. As alarm options, the
following settings are available.
Turn alarm on Mark this checkbox to turn on
the alarm. Unmark it to turn off
the alarm.
Time Change the time setting.
Repeat Set the alarm to sound at the
same time every day of the
week.
Ringtone Set the alarm sound.
165
Application
Vibrate Place a check mark to enable
both alarm sound and vibrator.
Label Enter a name for the alarm.
Note
sThe alarm functions at the time set for the alarm.
Menu is displayed at that time. Tap "Dismiss" to
stop the alarm. Tap snooze to make the alarm
function again after ten minutes.
Calendar
Calendar
The terminal has a calendar for managing your
schedule. It can synchronize with scheduler built by
Microsoft Exchange Server or with Google Calendar if
you have a Google account.
Opening Calendar
From the Home screen, "Applications"
X "Calendar"
sThe Calendar screen appears.
166
Application
Changing Calendar Display/
Displaying Schedule
Changing to Day/Week/Month view
From the Calendar screen, X "Day"
sCalendar changes to Day view.
From the Calendar screen, X "Week"
sCalendar changes to Week view.
From the Calendar screen, X "Month"
sCalendar returns to Month view.
Note
sIf you swipe up or down in Month view, the
previous or next month is shown. If you swipe left
or right in Day or Week view, the previous or next
day or week is shown.
sIf you tap X "Today" in the Calendar screen
when in Week or Month view, that day's date is
highlighted according to the system date.
Setting calendar type to display
From the Calendar screen, X "More"
X "Calendars"
sThe registered calendar type is displayed.
Tap the displayed calendar
sIf appears, update is automatically running.
If appears, the calendar is displayed. If both
of them are grayout, functions are not available.
"OK"
sThe Calendar screen appears and informations
based on the settings you set are displayed.
Note
sThis application cannot create calendar type. To
create calendar type, access Google calendar
web page from browser and tap "Settings" menu.
167
Application

Viewing your schedule
From the Calendar screen, tap the
schedule that you want to view
sThe "Agenda" screen appears. Your schedules
are displayed in list.
Note
sFrom Calendar screen, tap X "Agenda" to
display "Agenda".
Creating a Schedule
From the Calendar screen, X "More"
X "New event"
sThe "Event details" screen appears. Follow the
on-screen instructions to fill out each item and
tap "Done".
Note
sAs the schedule time approaches, appears in
the status bar. When you drag or swipe the status
bar downwards to open the Notification panel
then tap the calendar notification, the "Calendar
notifications" screen is displayed. You can delete
the notification by tapping "Dismiss all" and tap
"Snooze all" to repeat the notification 5 minutes
later.
Changing Calendar Settings
From the Calendar screen, X "More"
X "Settings"
sThe "Settings" screen appears.
Change the settings if required
sSet how to notify an event, also set ringtone,
vibrator and default notification time.
168
Application
Calculator
From the Home screen, "Applications"
X "Calculator"
sThe Calculator screen appears.
Input numerals and arithmetic
operations
sThe results are displayed.
Note
sYou can display the Functions screen by dragging
or swiping the keypad area to the left on the
Calculator screen or by tapping X "Advanced
panel". You can return to the Calculator screen
by dragging or swiping the keypad area to the
right on the Functions screen or by tapping X
"Basic panel".
sTap "CLEAR" to delete the most recently entered
number or arithmetic operator. Tap "CLEAR" for
over 1 second to delete all entered information.
sTap X "Clear history" to clear the history.
GREE
From the Home screen, "Applications"
X "GREE"
sGREE application screen is displayed.
"アプリをダウンロードする (Download)"
sGREE application download screen is
displayed.
"Update"
sAccess authority screen is displayed.
Confirm the contents and tap "OK"
sIt is download and installed automatically.
From "My apps" screen, tap "GREE (グ
リー)"
"Open"
sFollow the on-screen instructions.
Note
sGREE account is required to use this application.
sThe "Add a Google Account" screen appears if
Google account setting is not finished. Follow
the displayed instructions. If you do not have a
Google account, create one here.
sFor first-time Android market users, terms of use
are displayed. Tap "Accept" after reading.
169
Application
Electronic Book
BookLive! for LG
Access the on-line website "BookLive" to view electronic
books.
From the Home screen, "Applications"
X "BookLive! for LG"
sFor first time use, it is required to download the
application.
Tap "BookLive! for LGをダウンロード
(Download the BookLive! for LG)"
sNotification icon appears on the Status bar after
downloading.
Drag or swipe the Status bar downwards
to open the notification panel. Tap
"BookLiveForLG"
sA message to confirm the update is displayed.
"OK" X "Install" X "Open" X "同意する
(Agree)"
Search for a book and tap it
sFollow the on-screen instructions.
BookLive! for LG menu
The following menu is displayed.
Item Description
編集 (Edit) Edit the content of bookshelf.
本棚 (Bookshelf) Available to select a bookshelf.
Store My page to access "BookLive"
is displayed.
My page menu
The menu is displayed as below.
Item Description
会員登録
(Membership
registration)
BookLive! membership
registration page is displayed.
アカウントの設定
(Account setting)
Available to edit the Account
information.
電子書籍ストア
BookLive!
(Electric bookstore
BookLive!)
BookLive! page is displayed.
ヘルプ (Help) BookLive! Help is displayed.
170
Application
マガストア (MAGASTORE)
Access the online electric magazine website
"MAGASTORE" and purchase the magazine data.
sA registered account is required to when using
MAGASTORE. For detailed information about
MAGASTORE, refer to the website as below.
http://www.magastore.jp/
From the Home screen, "Applications"
X " マガストア (MAGASTORE)"
Search the book that you want to buy
and tap it
sFollow the on-screen instructions for the
following operations.
Menu of マガストア (MAGASTORE)
Tap to display the following menu.
Item Description
My 本棚
(My bookshelf)
Display the downloaded books.
前回誌面
(Start from this
page)
Display the book(s) that you are
reading.
しおり
(Bookmark)
Register a bookmark at the
page you are browsing.
ホーム (Home) Return to the top page of
MAGASTORE.
設定 (Setting) Available to login or register a
new account.
171
Application
LG World
From the Home screen, "Applications"
X "LG World"
s"LG World" screen opens.
LG World menu
The menu of LG World is displayed as below.
Item Description
Hot & New Hot & New screen is displayed.
Apps Apps screen is displayed.
動画 (Video) Video screen is displayed.
検索 (Search) Search screen is displayed.
マイアプリ
(My application)
マイアプリ (My application)
screen is displayed.
YouTube
Play YouTube videos, and upload the videos you have
shot to YouTube.
sFor first-time users, accept "mobile terms of service"
is required.
From the Home screen, "Applications"
X "YouTube"
sThe “YouTube” screen is displayed.
: Enter a keyword and then search for a
video
: Shoot a video with the camera of the
terminal and then upload the video to
YouTube
sYou need to log in to your YouTube account to
upload a video.
Tap a video you want to play
sThe video is played back.
: Switch between high quality (HQ)
playback and low quality playback.
s
Tap screen to pause a video, or to show playback
bar to play the scene you want to watch.
172
Application
Polaris Office
From the Home screen, "Applications"
X "Polaris Office"
s"Polaris Office" screen opens.
Note
sIf the user has not been registered, user
registration screen appears when activating
"Polaris Office".
sFiles with password may be unable to use.
sFiles created on PC may be displayed differently
or may not be able to display.
File Types and Formats
Use Polaris Office to read or edit Word, Excel,
PowerPoint files saved on the terminal or microSD card
(as of June 2011).
Type File format
Microsoft Word
(Word 97 to Word 2007)
doc, docx
Microsoft Excel
(Excel 97 to Excel 2007)
xls, xlsx
Microsoft PowerPoint
(Power Point 97 to PowerPoint 2007)
ppt, pptx
Adobe PDF (Version 1.2 to 1.7) pdf
Text file txt
Note
sOnly Word, Excel, PowerPoint files can be edited
in Polaris Office.
sIf you edit Word 2007, Excel 2007 or PowerPoint
2007, it is saved as doc, xls, ppt format
respectively.
173
Application
News & Weather
This application shows the latest news and weather
forecast of current location, etc.
From the Home screen, "Applications"
X "News & Weather"
s"News & Weather" application opens.
Tap "Weather" tab or news topics tab
sWeather forecast of both today and the current
week are displayed on "Weather" tab.
sNews title list is displayed on the news topics
tab. When a news title is tapped, the application
accesses the news site via a browser and
displays the details of the news.
sDrag leftward or rightward to switch tabs.
Note
sTap X "Refresh" to acquire location information
and update the information.
sTap X "Settings" to set weather forecast, news
and update function.
174
Application