LG Electronics USA JS750 Cellular/PCS GSM/WCDMA/EDGE Phone with WLAN and Bluetooth User Manual Layout 1
LG Electronics USA Cellular/PCS GSM/WCDMA/EDGE Phone with WLAN and Bluetooth Layout 1
UserManual.wiki
>
LG Electronics USA
>
JS750 User Manual
Users Manual
Navigation menu
Upload a User Manual
Namespaces
Wiki Guide
HTML
PDF
Info
Views
User Manual
Discussion / Help
Navigation
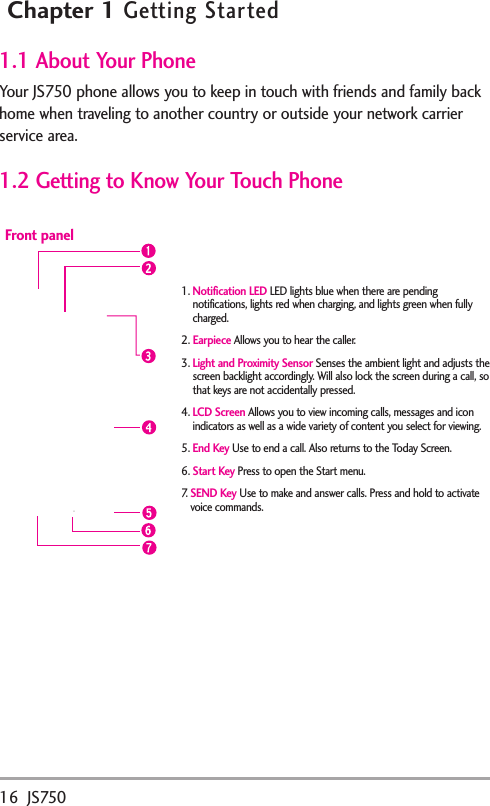


![JS750 69[Alarm Settings]To activate and deactivatealarm(s)If you want to disable an alarm,simply turn it off by tapping thecheckboxnext to it. The X isremoved, but the settings remainallowing you to simply tap thecheckbox to reactivate later. Dismissing an alarmWhen an alarm goes off, you canchoose to Snooze or Dismiss thealarm. When you select Snoozethe alarm will sound againafter fiveminutes.To set timeTap Timein the tab bar at the topof the screen to move to the Timetab, then adjust the settings fortime zone, date or time.Touch to save settings.[Time]OK](https://usermanual.wiki/LG-Electronics-USA/JS750/User-Guide-1297318-Page-56.png)
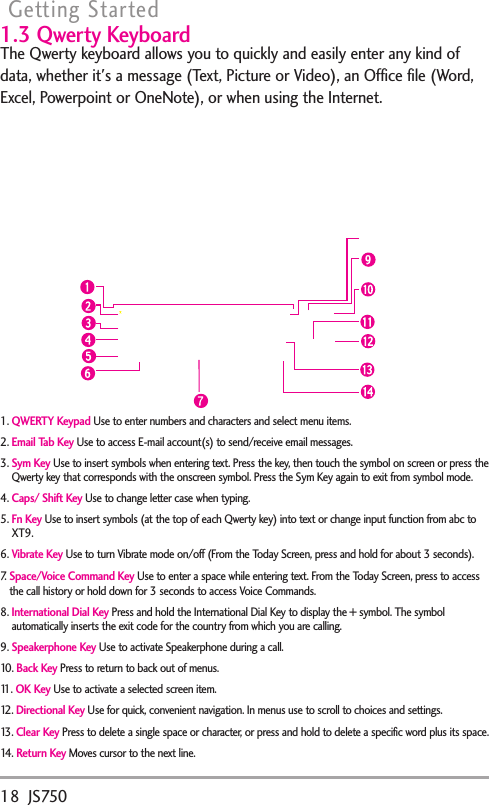
![JS750 93NOTEThe available menu optionsdepend on the selected mediafile. Send the media fileTap Send,tap the account to use,then complete the fields asnecessary to send the message oremail.Manage your media file(s)●Tap Delete,then tap Yes.●Tap Edit,then tap Cutor Copy.●Tap Go Toto jump to anotherfile area, such as My Device. Using Pictures●Tap Save to Contact,then tapthe contact you want to set withwith the picture.●Tap PlaySlide Show. Todisplaycontrol buttons to rotate, play,pause, rewind, fast-forward, orexit, tap the screen.●Tap Setas Home Background,tap the percent of transparency,then tap [ok graphic].File tools●Tap Tools,then tap Propertiesto view the detail properties ofthe selected file.●Tap Tools,then tap Sort Bytochange the sort to Name, Dateor Size. ●Tap Tools,then tap Optionstocustomize picture settings andslideshow playback preferences.TIPTap and hold a file to display apop-up menufor that file tocut,copy, delete, send, or set asHome Background.Tocopy a picture or video clip toyour phoneYou can copy pictures and videofiles from your PC to the MyPictures folder on your phone, andthen viewthem on your phone. Formore information about copyingfiles from your PC to your phone,see Windows Mobile Device Centeror ActiveSync Help on your PC.](https://usermanual.wiki/LG-Electronics-USA/JS750/User-Guide-1297318-Page-80.png)
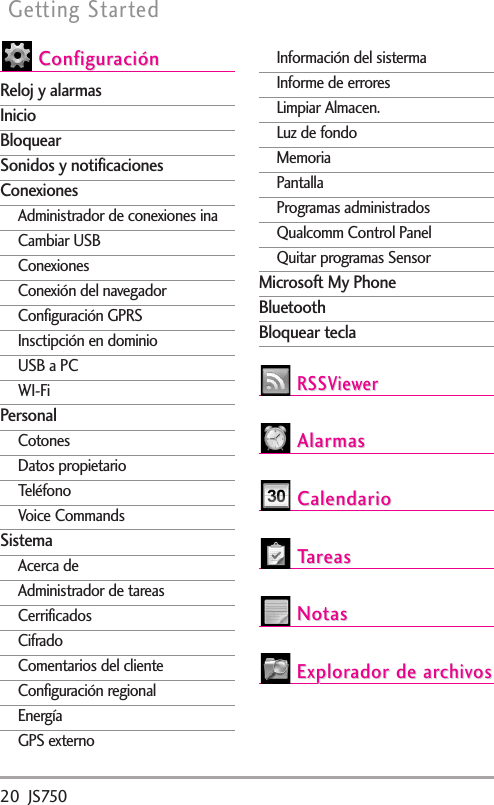
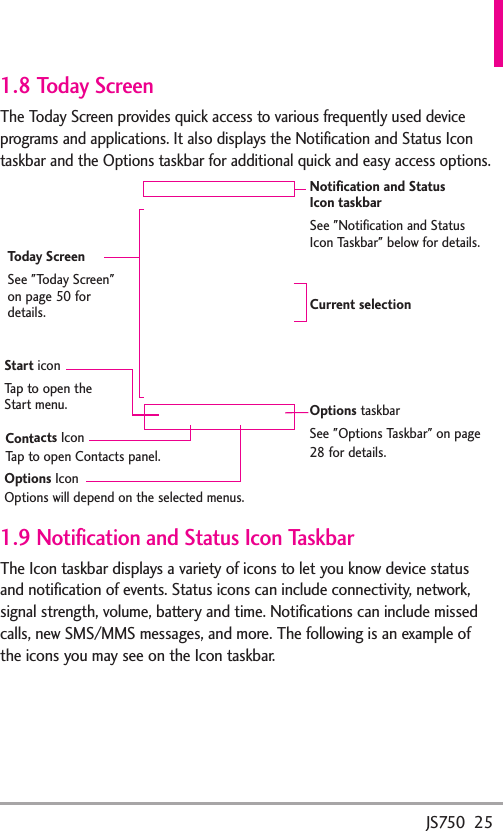
![110 JS750Chapter 4Entering Text4.1 On-screen Input MethodsWhen you start a program or select a field that requires text or numbers,the Input Panel icon is displayed on the Options taskbar.Tap the Input Selector arrow (next to the Input Panel icon) to open a menuwhere you can select a text input method and customize input options.After selecting a text input method, the corresponding Input Panel isdisplayed, which you can use to enter text.abc/123ModeTapping[abc/123 icon]Show/Hide Input Panel](https://usermanual.wiki/LG-Electronics-USA/JS750/User-Guide-1297318-Page-97.png)